


|
||||||
| DIY (Do-It-Yourself) Guides For all DIYs. |
 |
|
|
Thread Tools | Search this Thread |
 04-21-2013, 09:27 PM
|
#1 |
|
Member
Join Date: Apr 2013
Drives: 2013 Scion FR-S
Location: Seattle
Posts: 60
Thanks: 32
Thanked 21 Times in 15 Posts
Mentioned: 2 Post(s)
|
DIY - JDM TRD Strut bar for Toyota 86 / FR-S / BRZ install
I thought that folks might find this useful since the instructions that come with the parts are in Japanese.
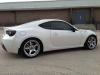
(copied from my blog - http://www.apexrally.com/2013/04/jdm...a-86-fr-s.html )  IMG_9385 by ApexRally.com, on Flickr TRD Japan seems to have a fair amount of parts available for the 86 / FR-S / BRZ. I recently purchased the JDM TRD Strut bar for my FR-S from a retailer in Japan. The instructions were in Japanese so I thought that I'd share my install experience. Please remember safety if you do your own install. The instructions that I received with the bar were faded so I found them online here - http://www.trdparts.jp/manual_pdf/86/MS324-18001.pdf . You can attempt to translate the instructions with an online translator but it's still not real clear what is being said.  IMG_9386 by ApexRally.com, on Flickr The tools needed are a 6 point star head type allen key (not sure what size) and a 12mm socket. I used a short socket extension to make it a bit easier.  IMG_9387 by ApexRally.com, on Flickr First I loosened the nuts at the end of the braces closest to each strut and the nut in a straight line next to each brace.  IMG_9388 by ApexRally.com, on Flickr  IMG_9389 by ApexRally.com, on Flickr Then I put the brackets on as they show in the instructions and loosely put the nuts back on.  IMG_9390 by ApexRally.com, on Flickr After that I put the bar in place with the star bolt and nut on each end loosely to hold it in place. I placed the other star bolt through on each end of the bar. The next step was to tighten the nuts only on the original lower section (the original braces and the ones by each strut). Then I carefully raised the car to unload the struts and I tighted the star bolts and nuts on each end of the strut bar. Finally I lowered the car back to the floor and rechecked each nut. The instructions have torque numbers by the way. Here is the final result. The carbon fiber looks great and it should add at least 10hp. ;-) After a fun little test drive it seems to help in the corners. It feels very planted with not much noticable body roll. The stock car cornered well too though... Cheers.  IMG_9391 by ApexRally.com, on Flickr  IMG_9392 by ApexRally.com, on Flickr Last edited by Kristian; 12-06-2013 at 06:24 PM. |

|

|
| The Following 5 Users Say Thank You to Kristian For This Useful Post: | acro (05-01-2013), Mr.Impreza (01-15-2017), Namuna (01-30-2014), normancw (04-21-2013), Taka (09-09-2017) |
|
05-01-2013, 01:18 PM
|
#2 |
|
Junior Member
Join Date: May 2013
Drives: 2013 Subaru BRZ Limited
Location: United States
Posts: 4
Thanks: 0
Thanked 1 Time in 1 Post
Mentioned: 0 Post(s)
|
I'm really liking the finish of this strut bar, nice write up!
|
|
|
|
|
05-02-2013, 09:13 PM
|
#3 | |
|
Member
Join Date: Apr 2013
Drives: 2013 Scion FR-S
Location: Seattle
Posts: 60
Thanks: 32
Thanked 21 Times in 15 Posts
Mentioned: 2 Post(s)
|
Quote:
|
|
|
|
|
|
05-12-2013, 11:58 PM
|
#4 | |
|
Just a dude
Join Date: Mar 2013
Drives: Scion FR-S 2013
Location: Edson, Alberta, Canada
Posts: 3,289
Thanks: 1,185
Thanked 1,188 Times in 852 Posts
Mentioned: 34 Post(s)
|
Quote:
Was it in instructions or you felt necessary to unload the struts per say? |
|
|
|
|
|
05-14-2013, 09:35 PM
|
#5 | |
|
Member
Join Date: Apr 2013
Drives: 2013 Scion FR-S
Location: Seattle
Posts: 60
Thanks: 32
Thanked 21 Times in 15 Posts
Mentioned: 2 Post(s)
|
Quote:
 I'm not quite sure what the instructions say (google translate version below) I'm not quite sure what the instructions say (google translate version below)"Installation of 1. Tower bar bracket (1) As shown Figure 1, the suspension upper support Remove the front side mounting nut, Burake of components ② Install the Tsu Prefecture, and temporarily stopped. (2) As Figure 2, RH front rod performance * Remove the two front side mounting nut 2, the components ③ Install the bracket, and temporarily stopped. LH side to carry out installation work (3) 1,,,, 2 (3) above. . . . Bracket between two attached to both left and right as in (1) Fig 3 TRD logo is toward the front tower bar components to ① The sandwich to be a tree. Put from the rear side of the cap bolt (2) Components ⑥, components * I temporarily fixed in the flange nut ⑦. Mounting of 2. Tower bar Tightening of work 3. Mounting bolts Specify the port of each nut RH side LH side in the order shown in (1) Figure 4 I Tighten the torque. ① 23Nm ② 23Nm ③ 16Nm (3) side also performed in the same manner (3) LH. . . . ① ② ③ Figure 4 the front of the vehicle Tightening to lift down by installing the tire, suspension State normal load is applied to the Pension Please execute Te." |
|
|
|
|
|
12-06-2013, 06:25 PM
|
#7 | |
|
Member
Join Date: Apr 2013
Drives: 2013 Scion FR-S
Location: Seattle
Posts: 60
Thanks: 32
Thanked 21 Times in 15 Posts
Mentioned: 2 Post(s)
|
Quote:
|
|
|
|
|
|
12-09-2013, 11:23 PM
|
#8 | |
|
Serial Cone Killer

Join Date: Jul 2013
Drives: '14 BRZ - WRB Premium 6MT
Location: Austin, TX
Posts: 1,326
Thanks: 1,081
Thanked 656 Times in 441 Posts
Mentioned: 19 Post(s)
|
Quote:
LOLOLOL ...and poor Te, he was innocent! Sorry for the  Too good of an opportunity! Too good of an opportunity!
|
|
|
|
|
|
12-26-2013, 09:34 PM
|
#9 | |
|
Member
Join Date: Apr 2013
Drives: 2013 Scion FR-S
Location: Seattle
Posts: 60
Thanks: 32
Thanked 21 Times in 15 Posts
Mentioned: 2 Post(s)
|
Quote:
|
|
|
|
|
|
04-27-2014, 02:18 PM
|
#10 | |
|
Senior Member

Join Date: Aug 2013
Drives: BRZ Limited
Location: vancouver
Posts: 518
Thanks: 60
Thanked 107 Times in 69 Posts
Mentioned: 4 Post(s)
|
Quote:
__________________
 |
|
|
|
|
|
04-27-2014, 08:47 PM
|
#11 | |
|
Member
Join Date: Apr 2013
Drives: 2013 Scion FR-S
Location: Seattle
Posts: 60
Thanks: 32
Thanked 21 Times in 15 Posts
Mentioned: 2 Post(s)
|
Quote:
Not sure on the torque for the bolts. Above are the google translated instructions. They list NM instead of pound feet though - http://www.convertunits.com/from/N+m/to/lb+ft . I just lined up the parts and tightened it down a little and then when I knew that they were lined up correctly then I tightened them well. The instructions were in Japanese so?? I don't know for sure if you need to lift up the front. I saw another forum DIY elsewhere and they recommended it to unload the struts. Cheers. |
|
|
|
|
| The Following User Says Thank You to Kristian For This Useful Post: | ucsmfu (04-27-2014) |
|
04-28-2014, 02:37 AM
|
#12 |
|
I draiv de cah

Join Date: Apr 2014
Drives: 2022 BRZ Limited MT
Location: Tyler, TX
Posts: 394
Thanks: 280
Thanked 136 Times in 89 Posts
Mentioned: 8 Post(s)
|
Looks great. Really want to add one of these.. Thought about doing the rear brace as well?
__________________
2022SubaruBRZ/CrystalWhitePearl/Limited |
|
|
|
|
04-28-2014, 10:35 AM
|
#13 | |
|
Member
Join Date: Apr 2013
Drives: 2013 Scion FR-S
Location: Seattle
Posts: 60
Thanks: 32
Thanked 21 Times in 15 Posts
Mentioned: 2 Post(s)
|
Quote:
|
|
|
|
|
|
04-28-2014, 10:26 PM
|
#14 | |
|
I draiv de cah
Join Date: Apr 2014
Drives: 2022 BRZ Limited MT
Location: Tyler, TX
Posts: 394
Thanks: 280
Thanked 136 Times in 89 Posts
Mentioned: 8 Post(s)
|
Quote:
__________________
2022SubaruBRZ/CrystalWhitePearl/Limited |
|
|
|
|
|
|
|
|
|
|
 Similar Threads
|
||||
| Thread | Thread Starter | Forum | Replies | Last Post |
| A simpler spring/strut install DIY -- no compressor needed | jeebus | DIY (Do-It-Yourself) Guides | 120 | 01-17-2023 09:28 AM |
| Blown strut or other problem after spring install? | f0rge | Suspension | Chassis | Brakes -- Sponsored by 949 Racing | 15 | 01-12-2016 03:26 PM |
| Lowering Springs|Alignment Kits|Strut bar|Sway Bars|Strut Mount +More | SOURCE,LLC | Brakes, Suspension, Chassis | 445 | 05-11-2015 05:41 PM |
| DIY - Password:JDM Strut Tower Brace & Lower Tie Bar Install | xxscaxx | DIY (Do-It-Yourself) Guides | 15 | 05-14-2013 09:52 PM |
| Gimmick Motorsports Hood Strut Install and Review | jadewbj | Cosmetic Modification (Interior/Exterior/Lighting) | 5 | 04-04-2013 12:27 PM |


 2013 Scion FR-S
 2013 Fuji Red Toyota 86 GTS 6spd.
 C'thulhu II
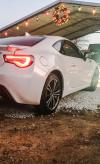 8SYX
8SYX