


|
||||||
| DIY (Do-It-Yourself) Guides For all DIYs. |
 |
|
|
Thread Tools | Search this Thread |
 11-25-2017, 07:01 PM
|
#29 | |
|
Simply Forgotus

Join Date: Sep 2013
Drives: 2014 Supercharged SSM BRZ Limited
Location: Baltimore, MD
Posts: 916
Thanks: 736
Thanked 912 Times in 454 Posts
Mentioned: 30 Post(s)
|
Quote:

|
|

|

|
| The Following User Says Thank You to BirdTRD For This Useful Post: | Exrald (11-29-2017) |
|
03-07-2018, 12:02 AM
|
#30 |
|
Senior Member

Join Date: Aug 2016
Drives: 2013 BRZ Limited / 2024 G70 3.3T
Location: Vegas
Posts: 270
Thanks: 243
Thanked 174 Times in 110 Posts
Mentioned: 4 Post(s)
|
With these installed what can you leave off in terms of the original fasteners?
I don't have any sag (yet) but if these make it faster/easier to get the bumper off and on I might as well do it now...going to take it off to respray my lip anyway >< |
|
|
|
|
03-07-2018, 12:38 AM
|
#31 |
|
Senior Member
Join Date: Apr 2017
Drives: 2017 BRZ
Location: CA
Posts: 662
Thanks: 200
Thanked 392 Times in 236 Posts
Mentioned: 3 Post(s)
|
How many times removing the bumper does it generally take before it starts to sag? Only had mine off once so far and it still looks good, wondering if I should plan on getting something like this installed the next time it comes off or if I don't need to worry about it yet.
|
|
|
|
|
03-07-2018, 07:41 AM
|
#32 | ||
|
Simply Forgotus
Join Date: Sep 2013
Drives: 2014 Supercharged SSM BRZ Limited
Location: Baltimore, MD
Posts: 916
Thanks: 736
Thanked 912 Times in 454 Posts
Mentioned: 30 Post(s)
|
Quote:
Quote:
The only reason I installed these was to remove the notorious gap. They do not make it faster or easier to remove the bumper in any way. If you don't have the gap, I wouldn't install them. |
||
|
|
|
| The Following User Says Thank You to BirdTRD For This Useful Post: | BRZyJ (03-07-2018) |
|
03-07-2018, 12:14 PM
|
#33 | |
|
Senior Member
Join Date: Aug 2016
Drives: 2013 BRZ Limited / 2024 G70 3.3T
Location: Vegas
Posts: 270
Thanks: 243
Thanked 174 Times in 110 Posts
Mentioned: 4 Post(s)
|
Quote:
I'll probably need them eventually but I guess I'll sit on it for now. |
|
|
|
|
|
05-19-2018, 04:23 PM
|
#34 |
|
Country Boy 4 Life

Join Date: Jul 2012
Drives: 19' & 06' Ridgelines, 13' FR-S
Location: EUGENE
Posts: 5,228
Thanks: 6,719
Thanked 5,293 Times in 2,720 Posts
Mentioned: 47 Post(s)
|
USE A STEP BIT!!!
For the bumber and inner plastic. 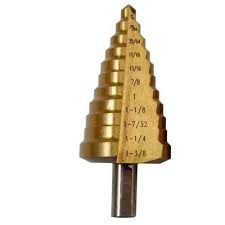 via Imgflip Meme Generator via Imgflip Meme Generator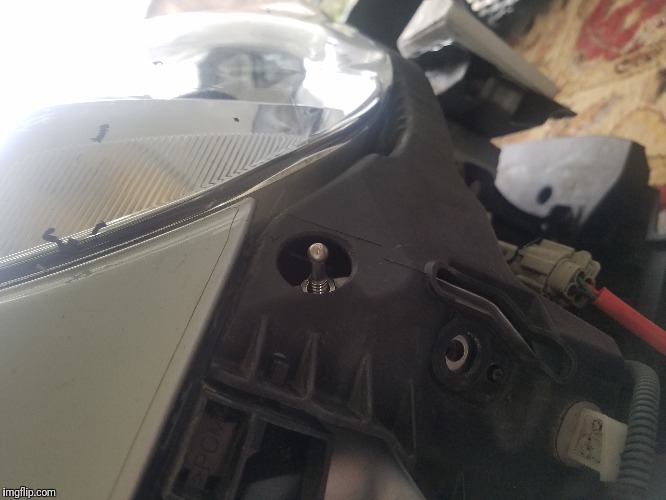 via Imgflip Meme Generator via Imgflip Meme Generator
__________________
 I LIKE TIRES! |
|
|
|
| The Following User Says Thank You to Leonardo For This Useful Post: | BirdTRD (05-19-2018) |
|
05-19-2018, 05:45 PM
|
#35 | |
|
Simply Forgotus
Join Date: Sep 2013
Drives: 2014 Supercharged SSM BRZ Limited
Location: Baltimore, MD
Posts: 916
Thanks: 736
Thanked 912 Times in 454 Posts
Mentioned: 30 Post(s)
|
Quote:
(Just don't go 1 step too far!) Sharp bits are the real key to success, no matter which type you choose to use.
|
|
|
|
|
|
05-19-2018, 06:42 PM
|
#36 | |
|
Country Boy 4 Life
Join Date: Jul 2012
Drives: 19' & 06' Ridgelines, 13' FR-S
Location: EUGENE
Posts: 5,228
Thanks: 6,719
Thanked 5,293 Times in 2,720 Posts
Mentioned: 47 Post(s)
|
Quote:
__________________
I LIKE TIRES! |
|
|
|
|
|
06-06-2018, 01:33 PM
|
#37 |
|
Member
Join Date: Sep 2017
Drives: Series. Blue
Location: Dallas
Posts: 13
Thanks: 1
Thanked 4 Times in 3 Posts
Mentioned: 0 Post(s)
|
Awesome write up, worked out great! My bumper tabs were so far gone i needed two for each side
|
|
|
|
| The Following 2 Users Say Thank You to bjac86 For This Useful Post: | BirdTRD (06-06-2018), PerCompLLC (10-16-2021) |
|
10-13-2021, 06:55 PM
|
#38 |
|
Member
Join Date: Apr 2013
Drives: 2013 BRZ, Limited, 6spd MT, GBS
Location: Gardean, CA
Posts: 63
Thanks: 7
Thanked 10 Times in 8 Posts
Mentioned: 1 Post(s)
   |
This is great! This is only one quick release were all the others are showing two.
|
|
|
|
|
|
|
|
| Tags |
| quik latch |
|
|
 Similar Threads
|
||||
| Thread | Thread Starter | Forum | Replies | Last Post |
| DIY - Quik Latch Mini install(front bumper) | stevo_12v | DIY (Do-It-Yourself) Guides | 31 | 07-20-2018 10:12 AM |
| DIY: TheRetrofitSource/Morimoto Retro-Quik Install in FR-S | civicdrivr | DIY (Do-It-Yourself) Guides | 236 | 07-10-2017 12:04 AM |
| FS: Quik Latch Mini Black | Ny Brz | Exterior Parts (Aero, Lighting, Etc.) | 1 | 06-22-2015 07:10 PM |
| FS: WA _Black Anodized Mini Quik-Latches NEW ..Great fix for bumper fitment issues!! | glamcem | Exterior Parts (Aero, Lighting, Etc.) | 6 | 11-26-2014 01:21 PM |
| Rear Bumper removal / bumper latch | SmartedPanda | Cosmetic Modification (Interior/Exterior/Lighting) | 3 | 05-01-2014 01:27 PM |


 2014 Subaru BRZ
