


 11-15-2014, 08:24 PM
|
#71 |
|
Member

Join Date: Nov 2012
Drives: 2013 BRZ Limited manual
Location: va
Posts: 68
Thanks: 5
Thanked 16 Times in 9 Posts
Mentioned: 2 Post(s)
|
can't wait to see thing running!
__________________
IAG built stage 3 block, HKS camshafts, built and tuned by national speed. 1050 ID injector, garret GTX3071 93 octane 415whp, E85 524whp monster! Quaife QBE69G sequential transmission!
|

|

|
|
11-15-2014, 09:13 PM
|
#72 |
|
My FR-S has 5 gears

Join Date: Aug 2012
Drives: FRS/280z/Tundra
Location: St. Louis
Posts: 1,993
Thanks: 626
Thanked 1,065 Times in 572 Posts
Mentioned: 49 Post(s)
|
Nice... I'm planning on the same timeframe. Btw keep a lookout for another m85, Id like one as I want that 3.73 FD
__________________
Omar GC
2JZ - 6870 - stock block - 1000whp? Instagram: 2jzus |
|
|
|
|
11-15-2014, 11:11 PM
|
#73 | |
|
Senior Member
Join Date: Mar 2013
Drives: 2013 Raven FRS 2JZ-GTE/V160 swapped
Location: Hampton, VA
Posts: 960
Thanks: 376
Thanked 623 Times in 315 Posts
Mentioned: 18 Post(s)
|
Quote:
M85 IS300 IS300 diff IS300 differential IS300 carrier assembly IS300 rear end IS300 part out IS300 LSD IS300 3.73 IS300 parts SXE10 '' (same as above) Took me a few hours to go through them all and got a few responses. Only two had M85, the other one isn't in great condition. Plan to pay at least $500+ for one. If you find one in good condition, jump on it. |
|
|
|
|
|
11-18-2014, 06:33 PM
|
#74 | |
|
Senior Member

Join Date: May 2014
Drives: BRZ
Location: NV
Posts: 249
Thanks: 50
Thanked 29 Times in 26 Posts
Mentioned: 2 Post(s)
|
Quote:
 In for results! In for results!
|
|
|
|
|
|
11-23-2014, 06:21 AM
|
#75 |
|
Senior Member
Join Date: Mar 2013
Drives: 2013 Raven FRS 2JZ-GTE/V160 swapped
Location: Hampton, VA
Posts: 960
Thanks: 376
Thanked 623 Times in 315 Posts
Mentioned: 18 Post(s)
|
Got some more stuff done.
What's this? 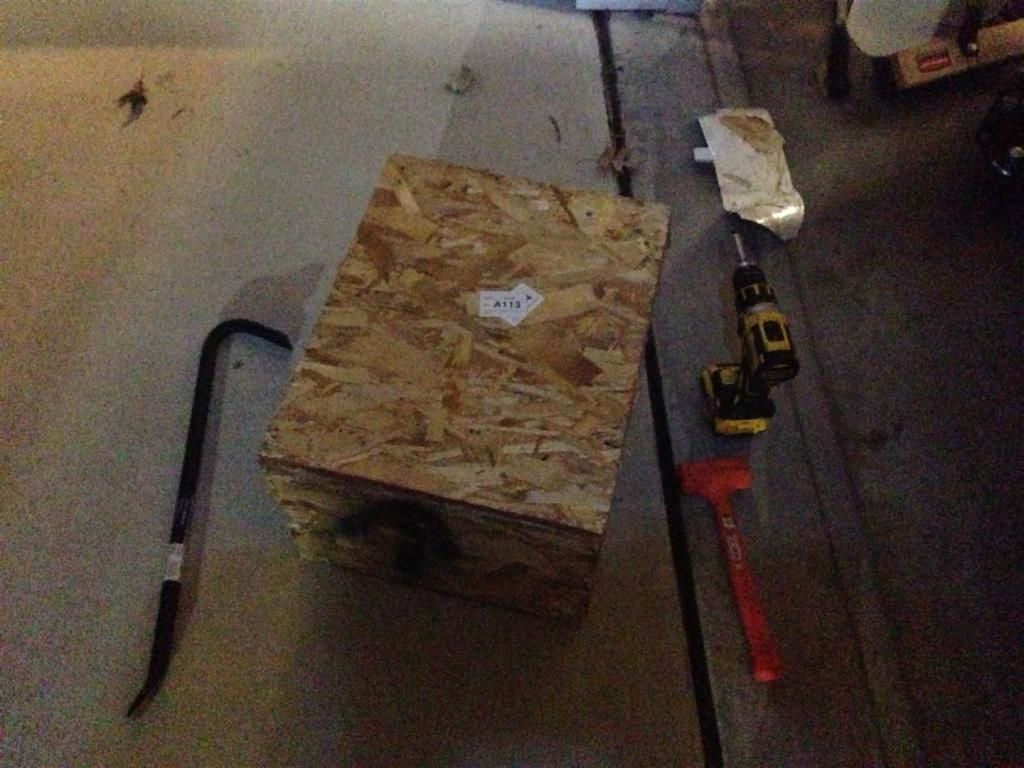 M85 Diff, took me like 10min to unpack it. 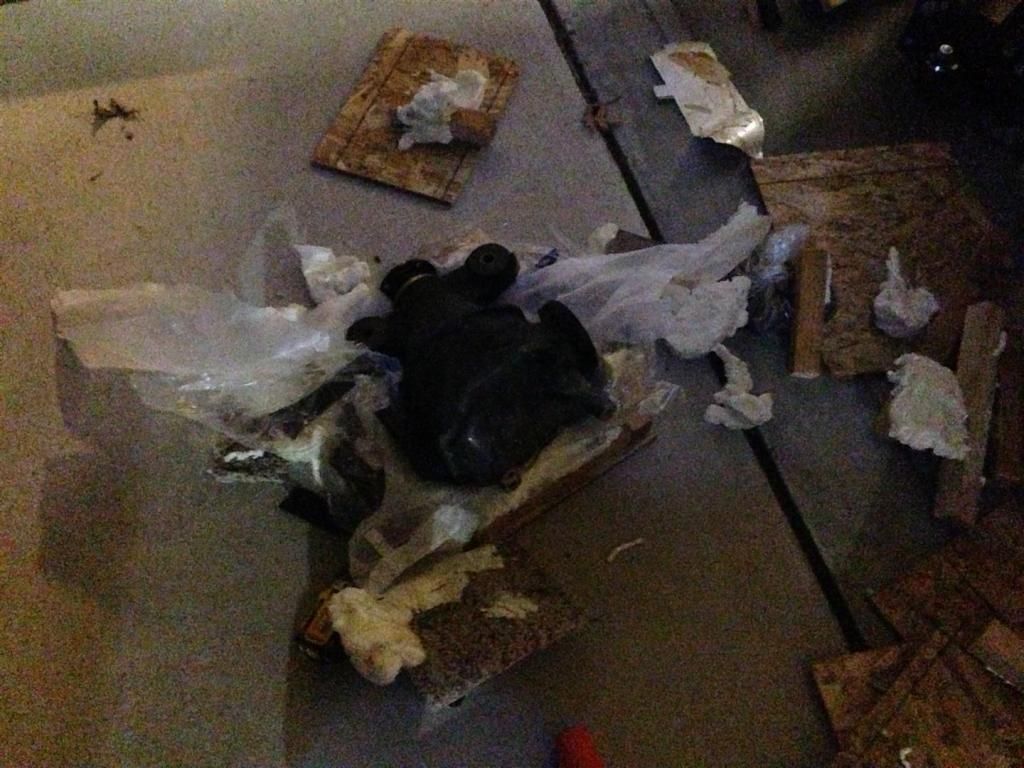 FullBlown Return-style Fuel Pump 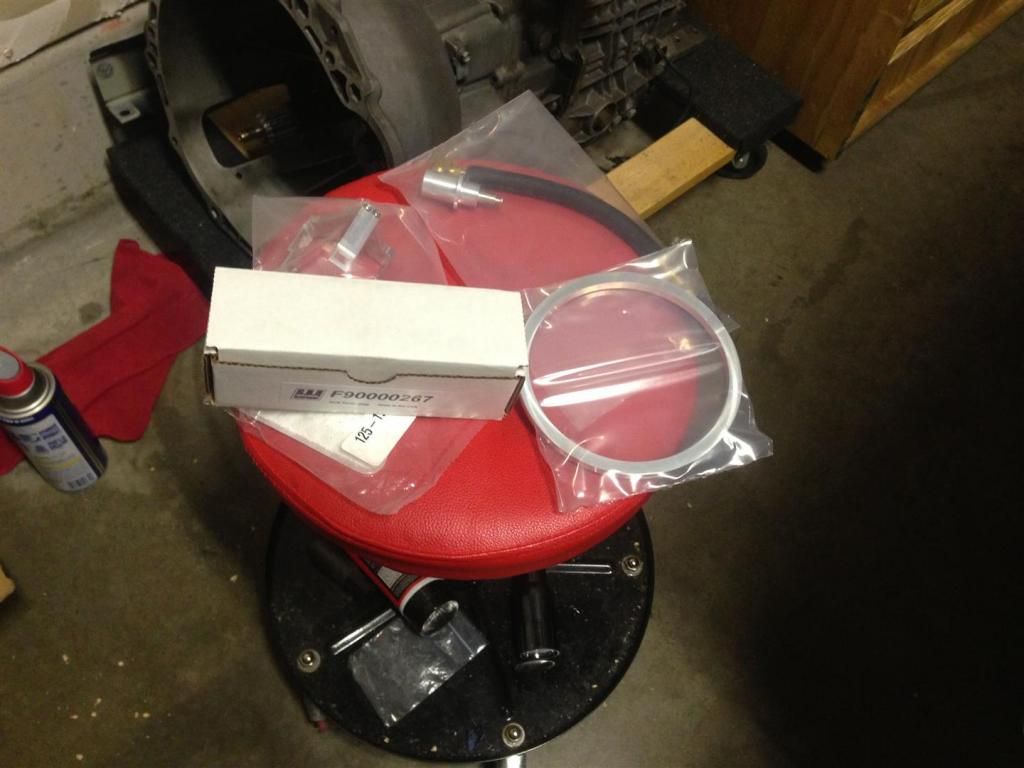  Still lots left to go. I started working out the fuel line routing, installed some bits on the motor, etc. Waiting on my clutch to really jump forward. That's what is holding me back at the moment. Since it'll use a push-type mechanism instead of the OEM pull-type, there's no use even installing the stock setup in the meanwhile. |
|
|
|
| The Following 3 Users Say Thank You to slicktop For This Useful Post: |
|
11-23-2014, 08:37 AM
|
#76 |
|
My FR-S has 5 gears
Join Date: Aug 2012
Drives: FRS/280z/Tundra
Location: St. Louis
Posts: 1,993
Thanks: 626
Thanked 1,065 Times in 572 Posts
Mentioned: 49 Post(s)
|
You the real MVP
__________________
Omar GC
2JZ - 6870 - stock block - 1000whp? Instagram: 2jzus |
|
|
|
|
11-27-2014, 07:28 AM
|
#77 |
|
Senior Member
Join Date: Mar 2013
Drives: 2013 Raven FRS 2JZ-GTE/V160 swapped
Location: Hampton, VA
Posts: 960
Thanks: 376
Thanked 623 Times in 315 Posts
Mentioned: 18 Post(s)
|
So, I wanted to post up some older pictures when I modified my valve covers to fit 1/2'' to -8/-10 adapters.
*Disclaimer: I'm a one man operation on this build (both labor and finances), without a shop, in a 1-1/2 car garage.... I get it.* I've never gone this deep into a build before, but I needed to modify my valve covers for the fittings. The stock crankcase ventilation system in my setup would have had a damn seizure. Important Tools: Drill, any works but I used a cordless Dewalt 20v ([ame="http://www.amazon.com/DEWALT-DCD790B-Lithium-Brushless-Compact/dp/B00CSDII3S/ref=pd_sim_hi_3?ie=UTF8&refRID=19RYPTMEQDJ08ZSPWPM D"]Amazon.com: DEWALT DCD790B 20V XR Lithium Ion Brushless Compact Drill / Driver: Home Improvement[/ame]) 45/64 HSS bit ([ame="http://www.amazon.com/gp/product/B0007Q75IW/ref=oh_aui_detailpage_o06_s00?ie=UTF8&psc=1"]45/64" High Speed Steel 1/2" Shank Drill Bit (S + D type drill) - Jobber Drill Bits - Amazon.com[/ame]) 1/2-14 tap (go for a quality bit from an ebay ad. Morse, Hanson Whitney, etc) Pro-Tap Tap Magic lubricant ([ame="http://www.amazon.com/Cutting-Fluid-Pro-Tap-16-Liquid/dp/B007I9Y2QY/ref=sr_1_cc_1?s=aps&ie=UTF8&qid=1417091557&sr=1-1-catcorr&keywords=tap+lubricant"]Cutting Fluid, Pro-Tap, 16 oz, Liquid - Construction Marking Tools - Amazon.com[/ame]) Tap Wrench for baffles ([ame="http://www.amazon.com/gp/product/B001KVJUZ4/ref=oh_aui_detailpage_o07_s00?ie=UTF8&psc=1"]Amazon.com: Starrett 93C T-Handle Tap Wrench, 1/4" - 1/2" Tap Size: Industrial & Scientific[/ame]) Tap Wrench for covers (Morse #4 straight tap wrench) 8-32 tap set for baffles (I'll get info up later) Permatex 82180 Oil resistant gasket maker ([ame="http://www.amazon.com/Permatex-82180-Maximum-Resistance-Silicone/dp/B0002UEN1U"]Amazon.com: Permatex 82180 Ultra Black Maximum Oil Resistance RTV Silicone Gasket Maker, 3.35 oz. Tube: Automotive[/ame]) Permatex Red threadlocker ([ame="http://www.amazon.com/Permatex-27100-High-Strength-Threadlocker/dp/B000AAM2Z6/ref=pd_bxgy_hi_text_y"]Amazon.com: Permatex 27100 High Strength Threadlocker Red, 6 ml: Automotive[/ame]) Brake Cleaner Other items: Parts cleaner bin Media Blaster cabinet Powdercoat setup Brushes Dremel + attachments Appropriate Stainless Steel hardware Braced the valve covers with some makeshift 2x4 braces to hold them in place. 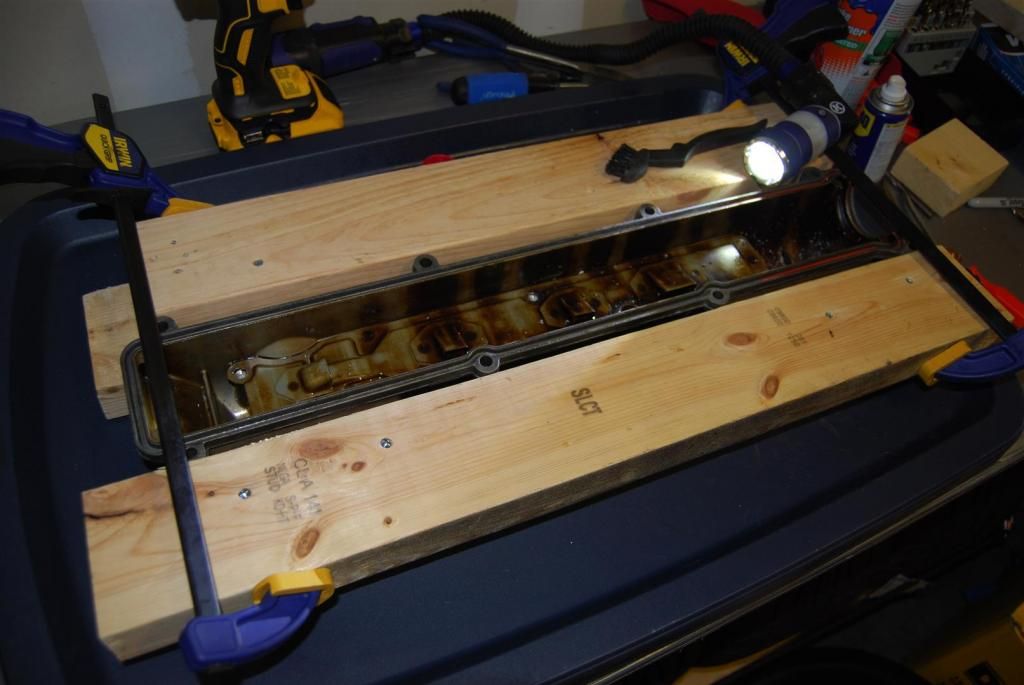 Drilled out the baffles. Can't remember what size bit, but it's not rocket science. 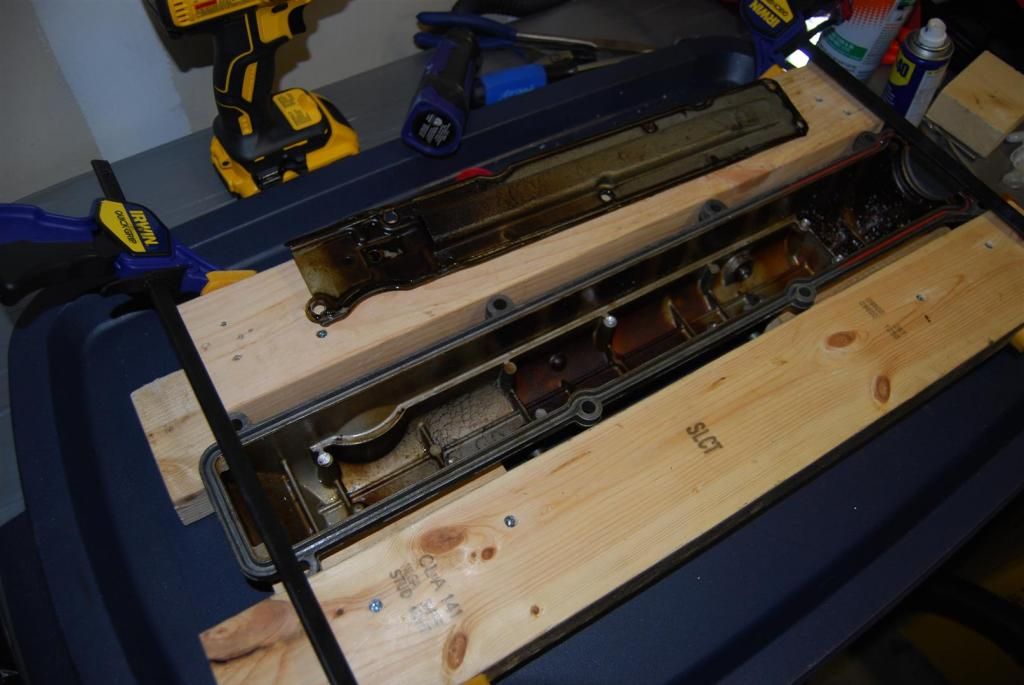 Lots of metal shavings, make sure you clean well. 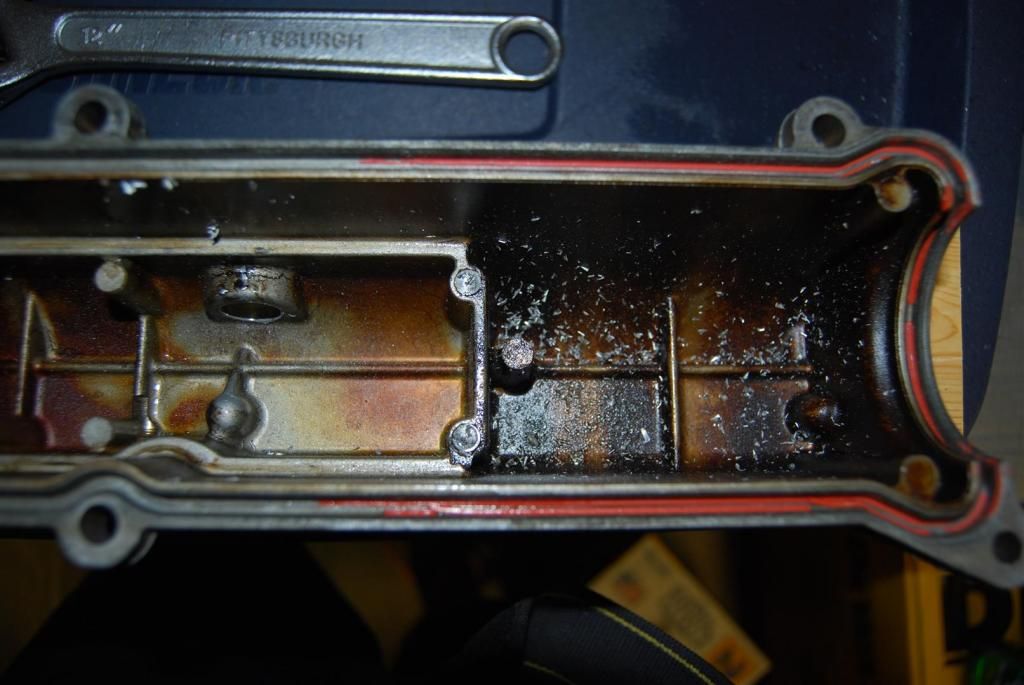 The stock fittings were press fit, so I just yanked them out. 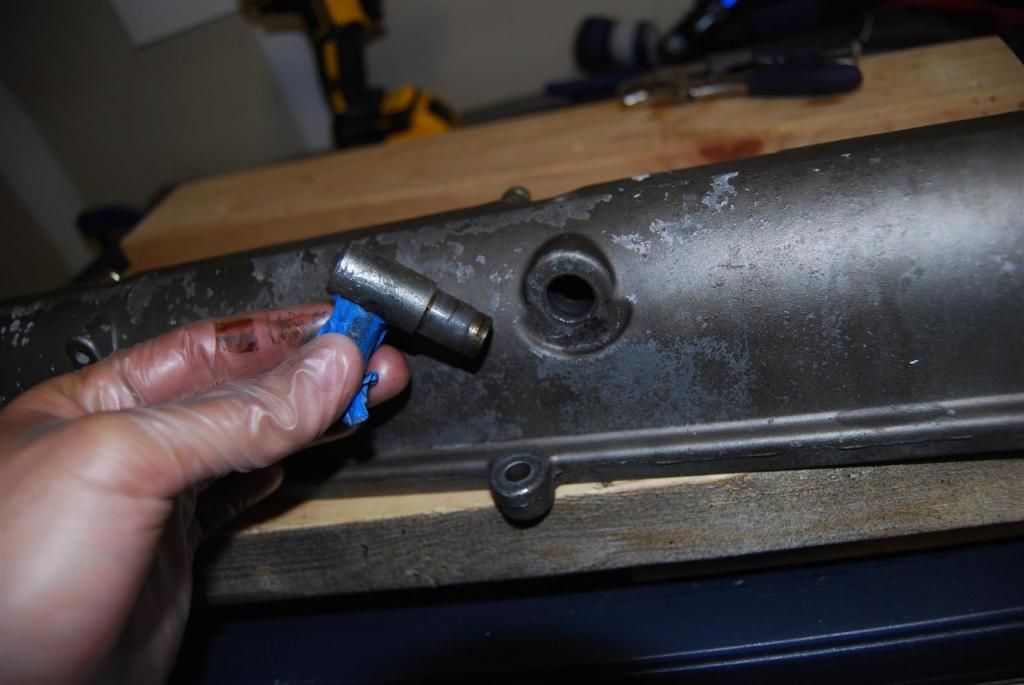 This is the drill bit size I used, along with the 1/2-14 NPT taper tap I used. No use getting anything other than this tap, they bottom out soon after penetrating the thickness of the valve cover. These fulfilled complete threading. 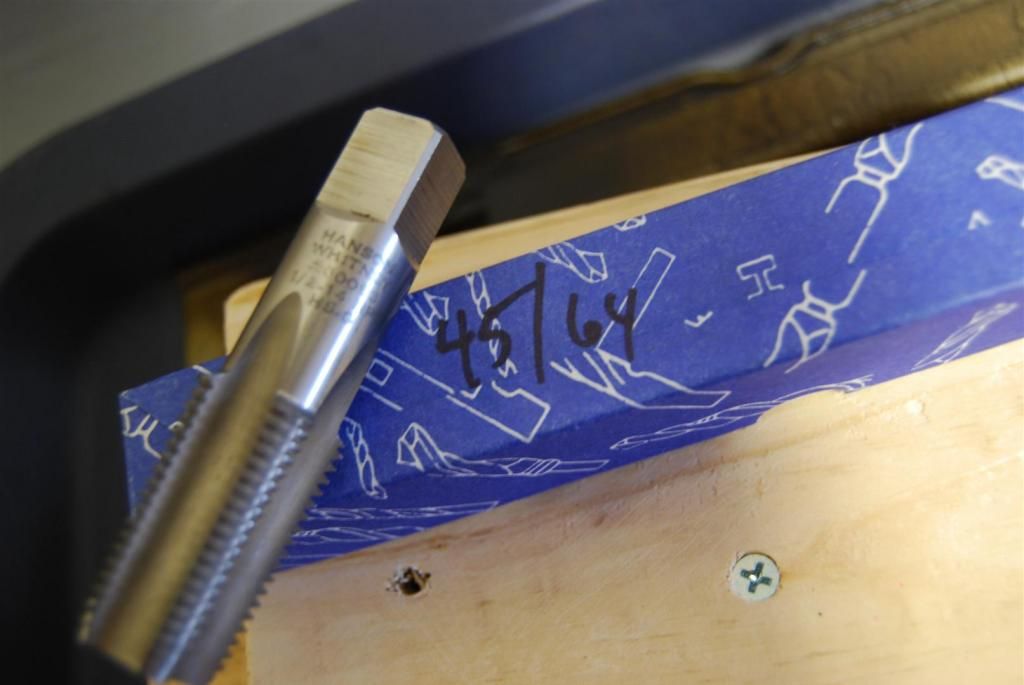 Tap in progress. When I was tapping, I would rotate a full turn, then back off about a 1/4 turn to break off accumulated shavings during the threading process. 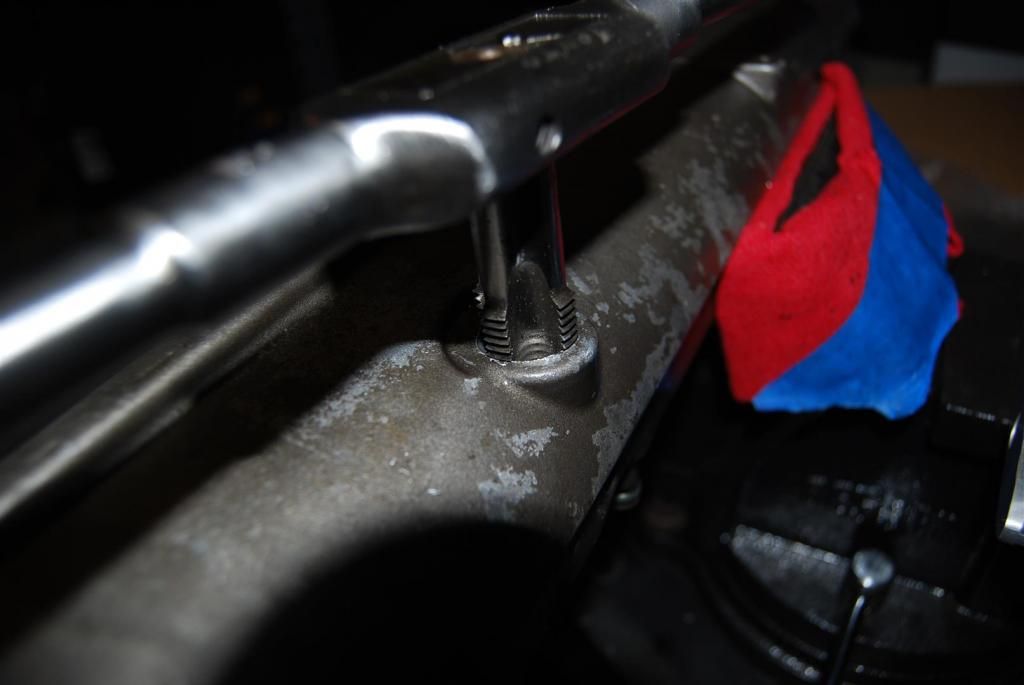 I went until I bottomed out just to be sure. 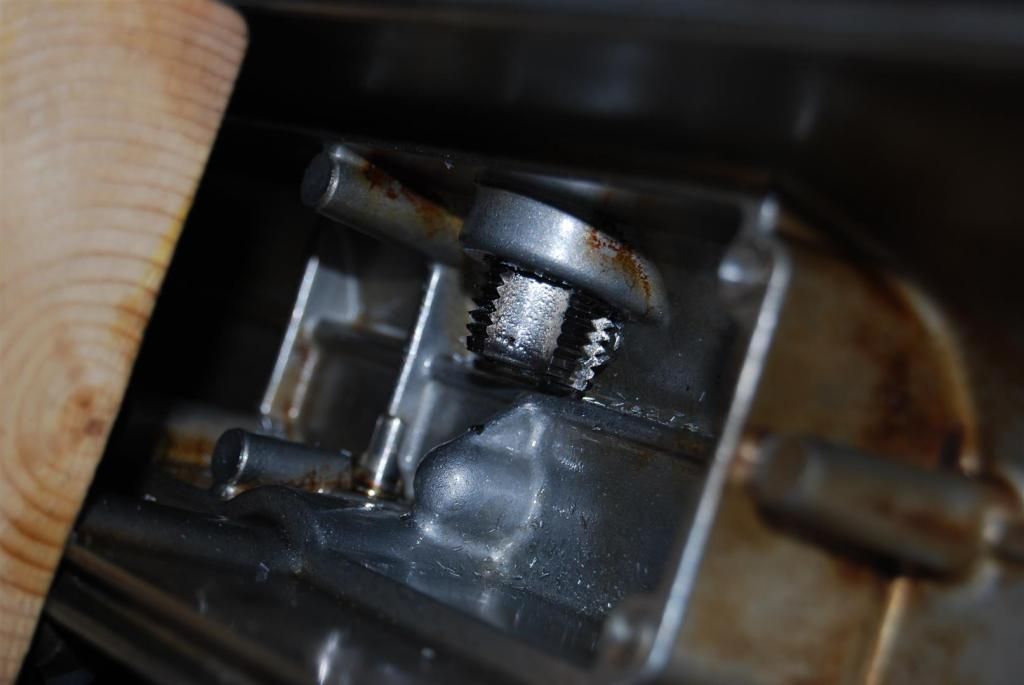 Tap complete. 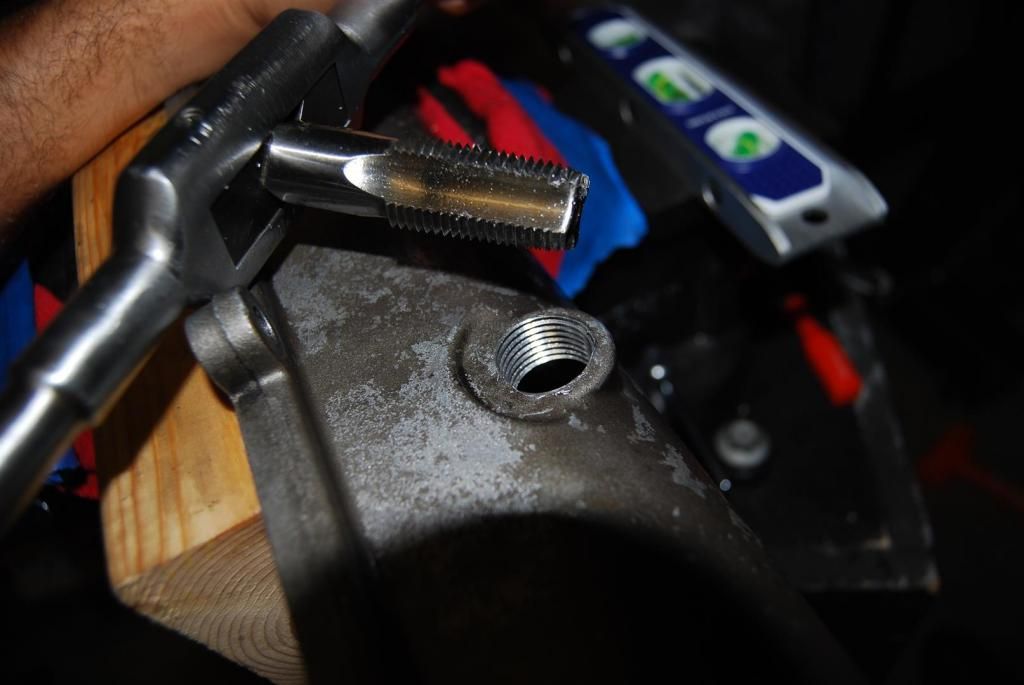 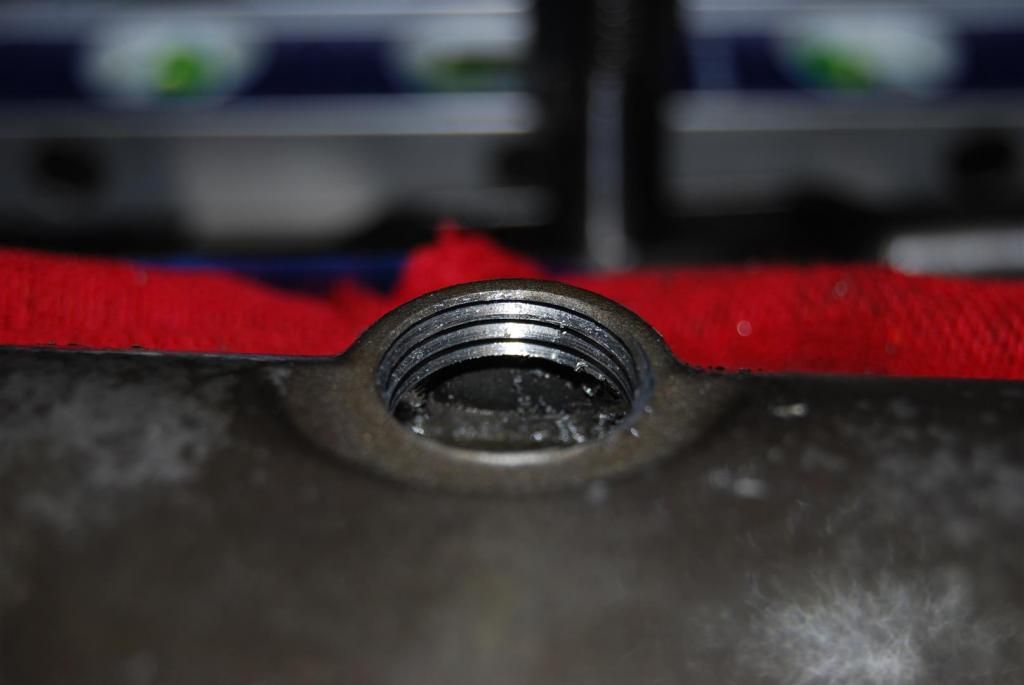 At this point, I made an almost grave mistake in cleaning one of the covers in stove cleaner to try and save some time. It ate away at the finish of the inside and created aluminum's natural protection "finish" which is a thick, almost sooty coating. Extreme pain in the ass to remove, but it took me a few days with a dremel. After removing, I would coat with WD40 or rust prohibitior to prevent the accumulation of the coating from coming back. You can see the pattern on these photos made by a dremel bit. I used maybe 8-10 cans of brake cleaner to scrub inside and out both covers. They were completely stripped and powdercoated wrinkle black. 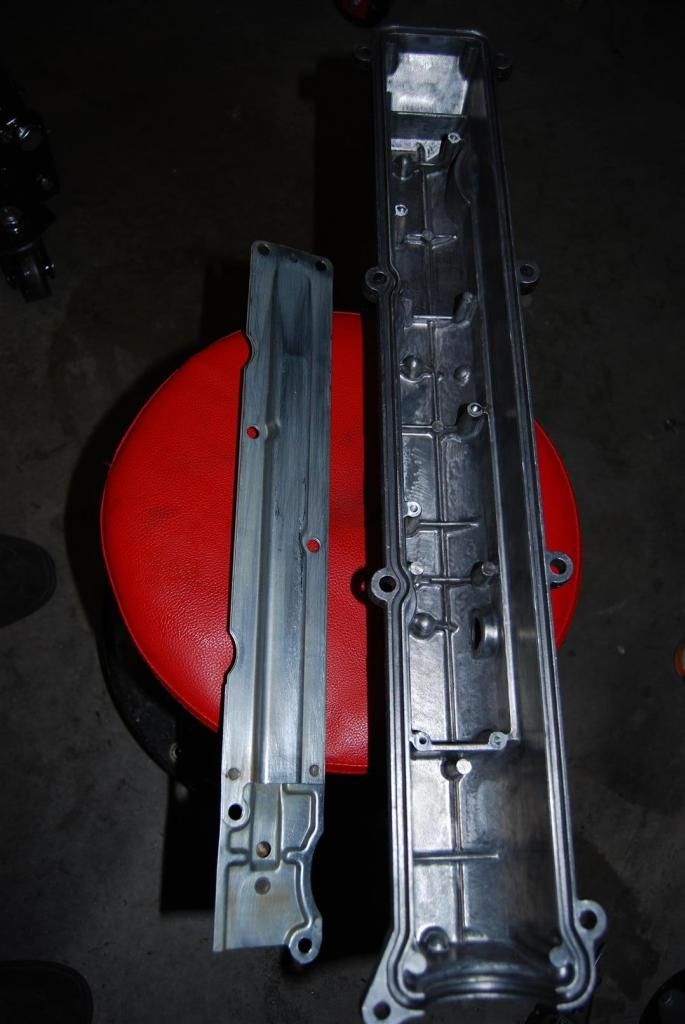 Ran a bead of oil resistant gasket maker along the part where the baffle and cover make contact. 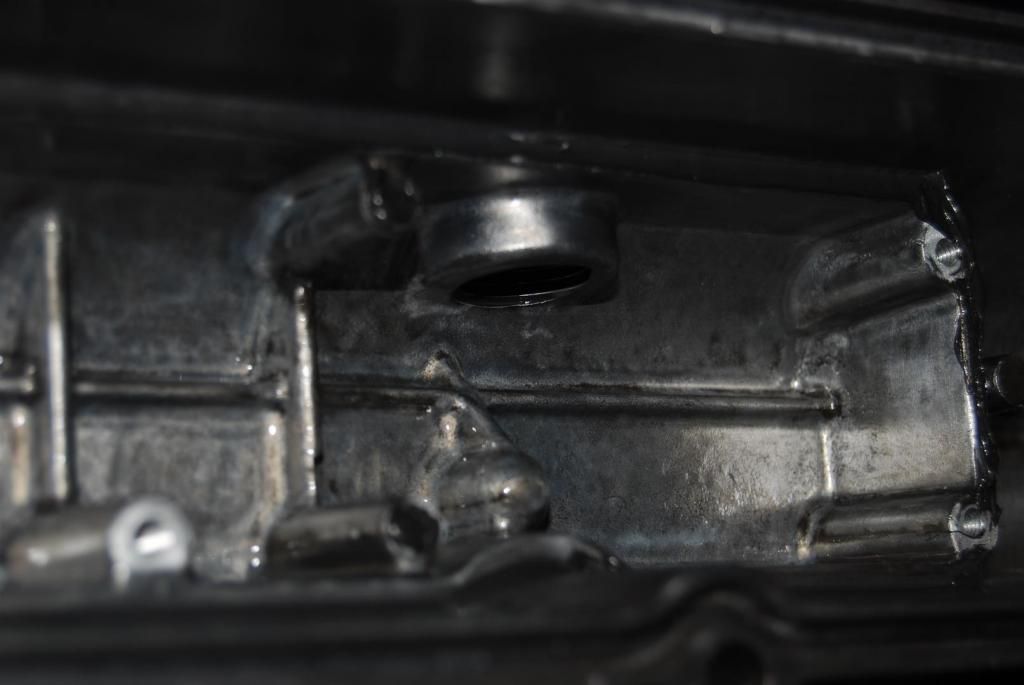 This is the gasket maker I used. Can be bought at Autozone for a under $10.  In all these pics, you can see I tapped the valve covers using 8-32 taps to tap the valve cover baffles. I used phillips head 8/32 x 1/2'' flat head *stainless steel* screws with a washer to hold the baffles in place. I ran each screw into each hole to make sure they'd thread all the way down, removed the screw and applied red threadlock to each, then reinstalled the final time. 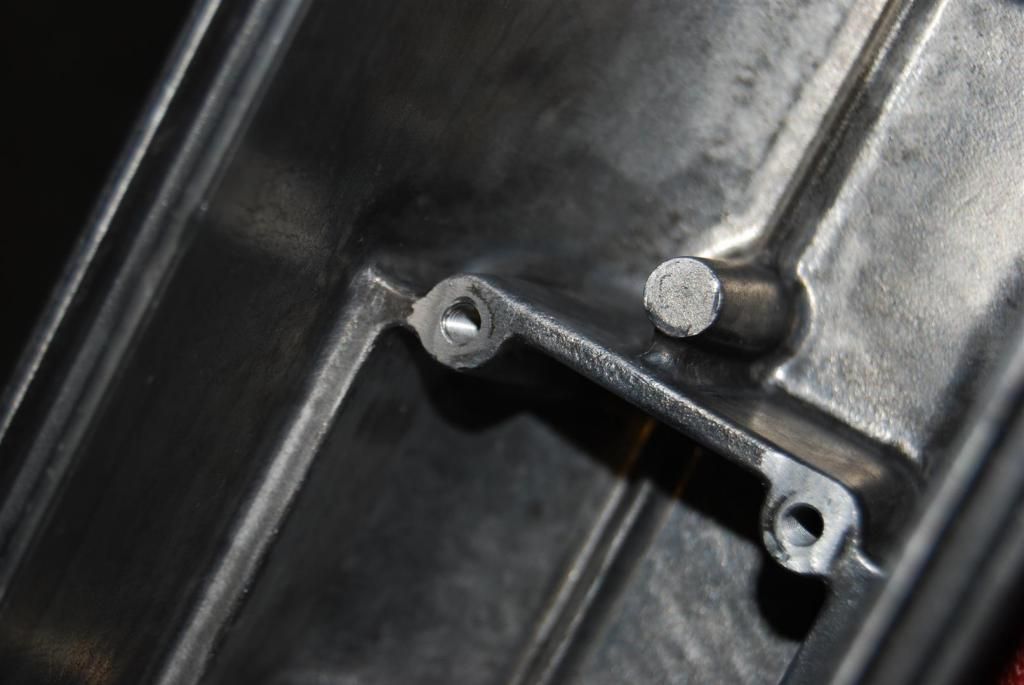 One done. Other is the same way. 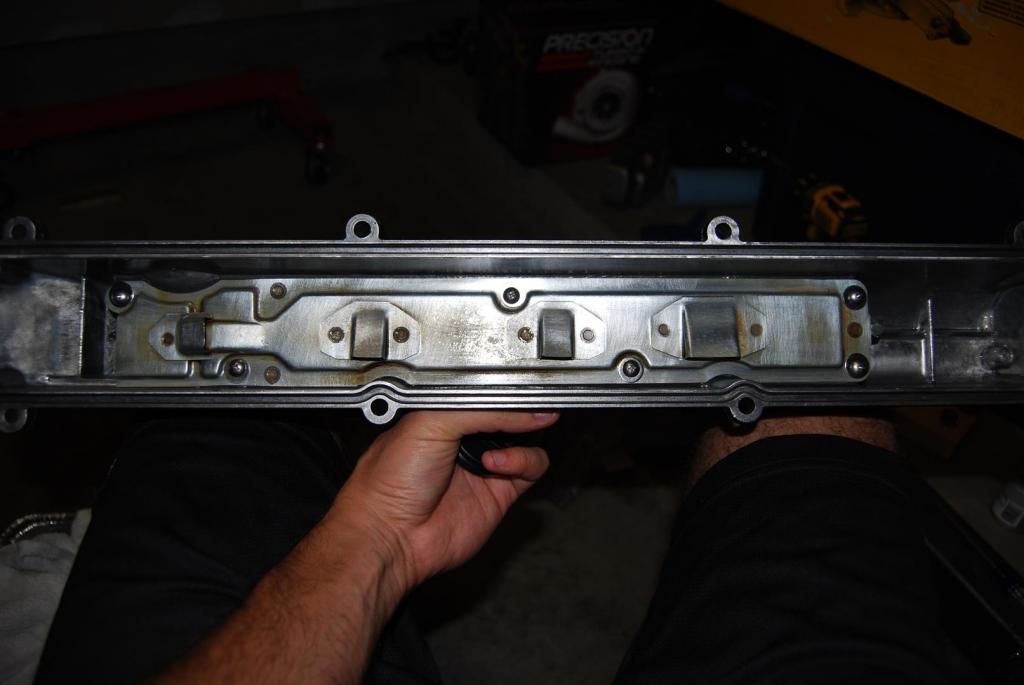 Installed. 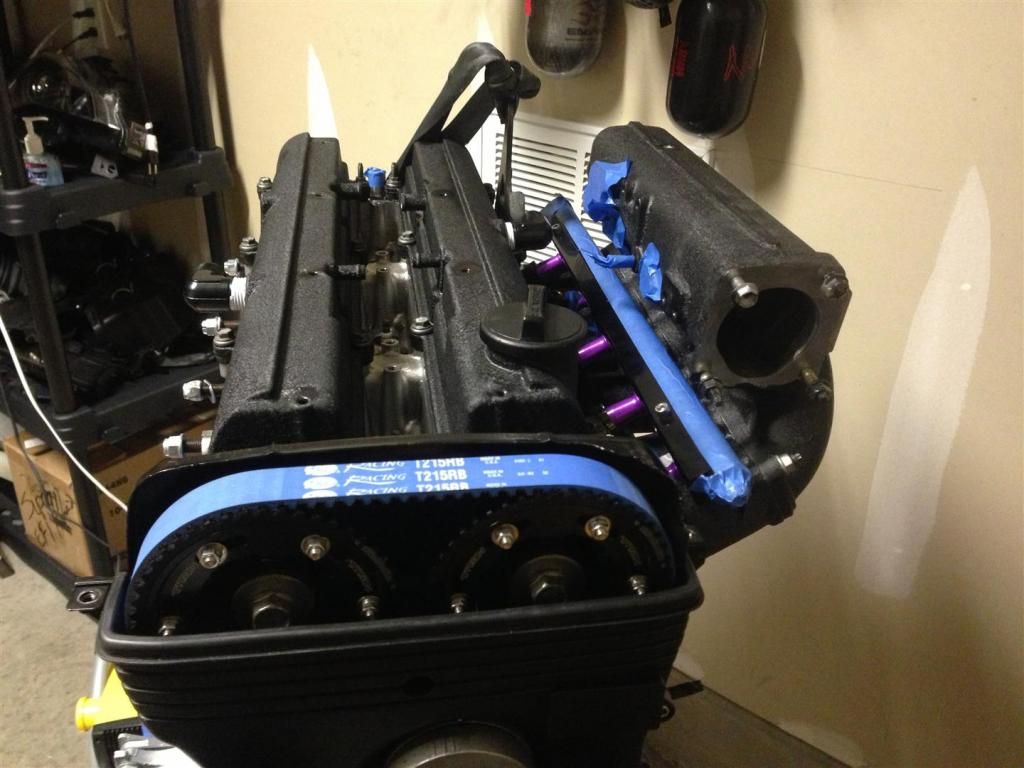 All in all. The project took a lot more money than if I just bought ones already modified, but I learned a lot and now all the tools I need for another time. They will last a lifetime and I have the confidence to do more if need be. Last edited by slicktop; 11-27-2014 at 07:42 AM. |
|
|
|
| The Following 2 Users Say Thank You to slicktop For This Useful Post: | Drift&Drag (11-29-2014), OmarGC (11-27-2014) |
|
11-27-2014, 07:53 AM
|
#78 |
|
My FR-S has 5 gears
Join Date: Aug 2012
Drives: FRS/280z/Tundra
Location: St. Louis
Posts: 1,993
Thanks: 626
Thanked 1,065 Times in 572 Posts
Mentioned: 49 Post(s)
|
So you get more practice I'll send you mine and you just send me yours in return
 lol lol
__________________
Omar GC
2JZ - 6870 - stock block - 1000whp? Instagram: 2jzus |
|
|
|
|
11-29-2014, 01:07 PM
|
#79 |
|
TURBOLICIOUS

Join Date: Nov 2013
Drives: a machine :]
Location: DALLAS, TX
Posts: 340
Thanks: 158
Thanked 243 Times in 126 Posts
Mentioned: 15 Post(s)
|
It is always wise to check your engine parts after getting them back from your powder coater. I found tiny portions of sand in the baffles which I am drilling out and performing a deep cleaning.
Thanks Alex for the write up. You're getting closer and closer in wrapping up with the build man! |
|
|
|
|
11-29-2014, 03:18 PM
|
#80 | |
|
Senior Member
Join Date: Mar 2013
Drives: 2013 Raven FRS 2JZ-GTE/V160 swapped
Location: Hampton, VA
Posts: 960
Thanks: 376
Thanked 623 Times in 315 Posts
Mentioned: 18 Post(s)
|
Quote:
|
|
|
|
|
|
11-30-2014, 05:59 AM
|
#82 |
|
Senior Member
Join Date: Mar 2013
Drives: 2013 Raven FRS 2JZ-GTE/V160 swapped
Location: Hampton, VA
Posts: 960
Thanks: 376
Thanked 623 Times in 315 Posts
Mentioned: 18 Post(s)
|
Got my clutch in today.
Decided to clean up the garage before I installed it and the trans only to find out it didn't come with flywheel bolts. Anyway, next week my fab guy is stopping by and we're going to work out plan of attack on a few things. Hope to have the motor started in two weeks or so. If there's some time off work available, I'm going to do that so I can bum rush the sound of hades. Ordered a lot more things today as well. Stay tuned! |
|
|
|
|
11-30-2014, 03:11 PM
|
#83 |
|
Senior Member

Join Date: Mar 2012
Drives: 2017 Subaru BRZ Perf Pack 6MT
Location: Colorado Springs
Posts: 5,048
Thanks: 1,949
Thanked 1,945 Times in 1,150 Posts
Mentioned: 28 Post(s)
|
I made the mistake of not removing the baffles after powdercoating the valve covers on the 4AGZE engine I swapped in my MR2; the media caught inside completely ruined the crank and rod bearings and cam journals. Waste of an engine. Never again!
__________________
 Current: 2005 Porsche 911 Carrera S 6MT Previous: 2 BRZ's, 997 C2S, C5 RS6, C4 S6, B8 S4, GDB STi, S30 240Z, FC3S RX-7 TII, AW11/SW20 MR2, E30 318is/325i, etc. |
|
|
|
|
12-01-2014, 10:33 AM
|
#84 |
|
Senior Member
Join Date: Mar 2013
Drives: 2013 Raven FRS 2JZ-GTE/V160 swapped
Location: Hampton, VA
Posts: 960
Thanks: 376
Thanked 623 Times in 315 Posts
Mentioned: 18 Post(s)
|
Small update. Decided to pull the stock differential. I really should upgrade the axles while I'm here, but I won't be able to drive the car hard for a few months so I'll just putt putt around until spring time.
Other than that, I'll install the M85 in the next few days. 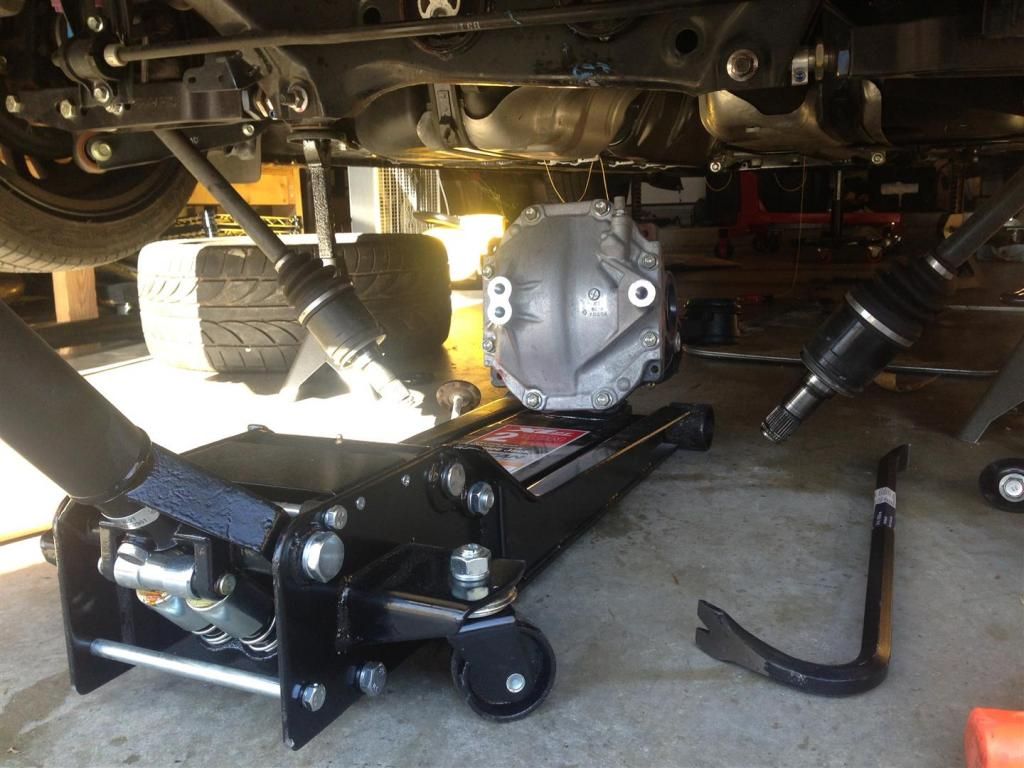
|
|
|
|
|
|
|
|
| Tags |
| 2jz, 2jz brz gt86 frs swap, 2jz frs, 2jz frs swap, 2jz swap |
|
|
 Similar Threads
|
||||
| Thread | Thread Starter | Forum | Replies | Last Post |
| Beginner STX Build Whiteout FRS Build Thread | Hachi86Roku | Tracking / Autocross / HPDE / Drifting | 21 | 03-31-2020 07:52 PM |
| Mr and Mrs FR-S Build | jaydee_do_work | Member's Car Journals | 2 | 12-04-2013 09:51 AM |
| 86 BUILD, AUS | JS86JS | Member's Car Journals | 9 | 05-31-2013 08:59 AM |
| My build... well some of it | cruzinbill | Electronics | Audio | NAV | Infotainment | 41 | 04-01-2013 04:02 PM |
| STX build | Evil86 | Tracking / Autocross / HPDE / Drifting | 2 | 01-08-2013 03:40 PM |


 Mister Two