


|
||||||
| Forced Induction Turbo, Supercharger, Methanol, Nitrous |
 |
|
|
Thread Tools | Search this Thread |
 02-25-2013, 12:47 PM
|
#1 |
|
NASA SpecE30 Racer

Join Date: May 2012
Drives: 2006 Honda S2000
Location: Gulf Breeze, FL
Posts: 7,279
Thanks: 607
Thanked 5,759 Times in 3,055 Posts
Mentioned: 274 Post(s)
Tagged: 10 Thread(s)
 |
Thanks:
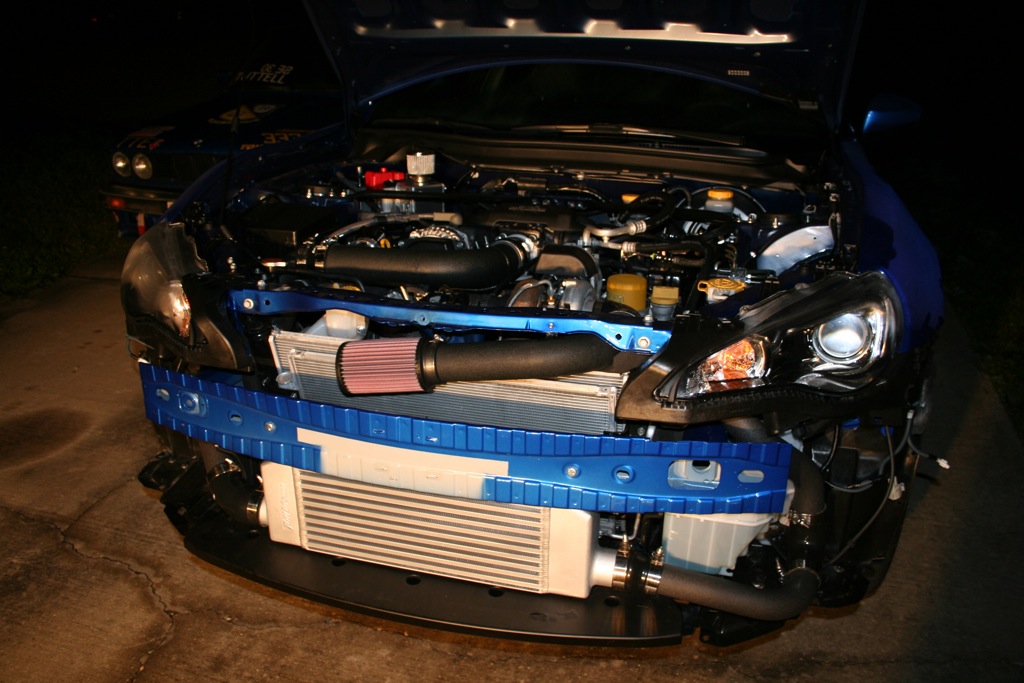
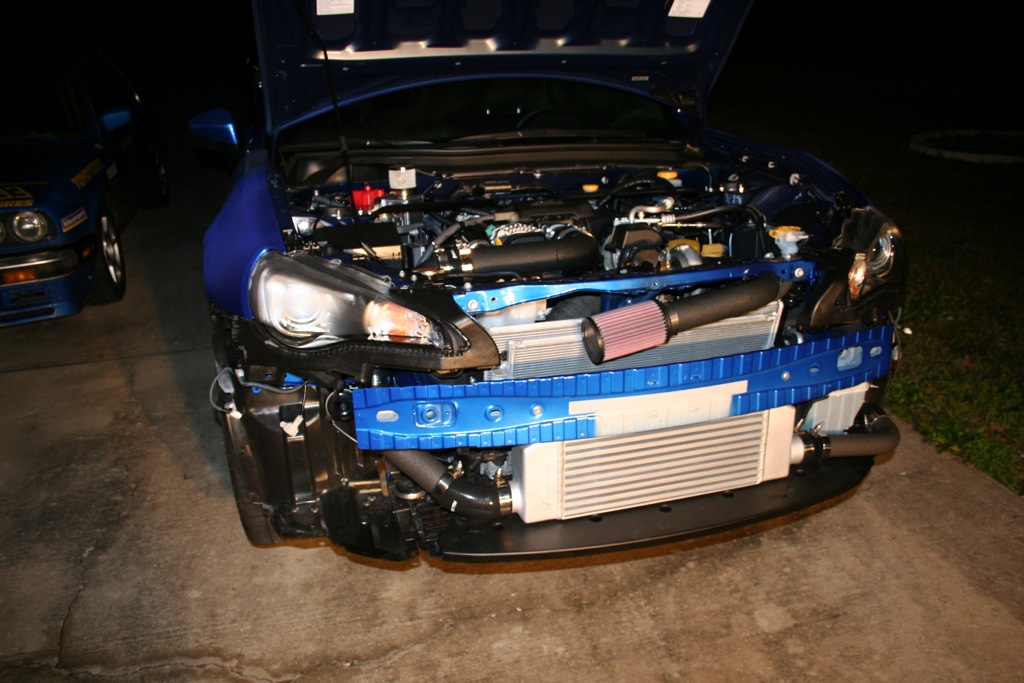
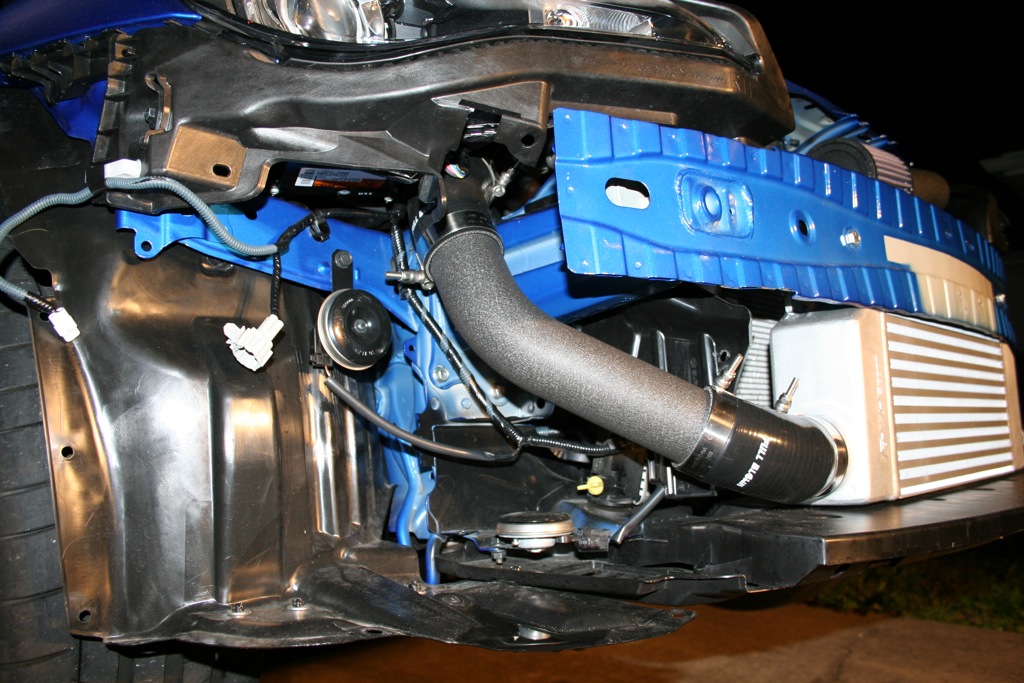
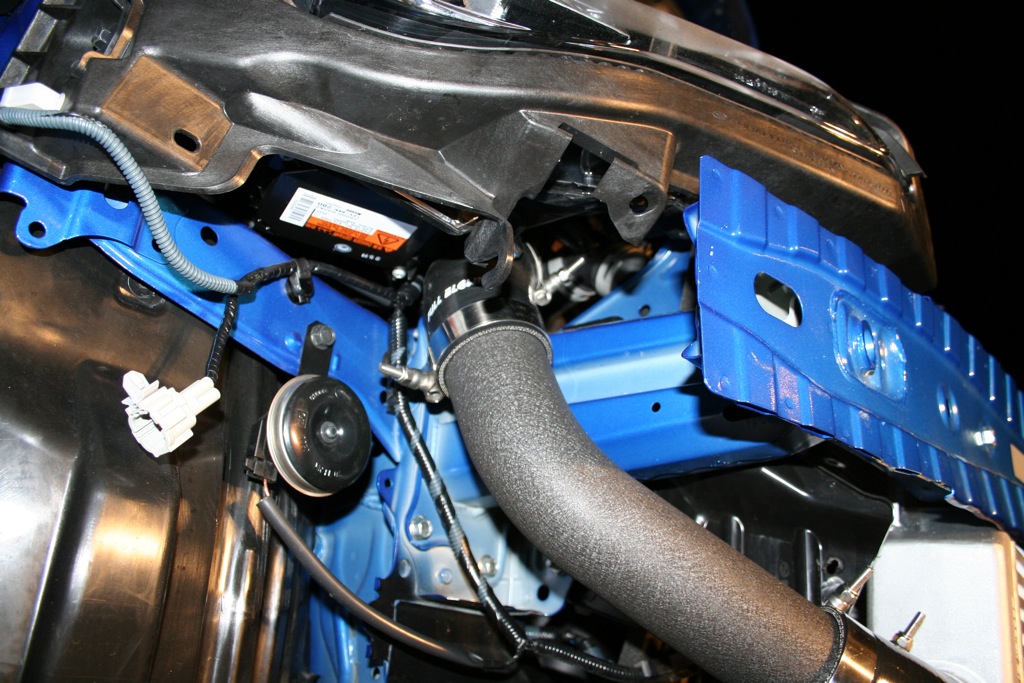
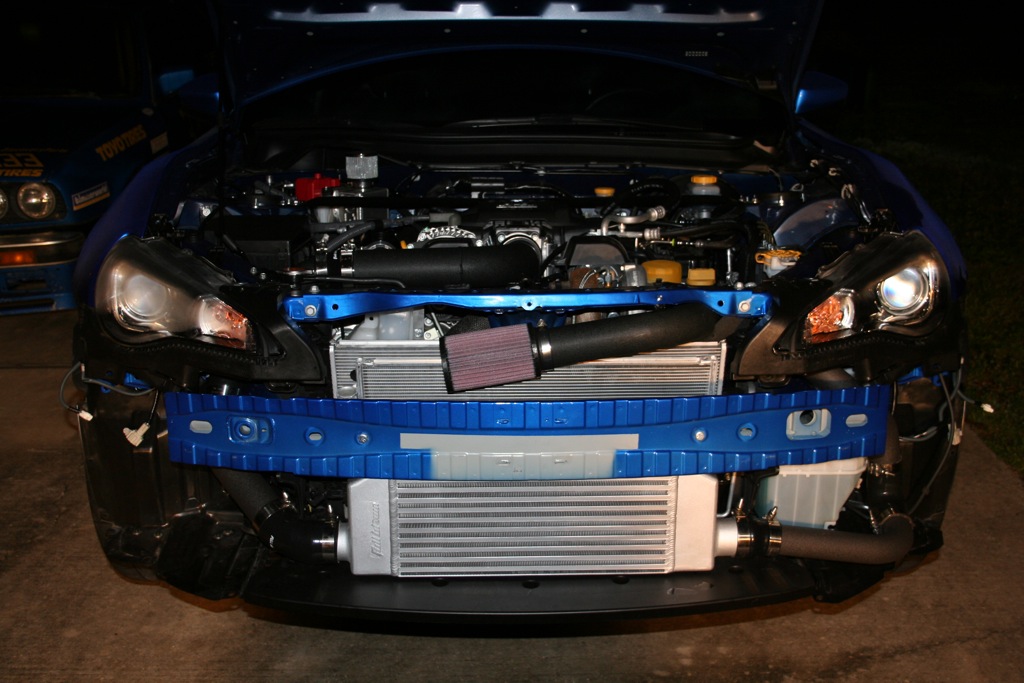
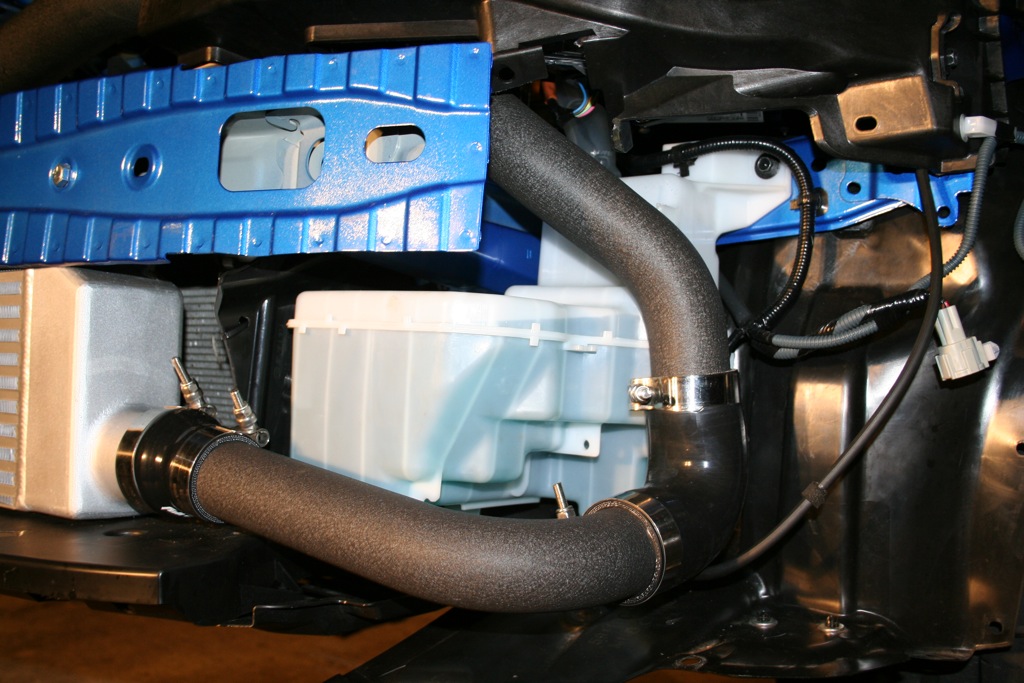
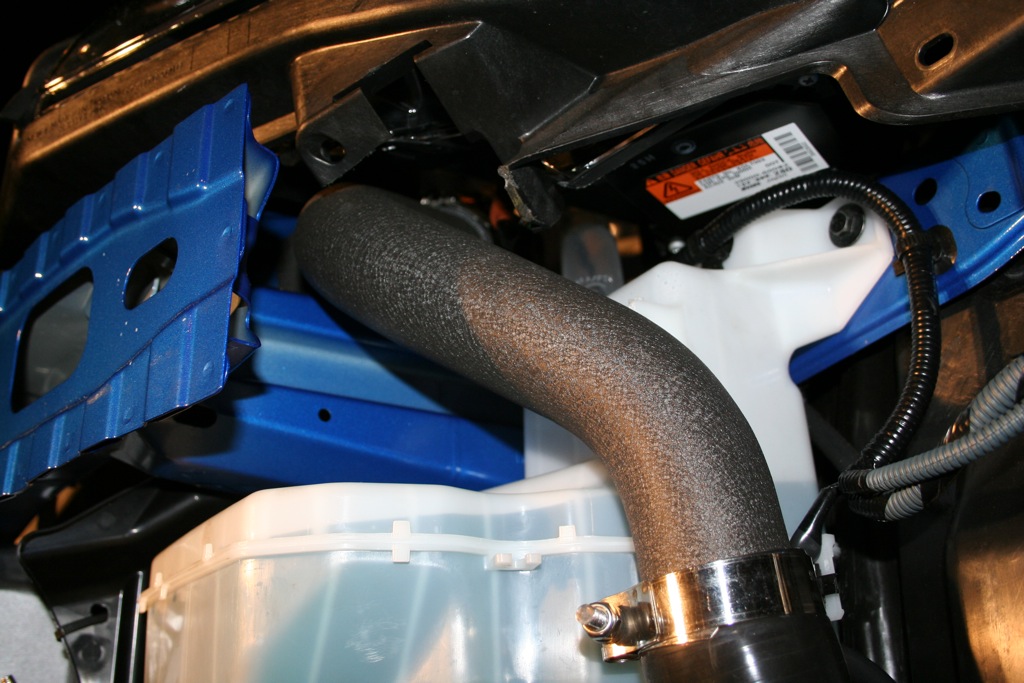
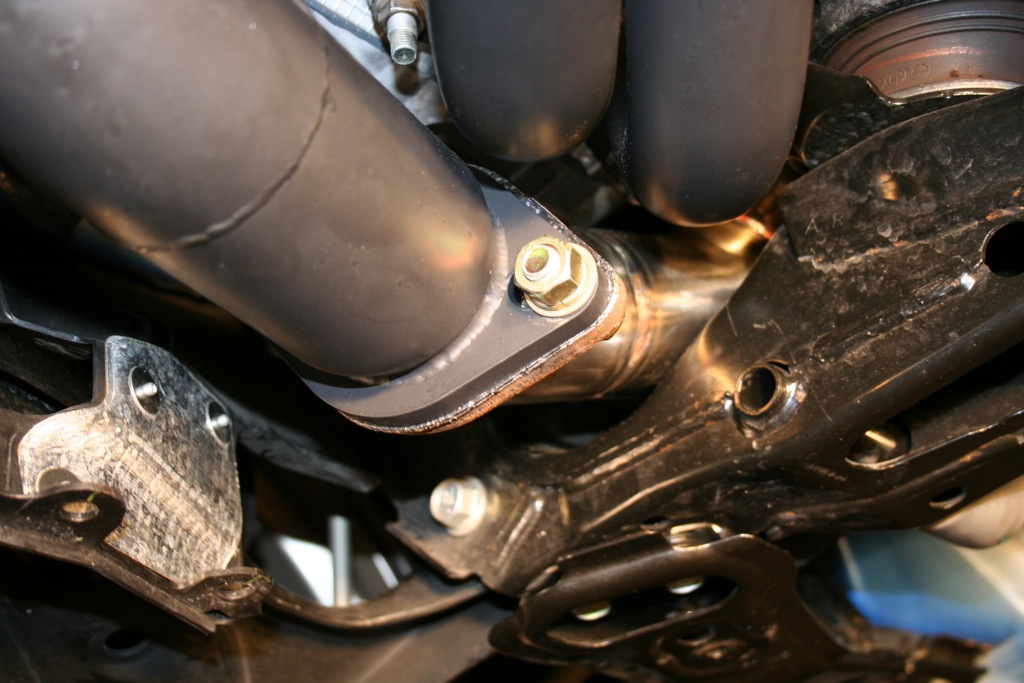
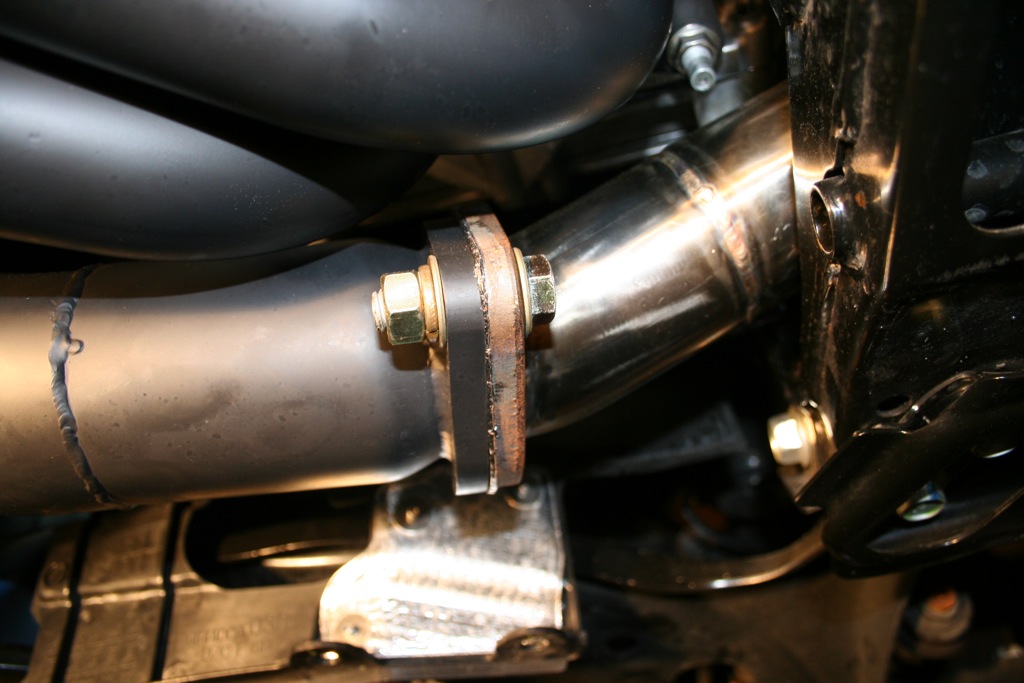
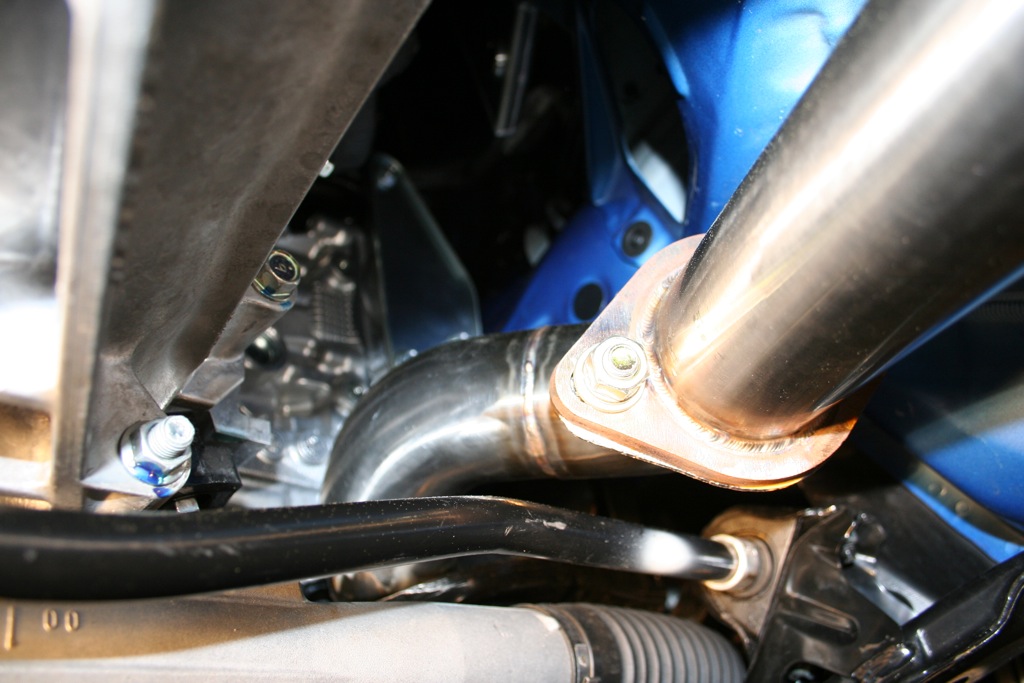
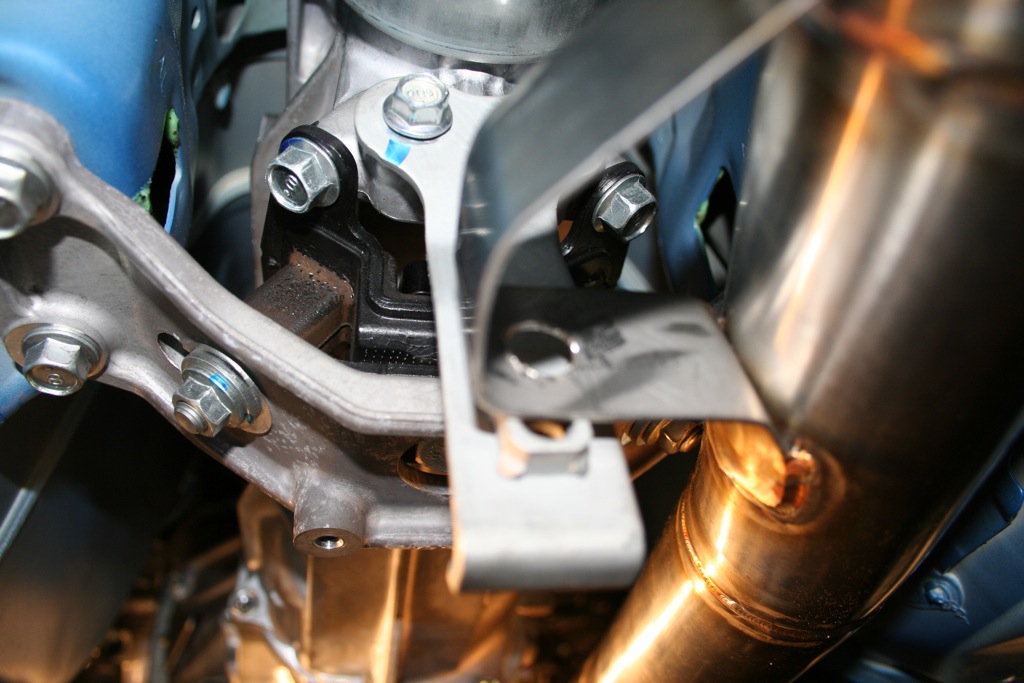
I really want to thank these guys. Without their help, who knows where I would be. John can tell you there were times where I wanted to quit. There were times I wanted to sell the car. I explored all options including ditching EcuTek and going with BRZEdit or Hydra as well. Jurrian @ ModBargains.com who I purchased the FBM turbo kit from and was a big help answering questions for me and getting my order updated for the ceramic coating and oil pan. LJ @ Full Blown Motorsports for the great tech support and trouble shooting help. He has gone beyond any expecations as far as customer service is involved in making sure I get this kit running perfectly. Part of me wishes I had driven my car to Minnesota to meet LJ and let them do the install and EcuTek reflash. John Visconti @ Visconti Tuning who I purchased my EcuTek cable and license from. I exchanged multiple calls, e-mails, and texts with John over the course of 2 weeks trying to get my ECU flashed with EcuTek. FA20Club.com for the troubleshooting ideas and offers of help when I couldn't get EcuTek to flash my ECU and was looking for any and all options for help. February 1st: I go to FedEx to pickup the 5 boxes I had held for me that contain the Full Blown turbo kit. Two boxes sent directly from Garrett with the two sides of the Garrett GT2871R turbo and three boxes sent from Full Blown with everything else. I get started on the car at around 1pm and work on it till around 10pm at night. Now before I start, the kit did not come with any instructions, just parts. Over the course of my install weekend, I had help from my buddy Curtis, Irb, and some members of the local Subaru club. The first step is the fuel pump install. I want to get it in and test that the car still runs prior to doing anything else. So we pull out the pump and get it disassembled with no issues. We come to the realization like everyone else that the pump is much longer than the OEM and the nicely designed white plastic clips that hold everything together will no longer work. A quick call to LJ at Full Blown and he says that he recommends drilling holes and using zip ties to secure everything. Sounds good to me, so we drill the holes and place the zip ties. We twist, solder, and heat shrink wrap the two wires for the new fuel pump and install everything back in the car. Press the Start button and we hear the pump turn on and assume it primes the fuel rails. Put the clutch in, hit the Start button again and it won't fire. Try it a few more times and still no fire. We are confused but the first step is to see if we have fuel at the rail. I disconnect the fuel line from the tank at the engine and we prime the pump, but no fuel comes out. Okay, we did something wrong, time for another call to LJ at Full Blown. He says, "Oh, you probably didn't clip the fuel pressure valve back in place. You have to cut it off and snap it in place. I have some photos I can send you." So we pull the fuel pump back out and cut fix our mistake. Throw the pump back in and the car runs just like it did with the OEM pump. Great, step 1 done. Step 2 was the fuel injectors. This was a relatively easy step just requiring removing the heavy steel protective/sound deadening covers over each of the fuel rails. The one on the driver side is a little bit more difficult to remove and the factory service manual recommends removing the two fuel lines and vent tube to get it out. Buy yourself the kit of small plastic fuel line removal tools from the autoparts store. You will most likely be using the smallest of them that are provided in the kit. My kit came with the Bosch 550cc injectors and clips to connect them to the factory wiring. Once I got the OEM injectors out I noticed how different the Boschs are. They are considerably taller and didn't have a rubber spacer or O ring on them. Well the spacer certainly won't help with the length, so leave that on the OEM injector. We will definitely need an O ring, so I swap the O rings over to the Boschs. I put them in the fuel rail and attempt to install the rail only to realize that there is no way the rail will bolt down due to the height of the Bosch injectors. Time for another call to LJ at Full Blown. He says the kit should have come with 1/2" nylon spacers and new bolts. I tell him I checked all the boxes again and they were not included. He says no problem, they can be found in the hardware section of Lowes. Time for our first parts run where we find the spacers, bolts, and washers with no issues. We install them and bolt the car back together. That is enough for one night. February 2nd: Day two starts around noon and is the disassembly day. Removing all the OEM parts was fairly straight forward. I didn't have any issues getting anything out, and I had already removed the front bumper before. The only part that was a little difficult to remove was the oil pan. I was lucky enough to realize that the base kit doesn't come with a new oil pan, so I had LJ add an oil pan to my order with the AN fitting already welded on as I do not have a welder. Removing the oil pan took a considerable amount of force to break lose the sealant used at the factory. It is now clear why the nearly finished Full Blown instructions, that LJ also e-mailed me along with the fuel pump photos, show a step where you have to hammer the oil pan back level because there is no way you are getting it off without bending the pan. I decided not to use the factory service manual recommended special bonding sealant and instead went to my local dealer and bought a tube of Subaru Fuji Bond which has been used on most of the Subaru boxer engines. I applied it to my modified oil pan from Full Blown and torqued it down using the recommended pattern and torque spec from the factory service manual. Next up was the turbo manifold which bolted up just fine, but one nut on each side was very difficult to get to. Unlike the OEM header which you can tell was designed to leave space to get to the bolt with an extension and wratchet, the only way to get to these bolts was with an angled wrench. The kit came with a gasket for the manifold to turbo so that went on next along with the turbo with no issues. The next step was to bolt the wastegate to the manifold. Because I went with the ultra nice recirculated dump pipe on my downpipe, I wanted to get the wastegate on first. I wrapped the majority of my downpipe with the supplied header wrap the night before, so it was ready to go on. Unfortunetly, the downpipe did not come with a gasket for either end. I contacted LJ about it, and he said they don't run a gasket at the turbo connection. I wasn't as confident as him about the levelness of the two surfaces, but I loosely fit the downpipe without one and ordered a gasket from ATP Turbo that weekend. I also loosely fit the bolts from the dump tube to the wastegate. I was glad everything lined up and that the dump tube had a flex section in it to help. I tightened all the bolts down and it fit great. I figured now was a good time to fit the dual electric fans. I measured the center of the radiator and placed each one centered top to bottom and side to side on each side of the radiator. I secured them using the through radiator plastic ties. The wiring for them was pretty simple as you cut off the connector from the driver side OEM fan and connect it to the wiring for the driver side aftermarket fan. The OEM wiring has another connector for the passenger side which has male connectors, so I just added some female connectors to the passenger side aftermarket fan. This makes both fans easily removeable. The only downside to this process that was in unbolting the A/C condensor to move it out of the way to gain access to the front of the radiator to do the plastic ties, a buddy from the Subaru club unbolted the A/C line from the condensor and shot all the refrigerant and oil out of it. I realized what he was doing just a few seconds too late, and quickly bolted it back up once the spraying was done. Expensive lesson learned for him.  The coolant tank now has no place to mount with the OEM fans removed. Luckily Full Blown includes a bracket to attach at the bottom for the little stub to sit in and at the top to connect it to the upper core support. These went on easily with some left over hardware and it mounts in nearly the same location as the OEM setup looking very clean. At this point I decided to attack the oiling for the turbo. This meant putting together the nylon AN lines for the oil return line. After attaching one fitting to the hose and attaching it to the oil pan AN fitting, I was able to determine the length of hose needed. I taped and cut the hose and then installed the other AN fitting and bolted the line up to the pan and turbo with no issues. I wasn't as lucky with the oil feed line. The kit comes with a brass T and a plastic elbow. I teflon taped all the threads and went to removing the OEM low oil pressure switch on the driver side front of the engine. That is when I noticed an issue. The threads on the sensor did not match the threads on the T. They were close, but not exactly correct. Luckily, I had the correct tap and die, so I tapped the female end of the T for the OEM sensor and used the die on the male end of the T that goes into the engine. Now the threads felt good and the T was installed in the correct orientation for the OEM sensor and the plastic elbow that the supplied stainless steel oil feed line attached to. The oiling system was done. I was kind of dreading the turbo water cooling install. I had seen the pictures in the install manual PDF, and there wasn't much space in there. Cutting each of the hoses and fitting the supplied 3 port brass barb fittings was very difficult. Getting both hoses underneath the A/C compressor was difficult. I got very frustrated during this time and managed to piss off my buddy Irb who was helping me by drilling out the holes on the bumper support to shift it upwards slightly for more intercooler mounting room (in the instructions). I eventually got them finished, but pissed off Irb enough that he left. Curtis came over again so we decided to install my JDL 2.5" overpipe and uppipe to the FBM downpipe and stock exhaust. The install went well as we were able to get enough subframe clearance on the overpipe. The only issue was the OEM transmission to uppipe bracket did not line up. Later in the week, I fabbed up my own bracket and no everything fits with great clearance. The pipes came with gaskets, but no hardware to mount which was a little disappointing so this took another parts run that I made earlier in the day. February 3rd: I was really hoping the kit would have been done by now as I wasn't going to let the install come between me and the Super Bowl. I started farily early at 9am to make sure I could get it done before the Super Bowl. At least all that was left was the intercooler, charge piping, and intake. How hard could that be? Honestly, it wasn't that difficult. I started by mounting the BOV to the pipe that goes to the throttle body. I then worked my way to the intercooler doing the passenger side of the piping. The main clearance issues here are with the headlight. You have to unclip a conector that mounts to the headlight to gain extra clearance. Even with that removed, my silicone hose connector is up against the headlight when mounted. You also have to cut a small area from each of the plastic pieces that help guide air to the radiator on each side of the intercooler. The driver side piping is a little more difficult. This is due to the small amount of area in this side of the bumper because of the three times larger than needed washer fluid bottle and the BRZ limited fog light. There is a little trimming of a washer fluid bottle bracket, but I got the pipes where I was happy and they weren't rubbing anything. I then attempted to fit the bumper and found out my solution wouldn't work. It took me 3 or 4 attempts of pipe placing and bumper fitting over the course of the next week before I came up with the correct angle and solution. My advice is to get the vertical pipe that comes up next to the washer bottle as far towards the back of the car as possible while keeping the angle of the lower pipe to where it fits between the fog light and bottom of the bumper. Only thing left was the intake which went on fairly easily reusing a factory bolt hole for the OEM snorkel. The hardest part was getting the big elbow on the intake pipe which required a little lube. I made sure the filter would not hit the A/C condensor and that the intake pipe was not making contact with the front core support. At this point the turbo kit is installed and it is around noon. Now comes what kept me from driving my car for two weeks. The EcuTek basemap reflash. I thought I had covered all my bases. I had tested my EcuTek cable with some datalogging earlier in the week to get a baseline for how the car idled and ran. I noticed my key did not have a license file on it to be able to reflash, so I had contacted John Visconti earlier in the week to get a license placed on my key. I had the battery charger on the battery, my laptop loaded with the latest drivers and software along with the power cable plugged in to a house outlet, and the basemap from LJ at Full Blown. I was ready to reflash my ECU. I plugged in and it read my ECU just fine identifiying it as a BRZ/FR-S. I loaded up the basemap and hit the flash ROM button. I sat there and watched the progress to make sure the laptop didn't do anything weird. I got to around 44%, and I got an error stating OBD communication failed. I was so disappointed at this point. I figured I would just give the reflash another shot. This is when I realized the number one issue I have with EcuTek. It takes your license before the reflash is successfully completed. So now I am left with a partially flashed ECU and no license to reflash it. Luckily, I had John Visconti's number, so I gave him a ring. I e-mailed him my EcuTek log file and he put another license on my key. EcuTek again failed in a similar fashion. Now John and I went into trouble shooting mode and he recommended a different laptop. I got my Dad's laptop and loaded up the latest drivers and software again. John put another license on my key, and I gave it another shot with the same result of EcuTek failing at between 40 and 60%. John now told me that EcuTek cables can often fail or be bad from the factory and that he doesn't get a chance to test reflashing with all of them. The plan is to mail me a new cable to give it another shot. February 5th: John sent the cable USPS Express on Monday, so I had it on Tuesday along with another license on my key. I was optimistic this would be the day I would drive my car. That optimisim was turned into rage when EcuTek yet again failed. I was looking for something or someone to punch at this point. I called up John again and we decide the best solution is to box up the ECU and new cable and use the USPS Priority Mail return label he sent so that he can flash the ECU for me. I figure the wait will be worth it as at least when the ECU comes back I know it will run the car. February 12th: A week later, and the ECU is back from John. I am so excited I take the day off from work and wait for it to arrive. I quickly install it and connect EcuTek to it to make sure everything looks right. It recognizes the ECU and shows that John flashed it with his key. I press the start button and the car fires to life. It sounds great at first, put then it idles down and is struggling to keep an idle. I figure this is just the ECU learning, so I leave it alone for 10 minutes at which time it hasn't gotten any better. I shut the car off and fire it back up and it is doing the same thing. I try and give it a little throttle and it reacts strangely. I hope it is just the idle so I try and drive it, but I can't even get it out of my cul de sac. It is going too lean when I give it throttle. I get it back in my driveway and contact John. He recommends contacting LJ at Full Blown, so I call him and go through some troubleshooting. Everything looks correct, so LJ sends me another basemap to try. Since the ECU is flashed, I don't need a license to flash it, so I give it another shot with the new basemap. Of course EcuTek fails at around 81% and now I am left in the same positon I was a week ago with a partially flashed ECU, no license, and $100 poorer. I contact John again and he says he will get back with me to try and help me. February 14th: I haven't been able to get any time with John to troubleshoot, but LJ at Full Blown has offered to help me by reflashing my ECU. I decide that I am tired of waiting for John, so I pack up my ECU, cable, and key and mail them to LJ with USPS Express Mail Flat Rate. February 18th: LJ got the ECU at around 3pm on Friday, but that is around 9pm in the UK where Merv at EcuTek is located, so he is unable to get it reflashed and working. He gets in contact with Merv on Monday and they work together to get my ECU reflashed. I am told these were the steps to make it happen: Hood Closed Close Doors Lock Doors Unlock Doors Open Driver Door Close Driver Door Reflash He ships the ECU back to me with USPS Express Mail Flat Rate again. February 19th: The day has finally arrived where I am going to get to drive my car. I take a half day off work so I can be home around the time the ECU should arrive at my house. As soon as I get it, I install it back in the car and again verify that everything looks right in EcuTek. I push the start button and again it first to life and sounds good. That is until the vacuum goes up to around -19 in/hg and the car tries to idle. It is surging again just like it did when I got it back from John. This time though I notice out of the corner of my eye that the BOV is opening and closing at idle. I pinch the vacuum line to the BOV and it shuts and the car idles just fine. This is only my second ever car with a turbo kit, but I am fairly certain that the BOV should be closed at idle especially with it mounted so close the MAF sensor. I call up LJ and tell him my findings. He tells me to get the TiAL Q BOV sensor box and look at the label on the side. I tell him it says 6 psi spring installed. He tells me that is for the S2000s where they run speed density and it is okay for the BOV to be open at idle. I was supposed to get a 10 psi spring. He says he will overnight the correct spring to me. I want to at least drive the car, so I plug the vacuum line to the BOV and drive the car without boost for the first time in 2.5 weeks. It drives well and idles well. I pull the BOV off and take it apart awaiting the new spring tomorrow. February 21st: The new spring arrives, and I pull it out of the package. To my surprise, it looks damn near identical to the last one. I have checked the TiAL website and I am hoping it is a PLAIN spring and not a BLACK spring like I already had, but both springs have some black paint on the top and bottom. They both felt the same, but I figure I better put it in and install the BOV just to verify. It of course does the same thing as the last spring. I call up LJ and he says he pulled that spring out of a box that was marked 10 psi, but didn't verify that it was actually a 10 psi spring. He says he will again overnight be the correct 10 psi spring, but it is already too late to get it in the mail today so it will be there in 2 days on Saturday. I once again pull the BOV off and take it apart. February 23rd: The new correct spring arrives, and I pull it out of the package. It is noticeably longer and has no black paint on it. I quickly throw it in the BOV and reinstall it. The car is finally idling better. I can't see the BOV opening at all. I take it for a quick spin, but the car dies at the end of my street. The extra vacuum is now enough to barely open the spring and mess with the MAF sensor to allow the RPM to drop enough to stall the car. I drive back to my house and call up LJ. He says this is the same spring all his FR-S/BRZ turbo kits use. I tell him what my vaccum at idle and off throttle is and recommend we try an 11 psi spring which is what most Subarus use. He agrees and says he will get one to me this week. I can't resist driving it even with the chance of it stalling, so I go out in the rain to feel boost for the first time. When it hits in 2nd gear on the highway, I nearly lose the rear end. I drive to the gas station where it stalls, and I have trouble getting it refired. I fill up with gas since I had run the tank low for the fuel pump install. February 24th: I have heard about and read about adding washers to the BOV to increase the psi. A quick trip to Lowes and a single washer install later and the car is idling better and now only stalling very rarely instead of every time I put the clutch in. The car is actually daily driveable now. The clouds part, the sun comes out, I grab my buddy Curtis who helped the most on the install. Time for a drive and Curtis breaks out his iPhone to record the drive. The saga is nearly over. I e-mail LJ some logs from my AEM Failsafe gauge with boost and AFRs. February 25th: I am currently waiting to hear from LJ on the shipping of the 11 psi spring. The current issues are the boost is not holding as steady as I would like. I think this is due to following the recommended install instructions from GrimmSpeed for the manual boost controller and not the instructions from the Precision wastegate. In my datalogs yesterday I saw between 6.8 and 9.1 psi at full throttle which seems like a big spread for a MBC. More pictures of the kit will be taken soon as well as any requests for pictures. I want to end by saying I am here to help anyone who attempts to install this kit themselves in their driveway on jackstands like I did. The Future: I have already ordered a Greddy Evo3 exhaust as the car is way too quiet even with the turbo kit and no cats. I also plan to have the car custom dyno tuned. The four closest EcuTek tuning shops are Forged Performance in Atlanta, DD and D3PE in the Houston area, and FA20club in Southern Florida. I am still exploring my options on this, but would like to have it tuned later in March or April. Current Modifications:
               Videos: [ame="http://www.youtube.com/watch?v=keNSl4CJffg"]King Tut's Subaru BRZ Full Blown Motorsports Turbo Kit - YouTube[/ame]
__________________
- King Tut
Street/Track Car: 2006 Honda S2000 TT3 || Race Car: 1987 BMW 325is SpecE30 || Tow Vehicle: 2014 RAM 1500 EcoDiesel Sold Cars: 2012 BMW M3 || 2013 Subaru BRZ || 2012 Porsche Cayman R || 2009 Chevrolet Z06 || 2009 BMW M3 || 2004 BMW M3 || 2004 Nissan 350Z Last edited by King Tut; 02-25-2013 at 03:56 PM. |

|

|
| The Following 36 Users Say Thank You to King Tut For This Useful Post: | 86gt? (03-29-2013), akuhei (02-26-2013), Alhammadi (02-25-2013), bacon_cheese_beer (03-02-2013), ben15r (02-28-2013), Black Tire (02-28-2013), brianbui23 (01-31-2022), Calum (02-25-2013), clayrush (02-25-2013), cmss2000 (02-25-2013), cobrabyte (03-04-2013), crook (02-25-2013), Deepseadiver (03-11-2013), diss7 (02-25-2013), djdnz (02-26-2013), Draco_PR23 (02-25-2013), D_Thissen (11-02-2014), Got3n (02-25-2013), illmatic (02-25-2013), itdansharpe (03-01-2013), Jeff86 (02-26-2013), joe strummer (03-01-2015), Kiske (11-17-2014), kmbkk (02-25-2013), LeeMaster (02-25-2013), Mr. (03-27-2013), Nightbringer (08-08-2013), OjiGeorge (02-26-2013), Pete (02-25-2013), ppbiggums (05-07-2015), Shawnofthedead (09-12-2013), SnapOv3st3r (03-11-2013), Sportsguy83 (02-25-2013), suaveflooder (02-25-2013), TheBRZsKnees (02-26-2017), TRD_07 (03-01-2013) |
|
02-25-2013, 02:47 PM
|
#2 |
|
Senior Member
Join Date: Mar 2012
Drives: FRS,09 370z, 00 CelicaGT-S, 85 300Z
Location: SF Bay/vallejo
Posts: 653
Thanks: 1,258
Thanked 280 Times in 161 Posts
Mentioned: 9 Post(s)
Tagged: 2 Thread(s)
|
Thanks a lot for this wright up. I am going to forward this to my shop.
 it's nice to see in detail what we are gettin into. it's nice to see in detail what we are gettin into.
|
|
|
|
|
02-25-2013, 02:52 PM
|
#3 |
|
NASA SpecE30 Racer
Join Date: May 2012
Drives: 2006 Honda S2000
Location: Gulf Breeze, FL
Posts: 7,279
Thanks: 607
Thanked 5,759 Times in 3,055 Posts
Mentioned: 274 Post(s)
Tagged: 10 Thread(s)
|
I know it is a long post, but I figured that Cliffs just wouldn't really work well.
I think it is worth the read for anyone considering doing the install themselves.
__________________
- King Tut
Street/Track Car: 2006 Honda S2000 TT3 || Race Car: 1987 BMW 325is SpecE30 || Tow Vehicle: 2014 RAM 1500 EcoDiesel Sold Cars: 2012 BMW M3 || 2013 Subaru BRZ || 2012 Porsche Cayman R || 2009 Chevrolet Z06 || 2009 BMW M3 || 2004 BMW M3 || 2004 Nissan 350Z |
|
|
|
|
02-25-2013, 02:59 PM
|
#4 |
|
TEQSPORT Brand Manager

Join Date: Jun 2012
Drives: '24 GR86 + '16 FR-S
Location: Atlanta
Posts: 3,666
Thanks: 3,725
Thanked 4,137 Times in 1,707 Posts
Mentioned: 90 Post(s)
Tagged: 6 Thread(s)
|
Nice write up! I noticed your build didn't include an oil cooler. Are you monitoring oil temps now that it's running and tuned?
|
|
|
|
|
02-25-2013, 03:03 PM
|
#5 |
|
Senior Member
Join Date: Mar 2012
Drives: FRS,09 370z, 00 CelicaGT-S, 85 300Z
Location: SF Bay/vallejo
Posts: 653
Thanks: 1,258
Thanked 280 Times in 161 Posts
Mentioned: 9 Post(s)
Tagged: 2 Thread(s)
|
It's even good for a seasoned tuner to read stuff like this. Every car and every kit is different.
I may be helping my shop with the install to help keep labor costs down. So now I am just keeping my fingers crossed on gettin a promotion at work and then I am gonna buy the kit for my girls FRS
|
|
|
|
|
02-25-2013, 03:06 PM
|
#6 |
|
Senior Member
Join Date: Dec 2012
Drives: 2013 Scion FR-S
Location: Vancouver
Posts: 328
Thanks: 93
Thanked 113 Times in 65 Posts
Mentioned: 3 Post(s)
Tagged: 0 Thread(s)
|
good read and info. congrats!
|
|
|
|
|
02-25-2013, 03:09 PM
|
#7 | |
|
NASA SpecE30 Racer
Join Date: May 2012
Drives: 2006 Honda S2000
Location: Gulf Breeze, FL
Posts: 7,279
Thanks: 607
Thanked 5,759 Times in 3,055 Posts
Mentioned: 274 Post(s)
Tagged: 10 Thread(s)
|
Quote:
__________________
- King Tut
Street/Track Car: 2006 Honda S2000 TT3 || Race Car: 1987 BMW 325is SpecE30 || Tow Vehicle: 2014 RAM 1500 EcoDiesel Sold Cars: 2012 BMW M3 || 2013 Subaru BRZ || 2012 Porsche Cayman R || 2009 Chevrolet Z06 || 2009 BMW M3 || 2004 BMW M3 || 2004 Nissan 350Z |
|
|
|
|
| The Following User Says Thank You to King Tut For This Useful Post: | Sportsguy83 (02-25-2013) |
|
02-25-2013, 03:20 PM
|
#8 |
|
Senior Member
Join Date: Jul 2012
Drives: 2015 Mustang GT (on order)
Location: San Diego
Posts: 904
Thanks: 114
Thanked 471 Times in 208 Posts
Mentioned: 9 Post(s)
Tagged: 0 Thread(s)
|
holy hell. I can't believe I read that whole thing. Thanks for the detail. Sounds like quite a few bumps along the way.
__________________
 |
|
|
|
|
02-25-2013, 03:44 PM
|
#9 |
|
Senior Member
Join Date: Oct 2012
Drives: 2013 Raven FRS
Location: Virginia Beach, Va
Posts: 496
Thanks: 30
Thanked 143 Times in 93 Posts
Mentioned: 18 Post(s)
Tagged: 3 Thread(s)
|
Dude, you're a hero for taking this one yourself. Good job troubleshooting and working out your problems. I'm gonna shell out the clams for my FI install... no way in hell am I going through your experience.
|
|
|
|
|
02-25-2013, 03:59 PM
|
#10 | |
|
NASA SpecE30 Racer
Join Date: May 2012
Drives: 2006 Honda S2000
Location: Gulf Breeze, FL
Posts: 7,279
Thanks: 607
Thanked 5,759 Times in 3,055 Posts
Mentioned: 274 Post(s)
Tagged: 10 Thread(s)
|
Quote:
__________________
- King Tut
Street/Track Car: 2006 Honda S2000 TT3 || Race Car: 1987 BMW 325is SpecE30 || Tow Vehicle: 2014 RAM 1500 EcoDiesel Sold Cars: 2012 BMW M3 || 2013 Subaru BRZ || 2012 Porsche Cayman R || 2009 Chevrolet Z06 || 2009 BMW M3 || 2004 BMW M3 || 2004 Nissan 350Z |
|
|
|
|
| The Following User Says Thank You to King Tut For This Useful Post: | itdansharpe (03-01-2013) |
|
02-25-2013, 04:09 PM
|
#11 |
|
Senior Member
Join Date: Jul 2012
Drives: BRZ
Location: ATL, GA
Posts: 1,021
Thanks: 289
Thanked 397 Times in 265 Posts
Mentioned: 13 Post(s)
Tagged: 0 Thread(s)
|
Thanks for sharing! I hope if I ever get a turbo kit, I don't have to go through all that.. Good luck with the 11psi spring & custom tuning!
|
|
|
|
|
02-25-2013, 05:00 PM
|
#12 |
|
Banned
Join Date: Apr 2012
Drives: 05 STi
Location: Norwalk, CT
Posts: 2,843
Thanks: 196
Thanked 3,188 Times in 1,197 Posts
Mentioned: 375 Post(s)
Tagged: 2 Thread(s)
|
Man what a mess and process this as been.
Glad your finally driving your car. Have you been able to flash it again yourself? -John |
|
|
|
|
02-25-2013, 05:03 PM
|
#13 | |
|
NASA SpecE30 Racer
Join Date: May 2012
Drives: 2006 Honda S2000
Location: Gulf Breeze, FL
Posts: 7,279
Thanks: 607
Thanked 5,759 Times in 3,055 Posts
Mentioned: 274 Post(s)
Tagged: 10 Thread(s)
|
Quote:
__________________
- King Tut
Street/Track Car: 2006 Honda S2000 TT3 || Race Car: 1987 BMW 325is SpecE30 || Tow Vehicle: 2014 RAM 1500 EcoDiesel Sold Cars: 2012 BMW M3 || 2013 Subaru BRZ || 2012 Porsche Cayman R || 2009 Chevrolet Z06 || 2009 BMW M3 || 2004 BMW M3 || 2004 Nissan 350Z |
|
|
|
|
|
02-25-2013, 05:17 PM
|
#14 |
|
Senior Member

Join Date: Sep 2012
Drives: 2003 Subaru Outback
Location: Long Island, NY
Posts: 1,318
Thanks: 154
Thanked 529 Times in 300 Posts
Mentioned: 3 Post(s)
Tagged: 0 Thread(s)
|
Seems like the PSS take the power really well.
|
|
|
|
|
|
|
|
| Tags |
| blown, fbm, full, king tut, turbo |
|
|
 Similar Threads
|
||||
| Thread | Thread Starter | Forum | Replies | Last Post |
| Full Blown FRS/BRZ Stage 1 Turbo Kit | FullBlown | Forced Induction | 456 | 09-27-2021 04:10 AM |
| TyperRspec789's Full Blown Stage 1 Base Turbo & e85 Progress and Testing | TyperRspec789 | Forced Induction | 63 | 12-31-2013 08:39 PM |
| Full Blown Motorsports Stage 1 Turbo Kits PROVEN POWER!@ Pure Automotive Performance | Pure Automotive | Forced Induction | 86 | 11-26-2013 09:27 AM |
| The Results Are In!! Full Blown Stage 1 Kit @ Pure Automotive Performance! | Pure Automotive | Forced Induction | 181 | 03-12-2013 03:11 PM |
| The Results Are In!! Full Blown Stage 1 Kit @ Pure Automotive | Pure Automotive | Mid-Atlantic | 22 | 02-12-2013 11:13 AM |


