


|
||||||
| DIY (Do-It-Yourself) Guides For all DIYs. |
 |
|
|
Thread Tools | Search this Thread |
 02-15-2013, 06:24 PM
|
#1 |
|
Negative Mass

Join Date: May 2012
Drives: Orange Metallic AVO Turbo GT86 6MT
Location: Arlington VA
Posts: 702
Thanks: 272
Thanked 346 Times in 201 Posts
Mentioned: 56 Post(s)
Tagged: 1 Thread(s)
|
JDM GT86 Spoiler Install without Template and Missing Hardware:
Hey all,
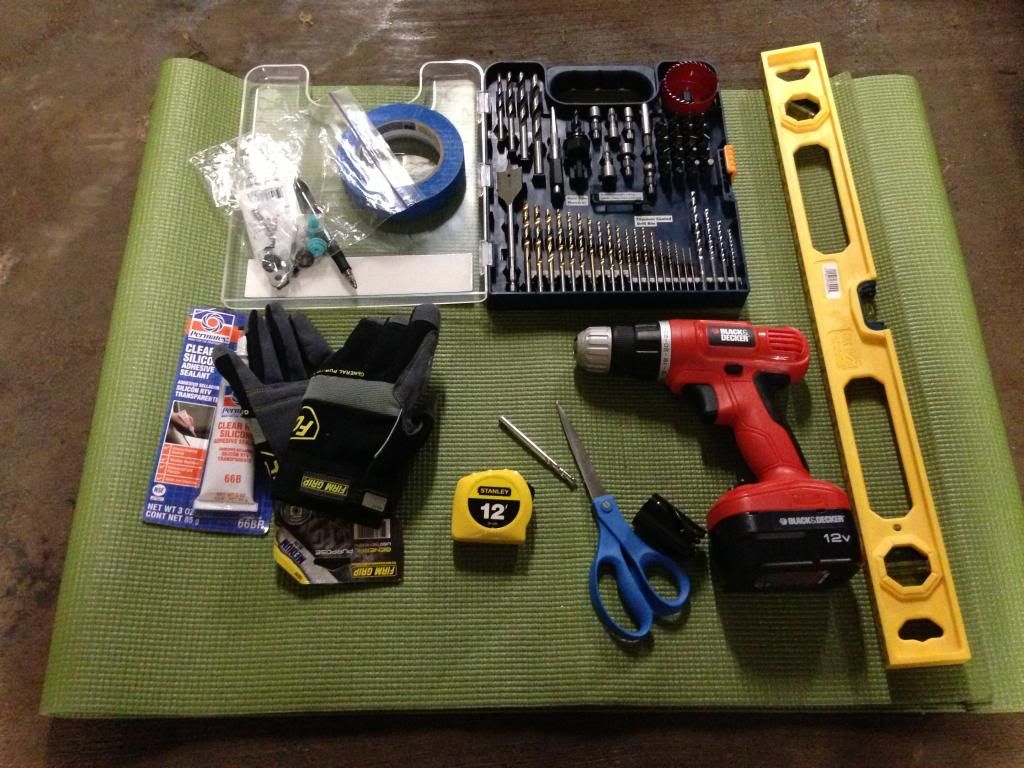
As the title states I am attempting to put together a guide for installing the JDM GT86 spoiler with nether the drilling template nor the necessary hardware. My original thread looking for help on this matter can be found here: http://www.ft86club.com/forums/showthread.php?t=27146 First I would like to thank @Area86 for his invaluable help with measurements of the holes and pictures of said holes. I would also like to thank @cdo221 for his hint on using 3m painter's tape to mark on the car. I would like to point out that a lot of what I did I highly recommend doing differently, and in cases where I do something dumb, even if it is obvious, I am going to point it out. My goal here is to not only inform on how I did this, but also how it really should be done. I was a complete noob going into this and I paid dearly for it. I am not at all embarrassed by my mistakes and I hope someone can learn from them. Step 1: The Tools You Need Nothing could be more important than having the right tools (as evidenced by my install happening in several phases). I am going to point out everything you need to do this correctly and cleanly, even if I did not have it on the first night of installation. I must also point out that I was fortunate enough to have a couple of the required pegs, and the bolt mounting brackets for the spoiler. I was missing the bolts themselves and the drilling template.
 Step 2: Measuring the Peg Holes I will refer once more to @Area86 's post on my original thread, as he gives excellent detail on where the drill holes are. http://www.ft86club.com/forums/showp...51&postcount=7 The underside of the spoiler looks like this: 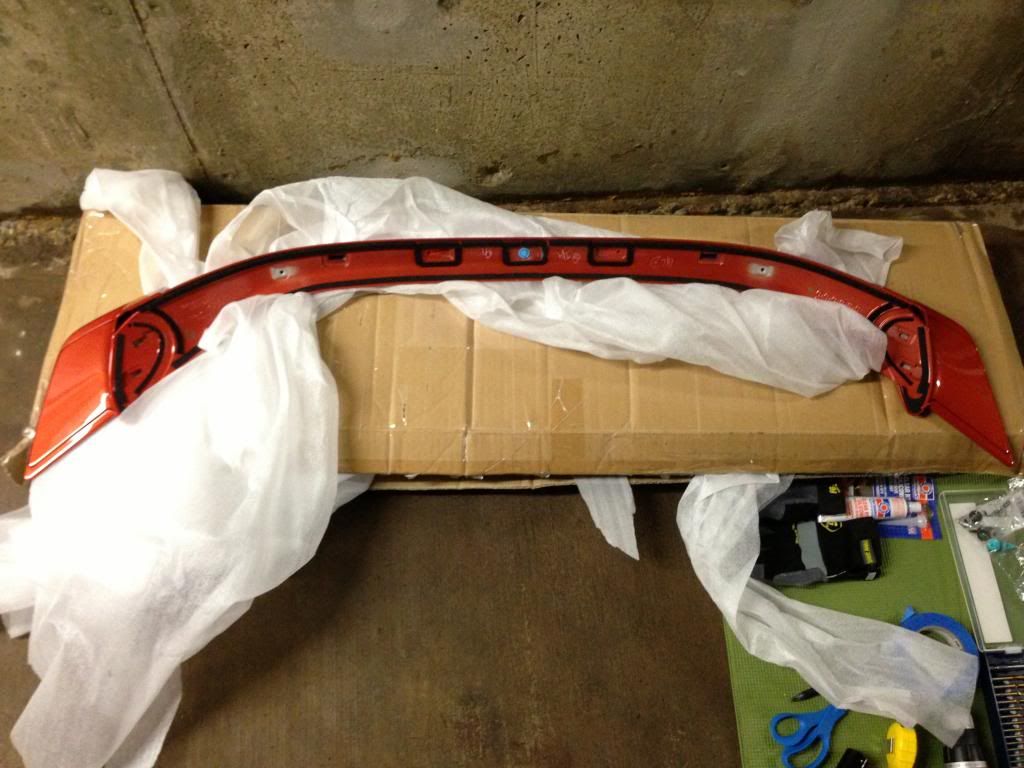 The night before I began my install I was originally planning to tape the spoiler on, so I had cut off and sanded down the center peg, as shown in this picture. 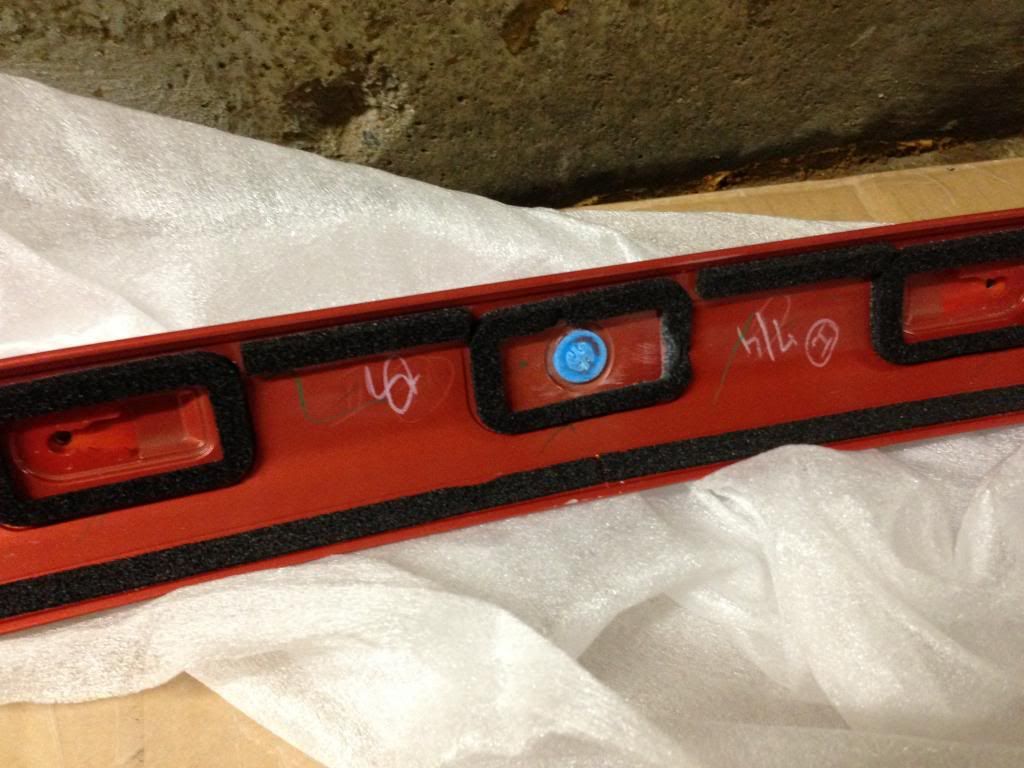 The first task is to find an object to center on. I decided that the emblem was most likely to be perfectly centered, as it is positioned using peg holes that are factory drilled. First I measured the width of the emblem to position a tick mark on the tape at the exact center. I used the level to draw a vertical line from which to measure the position of the tick mark above the emblem. 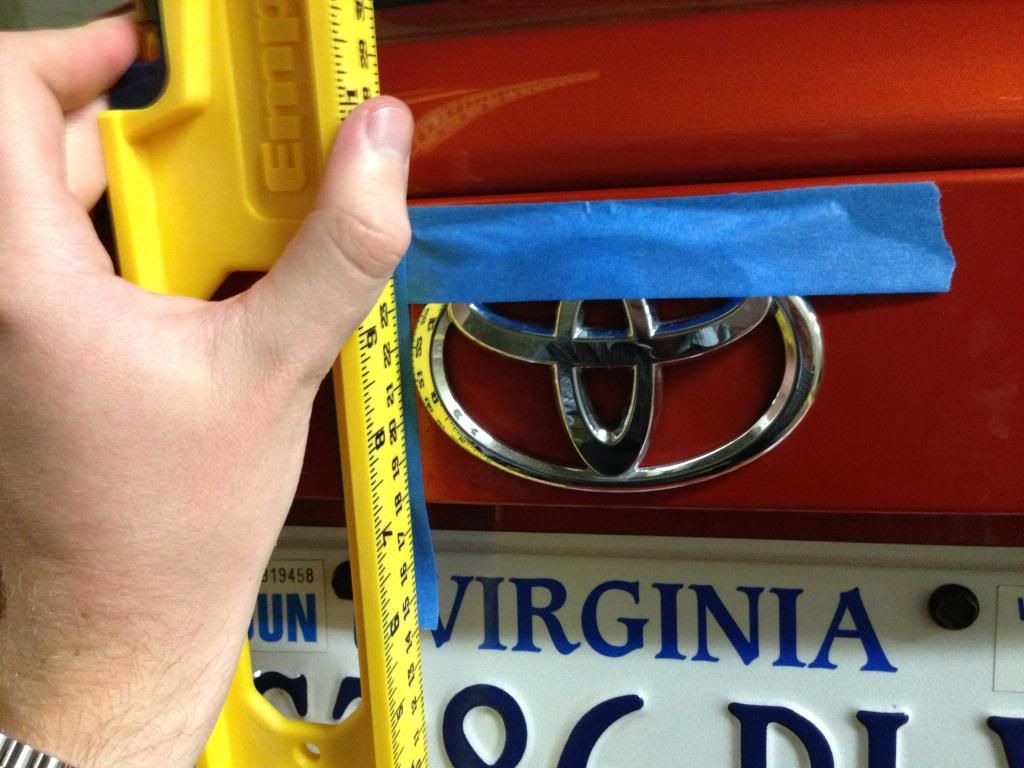 I then placed a line of tape across the trunk where I estimated the holes were going to be drilled (this can take a couple steps if you're not exactly sure, but I managed to eyeball it correctly). Using the measuring tape I measured exactly 1 1/8" from the crevice in the drunk to the position of the hole. (Protip: Don't use the start of the tape for this, place something like the 2" mark on the crevice with your eye as level to it as possible, then mark the 3 1/8" position on the tape with a '<' then draw a perfectly horizontal line using the level). Make sure that you press the measuring tape down firmly so that the tape is flush with the curve of the trunk or you might over-measure. Using the level I slowly "rolled" it from the tick mark above the emblem until it was flat with my horizontal line, making sure that it was staying level the entire time (watch the bubble closely!) Draw a vertical line using the level. The end result was this mark: 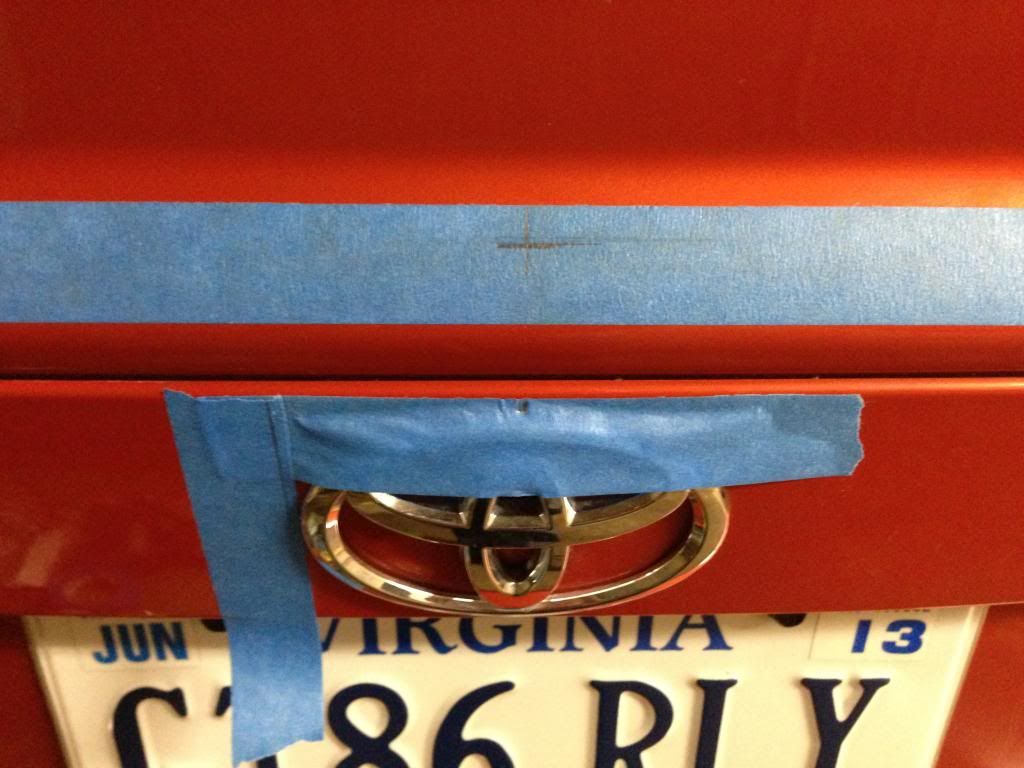 The cross hair makes it easy to see that you are drilling the correct spot, just as it makes it easier to aim things! The next step was to measure the two drill points for the outer pegs. The vertical distance from the trunk crevice can be measured the same way as before, but the horizontal measurement was a bit trickier. Again the measuring tape must be perfectly flush with the trunk, but this time we have to deal with the curvature of the trunk. For complicated geometric reasons that I won't get into here, you cannot use the level to draw a "horizontal" line as you are expecting, as you actually need a geodesic. I'll leave it to you to experiment with this fact, but suffice to say your "horizontal" line will actually taper downward unexpectedly. For this reason I estimated where I thought the vertical line would be drawn, and I drew a very long horizontal line at the correct height from the crevice (it's okay to use the level "locally" as it still serves it's purpose). I then used the measuring tape to measure the exact horizontal distance required from the center point to position my vertical mark. Finally I drew the vertical line using the level to make sure my cross hair was oriented correctly. The end results are as follows: 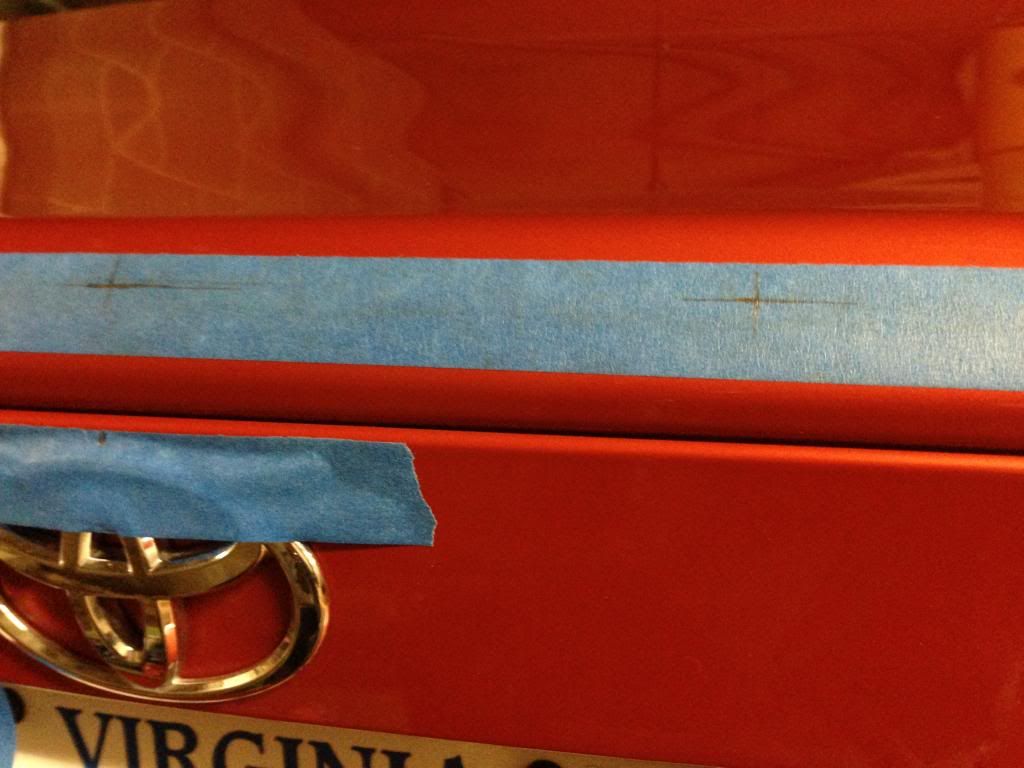 I didn't have the square pegs as shown in the other thread, so I never went about trying to measure those holes. I'll leave it to another handy person to go through that trouble if they actually have the hardware somehow but not a template! At this point, recheck your measurements a thousand times. Lay the measuring tape across all 3 points to guarantee they are the correct distance from each other, and keep re-measuring from the trunk crevice. This was the trickiest and most uncertain measurement, but if your eye is level with the crevice you should be fine. The pegs actually wiggle just a tad giving you about 1/32" 1/64" error buffer. You might consider giving yourself a sanity check by positioning the spoiler to at least see the horizontal positions of the pegs. This picture was an attempt at showing what I'm talking about: 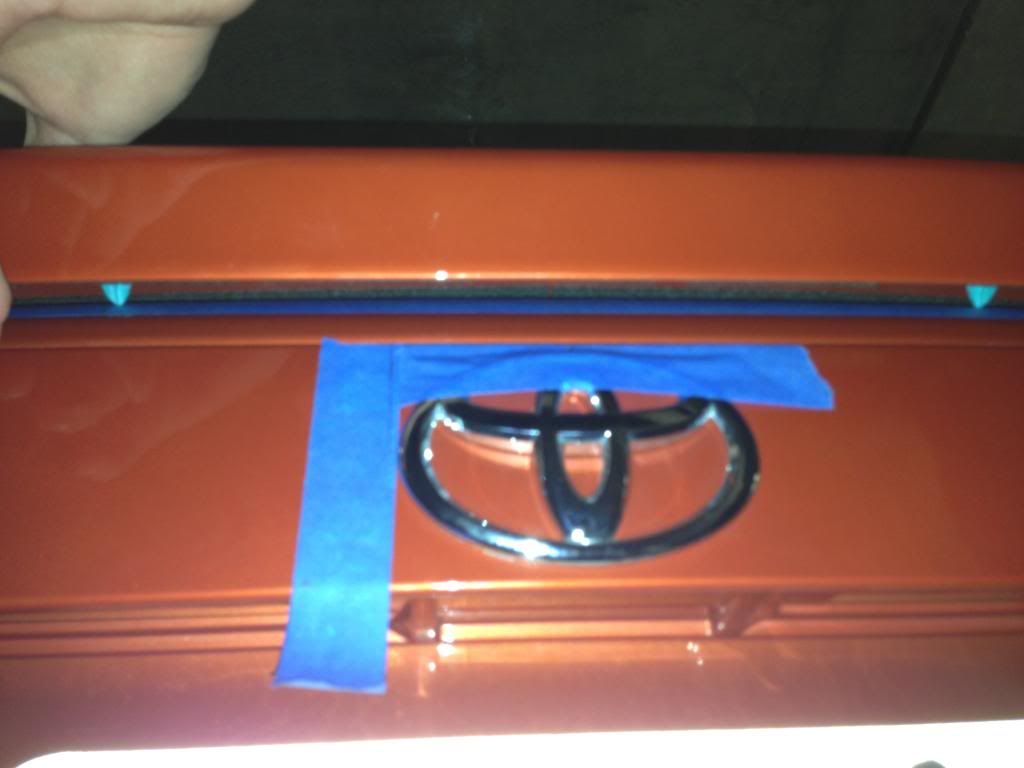 Step 3: Drilling the Peg Holes Now is the "Tim the Toolman" part. You have a few options here, but the best solution is to have a center punch available. An automatic one is fantastic but a hammer and manual one will suffice. Position the punch on the cross hair and give it a moderate tap. You don't need to kill it, but you should remember you're trying to dent aluminum. I didn't use the punch until later, so you'll see what that looks like when I drill the access holes for the bolts. If you don't have a center punch then start with a very small bit (I used almost every 1/64" step from 1/8" to 3/8"). Position the drill square to the cross hair and begin slowly. (Protip: wear stylish sunglasses as eye protection). 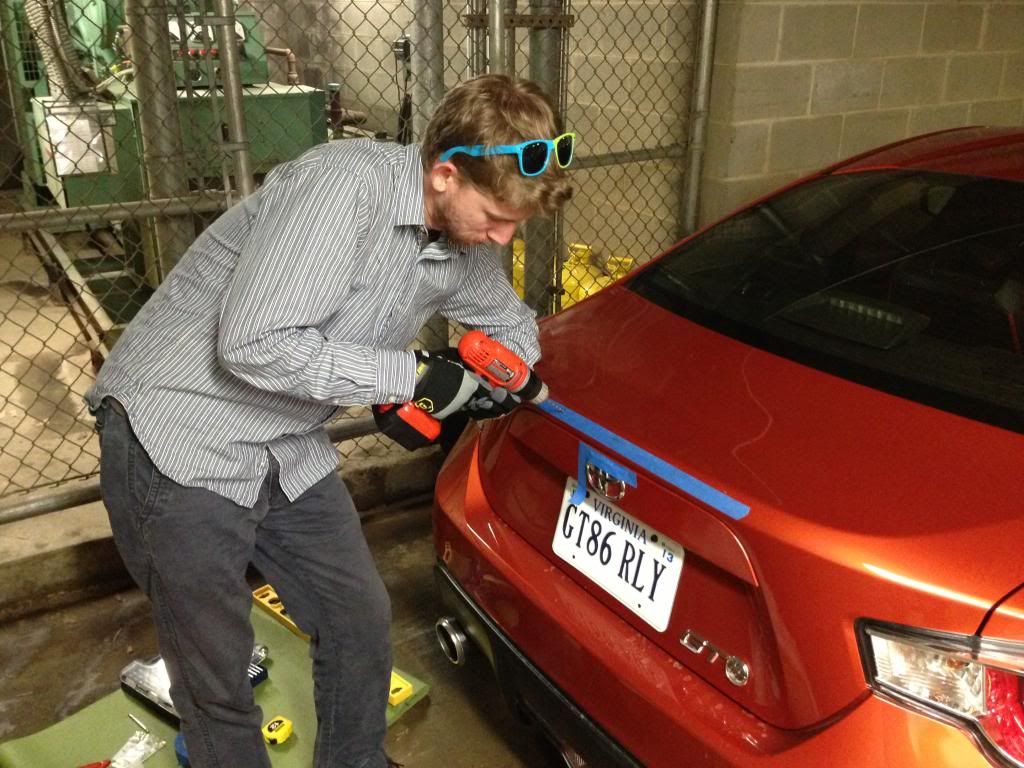 Work your way up to the 3/8" bit and drill the final holes. They will look similar to this (these look messy but it's just the tape fraying). 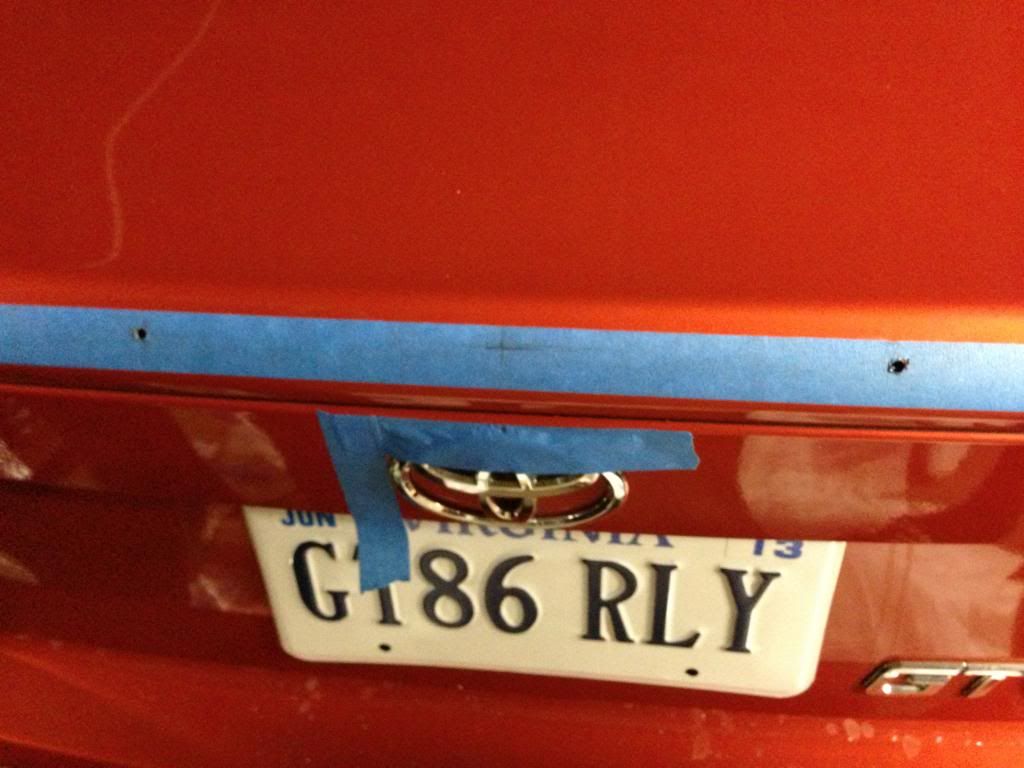 Step 4: Measuring for the Bolt Holes Now is where I began to make some major mistakes because I was tired and impatient! Looking back on this I think the idea was sound but the implementation was shoddy. I will share what I did as I think it's important to point out a couple of issues with it. I will then share what I think is the best solution. My Way My roommate and I stewed on this one for a bit and decided that we could use the bolts themselves to make impressions on a thick stack of painter's tape. If the spoiler were laid down flat with the bolts in and we pressed hard on the post, we figured the holes would line up correctly. The tape looked like this: 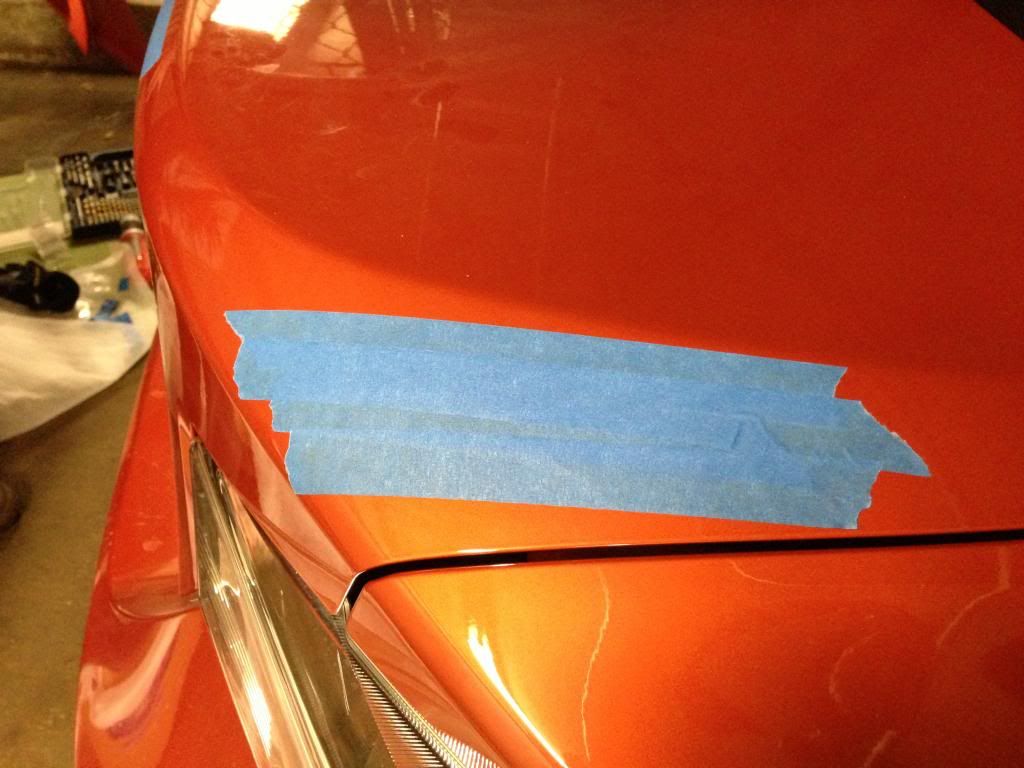 After pressing the spoiler down on the tape and marking the bolt positions it looked like this: 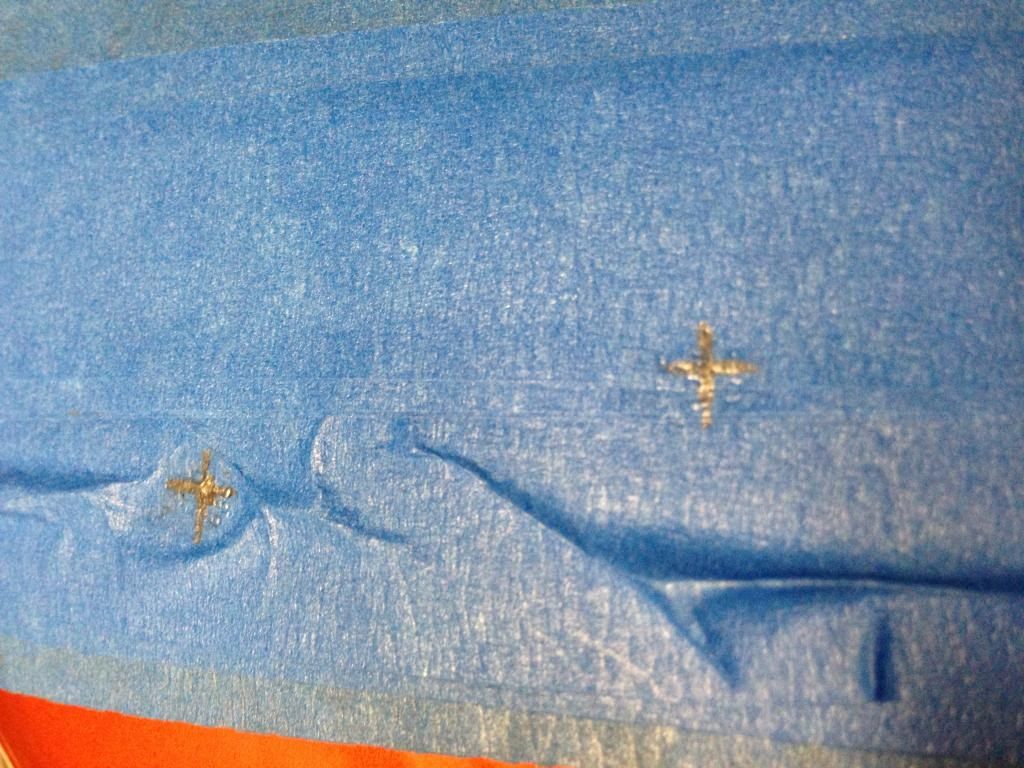 If you have a good eye and the picture weren't so blurry you would realize that you can actually read the symbols that were on the bolt heads. EUREKA I thought, this is going to work! Unfortunately I pushed forward on the spoiler a bit while I was doing one of the sides, so the impressions ended up off center of where they should have been... The Right Way Later talking with my step-dad I realized that the idea was sound but the need for applied pressure was the problem. It has the opportunity to push the spoiler off-center (as we saw). I would propose that a better solution is to use the tape still, but use some very thick grease like maybe caliper grease, dab it into the bolt holes til it's coming out of them, then position the spoiler carefully onto the trunk. The bolt holes should leave behind the excess grease in the right positions. Then it's as simple as finding the center of those holes and drilling away. Step 5: Drilling the Bolt Holes The pictures are going to become a bit more scarce at this point as I was getting even more tired and impatient... The drilling here works the same as it did for the peg holes, except that the holes are smaller. The other change is that you will actually need to drill through two sheets of metal because of the reinforced nature of this part of the trunk. Punch some dents first if you have the necessary tools, then drill square to the trunk lid making sure the drill doesn't change orientation as you go through the second sheet of metal. Step 6: VHB Taping At this point I realized that I couldn't attach the hole saw I had bought to my drill... (PROTIP: Bring your drill when you buy a bit for it!) So in order to cover up the holes I had just created in my trunk lid, I needed a way to attach the spoiler with moderate confidence. Fortunately I already had some VHB tape since I was planning to tape it on anyway. I'm going to take an opportunity here to make a very important point: The shape of the spoiler actually causes it to lift away from the trunk lid where the bolts are intended to go. There is an added complication that there is very little room in these spots to put VHB tape. Therefore I do not recommend VHB tape alone as a permanent solution for this spoiler! I will, however, point out that I was missing a good portion of the hardware, so the VHB tape gives me added peace of mind that the spoiler is going to stay put. Again, I was frustrated with the misaligned holes and impatient and tired at this point, so I did not take pictures of taping the spoiler. This isn't a particularly complicated process, though. There are a few steps involved:
If you look back at my picture of the underside of the spoiler you can see that virtually the entire spoiler qualifies as tape-able surface. Anywhere inside the squishy black tape is fair game. I would recommend trying to fill as much of it as possible with very long pieces of tape, as this takes advantage of the chemical bonding of the VHB tape (it really really sticks to itself and will never let go if the force is distributed over a long surface area). I also recommend trying to have pieces of tape that will curve down the trunk a bit, as this will cause the tape to have forces applied to it in more than one direction, further distributing that stress. When you have taped but not bolted you will see this: 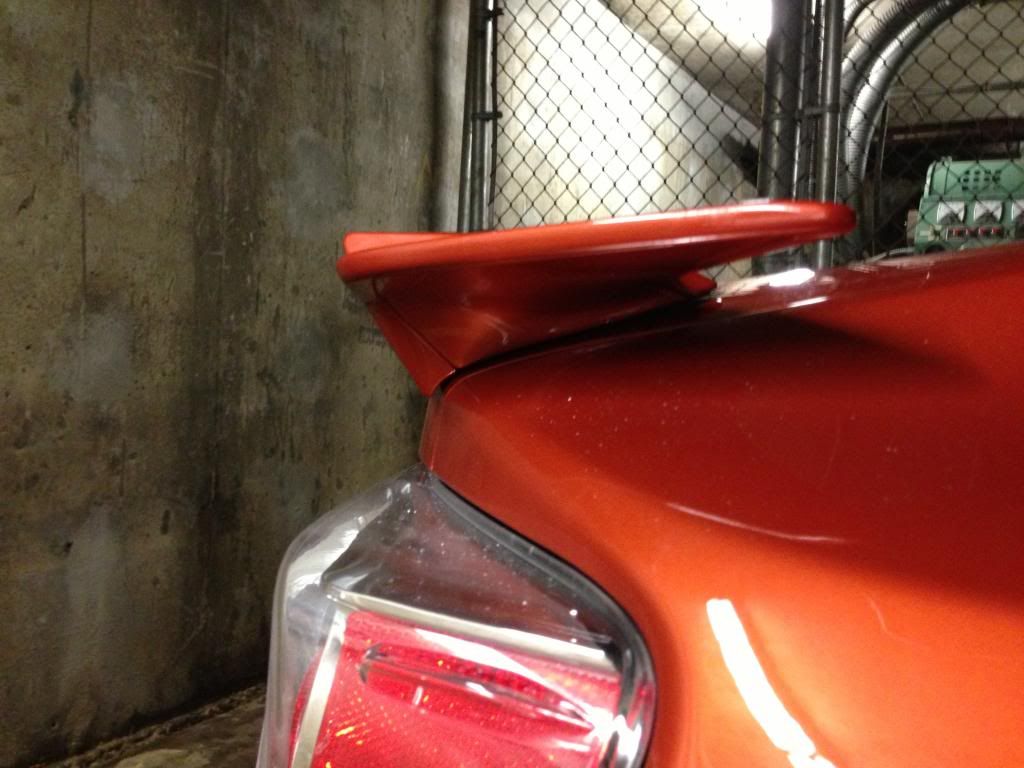 Notice the small gap because the spoiler is lifting away from the trunk. This will be dealt with when the bolts secure the spoiler better. Step 7: Drilling the Access Holes for the Bolts This was far and away the most difficult part of this installation for me because I made some very, very stupid mistakes in my impatience. First, I made these HIDEOUS holes on the lower sheet of metal thinking I could somehow make room to turn the bolts with some needle-nose pliers: 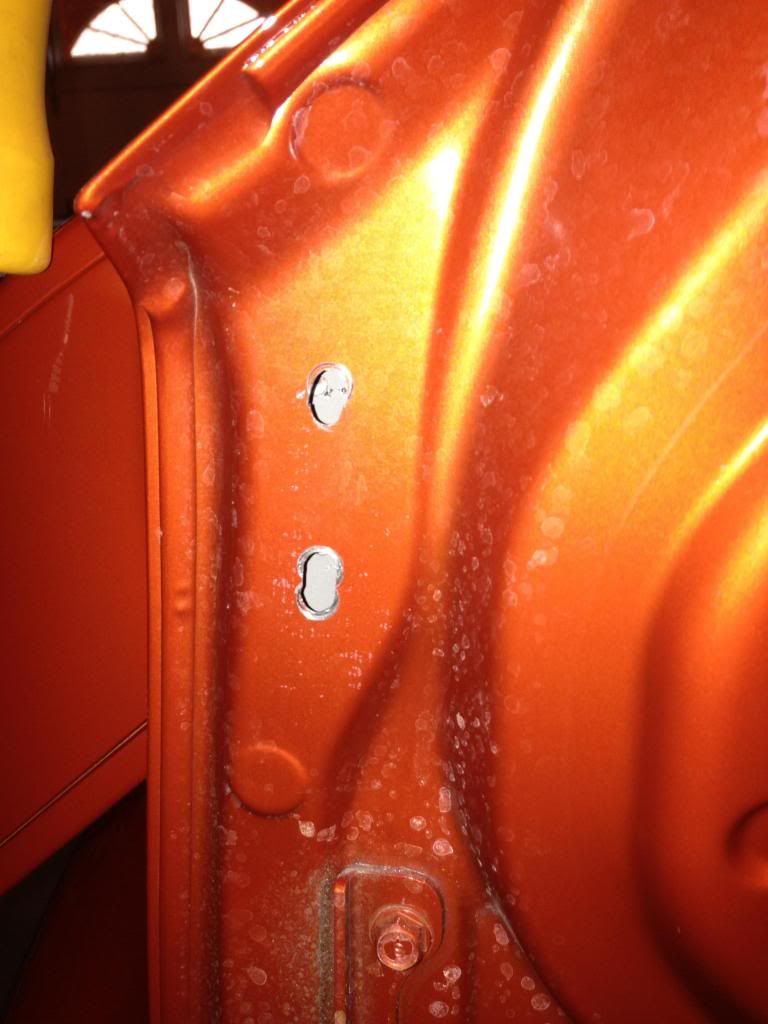 This was the biggest error I made and I really really really can't stress enough how important it is to leave the holes alone until you have a working hole saw! Thankfully my step-dad is very handy and rescued me from my stupidity. Our end result isn't factory beautiful, but it's a damn sight better than what I had. Because I had shifted the holes off-center we had to make up for that by punching some dents next to them for the guiding bit of the hole saw to mate with. They looked like this: 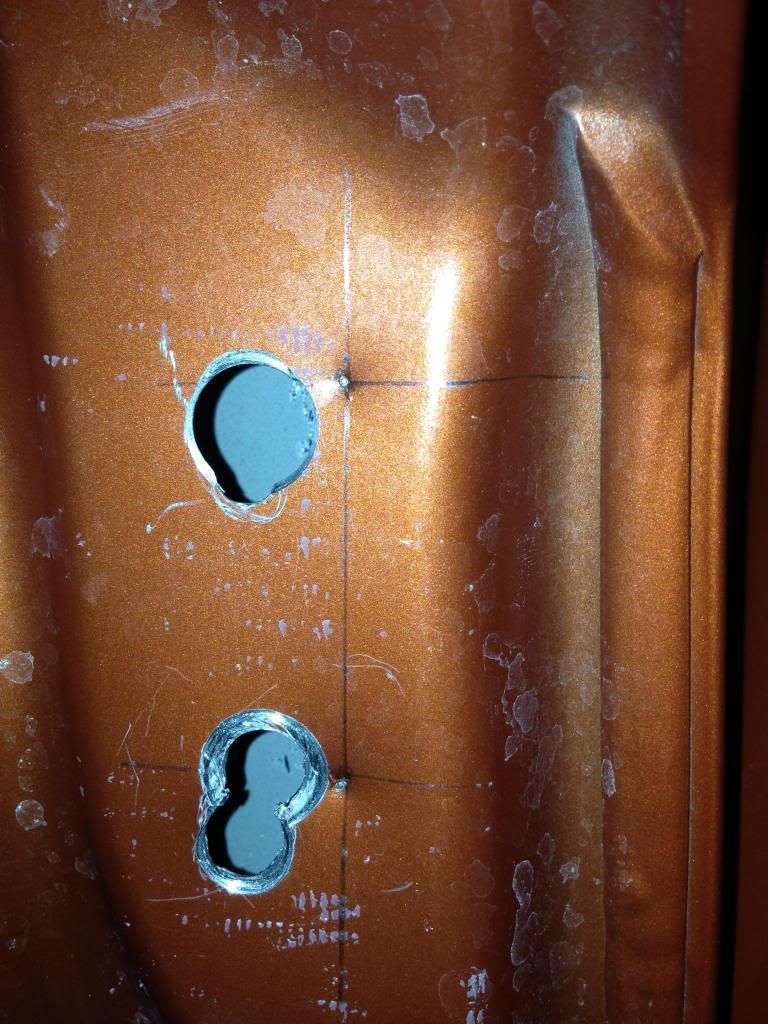 We used a 1 1/4" hole saw (I recommend 1" in hindsight) and my step-dad's industrial strength drill to make the holes to access the bolts. This is definitely a two man job as a hole saw requires a lot of pressure, but you want someone to push back against that pressure instead of relying solely on the hinges of the trunk. Start slow with the drill so the guide bit can set in then go to town. You will probably see smoke, that's okay you're just very manly. Here was our end result, and yes, the bolts are already positioned in this picture. 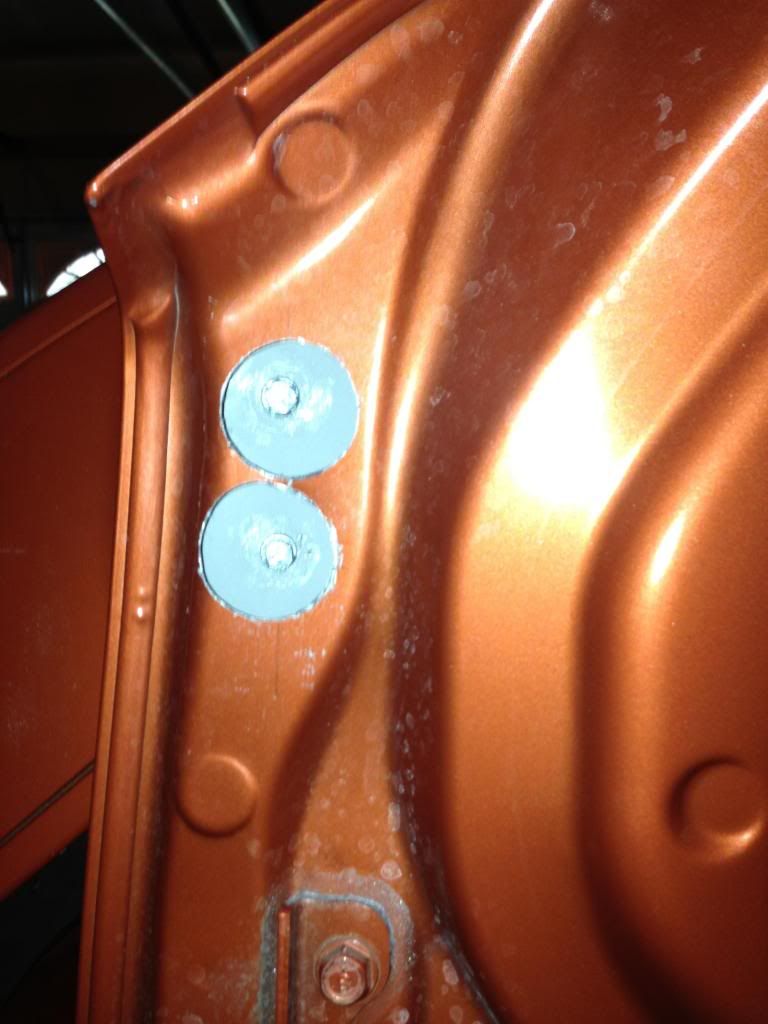 As you can see the holes got a bit close because they were simply too large, and the fact that we had to move them off-center was causing problems. One thing I'd defer to someone else on though... I still have circular pieces of metal wandering around inside my trunk lid because we didn't catch them as they were cut!  I don't really know if a magnet will help as I'm pretty sure it's aluminum. I don't really know if a magnet will help as I'm pretty sure it's aluminum.Step 8: Weatherproofing I had been planning to open my headlights and install my TRS HID kit with my step-dad instead of fixing my atrocious drilling. This was fortunate because it meant I had purchased silicone sealant as a safety net in case we messed up the sealant on the headlights. This served as a perfect sealant for the bolts and pegs to make sure water couldn't seep through the holes. Use the little attachment that looks like you're going to apply icing to the bolts and lay it on thick! Use a Q-tip to swirl it around the outside of the bolt. You can clean the excess with a utility knife if you want to (I didn't really care). The bolts will look like this: 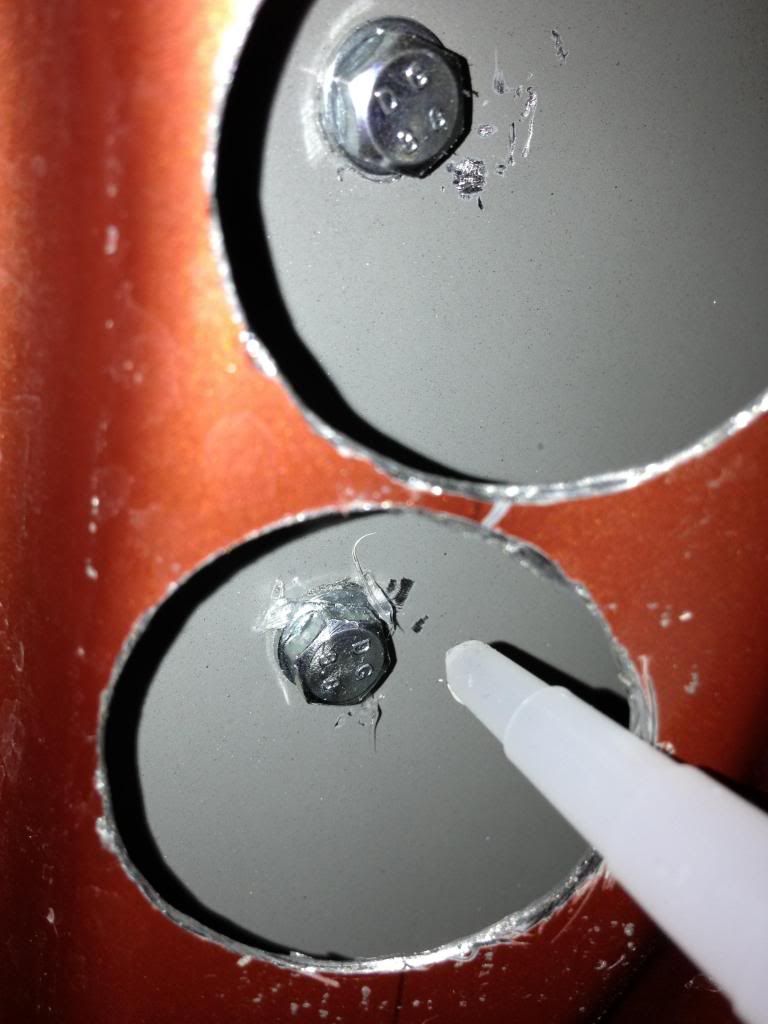 And the pegs will look like this before you spread the sealant around: 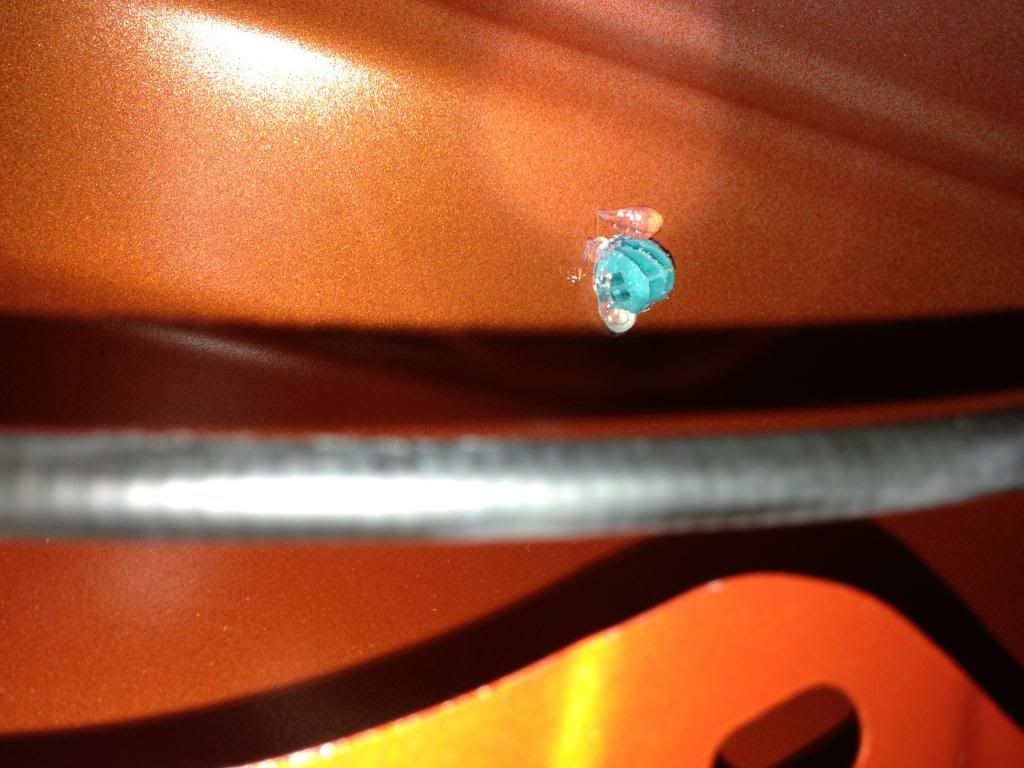 Finally I recommend buying some rubber stoppers or grommets to seal the holes you have created in the underside of the trunk. Duct tape is a great intermediate fix though! 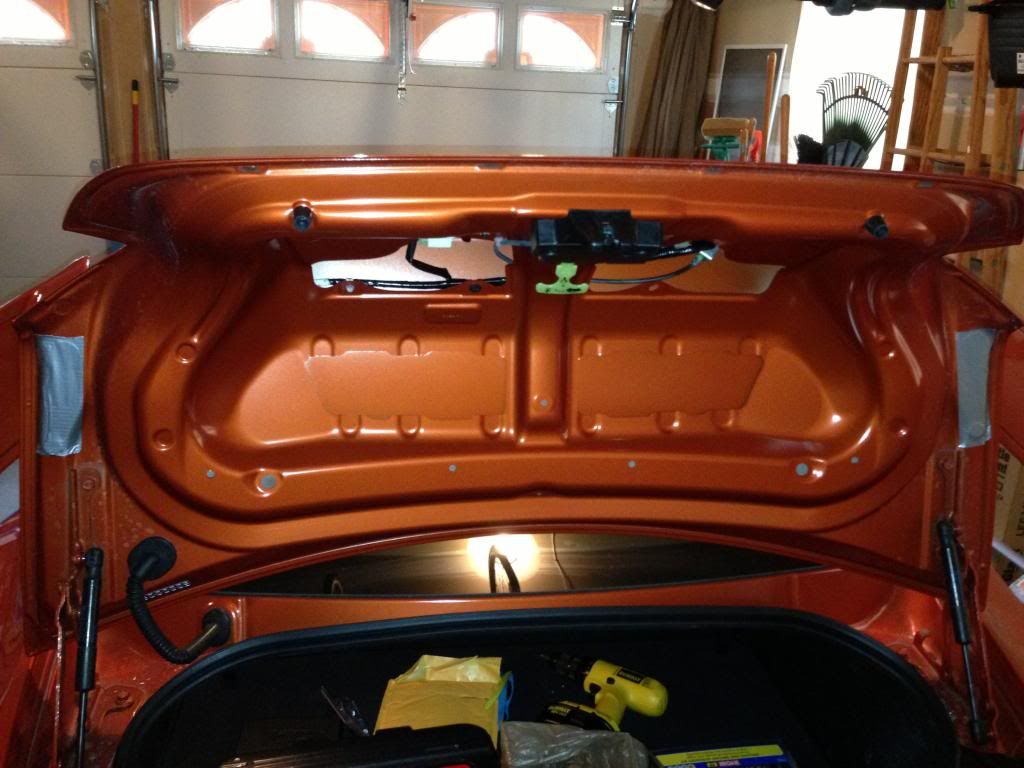 And enjoy the end product! 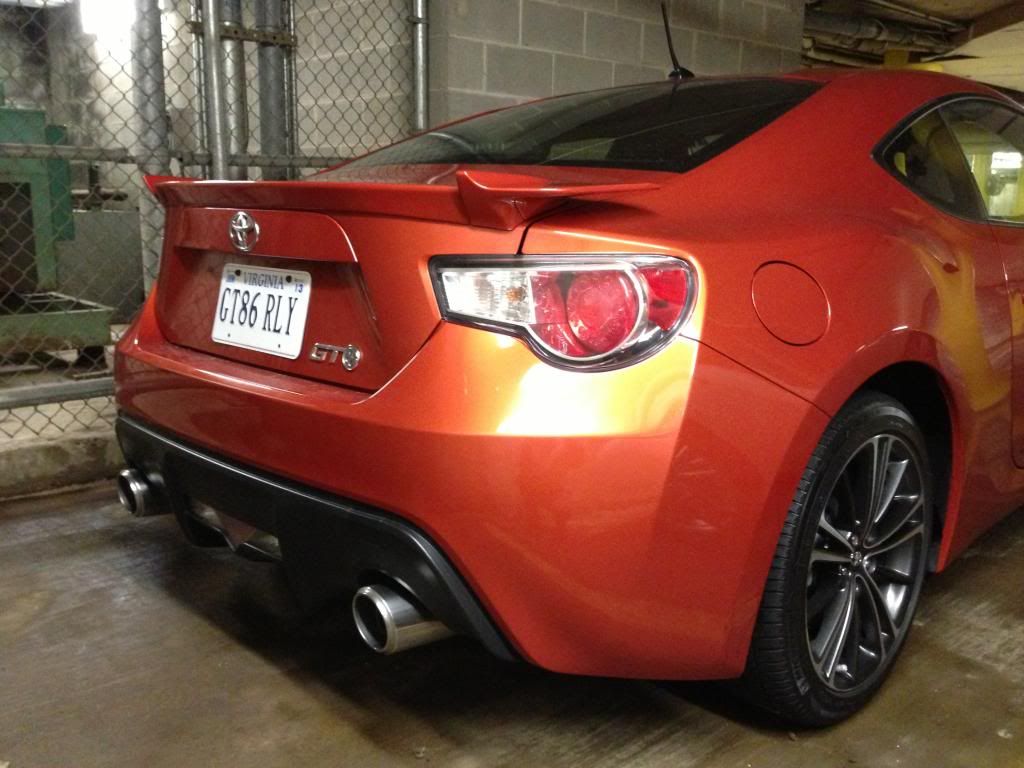 I accept all kinds of input, as that was the point of making this post. I hope it helps someone. I look forward to any corrections on my recommendations, or expert observations on my mistakes. Thanks for reading! Last edited by nataku; 02-16-2013 at 06:25 PM. Reason: Finishing the Job |

|

|
| The Following 8 Users Say Thank You to nataku For This Useful Post: | Area86 (02-16-2013), B L U E S L A T E (02-16-2013), FiRStsc10n (06-26-2013), Frs x3 (07-22-2013), mact (02-15-2013), Retro86 (02-15-2013), Spartan65 (02-18-2013), Zaku (02-15-2013) |
|
02-15-2013, 06:35 PM
|
#2 | |
|
Senior Member
Join Date: Apr 2012
Drives: FR-S
Location: California
Posts: 1,956
Thanks: 294
Thanked 673 Times in 390 Posts
Mentioned: 11 Post(s)
Tagged: 2 Thread(s)
|
Great write up
Quote:
|
|
|
|
|
|
02-16-2013, 06:29 PM
|
#3 | |
|
Negative Mass
Join Date: May 2012
Drives: Orange Metallic AVO Turbo GT86 6MT
Location: Arlington VA
Posts: 702
Thanks: 272
Thanked 346 Times in 201 Posts
Mentioned: 56 Post(s)
Tagged: 1 Thread(s)
|
Quote:
|
|
|
|
|
|
02-16-2013, 09:08 PM
|
#4 |
|
Senior Member

Join Date: Nov 2011
Drives: MY00 Impreza 2.5RS
Location: NH
Posts: 258
Thanks: 5
Thanked 115 Times in 42 Posts
Mentioned: 0 Post(s)
Tagged: 0 Thread(s)
|
Pretty ballsy hacking up the trunk lid.
If it were me I probably would have traded for someone with a BRZ and painted. |
|
|
|
|
02-18-2013, 06:08 PM
|
#5 | |
|
Negative Mass
Join Date: May 2012
Drives: Orange Metallic AVO Turbo GT86 6MT
Location: Arlington VA
Posts: 702
Thanks: 272
Thanked 346 Times in 201 Posts
Mentioned: 56 Post(s)
Tagged: 1 Thread(s)
|
Quote:
|
|
|
|
|
|
05-09-2013, 02:12 PM
|
#6 | |
|
Member
Join Date: Mar 2013
Drives: 86, Plucky Aygo
Location: Switzerland
Posts: 18
Thanks: 2
Thanked 28 Times in 7 Posts
Mentioned: 0 Post(s)
Tagged: 0 Thread(s)
|
Quote:
I like this DIY. It shows "personality"  It hopefully will prevent someone from doing stupid mistakes. It hopefully will prevent someone from doing stupid mistakes. This spoiler is factory standard on my car and I will remove it. Your pictures are useful. 
__________________
 |
|
|
|
|
| The Following User Says Thank You to FishMac For This Useful Post: | nataku (05-09-2013) |
|
02-28-2014, 07:30 PM
|
#7 |
|
RedBunny w/ Wing

Join Date: Jan 2013
Drives: FR-S
Location: PDX, OR
Posts: 962
Thanks: 346
Thanked 179 Times in 155 Posts
Mentioned: 22 Post(s)
Tagged: 0 Thread(s)
|
great information..just not sure if this wing ever able to be order from the USA toyota.
__________________
Firestorm FR-S MT【PDX, OR】I am just driving in normal speed. dont bother
  |
|
|
|
|
02-28-2014, 07:41 PM
|
#8 |
|
Negative Mass
Join Date: May 2012
Drives: Orange Metallic AVO Turbo GT86 6MT
Location: Arlington VA
Posts: 702
Thanks: 272
Thanked 346 Times in 201 Posts
Mentioned: 56 Post(s)
Tagged: 1 Thread(s)
|
No it won't. Scion has their own OEM spoiler.
__________________
Build thread for my Lovely Lady.
|
|
|
|
|
|
|
|
|
|
|
 Similar Threads
|
||||
| Thread | Thread Starter | Forum | Replies | Last Post |
| OEM BRZ Limited Spoiler Template: | nataku | Cosmetic Modification (Interior/Exterior/Lighting) | 15 | 04-20-2013 11:32 PM |
| [GTA] Places to order/install TRD spoiler? | i_4got | CANADA | 2 | 01-06-2013 10:51 PM |
| where to paint my spoiler + install? | whyreeto | AUSTRALIA | 6 | 09-12-2012 12:25 AM |
| Prepping for rear spoiler install? | zooki | Cosmetic Modification (Interior/Exterior/Lighting) | 2 | 09-02-2012 04:56 PM |
| Spoiler Install | CharlieChaos | Cosmetic Modification (Interior/Exterior/Lighting) | 1 | 07-07-2012 11:43 AM |


