08-16-2012, 10:18 AM
|
#43 | |
|
Corner Junkie

Join Date: Feb 2012
Drives: 13 BRZ, 11 STI, 99 RS
Location: Ohio
Posts: 2,908
Thanks: 129
Thanked 1,521 Times in 702 Posts
Mentioned: 11 Post(s)
Tagged: 0 Thread(s)
|
Quote:
|
|

|

|
|
08-24-2012, 05:23 PM
|
#44 | |
|
Senior Member

Join Date: Mar 2012
Drives: 2013 Subaru BRZ
Location: PA
Posts: 683
Thanks: 106
Thanked 248 Times in 133 Posts
Mentioned: 10 Post(s)
Tagged: 0 Thread(s)
|
Quote:
Because the front jack point is back a bit, the raised part of the jack gets much too close to the front bumper for my liking. Especially if the car is lowered, I can't imagine this jack will work. Maybe this one would have been a better option???: http://www.harborfreight.com/2-ton-l...ump-68050.html |
|
|
|
|
| The Following User Says Thank You to Phaedrus29 For This Useful Post: | allan_dc (10-13-2012) |
|
08-24-2012, 05:28 PM
|
#45 |
|
Photo Specialist

Join Date: Feb 2012
Drives: 2013 Toyota 86 DGM 6MT
Location: Texas
Posts: 1,152
Thanks: 587
Thanked 1,805 Times in 420 Posts
Mentioned: 94 Post(s)
Tagged: 0 Thread(s)
|
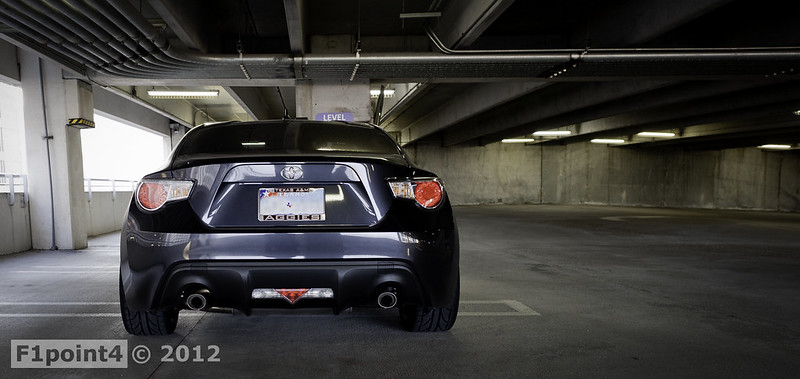
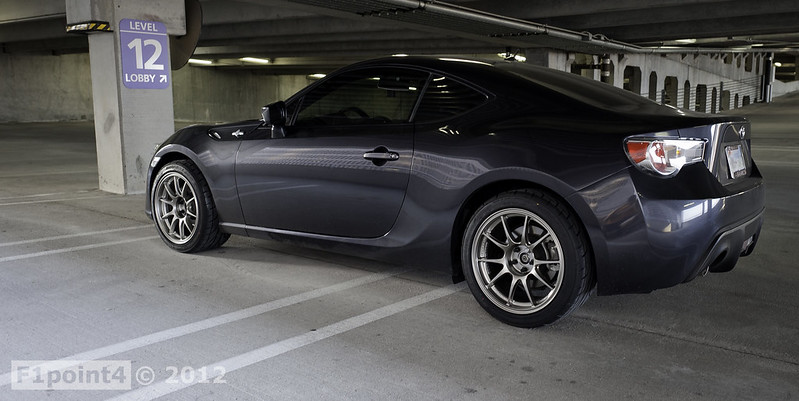
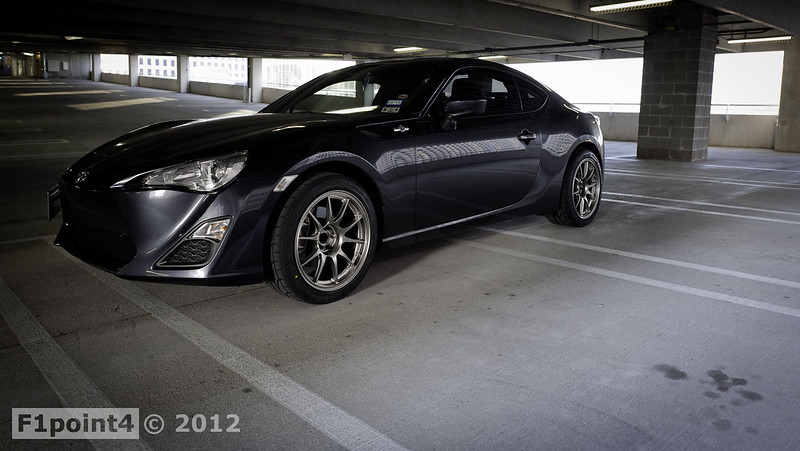
Got the JDM Side Markers on. Did a DIY writeup here
http://www.ft86club.com/forums/showthread.php?t=15560 It looks so much better now that all the lights match 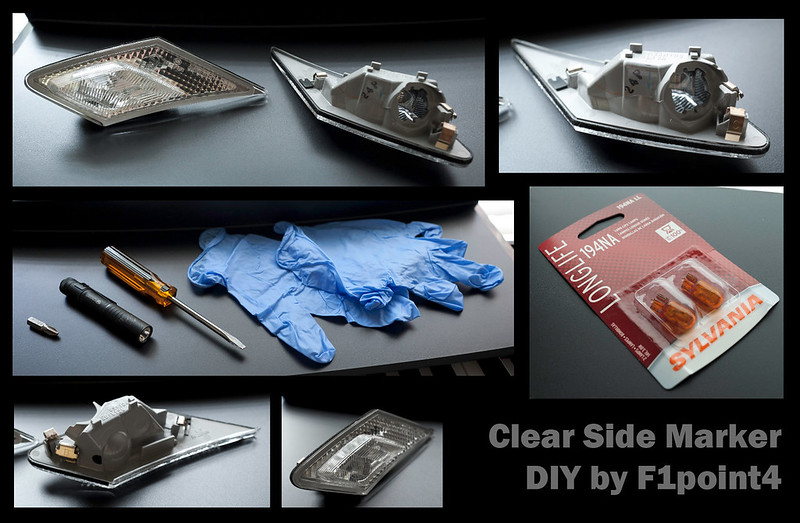 20120824-LolaClearSideMarker-01 by VictorN07, on Flickr 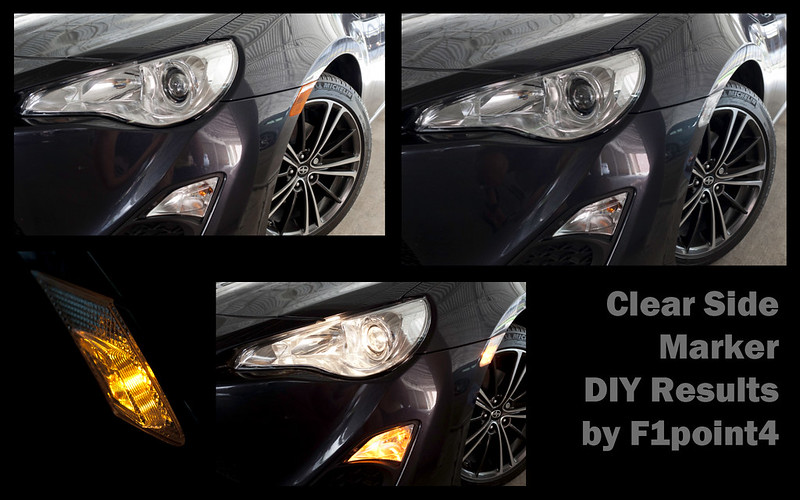 20120824-LolaClearSideMarker-33 by VictorN07, on Flickr 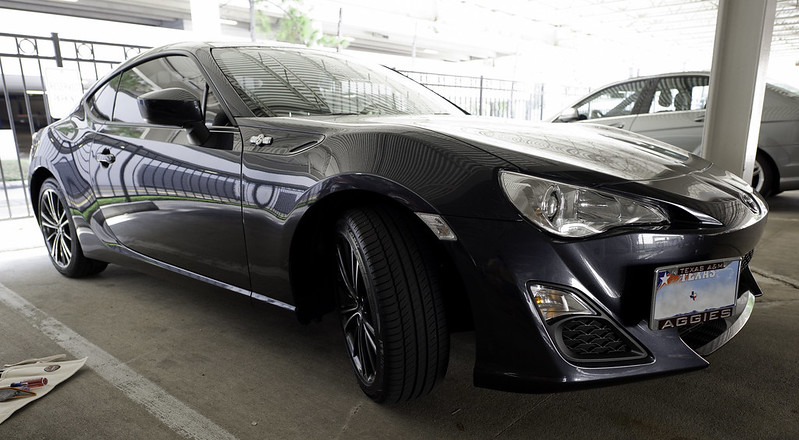 20120824-LolaClearSideMarker-31 by VictorN07, on Flickr Last edited by F1point4; 08-24-2012 at 05:28 PM. Reason: Forgot Link to DIY |
|
|
|
|
08-24-2012, 05:34 PM
|
#46 | |
|
Photo Specialist
Join Date: Feb 2012
Drives: 2013 Toyota 86 DGM 6MT
Location: Texas
Posts: 1,152
Thanks: 587
Thanked 1,805 Times in 420 Posts
Mentioned: 94 Post(s)
Tagged: 0 Thread(s)
|
Quote:
|
|
|
|
|
|
08-24-2012, 08:16 PM
|
#47 | |
|
Senior Member
Join Date: Mar 2012
Drives: 2013 Subaru BRZ
Location: PA
Posts: 683
Thanks: 106
Thanked 248 Times in 133 Posts
Mentioned: 10 Post(s)
Tagged: 0 Thread(s)
|
Quote:
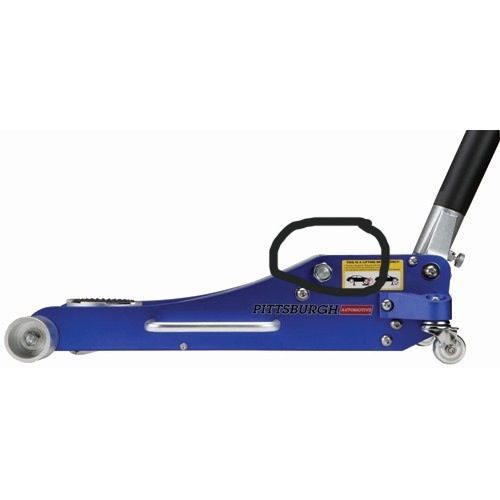 ----- UPDATE: I exchanged that jack for this one (http://www.harborfreight.com/2-ton-l...ump-68050.html), and I can report that this one works perfectly with no fitment issues. The Harbor Freight 3ton jack stands also do a nice job of supporting the car on both sides of the pinch welds...they clear the whole pinch weld. Last edited by Phaedrus29; 08-27-2012 at 11:35 PM. |
|
|
|
|
|
08-30-2012, 08:06 PM
|
#48 |
|
Photo Specialist
Join Date: Feb 2012
Drives: 2013 Toyota 86 DGM 6MT
Location: Texas
Posts: 1,152
Thanks: 587
Thanked 1,805 Times in 420 Posts
Mentioned: 94 Post(s)
Tagged: 0 Thread(s)
|
JDM Mirror installed.
DIY here http://www.ft86club.com/forums/showthread.php?t=16123 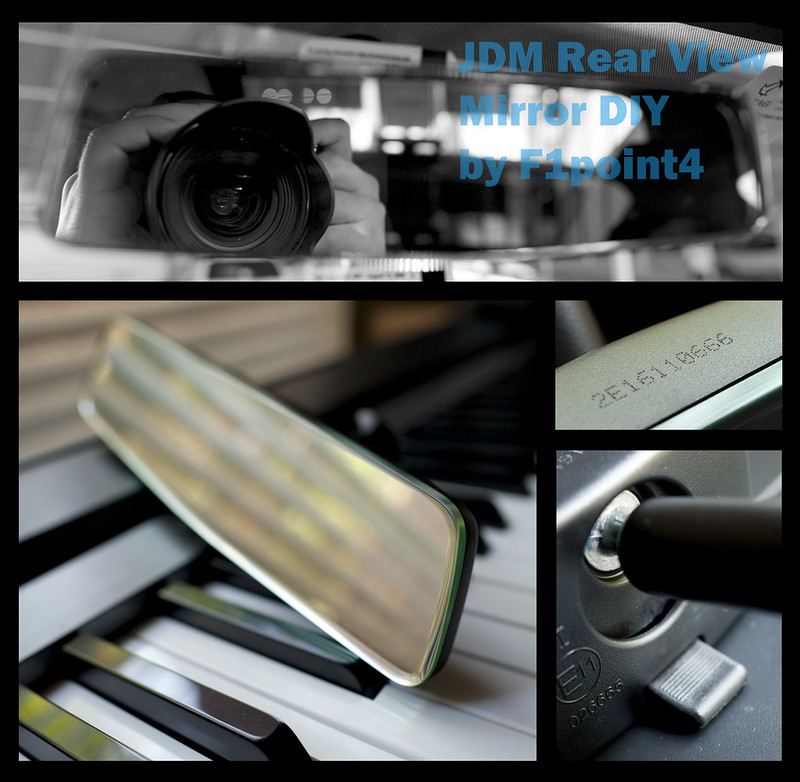 20120830-LolaJDMMirror-00 by VictorN07, on Flickr 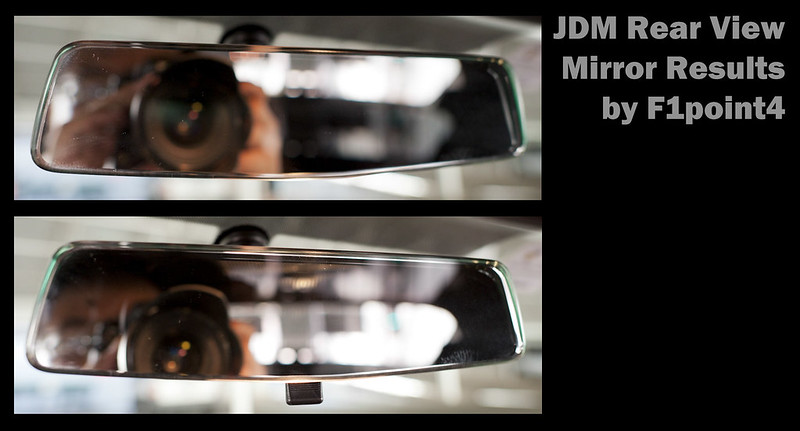 20120830-LolaJDMMirror-18 by VictorN07, on Flickr Last edited by F1point4; 08-31-2012 at 07:41 AM. Reason: Fixed image |
|
|
|
|
09-03-2012, 12:38 AM
|
#49 |
|
Photo Specialist
Join Date: Feb 2012
Drives: 2013 Toyota 86 DGM 6MT
Location: Texas
Posts: 1,152
Thanks: 587
Thanked 1,805 Times in 420 Posts
Mentioned: 94 Post(s)
Tagged: 0 Thread(s)
|
Back for more. http://www.ft86club.com/forums/showthread.php?t=16300
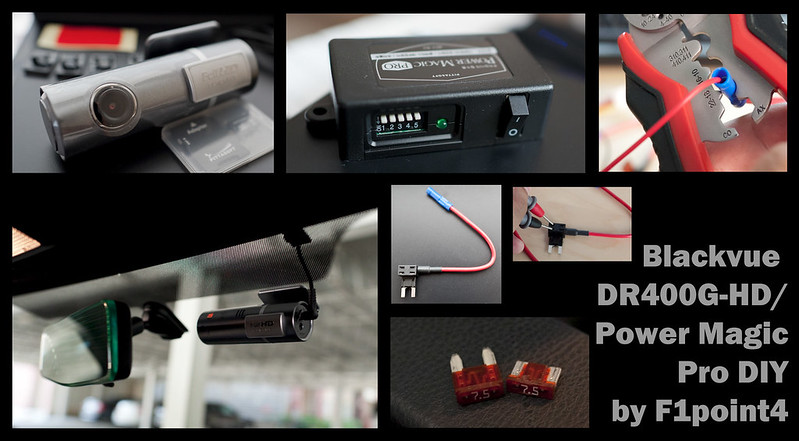 20120831-LolaBlackVue400DIY-01 by VictorN07, on Flickr On a side note I am currently averaging 29 MPG with 2500 miles on the clock. I am sadface because no matter how careful I am there is swirl marks in my paint. However I suspect that the body shop I used put some on while attempting to clean my car for repair. Guess I will take this as an opportunity to learn paint correction. |
|
|
|
|
09-15-2012, 04:49 PM
|
#50 |
|
Photo Specialist
Join Date: Feb 2012
Drives: 2013 Toyota 86 DGM 6MT
Location: Texas
Posts: 1,152
Thanks: 587
Thanked 1,805 Times in 420 Posts
Mentioned: 94 Post(s)
Tagged: 0 Thread(s)
|
Did some more interior changes recently. Here is a custom engraved Flossy Shift Knob. Swapped it to save the stock knob from getting marred from use.
It weighs considerably more than the OEM shift knob and makes shifts a little smoother. I believe MTF swap is needed for ultimate smoothness. Install was painful. It took me 20 minutes to screw it on so the picture was aligned correctly. You already know I like to take photos, artsy photos. Stock knob  20120831-FlossyShiftKnob-3 by VictorN07, on Flickr Comparison  20120831-FlossyShiftKnob-4 by VictorN07, on Flickr Final product  20120831-FlossyShiftKnob-5 by VictorN07, on Flickr |
|
|
|
| The Following User Says Thank You to F1point4 For This Useful Post: | Chewie4299 (02-17-2013) |
|
09-15-2012, 04:58 PM
|
#51 |
|
Photo Specialist
Join Date: Feb 2012
Drives: 2013 Toyota 86 DGM 6MT
Location: Texas
Posts: 1,152
Thanks: 587
Thanked 1,805 Times in 420 Posts
Mentioned: 94 Post(s)
Tagged: 0 Thread(s)
|
My legs don't bend the way necessary for heel toe. Decided to swap out for the Sullivan Racing Products Racing Pedals. The quality is quite good and it brings the gas pedal closer to the brake. SRP makes a gas pedal only option that matches OEM fairly close, but I opted for the entire set.
Must slow down with the mods. Staying true to the hellafunctional motto. Whole set. Milled out of aluminium.  20120914-SRP Racing Pedals-1 by VictorN07, on Flickr Grid pattern. Not anodized. The brake, clutch, and dead pedal have this texture.  20120914-SRP Racing Pedals-6 by VictorN07, on Flickr The gas pedal is smooth so your foot can slide  20120914-SRP Racing Pedals-7 by VictorN07, on Flickr Add the pedals have this finish on the back  20120914-SRP Racing Pedals-4 by VictorN07, on Flickr Installed!  20120915-SRP Racing Pedals-9 by VictorN07, on Flickr  20120915-SRP Racing Pedals-11 by VictorN07, on Flickr |
|
|
|
| The Following User Says Thank You to F1point4 For This Useful Post: | Turbowned (10-16-2012) |
|
09-15-2012, 05:29 PM
|
#52 |
|
Photo Specialist
Join Date: Feb 2012
Drives: 2013 Toyota 86 DGM 6MT
Location: Texas
Posts: 1,152
Thanks: 587
Thanked 1,805 Times in 420 Posts
Mentioned: 94 Post(s)
Tagged: 0 Thread(s)
|
Here are some observations from the racing pedal install.
My car was undriveable for a while  20120915-SRP Racing Pedals-12 by VictorN07, on Flickr Held on tight  20120915-SRP Racing Pedals-13 by VictorN07, on Flickr Covered removed and my chosen drill points  20120915-SRP Racing Pedals-14 by VictorN07, on Flickr Comparison between stock gas pedal and new gas pedal  20120915-SRP Racing Pedals-15 by VictorN07, on Flickr It's not a perfect fit. I'm okay with it though  20120915-SRP Racing Pedals-16 by VictorN07, on Flickr Dead Pedal was a bitch. I ended up cutting a hole in the carpet.  20120915-SRP Racing Pedals-17 by VictorN07, on Flickr Shows how much carpet I took out.  20120915-SRP Racing Pedals-19 by VictorN07, on Flickr Clips  20120915-SRP Racing Pedals-18 by VictorN07, on Flickr There was foam behind the pedal. I took that out.  20120915-SRP Racing Pedals-20 by VictorN07, on Flickr Full fit.  20120915-SRP Racing Pedals-21 by VictorN07, on Flickr Instead of leaving the foam there, I decided to remove it. The mounting surface for the dead pedal is not rubber, but metal. It was also not black so I ended up using black racing tape so it grey wouldn't show through the pedal. The kit included 8 self tapping screws and 6 bolts with locking nuts. The gas pedal was plastic so the self tapping screws were perfect for that. I used 4. The brake and clutch pedals were steel so I ended up using the nuts and bolts for those. Used 3 each. I knew ahead of time I wouldn't be able to use the nuts and bolts for the dead pedal since I can't reach behind. When I found out the mounting surface was metal I knew the self tapping screws provided aren't appropriate but I made them work. The instructions said to drill a 1/16" hole for the dead pedal but the screws wouldn't work unless until I bored out a 7/64" hole. The self tapping screws are also fairly short. Think 1/2". If I used the foam the screws would not reach the metal. Not aiming to bash SRP. It is a good product. Just wanted to raise awareness. |
|
|
|
| The Following User Says Thank You to F1point4 For This Useful Post: | mixtape (05-24-2016) |
|
09-15-2012, 05:30 PM
|
#53 |
|
Professional Smartass

Join Date: Jul 2012
Drives: White Out FRS
Location: Houston TX
Posts: 1,126
Thanks: 114
Thanked 610 Times in 308 Posts
Mentioned: 51 Post(s)
Tagged: 0 Thread(s)
|
What's the cost on those pedals? In my opinion the brake pedal is about an inch too far right, and the gas as well. Way too close to the wall your leg rests up against.
|
|
|
|
|
09-15-2012, 05:36 PM
|
#54 | |
|
Photo Specialist
Join Date: Feb 2012
Drives: 2013 Toyota 86 DGM 6MT
Location: Texas
Posts: 1,152
Thanks: 587
Thanked 1,805 Times in 420 Posts
Mentioned: 94 Post(s)
Tagged: 0 Thread(s)
|
Quote:
I do like that my shoes definitely grip to the brake and clutch with the new pedals' grid pattern. |
|
|
|
|
|
09-23-2012, 12:01 AM
|
#55 | |
|
Photo Specialist
Join Date: Feb 2012
Drives: 2013 Toyota 86 DGM 6MT
Location: Texas
Posts: 1,152
Thanks: 587
Thanked 1,805 Times in 420 Posts
Mentioned: 94 Post(s)
Tagged: 0 Thread(s)
|
http://www.ft86club.com/forums/showp...9&postcount=68
Quote:
Last edited by F1point4; 09-25-2012 at 06:36 AM. Reason: Darren moved the thread so updating link |
|
|
|
|
| The Following User Says Thank You to F1point4 For This Useful Post: | stevo_12v (10-29-2012) |
|
09-23-2012, 01:59 PM
|
#56 |
|
Photo Specialist
Join Date: Feb 2012
Drives: 2013 Toyota 86 DGM 6MT
Location: Texas
Posts: 1,152
Thanks: 587
Thanked 1,805 Times in 420 Posts
Mentioned: 94 Post(s)
Tagged: 0 Thread(s)
|
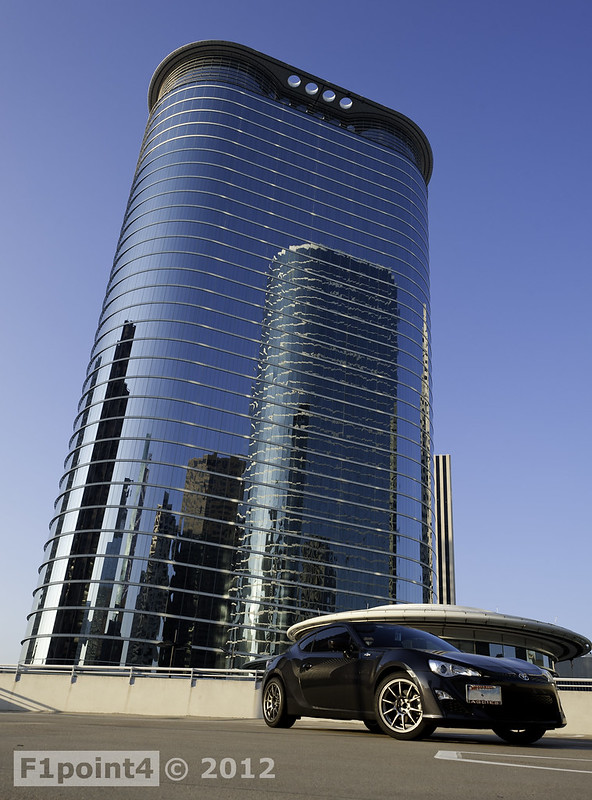
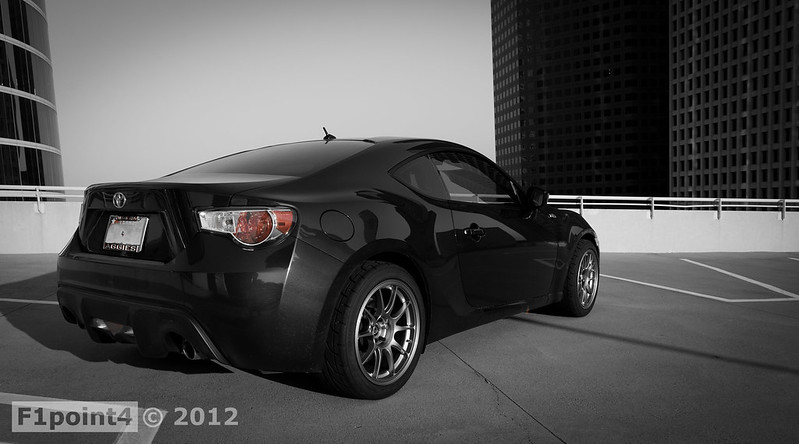
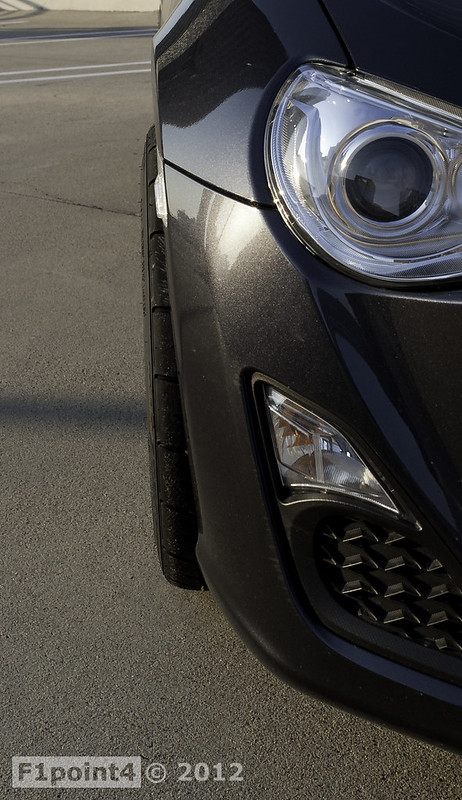
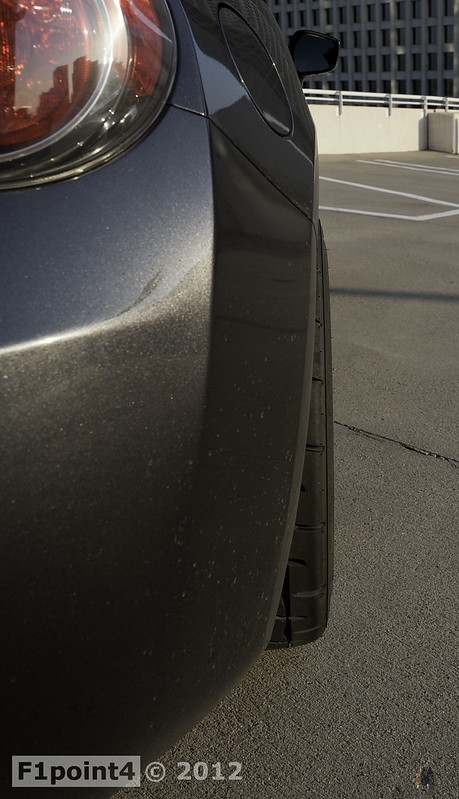
Rally Armor Mud Flaps Review
Ordered direct from Rally Armor. They shipped USPS Priority from NY. Wasn't expecting it, but it came in two days. And on it went this morning. I didn't get pictures of the flaps themselves. They are approximately 1/8" thick, made of urethane, have a shiny finish. They install into the factory clip locations so there isn't any drilling required. Remove the stock clips, install the bracket and plastic tabs for the screws and then screw the flap into place. The are "adjustable width" so they can slide in and out depending on preference. If you do not want to see the Rally Armor logo, you can turn the flaps over and switch sides. Definitely have the right tools or be able to remove the wheels. I opted to not remove the wheels so I turned the screws using vice grips. Other than the fact that the screws are silver, the flaps compliment the extra width from the 17x9 245 wheels. Some may say ugly, I think they look great and are hellafunctional. For pure aesthetics, I probably would not have gone with it if I didn't go with wide wheels. I think the color goes well with Asphalt/DGM too. I brought my Nikon sans memory card so iPhone has to do. Now on to the pictures Side shot: 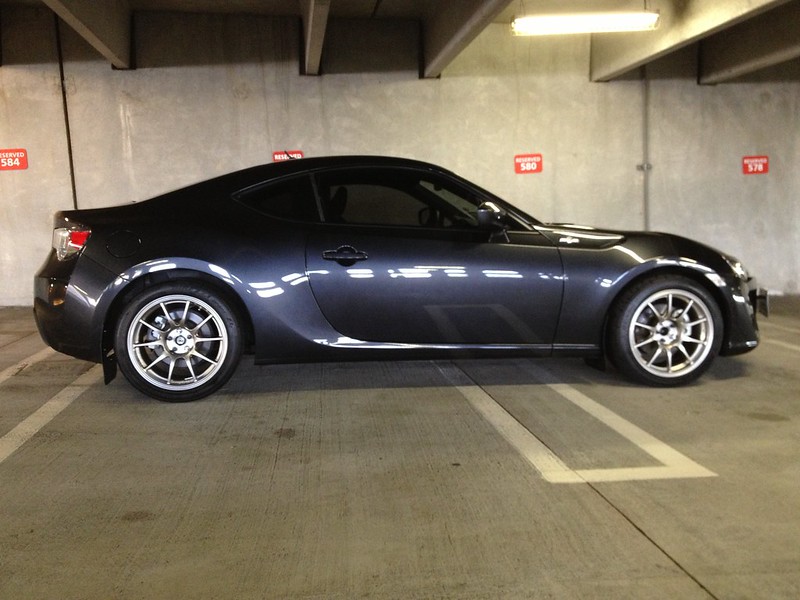 21020923-RallyArmorMudGaurd-01 by VictorN07, on Flickr Front 3/4:  21020923-RallyArmorMudGaurd-08 by VictorN07, on Flickr Rear 3/4  21020923-RallyArmorMudGaurd-07 by VictorN07, on Flickr  21020923-RallyArmorMudGaurd-02 by VictorN07, on Flickr Rear Stance  21020923-RallyArmorMudGaurd-04 by VictorN07, on Flickr Rear ISO View. This is the flap pulled all the way out. Lines up with the wheel very well. I can slide it in about 1/2".  21020923-RallyArmorMudGaurd-03 by VictorN07, on Flickr Front ISO View. I had the flap all the way in in the front. As you can sort of see, it's not flush with the wheel, but I think all the way out would look off.  21020923-RallyArmorMudGaurd-06 by VictorN07, on Flickr Front installation. Held on with screws and washers. Wish the screws were black. Four in the front. Note the shinyness.  21020923-RallyArmorMudGaurd-09 by VictorN07, on Flickr Rear Installation. Three in the back. It doesn't come all the way up to the wheel well liner, but you cannot see the gap from the rear, even if you bend down.  21020923-RallyArmorMudGaurd-10 by VictorN07, on Flickr Last edited by F1point4; 09-23-2012 at 02:01 PM. Reason: Added some more comments |
|
|
|
|
|
|
|
|
|
 Similar Threads
|
||||
| Thread | Thread Starter | Forum | Replies | Last Post |
| Asphalt Scion FR-S | aznsensazian | FR-S & 86 Photos, Videos, Wallpapers, Gallery Forum | 21 | 03-17-2014 01:13 PM |
| Asphalt FR-S pics | Rob_g | CANADA | 24 | 09-03-2012 05:01 AM |
| Asphalt in the snow | Double4Free | Scion FR-S / Toyota 86 GT86 General Forum | 5 | 06-10-2012 01:56 PM |
| Asphalt 6MT FR-S | Symbiont | Southern California | 22 | 06-06-2012 07:47 AM |
| ant08 Asphalt MT | ant08 | Member's Car Journals | 3 | 06-04-2012 04:16 PM |


 Betty
Betty