


 02-23-2014, 02:29 PM
|
#99 |
|
Emperor JDM

Join Date: Jun 2013
Drives: '91 MR2 Gen3 3SGTE, '13 FRS
Location: Onterrible, Canada
Posts: 1,750
Thanks: 3,498
Thanked 909 Times in 495 Posts
Mentioned: 20 Post(s)
Tagged: 3 Thread(s)
|
Got myself an extra set of oem tail lights and want to do this.
Btw, a lot of the pics are down. Well, at least on my phone they are...
__________________
 |

|

|
|
02-23-2014, 05:03 PM
|
#100 |
|
poor man's evora

Join Date: Dec 2012
Drives: Turbod BRZ
Location: Dallas
Posts: 620
Thanks: 42
Thanked 190 Times in 137 Posts
Mentioned: 1 Post(s)
Tagged: 0 Thread(s)
|
just did mine
__________________
|
|
|
|
| The Following User Says Thank You to malubawla For This Useful Post: | Lonewolf (02-23-2014) |
|
02-23-2014, 06:14 PM
|
#101 | |
|
Emperor JDM
Join Date: Jun 2013
Drives: '91 MR2 Gen3 3SGTE, '13 FRS
Location: Onterrible, Canada
Posts: 1,750
Thanks: 3,498
Thanked 909 Times in 495 Posts
Mentioned: 20 Post(s)
Tagged: 3 Thread(s)
|
Quote:
I can't stand the ugly chrome Altezza style. The headlights need black housing treatment too.
__________________
|
|
|
|
|
|
02-23-2014, 06:57 PM
|
#102 | |
|
Senior Member
Join Date: Jan 2014
Drives: 2013 Scion FR-S
Location: Ontario, Canada
Posts: 150
Thanks: 155
Thanked 74 Times in 52 Posts
Mentioned: 0 Post(s)
Tagged: 0 Thread(s)
|
Quote:
Matches perfectly with the wheels too. If you got the balls, do it up.
__________________
 |
|
|
|
|
|
02-24-2014, 01:10 AM
|
#103 |
|
Senior Member

Join Date: May 2013
Drives: SWP FR-S
Location: San Jose, CA
Posts: 620
Thanks: 346
Thanked 172 Times in 114 Posts
Mentioned: 24 Post(s)
Tagged: 0 Thread(s)
|
anybody blackout their tail light housings and red out the lenses?
__________________
 |
|
|
|
|
05-09-2014, 11:32 AM
|
#104 |
|
Senior Member

Join Date: Aug 2013
Drives: 2014 BR"ZED" Sport-tech DGM MT
Location: GTA CANADA
Posts: 741
Thanks: 471
Thanked 262 Times in 165 Posts
Mentioned: 7 Post(s)
Tagged: 3 Thread(s)
|
Are a few of the pictures still missing?
__________________
Old enough to know better but young enough to do it again
  |
|
|
|
|
05-09-2014, 07:31 PM
|
#105 |
|
Senior Member
Join Date: Oct 2011
Drives: 1993 Impreza w/ WRX Swap + FWD!
Location: Roseville, CA
Posts: 2,071
Thanks: 217
Thanked 952 Times in 500 Posts
Mentioned: 31 Post(s)
Tagged: 0 Thread(s)
|
I'm working on a set of spare lights courtesy @chanomatik
The first thing I need to say is: I DO NOT RECOMMEND THIS MODIFICATION!!! Down the road like maybe when these cars are 5-10 years old, then maybe this is a good idea. But on a brand new car, unless you are COMPLETELY anal about making sure nothing gets scratched and you do a 100% perfect job with the painting and don't leave debris anywhere inside the lights, your lights will look worse than a new set of tail lights no matter what you do... This IS NOT an easy modification!!! Anyway, on to my attempt... I decided NOT to use a Dremel for the lights, I have a Dremel and lots of experience wielding it, but due to the tight areas you have to work with these lights, I decided to try something different. With the talk of using a hot knife or something of the kind, I looked for other options, and found this wood burning tool at Hobby Lobby: The good thing about this tool is that it doesn't create any debris when cutting the plastic like a Dremel does, which makes cleanup MUCH easier and the cut you make pretty clean as well. My first attempt I used the "Exacto" knife attachment, and it was VERY difficult... The thick part of the blade heated the most not the tip, so cutting wasn't easy at all. My SECOND attempt, I used the middle kind of clover looking tool. This tool was basically perfect for the job, once you got it really hot it cut through the light like butter and made a nice smooth cut across the whole lamp. HOWEVER, it did in a couple spots cut too far through and touch the silver chrome bits causing some spots that might show up later. NOTE: The places you need to cut are not nearly as simple as it seems... If you cut to far towards the clear plastic, you can see the cuts when looking at the lamp, but if you cut too far away you can't get the lamp to separate!!! I discovered this my first attempt, and ended up having to cut a couple sections out just to separate the light.  I also decided to remove the corner red lens from the chrome in order to paint... Found out that is indeed GLUED into place and WILL BREAK if you try to remove it by force, however can be reinstalled with glue but I am concerned that at some point in the future it might break off while inside the lamp:  I did eventually get the lamps apart...  I wanted to do something different with painting the chrome. I did a bit of light sanding at first, and used black Plastic Paint (spray paint designed specifically for use with plastic, it is perfect for this application, I've used it on Nerf guns and such with the same type of plastic and it never comes off once its on). I wanted to leave the front trailing edge of the chrome unpainted, but there was too much overspray so I ended up just painting it all black minus the amber light area:   Started reassembly today after letting the paint dry for a day. I'm using the same Silicone #81158 for this assembly, its good stuff but I wish I could just some heat-applied liquified ABS plastic instead... Here are some pics, showing the gaps and what the goop is turning out to be like so far:     I've found a lot of pin holes where the goop hasn't filled yet, so I'm going to go over it with one or two more layers. Any suggestions on smoothing out the silicone, or should I just leave it as-is? Quick pick of a test fit of the assembly:  Conclusion so far: I really DO NOT recommend this modification, unless you have a spare set of headlights laying around and you've done this kind of work with plastics before (I have sadly)... I don't think I will use them on my car, they don't look very good due to scratches and such, my stock lights are in perfect shape. I think I'll probably buy a set of better aftermarket lights way down the road, or wait for a "revised" OEM tail light if they ever come out with one, or just keep the stockers on and not worry about it. |
|
|
|
| The Following 8 Users Say Thank You to Kostamojen For This Useful Post: | ATL BRZ (05-09-2014), chanomatik (05-09-2014), chas3wba0 (05-14-2014), FLYFISHR (05-10-2014), Lonewolf (05-10-2014), Mooseknuckle44 (05-12-2014), tigermack (12-17-2014), Vracer111 (06-13-2014) |
|
05-09-2014, 07:47 PM
|
#106 |
|
Snow Don't Hurt!

Join Date: Jul 2012
Drives: 2013 BRZ Limited 6MT CBS
Location: Anchorage, Alaska, USA
Posts: 2,538
Thanks: 6,416
Thanked 1,497 Times in 902 Posts
Mentioned: 42 Post(s)
Tagged: 0 Thread(s)
|
I think a tint overlay would set them apart. Sorry the Alaskan/road trip weather got to them.
 I've always considered tinting them red just to disguise the scratches a bit. I believe they can be cleaned up with a headlight restoration kit. I've always considered tinting them red just to disguise the scratches a bit. I believe they can be cleaned up with a headlight restoration kit.Overall I'm glad you tackled it so that now you know. |
|
|
|
|
05-09-2014, 08:04 PM
|
#107 |
|
Senior Member
Join Date: Oct 2011
Drives: 1993 Impreza w/ WRX Swap + FWD!
Location: Roseville, CA
Posts: 2,071
Thanks: 217
Thanked 952 Times in 500 Posts
Mentioned: 31 Post(s)
Tagged: 0 Thread(s)
|
I have some Headlight polish ill try when they are all finished.
Tinted tailights around here can get you pulled over here. Plus I don't really like that look. |
|
|
|
|
05-11-2014, 10:53 PM
|
#108 |
|
Senior Member
Join Date: Oct 2011
Drives: 1993 Impreza w/ WRX Swap + FWD!
Location: Roseville, CA
Posts: 2,071
Thanks: 217
Thanked 952 Times in 500 Posts
Mentioned: 31 Post(s)
Tagged: 0 Thread(s)
|
   Pics on the car... No way I'm keeping these on the car, I can see the cuts, scratches and glue up close. I'm not even sure if I like how it looks either. |
|
|
|
| The Following User Says Thank You to Kostamojen For This Useful Post: | hmong337 (05-12-2014) |
|
05-12-2014, 02:28 AM
|
#109 |
|
Senior Member
Join Date: May 2013
Drives: Scion FR-S Whiteout
Location: Hollywood, CA
Posts: 962
Thanks: 297
Thanked 241 Times in 137 Posts
Mentioned: 22 Post(s)
Tagged: 0 Thread(s)
|
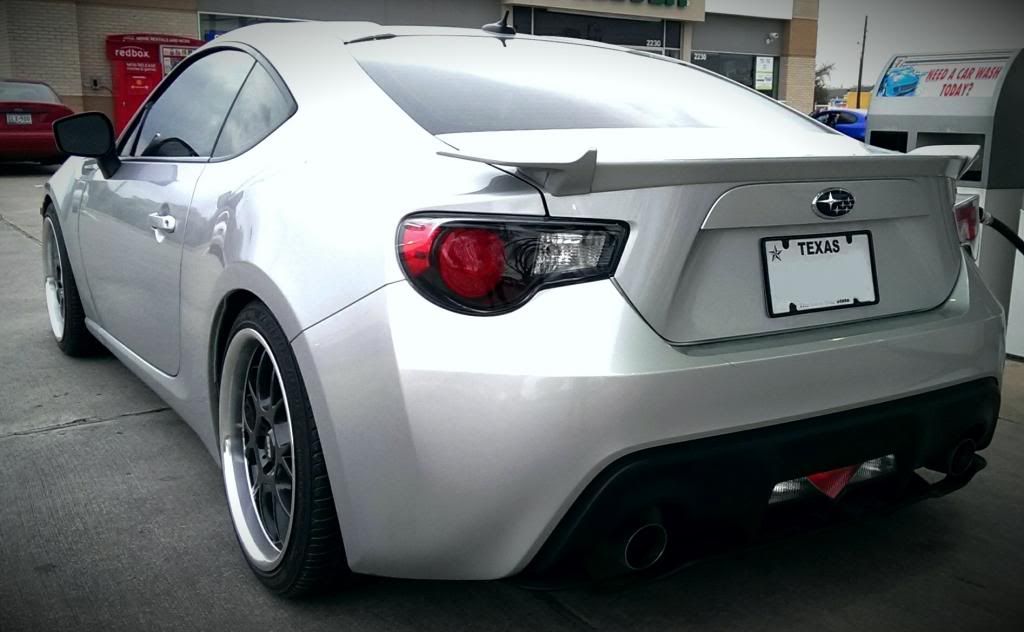
Here's my take on it. Wrapped the red side reflectors in CF. Used black-chrome paint instead of gloss/flat black, although I did put a bit too much, but I did lighten the spray on the turn signal reflectors. Silver-coated turn signal bulbs.
__________________
2013 Scion FR-S
|
|
|
|
|
05-20-2014, 03:31 PM
|
#110 | |
|
Senior Member

Join Date: Apr 2013
Drives: 2013 WRB BRZ Sport Tech
Location: Mississauga
Posts: 413
Thanks: 311
Thanked 122 Times in 73 Posts
Mentioned: 7 Post(s)
Tagged: 2 Thread(s)
|
Quote:
|
|
|
|
|
|
06-13-2014, 03:18 AM
|
#111 | |
|
Senior Member

Join Date: Mar 2012
Drives: '13 Nissan Frontier (4.0L 6spd 2WD)
Location: In the desert...
Posts: 1,645
Thanks: 179
Thanked 1,246 Times in 669 Posts
Mentioned: 21 Post(s)
Tagged: 1 Thread(s)
|
Thanks Kostamojen for your post...will help me with my plan of attack on the rears. I bought an extra set of stock BRZ tails in perfect condition with plans to just red out, going through this thread has changed my mind to open them up and tone that hideous chrome down...and then also red out the lenscovers on the inside...!
Quote:
Black-in looks nice...but I think also redding out the housing (not too dark) is what it really needs as well...
__________________
Had a '13 FR-S Asphalt 6spd manual (bought new 5/25/12, sold 6/10/20) but needed to let her go... she will be missed.
|
|
|
|
|
|
06-14-2014, 07:59 PM
|
#112 |
|
Member

Join Date: Sep 2012
Drives: Scion FR-S
Location: Coamo, Puerto Rico
Posts: 99
Thanks: 31
Thanked 48 Times in 28 Posts
Mentioned: 2 Post(s)
Tagged: 0 Thread(s)
 |
DIY: Black Housing Tail Lights
Last edited by Juan_Ri; 07-22-2014 at 10:51 AM. |
|
|
|
|
|
|
|
|
|
 Similar Threads
|
||||
| Thread | Thread Starter | Forum | Replies | Last Post |
| Smoking or Redding BRZ/FR-S Tail Lights | DarrenDriven | DIY (Do-It-Yourself) Guides | 596 | 02-20-2021 10:11 PM |
| Black Housing Tail Lights (FR-S) | sw20kosh | Cosmetic Modification (Interior/Exterior/Lighting) | 20 | 04-13-2016 11:38 PM |
| FR-S smoked tail lights and reverse lights | jjdrivesajazz | Cosmetic Modification (Interior/Exterior/Lighting) | 43 | 02-21-2013 08:38 PM |
| opening tail lights? | JollyJON | Cosmetic Modification (Interior/Exterior/Lighting) | 34 | 07-23-2012 04:35 PM |
| Are you going to smoke out your tail lights? | Liquidsnake | Cosmetic Modification (Interior/Exterior/Lighting) | 8 | 06-06-2012 09:02 AM |


 Big goops. It sealed beautifully when I looked at in the morning! I think I wont have condensation issues!!! I was very liberal with sealant.
 FR-S
FR-S