


 12-21-2013, 07:00 PM
|
#71 |
|
Twin Screw You

Join Date: Nov 2012
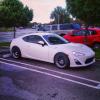
Drives: 2013 Supercharged Whiteout FR-S
Location: Burleson, Texas
Posts: 1,231
Thanks: 464
Thanked 620 Times in 332 Posts
Mentioned: 37 Post(s)
Tagged: 0 Thread(s)
|
Working on replacing the ring and pinion and installing the new differential. I got as far as I could with hand tools but need power tools for the next bit. I haven't seen a write up for how to do this so I may have taken extra steps or didn't do it as someone else would have. I am tackling this as someone who has never done it before. I have had a bit of guidance from me brother over the phone but a good portion of this is based off my judgement with a simple set of hand tools in a gravel driveway.
Removed the carrier.  Opened up 
__________________
Last edited by Dustin; 12-29-2013 at 12:28 PM. |

|

|
|
12-21-2013, 11:23 PM
|
#72 |
|
Twin Screw You
Join Date: Nov 2012
Drives: 2013 Supercharged Whiteout FR-S
Location: Burleson, Texas
Posts: 1,231
Thanks: 464
Thanked 620 Times in 332 Posts
Mentioned: 37 Post(s)
Tagged: 0 Thread(s)
|
I've had my Tomei diff in the freezer for the past couple of days. Made it easy as could be to slide the ring gear on. Had to be quick though to get a couple of bolts in place. An extra set of hands would've been useful. The diff started warming up and expanded to where the ring gear wouldn't budge. I got two bolts in though to set the gear in place.
  
__________________
Last edited by Dustin; 12-29-2013 at 12:28 PM. |
|
|
|
|
12-25-2013, 11:04 PM
|
#73 |
|
Twin Screw You
Join Date: Nov 2012
Drives: 2013 Supercharged Whiteout FR-S
Location: Burleson, Texas
Posts: 1,231
Thanks: 464
Thanked 620 Times in 332 Posts
Mentioned: 37 Post(s)
Tagged: 0 Thread(s)
|
Got my Nameless 3" OP/DP just in time for Christmas.
     And fog lights!! 
__________________
Last edited by Dustin; 12-25-2013 at 11:37 PM. |
|
|
|
|
12-26-2013, 11:41 PM
|
#74 |
|
Twin Screw You
Join Date: Nov 2012
Drives: 2013 Supercharged Whiteout FR-S
Location: Burleson, Texas
Posts: 1,231
Thanks: 464
Thanked 620 Times in 332 Posts
Mentioned: 37 Post(s)
Tagged: 0 Thread(s)
|
Started removing old bearings and installing new ones.
My brother's work is closed for the holidays so I did not have access to a press. I'm a little impatient so for installing the carrier bearings, I improvised. A block of aluminum  And a BFH. I just let the weight of the hammer do all the work until it was all the way down.   Then I removed the pinion nut with an impact.  I then tapped out the pinion with a piece of brass. I've been told to always use either aluminum or brass or some sort of soft metal when doing these things. Steel on steel = bad times.  I need the factory spacer under the pinion bearing. With no access to a press, another improvising was needed. Need to get under here.  Use of a cutting wheel got the top part off.  Started getting through the bottom but ran out of day light.  That was all I could get done tonight. I'll try to have more done on Saturday.
__________________
Last edited by Dustin; 12-29-2013 at 12:29 PM. |
|
|
|
| The Following 2 Users Say Thank You to Dustin For This Useful Post: | jcw99 (03-05-2016), mike_ekim1024 (12-27-2013) |
|
12-27-2013, 01:14 AM
|
#75 |
|
Senior Member
Join Date: Aug 2013
Drives: 2013 FRS, 2008 R32
Location: Miami, FL
Posts: 1,201
Thanks: 715
Thanked 593 Times in 383 Posts
Mentioned: 19 Post(s)
Tagged: 0 Thread(s)
|
Looks like fun lol.
|
|
|
|
| The Following User Says Thank You to mfbmike For This Useful Post: | Dustin (12-27-2013) |
|
12-27-2013, 01:25 PM
|
#76 |
|
Member

Join Date: Oct 2013
Drives: Shoe Leather Limousine
Location: Ft. Worth, TX
Posts: 38
Thanks: 1
Thanked 8 Times in 6 Posts
Mentioned: 6 Post(s)
Tagged: 0 Thread(s)
|
I'm not scared of the dark so I finished cutting and removing the inner race of the large pinion bearing. Doing it this way is not ideal but it was necessary at the time to continue making progress. The idea is to NOT CUT COMPLETELY THROUGH THE INNER RACE!!!!!! You'll start cutting into the pinion itself and damage the bearing surface. I usually cut it in a couple of places. Then get the fore-mentioned BFH and a chisel. Tip of the chisel goes in one of the grooves and apply the hammer. The bearing race is hardened steel and will crack if you've cut it deep enough and hit it hard enough.
 Here is the original spacer that goes between the pinion and the first bearing. This will be reused ONLY AS A STARTING PLACE as we wont be able to check the pinion depth until everything is assembled and we can run a pattern to check pinion/ring gear contact. Shims may need to be added or taken away depending on the final drive chosen.  First pinion bearing installed with the spacer.  Then the Weir solid pinion spacer goes on. It is a much thicker, stronger piece that replaces the original crush sleeve. Dustin took a picture of the original crush sleeve so I'll make him post it up for reference.  This is where I stopped last night as Dustin wants do as much of the work himself as possible. We should be able to get the solid pinion spacer install finished up tomorrow.
__________________
"Working on cars is not what I do... it's who I am." Steve Metcalf
|
|
|
|
|
12-27-2013, 04:08 PM
|
#77 |
|
Twin Screw You
Join Date: Nov 2012
Drives: 2013 Supercharged Whiteout FR-S
Location: Burleson, Texas
Posts: 1,231
Thanks: 464
Thanked 620 Times in 332 Posts
Mentioned: 37 Post(s)
Tagged: 0 Thread(s)
|
OEM Crush sleeve

__________________
|
|
|
|
|
12-29-2013, 12:32 PM
|
#78 |
|
Twin Screw You
Join Date: Nov 2012
Drives: 2013 Supercharged Whiteout FR-S
Location: Burleson, Texas
Posts: 1,231
Thanks: 464
Thanked 620 Times in 332 Posts
Mentioned: 37 Post(s)
Tagged: 0 Thread(s)
|
Got the old bearings and seals out of the carrier, replaced with new, and set the new pinion in.
__________________
|
|
|
|
|
12-29-2013, 03:14 PM
|
#79 | |
|
Member
Join Date: Oct 2013
Drives: Shoe Leather Limousine
Location: Ft. Worth, TX
Posts: 38
Thanks: 1
Thanked 8 Times in 6 Posts
Mentioned: 6 Post(s)
Tagged: 0 Thread(s)
|
Quote:
__________________
"Working on cars is not what I do... it's who I am." Steve Metcalf
|
|
|
|
|
|
12-29-2013, 04:35 PM
|
#80 |
|
86-er

Join Date: May 2012
Drives: BRZ tS
Location: Laredo, TX
Posts: 970
Thanks: 195
Thanked 253 Times in 175 Posts
Mentioned: 3 Post(s)
Tagged: 0 Thread(s)
|
Sweet diff build
__________________
2018 Subaru BRZ ts 020/500 - My Daily, work car, and track car
 |
|
|
|
| The Following User Says Thank You to *KID* For This Useful Post: | Dustin (12-29-2013) |
|
12-29-2013, 07:43 PM
|
#81 | |
|
Twin Screw You
Join Date: Nov 2012
Drives: 2013 Supercharged Whiteout FR-S
Location: Burleson, Texas
Posts: 1,231
Thanks: 464
Thanked 620 Times in 332 Posts
Mentioned: 37 Post(s)
Tagged: 0 Thread(s)
|
Quote:
    Setting up the pinion and pinion bearing preload.   More pics can be found it here------------------------------>DIY
__________________
Last edited by Dustin; 01-04-2014 at 11:41 PM. |
|
|
|
|
| The Following User Says Thank You to Dustin For This Useful Post: | jcw99 (03-05-2016) |
|
01-04-2014, 11:48 PM
|
#82 |
|
Twin Screw You
Join Date: Nov 2012
Drives: 2013 Supercharged Whiteout FR-S
Location: Burleson, Texas
Posts: 1,231
Thanks: 464
Thanked 620 Times in 332 Posts
Mentioned: 37 Post(s)
Tagged: 0 Thread(s)
|
My brother is teaching me how to design my own parts. This is my first part I did today. It's not finished yet. I still need 1 more measurement, but it is 99% done.
Solid aluminum bushing for the carrier with a stainless steel insert.  Stainless steel insert with a "stepped" inner diameter.  Bottom portion  Bottom portion with the sleeve  Top portion  Top portion with sleeve  Washer  Another shot of the 99% completed bushing 
__________________
|
|
|
|
|
01-11-2014, 12:19 PM
|
#83 |
|
Member
Join Date: Oct 2013
Drives: Shoe Leather Limousine
Location: Ft. Worth, TX
Posts: 38
Thanks: 1
Thanked 8 Times in 6 Posts
Mentioned: 6 Post(s)
Tagged: 0 Thread(s)
|
Got the sleeves machined out of some 304 stainless steel. A "Thank You" goes out to Boston Mike for helping me get these done.
 The stepped bore is necessary to clear the original bolt 
__________________
"Working on cars is not what I do... it's who I am." Steve Metcalf
|
|
|
|
| The Following User Says Thank You to Rue For This Useful Post: | Dustin (01-11-2014) |
|
01-11-2014, 03:37 PM
|
#84 |
|
Twin Screw You
Join Date: Nov 2012
Drives: 2013 Supercharged Whiteout FR-S
Location: Burleson, Texas
Posts: 1,231
Thanks: 464
Thanked 620 Times in 332 Posts
Mentioned: 37 Post(s)
Tagged: 0 Thread(s)
|
Still don't know why it has the threaded part towards the head of the bolt. It doesn't thread into anything.
__________________
Last edited by Dustin; 01-11-2014 at 09:55 PM. |
|
|
|
|
|
|
|
|
|
 Similar Threads
|
||||
| Thread | Thread Starter | Forum | Replies | Last Post |
| BRZ Limited Backup Camera Step by Step (WARNING long post, many pictures) | runny_yolk | Electronics | Audio | NAV | Infotainment | 120 | 01-29-2021 07:18 PM |
| step 1 :buy frs in phx, step 2: drive to pikes peak | haymaker | FR-S & 86 Photos, Videos, Wallpapers, Gallery Forum | 15 | 08-21-2012 11:44 AM |
| [StreetFX] License Plate LED light upgrade, and DIY step by step guide (GT and GTS) | WTF | Australia Classifieds | 0 | 07-11-2012 12:38 PM |
| [StreetFX] BRIGHT Boot/Trunk LED light upgrade & DIY step by step guide (GT and GTS) | WTF | Australia Classifieds | 0 | 07-11-2012 12:27 PM |


 2013 Scion FR-S
