|
||||||
| DIY (Do-It-Yourself) Guides For all DIYs. |
 |
|
|
Thread Tools | Search this Thread |
|
|
#1 |
|
Senior Member
Join Date: Aug 2012
Drives: FR-S ultramarine
Location: Kentucky
Posts: 377
Thanks: 163
Thanked 73 Times in 53 Posts
Mentioned: 4 Post(s)
Tagged: 0 Thread(s)
|
DIY- Perrin Oil Cooler/ Bumper removal notes
Alrighty, I received my Perrin Oil cooler from Joe Boxer.
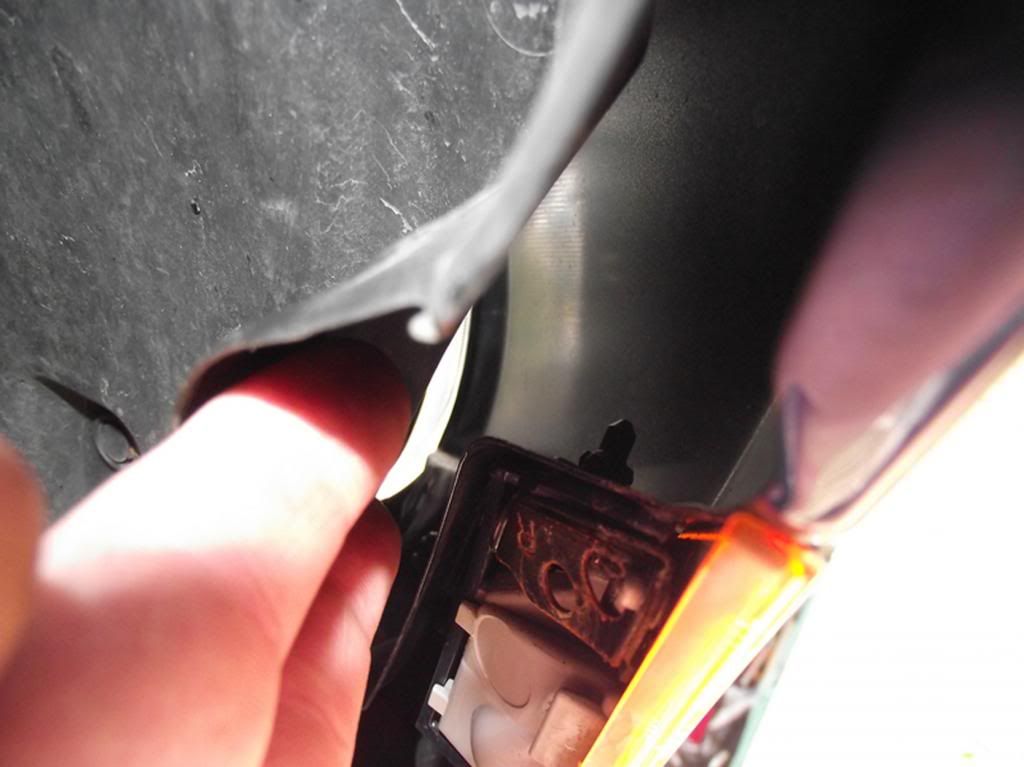
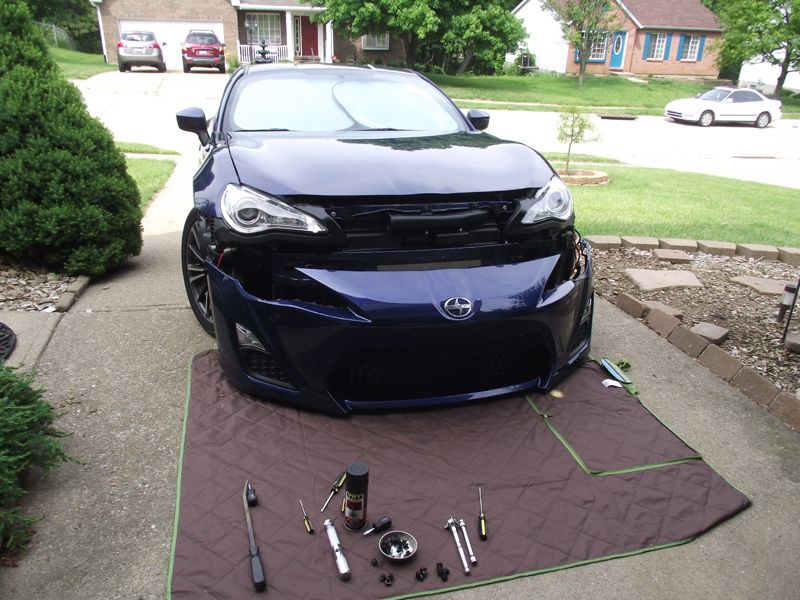
This will be a heavy pic loaded run. Starting with bumper removal notes. The 2 bumper removal DIY's are awesome and do that well. Everybody says screwdriver out the pop rivets, well, in pics following I wanted to show that you should always pop the rivet first, pull out the rivet, then the entire rivet piece will come right out. Ones that have a Philips, turn until it pops, then pull it out. Others you pry with tip of flathead till they pop out, then pull it out. This will ensure those rivet holes maintain their integrity for the next few times you do this. So, pics shows type of rivet and what they should look like before you pull all way out, when you put back in later, you put assembly in and then push/pop rivet all way in. Done. After these pics I will start with the oil cooler install.
__________________
Last edited by Splat; 06-17-2013 at 09:18 PM. |
|
|

|
| The Following 3 Users Say Thank You to Splat For This Useful Post: |
|
|
#2 |
|
Senior Member
Join Date: Aug 2012
Drives: FR-S ultramarine
Location: Kentucky
Posts: 377
Thanks: 163
Thanked 73 Times in 53 Posts
Mentioned: 4 Post(s)
Tagged: 0 Thread(s)
|
pics
__________________
|
|
|

|
|
|
#3 |
|
Senior Member
Join Date: Aug 2012
Drives: FR-S ultramarine
Location: Kentucky
Posts: 377
Thanks: 163
Thanked 73 Times in 53 Posts
Mentioned: 4 Post(s)
Tagged: 0 Thread(s)
|
__________________
|
|
|

|
|
|
#4 |
|
Senior Member
Join Date: Aug 2012
Drives: FR-S ultramarine
Location: Kentucky
Posts: 377
Thanks: 163
Thanked 73 Times in 53 Posts
Mentioned: 4 Post(s)
Tagged: 0 Thread(s)
|
__________________
|
|
|

|
|
|
#5 |
|
Senior Member
Join Date: Aug 2012
Drives: FR-S ultramarine
Location: Kentucky
Posts: 377
Thanks: 163
Thanked 73 Times in 53 Posts
Mentioned: 4 Post(s)
Tagged: 0 Thread(s)
|
Now, one person said to get behind the marker light then push down on the rivet, popping it in reverse. That worked very well, use the largest screwdriver you have to push down on it and it will pop..

__________________
|
|
|

|
|
|
#6 |
|
Senior Member
Join Date: Aug 2012
Drives: FR-S ultramarine
Location: Kentucky
Posts: 377
Thanks: 163
Thanked 73 Times in 53 Posts
Mentioned: 4 Post(s)
Tagged: 0 Thread(s)
|
Now after doing all this and getting all top bolts and rivets, you do pull down at the side marker area firmly on each side, and it will pop out. Then remove the bumper lights from the bumper and bam it is on ground.

__________________
|
|
|

|
|
|
#7 |
|
Senior Member
Join Date: Aug 2012
Drives: FR-S ultramarine
Location: Kentucky
Posts: 377
Thanks: 163
Thanked 73 Times in 53 Posts
Mentioned: 4 Post(s)
Tagged: 0 Thread(s)
|
Now the oil cooler start, I had some minor issues and will explain in the pics. Plan on after your bumper is off...2 hours taking your time to complete. No real special tools, Just need , 15/16th and 1" open end wrenches. Philips, vise grips, 27mm socket. 4mm and 6mm allen wrenches. Some side cutters or scissors to trim zip ties. An extra quart of oil ready to add when done. They do send you a new filter with kit.
__________________
|
|
|

|
|
|
#8 |
|
Senior Member
Join Date: Aug 2012
Drives: FR-S ultramarine
Location: Kentucky
Posts: 377
Thanks: 163
Thanked 73 Times in 53 Posts
Mentioned: 4 Post(s)
Tagged: 0 Thread(s)
|
__________________
|
|
|

|
|
|
#9 |
|
Senior Member
Join Date: Aug 2012
Drives: FR-S ultramarine
Location: Kentucky
Posts: 377
Thanks: 163
Thanked 73 Times in 53 Posts
Mentioned: 4 Post(s)
Tagged: 0 Thread(s)
|
__________________
|
|
|

|
|
|
#10 |
|
Senior Member
Join Date: Aug 2012
Drives: FR-S ultramarine
Location: Kentucky
Posts: 377
Thanks: 163
Thanked 73 Times in 53 Posts
Mentioned: 4 Post(s)
Tagged: 0 Thread(s)
|
__________________
|
|
|

|
|
|
#11 |
|
Senior Member
Join Date: Aug 2012
Drives: FR-S ultramarine
Location: Kentucky
Posts: 377
Thanks: 163
Thanked 73 Times in 53 Posts
Mentioned: 4 Post(s)
Tagged: 0 Thread(s)
|
__________________
|
|
|

|
|
|
#12 |
|
Senior Member
Join Date: Aug 2012
Drives: FR-S ultramarine
Location: Kentucky
Posts: 377
Thanks: 163
Thanked 73 Times in 53 Posts
Mentioned: 4 Post(s)
Tagged: 0 Thread(s)
|
__________________
|
|
|

|
|
|
#13 |
|
Senior Member
Join Date: Aug 2012
Drives: FR-S ultramarine
Location: Kentucky
Posts: 377
Thanks: 163
Thanked 73 Times in 53 Posts
Mentioned: 4 Post(s)
Tagged: 0 Thread(s)
|
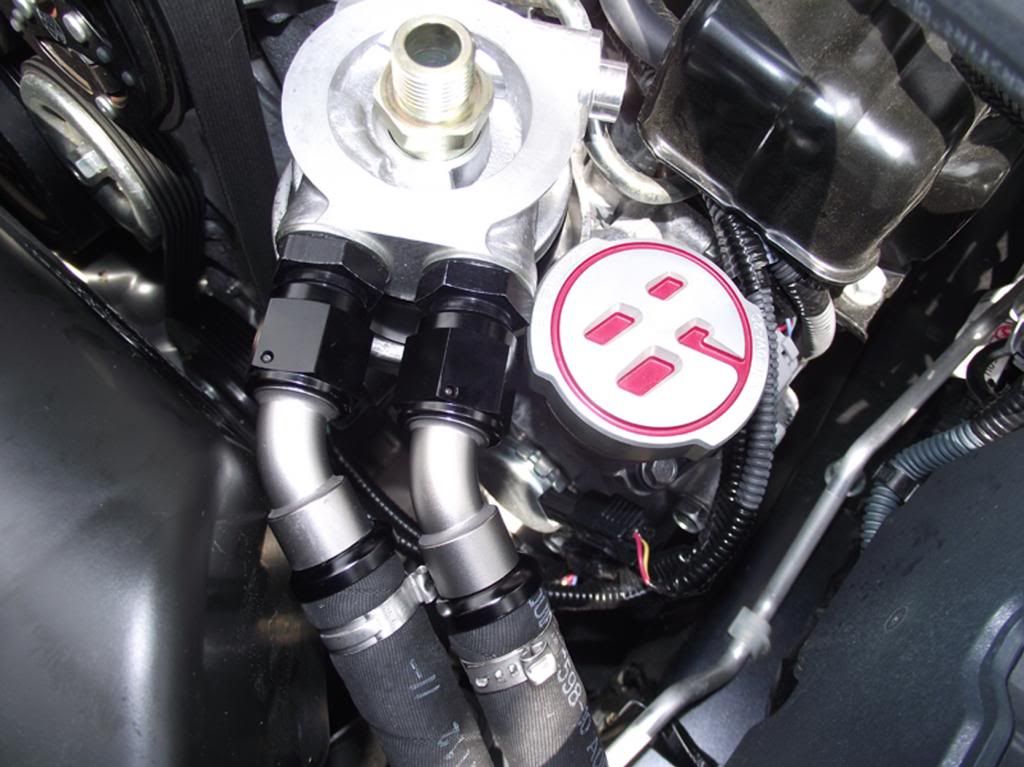
Now you run the hoses in above the washer fluid, and screw in the 27mm center piece loosely. Problem, right off the bat. The Grimmspeed oil cap will not work, as the oil lines are already against the stock air as you can tell from the pic. The only answer is to go back to stock oil cap. Those of you who have some other air box may not have this problem.

__________________
|
|
|

|
|
|
#14 |
|
Senior Member
Join Date: Aug 2012
Drives: FR-S ultramarine
Location: Kentucky
Posts: 377
Thanks: 163
Thanked 73 Times in 53 Posts
Mentioned: 4 Post(s)
Tagged: 0 Thread(s)
|
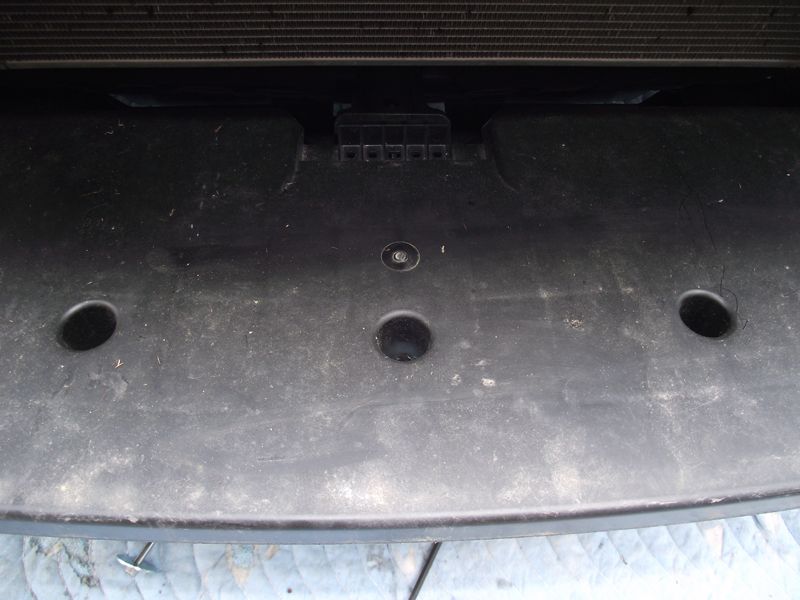
Next is to mount the cooler on the supplied blocks. I did not see any notes on where you install it, but , figured out you remove the 2 pop rivets underside for the 2 outside holes in picture, then run the long screws with the washers in from bottom.

__________________
|
|
|

|
|
|
|
|
|
|
 Similar Threads
|
||||
| Thread | Thread Starter | Forum | Replies | Last Post |
| You want it, you got it: PERRIN Oil Cooler GB | JoeBoxer | Groupbuys | 96 | 06-16-2013 04:10 PM |
| front bumper removal? | ft86me | DIY (Do-It-Yourself) Guides | 4 | 06-10-2013 01:28 PM |
| Perrin oil cooler trouble | ft86me | Engine, Exhaust, Transmission | 9 | 04-29-2013 08:56 PM |
| Perrin Oil cooler install review | LeeMaster | Engine, Exhaust, Transmission | 3 | 03-14-2013 11:41 PM |
| Perrin oil cooler group buy? | white devil | Engine, Exhaust, Transmission | 6 | 02-10-2013 04:17 AM |