


|
||||||
| Electronics | Audio | NAV | Infotainment Anything related to in-car electronics, navigation, and infotainment. |
 |
|
|
Thread Tools | Search this Thread |
 01-05-2014, 03:33 PM
|
#1 |
|
Boosted Member

Join Date: Dec 2013
Drives: 2013 Subaru BRZ
Location: Maryland, USA
Posts: 699
Thanks: 455
Thanked 464 Times in 246 Posts
Mentioned: 29 Post(s)
Tagged: 0 Thread(s)
  |
woode's audio setup
Hey guys/gals,
**Here is current progress, finishing up is on hold until middle of June due to me moving**  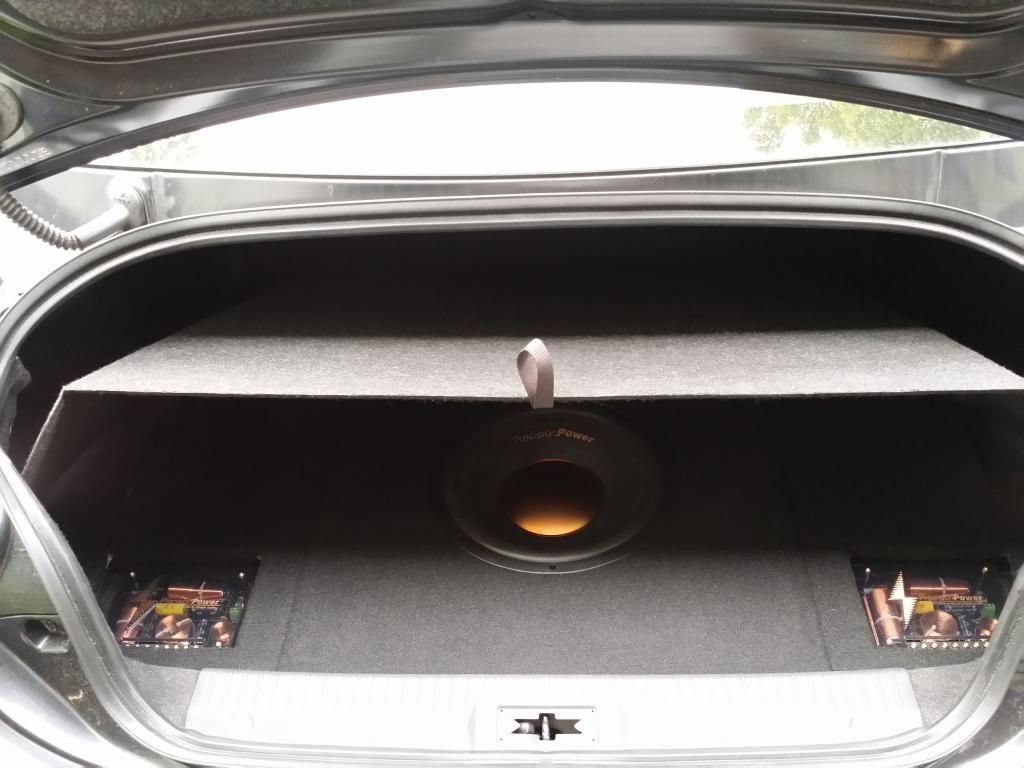 I am doing budget "best bang for your buck" type of build. I wanted better sound quality and more range than factory, without it looking like I have anything done to the audio system. My budget was initially around $500. After materials, wires, amps, speakers I will be sitting at just over $600. o Precision Power PPI PC3.65C Front Speakers $264 o Precision Power i350.2 Amplifier $98 o Precision Power A.12SQ Subwoofer $59 o Precision Power i650.1 Amplifier $107 o Rear Speaker Delete $0 o 25' 4GA wire for battery positive to distribution block $25 o 5' 4GA wire for main ground $12 o 2x 5' 8GA wire for power from distribution block to amps and ground from amps to distribution blocks $10 o 2x Distribution Blocks $15 The rear speakers are being deleted because 1) Rear fill ruins the sound imaging and 2) I rarely, if ever, will have passengers in the rear. The car is small enough that they can hear the fronts if need be. The subwoofer is going to be enclosed in a custom fiberglass box a friend and I will be building in place of the spare tire. The amplifiers, crossovers, and distribution blocks will all be under the rear cargo mat as well. This retains useage of the trunk, the factory look, and makes it much harder to steal. The factory spare tire and foam holder are taken out obviously. Their is a mount that sticks up a few inches for the spare tire to bolt into. This is directly in the way of where the subwoofer will be going. With this removed, the mounting depth from cargo tray to bottom of trunk is just over 6". I used a dremel to grind off the spot welds. 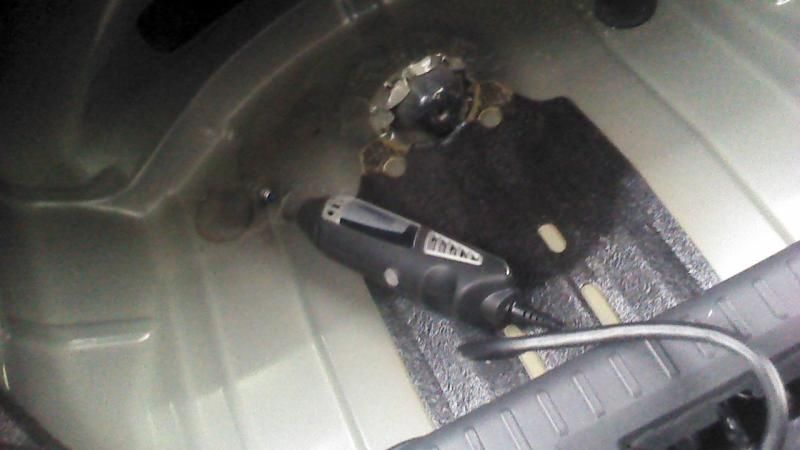 Starting to look ugly 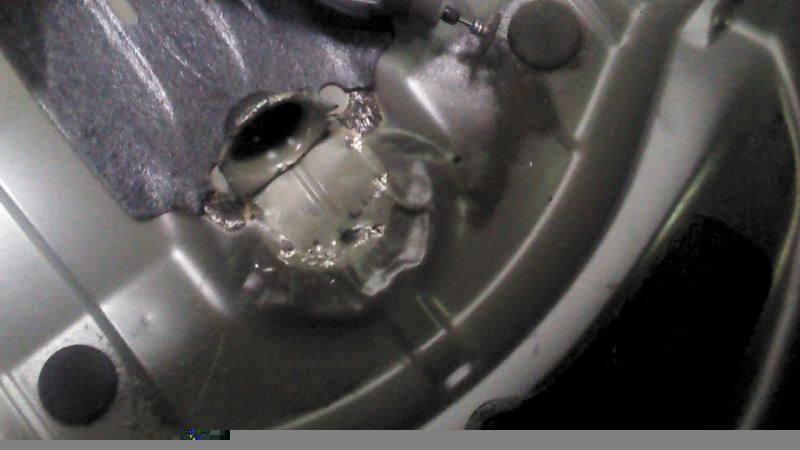 And it's off! 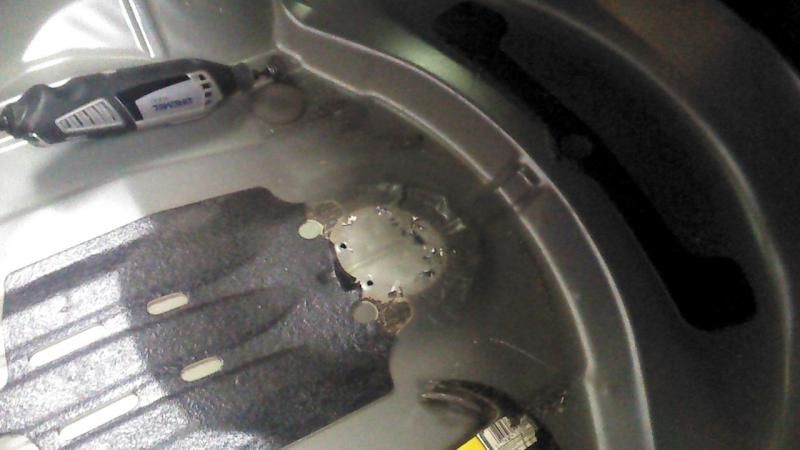 Heat gun + chisel to get the factory deadener off. 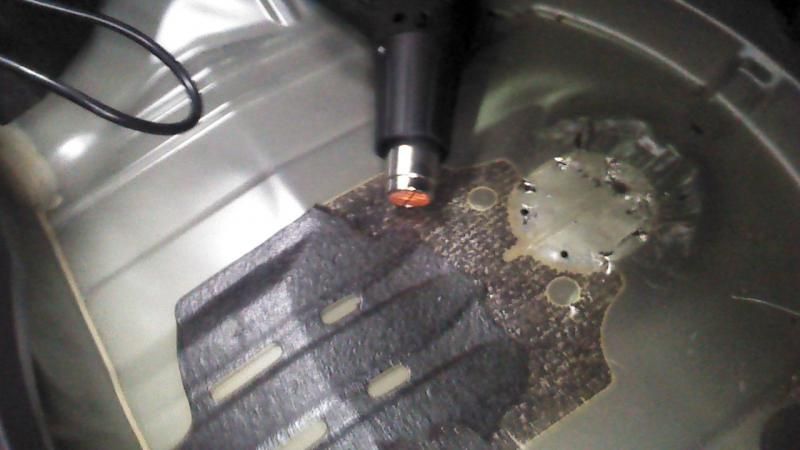 Ready for prep/cleanup. I will be filling in the holes, smoothing everything out, and getting rid of the adhesive still stuck on. 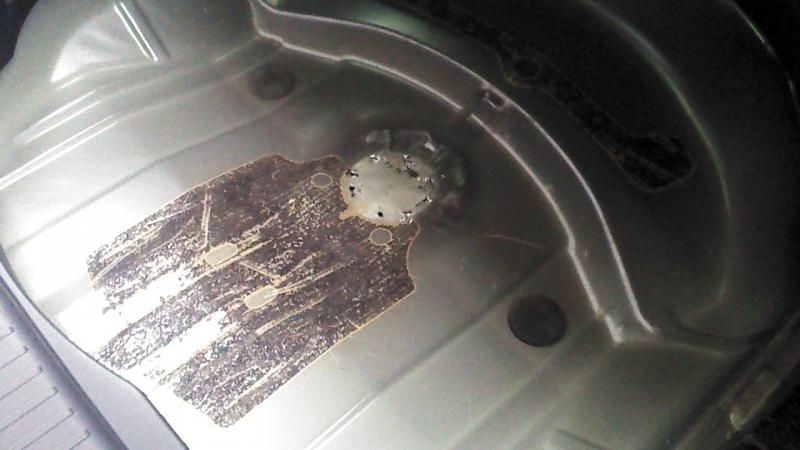 A quick test fit, just to make sure my depth measurements were correct when I ordered initially. The yard stick going across represents where the trunk mat sits. With this setup there is about 1.5" of clearance, most of which will be taken up by the wall of the fiberglass box. Perfect! 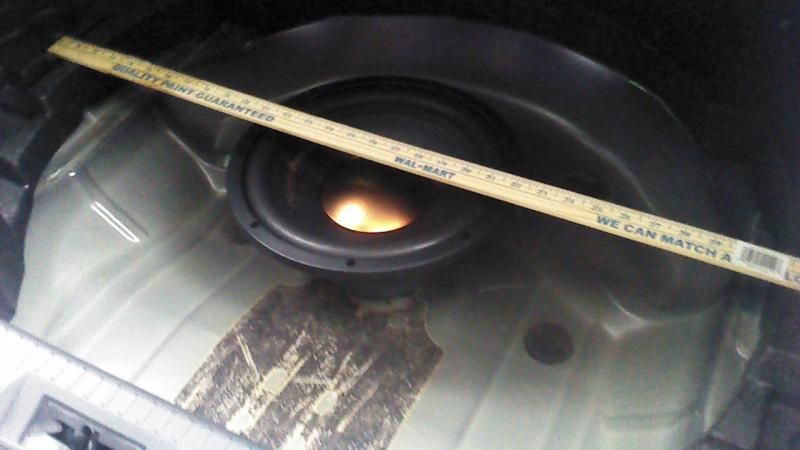 More to come! I am in NJ and it is below freezing so that is all for today. I plan to have this finished over the next few weeks. I am also turboing the car so some of my time is going to that.
__________________
2013 Subaru BRZ LTD 6MT DGM
2014 Subaru XV Crosstrek Hybrid TRG PG 2011 Honda CBR1000RR 2010 Subaru Impreza WRX PRM SSM Last edited by woode; 05-30-2014 at 05:39 PM. |

|

|
| The Following User Says Thank You to woode For This Useful Post: | eighty666 (05-23-2014) |
|
01-05-2014, 03:34 PM
|
#2 |
|
Boosted Member
Join Date: Dec 2013
Drives: 2013 Subaru BRZ
Location: Maryland, USA
Posts: 699
Thanks: 455
Thanked 464 Times in 246 Posts
Mentioned: 29 Post(s)
Tagged: 0 Thread(s)
|
I am using the factory amp wiring for the most part. This is in align with my goal of keeping as much of the OEM look as possible, and its less wires to run. The rear amp receives a full signal, and then filters it out to the door speakers bass. I am using it for the remote turn on and high line inputs for the amps. I will still be running the main power wire back from the battery, and the speaker wire from the amps to the front.
All you need to do this is a standard Toyota head unit harness. You have to change a couple pins but it plugs right in in place of the factory amp. Makes life easy. Here is a link to RandomHero's post on the pinouts of the factory amp wiring. 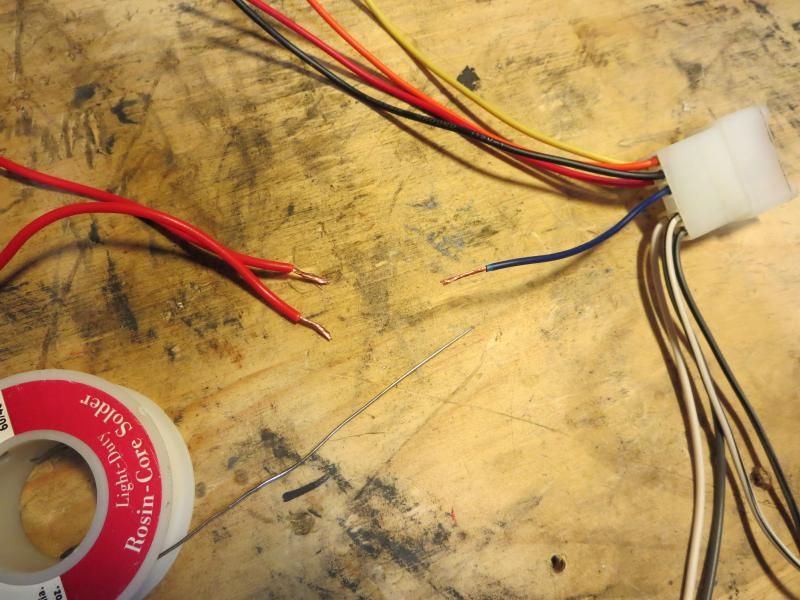 Remote turn on 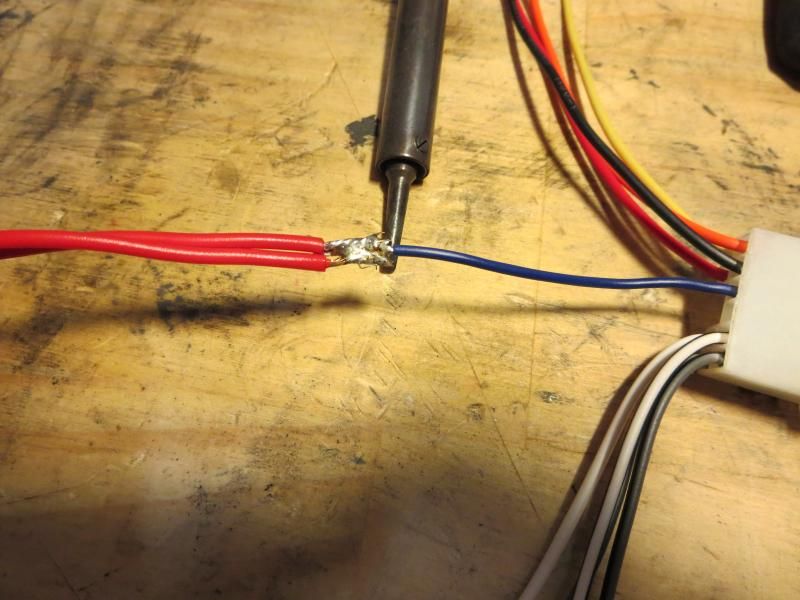 Solder 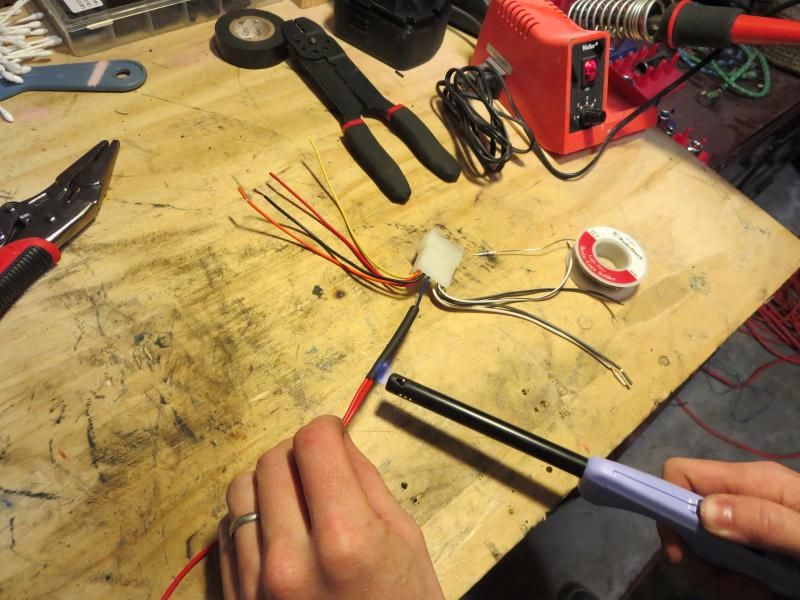 Heat shrink wrap, keeps it clean 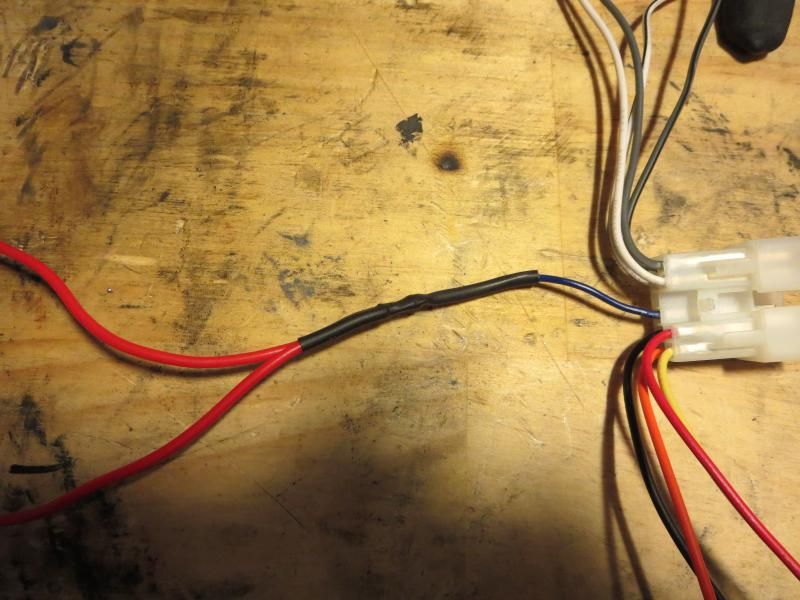 From head unit, going to be used as line inputs for the amps 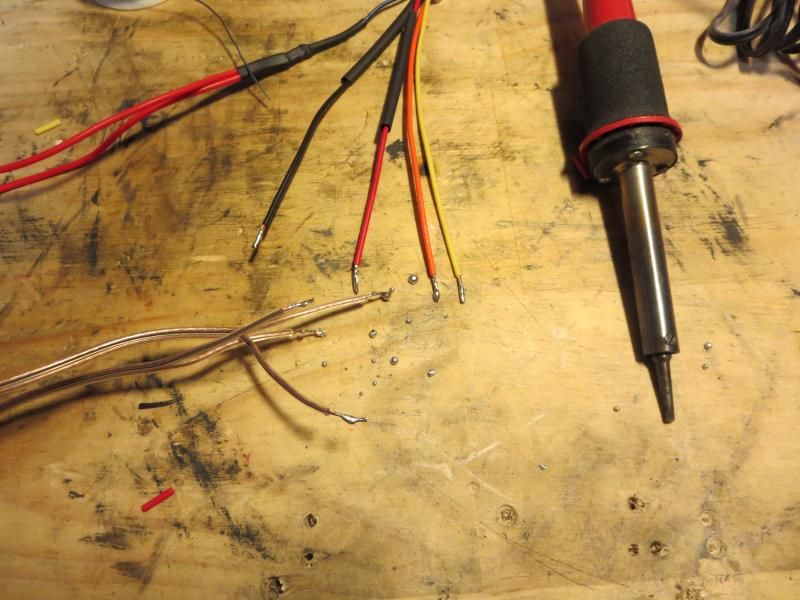   The remaining wires would originally be the output from the factory amp to the door speakers. I will not be using these since I am running all 3 speakers up front off the amp and through a crossover.  Here are the harnesses I will be using. From top to bottom: -Camera harness by ae64, this plugs into the rear of the factory head unit. It has a ground loop to trick the head unit into thinking the parking brake is on for watching videos. The pinout is a 6v signal telling the camera to turn on. I will be using this as a relay trigger to the bottom harness, as the camera I am using works better off of 12v. Lastly, the input for the camera feed. -Amp remote turn-on and line inputs harness. This will plug into the bigger of the two connections going to the OEM amp. Once I have things situated in the trunk, I will trim the wires to appropriate lengths. -Reverse camera harness. This will plug into the smaller of the two connections going to the OEM amp. It outputs 12v constantly, and I have a relay in line that will supply power to the camera when triggered by the signal from the head unit.
__________________
2013 Subaru BRZ LTD 6MT DGM
2014 Subaru XV Crosstrek Hybrid TRG PG 2011 Honda CBR1000RR 2010 Subaru Impreza WRX PRM SSM Last edited by woode; 05-23-2014 at 11:05 AM. |
|
|
|
|
02-04-2014, 08:48 PM
|
#3 |
|
Doctor

Join Date: Aug 2012
Drives: Fast
Location: Philadelphia
Posts: 496
Thanks: 410
Thanked 203 Times in 126 Posts
Mentioned: 2 Post(s)
Tagged: 0 Thread(s)
|
how is it coming along?
__________________
 Jeremy Clarkson "If you go though the Pearly Gates, backwards, in a fireball, that's a cool way to die!" 2013 White Pearl BRZ Limited 6MT - 15% Tint, Debadged, HIDPowerhouse LED Interiors and Dome |
|
|
|
|
05-14-2014, 11:29 PM
|
#4 |
|
Senior Member

Join Date: Aug 2012
Drives: 2013 Subaru BRZ Sport Tech
Location: Toronto, Ontario, Canada
Posts: 194
Thanks: 46
Thanked 39 Times in 21 Posts
Mentioned: 3 Post(s)
Tagged: 0 Thread(s)
|
UPDATES!!!!
__________________
Performance Parts: Innovate Motorsports Supercharger, Mishimoto Oil Cooler, Borla UEL Header, Perrin Cold Air Intake, Perrin Cat Back Exhaust, Perrin Crank Pulley, Perrin Rear Shifter Bushing, Perrin Transmission Bushing, Perrin Master Cylinder Brace, Billet Pro Short Shifter. Handling Parts: Perrin Control Arm Braces, Perrin PSRS Offset Steering System, Perrin 22mm Front & 22mm Rear Sway Bars, Perrin Spherical Rear Endlinks
|
|
|
|
|
05-15-2014, 04:43 AM
|
#5 |
|
Senior Member

Join Date: May 2014
Drives: '13 Subaru BRZ, '06 Toyota 4Runner
Location: Monroe, NC
Posts: 220
Thanks: 31
Thanked 59 Times in 45 Posts
Mentioned: 2 Post(s)
Tagged: 0 Thread(s)
|
>"rear fill runs the sound imaging"
Wat. |
|
|
|
|
05-15-2014, 01:15 PM
|
#6 | |
|
Frosty Carrot
Join Date: Jan 2013
Drives: The Atomic Carrot
Location: Baltimore, MD
Posts: 513
Thanks: 272
Thanked 428 Times in 199 Posts
Mentioned: 19 Post(s)
Tagged: 0 Thread(s)
|
Quote:
Rear fill tends to create some reflections that reduce stereo separation. If the sound doesn't arrive at the correct time, the interference will make a great EQ tune sound bad. Rear fill can help saturate the cabin, and get a more consistent frequency response throughout the car. Some cars only sound good in one seat. Personally, I feel more immersed in the sound when the front-rear balance is just slightly biased to the front. Just as with everything, rear fill has its pros and cons.
__________________
If you think you're nerd enough, join in the discussions about Suspension and Aerodynamic modelling!
Wall of Fame - JDL Auto Design, Raceseng, Vishnu Tuning, Penske Shocks, Nameless, Perrin, RaceComp Engineering, Essex/AP Racing, Verus, RacerX Wall of Shame - aFe Takeda, Wilwood, FA20Club |
|
|
|
|
| The Following User Says Thank You to Shankenstein For This Useful Post: | woode (05-23-2014) |
|
05-22-2014, 06:33 PM
|
#7 | |
|
Banned
Join Date: May 2014
Drives: BRZ
Location: Knew York
Posts: 88
Thanks: 17
Thanked 18 Times in 15 Posts
Mentioned: 0 Post(s)
Tagged: 0 Thread(s)
|
Quote:
|
|
|
|
|
|
05-22-2014, 06:36 PM
|
#8 | |
|
Boosted Member
Join Date: Dec 2013
Drives: 2013 Subaru BRZ
Location: Maryland, USA
Posts: 699
Thanks: 455
Thanked 464 Times in 246 Posts
Mentioned: 29 Post(s)
Tagged: 0 Thread(s)
|
I just started this project again yesterday, it was on hold for a while due to turbo'ing the car and then had to leave out of town for a couple months due to work. Also, since I am under a time crunch it, the bottom half isn't going to be fiberglassed in anymore (have to leave again in a week). It is going to be all wood with carpet over. The sub/amp/crossovers will all be recessed in giving a clean look.
The housing for the sub-woofer itself is almost done.. I'll be updating with pictures tonight and over the next few days. Quote:
__________________
2013 Subaru BRZ LTD 6MT DGM
2014 Subaru XV Crosstrek Hybrid TRG PG 2011 Honda CBR1000RR 2010 Subaru Impreza WRX PRM SSM |
|
|
|
|
|
05-23-2014, 02:34 AM
|
#9 |
|
Banned
Join Date: May 2014
Drives: BRZ
Location: Knew York
Posts: 88
Thanks: 17
Thanked 18 Times in 15 Posts
Mentioned: 0 Post(s)
Tagged: 0 Thread(s)
|
yyea ive been cutting just afraid to go through and scar up the metal under neath. looks like its pretty clean on yours just taking my time. what are you patching the holes with? welding them? or just rubber?
|
|
|
|
|
05-23-2014, 02:35 AM
|
#10 |
|
Banned
Join Date: May 2014
Drives: BRZ
Location: Knew York
Posts: 88
Thanks: 17
Thanked 18 Times in 15 Posts
Mentioned: 0 Post(s)
Tagged: 0 Thread(s)
|
i hate that hump there, it kinda ruins the trunk space when u gut it. thanks for the post
|
|
|
|
| The Following User Says Thank You to eighty666 For This Useful Post: | woode (05-23-2014) |
|
05-23-2014, 09:59 AM
|
#11 | |
|
Boosted Member
Join Date: Dec 2013
Drives: 2013 Subaru BRZ
Location: Maryland, USA
Posts: 699
Thanks: 455
Thanked 464 Times in 246 Posts
Mentioned: 29 Post(s)
Tagged: 0 Thread(s)
|
Updated 2nd post with some pictures/info using the factory wiring harness.
Quote:
__________________
2013 Subaru BRZ LTD 6MT DGM
2014 Subaru XV Crosstrek Hybrid TRG PG 2011 Honda CBR1000RR 2010 Subaru Impreza WRX PRM SSM Last edited by woode; 05-23-2014 at 10:12 AM. |
|
|
|
|
| The Following User Says Thank You to woode For This Useful Post: | Shankenstein (05-23-2014) |
|
05-25-2014, 11:57 PM
|
#12 |
|
I love peanut butter
Join Date: Jun 2013
Drives: 2013 SWP BRZ Limited
Location: NJ
Posts: 1,598
Thanks: 428
Thanked 584 Times in 349 Posts
Mentioned: 14 Post(s)
Tagged: 2 Thread(s)
|
What signal are you using for the subwoofer amp? Cross-over on the low-level inputs that feed the stock amp?
|
|
|
|
|
05-29-2014, 02:53 PM
|
#13 | |
|
Boosted Member
Join Date: Dec 2013
Drives: 2013 Subaru BRZ
Location: Maryland, USA
Posts: 699
Thanks: 455
Thanked 464 Times in 246 Posts
Mentioned: 29 Post(s)
Tagged: 0 Thread(s)
|
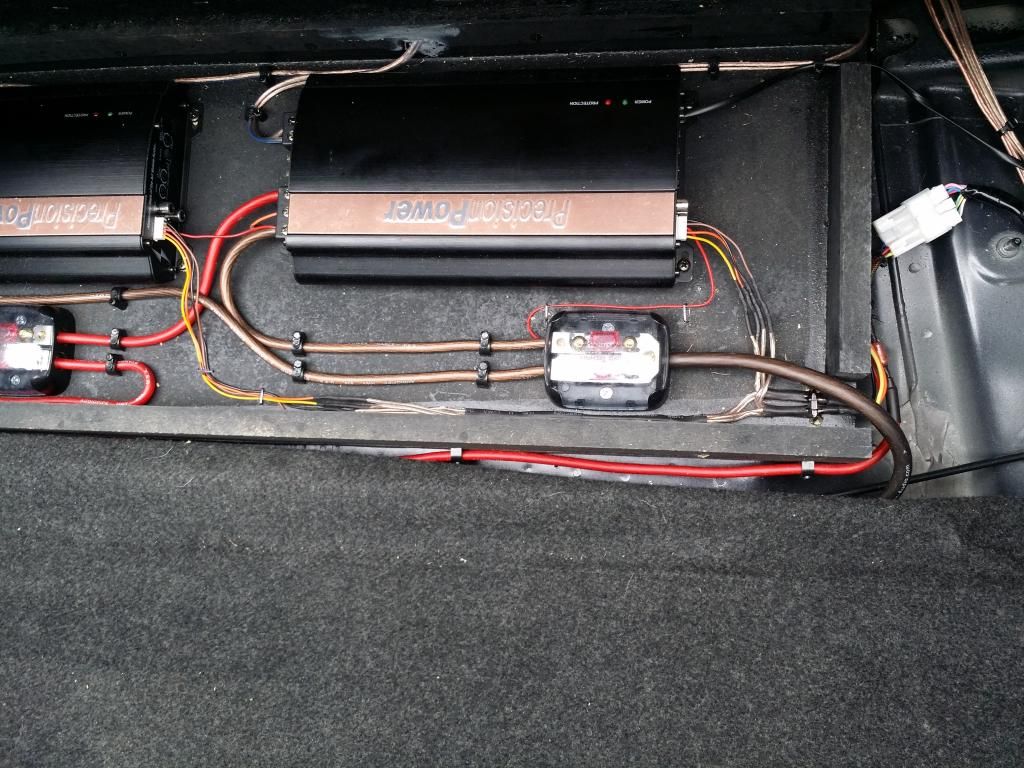
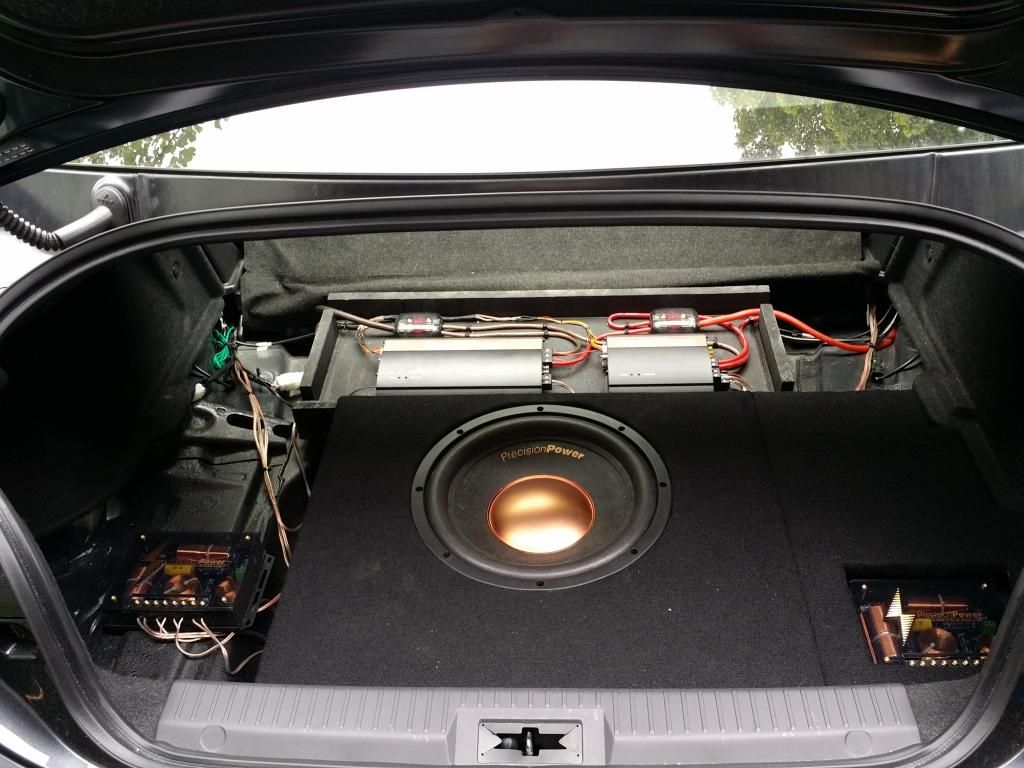 There is my progress thus far. I need to make a "box" for the left crossover, and a top piece for the amp "box". Then I will tidy up the wires a little more and call it good. I took a million pictures along the way, I am going to update once I get closer to being done. The only thing I forgot pictures of was some of the reverse camera stuff and how I epoxied in the tweeter. If anyone is curious, here is the PhotoBucket library of the pictures I took.. most of them are useless, I haven't sorted through them yet - hence why I haven't posted them yet. It is tough because I just found out I am moving this weekend instead of 2 weeks from now.. so I am trying to finish this up and pack the house at the same time! Quote:
__________________
2013 Subaru BRZ LTD 6MT DGM
2014 Subaru XV Crosstrek Hybrid TRG PG 2011 Honda CBR1000RR 2010 Subaru Impreza WRX PRM SSM Last edited by woode; 05-29-2014 at 03:08 PM. |
|
|
|
|
|
05-30-2014, 05:40 PM
|
#14 |
|
Boosted Member
Join Date: Dec 2013
Drives: 2013 Subaru BRZ
Location: Maryland, USA
Posts: 699
Thanks: 455
Thanked 464 Times in 246 Posts
Mentioned: 29 Post(s)
Tagged: 0 Thread(s)
|
**Here is current progress, finishing up is on hold until middle of June due to me moving**
All that is really left is making a cover for the amp box/rack/thing at the back of the trunk. It will be similar to the crossover one in that it will have cutouts for the amps.
__________________
2013 Subaru BRZ LTD 6MT DGM
2014 Subaru XV Crosstrek Hybrid TRG PG 2011 Honda CBR1000RR 2010 Subaru Impreza WRX PRM SSM |
|
|
|
| The Following User Says Thank You to woode For This Useful Post: | Shankenstein (06-02-2014) |
|
|
|
|
|
|
|
 Similar Threads
|
||||
| Thread | Thread Starter | Forum | Replies | Last Post |
| GaN-MaN's Custom Audio Setup + Sub/Amp Box | GaN-MaN | Electronics | Audio | NAV | Infotainment | 23 | 03-26-2014 05:43 AM |
| Building audio setup. Need amplifier advice from the experts | Kayzer Soze | Electronics | Audio | NAV | Infotainment | 69 | 06-04-2013 09:50 PM |
| 'Noobish' questions as I look to upgrade my car audio audio. | DkY in Vcr | Electronics | Audio | NAV | Infotainment | 0 | 09-22-2012 09:45 PM |
| Any specs on the standard Audio setup? | viking84 | Electronics | Audio | NAV | Infotainment | 72 | 05-30-2012 03:34 AM |
| Audio setup | 315FR-S | Electronics | Audio | NAV | Infotainment | 20 | 05-17-2012 06:23 PM |


 Snail
Snail White BRZ
 2013 Subaru BRZ Limited