|
||||||
| DIY (Do-It-Yourself) Guides For all DIYs. |
 |
|
|
Thread Tools | Search this Thread |
|
|
#1 |
|
Junior Member
Join Date: Dec 2015
Drives: 2014 Subaru BRZ
Location: HTown
Posts: 4
Thanks: 0
Thanked 2 Times in 2 Posts
Mentioned: 0 Post(s)
Tagged: 0 Thread(s)
|
100% Plug-&-Play Rearview Camera Installed from camera-source.com (Pics)
This is for those of us with the OEM 86271CA620 LKQ 6.1 inch touch screen radio with Navigation. I desperately wanted a backup camera for this car, and considering that the radio is a tolerable unit, I found this kit from camera-source.com from another youtube install video which can be seen here:
[ame="https://www.youtube.com/watch?v=6_F4ww1YHRY"]https://www.youtube.com/watch?v=6_F4ww1YHRY[/ame] However, the video shows an install on an FRS, and the head unit he's installing on is different from my BRZ unit. It turns out that with the BRZ OEM 86271CA620 LKQ 6.1 inch touch screen navigation radio, this install requires absolutely zero wire splicing or wire tapping. It is literally plug and play. The only modification necessary is creating a mount for the camera in the back. The total cost of the unit with shipping: $158 Difficulty: 4/10 Step 1: Unhook the negative terminal from your cars battery so that you can safely work on all the electronics. Remove the plastic trim around the radio. There are 4 clips, and you just gently pop the piece out. 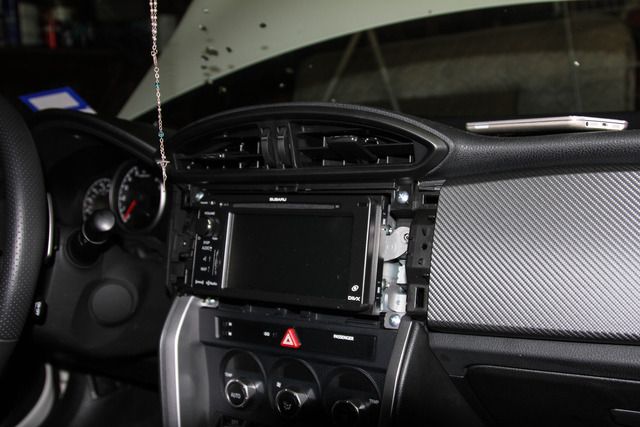 Step 2: Remove the screws holding the radio in, gently pull the radio out and remove all connectors completely from the radio (don't worry, all the different connectors can only fit into their one respective slot). You could probably do this job without removing all the connectors, but there's not a ton of slack on the wires so removing the radio completely out of the way will give you enough room to attach the new harness and its wires. It also gives you room to thread the camera wire through to the driver side foot well area. On the back of the radio, the upper white harness closest to the driver's side is the one that will be connected to the new harness provided in the kit. It has a single grey wire connected to it. 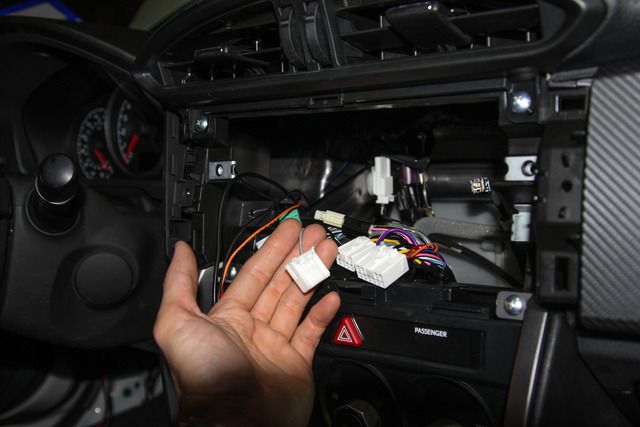 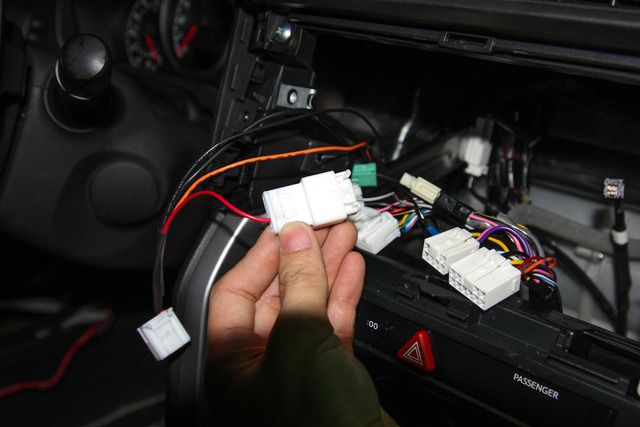 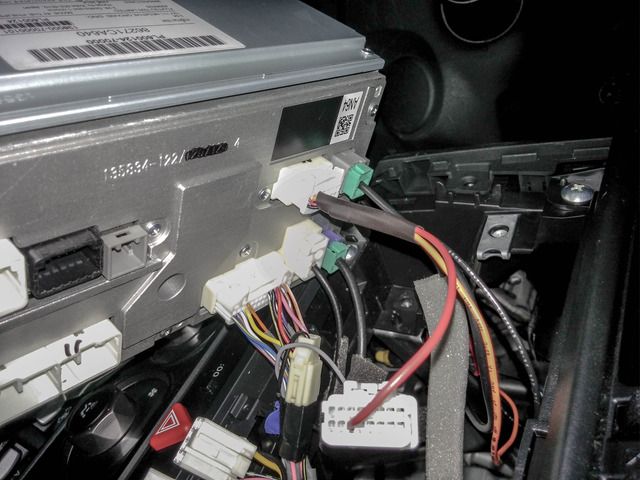 Step 3: Connect the RCA and power wire coming from the new harness you just connected to the RCA and power wire on the camera. Now reconnect all the wiring harnesses to the radio. Reconnect the battery, turn on the ignition, and test the camera system. It should automatically change the screen to the camera when you put the car in reverse and change back to normal when you shift out of reverse. Once you've verified that it works, thread the camera wire through the left side of the radio cavity into the driver's foot well area and reassemble the radio and dash trim completely. 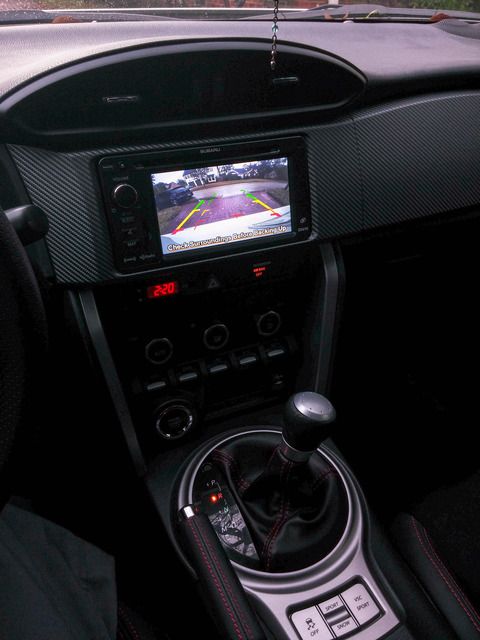 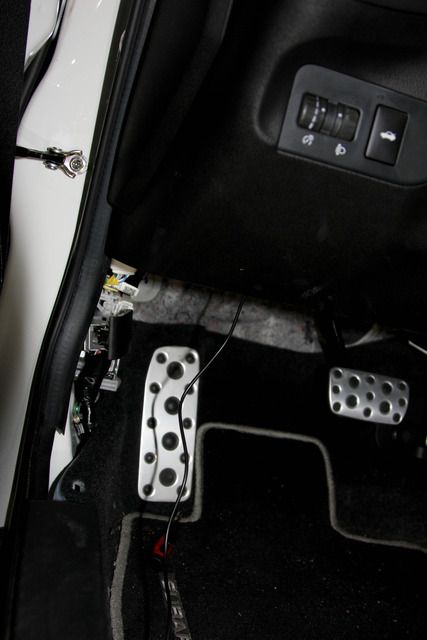 Step 4: Run the wire underneath the door trim and backseat toward the trunk. There's a bolt right beneath the lower back seat cushion to remove it. Remove the trunk liner and just follow the oem wires. 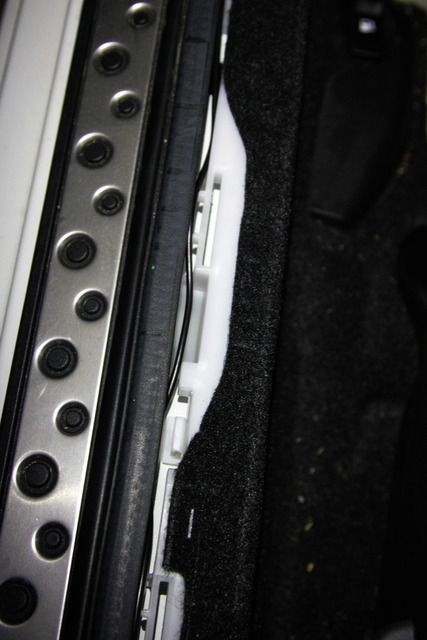 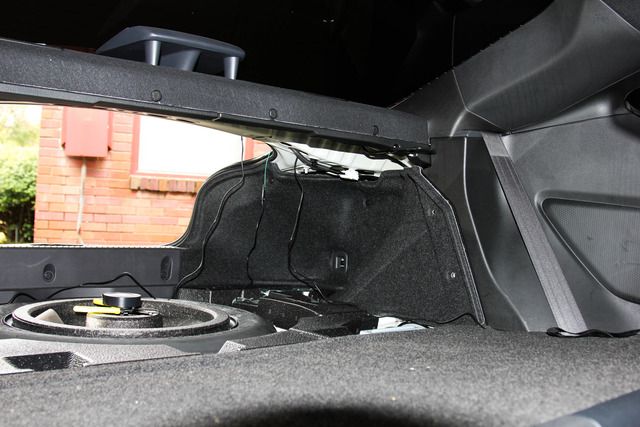 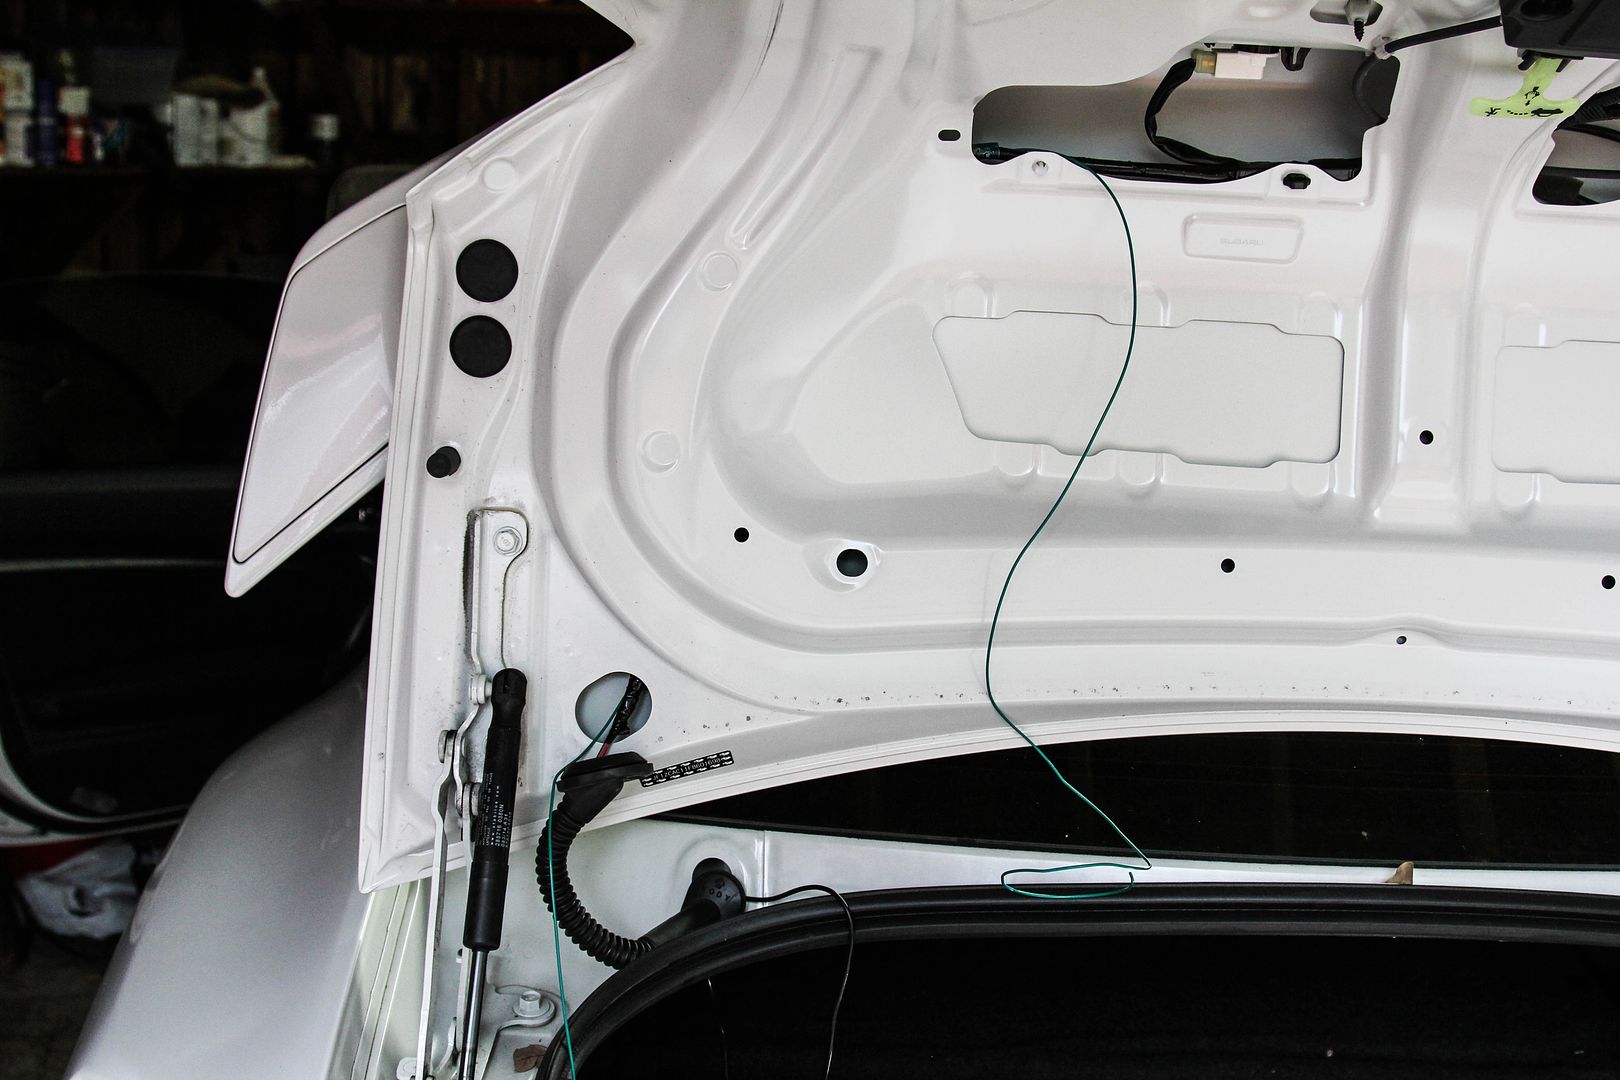 Step 5: After you've removed the trunk liner,remove the bracket that holds the trunk release button, trunk key lock, and license plate lights by removing the five 8mm nuts. Be careful here because the trunk release button cannot be removed from this trim piece. Detach the trim piece and just flip it up to lay on the trunk. Place a towel or something protective underneath it for the next step. 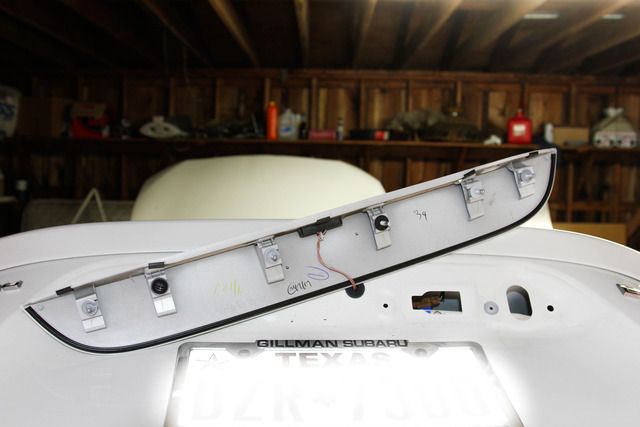 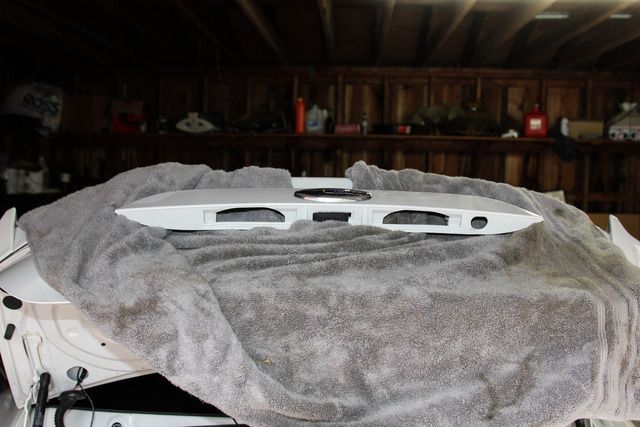 Step 6: Use the drill bit included in the kit to drill the hole for the camera. This trim piece is made of plastic so it will not take long. 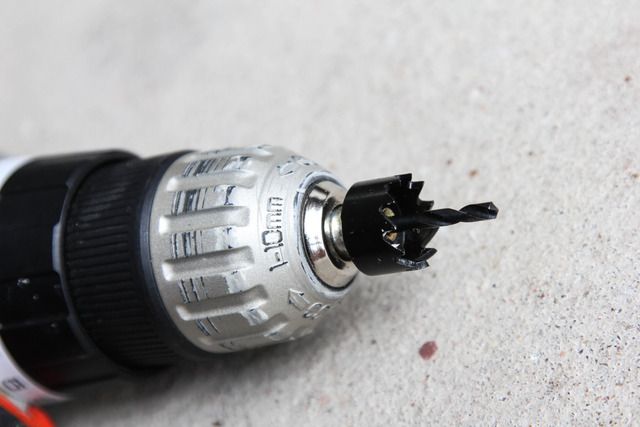 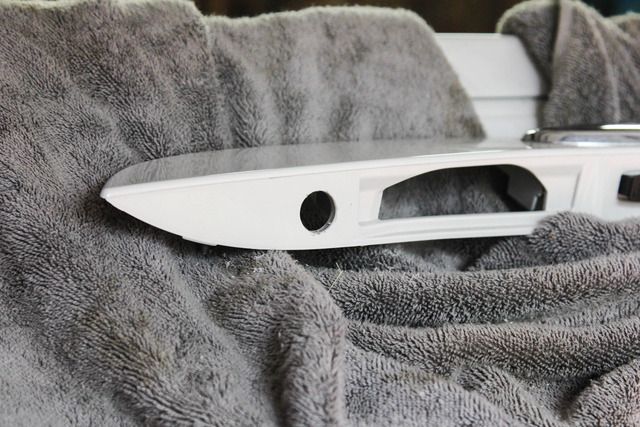 Step 7: Install the camera with the foam gasket and lock nut included. Zip tie the camera wires to the oem wires and harness, reassemble all panels etc, and enjoy! 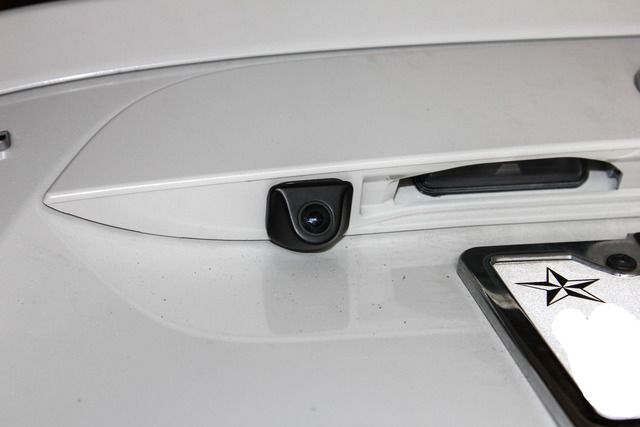  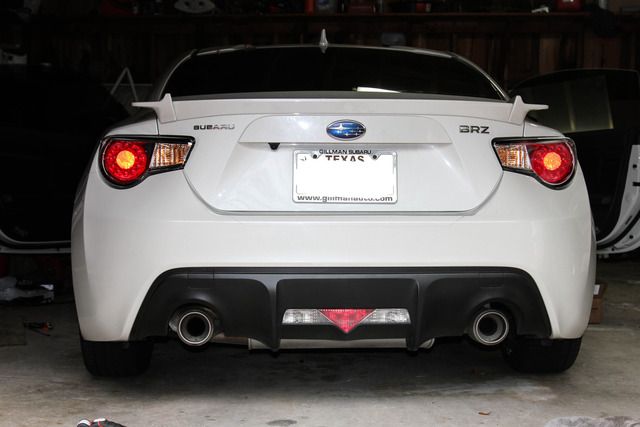 
|
|
|

|
| The Following User Says Thank You to zthang For This Useful Post: | RickyBobby (12-18-2015) |
|
|
#2 |
|
A.K.A. Starlord
Join Date: Oct 2013
Drives: 2015 Series.Blue
Location: Illinois
Posts: 1,842
Thanks: 845
Thanked 2,099 Times in 834 Posts
Mentioned: 30 Post(s)
Tagged: 3 Thread(s)
|
Is the camera adding its own set of lines in addition to those added by the head unit? I feel like I'm seeing two sets of lines in your last photo.
I remember could could change the line types in the head unit, but I can't remember if you could turn them off entirely. Either way, looks great. Definitely on my to-do list now! |
|
|

|
|
|
#3 |
|
Junior Member
Join Date: Dec 2015
Drives: 2014 Subaru BRZ
Location: HTown
Posts: 4
Thanks: 0
Thanked 2 Times in 2 Posts
Mentioned: 0 Post(s)
Tagged: 0 Thread(s)
|
You're correct. The instructions said that there's a little wire loop connected to the camera that you can cut to remove the guide lines. I was afraid to do that at first, but then said wth and snipped it. Cutting that wire removed the second set of non-solid guidelines so now it looks normal. Also, the lines are static and do not turn when you turn the wheel unfortunately.
|
|
|

|
| The Following User Says Thank You to zthang For This Useful Post: | Stang70Fastback (12-17-2015) |
|
|
#4 |
|
Senior Member
Join Date: Mar 2015
Drives: 2015 Subaru BRZ Limited CWP
Location: SoCal
Posts: 1,561
Thanks: 34
Thanked 669 Times in 469 Posts
Mentioned: 13 Post(s)
Tagged: 0 Thread(s)
|
what camera do they use? you can buy a rydeen duo for $70 off ebay and a wiring harness for $30. that's what I did and the install was exactly the same. do you get your extra $50 worth for this kit?
__________________
|
|
|

|
|
|
#5 |
|
Junior Member
Join Date: Dec 2015
Drives: 2014 Subaru BRZ
Location: HTown
Posts: 4
Thanks: 0
Thanked 2 Times in 2 Posts
Mentioned: 0 Post(s)
Tagged: 0 Thread(s)
|
Probably not. It could very well be the same thing. This just came all together. Not sure if all cameras are also, but it's made of a nice solid metal.
|
|
|

|
|
|
#6 |
|
Senior Member
Join Date: Jul 2014
Drives: 2013 Firestorm FR-S AT
Location: Smokey Mountains
Posts: 404
Thanks: 54
Thanked 261 Times in 138 Posts
Mentioned: 3 Post(s)
Tagged: 0 Thread(s)
|
Be careful buying Rydeen cameras from ebay. I and another forum member purchased what we thought were Rydeen cameras from an eBay vendor but were knockoffs. Real Rydeen cameras should come with a model/serial# sticker on them and should work with 6.0V. My Bespoke/Pioneer, PT546-00140 HU puts out 6.11V. Ours did not have the sticker and did not work with our HUs with SVXdc's wire harness. http://www.ft86club.com/forums/showt...ghlight=rydeen
I contacted Rydeen about vendors selling Rydeen cameras on eBay and this was their reply: From their director of sales and marketing: "We do not sell to any On Line merchants and if a product is missing a serial number it will not have a warranty no matter what it's origin is. Unlike Costco, we do not sell "bulk" items. Sorry, I can't be of more assistance but when you buy products from ebay you are taking a risk. Good luck with your purchase." I found out later that the only authorized Rydeen online vendor is Al & Ed's Autosound. http://www.al-eds.com/Rydeen-Mobile-...0B-p22239.html Nice guide zthang. It's easier to route the camera cable from the camera along the top of the trunk driver's side panel, diagonally under the rear left seat (remove the 10mm seat bolt and lift the seat up just enough to run the wire under it), and then tucked under the center console to the HU. No need to remove any panels. From your last pic your camera, like mine, is also angled down too much and is picking up too much of the bumper. I was going to put a rubber shim under mine, like another forum member did, but have not done it yet. http://www.ft86club.com/forums/showp...9&postcount=16 See my camera install in my FRS here: http://www.ft86club.com/forums/showp...5&postcount=20 I used AutoHarnessHouse's wire harness. http://www.autoharnesshouse.com/19867.html Last edited by RickyBobby; 12-18-2015 at 10:14 AM. |
|
|

|
| The Following User Says Thank You to RickyBobby For This Useful Post: | SlammedSilly (12-18-2015) |
|
|
#7 |
|
Senior Member
Join Date: Jul 2015
Drives: 2013 Argento FR-S
Location: Partlow, Va
Posts: 162
Thanks: 33
Thanked 39 Times in 26 Posts
Mentioned: 0 Post(s)
Tagged: 2 Thread(s)
|
Would this work on a 2013 frs without Nav ? I have the the touchscreen radio and all with the nav button. Just not the GPS shit
Sent from my SM-N900V using Tapatalk |
|
|

|
|
|
#8 | |
|
Junior Member
Join Date: Dec 2015
Drives: 2014 Subaru BRZ
Location: HTown
Posts: 4
Thanks: 0
Thanked 2 Times in 2 Posts
Mentioned: 0 Post(s)
Tagged: 0 Thread(s)
|
Quote:
Yea, it is a waste of about 25% of the screen space. But I figure, I can still see the sky above the house across the street so it's no biggie. Plus I don't have another foam gasket/washer to seal off the camera if I took it off again. |
|
|
|

|
|
|
#9 |
|
Senior Member
Join Date: Jul 2015
Drives: 2015 Ultramarine FR-S
Location: Philadelphia, PA
Posts: 382
Thanks: 550
Thanked 51 Times in 46 Posts
Mentioned: 5 Post(s)
Tagged: 0 Thread(s)
|
this looks stupid easy, deff may be worth it
|
|
|

|
|
|
#10 |
|
Senior Member
Join Date: Jul 2014
Drives: 2013 Firestorm FR-S AT
Location: Smokey Mountains
Posts: 404
Thanks: 54
Thanked 261 Times in 138 Posts
Mentioned: 3 Post(s)
Tagged: 0 Thread(s)
|
Yes, I do not have Nav. For an FRS you will need to install a reverse trigger wire. The BRZ does not need one.
|
|
|

|
|
|
#11 |
|
Senior Member
Join Date: Jul 2015
Drives: 2013 Argento FR-S
Location: Partlow, Va
Posts: 162
Thanks: 33
Thanked 39 Times in 26 Posts
Mentioned: 0 Post(s)
Tagged: 2 Thread(s)
|
That's not bad. I'm sure there is a write up somewhere.
Sent from my SM-N900V using Tapatalk |
|
|

|
|
|
|
|
 |
|
|
 Similar Threads
|
||||
| Thread | Thread Starter | Forum | Replies | Last Post |
| Few questions I could not google-fu answers for on rearview camera... | N757QQ | Electronics | Audio | NAV | Infotainment | 12 | 03-01-2015 01:29 AM |
| Rearview camera without drilling holes | sav | Electronics | Audio | NAV | Infotainment | 41 | 08-16-2014 01:27 AM |
| AU GT86 Rear view camera Plug-n-play on Canadian (Pioneer) navigation system ? | Simon99 | Electronics | Audio | NAV | Infotainment | 26 | 04-24-2014 04:38 PM |
| DIY: Play external video source through the rear view camera input (gauges on stereo) | robot | DIY (Do-It-Yourself) Guides | 5 | 01-31-2014 03:20 PM |