|
||||||
| Cosmetic Modification (Interior/Exterior/Lighting) Discussions about cosmetic mods. |
 |
|
|
Thread Tools | Search this Thread |
 12-30-2012, 05:52 PM
|
#1 |
|
I Love custom Turbo kits

Join Date: Mar 2012
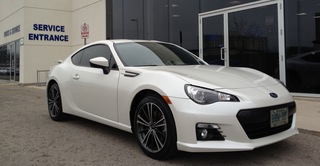
Drives: Limited BRZ
Location: Miami
Posts: 10,770
Thanks: 20,004
Thanked 8,346 Times in 4,361 Posts
Mentioned: 441 Post(s)
|
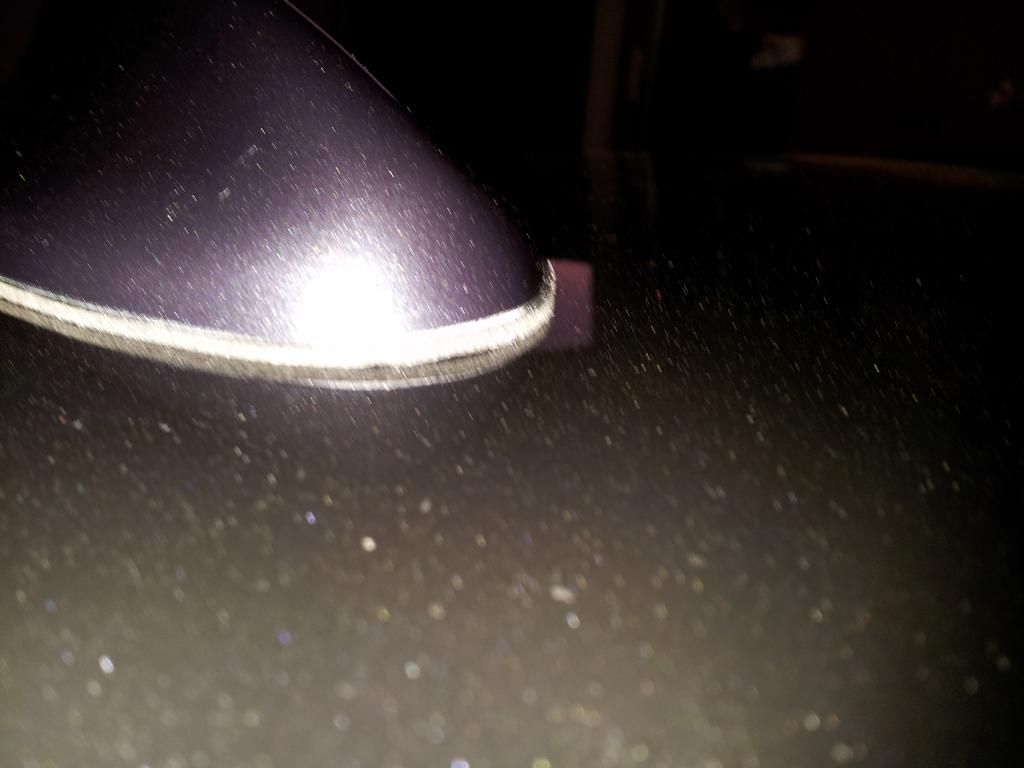
VG Sharkfinn Antenna. Could not make a 100% Seal, gaps in tape
I bought and installed the VG Sharkfinn. I tried three different times to install it, every single time there were gaps in the tape and I could never made them disappear completely. First two times I followed instructions (clean, dry, measure, tape, test fit, remove tape, press front part for 1 minute, press back for 1 minute, all set and done).
The third time (determined to get it to work) I got on a ladder and put all the weight of my body into the VG Sharkfinn, I could NEVER make the gap disappear. This last time was the best one (in terms of amount of gap). It initially looked completely sealed but gaps would come back 4-5 days later. I am not badmouthing them AT ALL. They are stand up guys, very friendly, with good customer service and they stood 10000% behind their product. They helped me all along the way and made things right with me at the end. They even shipped me different sharkfins to try. I just couldn't get it right (even put a small dent in the window frame trying to put so much force into the finn).  The Finn is awesome, extremely pretty, but I just could never get it to fit. Maybe I am too picky and wanted 100% seal on the tape, I know some people who have gaps in the tape and don't mind. I was concerned with water getting in there, especially since the gap was in the front. Just wanted to share my experience with the community, knowledge is power.
__________________
Last edited by Sportsguy83; 06-18-2013 at 08:24 AM. |

|

|
| The Following User Says Thank You to Sportsguy83 For This Useful Post: | Marchy (11-04-2014) |
|
12-30-2012, 06:04 PM
|
#2 |
|
Senior Member

Join Date: May 2012
Drives: JRSC'd Asphalt FR-S
Location: SoCal
Posts: 1,317
Thanks: 868
Thanked 436 Times in 260 Posts
Mentioned: 9 Post(s)
|
Same here, I got the VG fin as well but the seal never seems complete, I had a gap if you look at the reflection of the paint, but I tried to push the fin down and then I tried to press down the foam for a seal, but lets see how it will be in the next few days. Another thing that happened would be the foam not flattening and they end up pinching on each other, hope it won't cause a problem.
How did you remove it and reinstall? Just blowdryer and taking it off? Would the adhesive still work as well? Just curious because I forgot to double check whether the screw was on tightly or not (I'm sure it should be) but just incase it comes off. |
|
|
|
|
12-30-2012, 06:19 PM
|
#3 |
|
FT86Club Vancouver

Join Date: Jun 2012
Drives: BRZ Sport-Tech; Drove: MR-S, AE86
Location: Vancouver, BC
Posts: 2,533
Thanks: 391
Thanked 1,180 Times in 634 Posts
Mentioned: 16 Post(s)
|
I've order mine but have not got it yet.
I am hoping with the help of a blow dryer/heat gun and maybe installing it in the spring/summer season would help the adhesive stick better providing a better seal. Someone please try this method and let us know if it works any better. As for reception of these things; I know it's not a noticeable change in signal but have you guys thought of adding more copper wiring inside there for an even stronger reception?
__________________
1984 AE86 BT 20V 5MT 2007-2012
2000 MR-S 5MT 2010-2012 2013 BRZ Sport-Tech 6AT Since '12 (OEM+ STI tS Build) 2015 Lexus IS250 AWD F-Sport 2 2015-2018 2018 Lexus NX300 F-Sport 3 Since '18 |
|
|
|
|
12-30-2012, 06:43 PM
|
#5 |
|
Senior Member

Join Date: Sep 2012
Drives: 2013 Subaru BRZ in DGM
Location: Miami, FL
Posts: 230
Thanks: 61
Thanked 63 Times in 54 Posts
Mentioned: 21 Post(s)
|
My BeatSonic fit pretty well. And I'm OCD!
Sent from my iPhone using Tapatalk |
|
|
|
| The Following 3 Users Say Thank You to DGMBRZ For This Useful Post: |
|
12-30-2012, 06:59 PM
|
#6 |
|
Pull my finger...

Join Date: Dec 2011
Drives: Silver Scion Slushbox
Location: Illinois
Posts: 996
Thanks: 476
Thanked 367 Times in 226 Posts
Mentioned: 26 Post(s)
|
How are you all cleaning the area?
I always strip any wax or protective sealants before applying body moldings or adhesive. I use a product called prep-sol and then follow up with pure isopropyl (industrial/electronics grade) beforehand. For me, best practice would be installing when ambient temps are 70f or above. Not sure I want to use a focused heat method on a cold panel. |
|
|
|
|
12-30-2012, 07:18 PM
|
#7 | |
|
Senior Member
Join Date: Jul 2010
Drives: Subaru BRZ Limited
Location: Toronto, Canada
Posts: 2,624
Thanks: 763
Thanked 1,586 Times in 776 Posts
Mentioned: 10 Post(s)
|
Quote:
__________________
 |
|
|
|
|
|
12-30-2012, 07:30 PM
|
#8 | ||||
|
I Love custom Turbo kits
Join Date: Mar 2012
Drives: Limited BRZ
Location: Miami
Posts: 10,770
Thanks: 20,004
Thanked 8,346 Times in 4,361 Posts
Mentioned: 441 Post(s)
|
Quote:
Quote:
Quote:
I removed it two ways, one just using dental floss from the gap, and working around it. then for the glue still on the roof, used something like goo gone to remove it. The other way, using a heat gun to make the glue easier to pull and slowly peeling away the excess glue on the roof. Quote:

__________________
Last edited by Sportsguy83; 12-30-2012 at 08:37 PM. |
||||
|
|
|
|
12-30-2012, 08:02 PM
|
#9 |
|
Senior Member
Join Date: Oct 2012
Drives: Argento FR-S
Location: So Cal
Posts: 222
Thanks: 9
Thanked 18 Times in 17 Posts
Mentioned: 1 Post(s)
|
I just installed my VG Shark fin antenna right now. and I see what you guys are saying about the small gap in the front but I think its ok. I managed to seal it without a gap.
I did use a heat gun to warm the roof a little and then after i stuck it on i went around and warmed up the tape then pushed it down a little more. |
|
|
|
|
12-30-2012, 08:08 PM
|
#10 |
|
Senior Member
Join Date: Oct 2012
Drives: Argento FR-S
Location: So Cal
Posts: 222
Thanks: 9
Thanked 18 Times in 17 Posts
Mentioned: 1 Post(s)
|
anyone have a pic of the gap so we can compare?
|
|
|
|
|
12-30-2012, 08:24 PM
|
#11 | |
|
I Love custom Turbo kits
Join Date: Mar 2012
Drives: Limited BRZ
Location: Miami
Posts: 10,770
Thanks: 20,004
Thanked 8,346 Times in 4,361 Posts
Mentioned: 441 Post(s)
|
Quote:
I have pics of the fin after first removal, showing the gap if you did not position the fin specifically where the BRZ base did not touch any part of it, but I did not take one of the gap.
__________________
|
|
|
|
|
|
12-30-2012, 08:25 PM
|
#12 | |
|
Senior Member
Join Date: Oct 2012
Drives: Argento FR-S
Location: So Cal
Posts: 222
Thanks: 9
Thanked 18 Times in 17 Posts
Mentioned: 1 Post(s)
|
Quote:
|
|
|
|
|
| The Following User Says Thank You to EBMCS03 For This Useful Post: | Sportsguy83 (12-30-2012) |
|
12-30-2012, 08:41 PM
|
#13 | |||
|
Senior Member
Join Date: May 2012
Drives: JRSC'd Asphalt FR-S
Location: SoCal
Posts: 1,317
Thanks: 868
Thanked 436 Times in 260 Posts
Mentioned: 9 Post(s)
|
Quote:
Quote:
Quote:
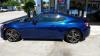
 and after I used the hair dryer method..  I hope it stays this way and not lift. |
|||
|
|
|
| The Following User Says Thank You to Wes For This Useful Post: | Sportsguy83 (12-30-2012) |
|
12-30-2012, 08:42 PM
|
#14 | ||
|
I Love custom Turbo kits
Join Date: Mar 2012
Drives: Limited BRZ
Location: Miami
Posts: 10,770
Thanks: 20,004
Thanked 8,346 Times in 4,361 Posts
Mentioned: 441 Post(s)
|
Quote:
Quote:
I hope it does work out, it looks extremely good!
__________________
|
||
|
|
|
| The Following User Says Thank You to Sportsguy83 For This Useful Post: | Wes (12-30-2012) |
|
|
|
|
|
|
 Similar Threads
|
||||
| Thread | Thread Starter | Forum | Replies | Last Post |
| First negative reaction to my FRS/86. Caught on tape lol. | sal | FR-S & 86 Photos, Videos, Wallpapers, Gallery Forum | 200 | 07-17-2013 04:37 PM |
| Beat-sonic JDM shark fin antenna install. | jadewbj | Cosmetic Modification (Interior/Exterior/Lighting) | 23 | 05-23-2013 01:12 AM |
| WTT: Beat-Sonic Antenna for Modelista Antenna | joergasm | Canada Classifieds | 4 | 12-10-2012 09:13 AM |
| 3M double sided tape for FR-S emblem | denverizzles | Cosmetic Modification (Interior/Exterior/Lighting) | 0 | 07-19-2012 11:03 PM |
| Painter's tape | Mazdaspeed | Cosmetic Maintenance (Wash, Wax, Detailing, Body Repairs) | 13 | 07-10-2012 10:40 PM |


 The One