


 04-16-2018, 05:37 AM
|
#85 |
|
Senior Member

Join Date: Jul 2016
Drives: BRZ, WRX
Location: Sydney, Australia
Posts: 292
Thanks: 105
Thanked 970 Times in 234 Posts
Mentioned: 2 Post(s)
Tagged: 0 Thread(s)
|
I got a bonus day working on the car today since there is a large bush fire near my work they told us to stay home.
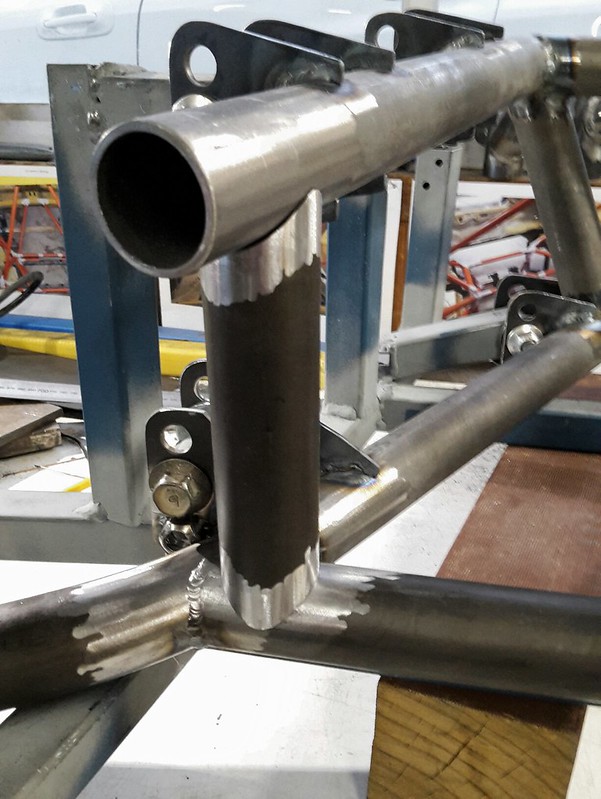
So I worked on the back half of the suspension cradle, mostly cutting and notching the two tubes that join the upper and lower sections. Also the horizontal tube that joins both sides together. I also had to do my first double notch where two tubes meet in the same spot. 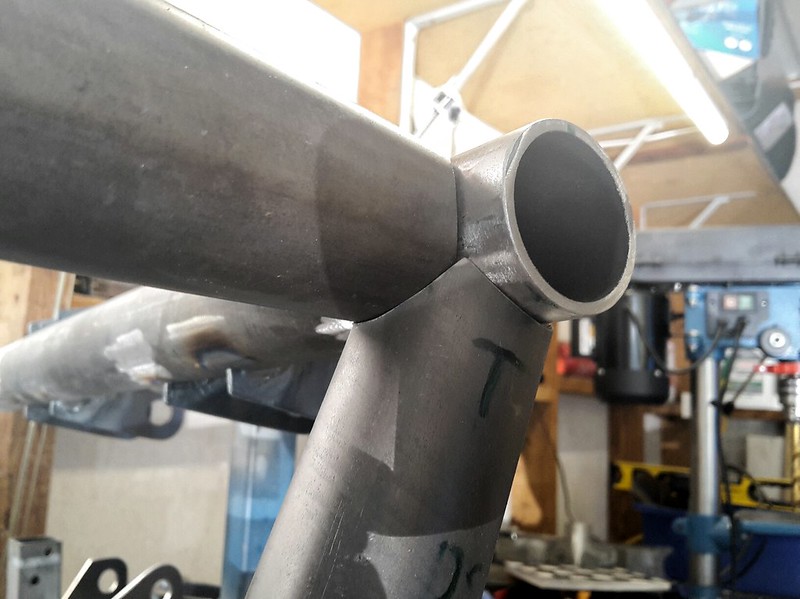 Here it is all cleaned up and ready to weld. 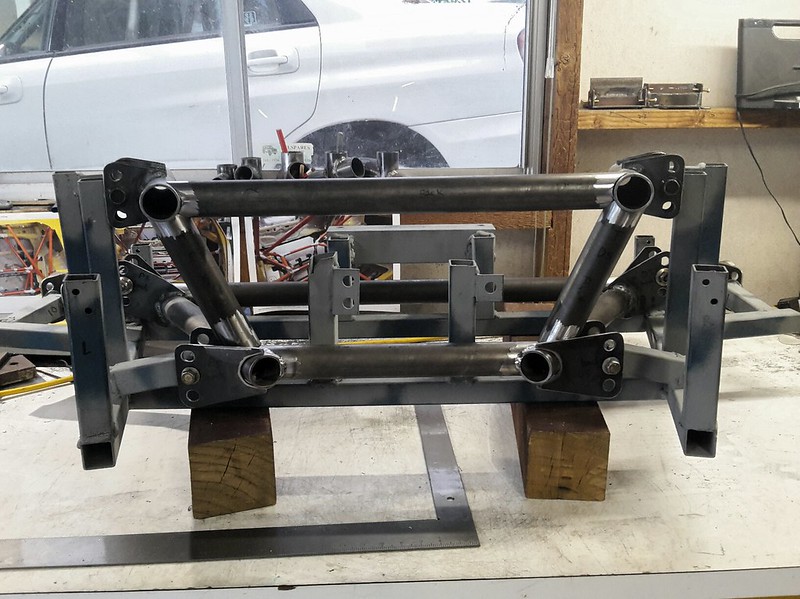 I didn't have enough time to weld it all but made a start and got the horizontal tube welded in. 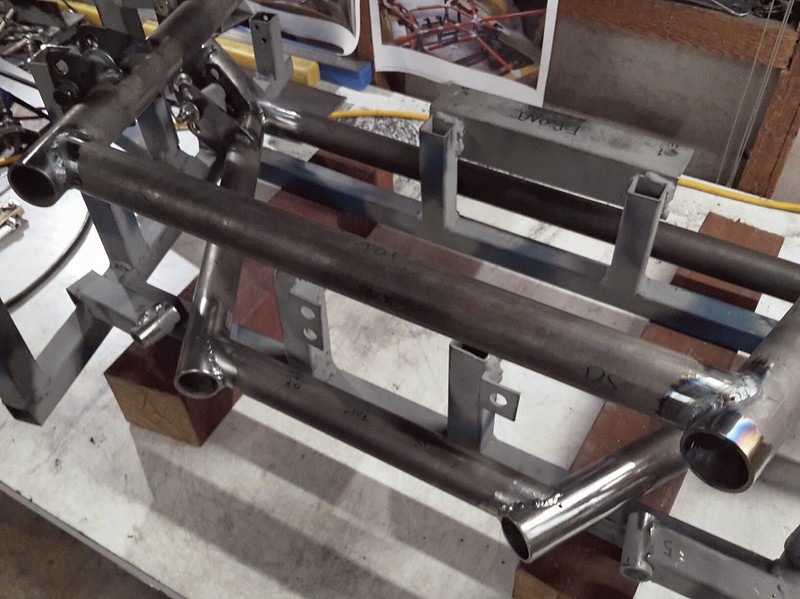 I have been thinking about the diff mounting and have decided to make it with some spacers that will allow me to lift the diff 26mm by removing the spacers. I'm not sure its necessary but it would be difficult to change later if the diff sits too low in the lowest ride height setting. |

|

|
| The Following 3 Users Say Thank You to DIY For This Useful Post: |
|
04-17-2018, 05:35 AM
|
#86 |
|
Senior Member
Join Date: Jul 2016
Drives: BRZ, WRX
Location: Sydney, Australia
Posts: 292
Thanks: 105
Thanked 970 Times in 234 Posts
Mentioned: 2 Post(s)
Tagged: 0 Thread(s)
|
Work was closed again today but I had my kids so only managed a few hours on the car whilst they had their afternoon nap.
I've now completely welded up all the tube I cut and notched yesterday, plus I have welded on the final tabs which are for the rear lower control arms. 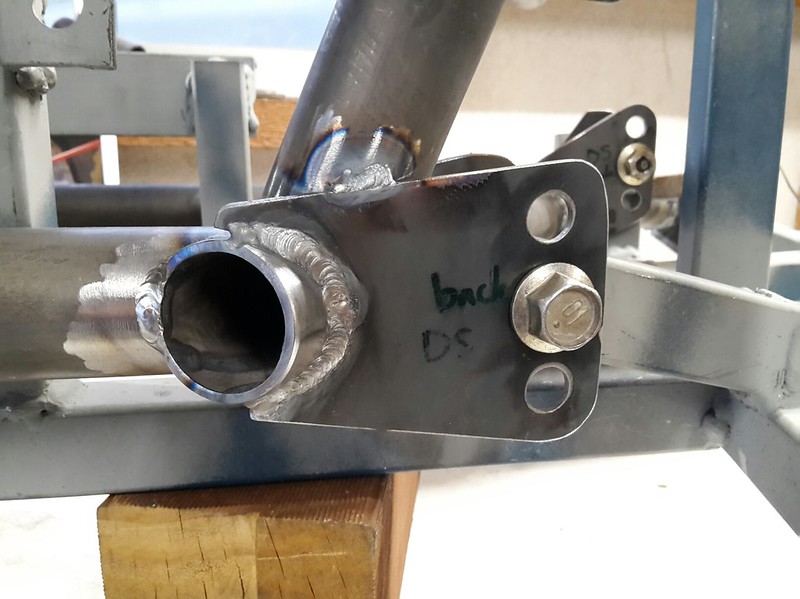 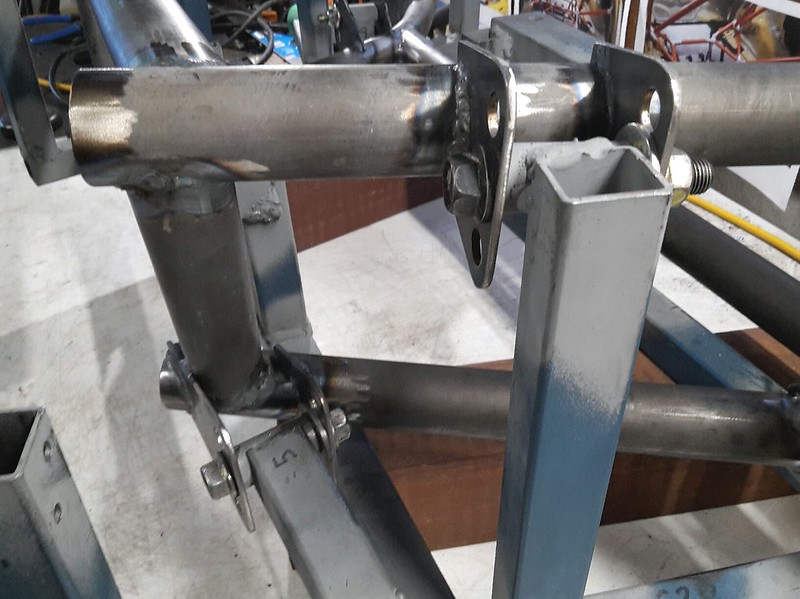 Some of the welds were hard to reach but I am able to flip the jig into almost any position to make it easier. There are a couple of spots that I will need to complete with the frame out of the jig too. 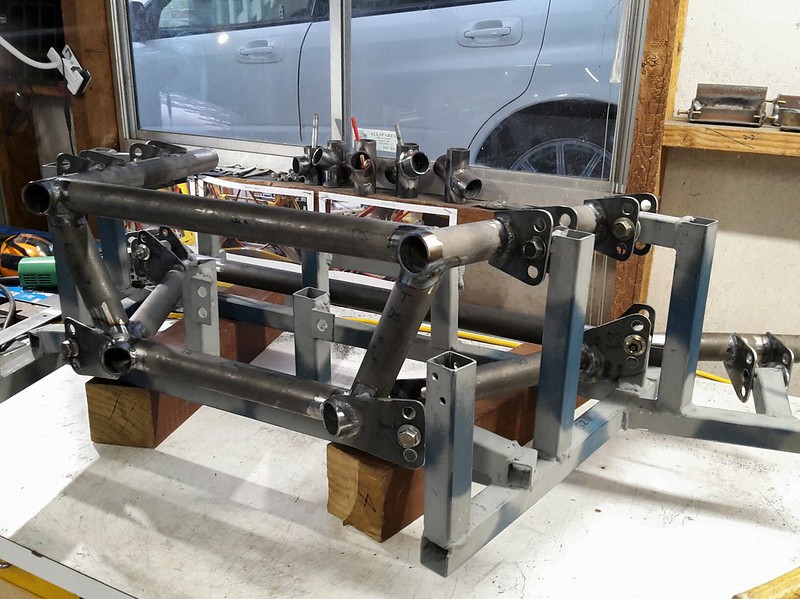 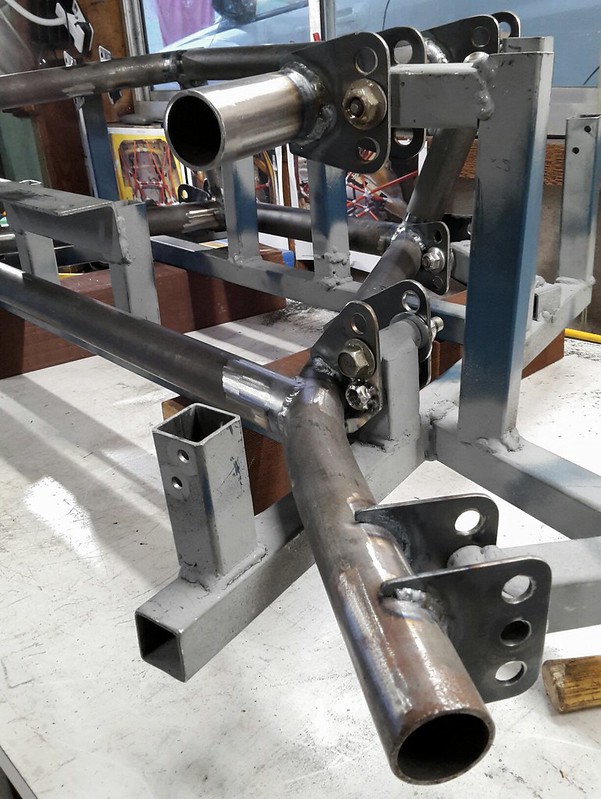 A couple more tubes to add and then I'll be working on mounting the diff. |
|
|
|
| The Following 3 Users Say Thank You to DIY For This Useful Post: |
|
04-17-2018, 10:20 AM
|
#87 |
|
Senior Member

Join Date: Apr 2013
Drives: 2014 BRZ
Location: Louisiana
Posts: 178
Thanks: 31
Thanked 122 Times in 67 Posts
Mentioned: 0 Post(s)
Tagged: 0 Thread(s)
|
Rear subframe is looking great. excited to see it all come together.
|
|
|
|
| The Following User Says Thank You to laextreme5 For This Useful Post: | DIY (04-17-2018) |
|
04-18-2018, 03:41 AM
|
#88 |
|
Senior Member
Join Date: Jul 2016
Drives: BRZ, WRX
Location: Sydney, Australia
Posts: 292
Thanks: 105
Thanked 970 Times in 234 Posts
Mentioned: 2 Post(s)
Tagged: 0 Thread(s)
|
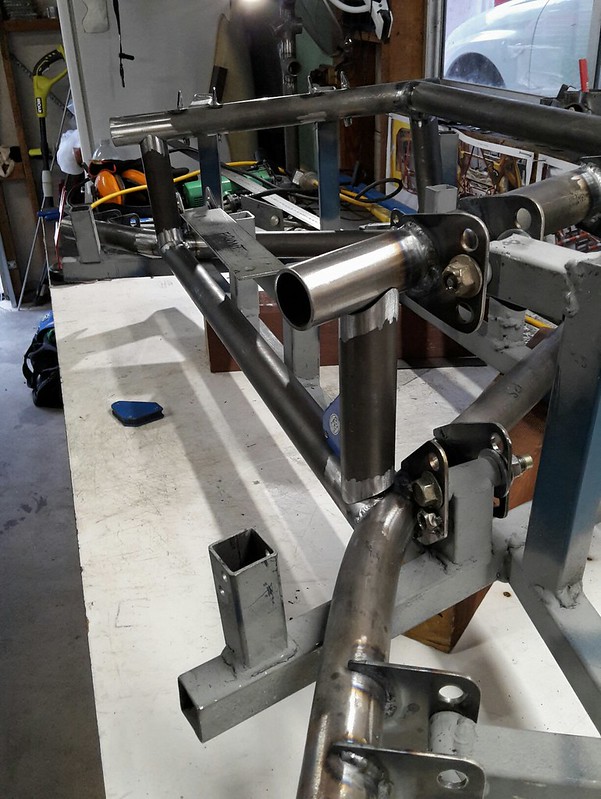
I had a small amount of time on the car again today and managed to cut and notch both the vertical tubes for the front of the subframe.
|
|
|
|
| The Following 2 Users Say Thank You to DIY For This Useful Post: | Ash_89 (03-01-2021), Irace86.2.0 (09-15-2018) |
|
04-25-2018, 04:46 AM
|
#89 |
|
Senior Member
Join Date: Jul 2016
Drives: BRZ, WRX
Location: Sydney, Australia
Posts: 292
Thanks: 105
Thanked 970 Times in 234 Posts
Mentioned: 2 Post(s)
Tagged: 0 Thread(s)
|
Hey guys,
A small update today, I got the vertical tubes welded in and then proceeded to cut and notch the final horizontal tube. 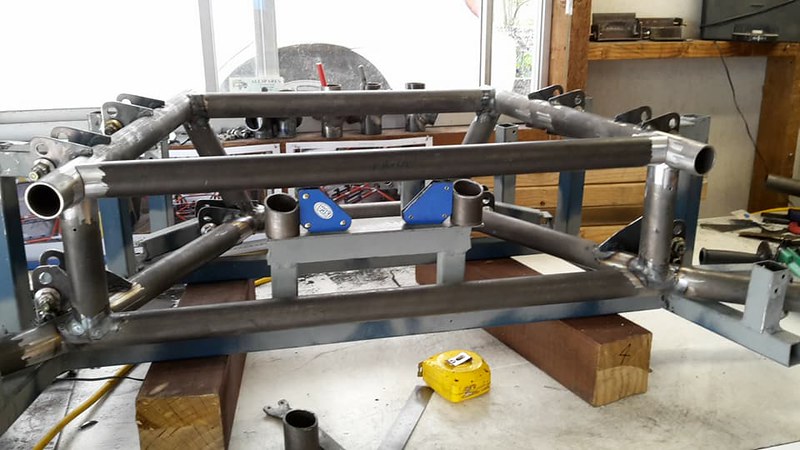 Notches came out nice and tight. 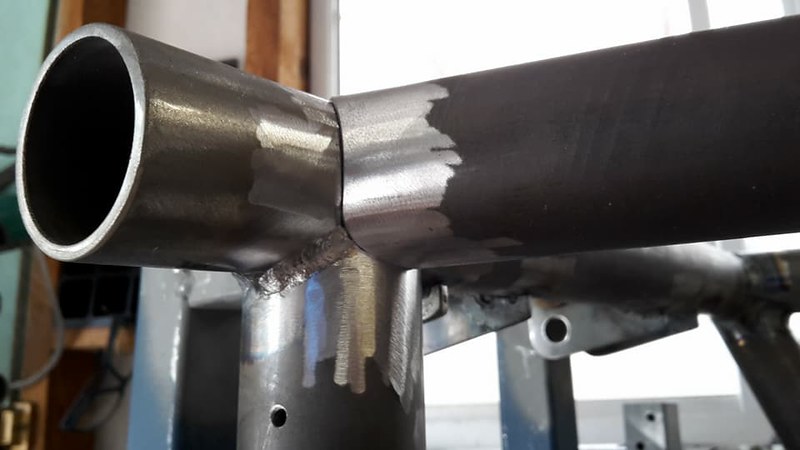 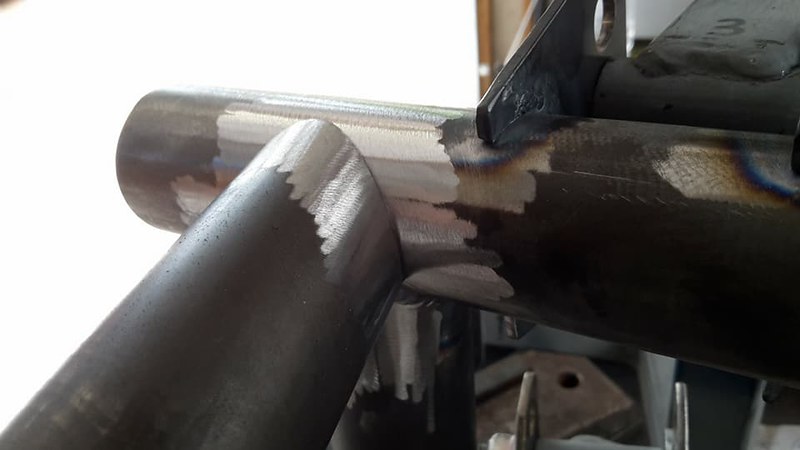 Then welded it in place. 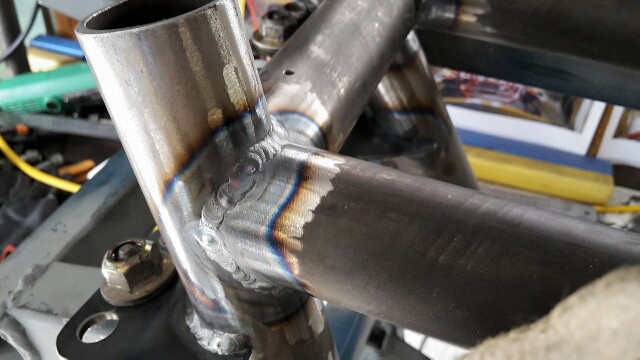 and finally I began making the front diff mounts, these will have captive nuts welded in the end of the tube but more on that later. 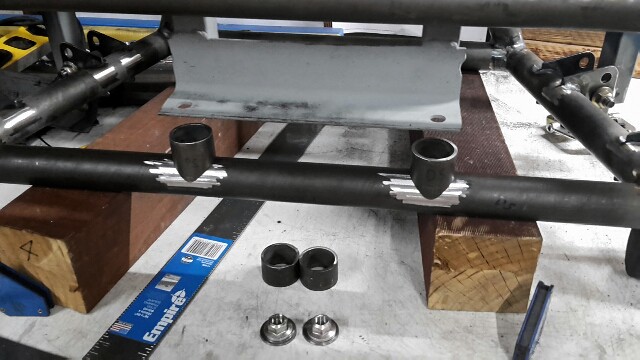
|
|
|
|
| The Following 2 Users Say Thank You to DIY For This Useful Post: | Ash_89 (03-01-2021), Irace86.2.0 (09-15-2018) |
|
04-28-2018, 06:09 AM
|
#91 |
|
Senior Member
Join Date: Jul 2016
Drives: BRZ, WRX
Location: Sydney, Australia
Posts: 292
Thanks: 105
Thanked 970 Times in 234 Posts
Mentioned: 2 Post(s)
Tagged: 0 Thread(s)
|
Major update time! the cradle is out of the jig and I have a bit of a problem but first lets look at those diff mounts.
For the front diff mounts I have simply welded a nut into the end of the tube. I had some leftover circles for the end caps from making the tabs with my hole saw. 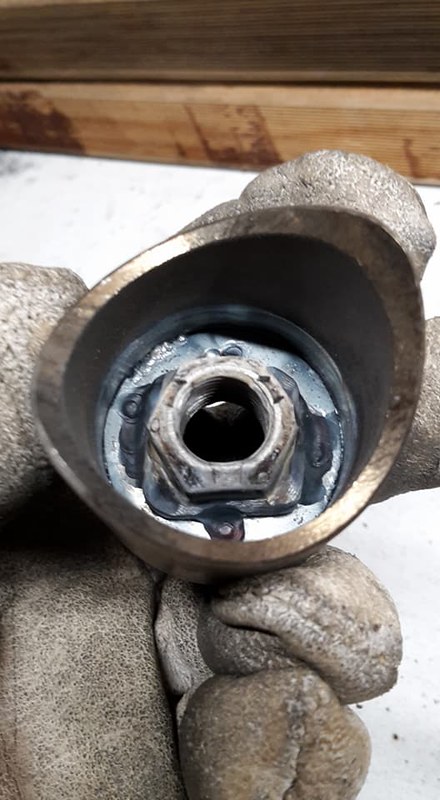 This is the mounting end with the captive nut showing. 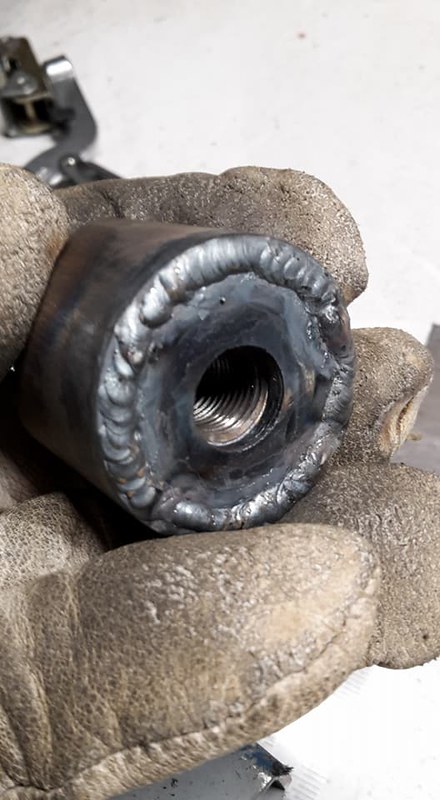 After flattening off the mounting surface on my bench grinder they were welded into position. You will notice a gap between the jig and the diff mounts, this will be filled with some aluminium spacers my friend is turning on the lathe. The gap is 26mm which is the same as the gap between the two holes on the rear of the diff cover. This allows me to lift the diff by 26mm if required by removing the spacers. The reason for this would be better drive shaft angles at lower ride heights, it may not ever be used but it was easy to add now. 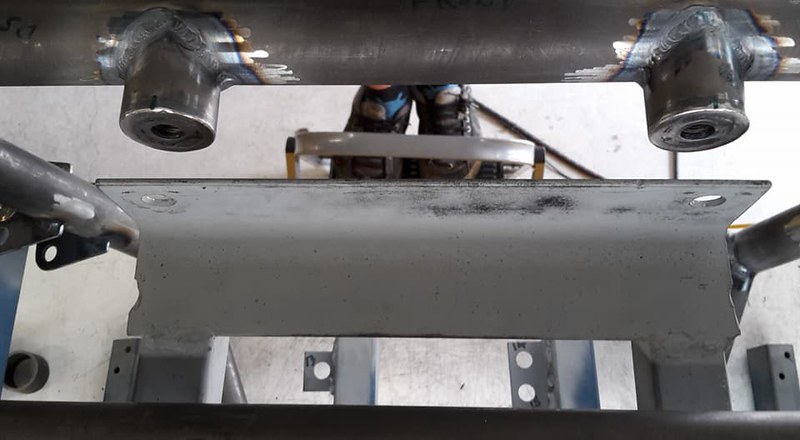 So with those done it was time to work on the rear diff mounts. I decided to just make one side, tack weld it in and then mount the diff before making the other side and finishing the welds. This is because the factory frame has captive nuts that slide around and mine are fixed position so I need to get the alignment almost perfect. 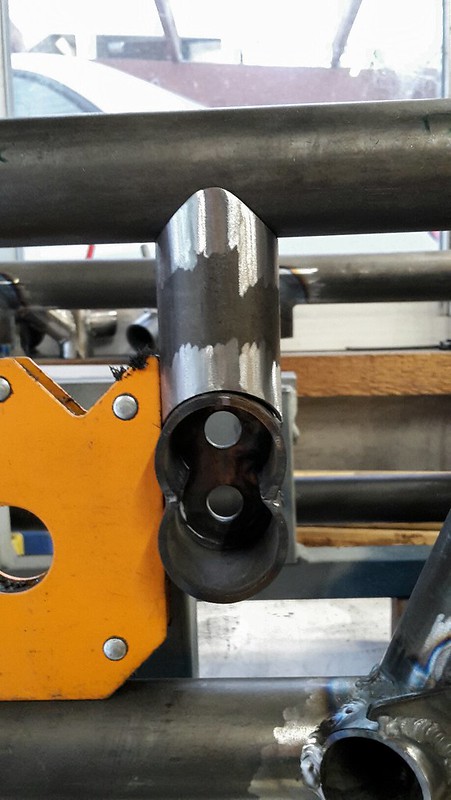 This rear mount was fun to make, I had to make a lot of cuts with the angle grinder but it all came together real nice! This mounts to the single hole on the diff cover and has two holes 26mm apart. 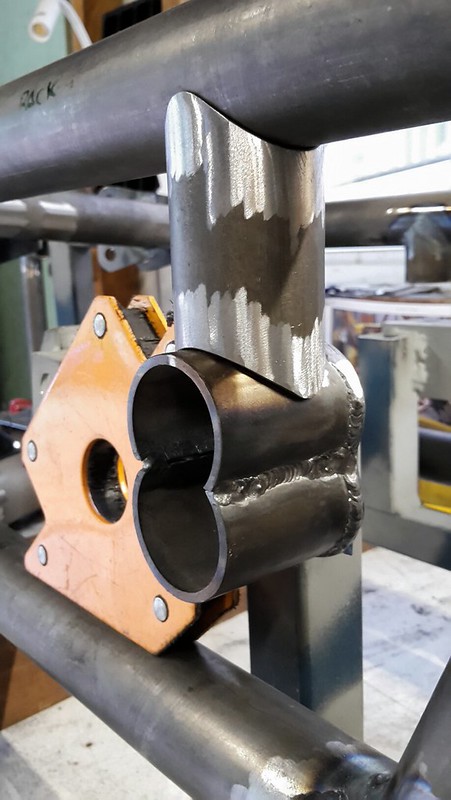 With the rear diff mount tacked in place I started to remove the cradle from the welding jig. It came out rather easy as I had used a washer with each control arm mount to get the gap I wanted, so once the washers were tapped out the frame separated from the jig quiet easily. 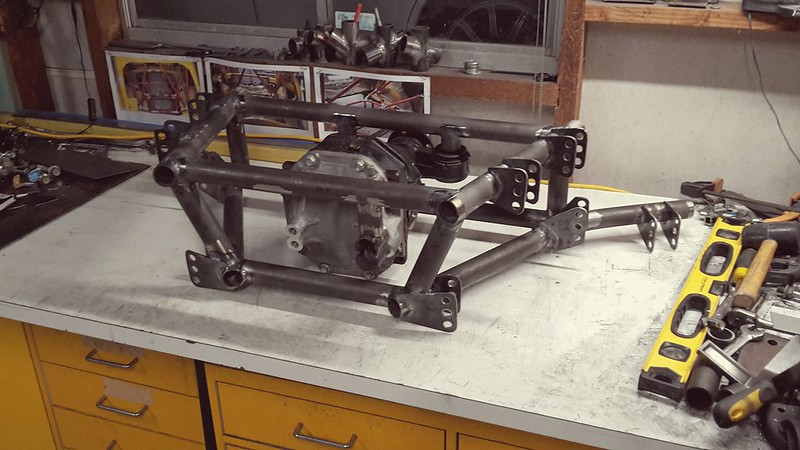 Alright so this is where I ran into a bit of a problem. The snout at the front of the diff is making contact with the lower horizontal tube and preventing me from mounting it in the correct position.  It needs about 25mm of the tube removed from a 38mm tube, so I can either notch that out then plate and reinforce the area or another idea I has was to weld this bend in it and cut out the straight part. I'd prefer not to do the bend as I will prevent me tucking the rear diffuser up as high as possible. Got some thinking to do.... 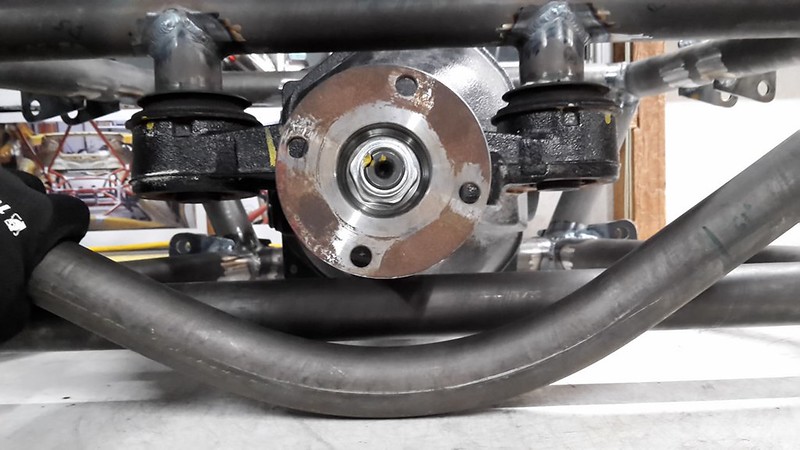
|
|
|
|
| The Following 3 Users Say Thank You to DIY For This Useful Post: |
|
05-01-2018, 02:48 PM
|
#92 |
|
Senior Member
Join Date: Apr 2013
Drives: 2014 BRZ
Location: Louisiana
Posts: 178
Thanks: 31
Thanked 122 Times in 67 Posts
Mentioned: 0 Post(s)
Tagged: 0 Thread(s)
|
Maybe purchase some more tubing with an ID the size of the OD of the current tubing. Slip it over the bottom half to use as a reinforcement to cut the 25mm out. That way you have minimal lower intrusion into your diffuser area.
|
|
|
|
|
05-01-2018, 04:52 PM
|
#93 |
|
Member
Join Date: May 2015
Drives: it's grey
Location: Cave Creek, AZ
Posts: 99
Thanks: 15
Thanked 39 Times in 23 Posts
Mentioned: 0 Post(s)
Tagged: 0 Thread(s)
|
cut a wide U channel from it for clearance (belly the pipe) and weld over a piece of plate on the removed section.
|
|
|
|
|
05-02-2018, 01:33 AM
|
#94 |
|
Junior Member

Join Date: Dec 2017
Drives: 2017 GT86 Pro
Location: UK
Posts: 4
Thanks: 0
Thanked 5 Times in 2 Posts
Mentioned: 0 Post(s)
Tagged: 0 Thread(s)
|
Amazing work, subscribed! Glad to see you reference Binky

|
|
|
|
|
05-02-2018, 05:22 AM
|
#95 |
|
Senior Member
Join Date: Jul 2016
Drives: BRZ, WRX
Location: Sydney, Australia
Posts: 292
Thanks: 105
Thanked 970 Times in 234 Posts
Mentioned: 2 Post(s)
Tagged: 0 Thread(s)
|
Thanks for the input guys, I have had a chat with my mate that did the FEA on the rear end and we have come up with a solution but I just have not had the time to do much during the week.
The tube has now been notched giving full clearance to the diff. You can see in the photo that it is bolted in place in the correct position, temporary spacers made with tube are there until I get the proper ones made. 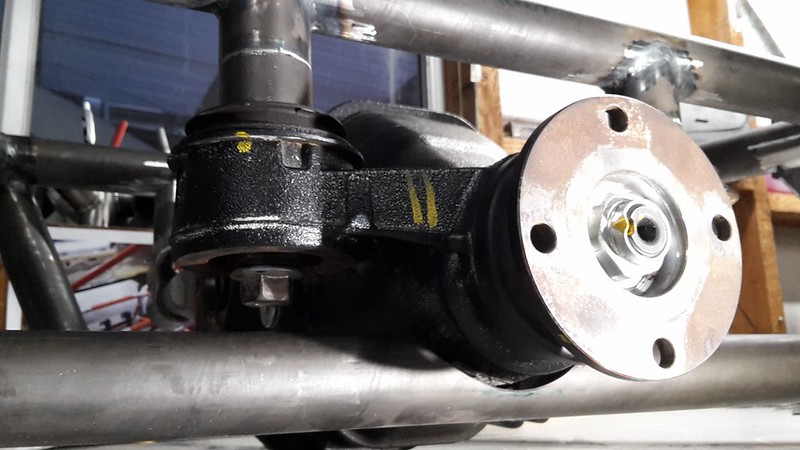 [/url] [/url]I then spent a little time making a patch to weld into the area that was notched. This is 3mm thick and the tube is 2.6mm wall. I bent this by hand with nothing more than a vice and a hammer, it took a while to get the curve to match the notch. 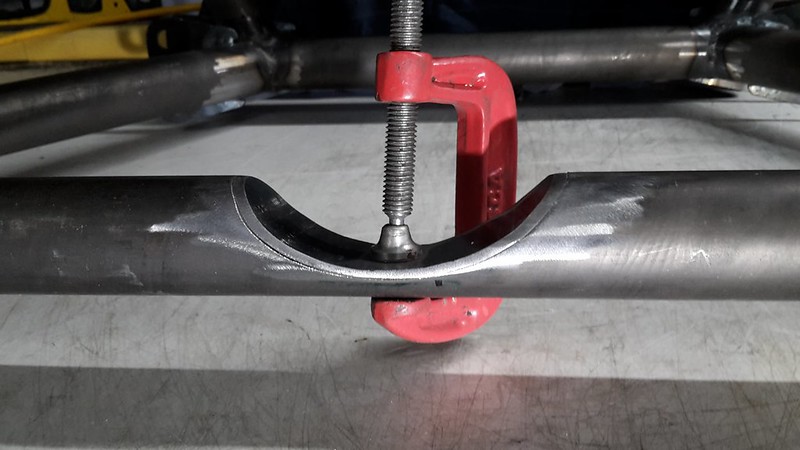 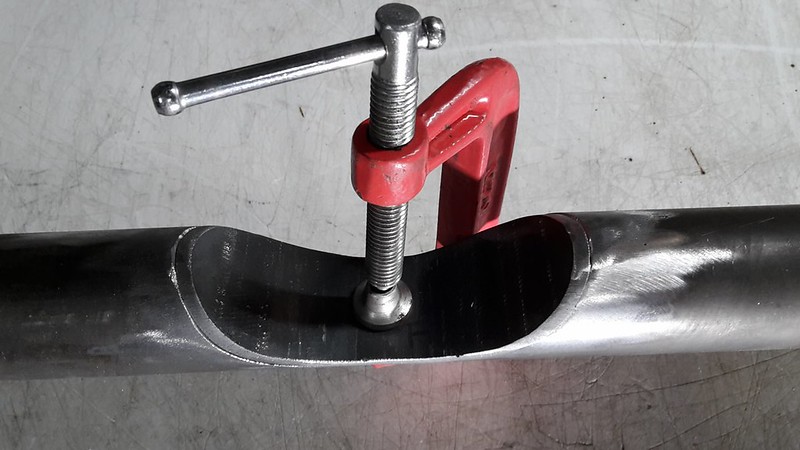 As mentioned before I was worried about reducing ground clearance if I added material to the bottom of the notched tube. So I placed the cradle in the car to take a look and I don't think it will be an issue at all as its not the lowest part of the frame. 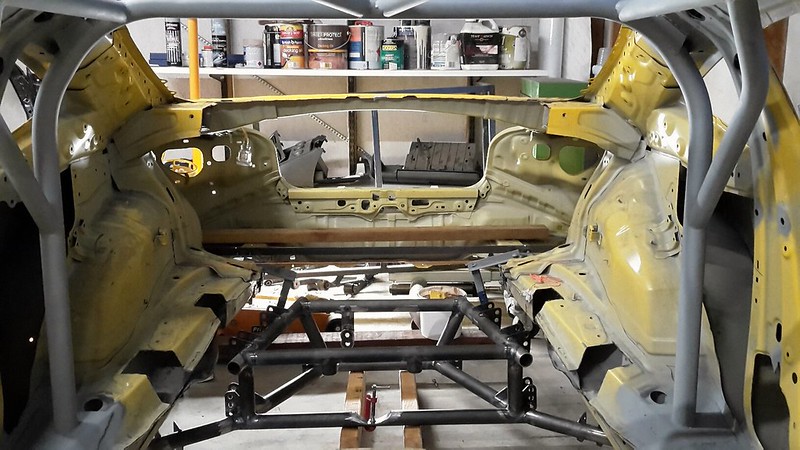 So the solution will involve adding to the bottom of the tube, there are a few ways I could do it, some easier than others but maybe less aesthetically pleasing to the eye. This weekend I hope to get it done so I can continue on with the rear diff mounts. |
|
|
|
| The Following 3 Users Say Thank You to DIY For This Useful Post: |
|
05-06-2018, 06:27 AM
|
#96 |
|
Senior Member
Join Date: Jul 2016
Drives: BRZ, WRX
Location: Sydney, Australia
Posts: 292
Thanks: 105
Thanked 970 Times in 234 Posts
Mentioned: 2 Post(s)
Tagged: 0 Thread(s)
|
Ok mega update time!
Picking up where we left off I started by fixing my issue with the notched tube for diff clearance. I took a unused bend I had lying around from building the roll cage and neatly sliced the bend off just above the half way mark. 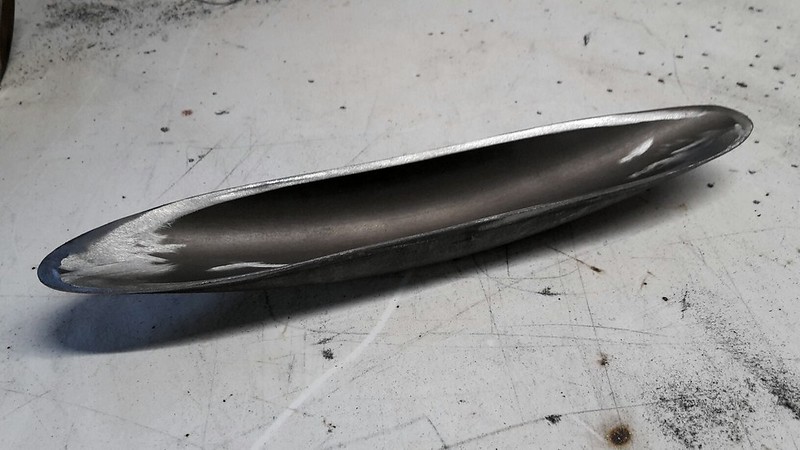 I then had to notch the ends of it until if fit snug on a flat piece if tube. 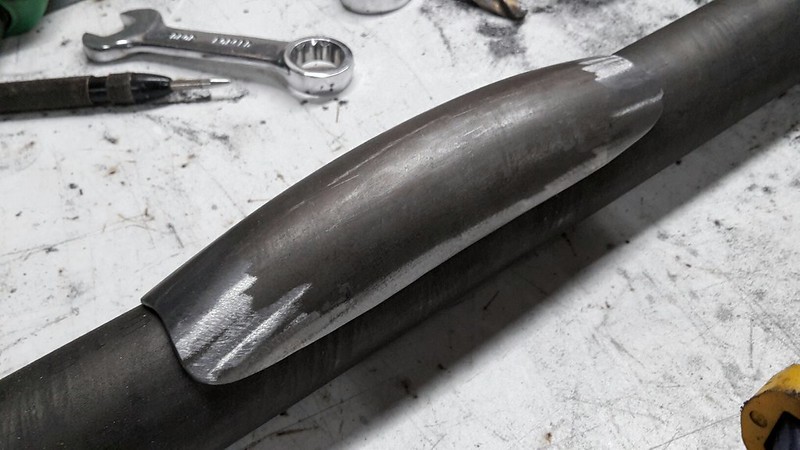 Then after a whole lot of welding it was all in place.  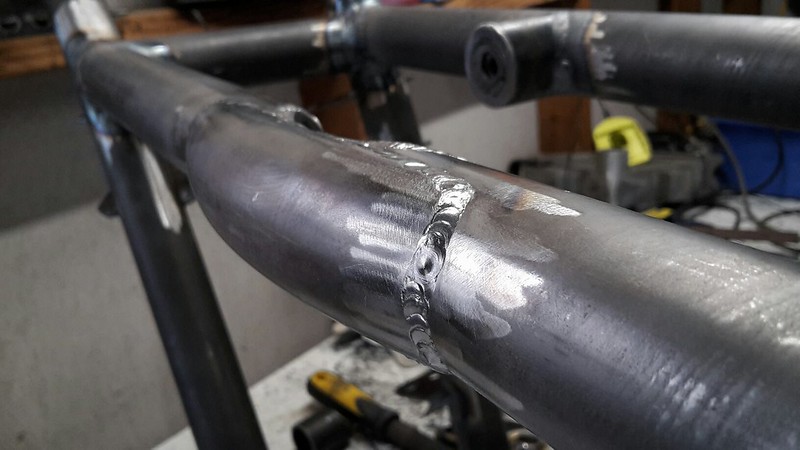 I'm happy with how it has turned out and I have no concern at all that the tube may now be weaker. Looking at the FEA simulation this is one of the least stressed tubes in the whole structure. Next up I decided to add a few little extra braces for some of the longer tabs where the control arms attach, just to make sure they would be stiff enough. 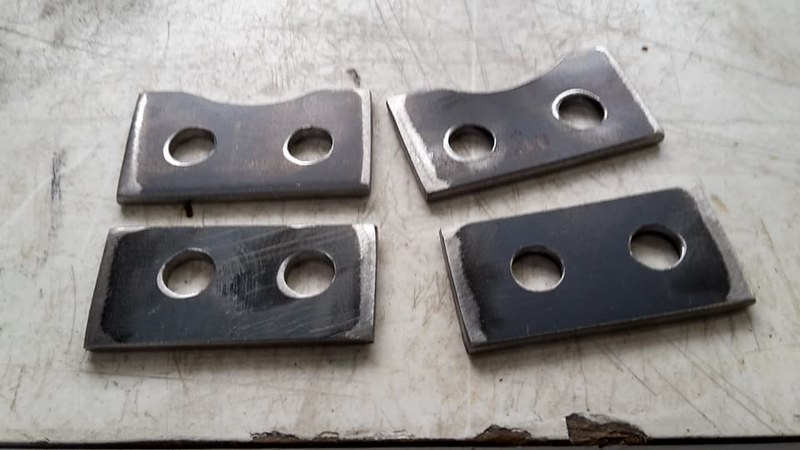 Then welded them into position. Easy job but still eats up a lot of time. 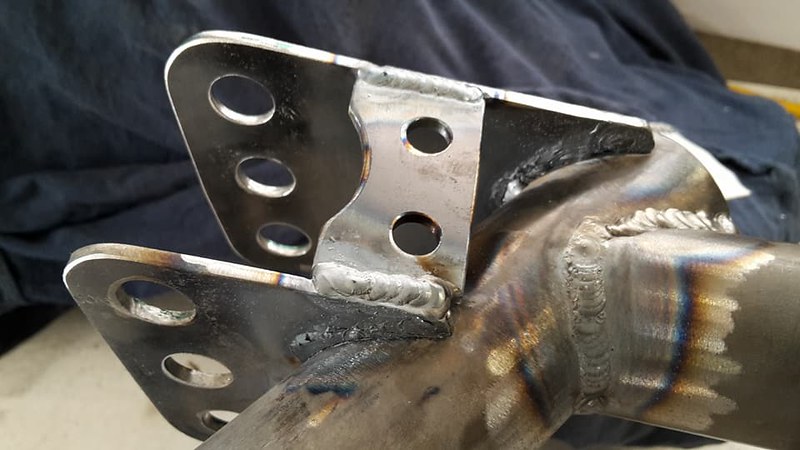 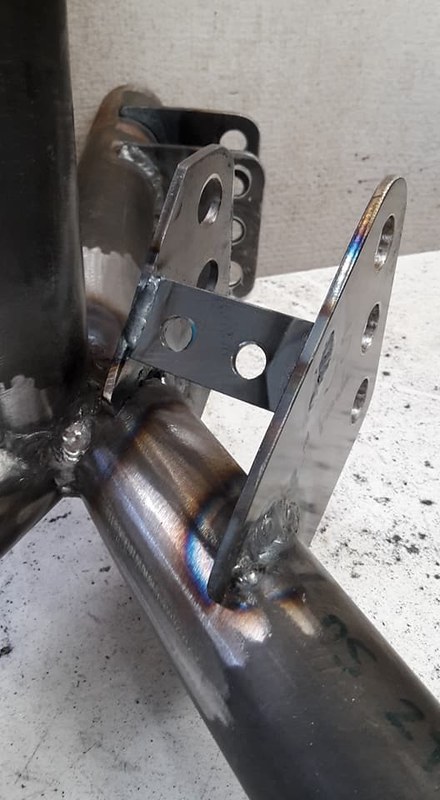 With that done it was back to mounting the diff. My mate turned up some aluminium spacers for me so I can adjust the height at the front diff mounts. They felt a little heavy so I drilled them out a little, turned out to be a complete waste of time though as not much weight was saved. 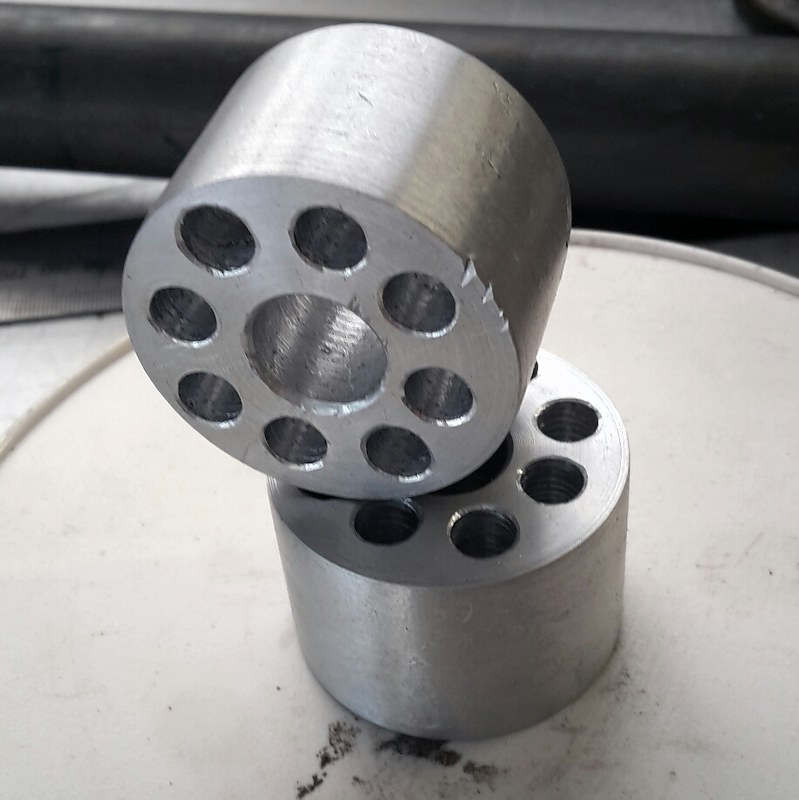 I then completed the welds on the rear diff mount I had previously tacked into position. 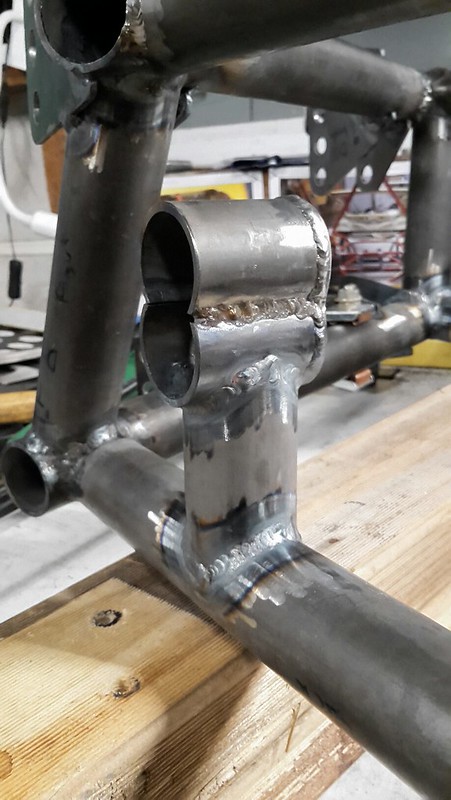 and then began to fabricate the final diff mount. 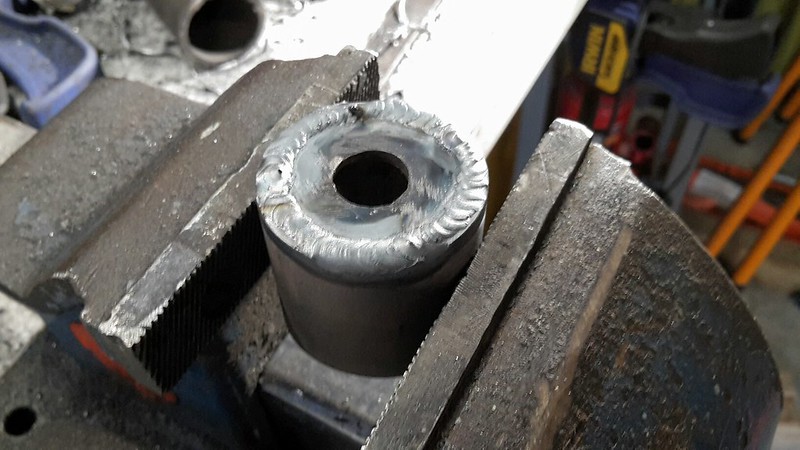 You may notice the spacer behind the bolt. I need to go buy some shorter bolts to mount the diff as the stock ones are super long so they can pass through the large rubber bushings in the stock frame. My diff will be solid mounted all the way, actually there will be no rubber bushings in the entire car. 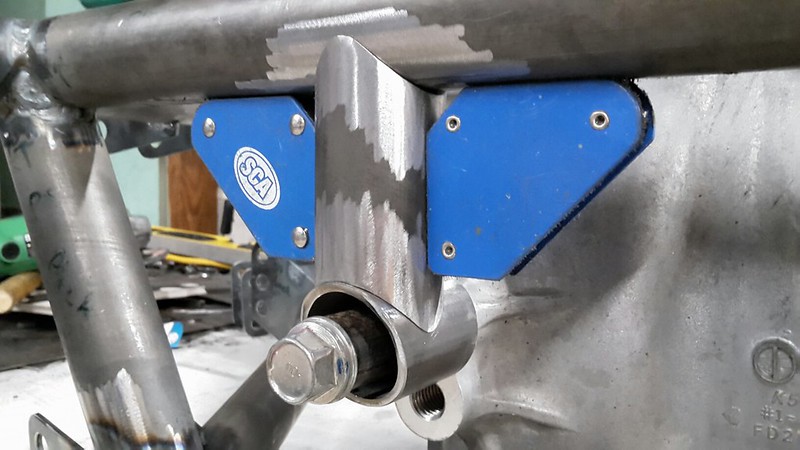 With all the welding now complete you can see how the diff moves up 26mm by removing those spacers at the front and swapping mounting holes at the rear. 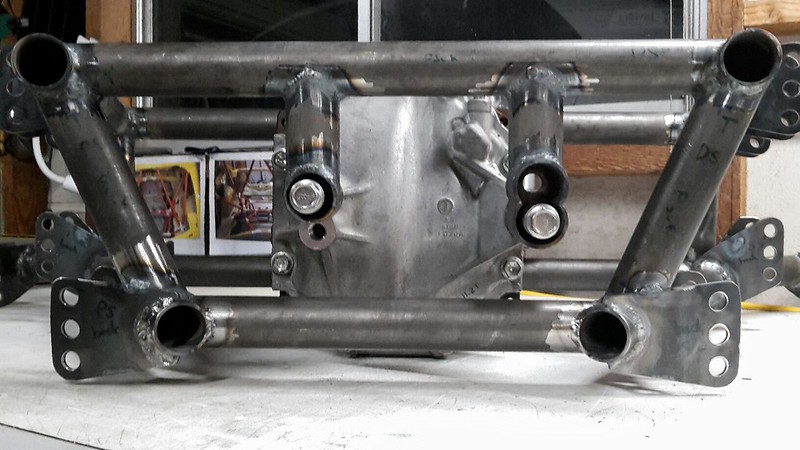 So that's where I got up to before running out of time. A great result as its basically ready to go back into the jig and then get welded into the car. I was thinking I might add a couple of tabs on the back to attach the uprights for the rear wing, I have also been toying with the idea of building a aluminium honeycomb impact attenuator to mount behind this cradle and extending to the rear bumper, you see them a lot in Jap racing series and FSAE cars. |
|
|
|
| The Following 3 Users Say Thank You to DIY For This Useful Post: |
|
05-10-2018, 04:47 AM
|
#97 |
|
Senior Member
Join Date: Jul 2016
Drives: BRZ, WRX
Location: Sydney, Australia
Posts: 292
Thanks: 105
Thanked 970 Times in 234 Posts
Mentioned: 2 Post(s)
Tagged: 0 Thread(s)
|
A small update today, I have added some mounting brackets for a rear wing onto the back of the suspension cradle. Much easier to add these now than when its in the car.
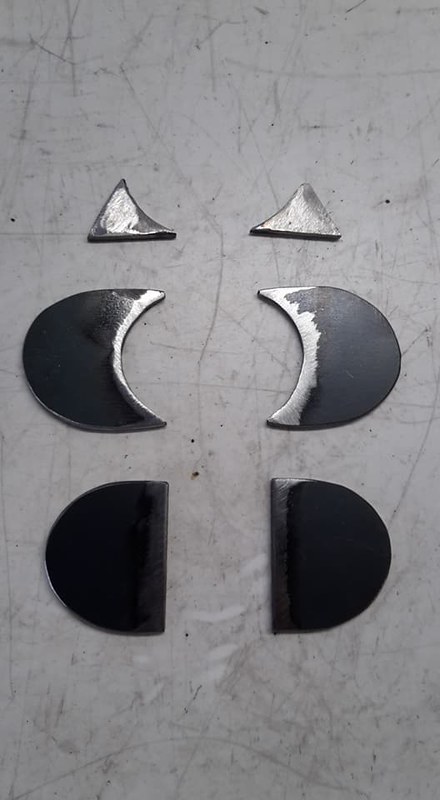 Those small triangular pieces were just to add a little extra bracing to the rear tab. 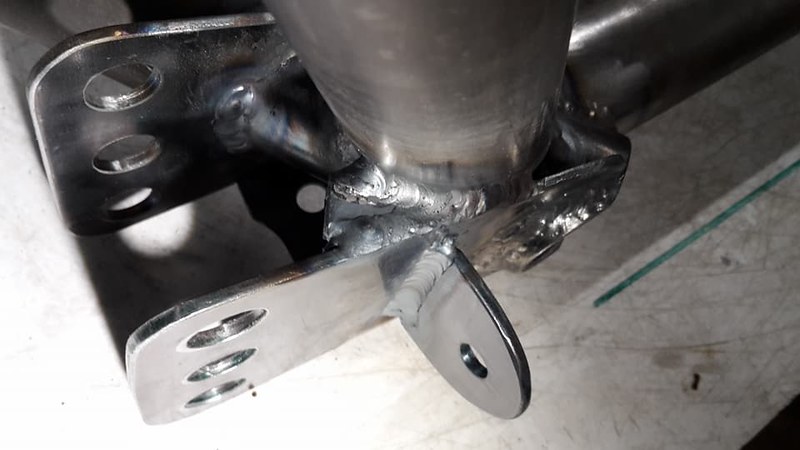  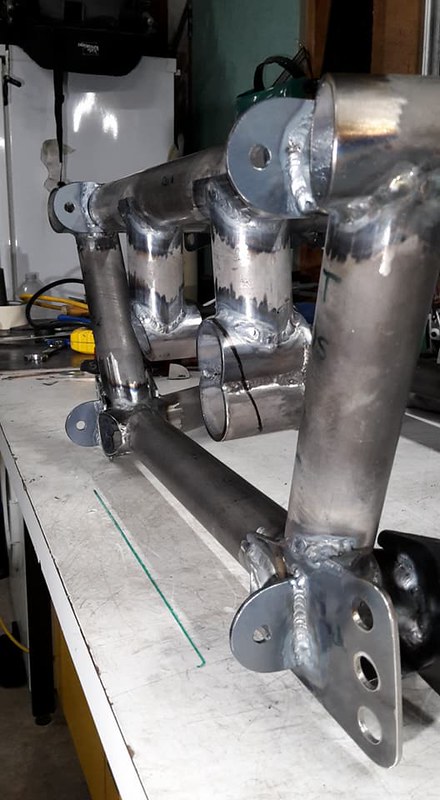 I will begin mounting it into the car on the weekend. |
|
|
|
| The Following 2 Users Say Thank You to DIY For This Useful Post: | Ash_89 (03-01-2021), Irace86.2.0 (09-15-2018) |
|
05-10-2018, 01:15 PM
|
#98 |
|
Senior Member

Join Date: Nov 2014
Drives: Fr-s
Location: MN
Posts: 774
Thanks: 139
Thanked 555 Times in 288 Posts
Mentioned: 5 Post(s)
Tagged: 0 Thread(s)
|
Awesome job! Love seeing the progress.
I can't help but think some of those control arms tabs should have gussets.
__________________
|
|
|
|
|
|
|
|
|
|


