


 05-03-2017, 03:20 PM
|
#43 |
|
Senior Member
Join Date: May 2016
Drives: 2016 BRZ Limited, Stock
Location: Seattle, WA
Posts: 243
Thanks: 183
Thanked 154 Times in 94 Posts
Mentioned: 3 Post(s)
Tagged: 0 Thread(s)
|
Build looks great but get some jack stands man! I always worry when I see the car up, wheels off, with no jack stands.
|

|

|
|
05-04-2017, 12:45 AM
|
#44 |
|
Senior Member

Join Date: Apr 2013
Drives: 2014 BRZ
Location: Louisiana
Posts: 178
Thanks: 31
Thanked 122 Times in 67 Posts
Mentioned: 0 Post(s)
Tagged: 0 Thread(s)
|
More work on the calipers. We had a bad storm roll through. Again. Seems likely a daily/weekly occurrence. Anyway, due to the rain I yet again couldn't work on the big projects (ae86 and truck).
So on the way home I picked up some high temp paint and it was time to get down to business. I stil had to finish cleaning the other side calipers before paint as well. 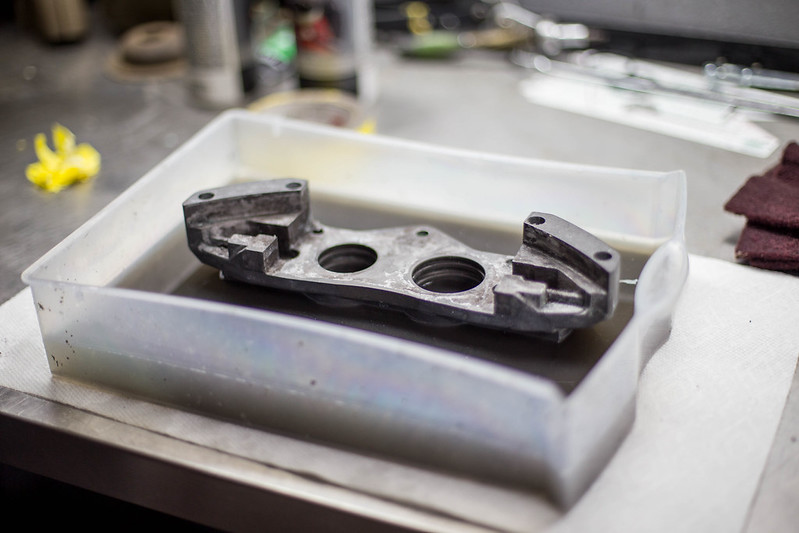 new computer (11 of 18) by lawrx, on Flickr new computer (11 of 18) by lawrx, on Flickr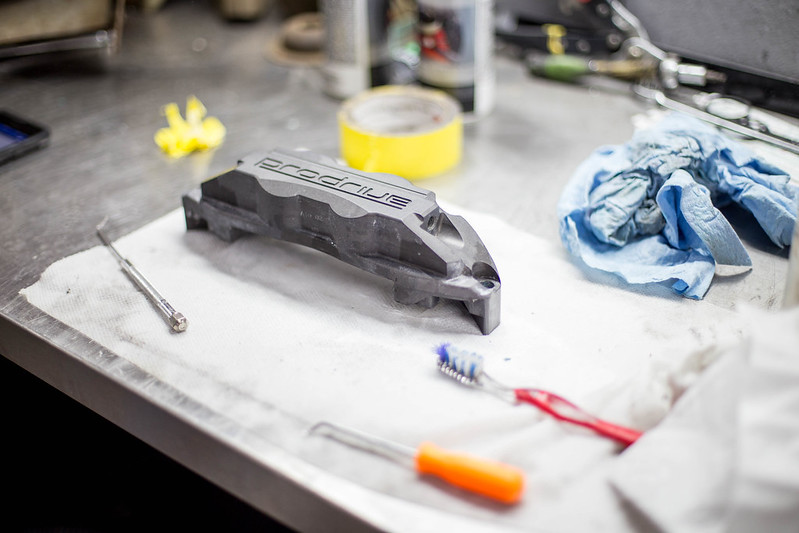 new computer (13 of 18) by lawrx, on Flickr new computer (13 of 18) by lawrx, on FlickrWith both sides of calipers clean it was time for paint. Found some suitable colors and went with it. As it turns out the silver is a damn near match to my car color, and the blue is also very similar to the prodrive color im trying to replicate. Also can't forget the pizza. Necessary "working on cars food" for sure. 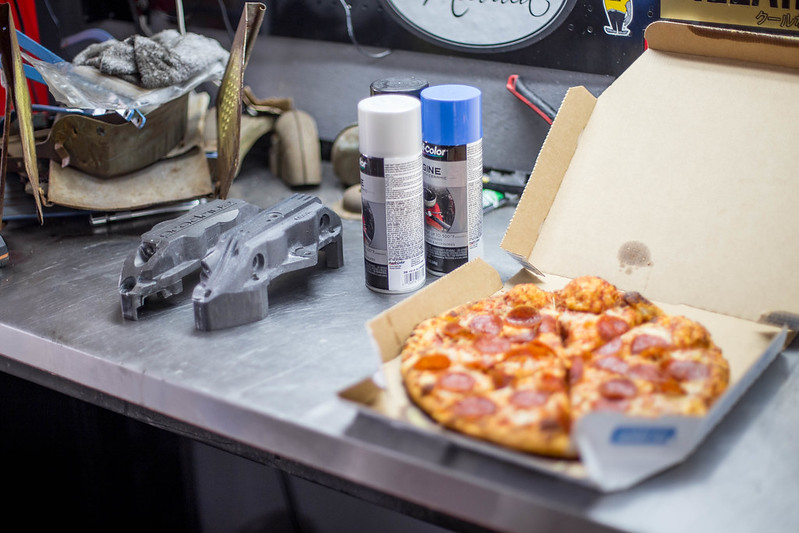 new computer (1 of 18) by lawrx, on Flickr new computer (1 of 18) by lawrx, on Flickr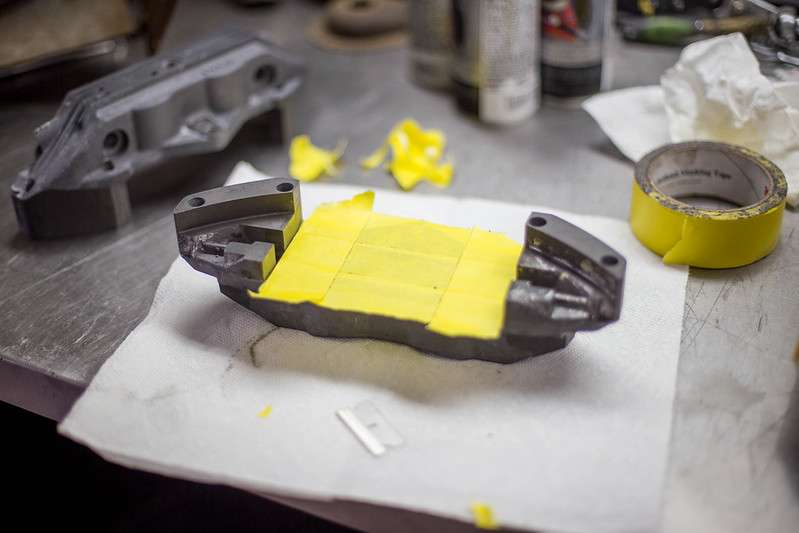 new computer (2 of 18) by lawrx, on Flickr new computer (2 of 18) by lawrx, on Flickr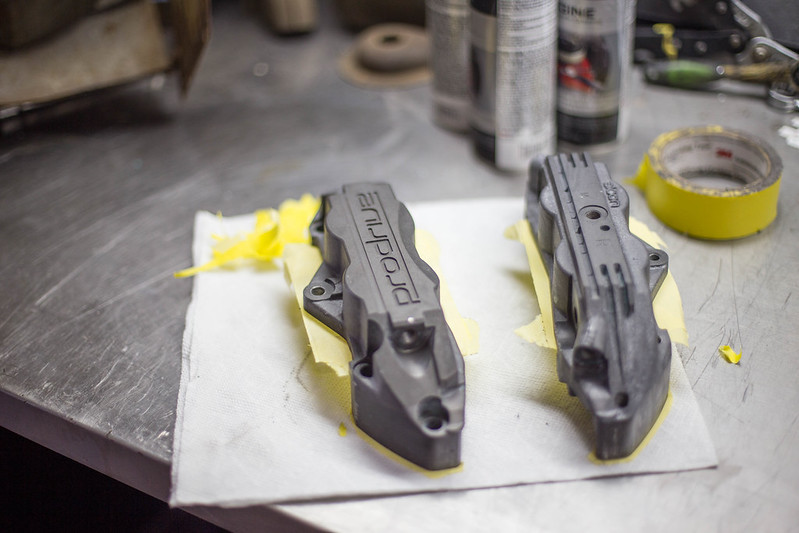 new computer (3 of 18) by lawrx, on Flickr new computer (3 of 18) by lawrx, on Flickr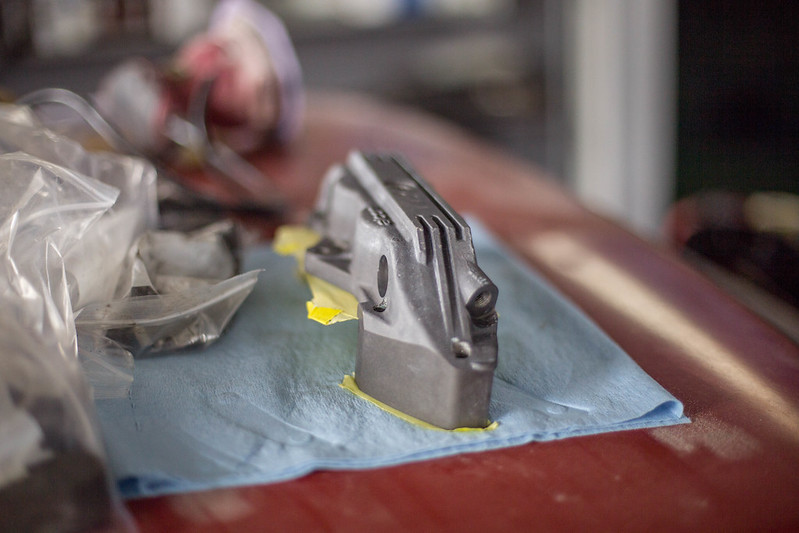 new computer (12 of 18) by lawrx, on Flickr new computer (12 of 18) by lawrx, on Flickr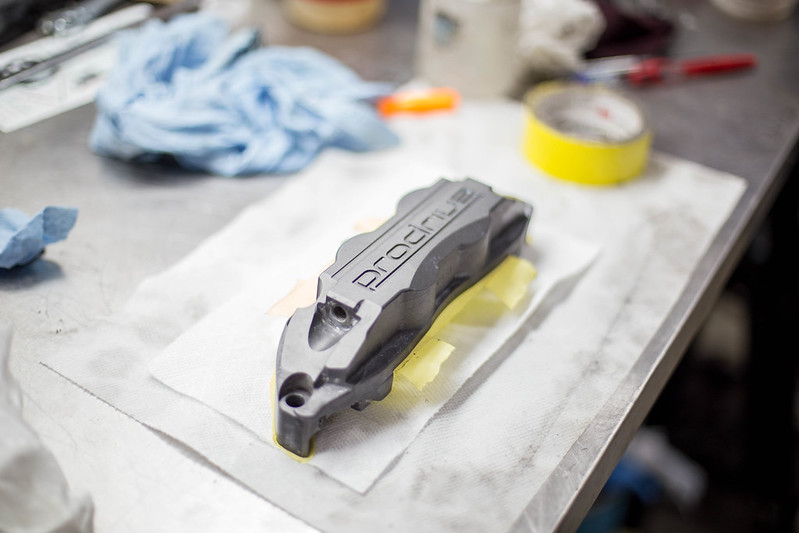 new computer (14 of 18) by lawrx, on Flickr new computer (14 of 18) by lawrx, on FlickrWith them all taped up and clean, let the spraying commence. At first I set them up on the truck hood, but then the weather rolled back around and was forced back into the garage. This weather isn't messing around lately. Feel another big flood is a coming sadly. 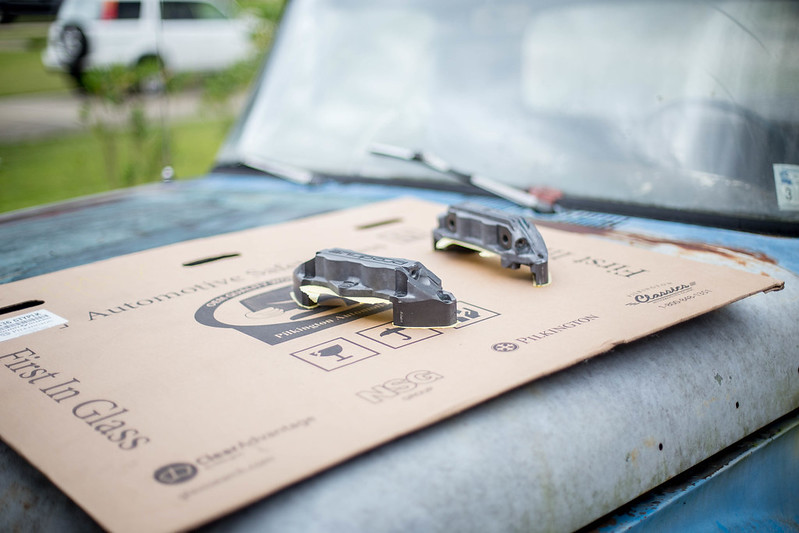 new computer (4 of 18) by lawrx, on Flickr new computer (4 of 18) by lawrx, on Flickr new computer (6 of 18) by lawrx, on Flickr new computer (6 of 18) by lawrx, on Flickr new computer (5 of 18) by lawrx, on Flickr new computer (5 of 18) by lawrx, on Flickr new computer (7 of 18) by lawrx, on Flickr new computer (7 of 18) by lawrx, on Flickr new computer (9 of 18) by lawrx, on Flickr new computer (9 of 18) by lawrx, on Flickr new computer (10 of 18) by lawrx, on Flickr new computer (10 of 18) by lawrx, on Flickr new computer (15 of 18) by lawrx, on Flickr new computer (15 of 18) by lawrx, on Flickr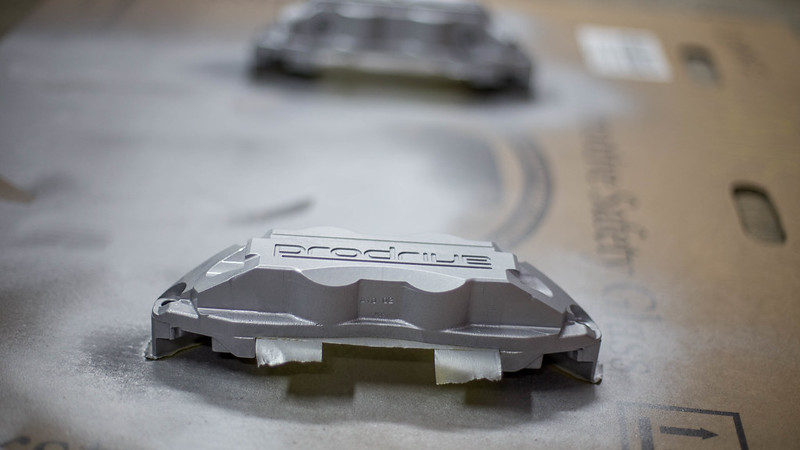 new computer (16 of 18) by lawrx, on Flickr new computer (16 of 18) by lawrx, on Flickr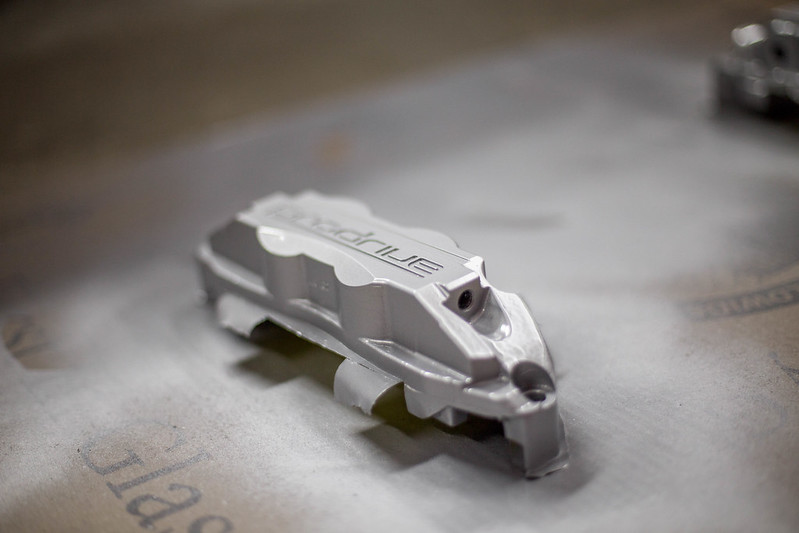 new computer (17 of 18) by lawrx, on Flickr new computer (17 of 18) by lawrx, on Flickr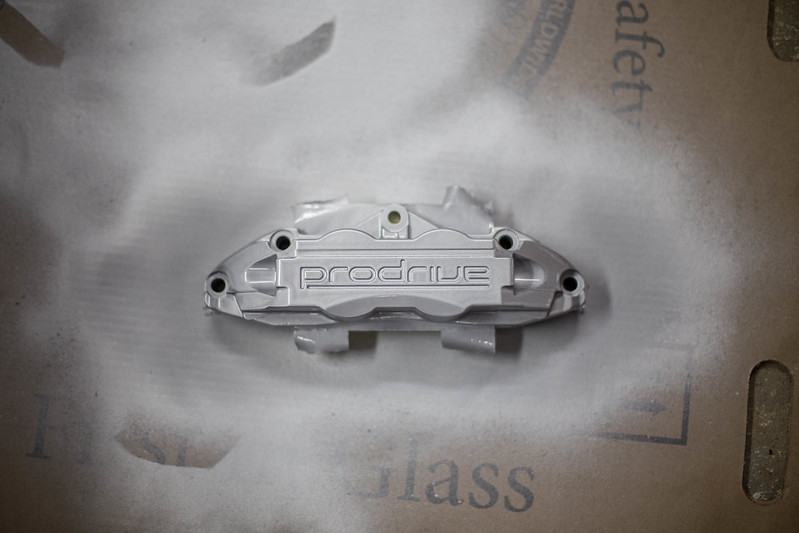 new computer (18 of 18) by lawrx, on Flickr new computer (18 of 18) by lawrx, on FlickrNext step is to bring home some touch up brushes to use to paint the letters and the underscore. Going to have to channel my inner steadiness as they are small and plentiful. Would really hate to have to spray the silver again and start over. Once the paint work is done I can install the new seals, clean up the pistons a bit and insert the, back in, and then its a waiting game on the Ti hardware to come in. |
|
|
|
|
05-04-2017, 11:21 AM
|
#45 |
|
Senior Member

Join Date: Oct 2016
Drives: DGM BRZ
Location: MN
Posts: 176
Thanks: 126
Thanked 78 Times in 60 Posts
Mentioned: 0 Post(s)
Tagged: 0 Thread(s)
|
Calipers turned out great. Your attention to detail is inspiring.
|
|
|
|
| The Following User Says Thank You to jubella2 For This Useful Post: | laextreme5 (05-04-2017) |
|
05-04-2017, 10:29 PM
|
#46 | |
|
Senior Member
Join Date: Apr 2013
Drives: 2014 BRZ
Location: Louisiana
Posts: 178
Thanks: 31
Thanked 122 Times in 67 Posts
Mentioned: 0 Post(s)
Tagged: 0 Thread(s)
|
Quote:
|
|
|
|
|
|
05-04-2017, 10:47 PM
|
#47 |
|
Senior Member
Join Date: Apr 2013
Drives: 2014 BRZ
Location: Louisiana
Posts: 178
Thanks: 31
Thanked 122 Times in 67 Posts
Mentioned: 0 Post(s)
Tagged: 0 Thread(s)
|
Today was the day. Make or break. All the cards on the table.
I knew it was going to be a pain to paint the letters by hand, but boy did they put me through the ringer. The spaces are so incredibly small. It was physically impossible to not go over the edges some, which sucks, but its fixable. Once they are all good and dry ill lightly hit the faces with some high grit sand paper to remove the excess over paint. I had to commandeer the kitchen table from here mothers day crafts with my son, as she already had paper towels and such laid out. I was going to need to sit down to do this lol 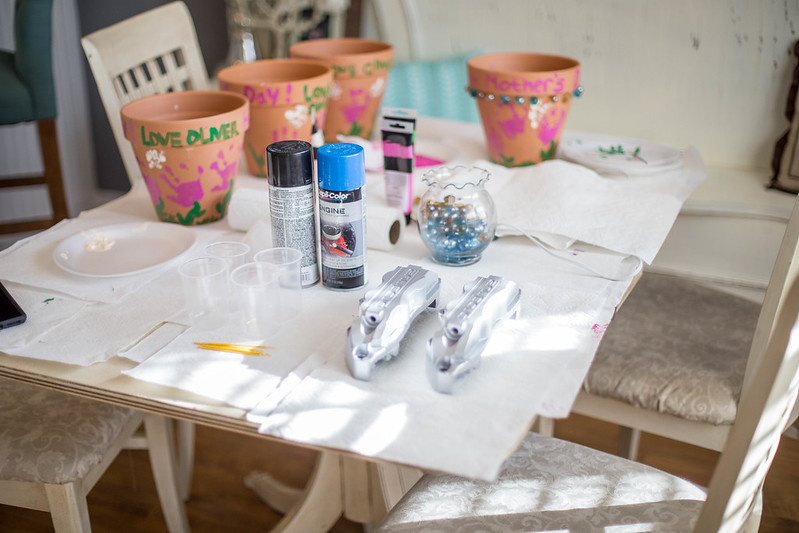 new computer (1 of 23) by lawrx, on Flickr new computer (1 of 23) by lawrx, on Flickr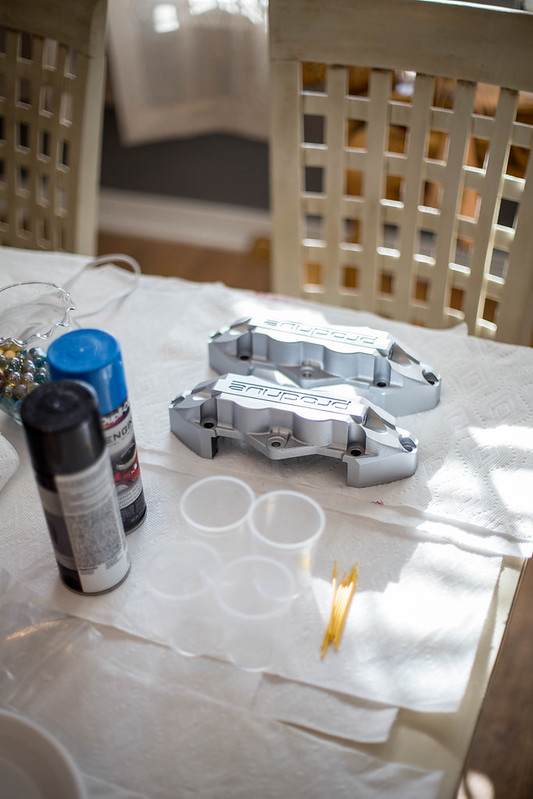 new computer (2 of 23) by lawrx, on Flickr new computer (2 of 23) by lawrx, on Flickr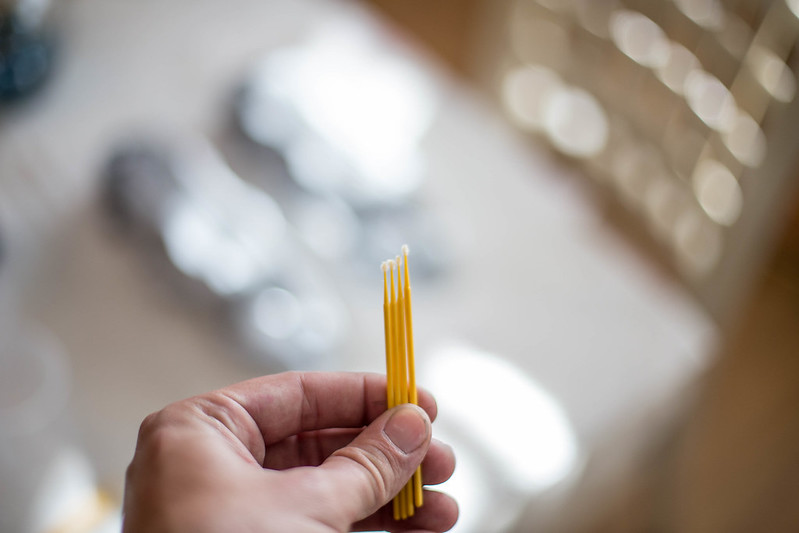 new computer (3 of 23) by lawrx, on Flickr new computer (3 of 23) by lawrx, on FlickrSo my plan was to spray the aerosol paint into these small container I brought home from work, and use out touch up brushes to paint the letters. The plan went as I hoped, and thankfully I didn't have any issues. 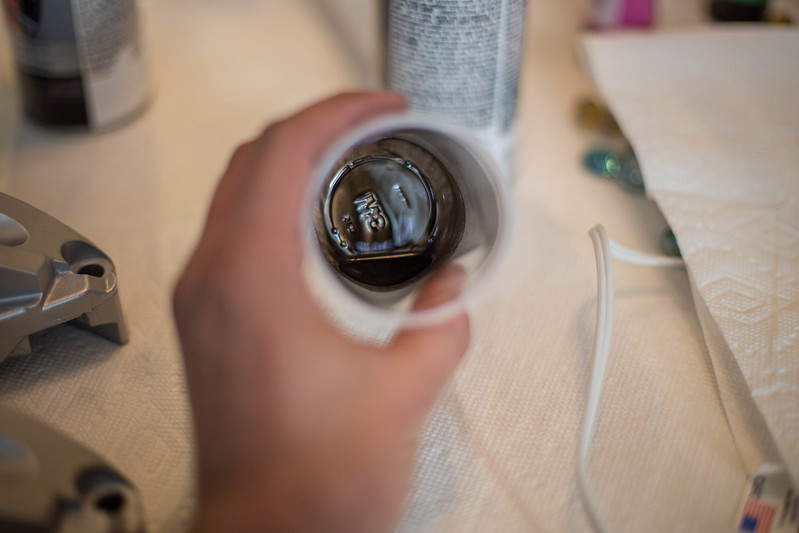 new computer (4 of 23) by lawrx, on Flickr new computer (4 of 23) by lawrx, on Flickr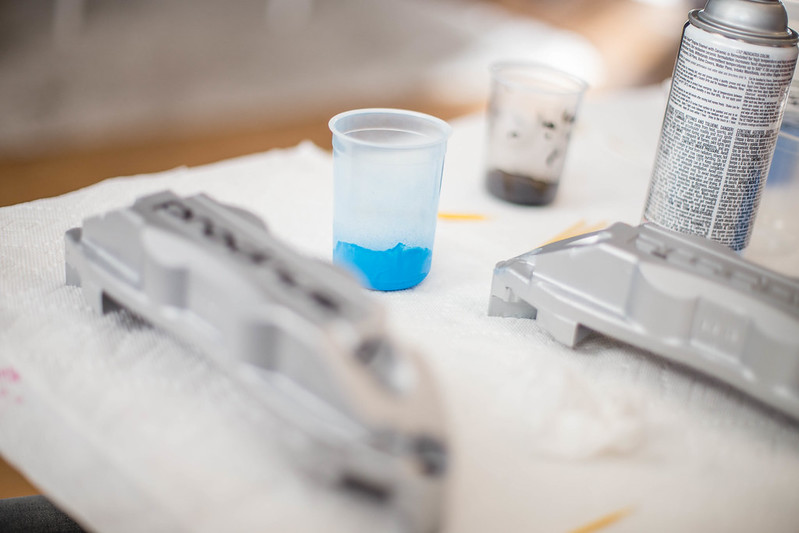 new computer (8 of 23) by lawrx, on Flickr new computer (8 of 23) by lawrx, on FlickrExcept for one thing. The VERY first thing I paint, one of the underscores. I do in the wrong color, black. Its suppose to be the blue color F$&%@&#$&%$#$!!!!!!!!! Yeah, that pissed me off. Took the caliper outside, sprayed it and let it sit to cure. Came back inside, embarrassed by my mistake and started on the other caliper. 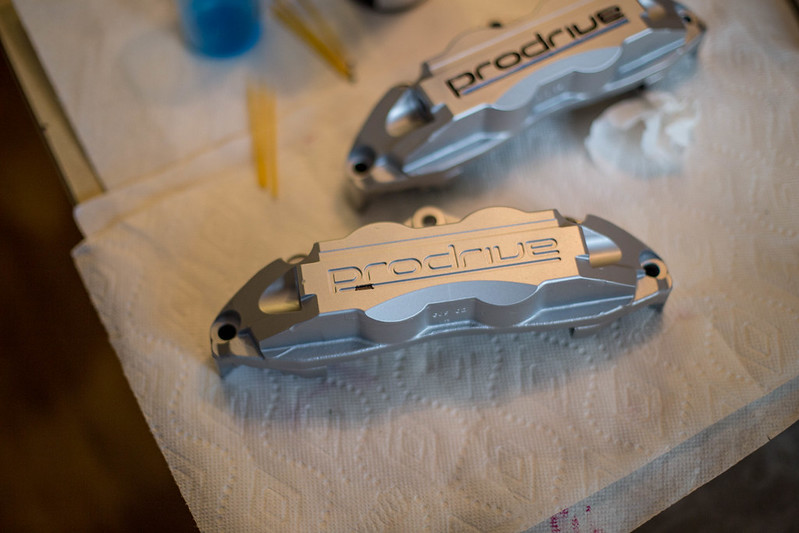 new computer (12 of 23) by lawrx, on Flickr new computer (12 of 23) by lawrx, on Flickr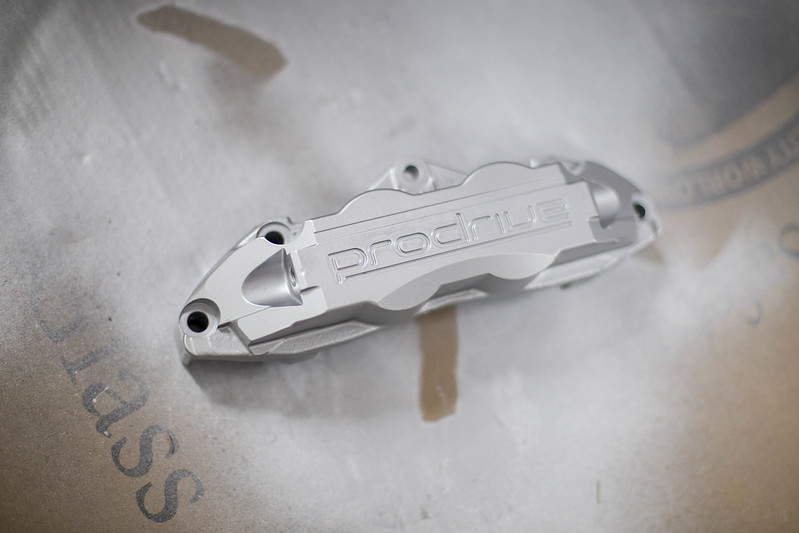 new computer (13 of 23) by lawrx, on Flickr new computer (13 of 23) by lawrx, on Flickr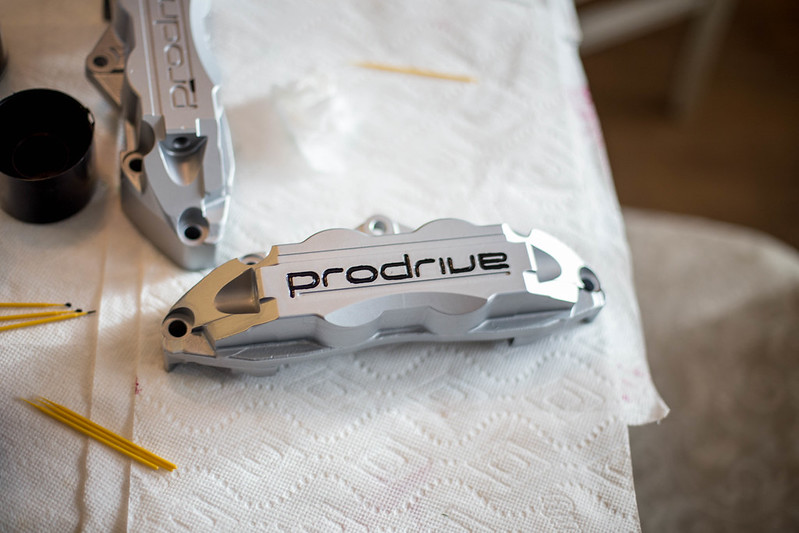 new computer (5 of 23) by lawrx, on Flickr new computer (5 of 23) by lawrx, on Flickr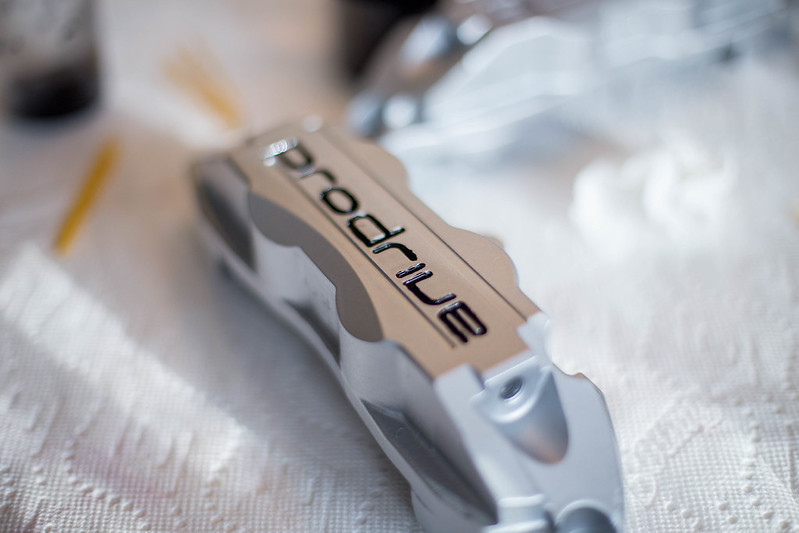 new computer (6 of 23) by lawrx, on Flickr new computer (6 of 23) by lawrx, on Flickr new computer (11 of 23) by lawrx, on Flickr new computer (11 of 23) by lawrx, on Flickr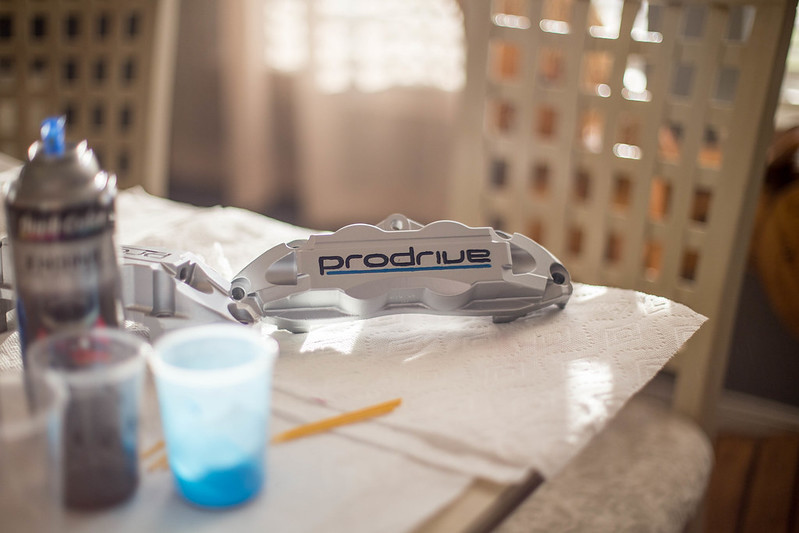 new computer (10 of 23) by lawrx, on Flickr new computer (10 of 23) by lawrx, on FlickrOnce I had finished the first, took a break, ate, and then started on the other one. Once I was done with the final caliper I of course had to take some mock up pics with the wheels. I also took a few extra shots for reference where the stickers go and such since they will be removed when painted. 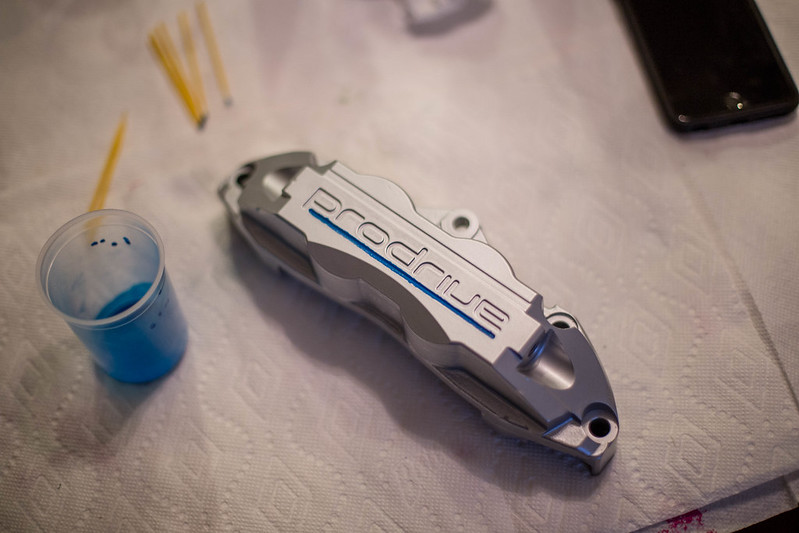 new computer (21 of 23) by lawrx, on Flickr new computer (21 of 23) by lawrx, on Flickr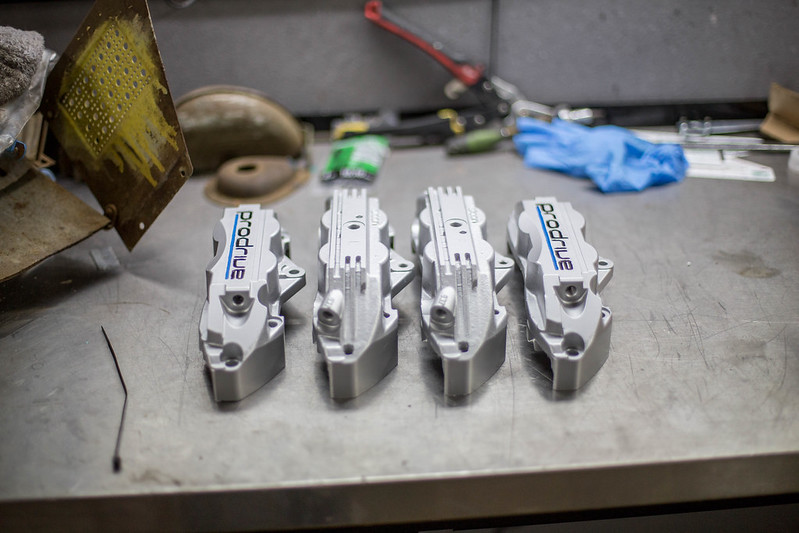 new computer (22 of 23) by lawrx, on Flickr new computer (22 of 23) by lawrx, on Flickr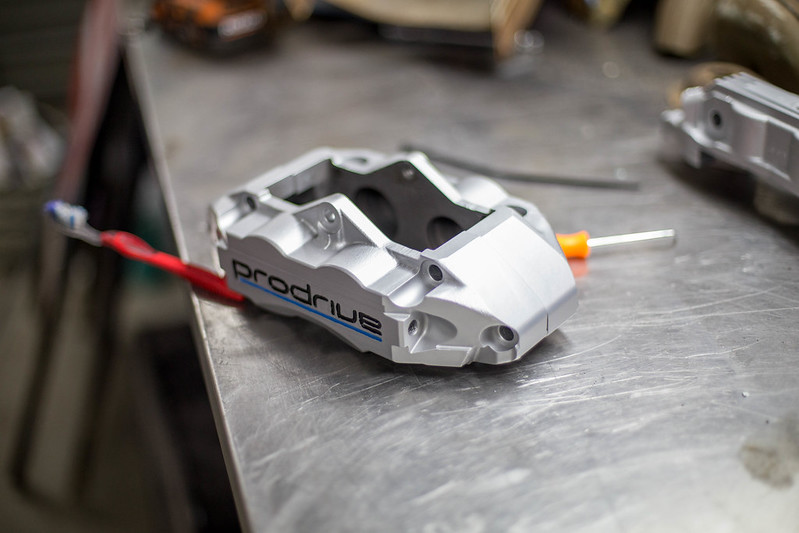 new computer (20 of 23) by lawrx, on Flickr new computer (20 of 23) by lawrx, on Flickr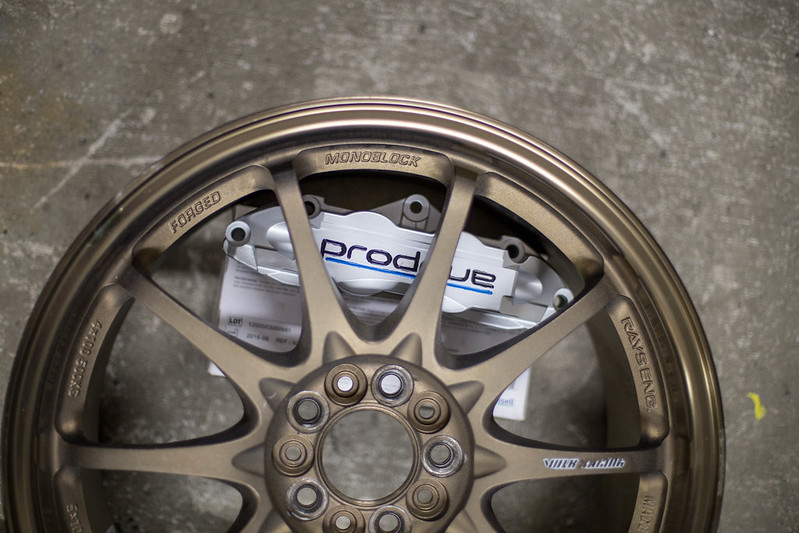 new computer (15 of 23) by lawrx, on Flickr new computer (15 of 23) by lawrx, on Flickr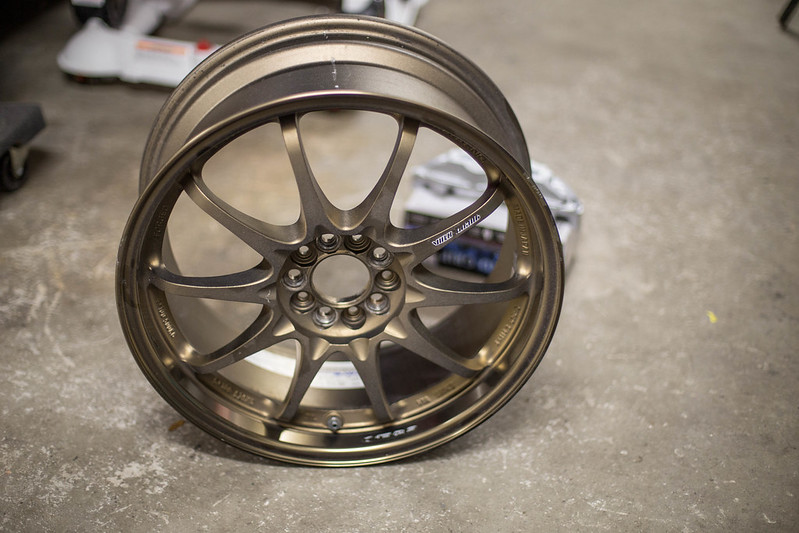 new computer (16 of 23) by lawrx, on Flickr new computer (16 of 23) by lawrx, on Flickr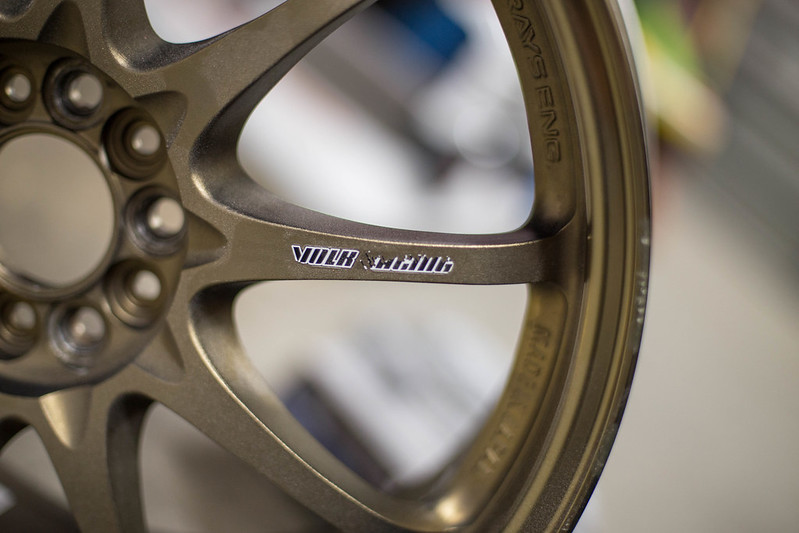 new computer (18 of 23) by lawrx, on Flickr new computer (18 of 23) by lawrx, on Flickr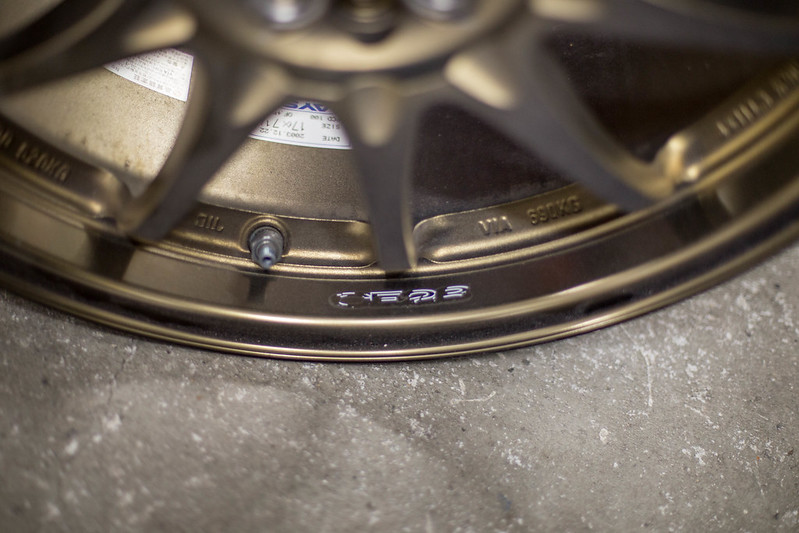 new computer (17 of 23) by lawrx, on Flickr new computer (17 of 23) by lawrx, on Flickr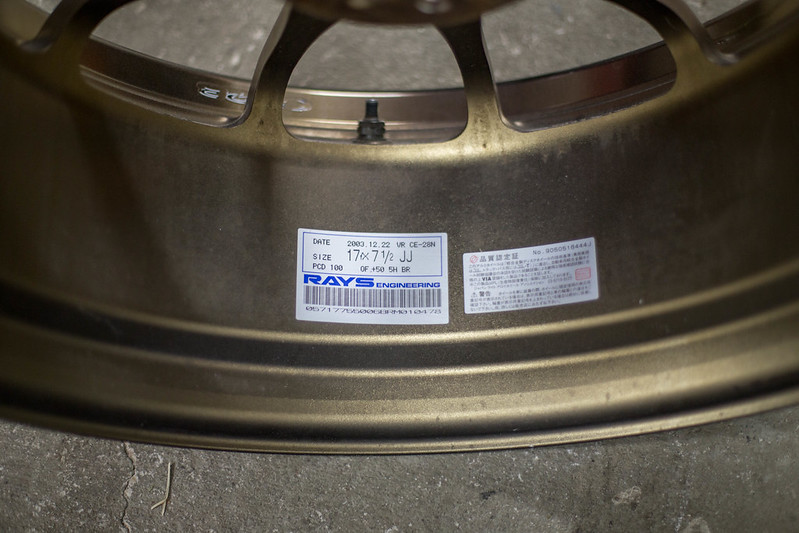 new computer (19 of 23) by lawrx, on Flickr new computer (19 of 23) by lawrx, on Flickr
|
|
|
|
| The Following User Says Thank You to laextreme5 For This Useful Post: | zeal86 (05-05-2017) |
|
05-17-2017, 01:20 AM
|
#48 |
|
Senior Member
Join Date: Apr 2013
Drives: 2014 BRZ
Location: Louisiana
Posts: 178
Thanks: 31
Thanked 122 Times in 67 Posts
Mentioned: 0 Post(s)
Tagged: 0 Thread(s)
|
Got a bit of work done on the wheels tonight. removed the old valve stems, removed the old peeling stickers, and cleaned off the balance weights and their glue.
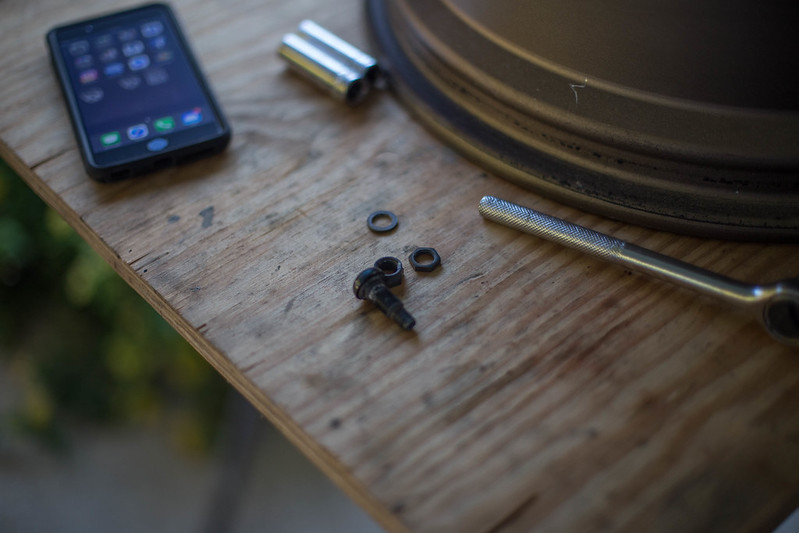 new computer (1 of 22)-2 by lawrx, on Flickr new computer (1 of 22)-2 by lawrx, on Flickr new computer (2 of 22)-2 by lawrx, on Flickr new computer (2 of 22)-2 by lawrx, on Flickr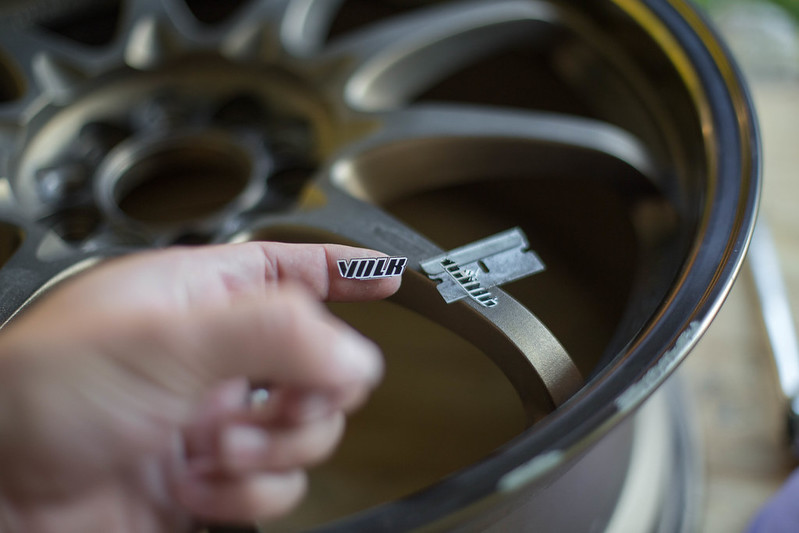 new computer (3 of 22)-2 by lawrx, on Flickr new computer (3 of 22)-2 by lawrx, on Flickr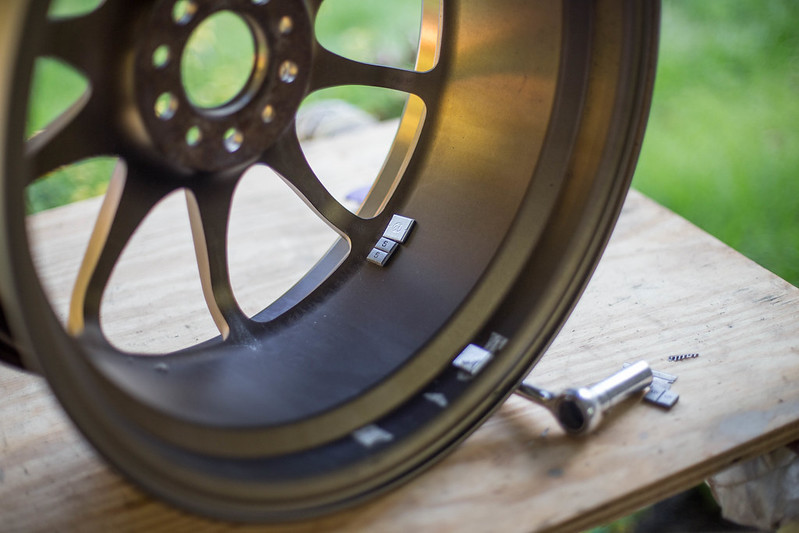 new computer (5 of 22)-2 by lawrx, on Flickr new computer (5 of 22)-2 by lawrx, on Flickr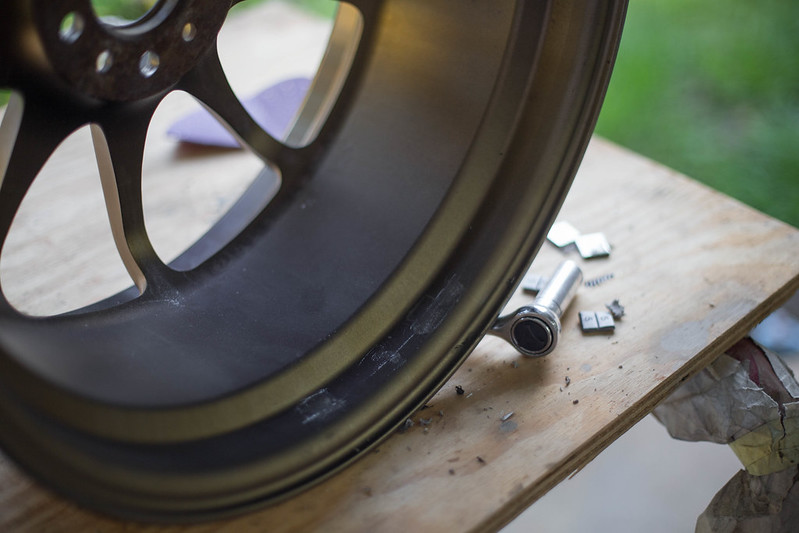 new computer (6 of 22)-2 by lawrx, on Flickr new computer (6 of 22)-2 by lawrx, on Flickr[img]https://c1.staticflickr.com/5/4185/34577542151_a6cf***a13_c.jpg[/img]new computer (10 of 22)-2 by lawrx, on Flickr Once all that was completed it was time to clean the hub mating surfaces up and start the minor repairs of curb rash and chips. Only one wheel was "bad" and it wasnt all that bad either. The other three were fairly minor, need small putty work to fill in minor gashes. Only that one wheel had multiple spots that needed filling, again only minor. 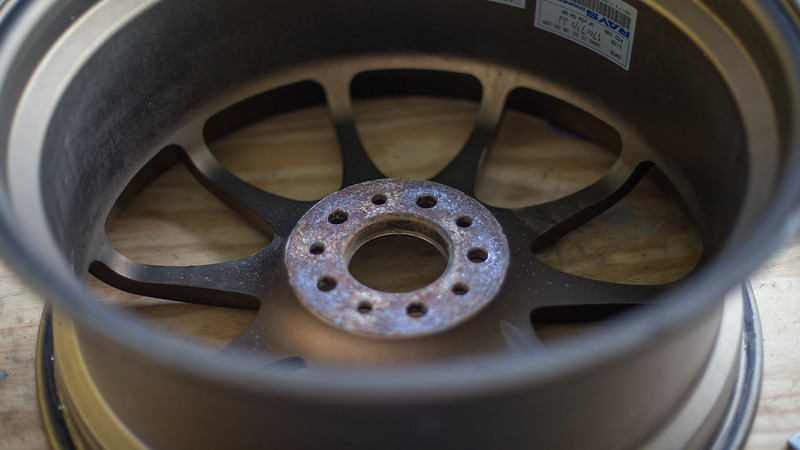 new computer (7 of 22)-2 by lawrx, on Flickr new computer (7 of 22)-2 by lawrx, on Flickr new computer (8 of 22)-2 by lawrx, on Flickr new computer (8 of 22)-2 by lawrx, on Flickr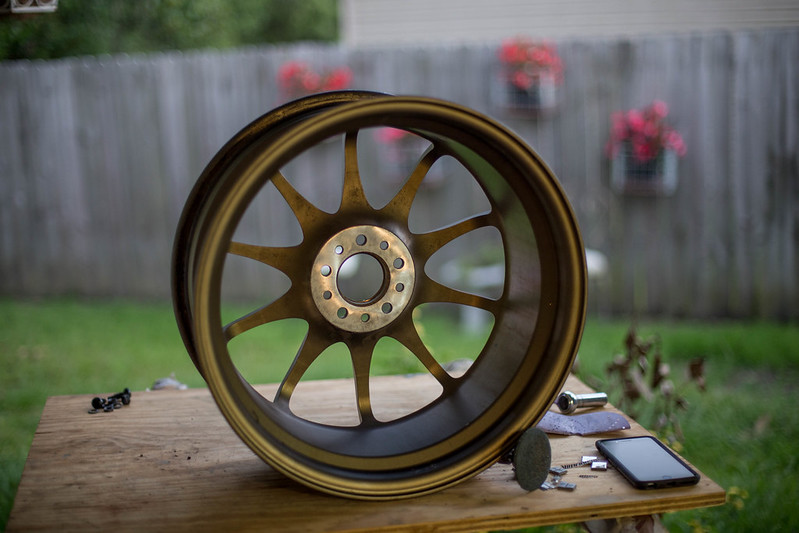 new computer (11 of 22)-2 by lawrx, on Flickr new computer (11 of 22)-2 by lawrx, on Flickr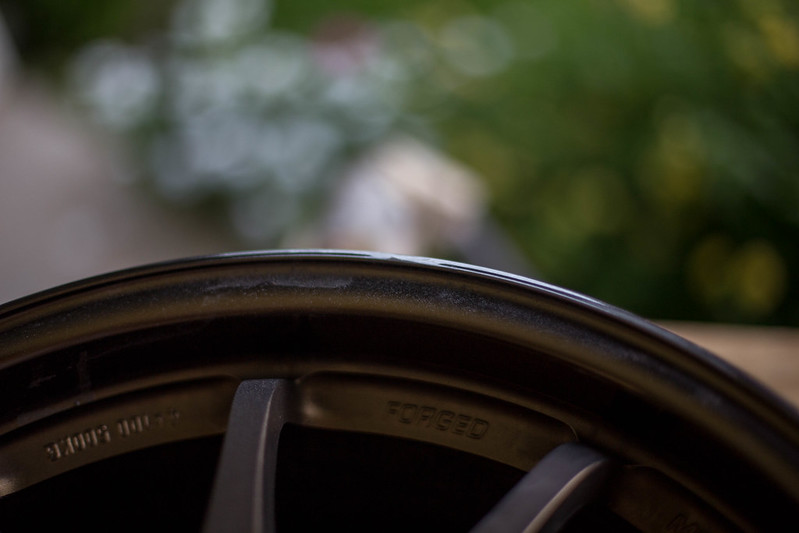 new computer (9 of 22)-2 by lawrx, on Flickr new computer (9 of 22)-2 by lawrx, on Flickr new computer (12 of 22)-2 by lawrx, on Flickr new computer (12 of 22)-2 by lawrx, on Flickr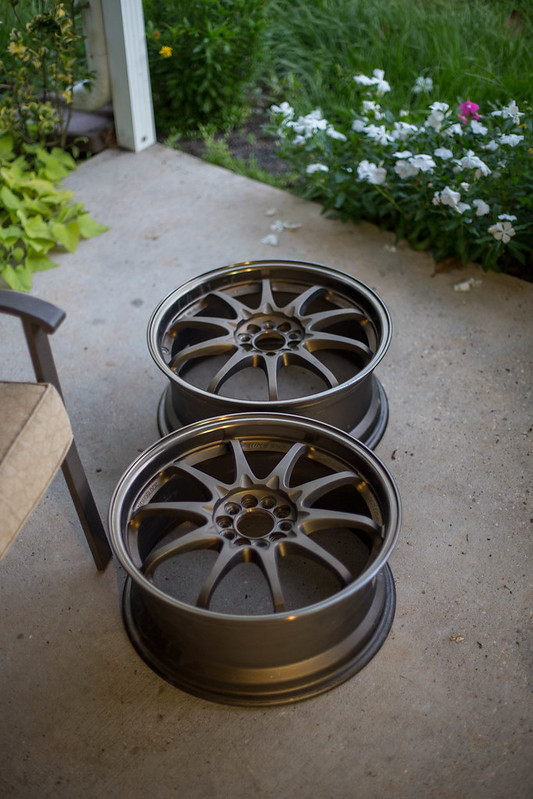 new computer (13 of 22)-2 by lawrx, on Flickr new computer (13 of 22)-2 by lawrx, on Flickr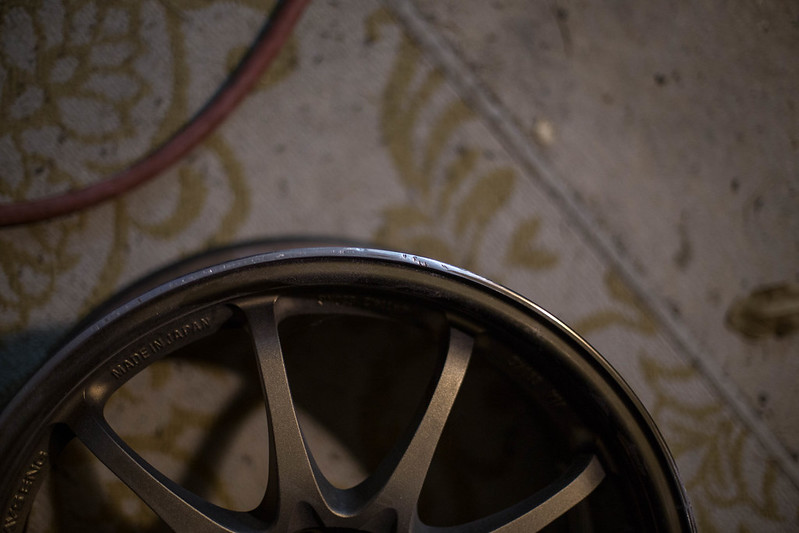 new computer (14 of 22)-2 by lawrx, on Flickr new computer (14 of 22)-2 by lawrx, on Flickr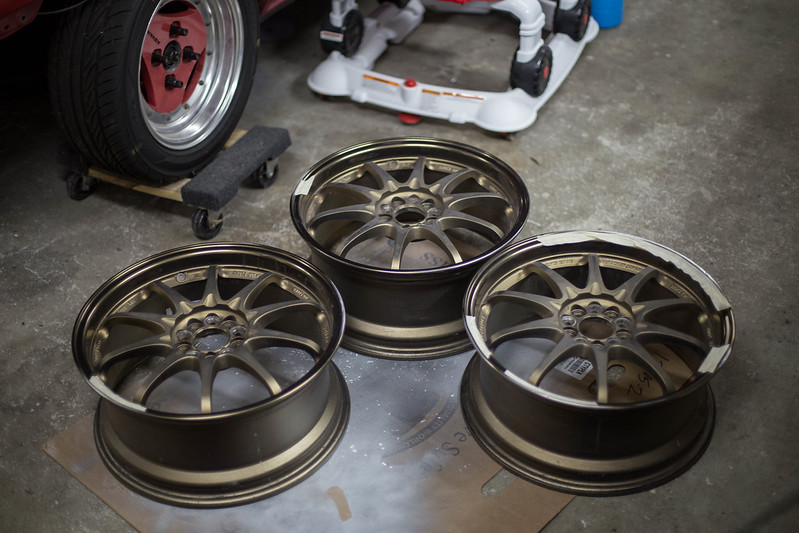 new computer (15 of 22)-2 by lawrx, on Flickr new computer (15 of 22)-2 by lawrx, on Flickr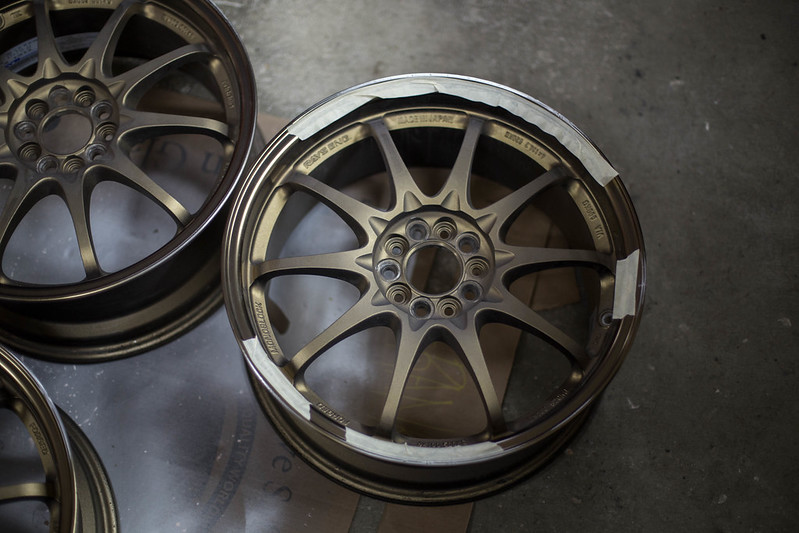 new computer (16 of 22)-2 by lawrx, on Flickr new computer (16 of 22)-2 by lawrx, on Flickr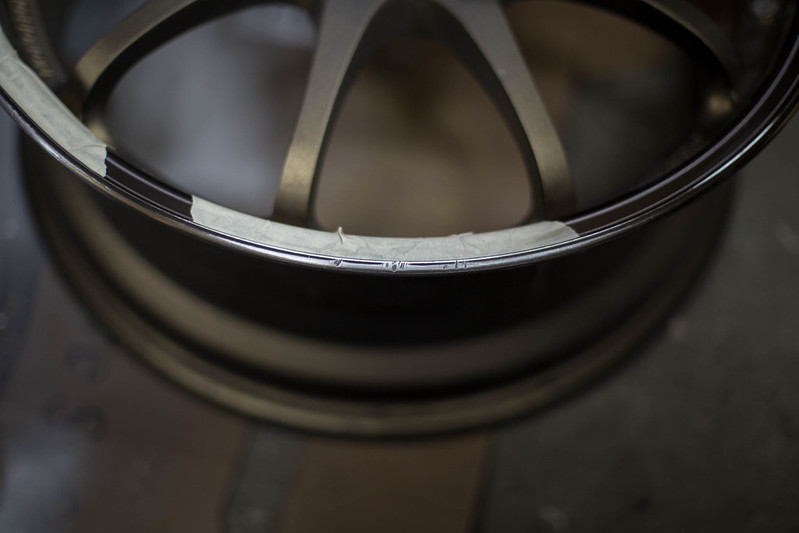 new computer (17 of 22)-2 by lawrx, on Flickr new computer (17 of 22)-2 by lawrx, on Flickr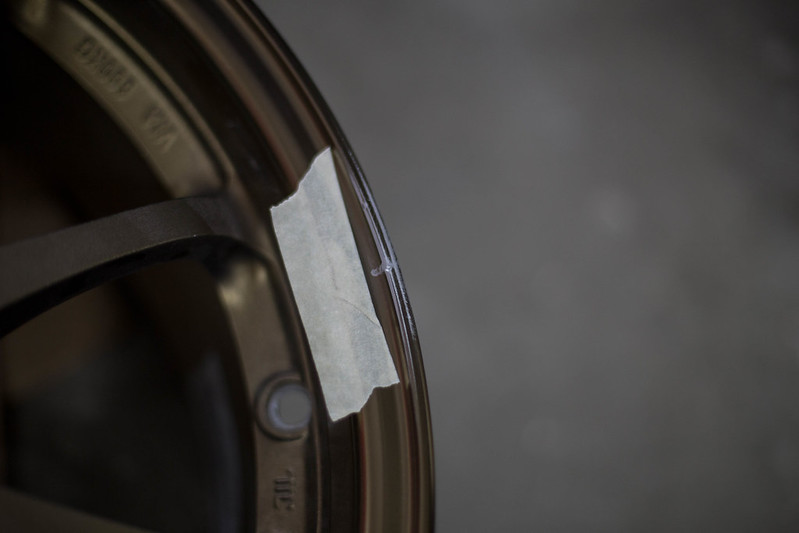 new computer (18 of 22)-2 by lawrx, on Flickr new computer (18 of 22)-2 by lawrx, on Flickr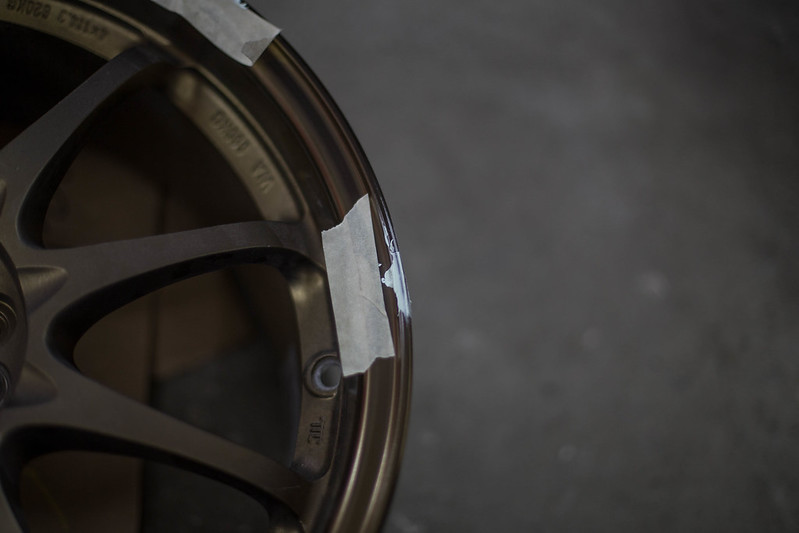 new computer (19 of 22)-2 by lawrx, on Flickr new computer (19 of 22)-2 by lawrx, on Flickr new computer (20 of 22)-2 by lawrx, on Flickr new computer (20 of 22)-2 by lawrx, on Flickr new computer (21 of 22)-2 by lawrx, on Flickr new computer (21 of 22)-2 by lawrx, on FlickrSadly its going to be a bit before I can get them painted as we are currently in the middle of going from two small paint booths to one larger one. And we are currently refined to our primer booth to prime and spray cars which seriously cuts down production and time. So personal projects are on the back burner. The new booth should be up and running in 2-3 weeks time and then hopefully I can see about getting the wheels sprayed in their new color.  IMG_9336 by lawrx, on Flickr IMG_9336 by lawrx, on Flickr IMG_9340 by lawrx, on Flickr IMG_9340 by lawrx, on Flickr
|
|
|
|
| The Following User Says Thank You to laextreme5 For This Useful Post: | carsebuco (05-17-2017) |
|
05-22-2017, 12:34 AM
|
#49 |
|
Senior Member
Join Date: Apr 2013
Drives: 2014 BRZ
Location: Louisiana
Posts: 178
Thanks: 31
Thanked 122 Times in 67 Posts
Mentioned: 0 Post(s)
Tagged: 0 Thread(s)
|
As of late I've been extremely busy, and sadly my garage has taken the brunt of it. There is stuff EVERYWHERE. toys, tools, parts, you name it. Before I got any more work done I had to clean it up some. Consolidate, throw away, sell a few things. Something, I can't work in an environment like this.
 new computer (1 of 18)-2 by lawrx, on Flickr new computer (1 of 18)-2 by lawrx, on Flickr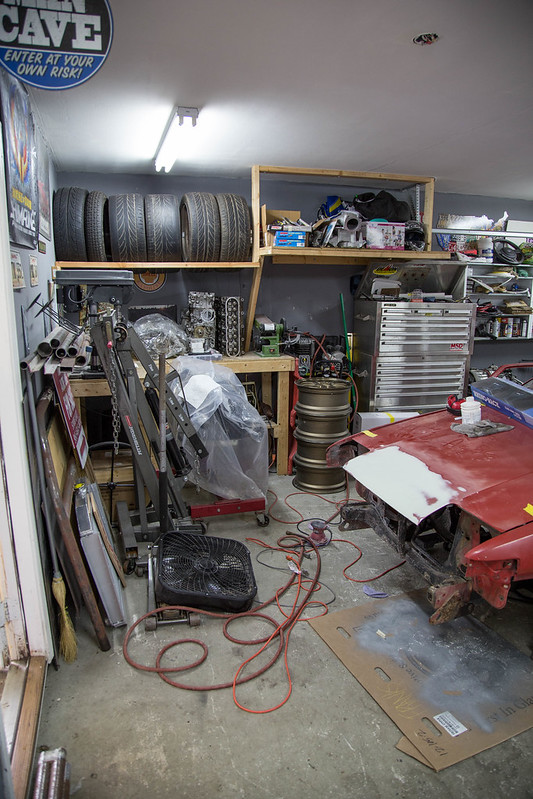 new computer (2 of 18)-2 by lawrx, on Flickr new computer (2 of 18)-2 by lawrx, on Flickr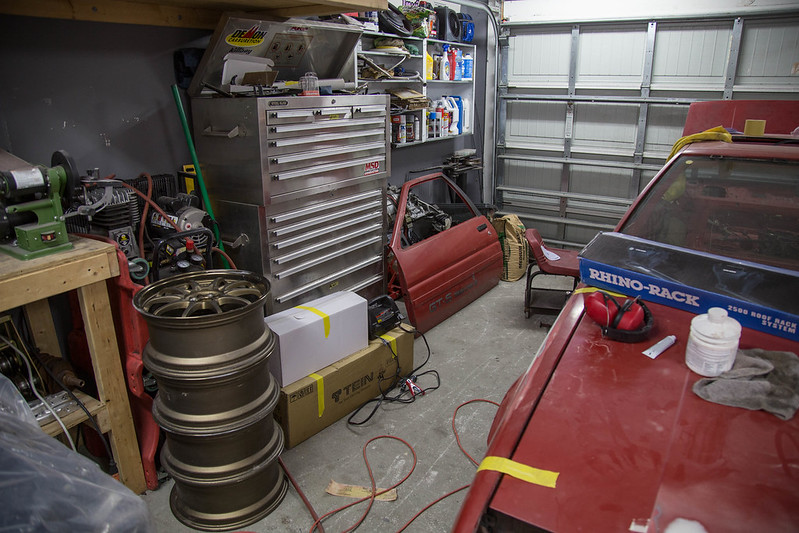 new computer (3 of 18)-2 by lawrx, on Flickr new computer (3 of 18)-2 by lawrx, on FlickrHad a few more parts roll in. Coilovers arrived. Along with my air tank. I already had the lines, pressure gauge, fittings, and compressor from a while back which I traded work for. The tank is going to work out great. Its just a hair too tall with the fitting hour on top prolly about 1/2'' too ill and hits the false floor. However the floor sits in there just fine. I may try to find a way to lower it that 1/2' to make it flush, but im not to worried about it. 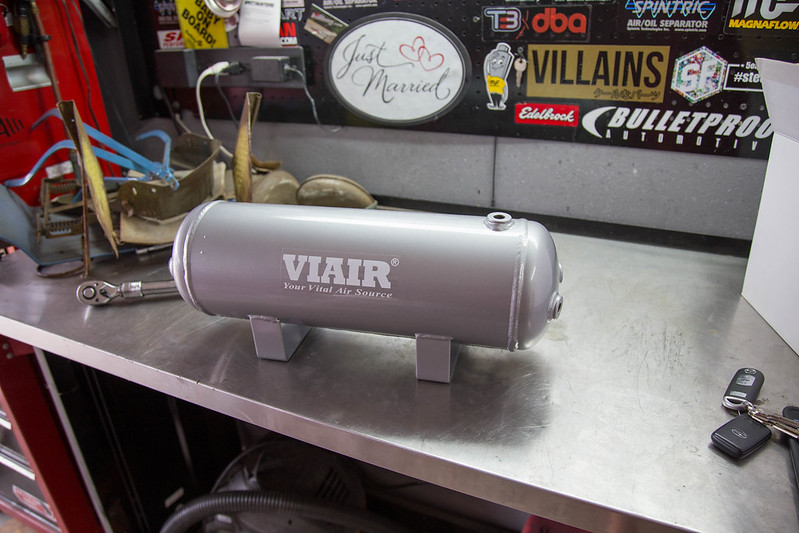 new computer (4 of 18)-2 by lawrx, on Flickr new computer (4 of 18)-2 by lawrx, on Flickr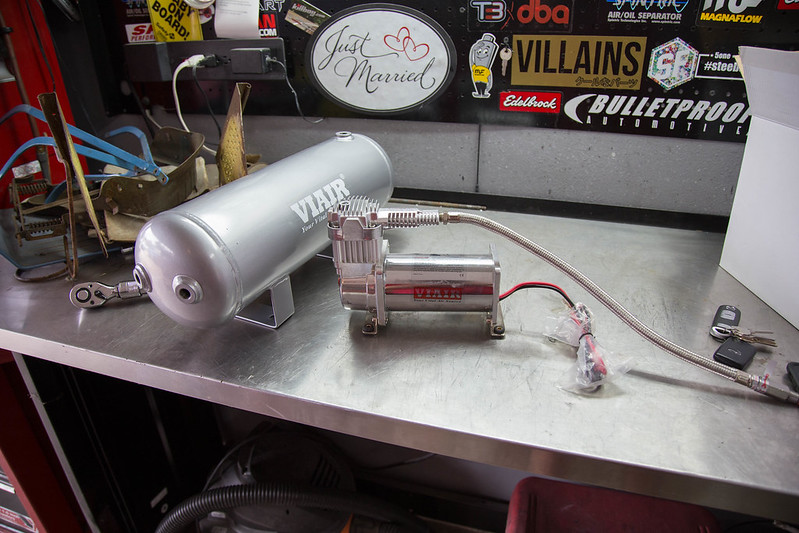 new computer (5 of 18)-2 by lawrx, on Flickr new computer (5 of 18)-2 by lawrx, on Flickr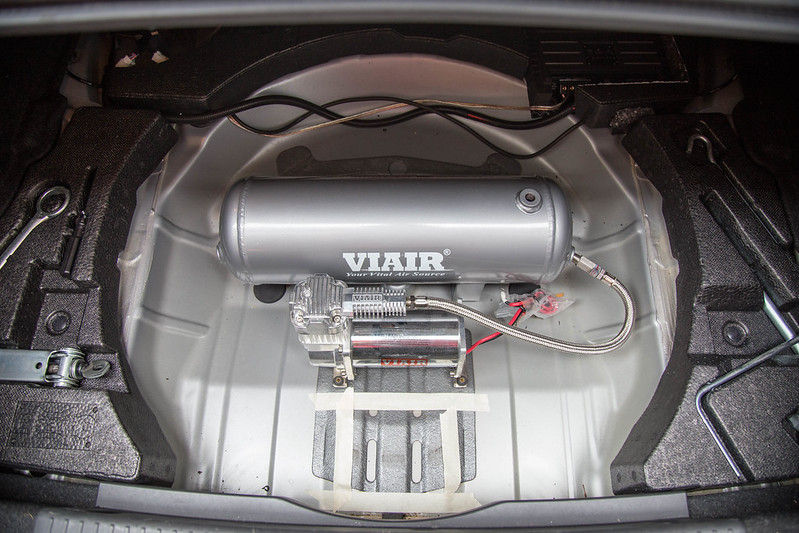 new computer (6 of 18)-2 by lawrx, on Flickr new computer (6 of 18)-2 by lawrx, on Flickr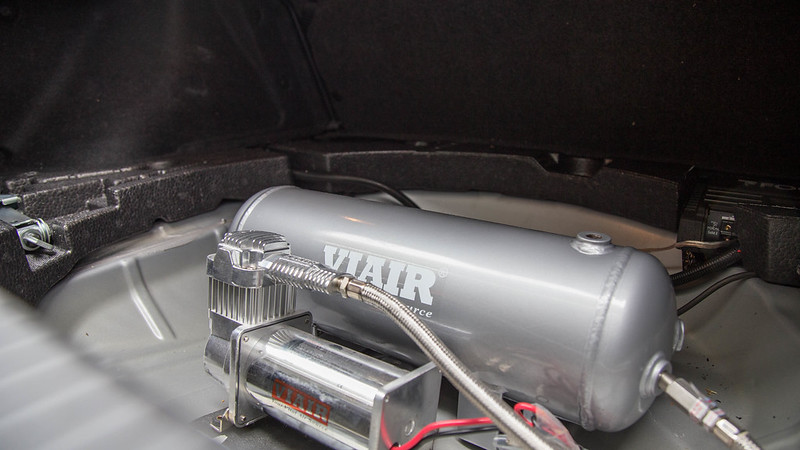 new computer (7 of 18)-2 by lawrx, on Flickrnew computer (6 of 18)-2 by lawrx, on Flickr new computer (7 of 18)-2 by lawrx, on Flickrnew computer (6 of 18)-2 by lawrx, on Flickr new computer (8 of 18)-2 by lawrx, on Flickr new computer (8 of 18)-2 by lawrx, on Flickr new computer (9 of 18)-2 by lawrx, on Flickr new computer (9 of 18)-2 by lawrx, on Flickr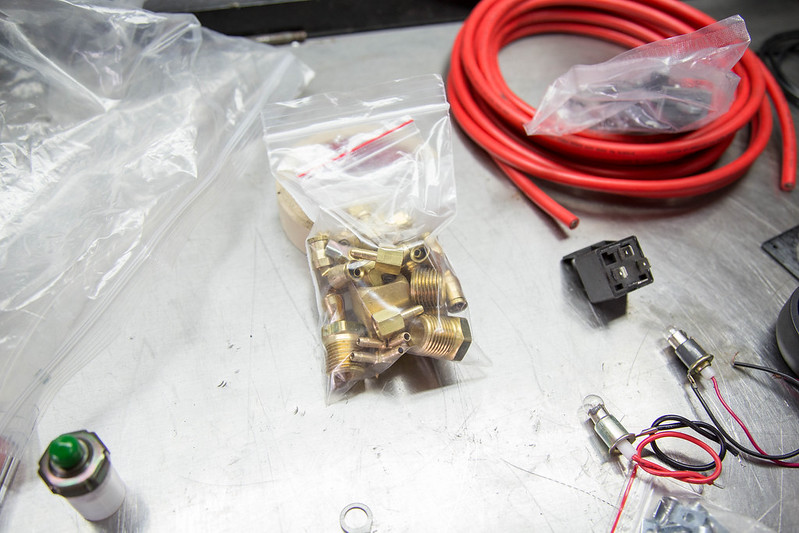 new computer (10 of 18)-2 by lawrx, on Flickr new computer (10 of 18)-2 by lawrx, on Flickr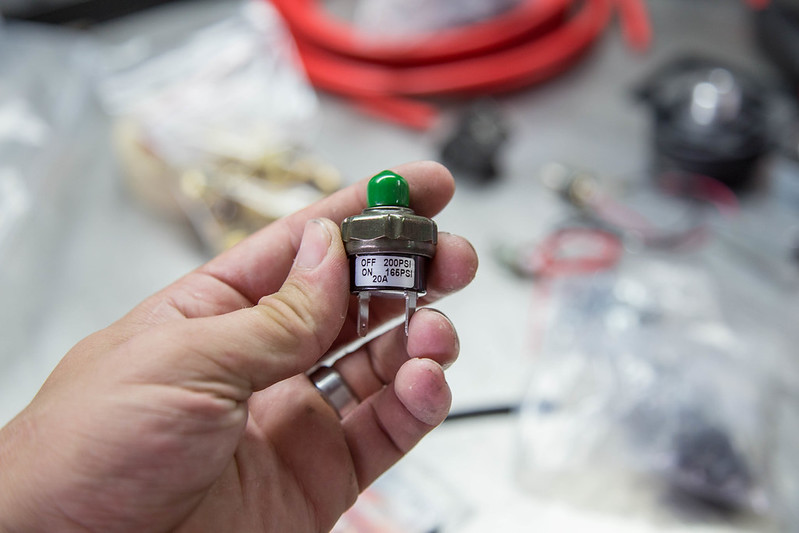 new computer (11 of 18)-2 by lawrx, on Flickr new computer (11 of 18)-2 by lawrx, on Flickr new computer (12 of 18)-2 by lawrx, on Flickr new computer (12 of 18)-2 by lawrx, on FlickrFinally able to get a hold of my coils, after having to cancel my initial order, then placing my new order and being told they are on back-order till late June, and then to have them arrive just 2 weeks after ordering. It was quite the roller coaster lol. Also had my caliper seals come in. Still waiting on the Ti bolts and pistons. Ive also got something awesome in the works for the rotors as well. Cant wait to get the ball rolling on that once I have the cash. This braking system is going to be like no other, I can't wait. Oh, almost forgot. Also picked up some solid steering rack bushings. Its actually one of the things im most looking forward to in this install, really hoping to improve sterring feedback a good bit. 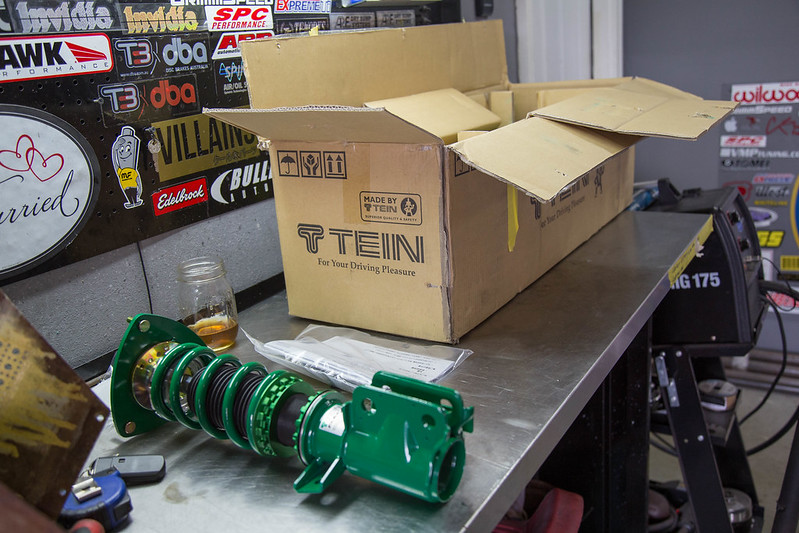 new computer (13 of 18)-2 by lawrx, on Flickr new computer (13 of 18)-2 by lawrx, on Flickr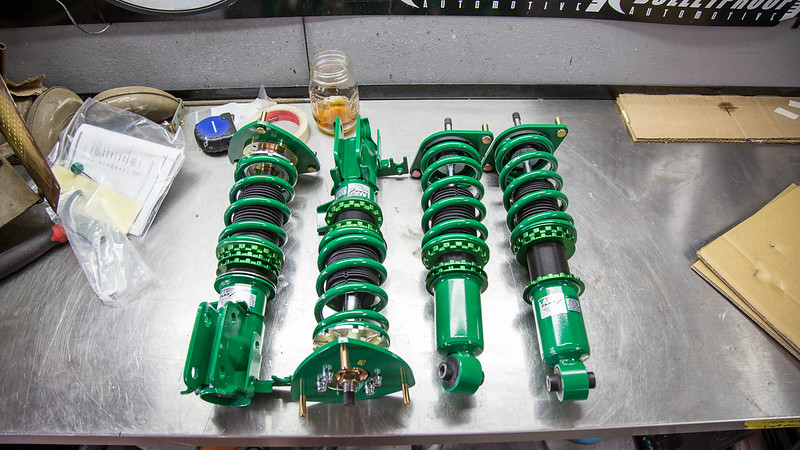 new computer (14 of 18)-2 by lawrx, on Flickr new computer (14 of 18)-2 by lawrx, on Flickr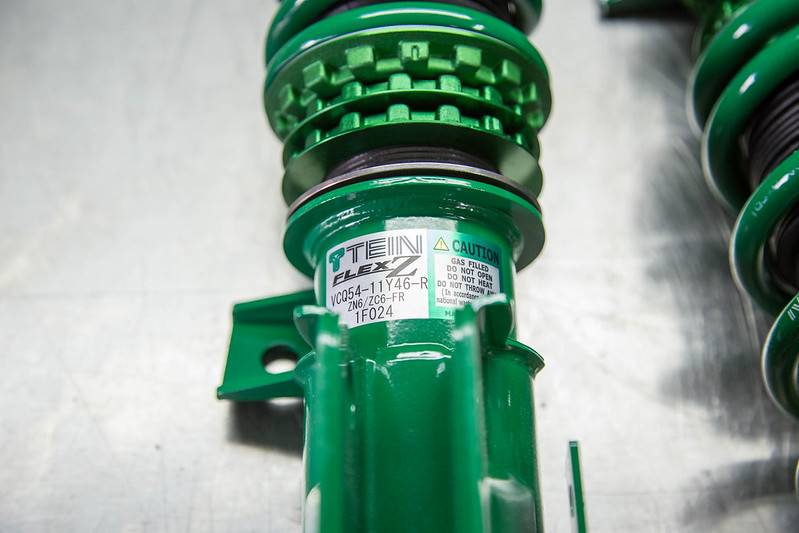 new computer (15 of 18)-2 by lawrx, on Flickr new computer (15 of 18)-2 by lawrx, on Flickr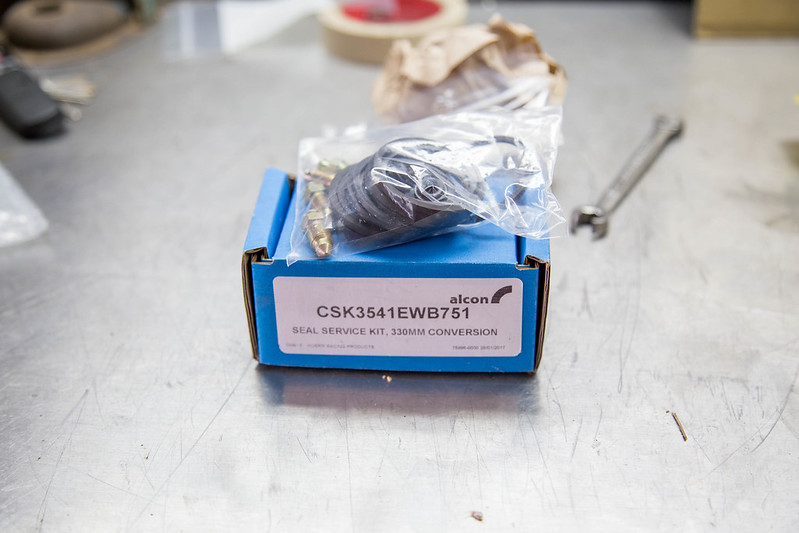 new computer (16 of 18)-2 by lawrx, on Flickr new computer (16 of 18)-2 by lawrx, on Flickr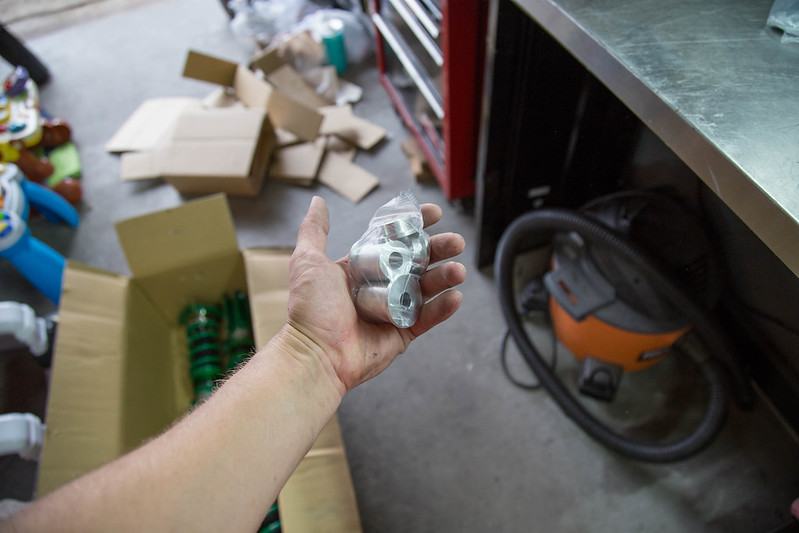 new computer (17 of 18)-2 by lawrx, on Flickr new computer (17 of 18)-2 by lawrx, on Flickr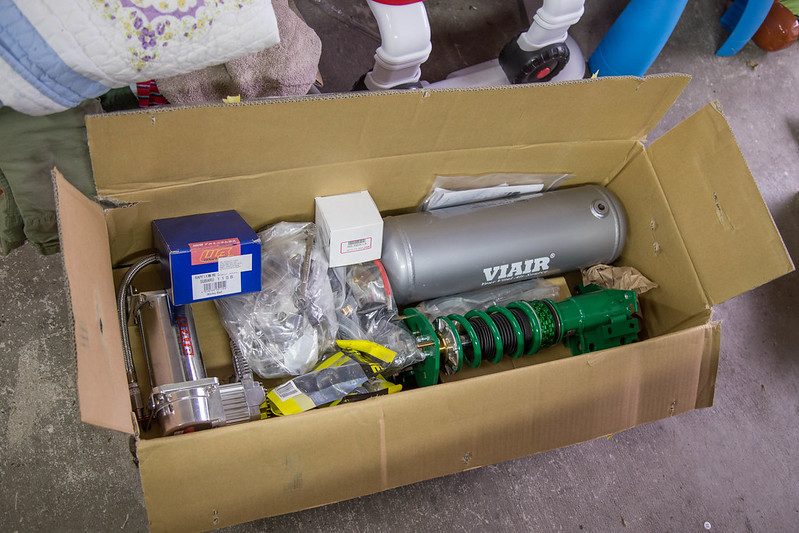 new computer (18 of 18)-2 by lawrx, on Flickr new computer (18 of 18)-2 by lawrx, on Flickr
|
|
|
|
| The Following User Says Thank You to laextreme5 For This Useful Post: | zeal86 (05-22-2017) |
|
05-29-2017, 12:23 PM
|
#50 |
|
Senior Member
Join Date: Apr 2013
Drives: 2014 BRZ
Location: Louisiana
Posts: 178
Thanks: 31
Thanked 122 Times in 67 Posts
Mentioned: 0 Post(s)
Tagged: 0 Thread(s)
|
Finally had some time to mount up the roof rack. Was a bit involved, but nothing i couldn't handle. We initially had some trouble actually finding one that fit my car. Yamaka has the Q clips howver they were backordered and then discontinued. SO i had to find another route. I didn't like the ones that Strapped to the window openings, and this was really the only option, drilling and riveting to the roof. rather that i didn't have to but is what it is.
Started out by laying out all the parts and such, i can be OCD at times. I also apologize, all the pictures are with my iphone as the wife has the camera for the day. 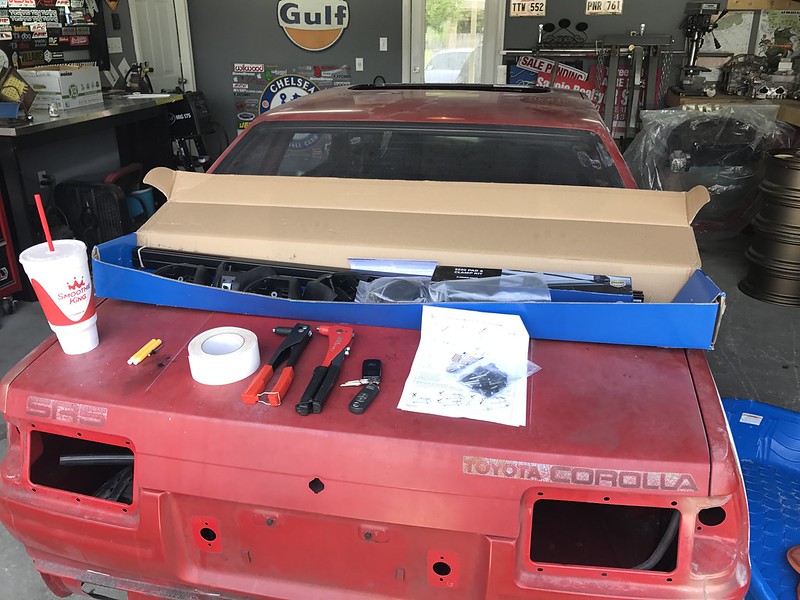 IMG_9440 by lawrx, on Flickr IMG_9440 by lawrx, on Flickr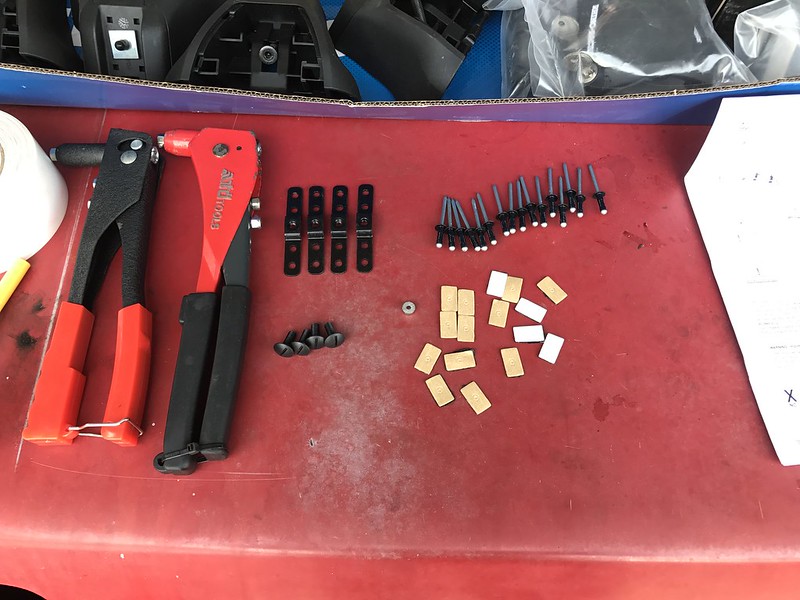 IMG_9442 by lawrx, on Flickr IMG_9442 by lawrx, on Flickr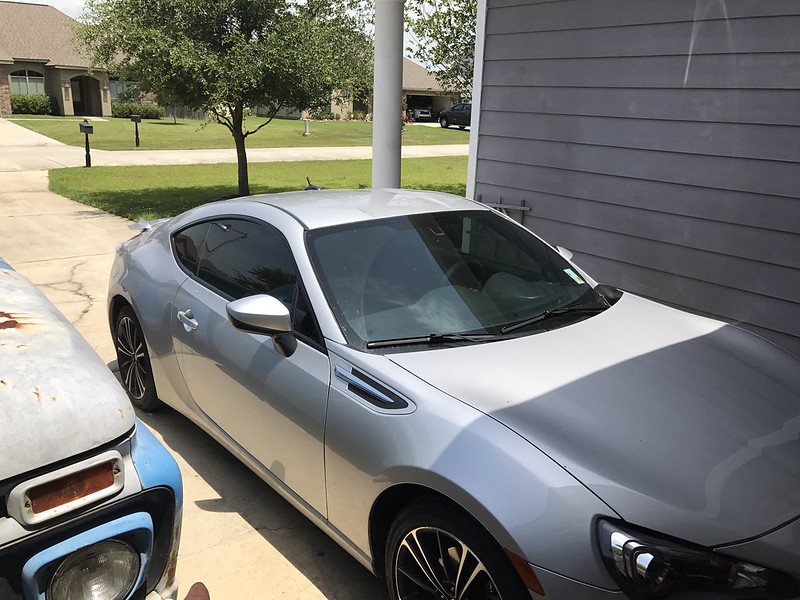 IMG_9441 by lawrx, on Flickr IMG_9441 by lawrx, on FlickrStarted off by doing a test fit. Verifying the minimum distance the towers must be apart would fit my roof. It did with not much room to spare. Im glad i have the shorty antenna as it would have hit the crossbar. With them mocked up, i marked my center points, verified side to side it was square and then started marking the holes to drill for the rivets. 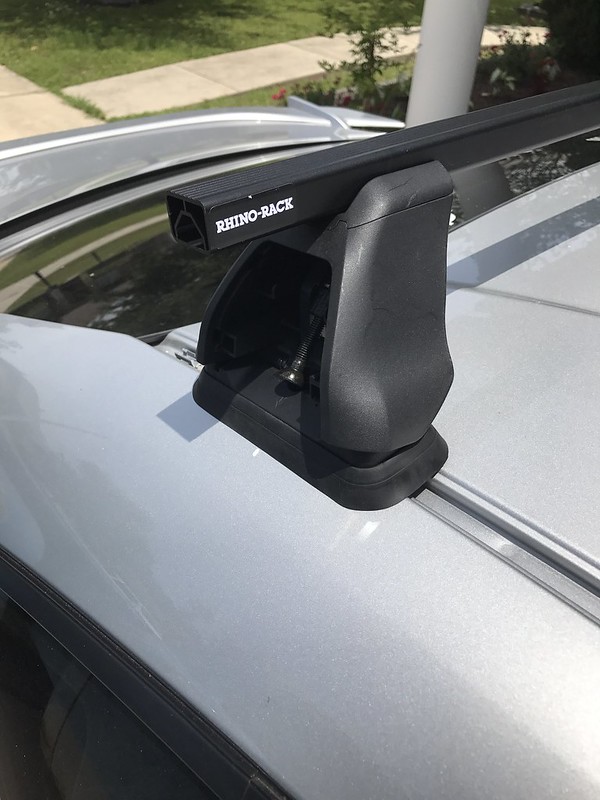 IMG_9445 by lawrx, on Flickr IMG_9445 by lawrx, on Flickr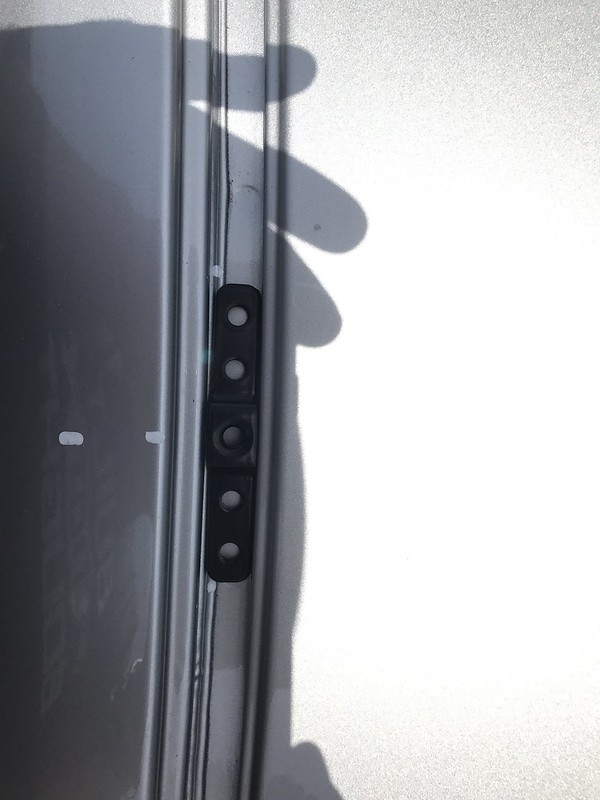 IMG_9446 by lawrx, on Flickr IMG_9446 by lawrx, on Flickr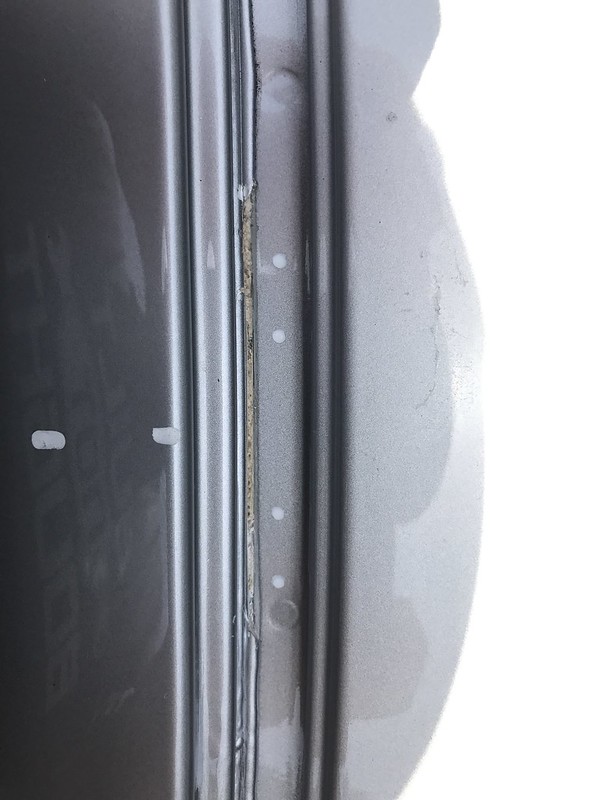 IMG_9448 by lawrx, on Flickr IMG_9448 by lawrx, on Flickr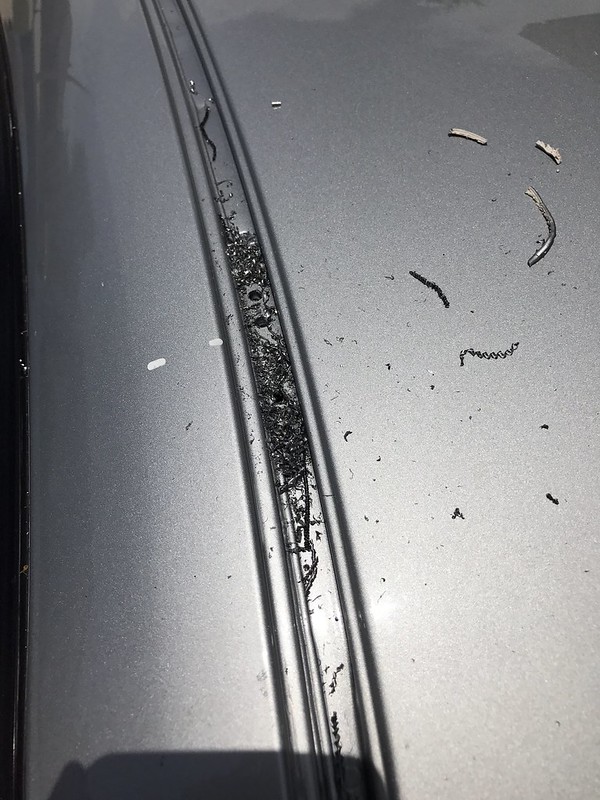 IMG_9449 by lawrx, on Flickr IMG_9449 by lawrx, on Flickr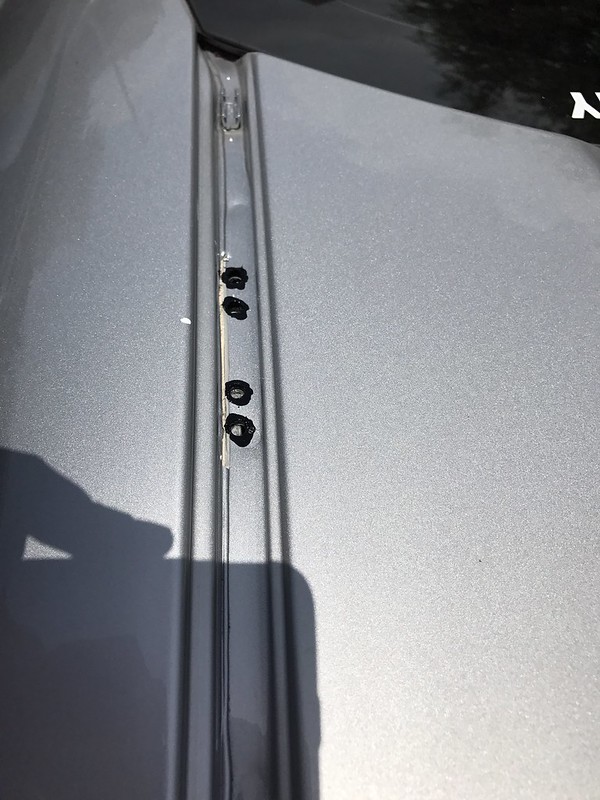 IMG_9450 by lawrx, on Flickr IMG_9450 by lawrx, on FlickrWith the holes drilled, primed for corrosion protection from i riveted in the brackets. With the brackets in i had to trim the roof moulding to fit around them. Cutting soft rubber sucks. 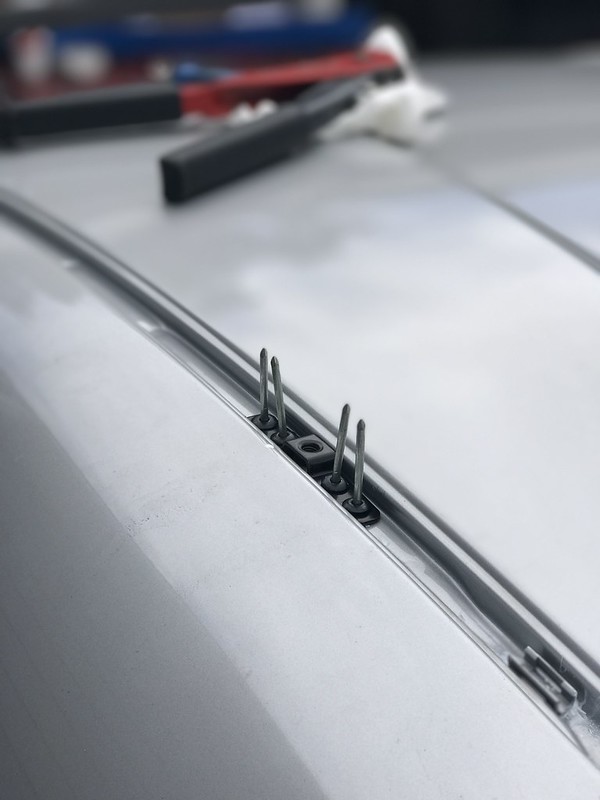 IMG_9466 by lawrx, on Flickr IMG_9466 by lawrx, on Flickr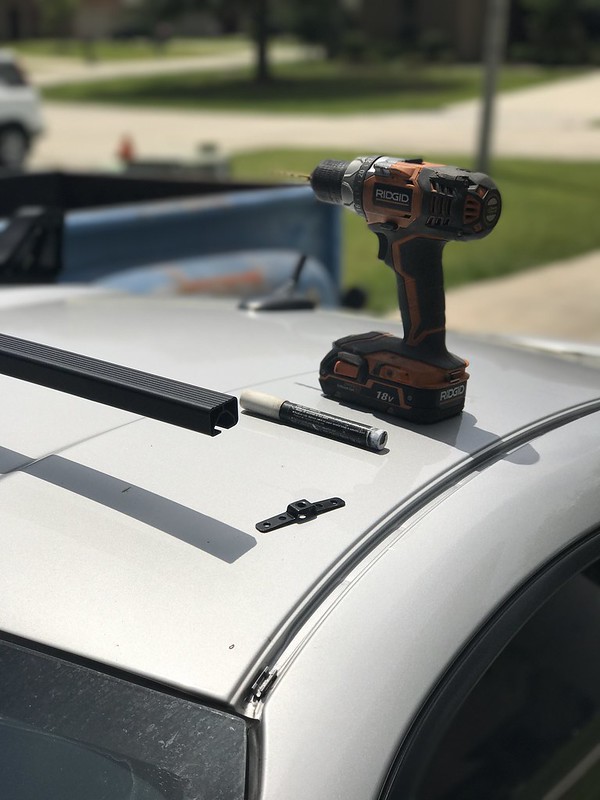 IMG_9464 by lawrx, on Flickr IMG_9464 by lawrx, on Flickr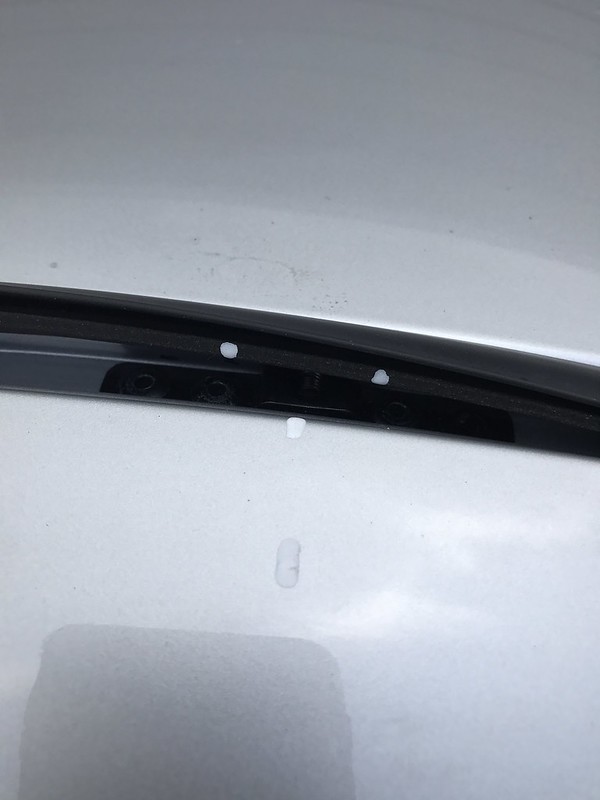 IMG_9452 by lawrx, on Flickr IMG_9452 by lawrx, on Flickr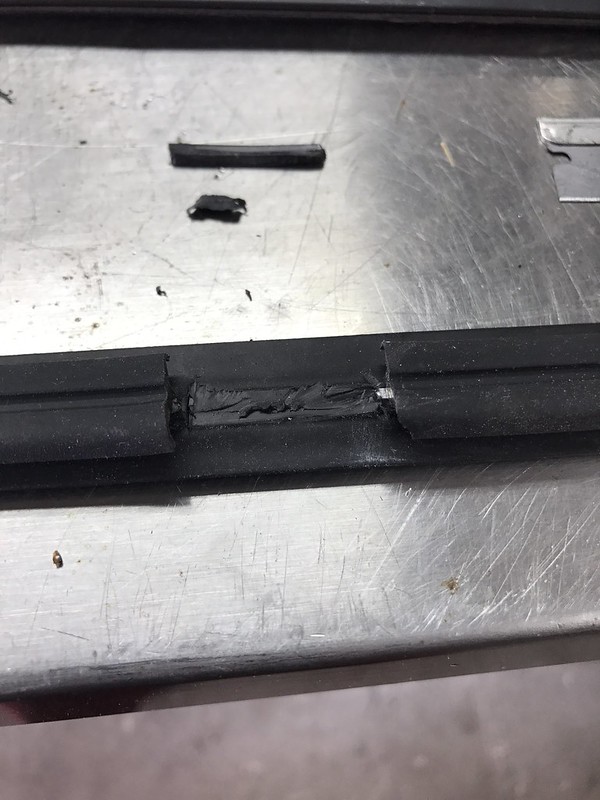 IMG_9454 by lawrx, on Flickr IMG_9454 by lawrx, on Flickr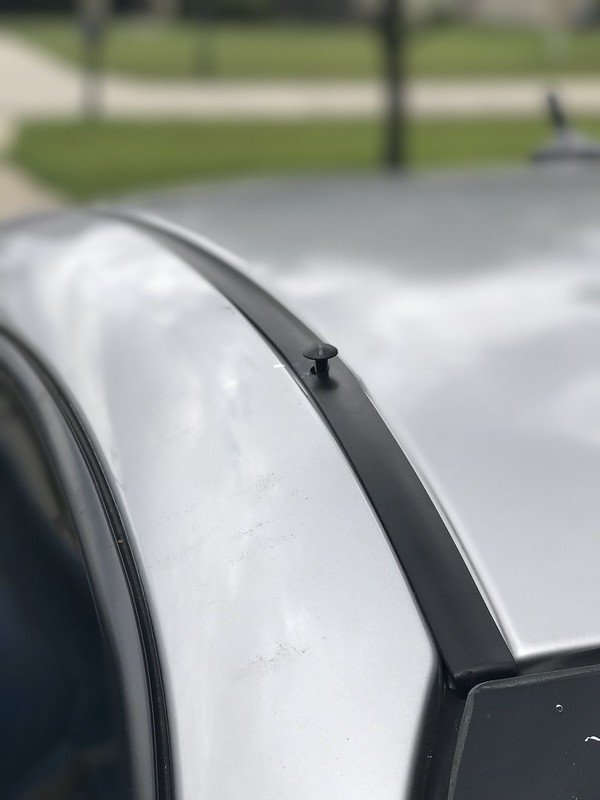 IMG_9457 by lawrx, on Flickr IMG_9457 by lawrx, on FlickrWith the holes drilled, brackets riveted, and roof moulding trimmed all thats left to do was to changing the mounting hardware on the towers and bolt them up. With them bolted up i could slide the crossbars in and tighten them down once verifying they were centered. Once all was tight it was a trip to academy to pick up a universal kayak mount system and take her on her maiden voyage. Other than some wind noise all was golden, she took it like a champ. 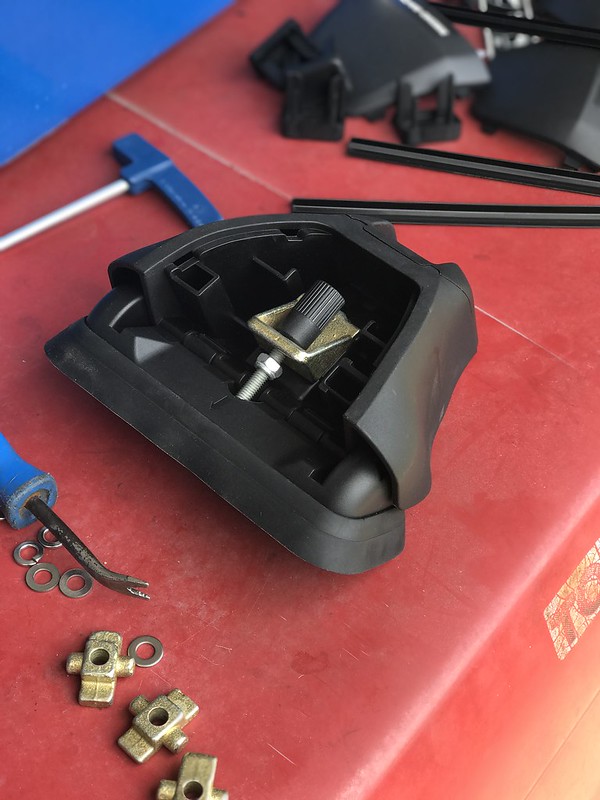 IMG_9459 by lawrx, on Flickr IMG_9459 by lawrx, on Flickr IMG_9460 by lawrx, on Flickr IMG_9460 by lawrx, on Flickr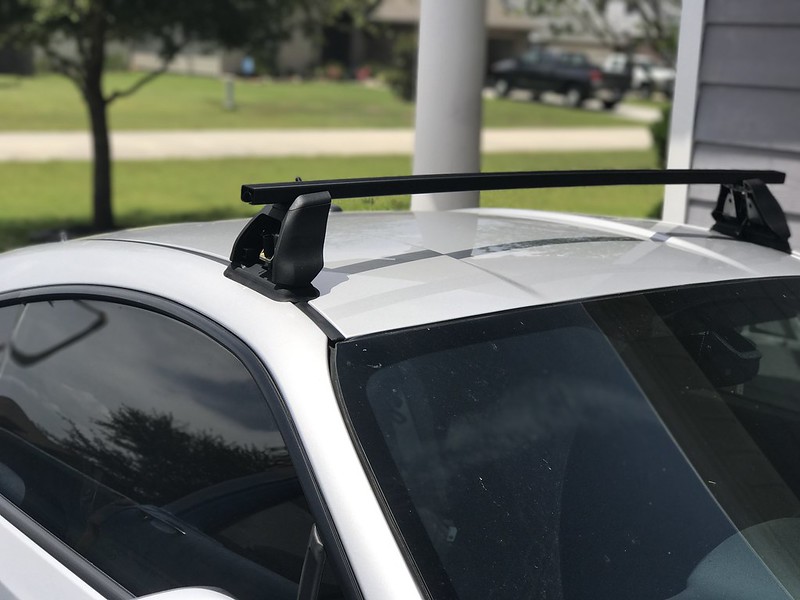 IMG_9462 by lawrx, on Flickr IMG_9462 by lawrx, on Flickr IMG_9468 by lawrx, on Flickr IMG_9468 by lawrx, on Flickr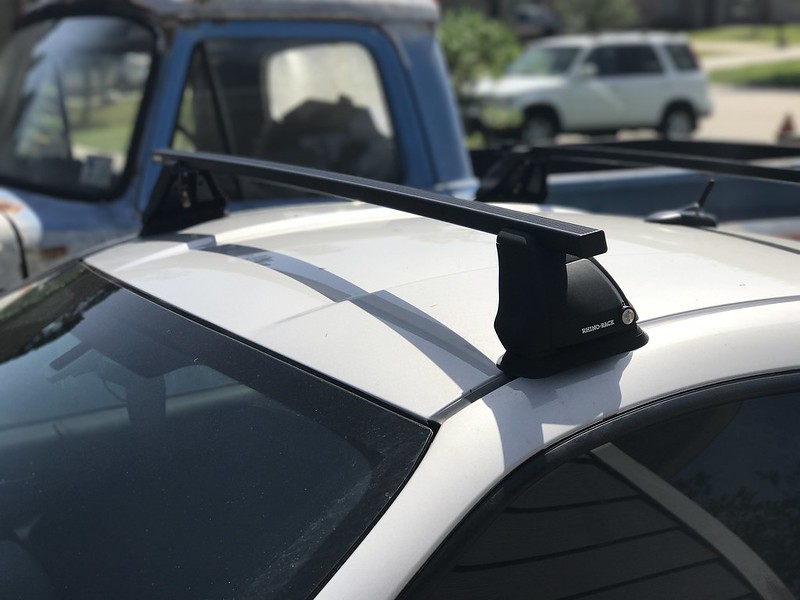 IMG_9470 by lawrx, on Flickr IMG_9470 by lawrx, on Flickr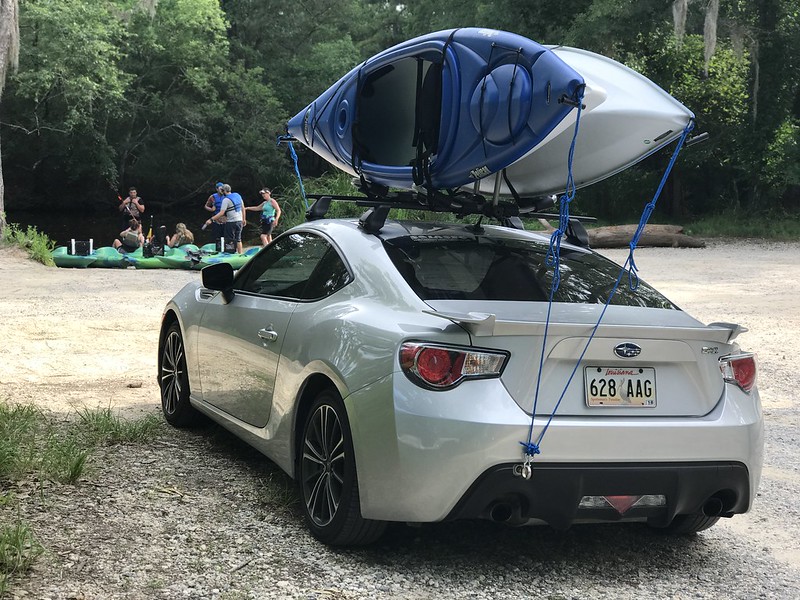 IMG_9472 by lawrx, on Flickr IMG_9472 by lawrx, on Flickr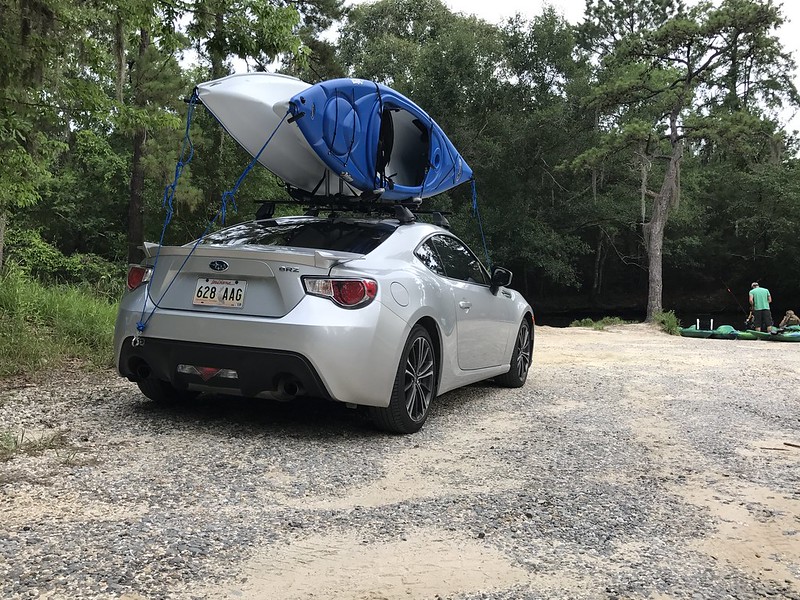 IMG_9473 by lawrx, on Flickr IMG_9473 by lawrx, on Flickr
|
|
|
|
| The Following User Says Thank You to laextreme5 For This Useful Post: | Allch Chcar (11-01-2017) |
|
05-29-2017, 07:36 PM
|
#51 | |
|
Senior Member

Join Date: Oct 2016
Drives: Grrrr
Location: The Motherland (not France)
Posts: 599
Thanks: 330
Thanked 378 Times in 231 Posts
Mentioned: 14 Post(s)
Tagged: 0 Thread(s)
|
Quote:
|
|
|
|
|
|
05-29-2017, 09:49 PM
|
#52 | |
|
Senior Member
Join Date: Apr 2013
Drives: 2014 BRZ
Location: Louisiana
Posts: 178
Thanks: 31
Thanked 122 Times in 67 Posts
Mentioned: 0 Post(s)
Tagged: 0 Thread(s)
|
Quote:
|
|
|
|
|
|
05-29-2017, 09:50 PM
|
#53 | |
|
Senior Member
Join Date: Apr 2013
Drives: 2014 BRZ
Location: Louisiana
Posts: 178
Thanks: 31
Thanked 122 Times in 67 Posts
Mentioned: 0 Post(s)
Tagged: 0 Thread(s)
|
Quote:
|
|
|
|
|
|
05-30-2017, 03:59 AM
|
#54 | |
|
Senior Member
Join Date: Oct 2016
Drives: Grrrr
Location: The Motherland (not France)
Posts: 599
Thanks: 330
Thanked 378 Times in 231 Posts
Mentioned: 14 Post(s)
Tagged: 0 Thread(s)
|
Quote:
If I had the truck I'd just make it a runner and use it. It looks right in the condition it is in to my eyes. |
|
|
|
|
|
06-15-2017, 10:58 PM
|
#55 |
|
Senior Member
Join Date: Apr 2013
Drives: 2014 BRZ
Location: Louisiana
Posts: 178
Thanks: 31
Thanked 122 Times in 67 Posts
Mentioned: 0 Post(s)
Tagged: 0 Thread(s)
|
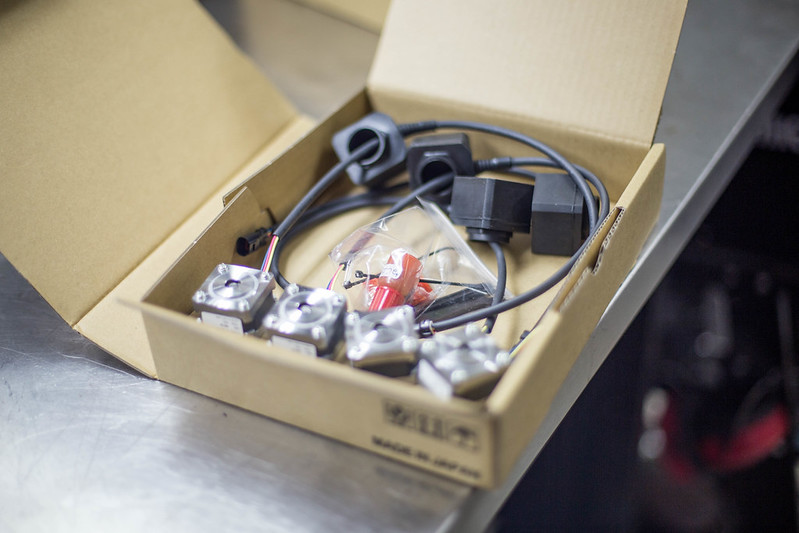
Few more parts are rolling in. Tein edfc controller and motors are in. I also ordered a new center console and lower din which ill be using to mold in the buttons and move a few things around to my liking.
 untitled (1 of 5) by lawrx, on Flickr untitled (1 of 5) by lawrx, on Flickr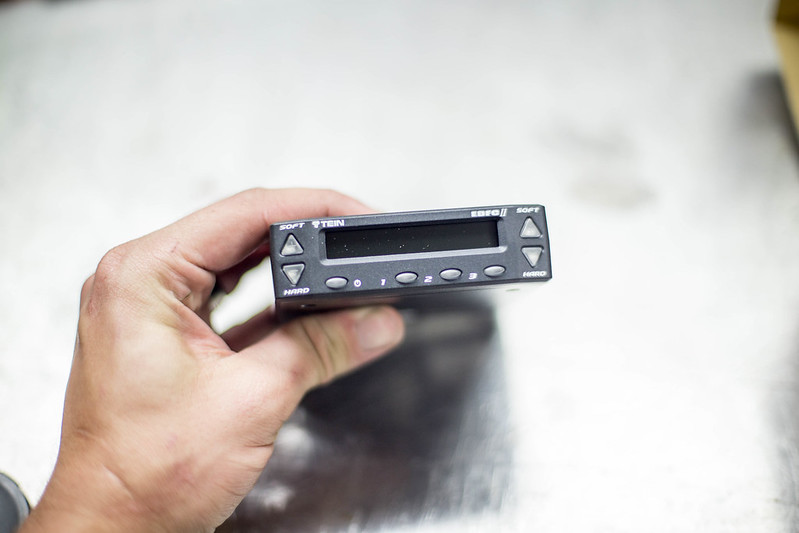 untitled (2 of 5) by lawrx, on Flickr untitled (2 of 5) by lawrx, on Flickr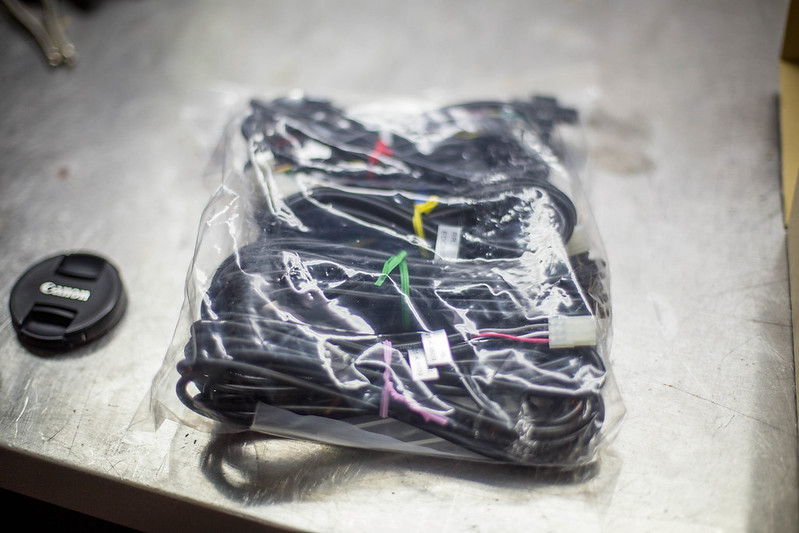 untitled (3 of 5) by lawrx, on Flickr untitled (3 of 5) by lawrx, on Flickr untitled (4 of 5) by lawrx, on Flickr untitled (4 of 5) by lawrx, on Flickr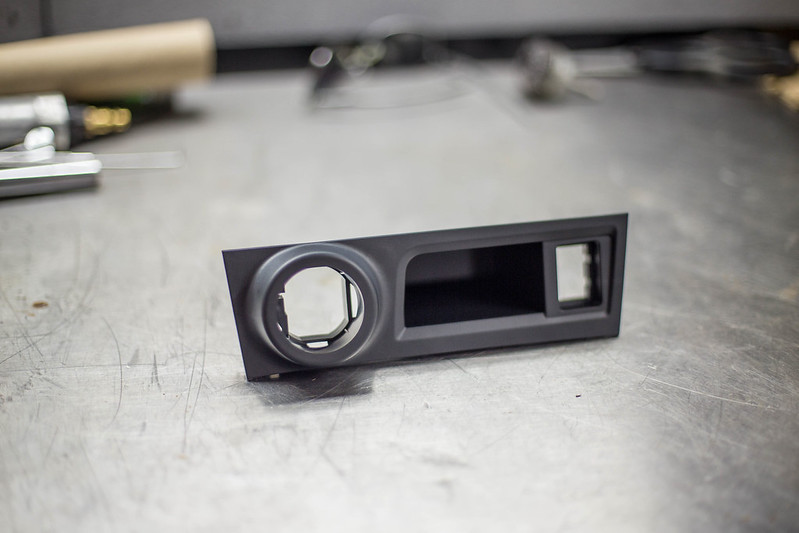 untitled (5 of 5) by lawrx, on Flickr untitled (5 of 5) by lawrx, on Flickr
|
|
|
|
| The Following User Says Thank You to laextreme5 For This Useful Post: | zeal86 (06-15-2017) |
|
06-23-2017, 01:52 PM
|
#56 |
|
Senior Member
Join Date: Apr 2013
Drives: 2014 BRZ
Location: Louisiana
Posts: 178
Thanks: 31
Thanked 122 Times in 67 Posts
Mentioned: 0 Post(s)
Tagged: 0 Thread(s)
|
Last night i had a bit of downtime while waiting for an alignment to show up. So i threw the car up the rack to tidy a few things up.
LAst few weeks my tire lights kicked on and off so i checked the pressures, sure enough they were all 5-6 psi low. I also checked the alignment as i needed to recenter the steering wheel after the installation of the Prodrive and quick release setup, as it was one tooth off from center and driving me nuts. Steering wheel center, toe straight, and tires topped off i was good to go. Ive got a bunch of stuff i the works to finish up collecting the rest of the suspension setup, its taking a little longer than i planned, but ive got some stuff coming in soon. Sadly still lots more to buy. I cant wait till its all in and installed, going to change everything about the car, in a very good way. (sorry for the iphone shots) 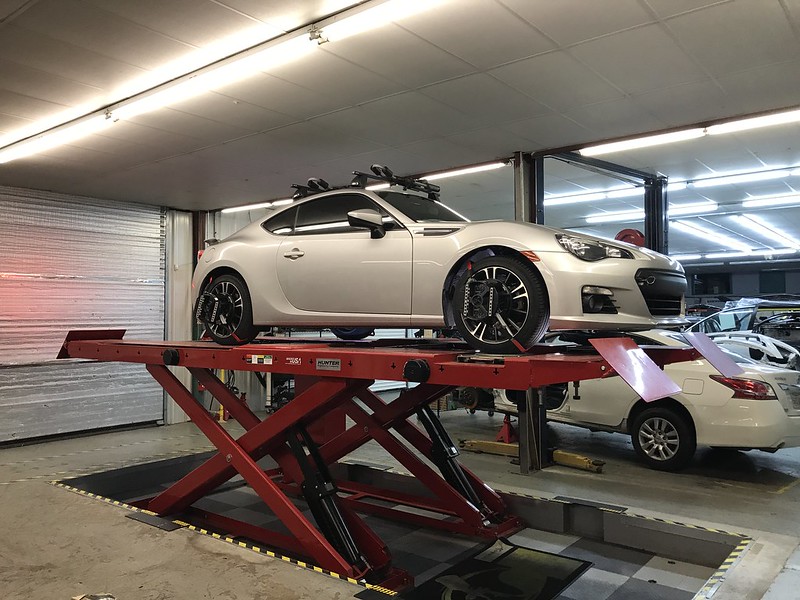 IMG_9718 by lawrx, on Flickr IMG_9718 by lawrx, on Flickr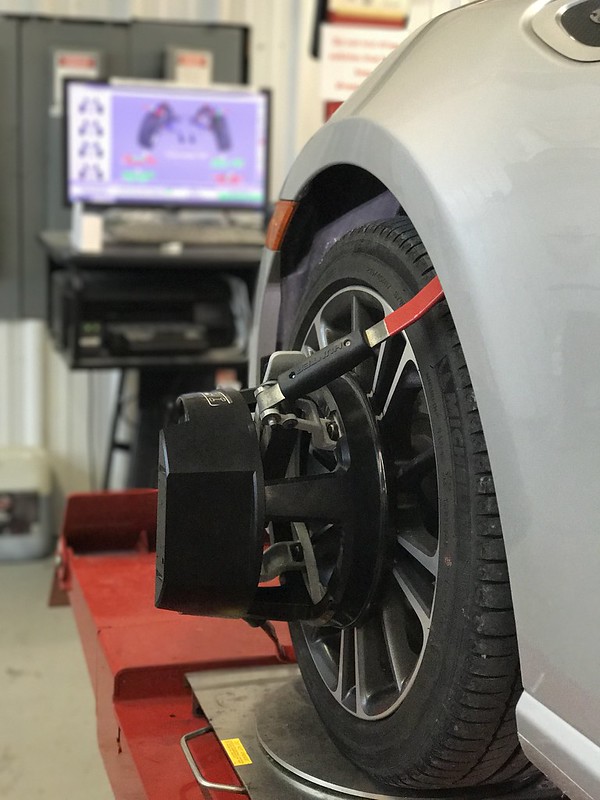 IMG_9715 by lawrx, on Flickr IMG_9715 by lawrx, on Flickr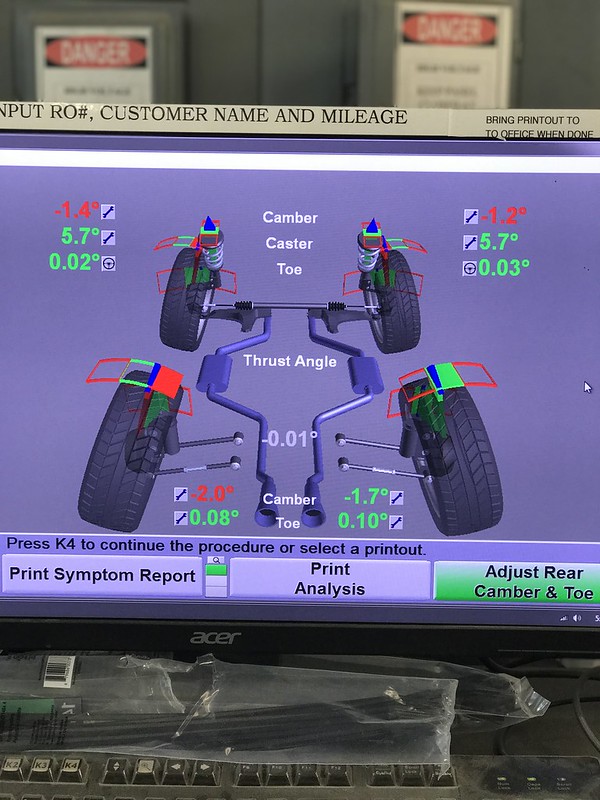 IMG_9717 by lawrx, on Flickr IMG_9717 by lawrx, on Flickr IMG_9713 by lawrx, on Flickr IMG_9713 by lawrx, on Flickr
|
|
|
|
|
|
|
|
|
|
 Similar Threads
|
||||
| Thread | Thread Starter | Forum | Replies | Last Post |
| Red GT86 from Europe - Slow build - Daily+track. | Iceman | Member's Car Journals | 53 | 12-22-2020 03:59 PM |
| Matey's BReeZy. Slow and steady | Matey | Member's Car Journals | 23 | 08-23-2015 06:43 PM |
| FRS slow daily/ drift build | SciOnDrifTtSlIdeR | Member's Car Journals | 7 | 04-19-2015 02:50 AM |
| Slow and Steady | Simok | Member's Car Journals | 5 | 02-06-2015 05:26 PM |
| Mr. Sociable's BRZ Daily Driver (slow) Build | Mr. Sociable | Member's Car Journals | 23 | 11-01-2012 10:46 AM |


