02-18-2014, 01:57 AM
|
#211 | |
|
Senior Member

Join Date: Dec 2012
Drives: Firestorm Red FRS/86 MT
Location: So Cal South Bay LA/ 626
Posts: 182
Thanks: 177
Thanked 57 Times in 31 Posts
Mentioned: 1 Post(s)
Tagged: 0 Thread(s)
|
Quote:
Agreed. I ended up using an old cable from a previous hid kit. Worked out nicely
__________________
 |
|

|

|
| The Following User Says Thank You to Techfl3x For This Useful Post: | lbroskee (02-18-2014) |
|
02-18-2014, 02:07 AM
|
#212 | |
|
Senior Member

Join Date: Jul 2012
Drives: 2023 WRB BRZ (MT)
Location: Coral Springs, SoFlo
Posts: 2,252
Thanks: 1,503
Thanked 534 Times in 430 Posts
Mentioned: 42 Post(s)
Tagged: 5 Thread(s)
|
Quote:
|
|
|
|
|
| The Following User Says Thank You to lbroskee For This Useful Post: | Techfl3x (02-18-2014) |
|
02-18-2014, 08:29 PM
|
#213 |
|
Senior Member
Join Date: Dec 2012
Drives: Firestorm Red FRS/86 MT
Location: So Cal South Bay LA/ 626
Posts: 182
Thanks: 177
Thanked 57 Times in 31 Posts
Mentioned: 1 Post(s)
Tagged: 0 Thread(s)
|
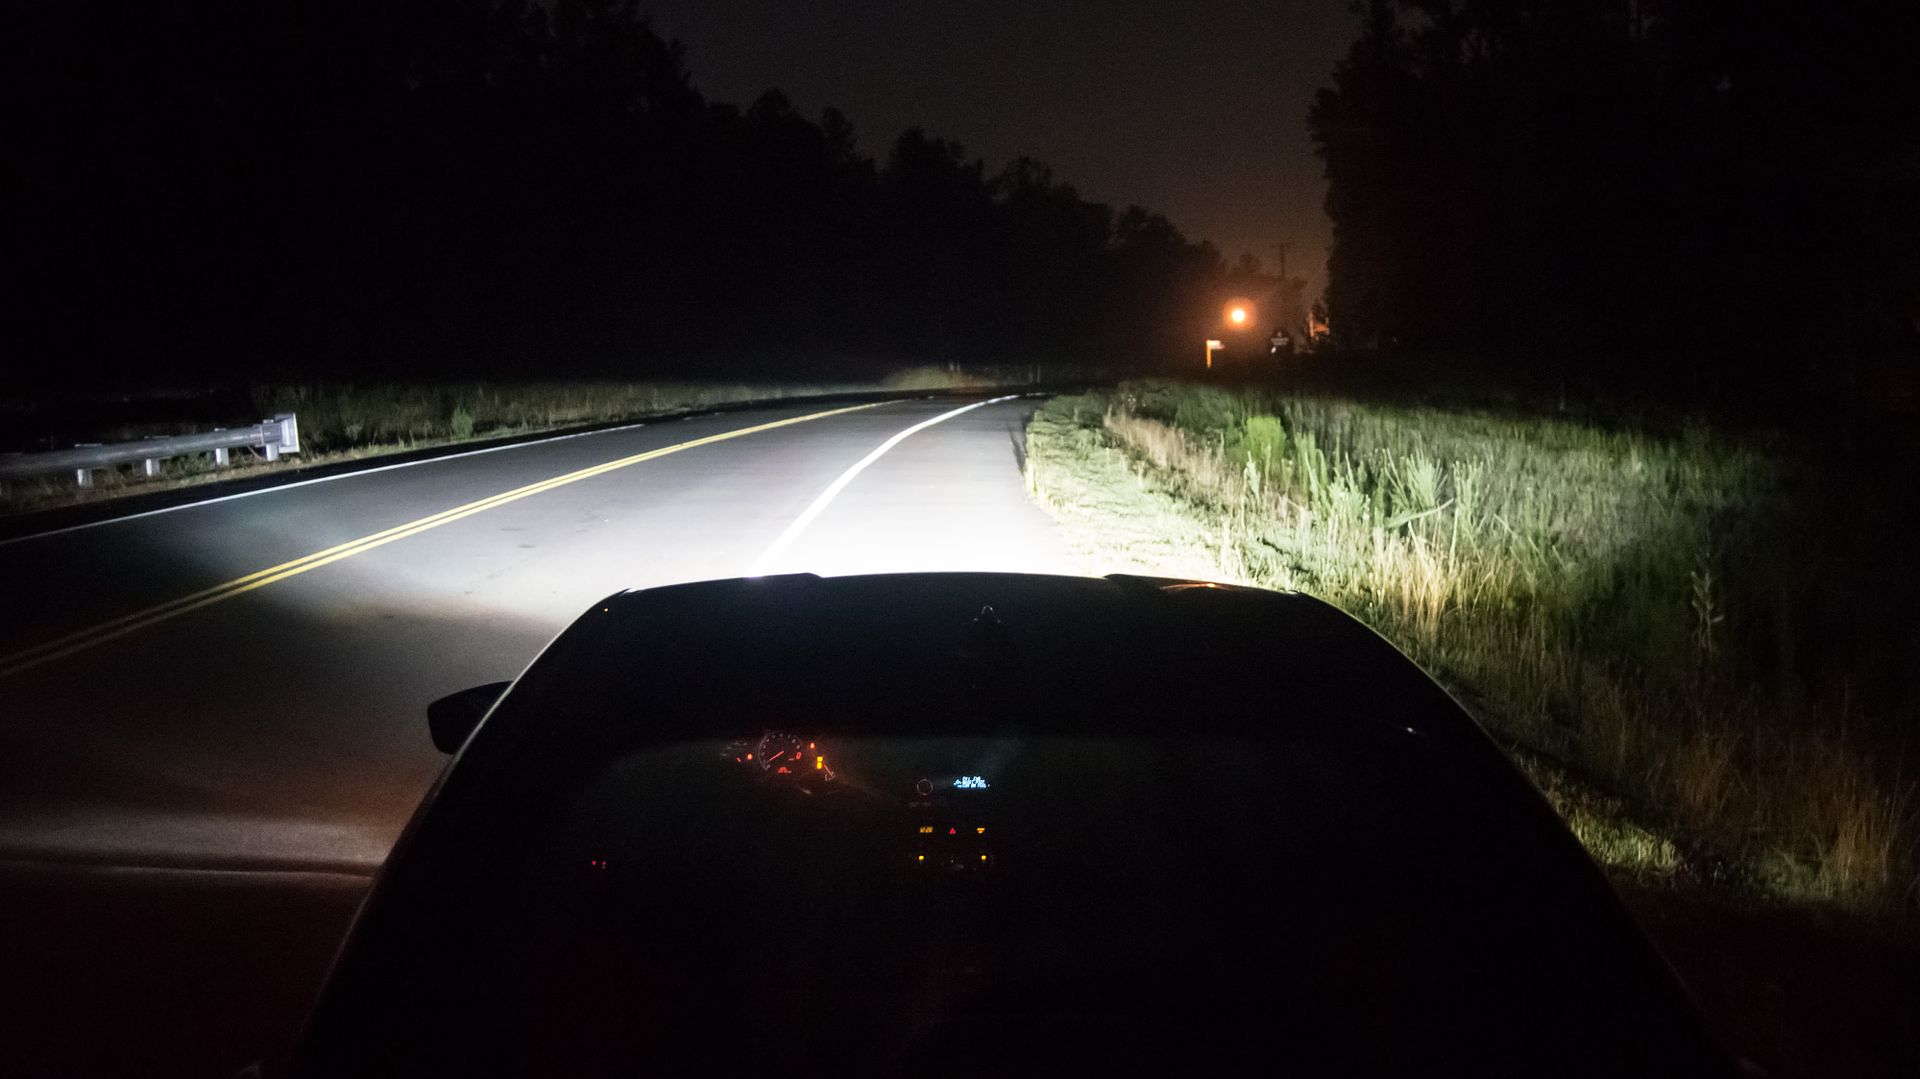
Finally finished this DIY. Thx for the info. Haven't aligned them yet but cut off line looks nice. Was bummed that one ballast doesn't turn on immediately though. I have to switch them on and off.
__________________
|
|
|
|
| The Following User Says Thank You to Techfl3x For This Useful Post: | lbroskee (02-19-2014) |
|
02-19-2014, 12:11 AM
|
#214 | |
|
Senior Member
Join Date: Jul 2012
Drives: 2023 WRB BRZ (MT)
Location: Coral Springs, SoFlo
Posts: 2,252
Thanks: 1,503
Thanked 534 Times in 430 Posts
Mentioned: 42 Post(s)
Tagged: 5 Thread(s)
|
Quote:

|
|
|
|
|
|
03-20-2014, 01:37 AM
|
#215 |
|
Member

Join Date: Jul 2013
Drives: 2013 Whiteout FRS
Location: Charlotte, NC
Posts: 70
Thanks: 13
Thanked 32 Times in 21 Posts
Mentioned: 2 Post(s)
Tagged: 0 Thread(s)
|
Wow, huge thanks to @civicdrivr @raul and HIDPlanet for the awesome guide/help. I was finally able to complete the project over the weekend and I gotta admit, its a lot better than our stock halogens.
Raul and i have noticed that the relay harness that's being shipped out now is different than the one pictured on the first page. For pics: http://www.hidplanet.com/forums/show...2013-Scion-FRS
__________________
 |
|
|
|
| The Following 2 Users Say Thank You to BaeK For This Useful Post: | civicdrivr (05-06-2014), raul (03-20-2014) |
|
04-26-2014, 12:59 AM
|
#216 | |
|
Senior Member

Join Date: Jul 2012
Drives: '13 Firestorm Base AT
Location: Tucson
Posts: 473
Thanks: 354
Thanked 75 Times in 63 Posts
Mentioned: 5 Post(s)
Tagged: 0 Thread(s)
|
Quote:
Oh and this thread is amazing! I love the using the stock projectors in the high beam spot just for the DRLs. Looks sick... I Hope people start playing with the taillights some. It'd be cool to see some custom ones, though, the aftermarket has really done well on that front. I don't think I can do this mod until I fix the lights in my miata or at some point I will have to go from these to Oem Miata garbage... It's awful... anyone who's owned an NA can attest to this. |
|
|
|
|
|
05-02-2014, 12:51 AM
|
#217 | |
|
Canadian
Join Date: Jul 2012
Drives: Frieda: Firestorm/MT (11/28/2012)
Location: Kitchener, ON
Posts: 408
Thanks: 55
Thanked 53 Times in 37 Posts
Mentioned: 13 Post(s)
Tagged: 0 Thread(s)
|
Quote:
I'm ordering the new wiring harness with those grounds (mine is the one with just the battery ground) and also some 4300k bulbs instead of the 6000k's. Hopefully that (the harness, not the bulbs) fixes it. If not, ballasts are next.
__________________
Brandon
Last edited by thorlius; 05-02-2014 at 01:06 AM. |
|
|
|
|
|
05-02-2014, 04:16 AM
|
#218 |
|
Senior Member

Join Date: Jul 2013
Drives: Asphalt FR-S
Location: Quebec, Canada
Posts: 654
Thanks: 822
Thanked 418 Times in 222 Posts
Mentioned: 6 Post(s)
Tagged: 1 Thread(s)
|
Could you reupload your pictures to imgur? This way we can see the tutorial. your images are over-bandwidth!
|
|
|
|
| The Following 2 Users Say Thank You to Mad1723 For This Useful Post: | civicdrivr (05-06-2014), kalamitykode (05-02-2014) |
|
05-06-2014, 02:28 PM
|
#219 | |
|
Senior Member

Join Date: Mar 2012
Drives: 2018 Golf R
Location: Richmond, VA
Posts: 2,807
Thanks: 5,386
Thanked 1,095 Times in 647 Posts
Mentioned: 68 Post(s)
Tagged: 7 Thread(s)
|
Quote:
Sent from my Nexus 4 using Tapatalk
__________________
Parting out HERE
|
|
|
|
|
|
07-28-2014, 01:46 PM
|
#220 | |
|
Senior Member
Join Date: Mar 2013
Drives: 2017 Halo Toyota 86
Location: Frisco Tx
Posts: 221
Thanks: 44
Thanked 37 Times in 27 Posts
Mentioned: 4 Post(s)
Tagged: 0 Thread(s)
|
The pictures are no longer accessible and I just got mine in and I need to adjust them. This is the only link I can find for it lol.
Quote:
__________________
previous build thread!
http://www.ft86club.com/forums/showt...236#post962236 |
|
|
|
|
|
08-04-2014, 03:03 PM
|
#221 | |
|
Senior Member

Join Date: Mar 2014
Drives: 2013 FR-S
Location: North Georgia
Posts: 451
Thanks: 264
Thanked 117 Times in 81 Posts
Mentioned: 13 Post(s)
Tagged: 0 Thread(s)
|
Quote:
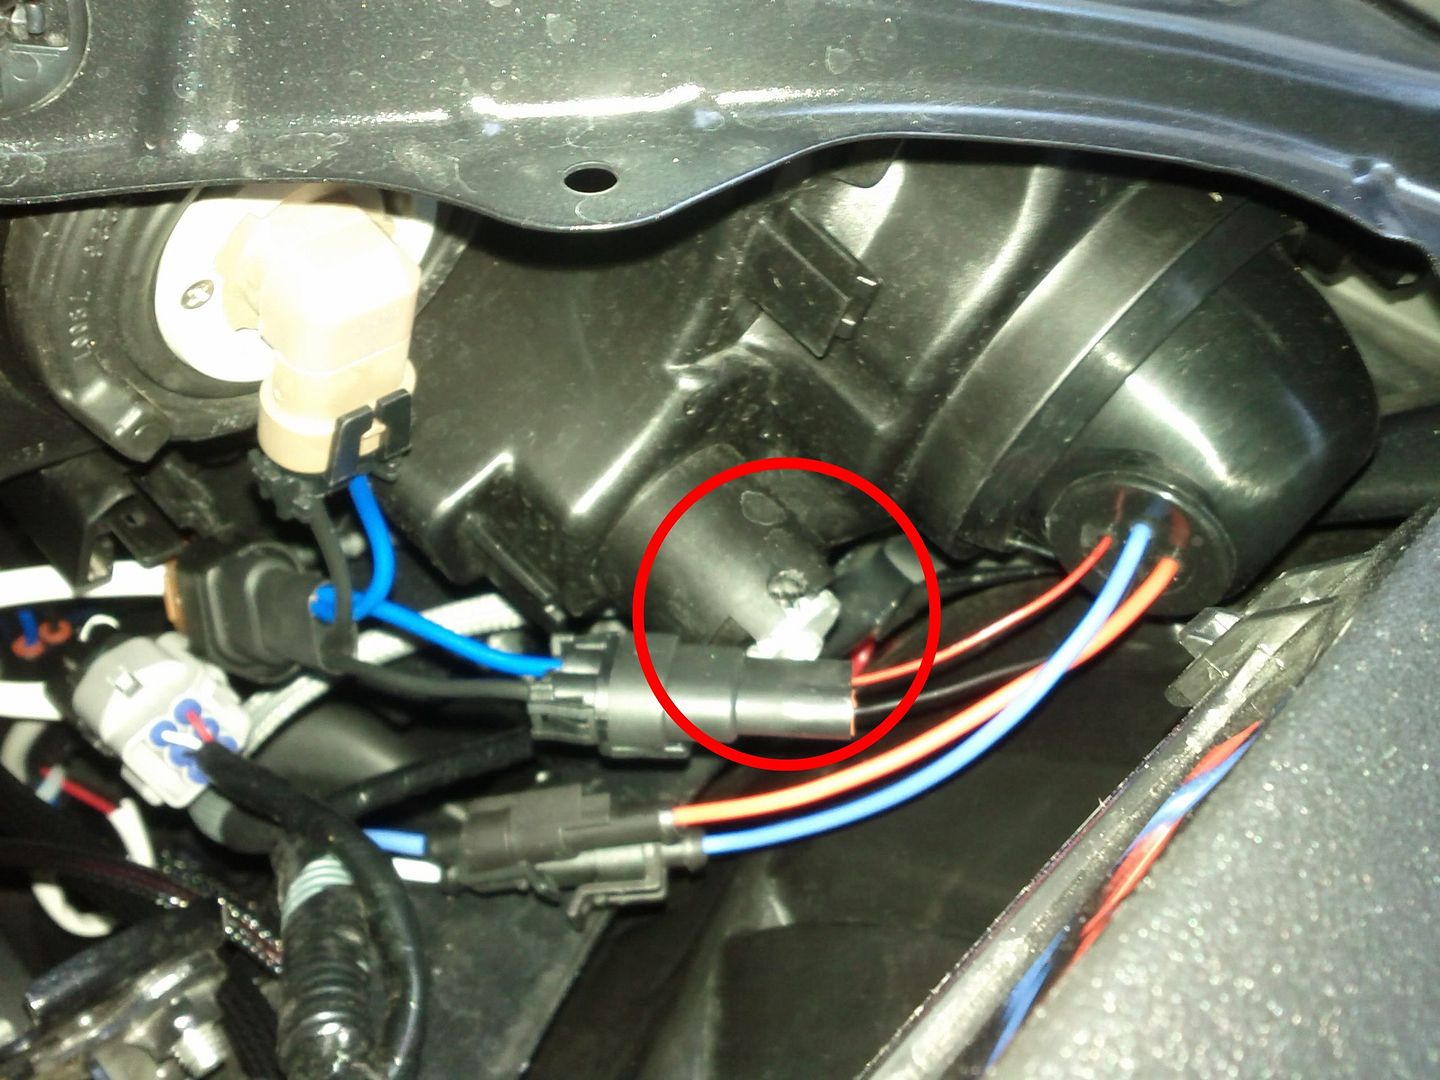
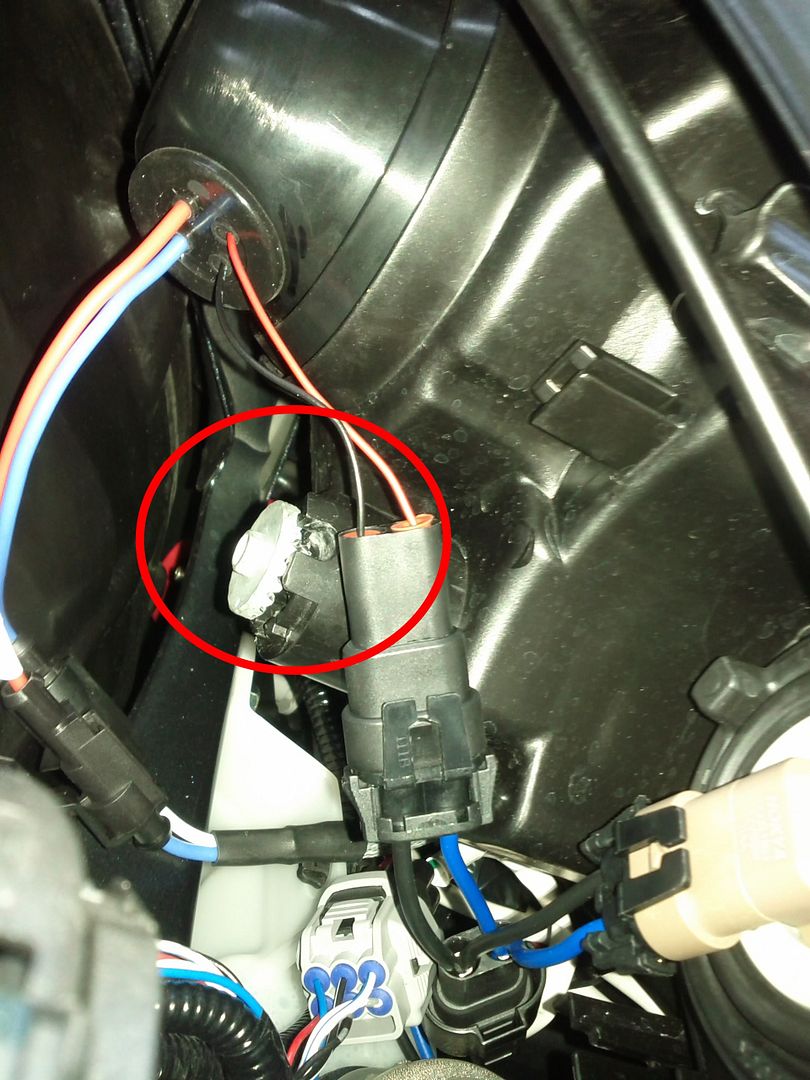
The adjustment is really simple. If you're looking at the backside of your headlights there's 2 little knob looking things with a toothed washer underneath them. One is on the corner down towards the wheel and one is right there in plain sight closer to the hood. Just wrench on those til you're happy with their direction. One is for elevation and one is for right to left. Good luck.
__________________
2013 FRS-Asphalt-M6-Invidia N1, K&N drop in, plasti dipped emblems, debadged FRS, Spyder II tails, 5000K Bi-xenon HID's, red demon eyes, Quad halo's, switchbacks w/Tapturn mod,Grimmspeed hood struts, led everything exterior, H&R 25mmF/15mmR spacers, Sportlines, SPC LCA's..(FUN car)
|
|
|
|
|
| The Following User Says Thank You to Mooseknuckle44 For This Useful Post: | civicdrivr (08-12-2014) |
|
08-08-2014, 05:47 PM
|
#222 |
|
Junior Member
Join Date: Aug 2014
Drives: N/a
Location: Georgia
Posts: 2
Thanks: 0
Thanked 0 Times in 0 Posts
Mentioned: 0 Post(s)
Tagged: 0 Thread(s)
|
Question
Does anyone know if we can use this kit to retrofit aftermarket headlights such as the ones by spyder, spec-d, and winjet so we can have led drl's instead of halogen? I want to have the "expensive" look of LEDs and bi-xenon.
|
|
|
|
|
08-08-2014, 05:49 PM
|
#223 |
|
Senior Member
Join Date: Mar 2014
Drives: 2013 FR-S
Location: North Georgia
Posts: 451
Thanks: 264
Thanked 117 Times in 81 Posts
Mentioned: 13 Post(s)
Tagged: 0 Thread(s)
|
Depends on how comfortable you are baking open the lights. Should be fine but don't hold me to that.
__________________
2013 FRS-Asphalt-M6-Invidia N1, K&N drop in, plasti dipped emblems, debadged FRS, Spyder II tails, 5000K Bi-xenon HID's, red demon eyes, Quad halo's, switchbacks w/Tapturn mod,Grimmspeed hood struts, led everything exterior, H&R 25mmF/15mmR spacers, Sportlines, SPC LCA's..(FUN car)
|
|
|
|
|
08-08-2014, 10:41 PM
|
#224 | |
|
Junior Member
Join Date: Aug 2014
Drives: N/a
Location: Georgia
Posts: 2
Thanks: 0
Thanked 0 Times in 0 Posts
Mentioned: 0 Post(s)
Tagged: 0 Thread(s)
|
Quote:
|
|
|
|
|
|
|
|
|
|
|
 Similar Threads
|
||||
| Thread | Thread Starter | Forum | Replies | Last Post |
| Morimoto Retro-Quik Xenon Retrofit System for FR-S | Xenocide117 | Cosmetic Modification (Interior/Exterior/Lighting) | 63 | 07-18-2014 08:37 PM |
| The Retrofit Source Bi-Xenon FR-S Retro-Quik Conversion | Andrew @ TRS | Exterior Parts - The Rest | 84 | 07-23-2012 10:43 PM |
| OEM Fog Light install! ON and working! | 86design | FR-S & 86 Photos, Videos, Wallpapers, Gallery Forum | 38 | 07-04-2012 08:11 PM |
| How to install Homelink mirror? | Grimlock | Electronics | Audio | NAV | Infotainment | 10 | 06-10-2012 07:07 PM |
| Five axis limited retro | Hawaiian | Scion FR-S / Toyota 86 GT86 General Forum | 28 | 05-18-2012 04:16 PM |


 2013 Scion FR-S