


|
||||||
| DIY (Do-It-Yourself) Guides For all DIYs. |
 |
|
|
Thread Tools | Search this Thread |
 07-02-2014, 07:01 PM
|
#15 | |
|
Project BRZ-Boosted Autos

Join Date: Nov 2013
Drives: MY14 BRZ
Location: Australia
Posts: 121
Thanks: 15
Thanked 154 Times in 45 Posts
Mentioned: 2 Post(s)
Tagged: 0 Thread(s)
|
Quote:

|
|

|

|
|
07-02-2014, 11:52 PM
|
#16 | |
|
Realtor/ Principal Broker
Join Date: Oct 2013
Drives: JRSC BRZ GBS LTD 2010 LTD Outback
Location: Salem Oregon
Posts: 899
Thanks: 806
Thanked 218 Times in 178 Posts
Mentioned: 31 Post(s)
Tagged: 0 Thread(s)
|
Quote:
|
|
|
|
|
|
07-03-2014, 11:33 PM
|
#18 | |
|
Project BRZ-Boosted Autos
Join Date: Nov 2013
Drives: MY14 BRZ
Location: Australia
Posts: 121
Thanks: 15
Thanked 154 Times in 45 Posts
Mentioned: 2 Post(s)
Tagged: 0 Thread(s)
|
Quote:
|
|
|
|
|
| The Following User Says Thank You to The Sentinel For This Useful Post: | JPxM0Dz (07-04-2014) |
|
07-22-2014, 04:51 AM
|
#20 | |
|
Member
Join Date: Feb 2012
Drives: 14 WRB BRZ Limited
Location: United States
Posts: 33
Thanks: 9
Thanked 10 Times in 7 Posts
Mentioned: 0 Post(s)
Tagged: 0 Thread(s)
|
Quote:
http://www.homedepot.com/p/Dasco-Pro...e-34/100507476 |
|
|
|
|
| The Following User Says Thank You to bkstarx1 For This Useful Post: | Chad86 (07-22-2014) |
|
08-08-2014, 11:10 PM
|
#21 |
|
Realtor/ Principal Broker
Join Date: Oct 2013
Drives: JRSC BRZ GBS LTD 2010 LTD Outback
Location: Salem Oregon
Posts: 899
Thanks: 806
Thanked 218 Times in 178 Posts
Mentioned: 31 Post(s)
Tagged: 0 Thread(s)
|
Thanks for an easy to follow DYI!!
This Raceseng Ashiko shiftknob and Reverse Lockout feels amazing! 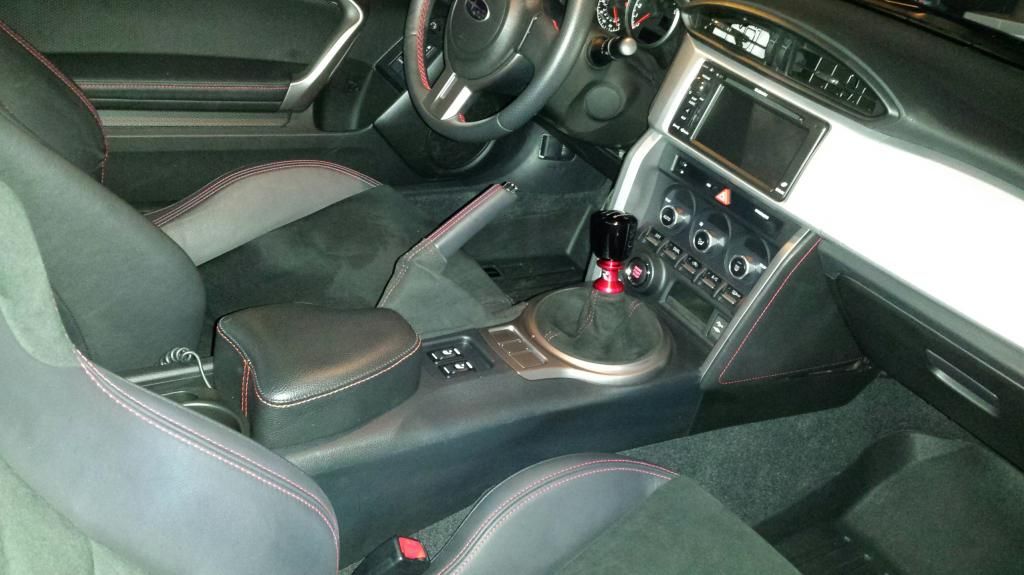 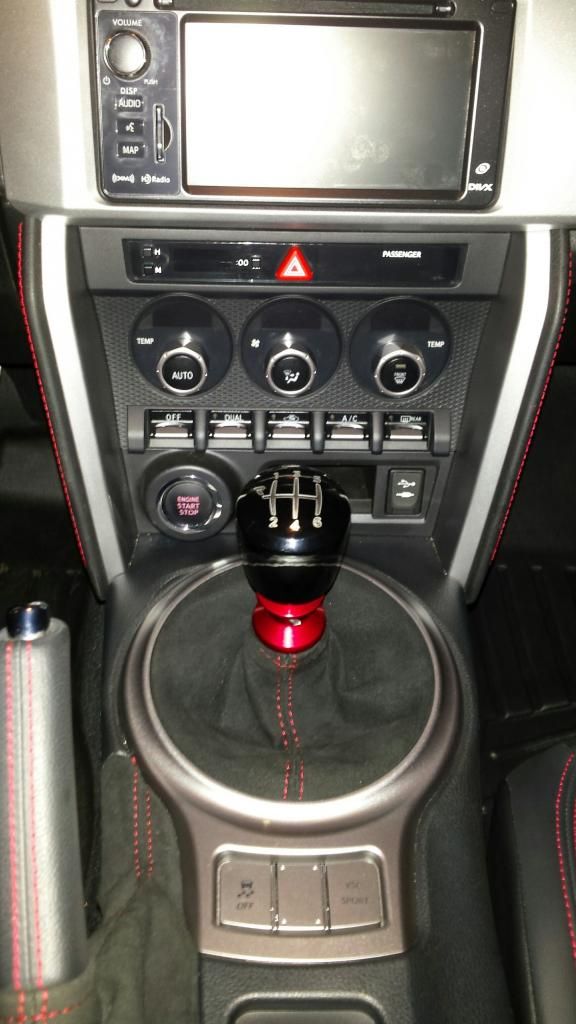
|
|
|
|
|
09-01-2014, 02:47 PM
|
#22 |
|
Banned
Join Date: Oct 2012
Drives: Whiteout frs
Location: PR
Posts: 188
Thanks: 214
Thanked 86 Times in 52 Posts
Mentioned: 2 Post(s)
Tagged: 1 Thread(s)
|
Ashiko Charcoil translucent w red lockout
I used a 3/32 allen and pliers to hold the allen so i could hammer away. If precise and strong strokes are done, pain is minimal. But the pin is difficult to remove anywyas.
Thanks to the vid i had an idea on how forcefull one should be. I love the new shifting feel the ashiko brings, i'm having so much fun modding my car, it's ridiculous. One more step in building my sport car. Thanks again to the makers of the video. Thanks also to raceseng for the attention and a great product. Keep the DIY coming |
|
|
|
|
09-09-2014, 11:49 PM
|
#23 |
|
Member
Join Date: Oct 2013
Drives: 2013 WRB BRZ
Location: Houston tx
Posts: 37
Thanks: 4
Thanked 2 Times in 2 Posts
Mentioned: 0 Post(s)
Tagged: 0 Thread(s)
|
Maybe this isn't the right place BUT any ashiko owners know how to remove the adapter out of the knob itself?
|
|
|
|
|
12-01-2014, 09:47 PM
|
#24 | |
|
Member

Join Date: Mar 2013
Drives: 17' WRB BRZ Limited P.P. 6MT
Location: Cincinnati OH
Posts: 65
Thanks: 34
Thanked 34 Times in 23 Posts
Mentioned: 1 Post(s)
Tagged: 0 Thread(s)
|
Quote:
 I just placed my order with Raceseng today! I just placed my order with Raceseng today! I decided to go with the Slammer Gear Knob instead of the Ashiko but I too purchased the red reverse lockout. I was debating red or blue for the lockout since my BRZ is WRB but ultimately decided the red will look fantastic with the red interior stitching. I decided to go with the Slammer Gear Knob instead of the Ashiko but I too purchased the red reverse lockout. I was debating red or blue for the lockout since my BRZ is WRB but ultimately decided the red will look fantastic with the red interior stitching.
|
|
|
|
|
|
12-01-2014, 10:08 PM
|
#25 |
|
Senior Member
Join Date: Apr 2014
Drives: 2014 Pearl White BRZ
Location: USA
Posts: 764
Thanks: 123
Thanked 461 Times in 233 Posts
Mentioned: 7 Post(s)
Tagged: 0 Thread(s)
|
This is what you seek:
http://www.homedepot.com/p/Dasco-Pro...e-34/100507476 Edit - oops. Sorry - I just re-read. What happened? You shouldn't have to remove anything from the knob. I have an Ashiko. I had to add nuts to the stick - not pull anything out of the knob. I'll leave that link to the punch needed above since that was the hardest part of the RLO install. |
|
|
|
|
01-09-2015, 07:40 AM
|
#26 | |
|
Project BRZ-Boosted Autos
Join Date: Nov 2013
Drives: MY14 BRZ
Location: Australia
Posts: 121
Thanks: 15
Thanked 154 Times in 45 Posts
Mentioned: 2 Post(s)
Tagged: 0 Thread(s)
|
Quote:
I'm installing a Kraftwerks Supercharger kit, Skunk2 Radiator and Kraftwerks oil cooler tomorrow. First in Australia as far as I can tell. There will be a bunch more videos up soon and lots of pictures of the install on my facebook page linked in my signature.
__________________
Check out my ProjectBRZ YouTube Channel and Facebook Page for the latest reviews, guides and information.  |
|
|
|
|
|
04-01-2015, 11:08 PM
|
#27 |
|
Senior Member
Join Date: Sep 2012
Drives: DGMBRZ
Location: Pacific-ah
Posts: 276
Thanks: 139
Thanked 104 Times in 71 Posts
Mentioned: 10 Post(s)
Tagged: 0 Thread(s)
|
Thanks for the video. Helped a bunch. Only thing I would add is that I had to use the punch to push the grub screw back in as well.
__________________
|
|
|
|
|
04-28-2015, 03:37 PM
|
#28 |
|
Senior Member

Join Date: Feb 2013
Drives: 2013 FR-S Whiteout MT
Location: Orange County CA
Posts: 535
Thanks: 102
Thanked 79 Times in 67 Posts
Mentioned: 3 Post(s)
Tagged: 0 Thread(s)
|
Just did this today. The pin was actually hard to get out. Get the right tool or its going to be harder. My punch pin got stuck inside the lockout and I couldn't even get it out until I used pliers to yank it out. It even bent the punch pin. Just remember to leave it in reverse while doing this. Other than that it took longer than I expected.
Also installed the slammer shift knob and that was annoying to align right. But its all done and feels and shifts great! Shifting feels great now. I heard the knob gets hot and cold, so I'm gonna look for a cellphone sleeve or a good looking sock and cut it up.
__________________
When in doubt, throttle out!
 |
|
|
|
|
|
|
|
|
| Tags |
| gear, knob, raceseng, reverse lockout |
|
|
 Similar Threads
|
||||
| Thread | Thread Starter | Forum | Replies | Last Post |
| Raceseng Ashiko Shift knob + Reverse Lockout | E46toFT86 | Interior Parts (Incl. Lighting) | 2 | 09-01-2014 02:37 PM |
| Raceseng | Ashiko Shift Knob - Introductory Forum Price | Raceseng | Groupbuys | 65 | 06-01-2014 04:41 AM |
| WTB:Raceseng Ashiko Knob & Cusco Carbon Strut Bars | T_Scott | Want-To-Buy Requests | 0 | 05-12-2014 10:39 PM |
| WTB: Raceseng slammer shift knob | arharris2 | Interior Parts (Incl. Lighting) | 1 | 03-09-2014 07:02 PM |
| FS:Raceseng slammer knob+factory knob | enthennd | Interior Parts (Incl. Lighting) | 1 | 11-02-2013 07:51 AM |


 F DR1VR


