


 10-03-2013, 02:47 PM
|
#351 | |
|
Driveway labs.

Join Date: Feb 2013
Drives: '13 BRZ Limited, 6sp, SWP
Location: NC
Posts: 1,544
Thanks: 534
Thanked 912 Times in 487 Posts
Mentioned: 125 Post(s)
|
Quote:

__________________
-'13 Subaru BRZ Limited, SWP. (Mods: Driveway Labs full aero, MCA, etc)
-'06 Mitsubishi Eclipse 3.8L, UV blue. (Mods: turbocharged, full suspension, too much to list) -'13 Town and Country Limited (Mods: too many kids) |
|

|

|
|
10-03-2013, 10:50 PM
|
#352 |
|
Photo Specialist

Join Date: Feb 2012
Drives: 2013 Toyota 86 DGM 6MT
Location: Texas
Posts: 1,152
Thanks: 587
Thanked 1,805 Times in 420 Posts
Mentioned: 94 Post(s)
|
Wet Session
Feedback welcome! [ame="http://www.youtube.com/watch?v=Tu5TDR1p4fI"]The Drivers Edge Texas World Speedway CCW Session 5 - YouTube[/ame]
__________________
|
|
|
|
|
10-04-2013, 12:01 AM
|
#353 |
|
Photo Specialist
Join Date: Feb 2012
Drives: 2013 Toyota 86 DGM 6MT
Location: Texas
Posts: 1,152
Thanks: 587
Thanked 1,805 Times in 420 Posts
Mentioned: 94 Post(s)
|
Vortech MaxFlow LOL Generator
After the long wait, we finally get it. The MaxFlow Race Blow-Off Valve. Sorry @Brian@Vortech, I like my name better. Basically it replaces the plastic bypass valve on the stock kit and goes to this kit. I've seen some others come with a metal bypass valve/bov(?) but this MaxFlow Kit is something else. I did some quick and dirty pictures. Let's get to it. The entire kit. The stock pipe has a cylindrical flange on it which this son of a gun can't attach to. Vortech decided to ship new powdercoated metal pipes to us. I think this is the reason why the kit cost as much as it did! 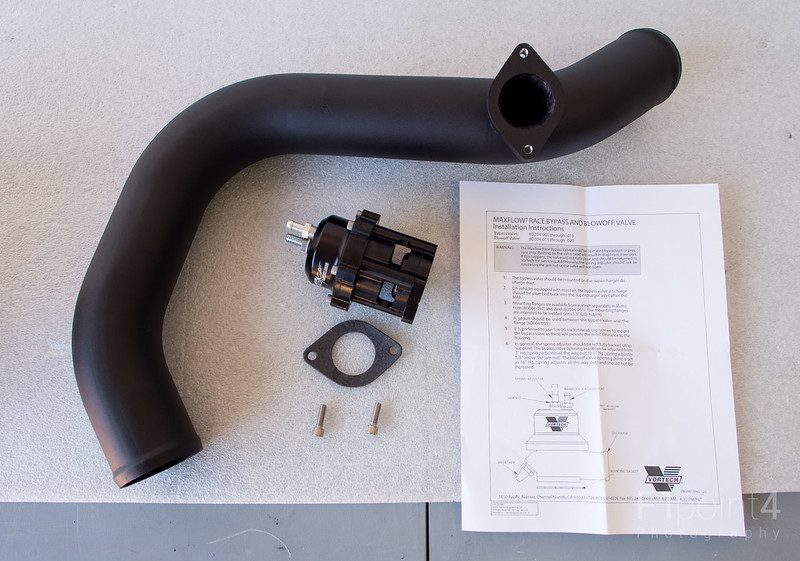 20131003-VortechMaxFlowRaceBlowOffValve-001 by VictorN07, on Flickr Pictures of the pipe. 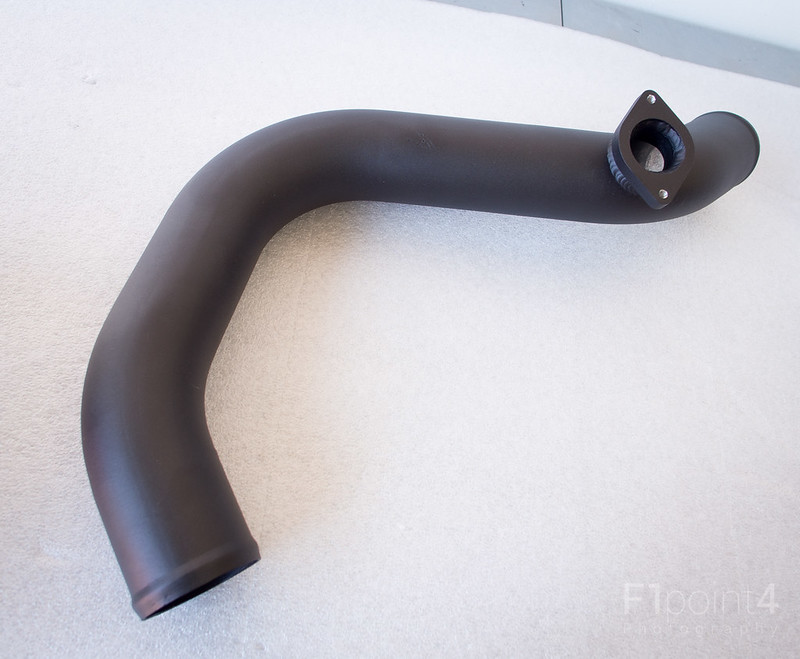 20131003-VortechMaxFlowRaceBlowOffValve-002 by VictorN07, on Flickr Welding on the flange was good 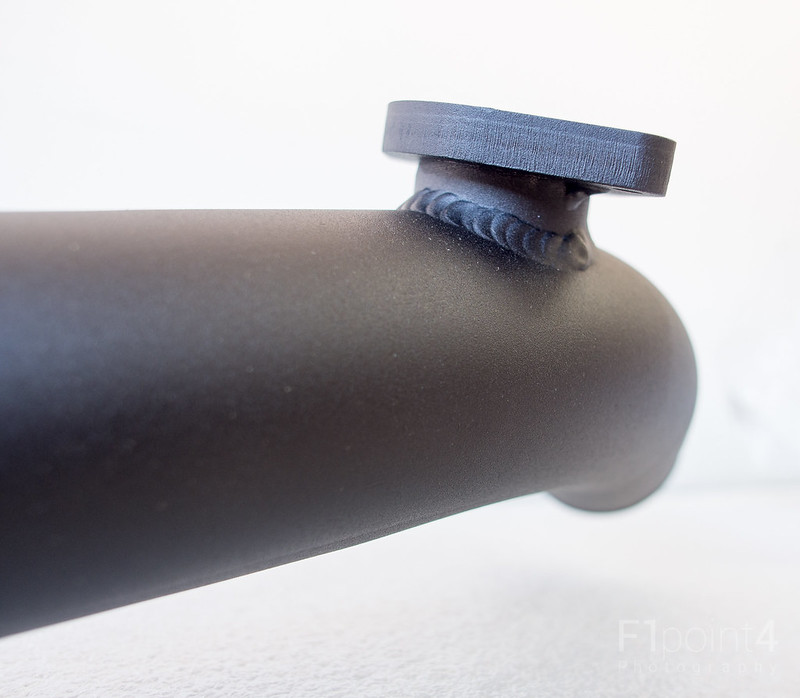 20131003-VortechMaxFlowRaceBlowOffValve-003 by VictorN07, on Flickr Got the inside too 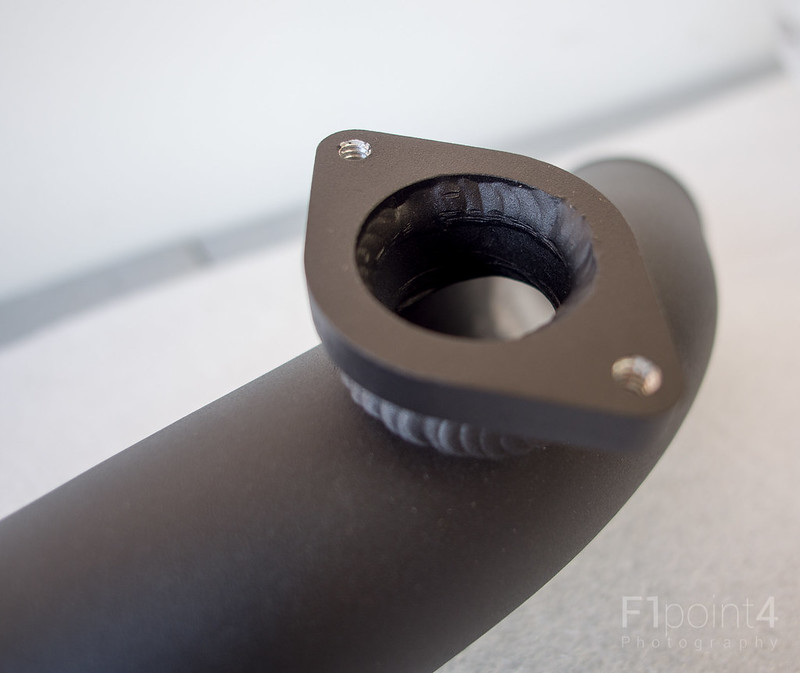 20131003-VortechMaxFlowRaceBlowOffValve-005 by VictorN07, on Flickr Not 100% perfect. I'm still okay overall. 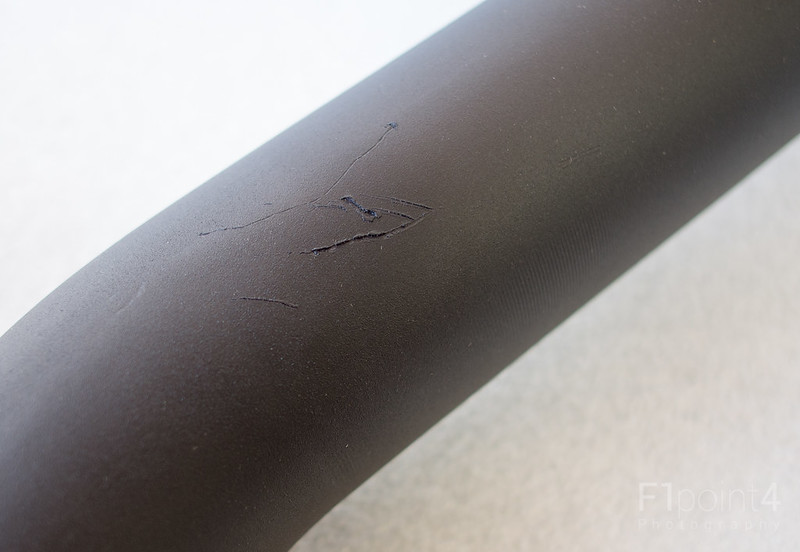 20131003-VortechMaxFlowRaceBlowOffValve-007 by VictorN07, on Flickr 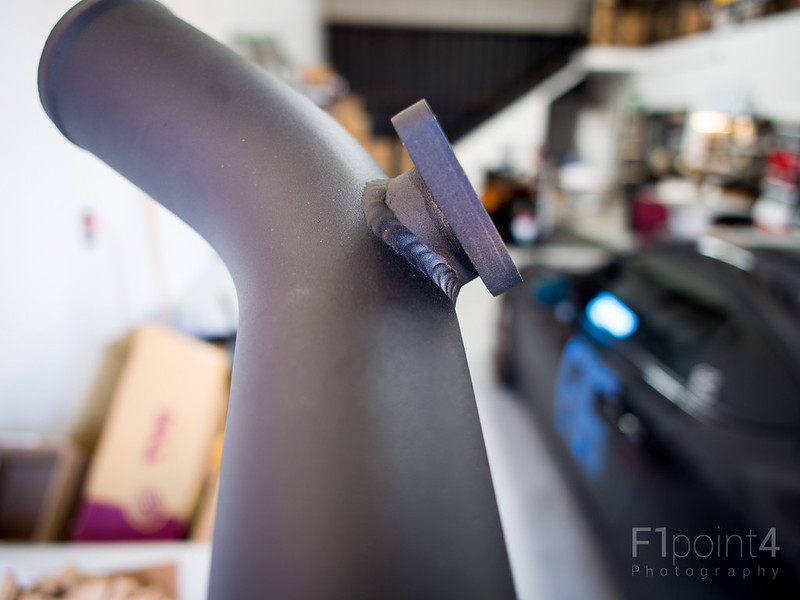 20131003-VortechMaxFlowRaceBlowOffValve-010 by VictorN07, on Flickr 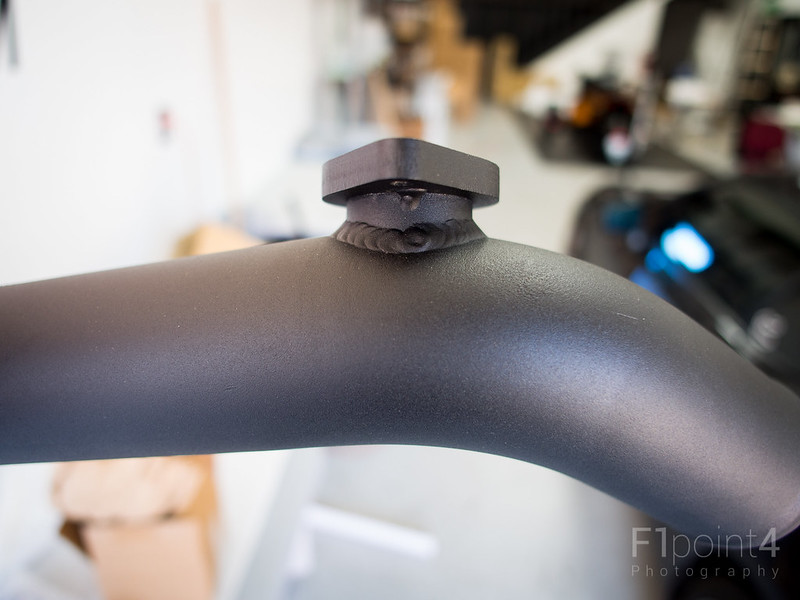 20131003-VortechMaxFlowRaceBlowOffValve-012 by VictorN07, on Flickr The Blow-Off Valve looks like its made from aluminium. It looks like a typical BOV to me. It is adjustable per the instructions. I decided to leave it standard. 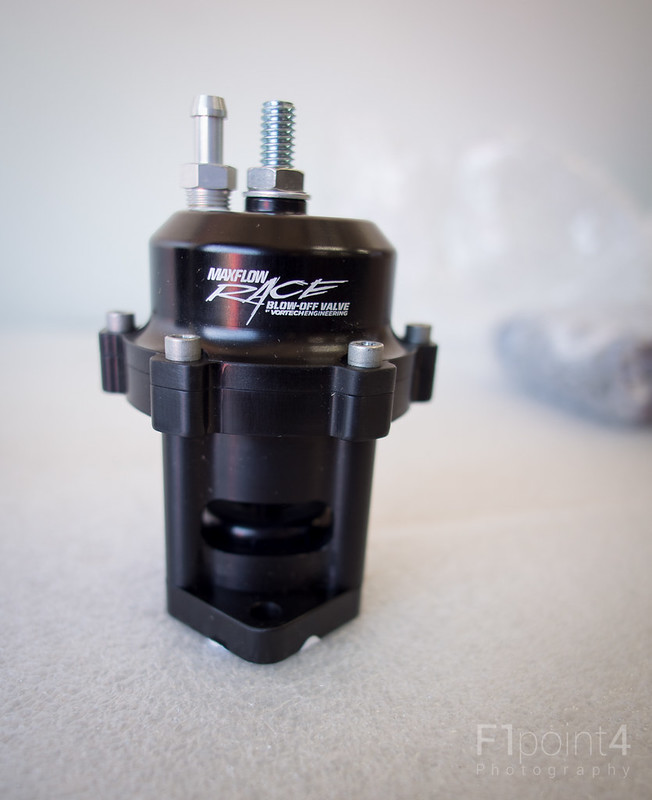 20131003-VortechMaxFlowRaceBlowOffValve-013 by VictorN07, on Flickr 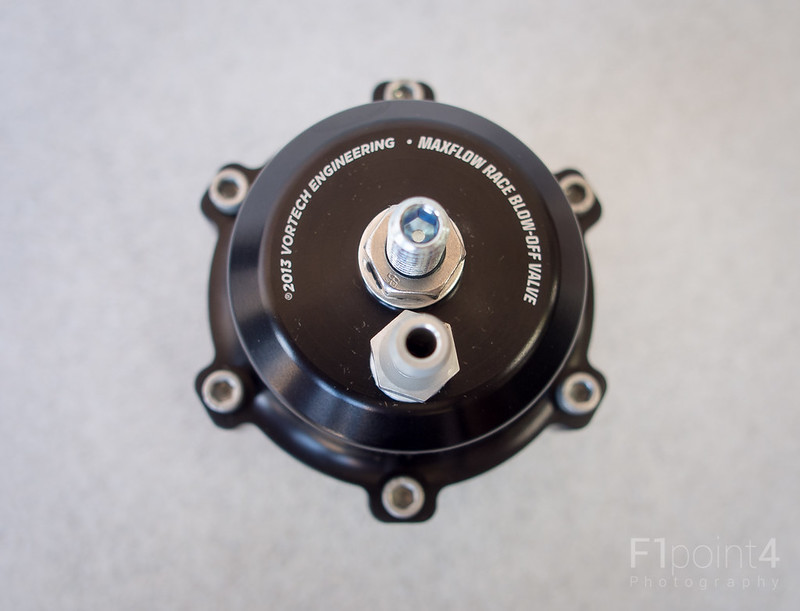 20131003-VortechMaxFlowRaceBlowOffValve-016 by VictorN07, on Flickr  20131003-VortechMaxFlowRaceBlowOffValve-017 by VictorN07, on Flickr Warning! 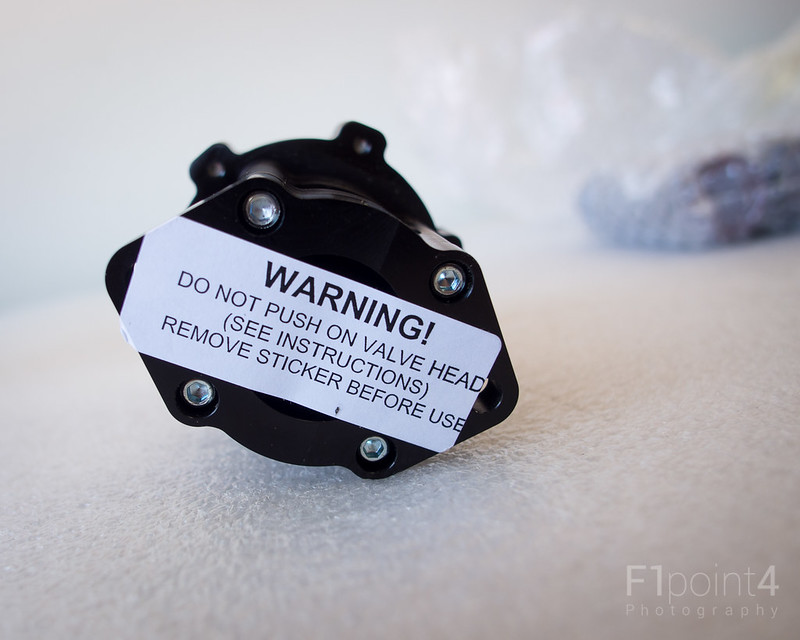 20131003-VortechMaxFlowRaceBlowOffValve-018 by VictorN07, on Flickr Hardware. Pretty simple 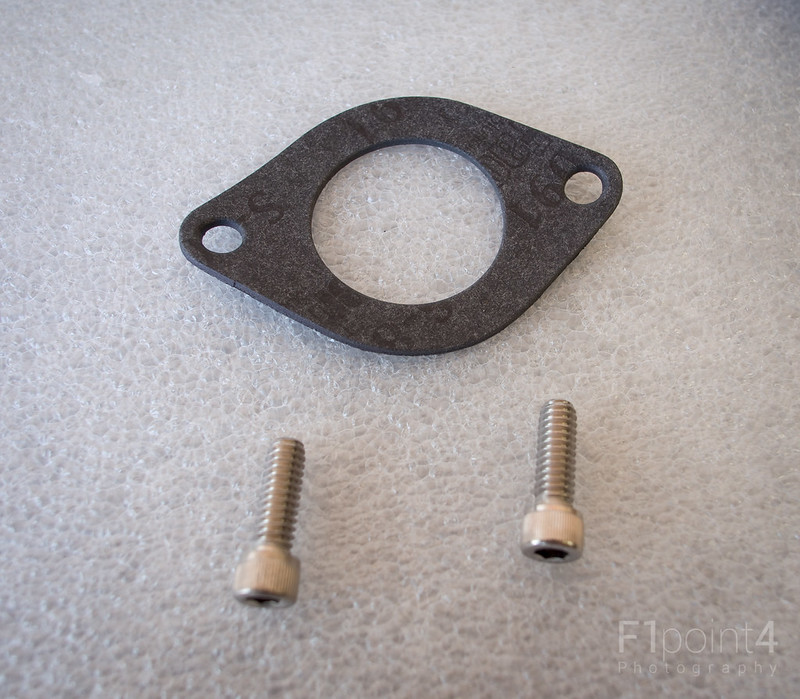 20131003-VortechMaxFlowRaceBlowOffValve-021 by VictorN07, on Flickr I didn't pull my bumper to get it out. I just peeled back the fenderwell lining. I don't have my wiper tank in there for #Racecar 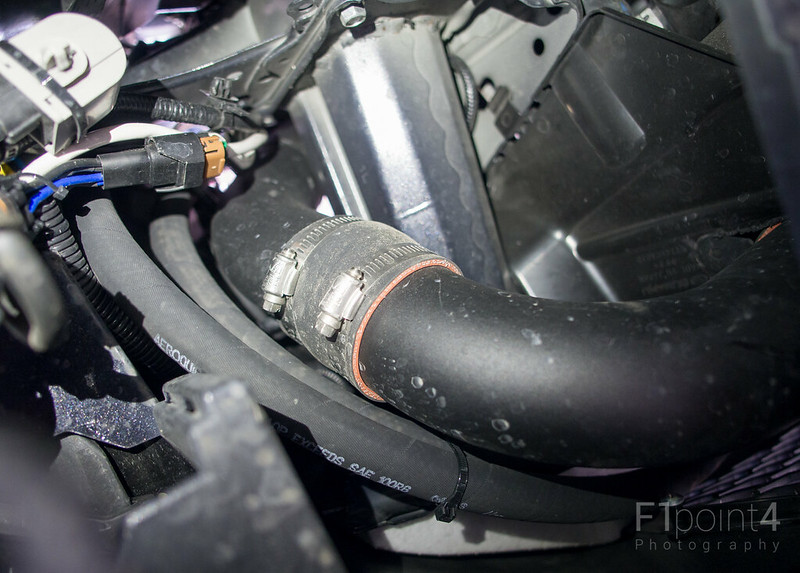 20131003-VortechMaxFlowRaceBlowOffValve-028 by VictorN07, on Flickr My pipe had some rubbing damage on it. THis is the part that wraps around the crash beam 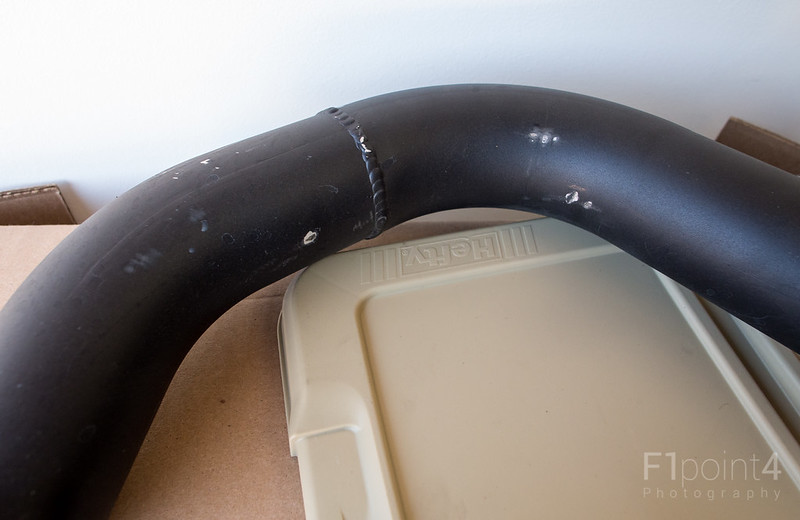 20131003-VortechMaxFlowRaceBlowOffValve-034 by VictorN07, on Flickr The standard bypass valve flange, and perspective on my rubbing damage 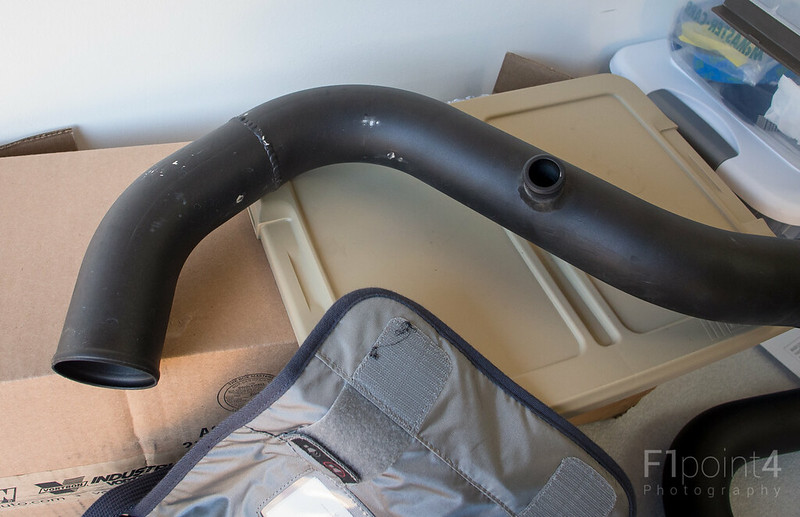 20131003-VortechMaxFlowRaceBlowOffValve-037 by VictorN07, on Flickr Gutted. I think i took off about one or two more parts before able to getting it installed for real 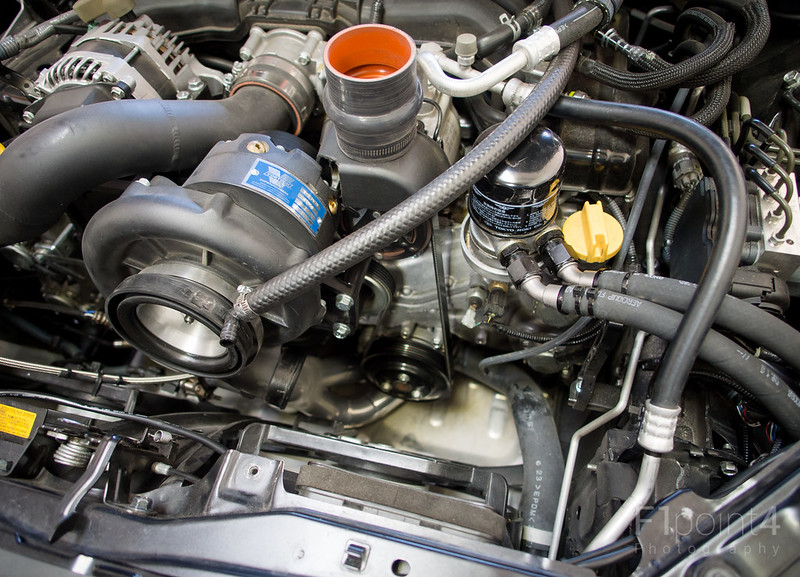 20131003-VortechMaxFlowRaceBlowOffValve-040 by VictorN07, on Flickr I took a good picture of it installed, but I had to remove it prior to installing it into the car 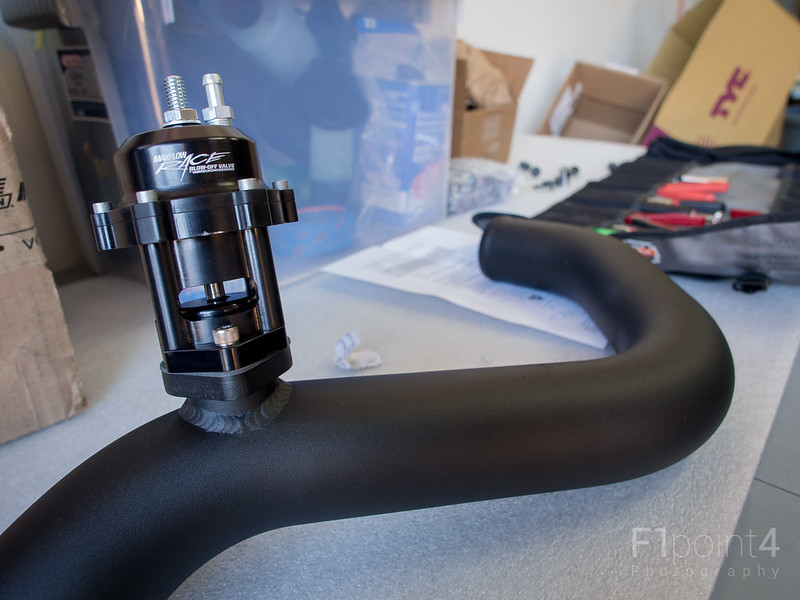 20131003-VortechMaxFlowRaceBlowOffValve-041 by VictorN07, on Flickr We used a T handle Torx wrench to tighten it down. Doing it this way does scratch the BOV a little bit. This part was not super fun because the pipe won't go into the car without the BOV off. 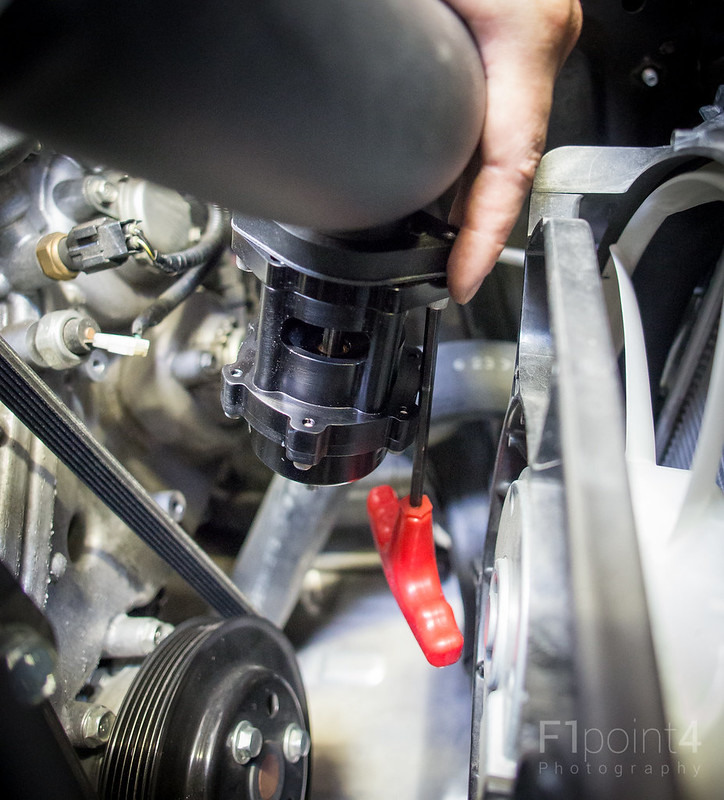 20131003-VortechMaxFlowRaceBlowOffValve-044 by VictorN07, on Flickr Installed the BOV does sit close to the accessory belt. I watched it while @Chris@Phastek Revved the crap out of it, and the pipe or engine doesn't move. Note I have Perrin Engine Mounts 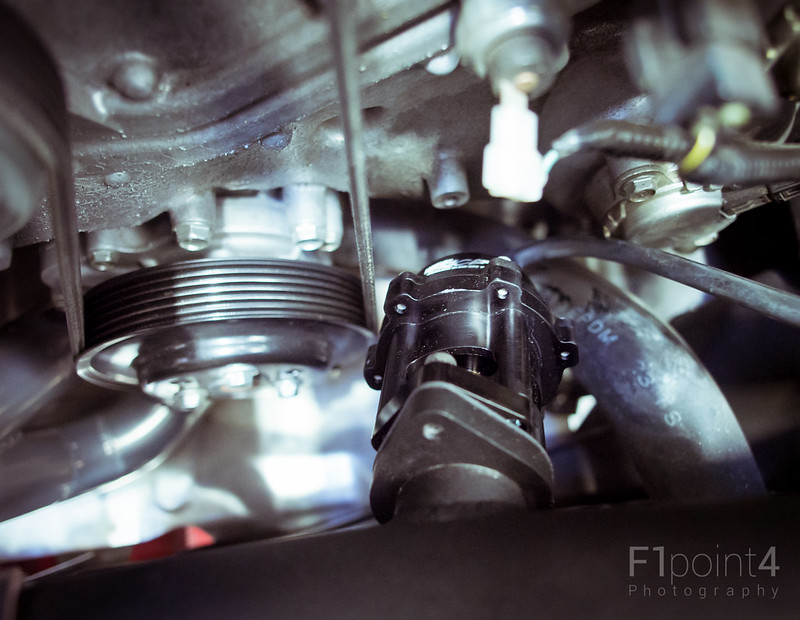 20131003-VortechMaxFlowRaceBlowOffValve-046 by VictorN07, on Flickr 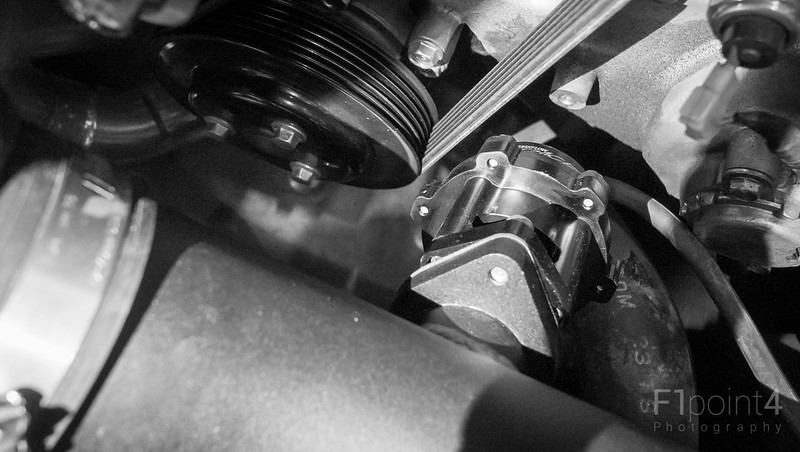 20131003-VortechMaxFlowRaceBlowOffValve-054 by VictorN07, on Flickr  20131003-VortechMaxFlowRaceBlowOffValve-058 by VictorN07, on Flickr Video Idle Video. My goodness it's loud. Yes I forgot to hook up the breather hose. [ame="http://www.youtube.com/watch?v=u2Q9qyk-vYk"]Vortech Superchargers Maxflow Race Blow-Off Valve - Toyota 86 - YouTube[/ame] Installation: @ft86me asked me if I followed @Rick@Vortech's instruction. I told him that I am a man and I break my shit on my own. haha. Big Huge Thanks to @Chris@Phastek and Phastek Performance for their continual help in developing my car!!!! Here's how I did it Some notes about my car + I don't have a wiper fluid tank + I do have an oil cooler, this makes space tight. 1) Floor jack under front and center. Two Jack stands propping up the front of the car 2) Turn ignition on (not car on) and turn the wheels all the way to the right 3) Open the hood 4) Take off three screw driven clips behind the outside bumper in front of the wheel 5) Laying on the ground, remove one 10mm bolt, then pull three rimmed clips. One in the corner, then following the bumper forward get the next one. Then the last on the inside of the rectangle wind breaker. Now the fender lining peels back. 6) Undo two 10mm long black bolts on the front of the airbox. 7) Undo the large clamp on the rubber coupler between the airbox and the blower. Take off the breather tube hose. 8) Because of the oil cooler I undid the two 10mm silver bolts on the right side of the airbox that attach it to the side bracket. On the inside a bracket will come loose and fall. Dont' worry 9) Then I removed the airbox 10) Remove the airbox support bracket that's in front of the oil filler cap. 10mm box wrench will do this. 11) Get back under the car and undo the top clamp for the charge pipe 12) Get up and undo both clamps on the coupler that hold the charge pipe to the blower 13) undo the base clamp on the bypass valve hose. 14) Pull the bypass valve off, yes there is room. Disconnect the hose 15) Take the charge pipe off 16) snake the new charge pipe in. Yes it'll suck. 17) When you get it in, go ahead and mount the BOV to the pipe. Yes the BOV will go on upside down. Don't forget the gasket. Yes it will suck 18) ONce that is on, push the coupler onto the new charge pipe, almost all the way. 19) Then line it up with the blower and slip the coupler off the charge pipe onto the blower. 20) Then get back on the ground and slip the charge pipe back onto the L pipe that goes into the intercooler. 21) Adjust the pipe for clearance to the belt and crashbeam. I rotated the pipe so the BOV would get away from the belt as much as it could. I also pulled the charge pipe away from the L pipe so it wouldn't rub against the crash beam. 22) Once you are happy, clamp it all down. Connect the vacuum hose to the BOV 23) Open the airbox cover and re-install the airbox. Now is a good time to rotate the filter if its dirty 24) Install the side airbox support using that one 10mm bolt 25) the two long black 10mm bolts go back in. Large clamp goes on the rubber coupler. Two 10mm silver bolts go back into the right side of the airbox into that bracket that fell loose on the inside of the airbox. 26) Cover goes back on. Breather tube goes back in. Now you can test the car. Do it. 27) When there is no leaks and you are satisfied, install the bumper and fenderwall lining clips and screws. 28) Lower the car and go for a drive. Notes from my experience +The catch can is doing its job, the inside of my airbox is clean as well as the charge pipe. No residual oil. +The section of the air filter facing the snorkel was super dirty. I rotated my air filter so a clean section was facing the front. I think I only have like 7-8k miles on mine with two track days so far. It was fairly dark in sections. +the oil cooler made things 10x harder to install. +Not having a wiper tank made it easy! +Take the opportunity to check for rubbing while you are in there. +Two people is great! +I used adhesive remover to get the sticker off. + I didn't pull my bumper, I didn't think it'll make it easier except to get to the coupler where the charge pipe meets the L pipe. +It took about 2.5 hours Quick Feedback As you saw from the video this thing is loud. My car is no longer stealth. It gives that turbo wastegatey noise. I do like it even if its obnoxious. You hear it on startup, blips, shifts, and for me cruising. If i'm going 70mph in 6th, you can hear release of excess air. Yea it's normal to be under vacuum but yea no stealth. I could probably adjust it so it doesn't do it. Getting in there may be hard now that everything is back together. @Chris@Phastek stood there while i drove off doing some hard pulls. He feedback was, clear, audible sound. Overall I like it. It does reduce my matureness factor by a factor of 1337x but oh well, #racecar or #ricecar? Hope y'all enjoyed.
__________________
|
|
|
|
| The Following 3 Users Say Thank You to F1point4 For This Useful Post: |
|
10-04-2013, 01:09 AM
|
#354 |
|
Boosted

Join Date: Feb 2013
Drives: Not a supra....yet
Location: Riverside,CA/ Abu Dhabi,UAE
Posts: 2,925
Thanks: 487
Thanked 1,203 Times in 812 Posts
Mentioned: 90 Post(s)
|
 once again a great review from you, but holy shit that thing sits really close to the belt once again a great review from you, but holy shit that thing sits really close to the belt 
|
|
|
|
|
10-04-2013, 10:43 AM
|
#355 |
|
Member
Join Date: Aug 2013
Drives: Scion FR-S
Location: Channel Islands, CA
Posts: 55
Thanks: 51
Thanked 76 Times in 34 Posts
Mentioned: 15 Post(s)
|
Excellent write-up!
 And yes, the valve sits close to the belt, but she ain't gonna touch. We have it on our blue FR-S with stock mounts & hasn't given us any trouble. Shoot...if your engine flexes THAT much, you have other issues! |
|
|
|
|
10-04-2013, 12:01 PM
|
#356 |
|
Photo Specialist
Join Date: Feb 2012
Drives: 2013 Toyota 86 DGM 6MT
Location: Texas
Posts: 1,152
Thanks: 587
Thanked 1,805 Times in 420 Posts
Mentioned: 94 Post(s)
|
Post Track Day Inspection
Got the car up to check the car out after I went off road. Knocked out some of the wildlife I took home with me  20131004-PostTrackInspection-011 by VictorN07, on Flickr The last time I emptied the catch cans was 5500mi ago. I also have 2 track days on this. Most of this was the primary PCV system  20131004-PostTrackInspection-017 by VictorN07, on Flickr Ready for more. 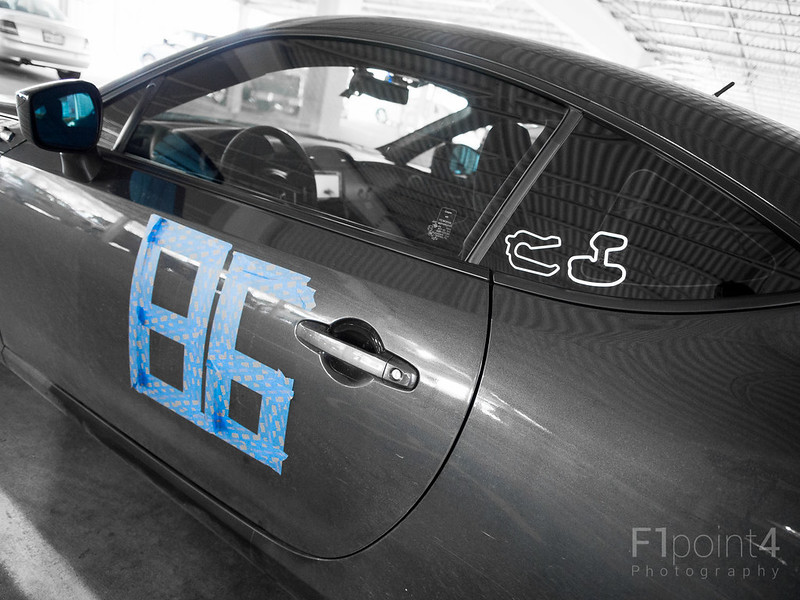 20131004-PostTrackInspection-003 by VictorN07, on Flickr  20131004-PostTrackInspection-010 by VictorN07, on Flickr
__________________
|
|
|
|
|
10-06-2013, 09:41 PM
|
#357 |
|
Photo Specialist
Join Date: Feb 2012
Drives: 2013 Toyota 86 DGM 6MT
Location: Texas
Posts: 1,152
Thanks: 587
Thanked 1,805 Times in 420 Posts
Mentioned: 94 Post(s)
|
Sunset
I recorded this video primarily because the sky was just gorgeous. Wanted a keepsake to remind me of how well we have it, and not to waste our gifts. Second, this was a chance to get a clip of the Vortech MaxFlow Blow-Off Valve. I may give a shot at adjusting the valve soon to see if I can reduce the amount of time the system is venting. I do not condone holding a camera while driving! [ame="http://www.youtube.com/watch?v=e1CEtlR_eO4"]Beautiful Sunset/Vortech MaxFlow Blow-Off Valve - YouTube[/ame]
__________________
|
|
|
|
|
10-07-2013, 12:02 AM
|
#358 |
|
Photo Specialist
Join Date: Feb 2012
Drives: 2013 Toyota 86 DGM 6MT
Location: Texas
Posts: 1,152
Thanks: 587
Thanked 1,805 Times in 420 Posts
Mentioned: 94 Post(s)
|
I love this thing
First time she's been clean in a while. The Hawk HP+ Pads are very dusty, and its not easy to clean the insides of the Driveway Labs Diffuser Regardless, I love driving around when the sun is going down. Absolutely gorgeous. Got these while Lola was going for a drink.  20131006-Reflection-003 by VictorN07, on Flickr Clean Car. New Sticker  20131006-Reflection-005-Edit by VictorN07, on Flickr  20131006-Reflection-007 by VictorN07, on Flickr  20131006-Reflection-013 by VictorN07, on Flickr
__________________
|
|
|
|
|
10-07-2013, 12:28 AM
|
#359 |
|
Photo Specialist
Join Date: Feb 2012
Drives: 2013 Toyota 86 DGM 6MT
Location: Texas
Posts: 1,152
Thanks: 587
Thanked 1,805 Times in 420 Posts
Mentioned: 94 Post(s)
|
Oil Cooler Woes? An FYI
@brillo and I have known about this for a while. The Mocal Thermostatic Sandwich plate used in many oil cooler kits, including my homebrew one, can sit very close to this metal line. I'm pretty sure its a fuel line for the port injectors. It really depends on how you install it, but the OEM airbox as well as the Vortech airbox can make this sandwich plate make contact with the line. [This is an example of how it hits, I took this picture after I modified the plate]  20131005-OilCoolerFuelLineContact-001 by VictorN07, on Flickr @brillo took action immediately but I decided to wait. Three months, 4800 mi, and two track weekends later I get this 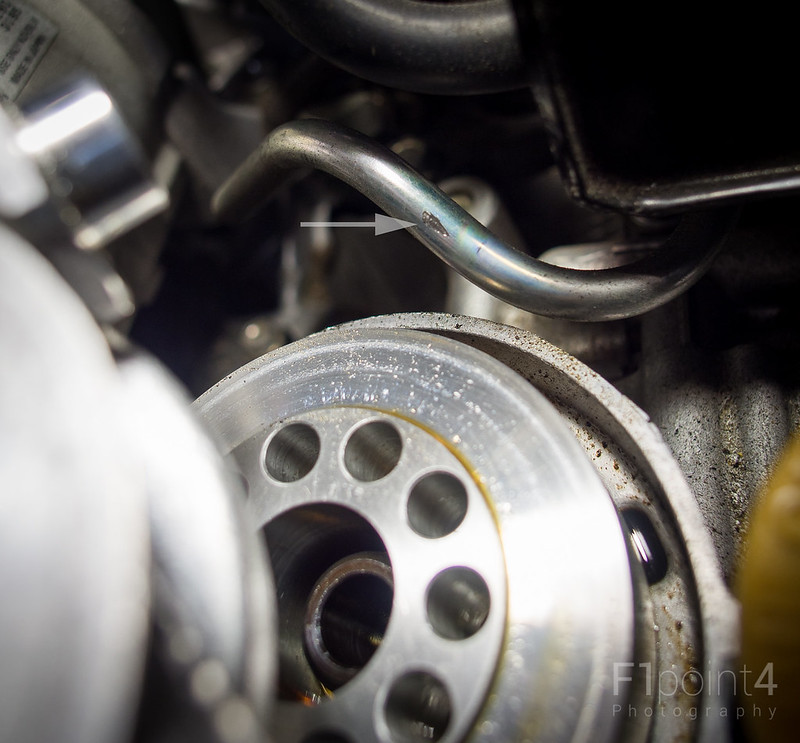 20131005-OilCoolerFuelLineContact-007-Edit by VictorN07, on Flickr @brillo contacted Racer Parts WHolesale and Mocal and they say its fine to file down the edge of the thermostat. He did and didn't have problem s yet, so its my turn. I basically filed it down so its close to even with the plate itself  20131005-OilCoolerFuelLineContact-004 by VictorN07, on Flickr 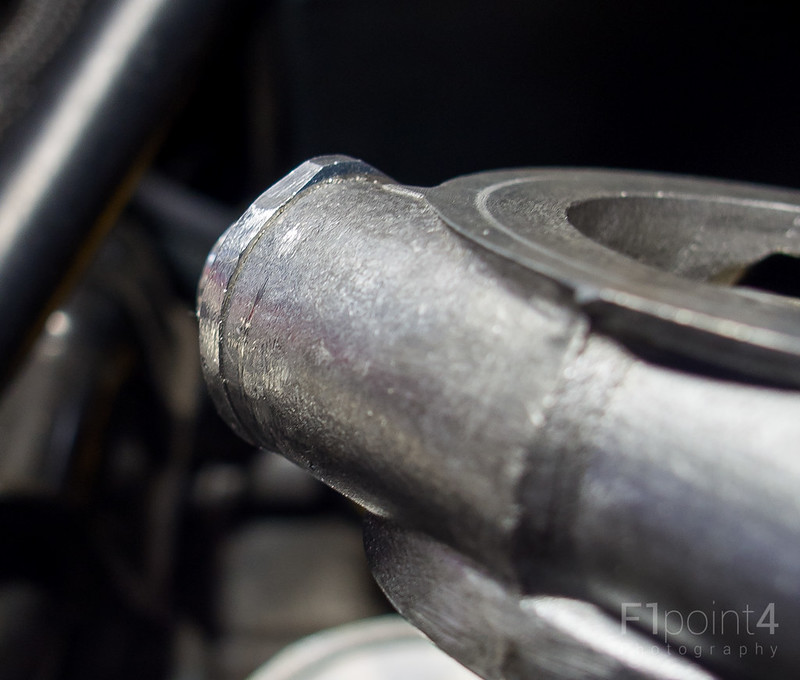 20131005-OilCoolerFuelLineContact-008 by VictorN07, on Flickr After it is all said and done, there is a little bit more wiggle room. If i keep turning it CCW, the plate will still hit the line, but in a different place. Thankfully the oil cap keeps me from turning it more. I think a true solution is to reroute the oil cooler lines (I have something in mind) or to create a larger spacer to raise the sandwich plate higher. I'm not sure if kits like the Perrin have a larger sandwich plate.
__________________
|
|
|
|
|
10-07-2013, 12:46 AM
|
#360 |
|
Photo Specialist
Join Date: Feb 2012
Drives: 2013 Toyota 86 DGM 6MT
Location: Texas
Posts: 1,152
Thanks: 587
Thanked 1,805 Times in 420 Posts
Mentioned: 94 Post(s)
|
I was thinking about using 90 degree barbs and having the lines basically go straight down in front of the block from the sandwich plate. Looking at some old photos I'm not sure if that's possible.
Here is 45 degree barbs on my Vortech kit. I think I can make the 90 degree barb clear. 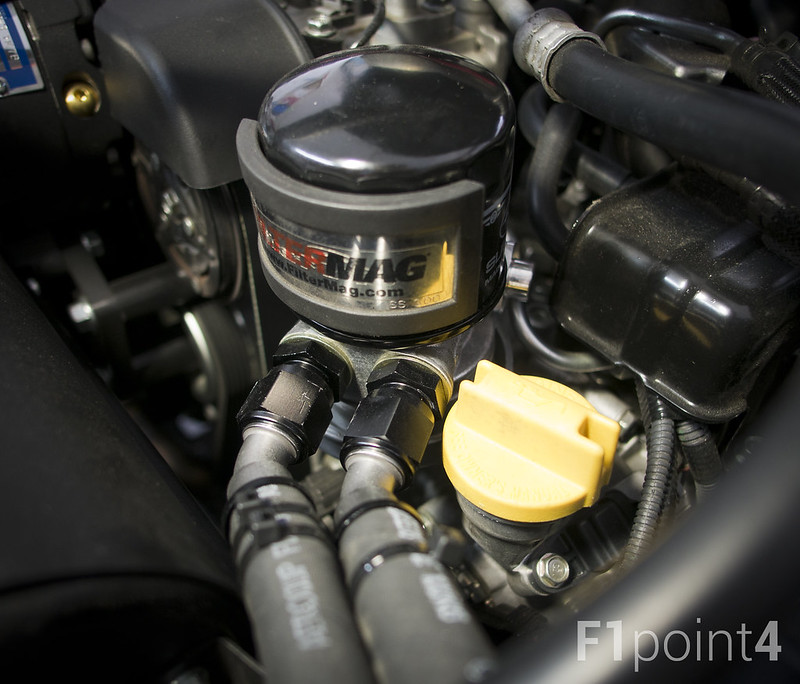 20130704-HomeBrewOilCoolerSandwichPlate-001 by VictorN07, on Flickr Here is the same thing on the stock Airbox. I don't think there is room for 90 degree barbs to go straight out and down.  20130713-ADOilCoolerInstall-078 by VictorN07, on Flickr I'm open to ideas!
__________________
|
|
|
|
|
10-07-2013, 12:30 PM
|
#361 | |
|
Senior Member
Join Date: Apr 2012
Drives: 2014 Subaru BRZ
Location: Hillsboro, Oregon
Posts: 770
Thanks: 450
Thanked 536 Times in 316 Posts
Mentioned: 137 Post(s)
 |
Quote:
|
|
|
|
|
|
10-07-2013, 12:36 PM
|
#362 | |
|
Driveway labs.
Join Date: Feb 2013
Drives: '13 BRZ Limited, 6sp, SWP
Location: NC
Posts: 1,544
Thanks: 534
Thanked 912 Times in 487 Posts
Mentioned: 125 Post(s)
|
Quote:
__________________
-'13 Subaru BRZ Limited, SWP. (Mods: Driveway Labs full aero, MCA, etc)
-'06 Mitsubishi Eclipse 3.8L, UV blue. (Mods: turbocharged, full suspension, too much to list) -'13 Town and Country Limited (Mods: too many kids) |
|
|
|
|
|
10-07-2013, 11:50 PM
|
#363 |
|
Photo Specialist
Join Date: Feb 2012
Drives: 2013 Toyota 86 DGM 6MT
Location: Texas
Posts: 1,152
Thanks: 587
Thanked 1,805 Times in 420 Posts
Mentioned: 94 Post(s)
|
Going about
One more montage of the new Vortech BOV at the default setting. I'm pretty sure i'm going to get her in the air and try to adjust it this weekend. Has putzing about, spirited driving, as well as some tach sweeps in there. [ame="http://www.youtube.com/watch?v=1B-xTn0EFAA"]Going About - Vortech MaxFlow Race Blow-Off Valve - YouTube[/ame]
__________________
|
|
|
|
|
10-11-2013, 11:44 PM
|
#364 |
|
Photo Specialist
Join Date: Feb 2012
Drives: 2013 Toyota 86 DGM 6MT
Location: Texas
Posts: 1,152
Thanks: 587
Thanked 1,805 Times in 420 Posts
Mentioned: 94 Post(s)
|
Be a Hero Take 1
My first GoPro ever, the Hero3+ Black Edition. I wanted to get some in car footage, so I decided to target mounting the camera in between the seats. I normally have an instructor in the car with me during HPDE so mounting it to the passenger seat is a no go for me. Ultimately decided to cop @Scenic Driver's Idea. I already use RamMount products so it wasn't a hard decision. The arms being braced against the seat. I mounted the camera on my chair because my mass will also serve to dampen vibrations further. RamMount's are more expensive, but they give me flexibility to adjust the camera position, and it's easy to transfer to other vehicles. I can also take off the last arm with the camera quickly with just one knob. The Hero3+ is good so far. Wasabi battery packs work with it, but they changed the battery in the Hero3+ so it doesn't fit in the Wasabi Wall charger unit. I love the WiFi the most. I dont see a need to use the bundled remote when my smartphone can control just about every aspect of the camera. I may figet with the mount more and see what else I can do. I think if I use less joints the vibrations will be dampened more, but I like the idea that when i take off the small arm, all you really see is the black nub. It won't be obvious I am attaching a GoPro to it. I'm more happy with the way these photos turned out than the install itself! I rarely use flash and I get excited when I get it right.  20131011-GoProRamMountTry1-006 by VictorN07, on Flickr  20131011-GoProRamMountTry1-013 by VictorN07, on Flickr  20131011-GoProRamMountTry1-016 by VictorN07, on Flickr  20131011-GoProRamMountTry1-017 by VictorN07, on Flickr  20131011-GoProRamMountTry1-019 by VictorN07, on Flickr 1080p60 spot metering. It did very well. THe mount/seat dampened vibrations quite a bit. [ame="http://www.youtube.com/watch?v=Bg8ADVhDKYs"]Hero3+ first ride 1080p60 - YouTube[/ame]
__________________
|
|
|
|
|
|
|
|
|
|
 Similar Threads
|
||||
| Thread | Thread Starter | Forum | Replies | Last Post |
| Asphalt Scion FR-S | aznsensazian | FR-S & 86 Photos, Videos, Wallpapers, Gallery Forum | 21 | 03-17-2014 01:13 PM |
| Asphalt FR-S pics | Rob_g | CANADA | 24 | 09-03-2012 05:01 AM |
| Asphalt in the snow | Double4Free | Scion FR-S / Toyota 86 GT86 General Forum | 5 | 06-10-2012 01:56 PM |
| Asphalt 6MT FR-S | Symbiont | Southern California | 22 | 06-06-2012 07:47 AM |
| ant08 Asphalt MT | ant08 | Member's Car Journals | 3 | 06-04-2012 04:16 PM |


 Scoobie
