I was trying to find some reasonable brake ducting kit that utilizes the fog light bezels since I didn't want to spend $650 for the APR brake ducting kit. Then I figured there is no other alternative so I decided to make my own. My total cost was about $80 bucks and it seems to be working just fine

FYI, the aftermarket brake ducting options seem to be using the same quality ducting hose so you basically pay for the backing plates and some clamps/zip ties

I am sure there are many creative guys here and someone can come up with a lot easier method
. This should typically take about 3-4 hours but I have to say I am very slow so YMMV ..with that said, please read carefully
WARNING: This mod requires you to remove the bumper, brake pads, calipers and rotors so please see below links and make sure you are comfortable with performing these and as always DO IT AT YOUR OWN RISK!!!
It also involves the washer bottle removal on the driver side in order to utilize the fog light inserts and requires you to modify the OEM brake backing plates,, Did I mention the removal of the fog lights  . Since I have an intercooler I wasn't able to use an air inlets but if you're NA, you may be able to route the ducting and use these air inlets and keep your fog lights and washer bottle in their places
  https://www.pegasusautoracing.com/pr...p?Product=3624
Tools and Parts required :
Props to @
blackfireball5 for providing information about the mesh screen and how I can fix it on the fog light bezels. If you have an FRS I would highly recommend you to follow his directions since the fog light bezels might be slightly different
http://www.ft86club.com/forums/showthread.php?t=63231
To remove your bumper you may use the following link as a reference or the video below:
http://www.ft86club.com/forums/showthread.php?t=8788
[ame="http://youtu.be/7bUV3nVVtds"]http://youtu.be/7bUV3nVVtds[/ame]
Bumper and fog lights removed

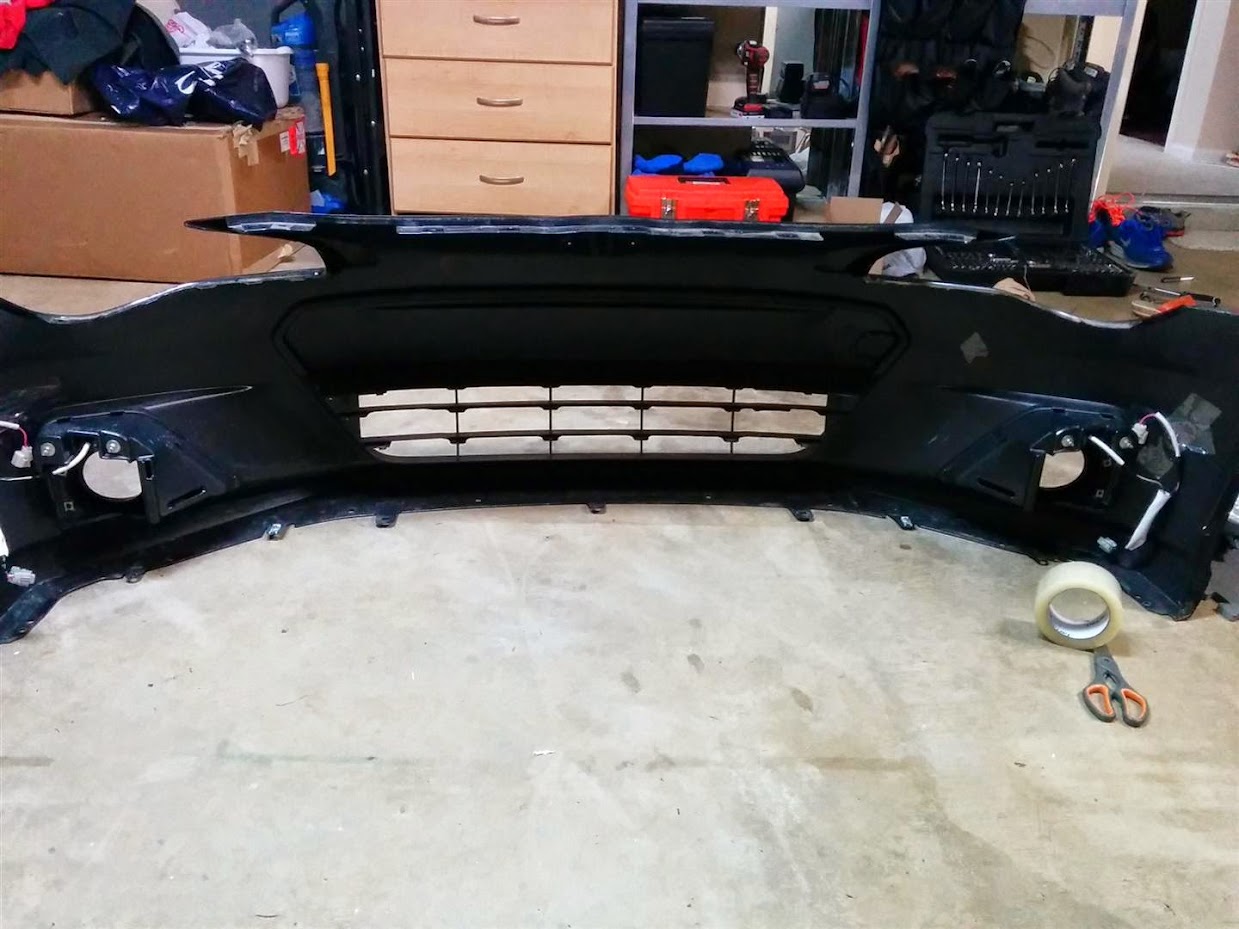

since I have the foglights (BRZ Limited) I removed after removing the bumper and safely put aside the fog light cable (you may use gorilla tape to fix it inside the bumper) then I cut the mesh gutter with a scissor and placed it into the fog light bezel and applied some liquid nails..
** make sure you cut the mesh a bit bigger than the opening so it will fit tightly
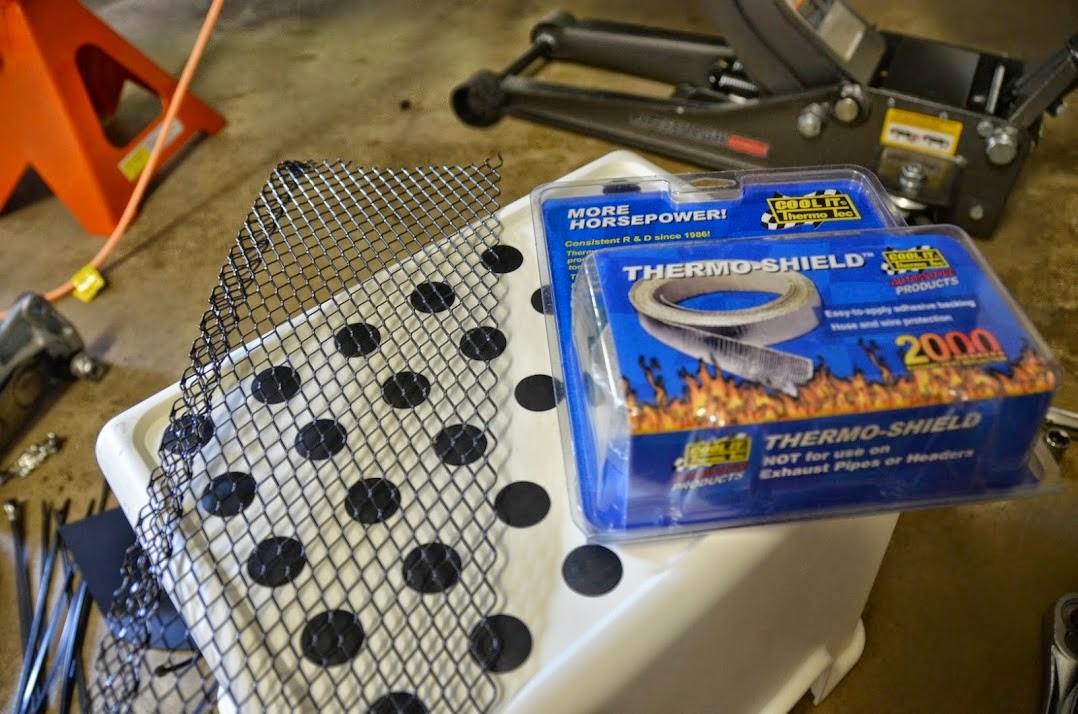


Pay attention to these tabs you will need to put the zip ties through these tabs and the holes on the side and connect the couplers from their shields so those will stay in place

you can test fit your ducting hose but
don't attach your hose yet

After removing the bumper I drained the washer bottle (this step is also necessary with Kraftwerks kit install and
the smaller washer bottle that comes with the KW kit still wouldn't work)
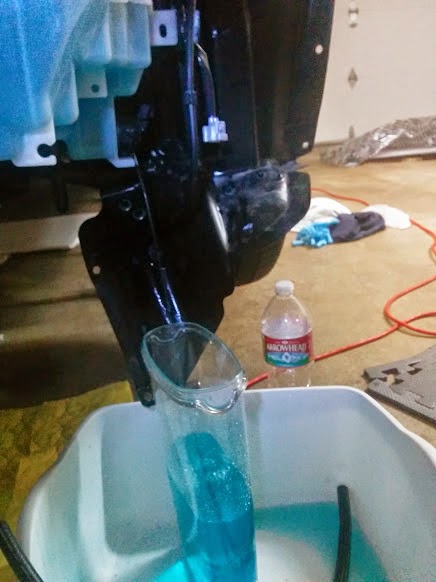
after draining the washer bottle you can remove the whole thing (washer bottle) and put back your bumper so behind the inner tire wells you can see the grills (passenger side in the picture)
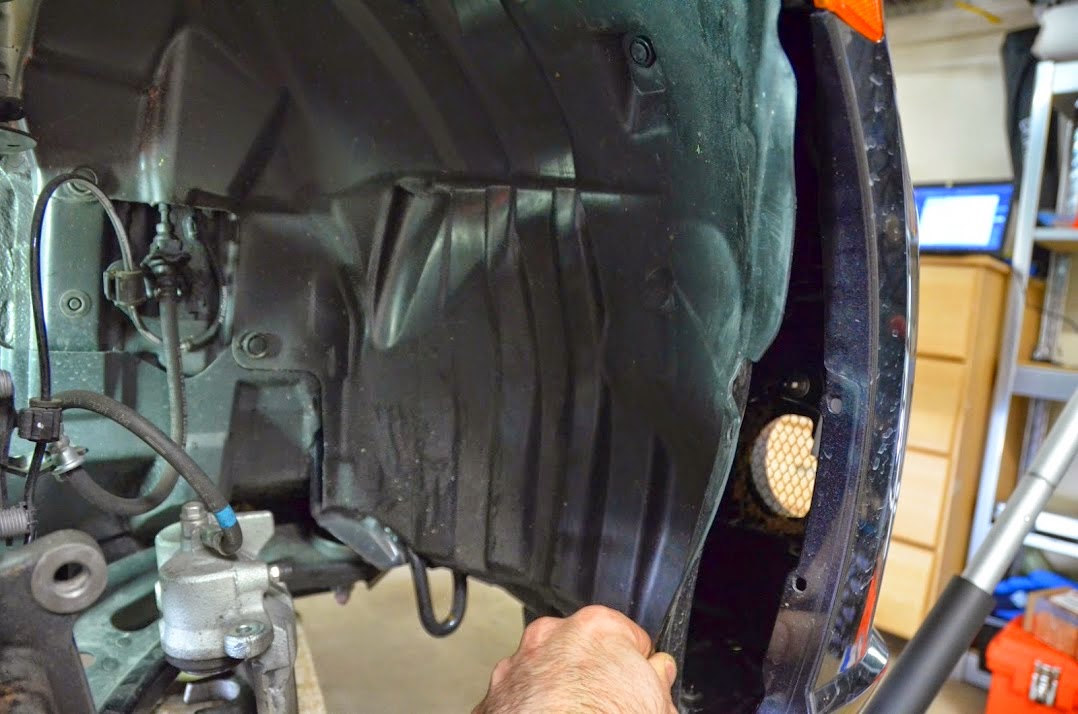
and the way it looks from the front


if you see some liquid nail residue you can either clean it or simply ignore it since they will be completely dirty and look black after a while
you can now remove your front calipers, brakes and rotors
you may refer to below instructions
http://www.ft86club.com/forums/showthread.php?t=45713

after removing the calipers and rotors you may put the calipers on the control arm and remove the brake backing plates(those should be 3x 12 mm bolts)
I didn't have electric saw and the Dremel tool wasn't strong enough so I simply used the electric drill and put some holes in the backing plate(this is the left/driver side backing plate) and connected the dots to make a hole

now you can
cut the 11ft ducting hose in half and attach one half of the backing plate with 5-6 zip ties if you have metal zip ties those might be even better UPDATE: I have used Metal zip ties and left the plastic ones to see if they get melted after some hard track use and they all held up just fine but it wouldn't hurt to use the metal ones (driver side shown in the picture) since I didn't test the longevity of the regular zip ties I will check them after a few event and will probably change them with metal ones
 you can now put the rotors, calipers and pads in place so we will have more room to route the ducting hose
here is the correct routing of the ducting hose and more zip ties of course

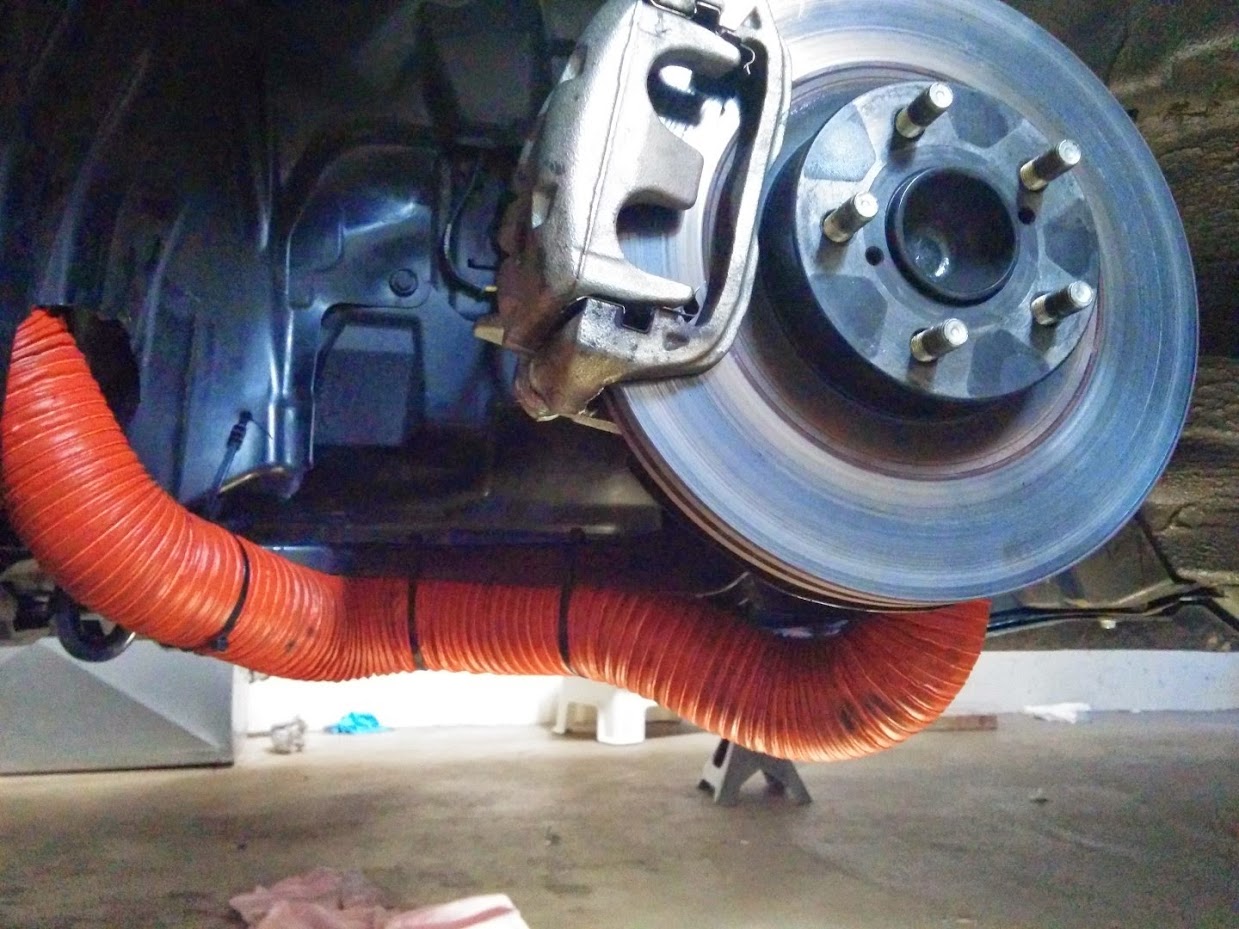
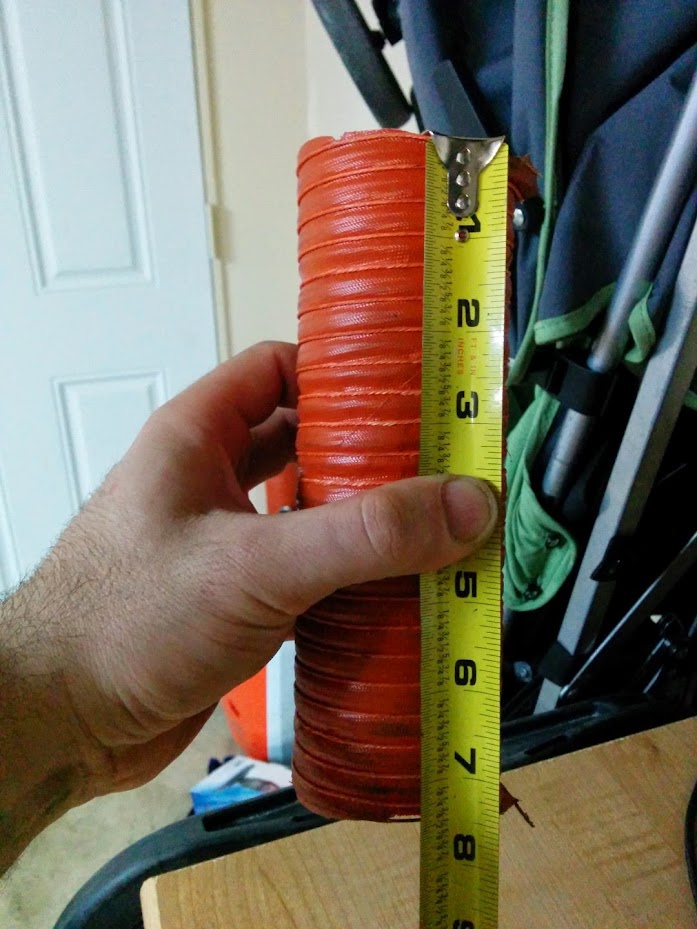
then you will cut the other end of the hose about 7.5" long so
the remainder of the hose will make some tension and push it forward to the bumper and the hose will stay in place (you will do the same thing for the passenger side too)
you can now cut the inner fender well and make sure you cut it close to the frame and control arm side as much as possible .. there is a metal hook (not pictured) right behind the hose you will use that to zip tie the hose before you put it through the fender well
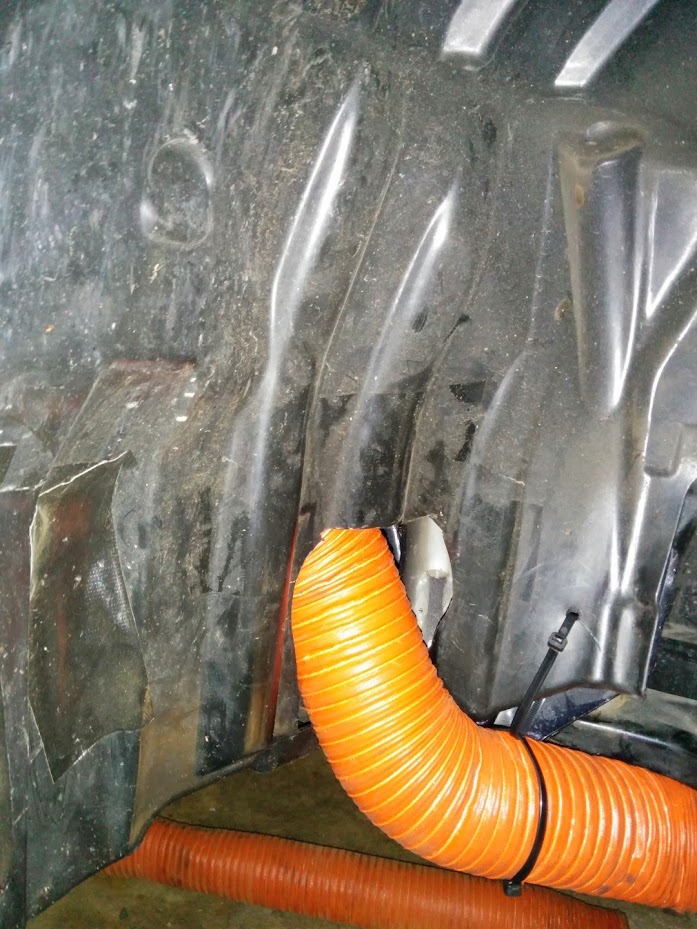

 IMPORTANT: Make sure you test fit the ducting hose to see if the tires make contact with them at full lock.. I would definitely suggest you to to put the wheels when the car is on the jack stands so it would save you some time and effort
Gorilla tape comes in handy to close the gaps

now you can follow the same steps for the passenger side, there you have it a cheap alternative to those expensive brake duct kits ..enjoy it