


|
||||||
| DIY (Do-It-Yourself) Guides For all DIYs. |
 |
|
|
Thread Tools | Search this Thread |
 10-06-2013, 11:34 PM
|
#1 |
|
Senior Member

Join Date: Jul 2013
Drives: 2013 Scion FR-S (Raven) MT
Location: Kitchener
Posts: 535
Thanks: 99
Thanked 125 Times in 89 Posts
Mentioned: 4 Post(s)
Tagged: 0 Thread(s)
|
DIY: Installing Pioneer AVIC Z150BH Aftermarket Head Unit
DIY: Installing Pioneer AVIC Z150BH Aftermarket Head Unit
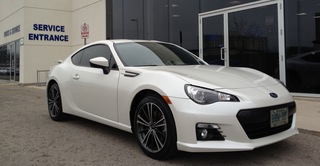
Okay so this car is the first I've modded in any way and the more I do, the more I want to do. I started with doing my tail lights from a DIY and I have just gone from there doing it all myself...Having no wiring experience this head unit install was a little nerve wracking but I think with the help of the other DIYs (that I will quote here) and my experience it's safe to say anyone can do this. So bare with me, first DIY but I'll do my best to skip over parts other people have covered well, and stick to the parts that I couldn't find any help on this forum about (probably because most thought it was easy/not worth detailing) First off, I had the old Bespoke (canadian version) touchscreen unit installed in my FR-S and while it's good...I wanted better. Rear cam, DVD/video playback, GPS were all big for me as I spend a lot of work hours in my car. Old Head Unit --> I decided to go all out and got the Pioneer Z150BH Head Unit and so far I have not been disappointed. Sounds great, fast responsive touch screen and pretty good GPS. Video quality is excellent and setup is pretty straightforward. If you have any questions about the head unit itself let me know... Here's what it looks like out of the box --> Now let's get to the DIY: What I used... - Pioneer AVIC Z150BH Found here: http://www.pioneerelectronics.com/PU...on/AVIC-Z150BH - Beat sonic BH1 mounting kit & wiring harness (looks good and includes both harness and mount kit which is nice) Found here: http://www.beatsonicusa.com/bh1.html - Pioneer's iPhone HDMI cables Found here: http://www.pioneerelectronics.com/PU...ables/CD-IH202 - Male/female bullet connectors for 14-16 gauge wires (found at Canadian Tire/Home Hardware/Home Depot) Like this: http://www.homehardware.ca/en/rec/in...ppn/R-I8619042 - Optional: If you want to retain your USB connector and your stock antenna, you need two adapter cables. I opted for just USB as my stock radio sucks and I just use TuneIn radio for my iPhone which gets crystal clear local radio stations Antenna: Lexus Antenna Adaptor ( I used Scosche LSAAB ) USB: just ebay: Axxess AX-TOYUSB (axtoyusb) Select Toyota & Lexus OEM USB Retention Adapter This is all you need to get it setup properly. If you want to do the e-brake bypass, you DON'T need the PAC TR7 from eBay...Most people say you can't ground out the parking brake anymore (which is slightly true) but you can still bypass it with no additional adapters. Follow this YouTube video: [ame="http://www.youtube.com/watch?v=6nlCjHDrryE"]Bypass Pioneer avic-z150bh and avic-x950bh - YouTube[/ame] Now for the installation process...Like I said I will reference some existing DIY guides I followed as they are done well and no need to repeat things twice. 1. To get your existing radio out, and to see the 3 stock harnesses you need to worry about, see this DIY guide http://www.ft86club.com/forums/showthread.php?t=8585 Keep in mind that he does not use the beat sonic wiring harness and instead needed to solder the connections. With the beat sonic, they provide you with bullet connectors for easy install/removal if necessary. The only wiring you really need to do, is add the correct male or female bullet connector to the POWER connector that comes with the head unit. Here's the harnesses you will need for our purposes: 2. For help with wiring up the beat sonic, you need to know a few things. The POWER connector has all the bare wires coming out of it (as opposed to the ACCESSORY connector that has all of the red/white/yellow connectors coming out of it). Simply look at the Beat Sonic wiring harness wire colours, and match them up to the power connector wires. White goes with white, white/black goes with white/black, etc. Each wire on the Beat Sonic will have a bullet connector so you just need to add the opposite bullet connector to the POWER connectors corresponding wire, then crimp it to lock it on the wire. With male and female bullet connectors on each wire, you simply plug in the terminals and you're done. Refer to this wiring guide: http://www.beatsonicusa.com/Instruct...ual_En_BH1.pdf That guide also shows you how to mount the beat sonic mounting kit onto the head unit. Keep in mind that it looks like the beat sonic kit goes on first followed by the metal bracket, but it does not. The metal bracket goes first, then the black mounting kit. Use the screws that come with Beat Sonic kit and your head unit, not the existing screws in the old head unit. Here's everything all wired and ready to go: 3. Now that the "hard" part is done, you'll need to take your console out to get at your E-Brake connector. To get that done, follow this guide: http://www.ft86club.com/forums/showthread.php?t=15558 If you're having trouble getting some of the panels off (like the USB/AUX connection), follow this guide for help: http://www.ft86club.com/forums/showthread.php?t=13583 **But stop before you touch anything to do with the knee pad as that is all unnecessary** Here's what it looks like when all is out and console is removed: 4. Connect the HDMI cord and usb cable that comes with the CD-IH202 kit. Then plug your USB to lighting cable into the USB end of the CD IH202. Then plug HDMI end + lightning end into an HDMI to Lightning Digital AV Adapter (apple.com) Here is the final setup routed through to the glovebox (more on that later) 5. I connected an AUX cord to the ACCESSORY connector just in case I ever wanted to hook something old up that could only take AUX connection. (see above picture) 6. CABLE ROUTING This part sucked. I basically did the easiest thing I could that looked stealthy. What that ended up being was the iPhone cable + AUX cable + GPS antenna through the right side of the head unit opening into the GloveBox. I cleared out my glove box and basically made it the "control centre" for my car as my iPad and all cables now sit in there alone. This let's my iPhone sit in the window mount free and clear on Bluetooth for calls and my iPad does the rest (videos/music/screen mirroring, app mode, etc.) All you have to do to these cables is stick it through the back of the glovebox and then to the left, and grab it with your other hand on the right of the head unit opening. For the new mic, I decided against removing the A-Pillar and trying to get it up on the OEM location as I had complaints from people that it didn't sound great so I opted to go through the steering wheel column and mount it right by my engine temperature gauge. Looks very clean (as only I can see it) and functionally it is PERFECT. Sound quality is way better than OEM. Here is the MIC location: 7. E-Brake: For now, I have wired the e-brake properly (legally). I want to see how much of a pain it is, because if I can live with it then that's the option I want to go with. To do this you simply feed the green wire (from the POWER connector) down past the HVAC panel, to the left of your shifter, and then attach the red clamp to the existing parking brake wire. EDIT: I switched to the illegal way by bypassing the e-brake restrictions. If you want to do it this way...Simply follow this YouTube link: [ame="http://www.youtube.com/watch?v=6nlCjHDrryE"]Bypass Pioneer avic-z150bh and avic-x950bh - YouTube[/ame] Basically, you add a small wire to the left slot next to the mute wire (accessory connector) and connect it to the parking wire. Then take the new combined wire and connect it to the ground wire (which should already be grounded) -- DONE! 8. You're DONE! Make sure you zip tie all the wires into nicely packed bunches so that all the wires aren't getting tangled and stuff. Then just slide your new head unit back into the existing slots (making sure the black pegs on the bottom corners go through the metal bracket hole) and put all the screws back in and panels snapped back on. Here's the final product: Video Quality: **VIDEO COMING SOON**
__________________
--------------------------------------------------------
My Car Journal: Raven FR-S w/ TRD Flavour  Click for my AVIC Z150BH Head Unit DIY Install  Last edited by tiz22; 10-13-2013 at 11:24 AM. |

|

|
|
10-06-2013, 11:50 PM
|
#2 |
|
Senior Member
Join Date: Jul 2013
Drives: 2013 Scion FR-S (Raven) MT
Location: Kitchener
Posts: 535
Thanks: 99
Thanked 125 Times in 89 Posts
Mentioned: 4 Post(s)
Tagged: 0 Thread(s)
|
Let me know if there is anything you want me to add or expand on...I'm hoping I've covered everything for a successful install but I may have skipped over something
__________________
--------------------------------------------------------
My Car Journal: Raven FR-S w/ TRD Flavour Click for my AVIC Z150BH Head Unit DIY Install |
|
|
|
|
10-06-2013, 11:54 PM
|
#3 |
|
Senior Member
Join Date: Jul 2010
Drives: Subaru BRZ Limited
Location: Toronto, Canada
Posts: 2,624
Thanks: 763
Thanked 1,586 Times in 776 Posts
Mentioned: 10 Post(s)
Tagged: 0 Thread(s)
|
Looks great! I actually just posted a question in the Canada section of the forum and maybe you can help. I was actually looking at getting that exact same HU, and since the BRZ already has an aftermarket Pioneer HU do you think it would be a direct swap?
__________________
 |
|
|
|
|
10-07-2013, 12:03 AM
|
#4 | |
|
Senior Member
Join Date: Jul 2013
Drives: 2013 Scion FR-S (Raven) MT
Location: Kitchener
Posts: 535
Thanks: 99
Thanked 125 Times in 89 Posts
Mentioned: 4 Post(s)
Tagged: 0 Thread(s)
|
Quote:
Double check on your BRZ but I imagine it's exactly the same as the FR-S in that it uses an amplified mic (adapter if you want to still use that), a weird 7.something" head unit and a slightly different wiring connector. Regardless, once you connect those little bullet connectors it is a direct plug and play (minus routing your new cables)
__________________
--------------------------------------------------------
My Car Journal: Raven FR-S w/ TRD Flavour Click for my AVIC Z150BH Head Unit DIY Install |
|
|
|
|
|
10-07-2013, 12:14 AM
|
#5 | |
|
Senior Member
Join Date: Jul 2010
Drives: Subaru BRZ Limited
Location: Toronto, Canada
Posts: 2,624
Thanks: 763
Thanked 1,586 Times in 776 Posts
Mentioned: 10 Post(s)
Tagged: 0 Thread(s)
|
Quote:

__________________
|
|
|
|
|
|
10-07-2013, 12:27 AM
|
#6 | |
|
Senior Member
Join Date: Jul 2013
Drives: 2013 Scion FR-S (Raven) MT
Location: Kitchener
Posts: 535
Thanks: 99
Thanked 125 Times in 89 Posts
Mentioned: 4 Post(s)
Tagged: 0 Thread(s)
|
Quote:
Just pull of those two dash panels, unscrew the four bolts that are showing and slide it out...You can check the three harnesses and compare them to the ends of the Beat Sonic ones, if they're the same, they'll fit!
__________________
--------------------------------------------------------
My Car Journal: Raven FR-S w/ TRD Flavour Click for my AVIC Z150BH Head Unit DIY Install |
|
|
|
|
|
10-07-2013, 12:31 AM
|
#7 | |
|
Senior Member
Join Date: Jul 2010
Drives: Subaru BRZ Limited
Location: Toronto, Canada
Posts: 2,624
Thanks: 763
Thanked 1,586 Times in 776 Posts
Mentioned: 10 Post(s)
Tagged: 0 Thread(s)
|
Quote:
__________________
|
|
|
|
|
|
10-07-2013, 12:32 AM
|
#8 | |
|
Senior Member
Join Date: Jul 2013
Drives: 2013 Scion FR-S (Raven) MT
Location: Kitchener
Posts: 535
Thanks: 99
Thanked 125 Times in 89 Posts
Mentioned: 4 Post(s)
Tagged: 0 Thread(s)
|
If you're unsure just snap a picture of the three harnesses and I'll take a look at mine for you. Good luck!
Quote:
__________________
--------------------------------------------------------
My Car Journal: Raven FR-S w/ TRD Flavour Click for my AVIC Z150BH Head Unit DIY Install |
|
|
|
|
| The Following User Says Thank You to tiz22 For This Useful Post: | Burrcold (10-07-2013) |
|
10-07-2013, 10:24 PM
|
#9 |
|
Member
Join Date: Sep 2013
Drives: Scion FR-S
Location: Miami
Posts: 87
Thanks: 11
Thanked 30 Times in 21 Posts
Mentioned: 2 Post(s)
Tagged: 0 Thread(s)
|
can u specify which USB adapter cable is the one you bought? do you have any pics of it?
|
|
|
|
|
10-08-2013, 10:48 AM
|
#10 | |
|
Senior Member
Join Date: Jul 2013
Drives: 2013 Scion FR-S (Raven) MT
Location: Kitchener
Posts: 535
Thanks: 99
Thanked 125 Times in 89 Posts
Mentioned: 4 Post(s)
Tagged: 0 Thread(s)
|
Quote:
http://www.ebay.com/itm/Axxess-AX-TO...ht_1715wt_1399 I can take pics for you tonight just let me know if you still need it
__________________
--------------------------------------------------------
My Car Journal: Raven FR-S w/ TRD Flavour Click for my AVIC Z150BH Head Unit DIY Install |
|
|
|
|
|
10-08-2013, 12:53 PM
|
#11 |
|
MODERATOR-SAMA

Join Date: Oct 2009
Drives: Swagtron Scooter
Location: Seattle
Posts: 2,685
Thanks: 345
Thanked 1,562 Times in 524 Posts
Mentioned: 81 Post(s)
Tagged: 0 Thread(s)
|
added to directory
__________________
 |
|
|
|
| The Following User Says Thank You to WingsofWar For This Useful Post: | tiz22 (10-08-2013) |
|
10-08-2013, 03:57 PM
|
#12 |
|
RedBunny w/ Wing

Join Date: Jan 2013
Drives: FR-S
Location: PDX, OR
Posts: 962
Thanks: 346
Thanked 179 Times in 155 Posts
Mentioned: 22 Post(s)
Tagged: 0 Thread(s)
|
@tiz22 how much is the Z150 cost?
__________________
Firestorm FR-S MT【PDX, OR】I am just driving in normal speed. dont bother
 |
|
|
|
|
10-08-2013, 04:27 PM
|
#13 | |
|
Senior Member

Join Date: Jan 2012
Drives: DGM BRZ Limited
Location: FL
Posts: 192
Thanks: 53
Thanked 58 Times in 33 Posts
Mentioned: 2 Post(s)
Tagged: 0 Thread(s)
|
Quote:
|
|
|
|
|
|
10-08-2013, 05:42 PM
|
#14 | |
|
Member
Join Date: Sep 2013
Drives: Scion FR-S
Location: Miami
Posts: 87
Thanks: 11
Thanked 30 Times in 21 Posts
Mentioned: 2 Post(s)
Tagged: 0 Thread(s)
|
Quote:
 He just had a couple different ones listed and I wanted to be sure. He just had a couple different ones listed and I wanted to be sure.
|
|
|
|
|
|
|
|
|
|
|
 Similar Threads
|
||||
| Thread | Thread Starter | Forum | Replies | Last Post |
| FS: Stock Pioneer Head Unit | alderaan34 | Audio/Visual, Electronics, Infotainment, NAV | 1 | 06-04-2013 10:21 AM |
| WTB: Pioneer Premium Audio radio/head unit | tech4pdx | Canada Classifieds | 2 | 04-14-2013 08:31 PM |
| Pioneer Avic-Z150bh | TRD_86 | Electronics | Audio | NAV | Infotainment | 0 | 04-04-2013 03:42 AM |
| FS: (AB) Pioneer Premium Upgraded Head Unit | pheoxs | Canada Classifieds | 0 | 01-14-2013 04:42 PM |
| FR-S stock Pioneer head unit and Driod Razr problem | JayNutter | Electronics | Audio | NAV | Infotainment | 1 | 10-09-2012 09:52 PM |


