08-25-2012, 09:33 PM
|
#1 |
|
Member

Join Date: Aug 2012
Drives: Scion FR-S
Location: Exton, PA
Posts: 53
Thanks: 8
Thanked 23 Times in 9 Posts
Mentioned: 2 Post(s)
Tagged: 0 Thread(s)
|
Another DIY Armrest
I got tired of waiting for the "official" armrest from Toyota so I thought I throw one together. It was actually fairly easy and only cost about $25 in materials, some of which I already had lying around the house. One word of caution, this method does require a little bit of sewing (you know, with a needle and thread). I figure if you guys and install a new exhaust or a turbo unit, you can certainly handle a needle and thread!!
Materials: 1 foot of black vinyl fabric (from my local Jo-Ann's fabric store). They have a large variety of different colors and textures. I chose the Whisper Black, which has a nice matte finish. It costs $21.99/yd but you only need a foot long section to make two or three of these. A piece of 1/2" MDF (Medium Density Fiberboard) A 1" thick piece of foam cushion (from Jo-Ann's it was their "Chairpad" foam sold in multiple thicknesses and sizes.) You can change the thickness of your armrest by using thicker or thinner foam. A spool of heavy duty upholstery thread and a needle. Here is what the vinyl I chose looks like: 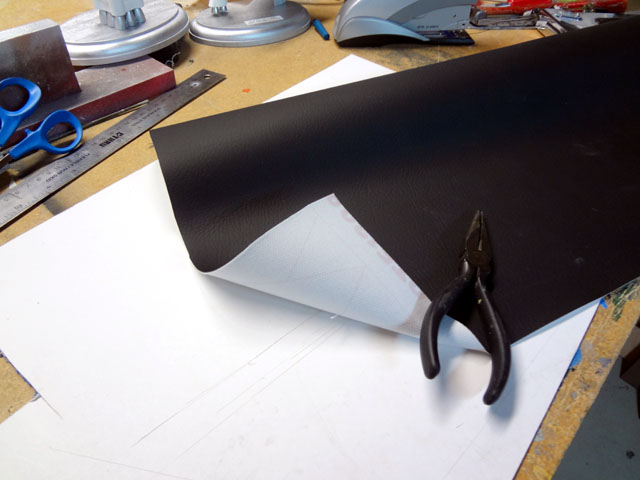 I wanted mine to be a rectangle and to leave the gap at the front open for a cell phone or MP3 player power cord to exit. I chose the size of 6.5" by 16", which covers the entire opening and then some. First, cut the MDF to 6.5" x 16". Same with the foam (using the MDF as the template). Sand the MDF on all sides and lightly round all the corners to avoid sharp edges. 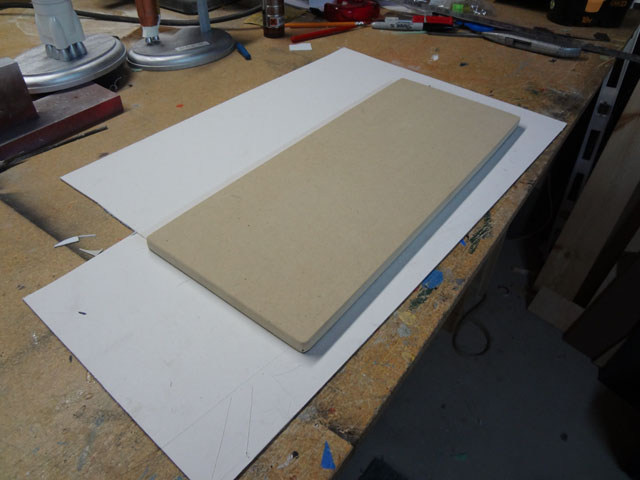 Lay the foam and then the MDF on top of a vinyl, with the black face down. The vinyl has a white fabric backing. Mark the outline of the foam/MDF with a marker so you will know where to cut the corners.  Now, cut the corners as shown. You can then gather a corner inside out and sew from the corner down about 1 1/2" (or the height of the combined foam and MDF). After sewing all four corners, turn the vinyl inside out and put it black side down. Now insert the foam followed by the MDF. Start at one of the narrow ends and pull the vinyl taught and lay the edge on the back of the MDF. Using a heavy duty staple gun, secure the edge of the vinyl to the MDF (The MDF is incredibly hard to staple into. If the staple doesn't penetrate the entire way take a hammer and finish the job.) Next, do the opposite end and then the two long sides, pulling the vinyl taught before stapling. Try to avoid any bunching or sags. You can always pull out the staple and try again if it's not quite right. Once all the sides are done, the next part is always the hardest for me, the corners. Try and remove as much material as you can at each corner and fold the remainder over and staple it to the MDF. You want to have a nice flat fold, not a thick bunch of vinyl at each corner. I was partially successful! 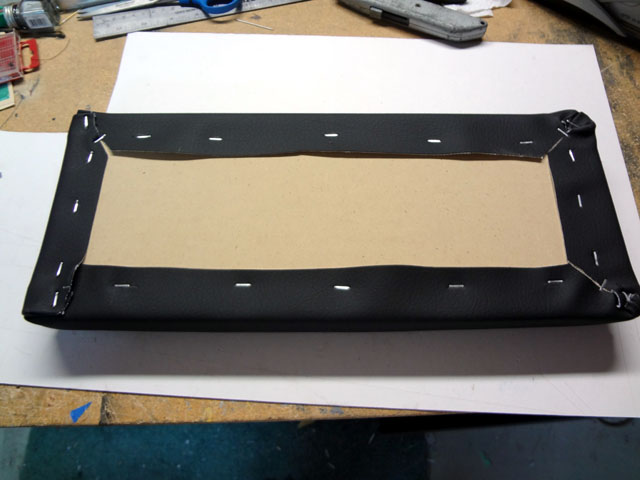 Here is what it looks like from the top: 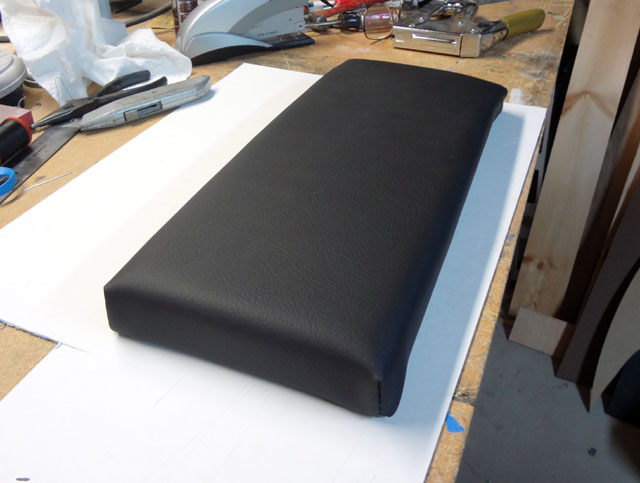 Here is how it looks sitting in the car. 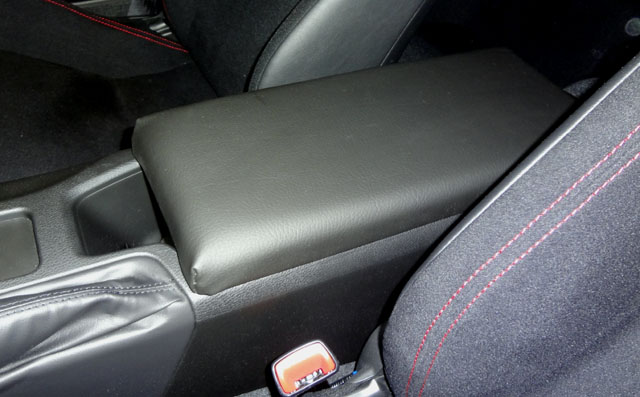 I came up with a method to have the armrest slide open to access the contents. I made two tracks out of 90 degree angle aluminum and mounted them on the bottom as shown below. I had to curve the ends so they would slide up to the curved section of the opening. 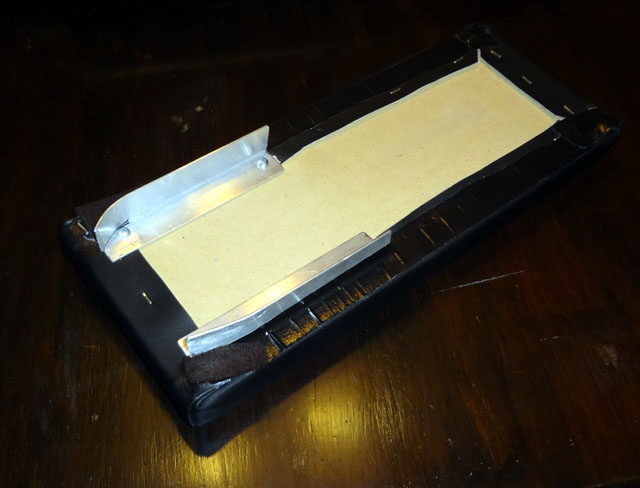 Here is a picture of the armrest in the open position:  It is not secured with anything so it can be removed easily. Last edited by greighn; 11-18-2012 at 07:47 AM. Reason: Added photos of slide mount. |

|

|
| The Following 12 Users Say Thank You to greighn For This Useful Post: |
|
08-26-2012, 01:43 AM
|
#2 |
|
Senior Member

Join Date: Jul 2012
Drives: Scion FR-S Ultramarine
Location: San Jose, CA
Posts: 740
Thanks: 147
Thanked 291 Times in 194 Posts
Mentioned: 40 Post(s)
Tagged: 3 Thread(s)
|
this looks great. there was another thread for armrests and there was a picture of one that slid back. if you could finaggle some rails or something so you could get it to slide back instead of pop up then i think that'd be awesome. but it does look great!
|
|
|
|
|
08-26-2012, 03:01 AM
|
#3 |
|
NW Region Moderator

Join Date: Mar 2010
Drives: FR-S No More
Location: Portland OR
Posts: 5,156
Thanks: 1,134
Thanked 3,186 Times in 1,091 Posts
Mentioned: 300 Post(s)
Tagged: 4 Thread(s)
|
Added to the DIY Directory:
http://www.ft86club.com/forums/showthread.php?t=7365
__________________
|
|
|
|
|
11-14-2012, 01:09 AM
|
#4 | |
|
Senior Member

Join Date: Sep 2012
Drives: 2013 Raven Black FRS
Location: Atlanta, Ga
Posts: 628
Thanks: 415
Thanked 120 Times in 98 Posts
Mentioned: 4 Post(s)
Tagged: 0 Thread(s)
|
Quote:
Is there any functionality to this thing? Did you attach it with hinges or anything? More pics please. Looks good though. I was thinking about doing one, but without padding. Just maybe some plush leather (thick heavy duty leather) Cup holders would be cool, but not sure if its practical cause ur elbow kinda sits right where you'd want a cup holder. |
|
|
|
|
|
11-14-2012, 06:23 PM
|
#5 |
|
The Mechanic

Join Date: Mar 2012
Drives: Civic Turbo,FR-S
Location: NJ
Posts: 928
Thanks: 130
Thanked 171 Times in 119 Posts
Mentioned: 2 Post(s)
Tagged: 1 Thread(s)
|
That looks good. Im gonna have my friend who sews make it lol
__________________
|
|
|
|
|
11-14-2012, 06:51 PM
|
#6 | |
|
When In Doubt...

Join Date: May 2011
Drives: Slowww
Location: PA215
Posts: 1,844
Thanks: 1,023
Thanked 752 Times in 412 Posts
Mentioned: 20 Post(s)
Tagged: 0 Thread(s)
|
Quote:
I sat in the OP's car and from what I remember there are no hinges. It is a good height and size overall for someone who wants an arm rest for those long drives without fun roads. It's a simple but efficiently executed idea.
__________________
Join the Galaxy Blue Silica BRZ registry below: https://docs.google.com/spreadsheet/...2c&usp=sharing |
|
|
|
|
|
11-18-2012, 07:57 AM
|
#7 |
|
Member
Join Date: Aug 2012
Drives: Scion FR-S
Location: Exton, PA
Posts: 53
Thanks: 8
Thanked 23 Times in 9 Posts
Mentioned: 2 Post(s)
Tagged: 0 Thread(s)
|
Ravenblackfrs and Laika,
I finally did come up with a way to mount the armrest so it slides open for limited access to the contents. See the original post for some new photos. Basically, I mounted two 90 degree angle aluminum pieces top the bottom. They are curved to match the curve in the opening so the armrest slides all the way forward in the closed position. I don't use the cup holders so that wasn't a priority to keep them with this method. It is also not permanently secured as I didn't want to make any holes until I see what the OEM armrest will look like. Hope this helps. Thanks. -Gary. |
|
|
|
|
06-06-2013, 02:26 PM
|
#9 |
|
Member

Join Date: May 2013
Drives: Silver Limited BRZ
Location: United States
Posts: 22
Thanks: 0
Thanked 8 Times in 7 Posts
Mentioned: 7 Post(s)
Tagged: 1 Thread(s)
|
Sorry for bringing this back from the dead, but I just picked up the materials for this today. I'll be doing the same vinyl on the sides, but with a black suede on top to match the BRZ seat with red thread to stitch it all up. I also opted for 1/2" foam instead of the full 1". Might take me a little to get this done, but I have nothing better to do this weekend so I'll post pics once I get it done.
|
|
|
|
|
|
|
|
 |
|
|
 Similar Threads
|
||||
| Thread | Thread Starter | Forum | Replies | Last Post |
| JDM Center Armrest | K2 | Scion FR-S / Toyota 86 GT86 General Forum | 49 | 10-09-2012 12:08 AM |
| DIY Center Armrest | BRZranger | Cosmetic Modification (Interior/Exterior/Lighting) | 6 | 07-19-2012 11:04 AM |
| Interest In Carbon Parts + Armrest | PrimeMotoring | Cosmetic Modification (Interior/Exterior/Lighting) | 0 | 06-05-2012 09:02 PM |
| Center Armrest | Sovran | Cosmetic Modification (Interior/Exterior/Lighting) | 13 | 05-11-2012 12:49 AM |
| Armrest?! | Abflug | Scion FR-S / Toyota 86 GT86 General Forum | 59 | 04-03-2012 01:42 PM |