


|
||||||
| Engine, Exhaust, Transmission Discuss the FR-S | 86 | BRZ engine, exhaust and drivetrain. |
 |
|
|
Thread Tools | Search this Thread |
 10-03-2016, 08:43 AM
|
#1 |
|
Senior Member

Join Date: Jun 2015
Drives: Drives like a crab.
Location: Belgium
Posts: 101
Thanks: 2
Thanked 42 Times in 14 Posts
Mentioned: 2 Post(s)
Tagged: 0 Thread(s)
|
Stock muffler - Valved exhaust project
Hi everyone,
I'd like to share with you the latest project I've been working on for my Toyota GT86: a valved exhaust project (think ArmyTrix, Porsche Sport Exhaust, Jaguar Sport Exhaust, etc). The objective is simple: I want to be able to turn into a civilized citizen or a moderate hooligan with only a flick of a switch and it has to come cheap. Here's the idea: Using the stock exhaust, simply add a cutout valve that would bypass the muffler and flow back into one of the exhaust tail pipes. Easy. Well not so easy. Make the project even harder by making a design that allow you to change the valve if it ever possibly fails. So let's have a tour around the project. Step 1: Finding the right spot. This is the first step and is probably the most critical. Where to put this valve? Numerous scenari (actual plural for scenario, I believe) were imagined. - From several positions on the midpipe to the left tail pipe - From the latest possible position on the exhaust entry to the left tail pipe - From the midpipe, just below the LSD, to the right tail pipe 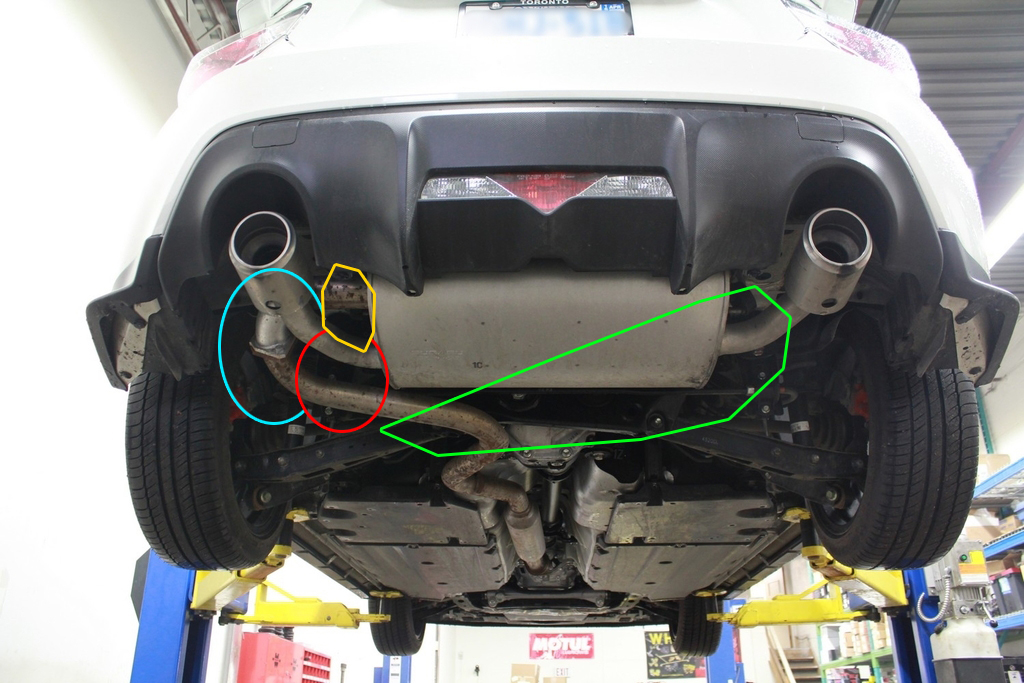 Courtesy of TougeTuning.com And then we told ourselves "well, we'll see when we have the valve". So I started ordering the parts. Step 2: Buying the parts. I need a cutout valve. Generally, the reflex is to go on eBay. I found every valve to be too expensive for what they are. So I browsed AliExpress and found what I wanted. (Well as I'm writing, the product I ordered is no longer available).  http://bit.ly/AlibabaExhaustCutout Here's, mas o menos, what I bought, without the turndown tip. Shipped, this was 60€ I was dumb enough to buy a 2.5" valve while the stock exhaust piping of the GT86 exhaust is 2.11". So, as you can imagined, it made step 1 even more complicated... Because of that, I had to buy a 2.5 to 2.0 inch converter and 2.0" piping. Both shipped, it cost 55€ (not a bargain at all) Also, buying another stock muffler and midpipe was mandatory in order to pass tha annual road security test we have here in Belgium. But also if I ever screwed up because I would need something to put after my cat, obviously. I managed to find one in Germany for 100€ (+35€ for gas to collect it). So all in all, parts-wise, the total cost is: 250€. Currently approx.: 280$ A third of the price of a catback exhaust. Step 3: Finding the right spot. Yes, because we finally got our hands on the parts, we could eventually imagine where it might be possible to fit the valve. And, because the valve is so big (I'm not using a small turbo blow-off valve like many do, partly because I need to be able to remove the valve if needed), we had to rethink it all. So we took a look at cut-open pictures of the muffler, like this one:  Drank a beer and then decided to open the muffler and make a deviation tube inside it that will go out on the right side of the muffler, into the valve, into the tailpipe. The is like the green scenario but inside the muffler. The drawback of this design is that we'll have, when the valve is closed, a permanent back pressure dead zone (hope this sounds cool and right in English). This may provide a little more torque at lower RPM. But once opened, the problem will be gone. Step 4: Cutting, soldering, wielding, you name it. Step 4.1 : Drill through the muffler outer panel soldering points 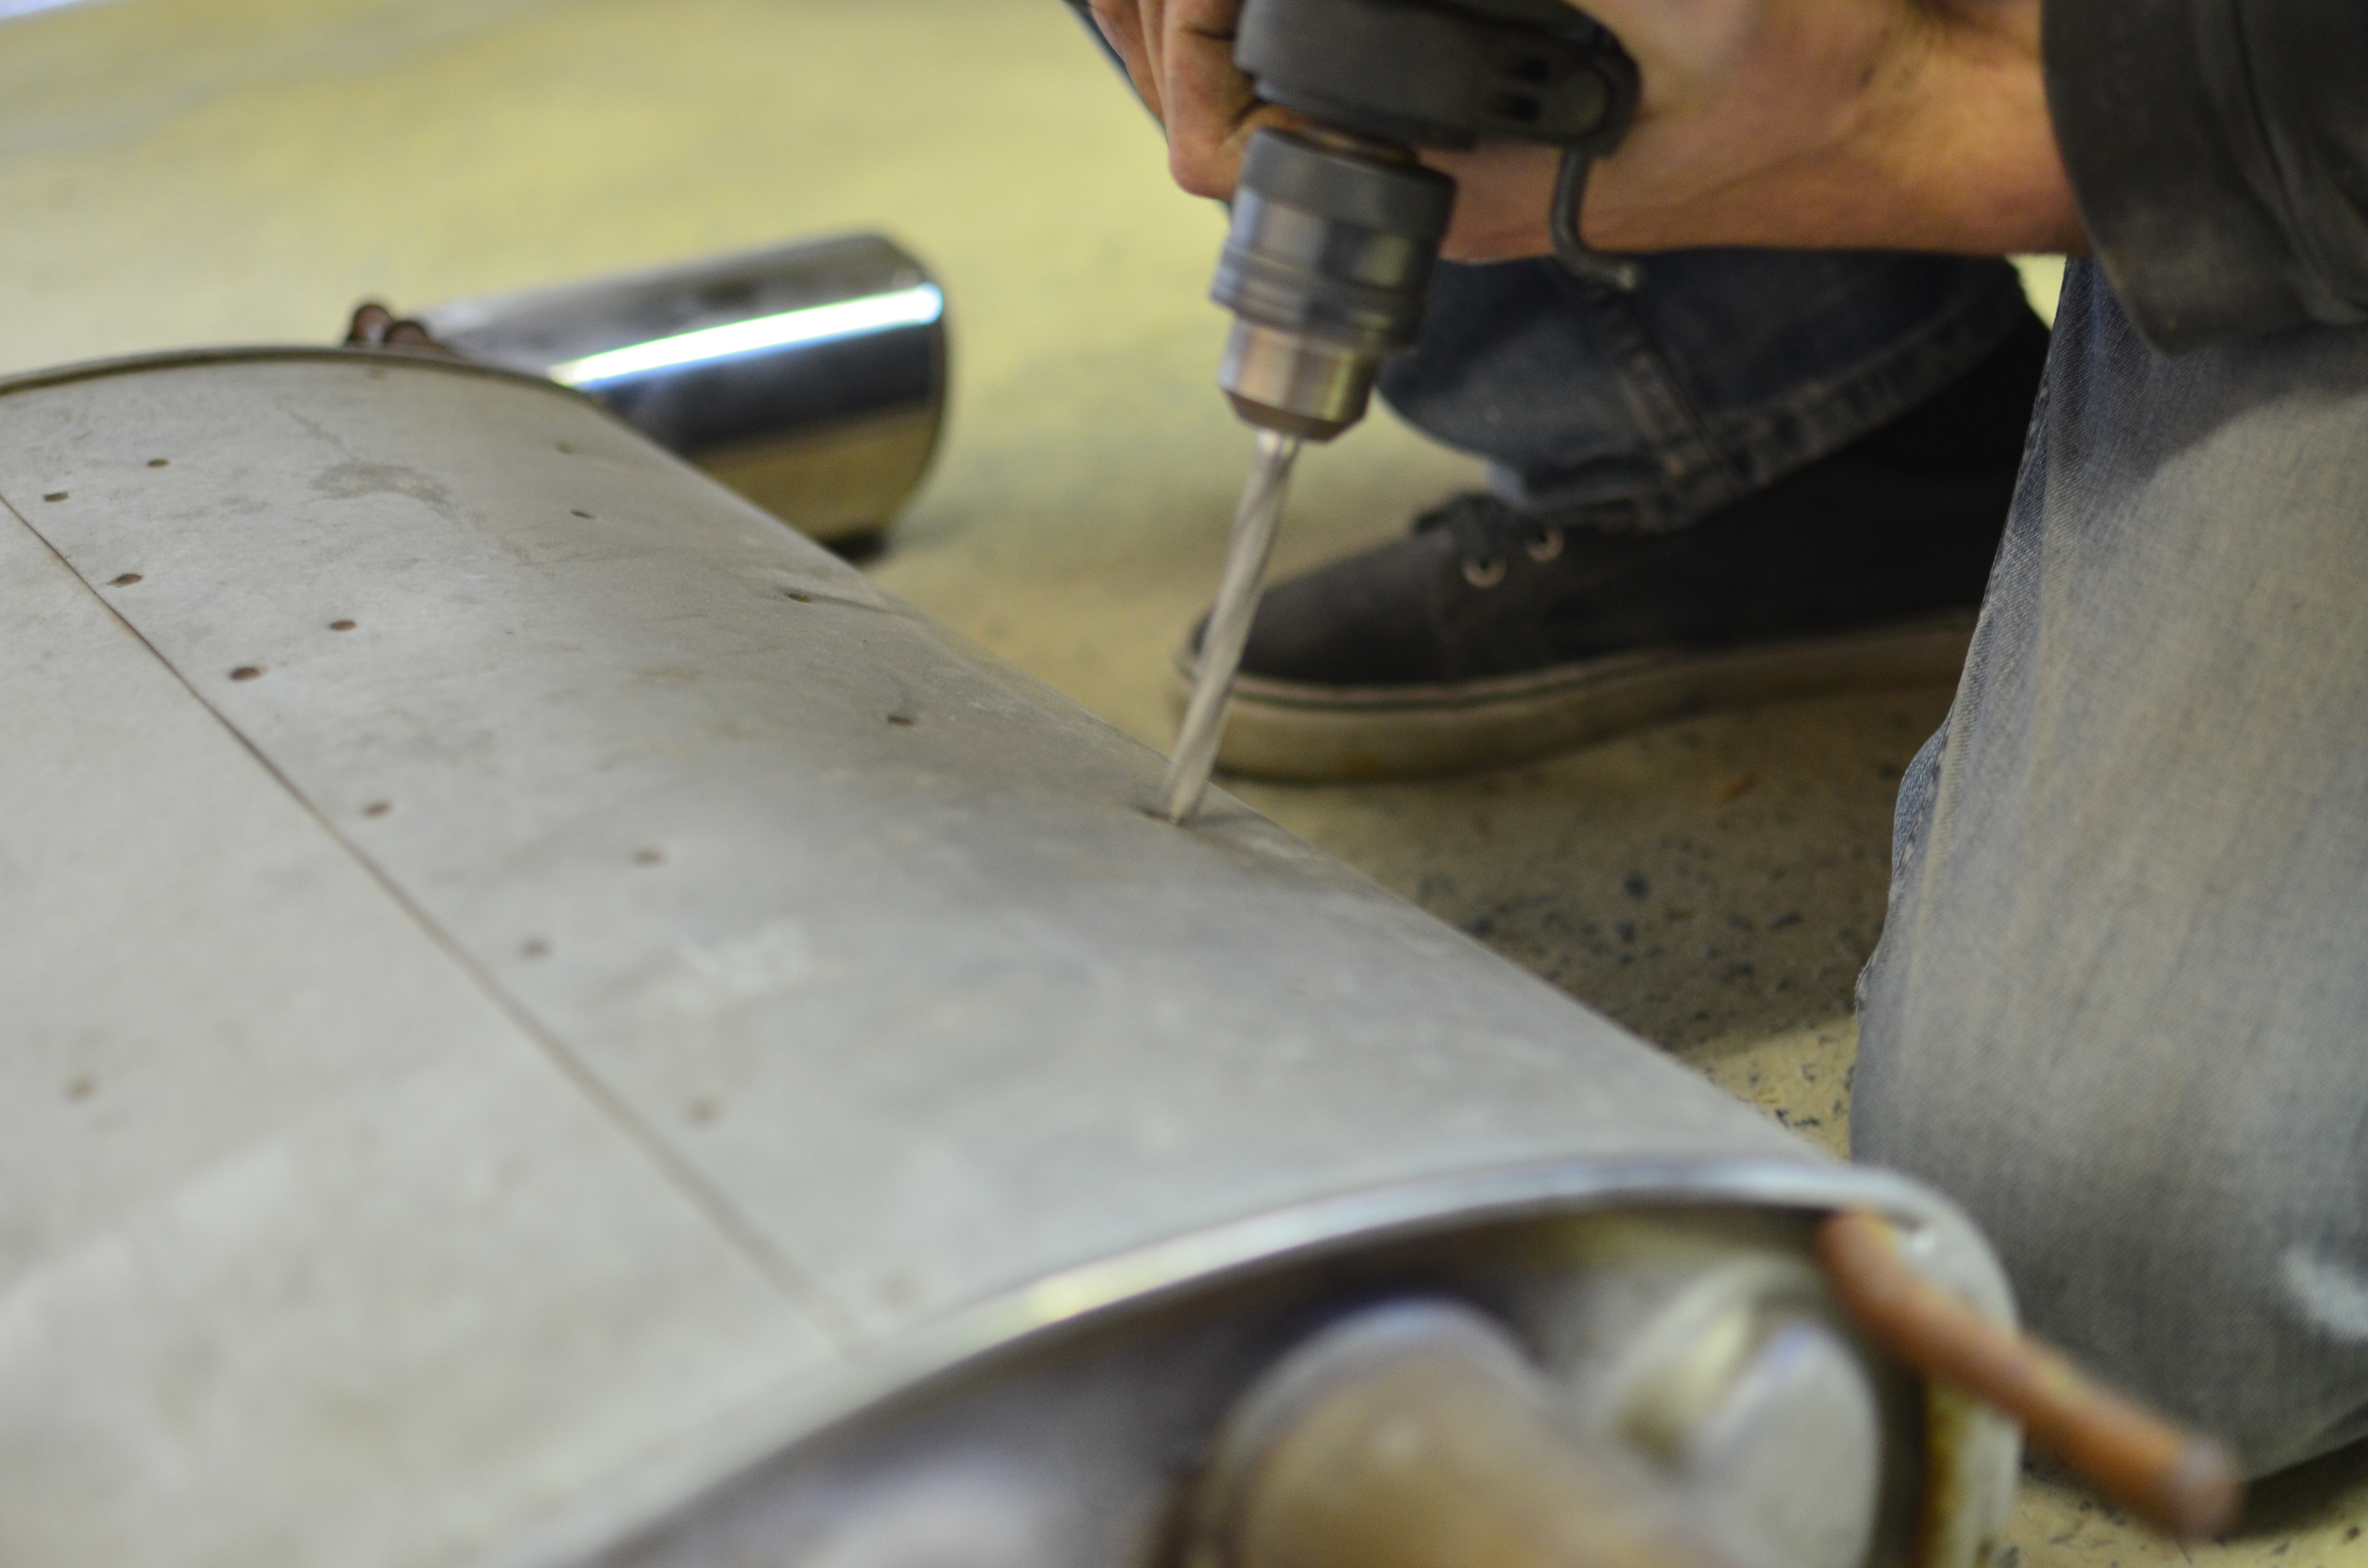 Step 4.2 : Cut open the outer panel (with the lightest force you can apply - you don't want to damage anything inside the muffler) 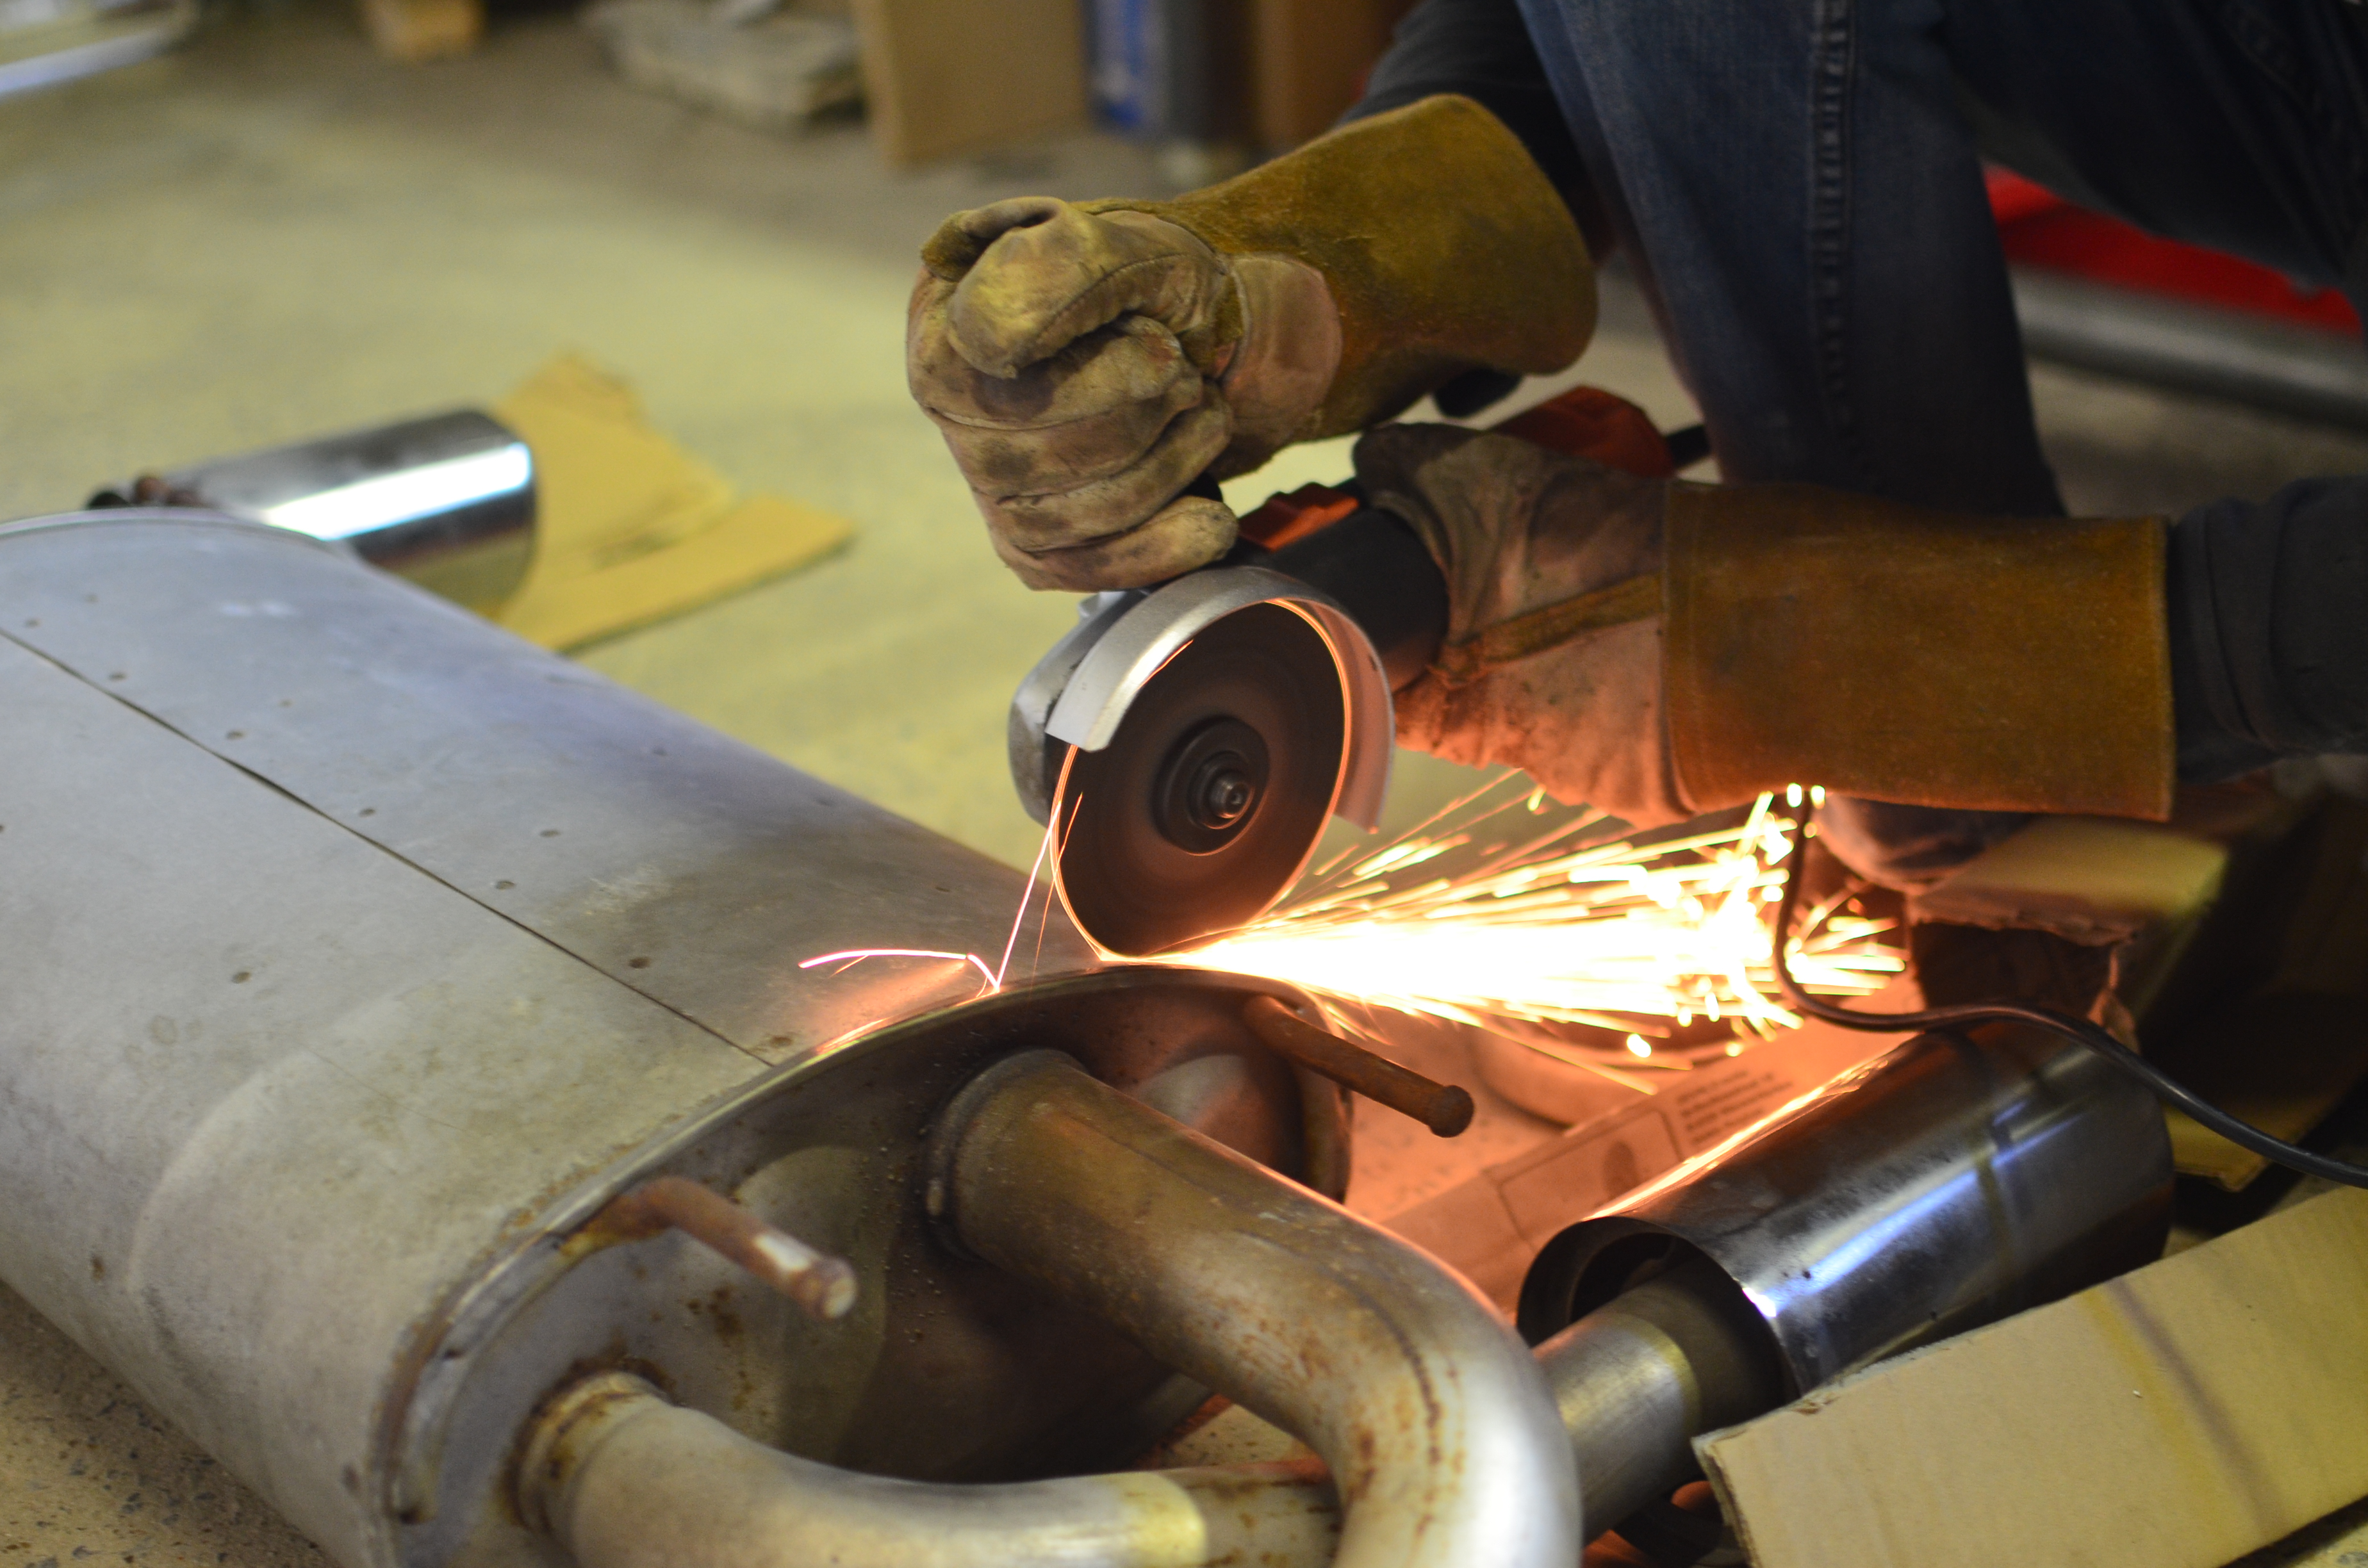 Notice how different the European muffler design is from the US one. The main tube gets larger as it enters the muffler and goes farer on the right side than the US version one. For info, this main tube is a dead end. Exhausts gases can only exit through the small holes. 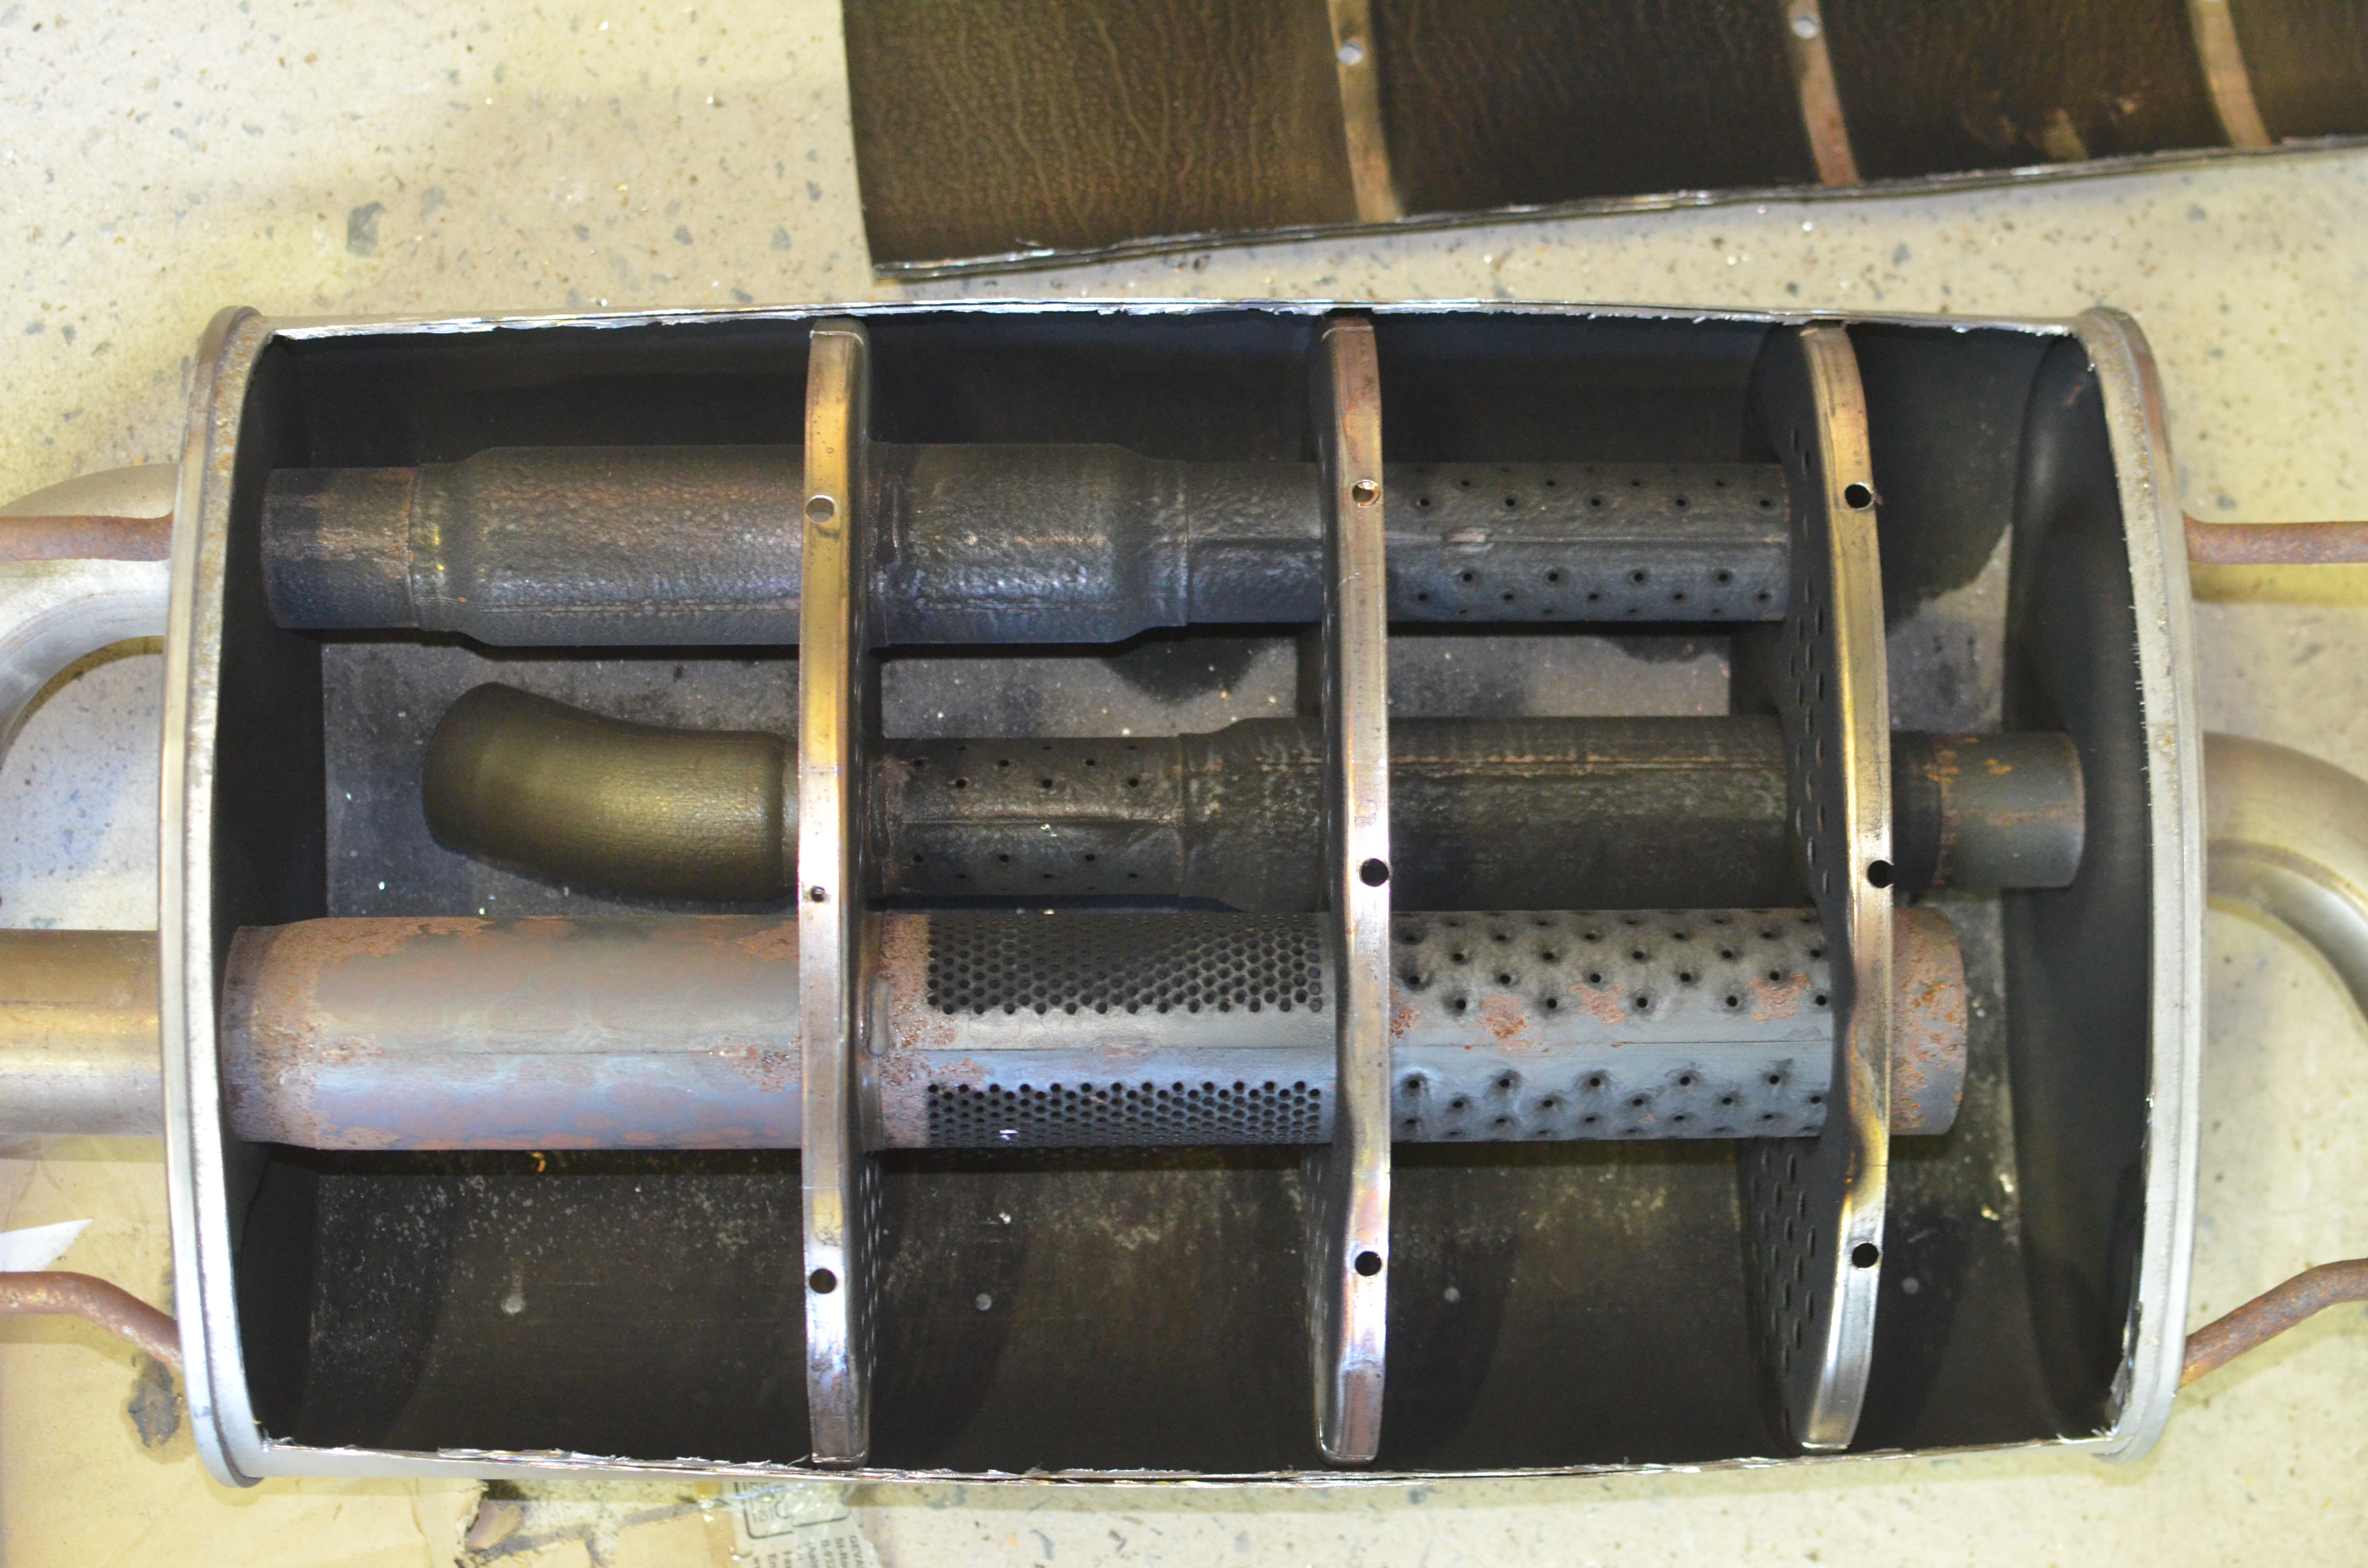 Step 4.3 : Cut bigger holes through the compartment panels in order to make room for the deviation tube. 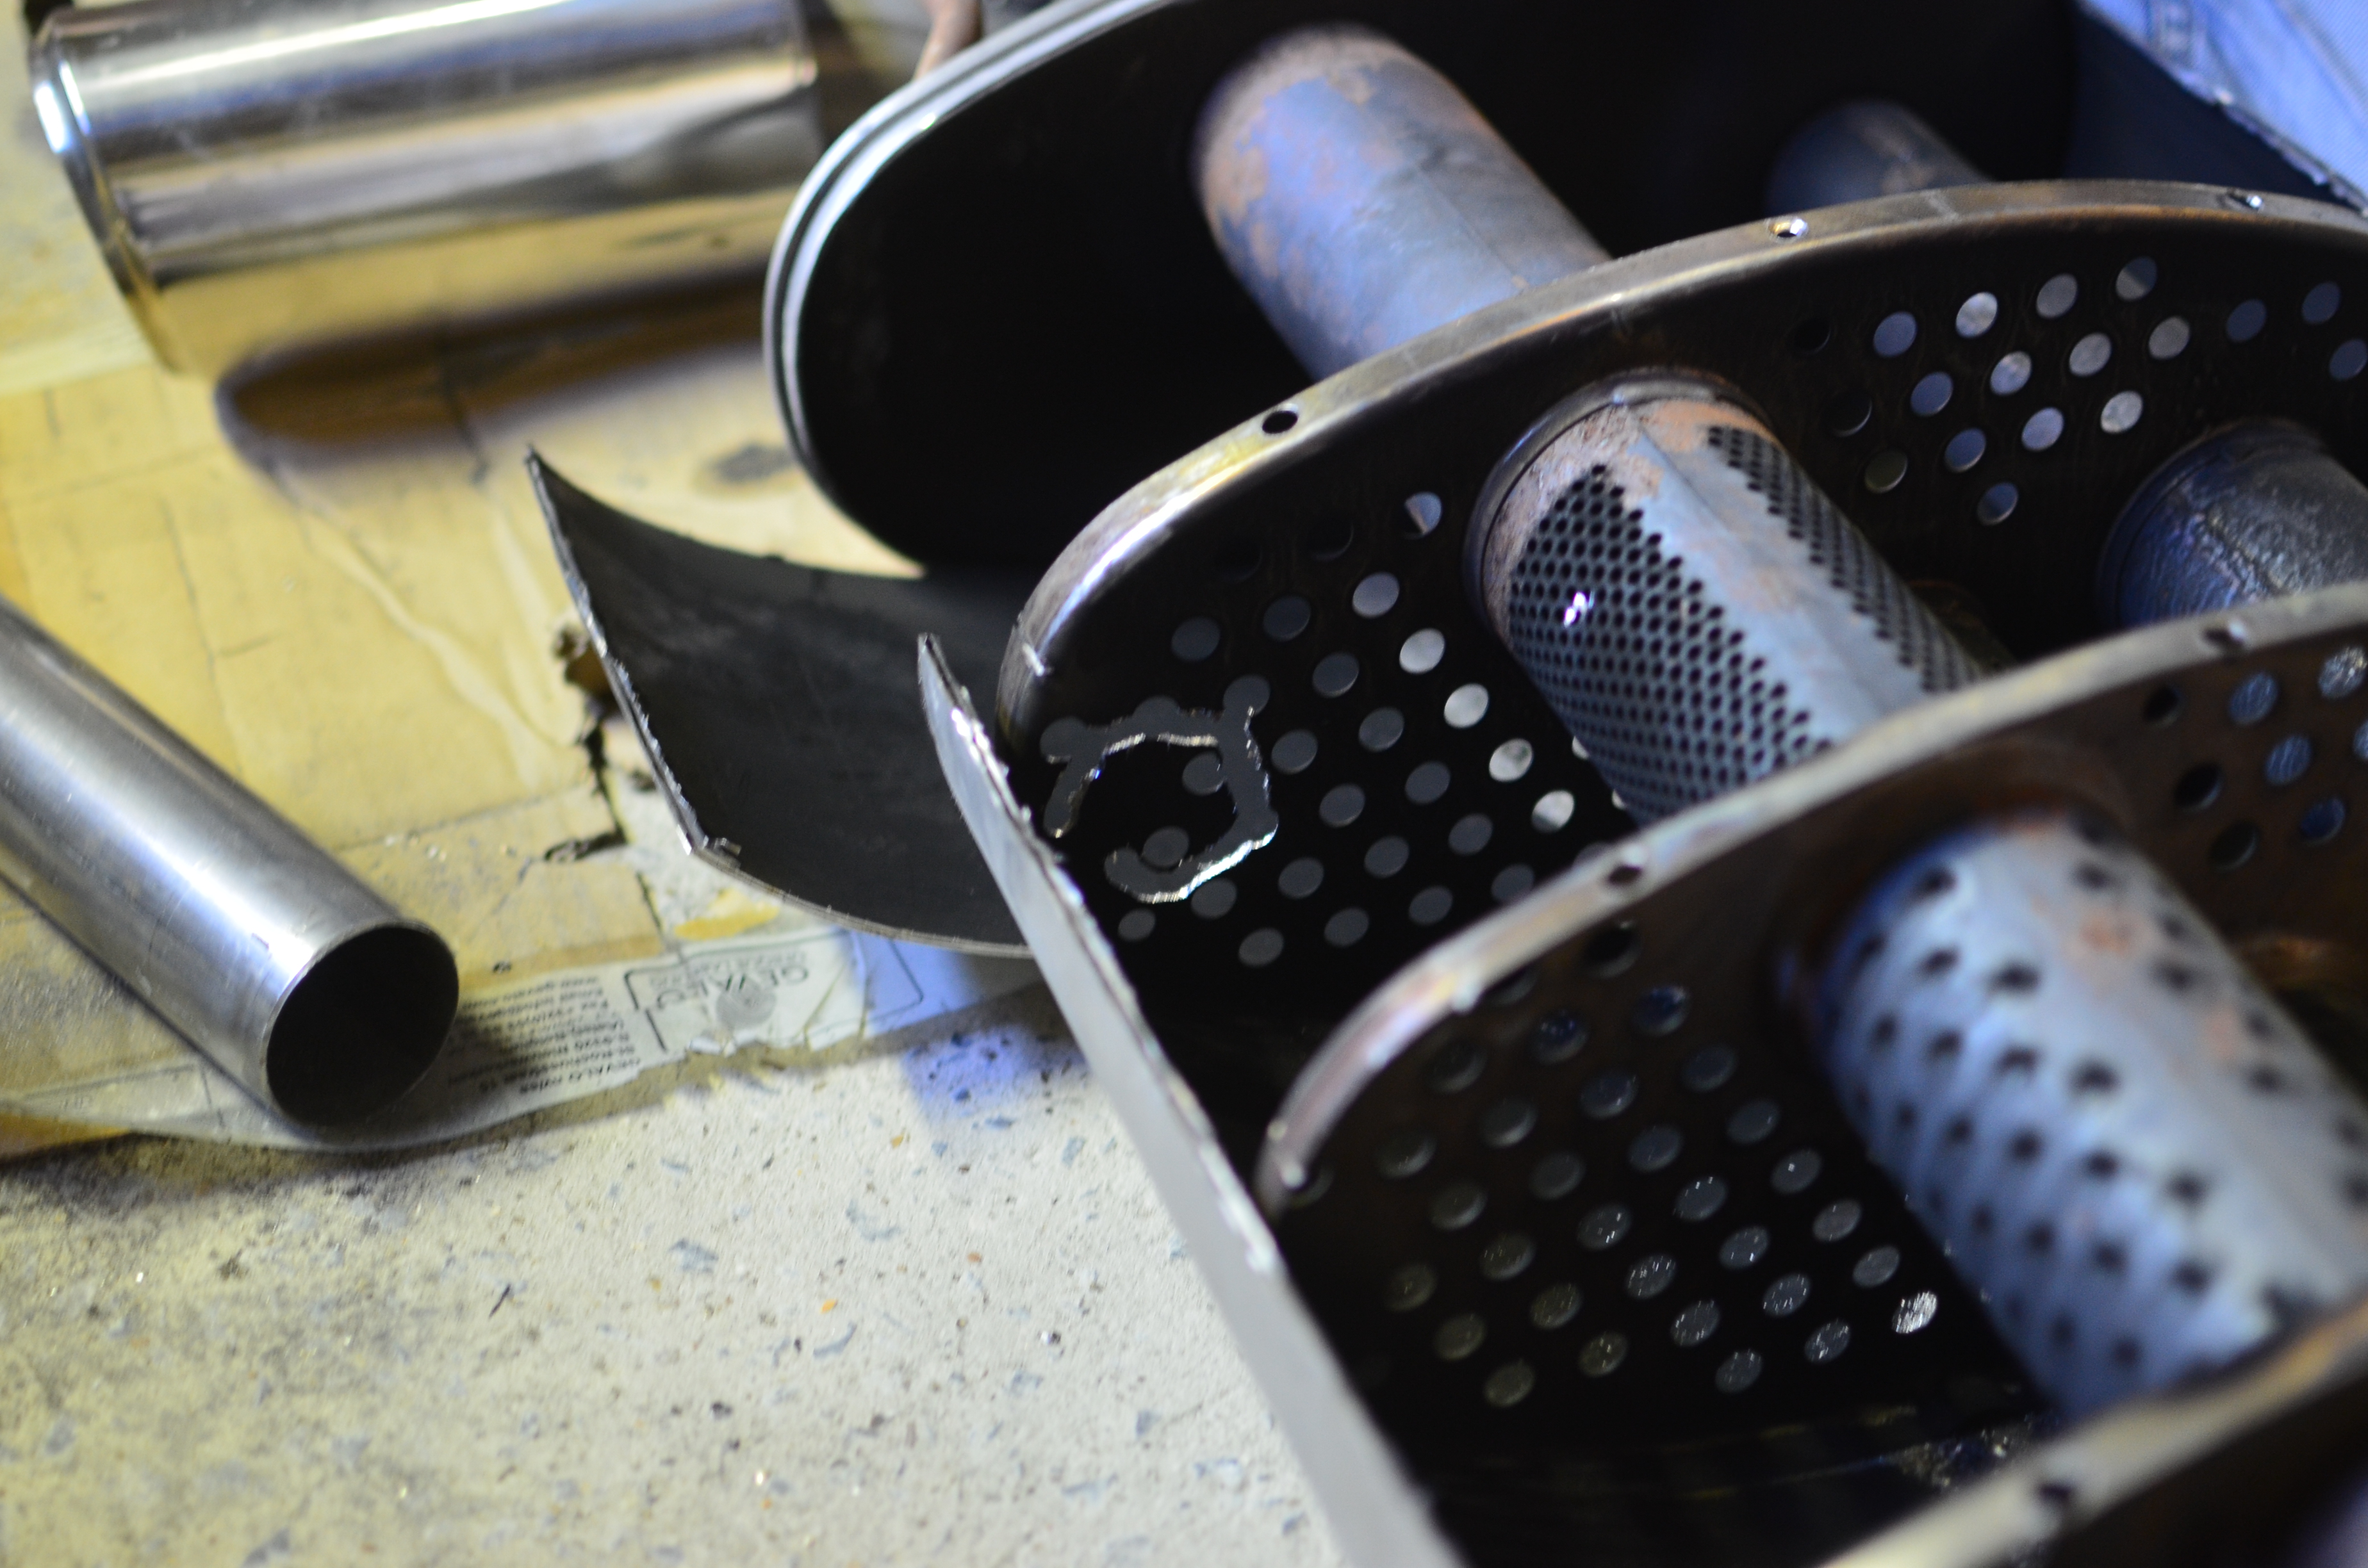 Not that clean at the moment when the picture was taken... Step 4.4 : Make a hole on the right-hand side of the muffler for the deviation tube to meet the valve. Step 4.5 : Make some fitment tests and visualize the final exhaust routing 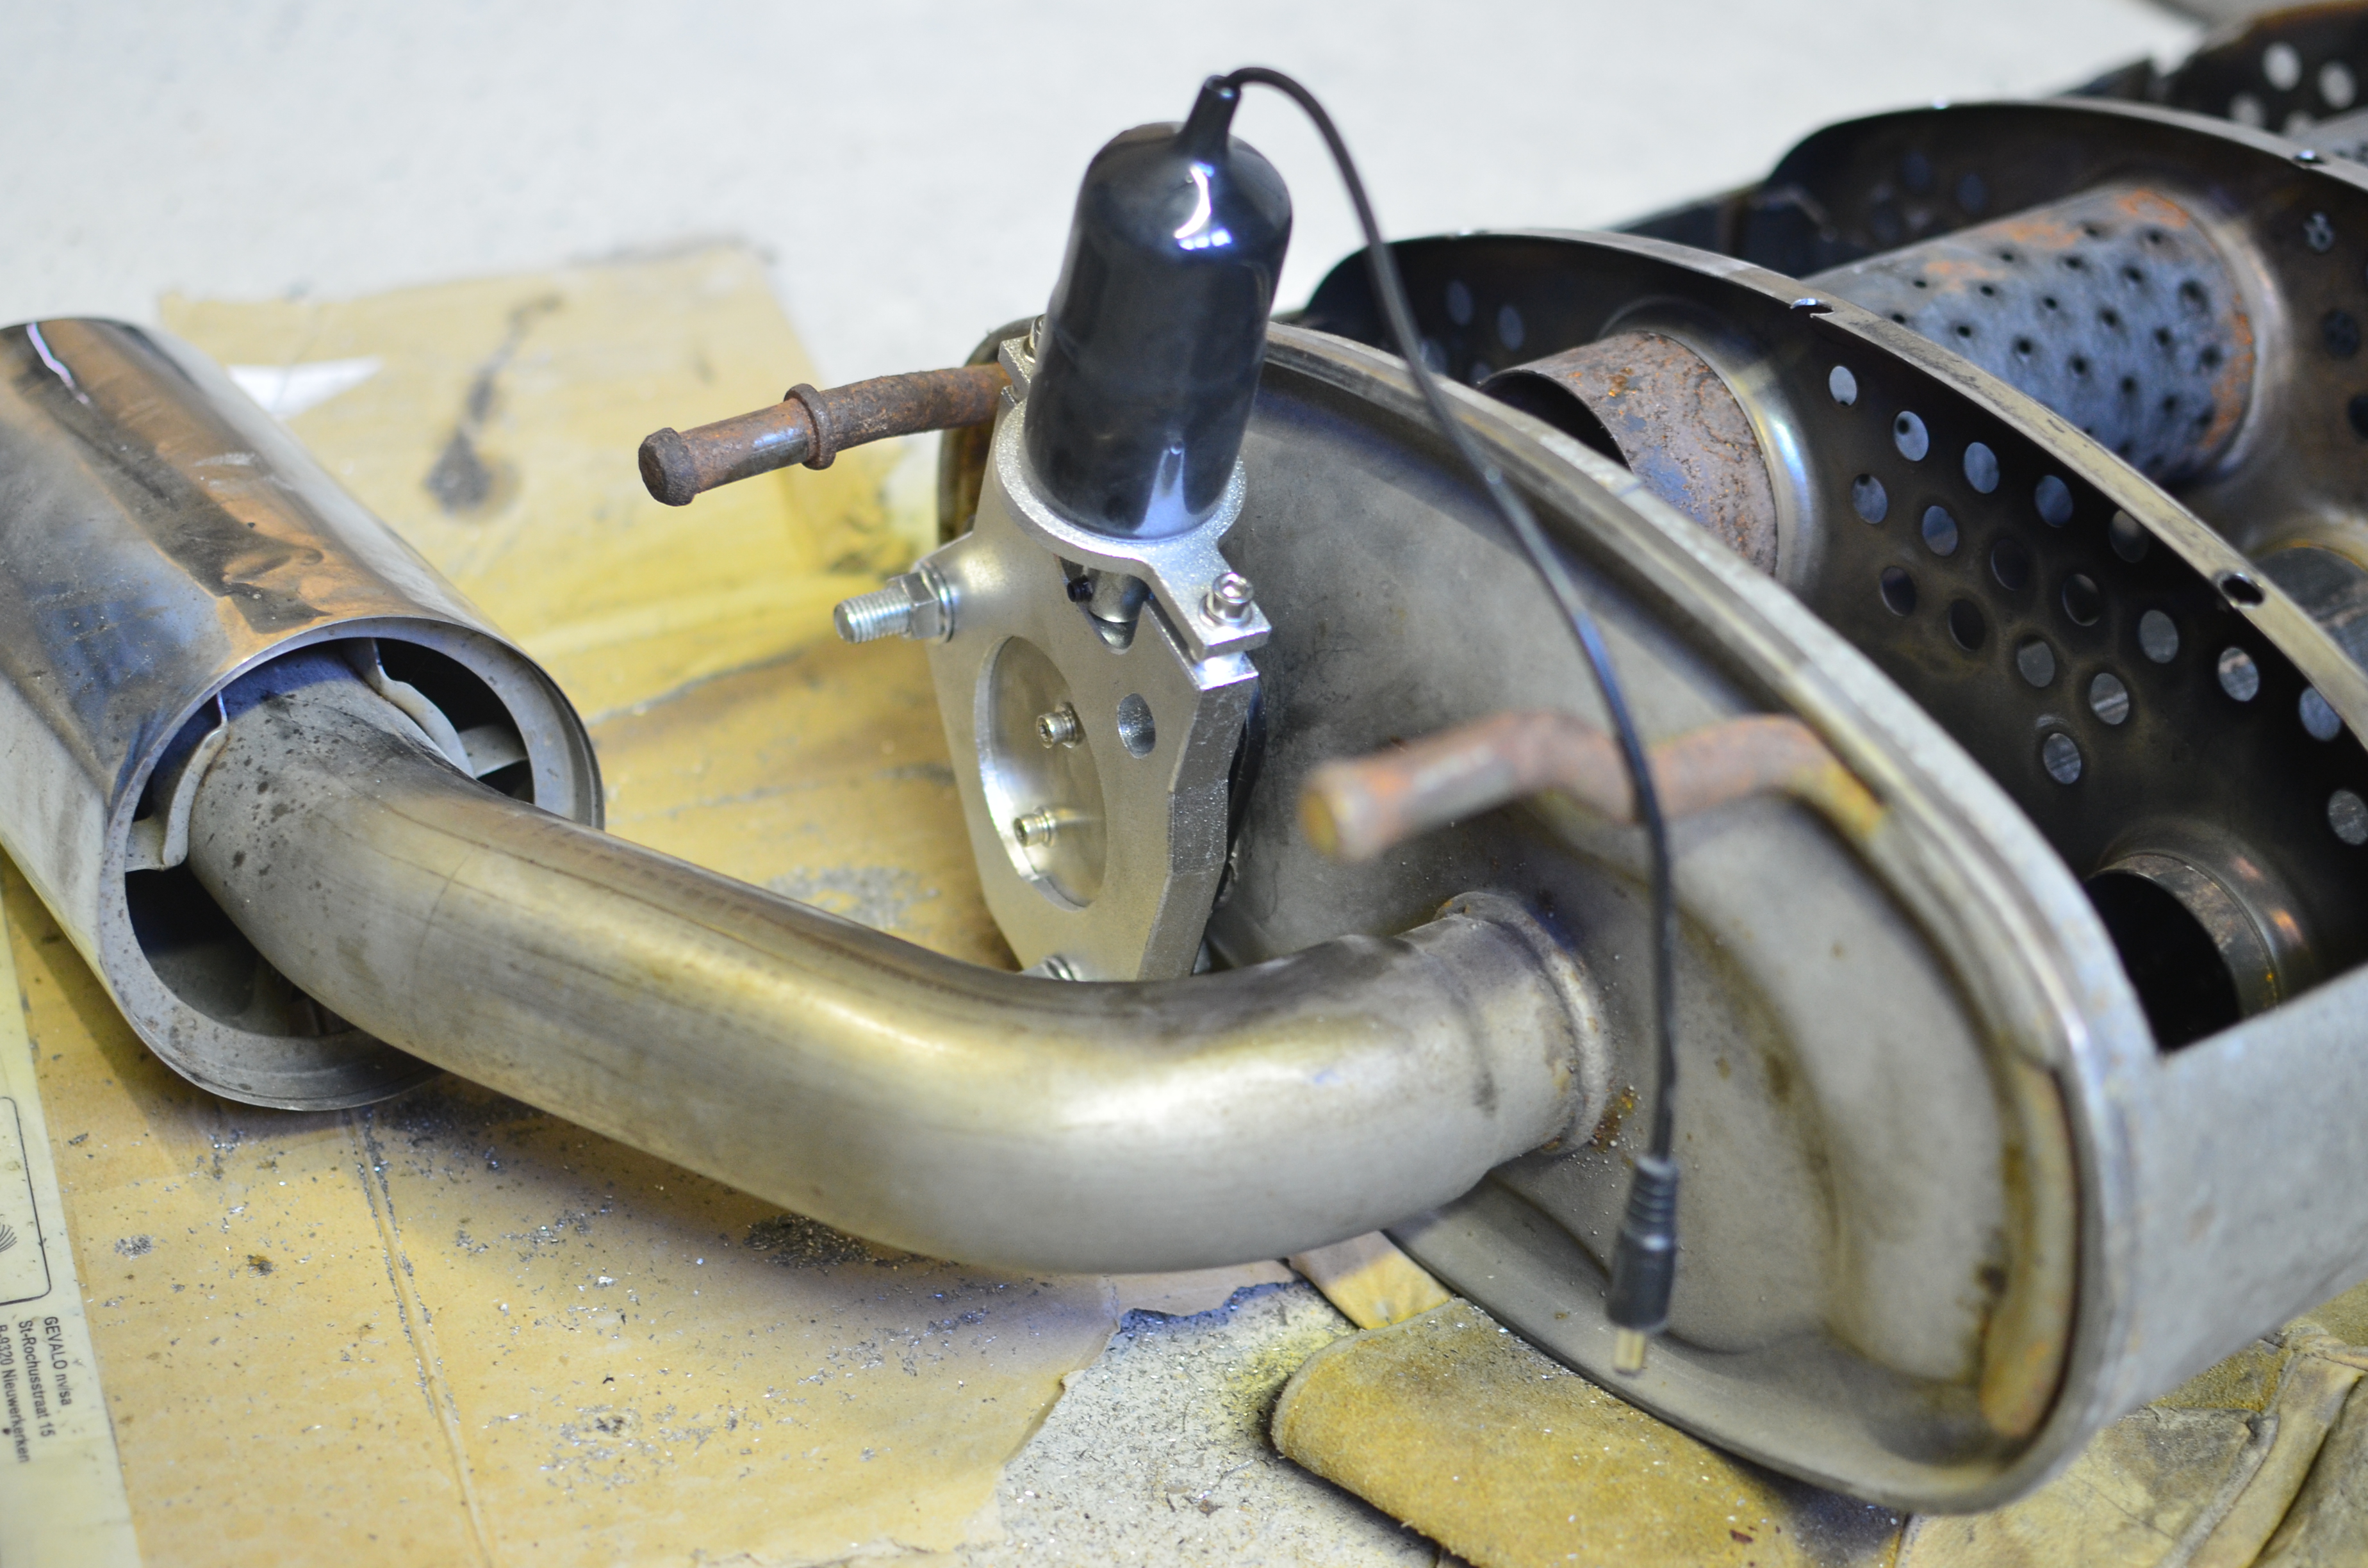 Step 4.6 : Have some fun trying to solder different parts of tube of all different shapes between two or more compartment panels... 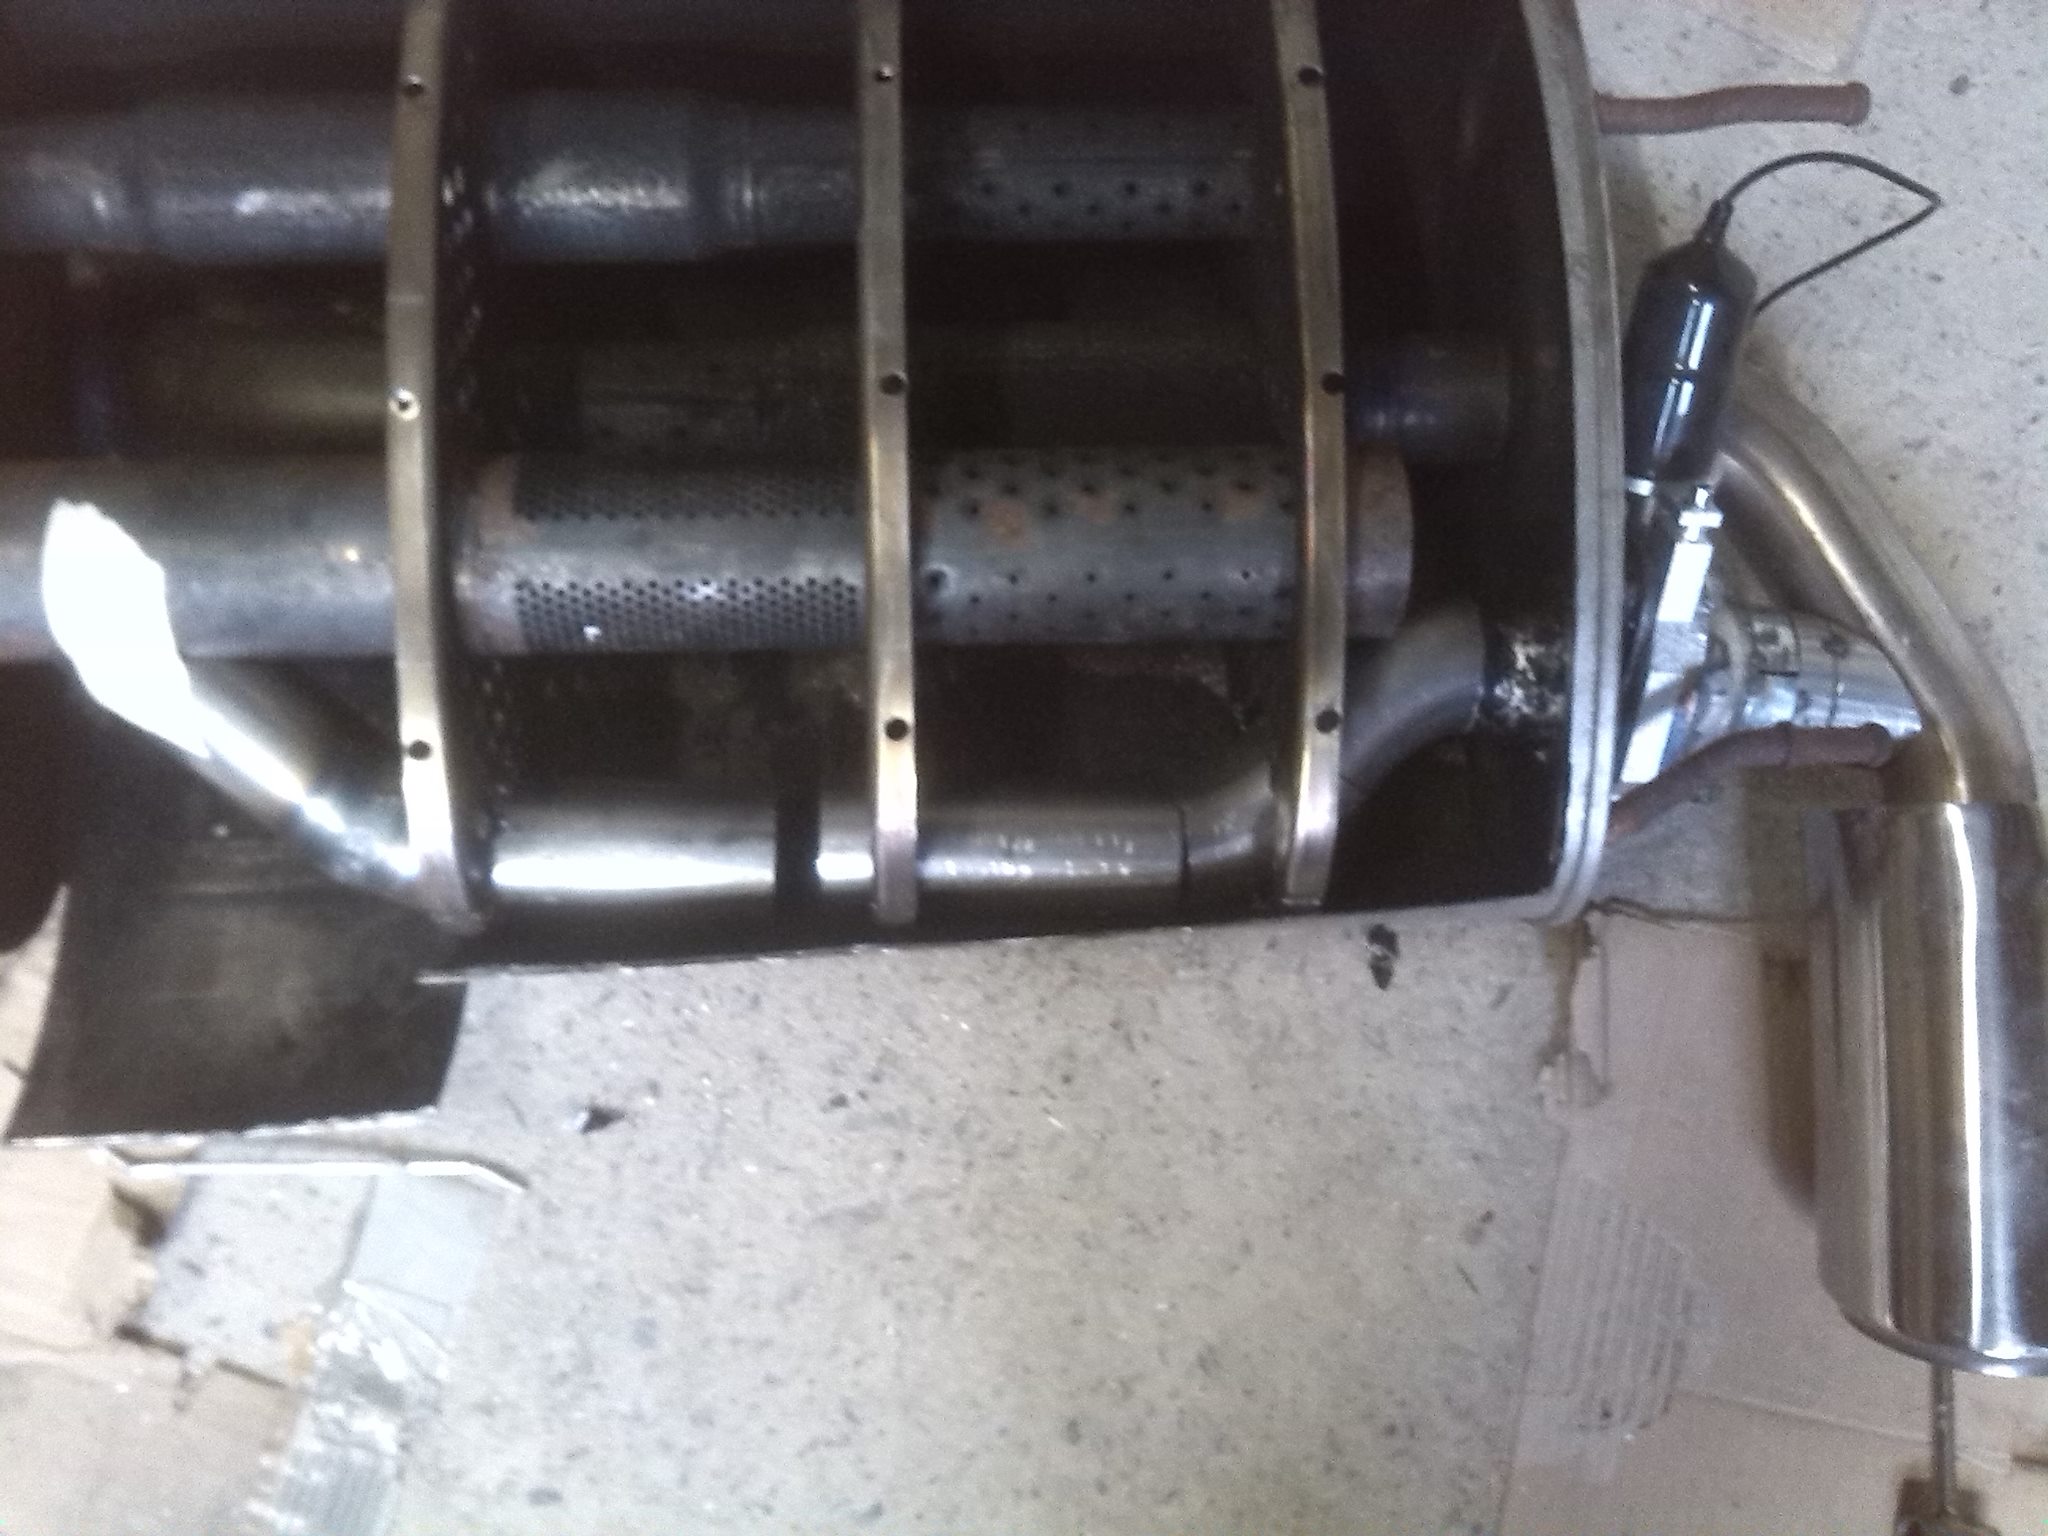  Step 4.7 : Do not forget to make a second 3-bolt plate so the valve can be properly bolted on each side (...) 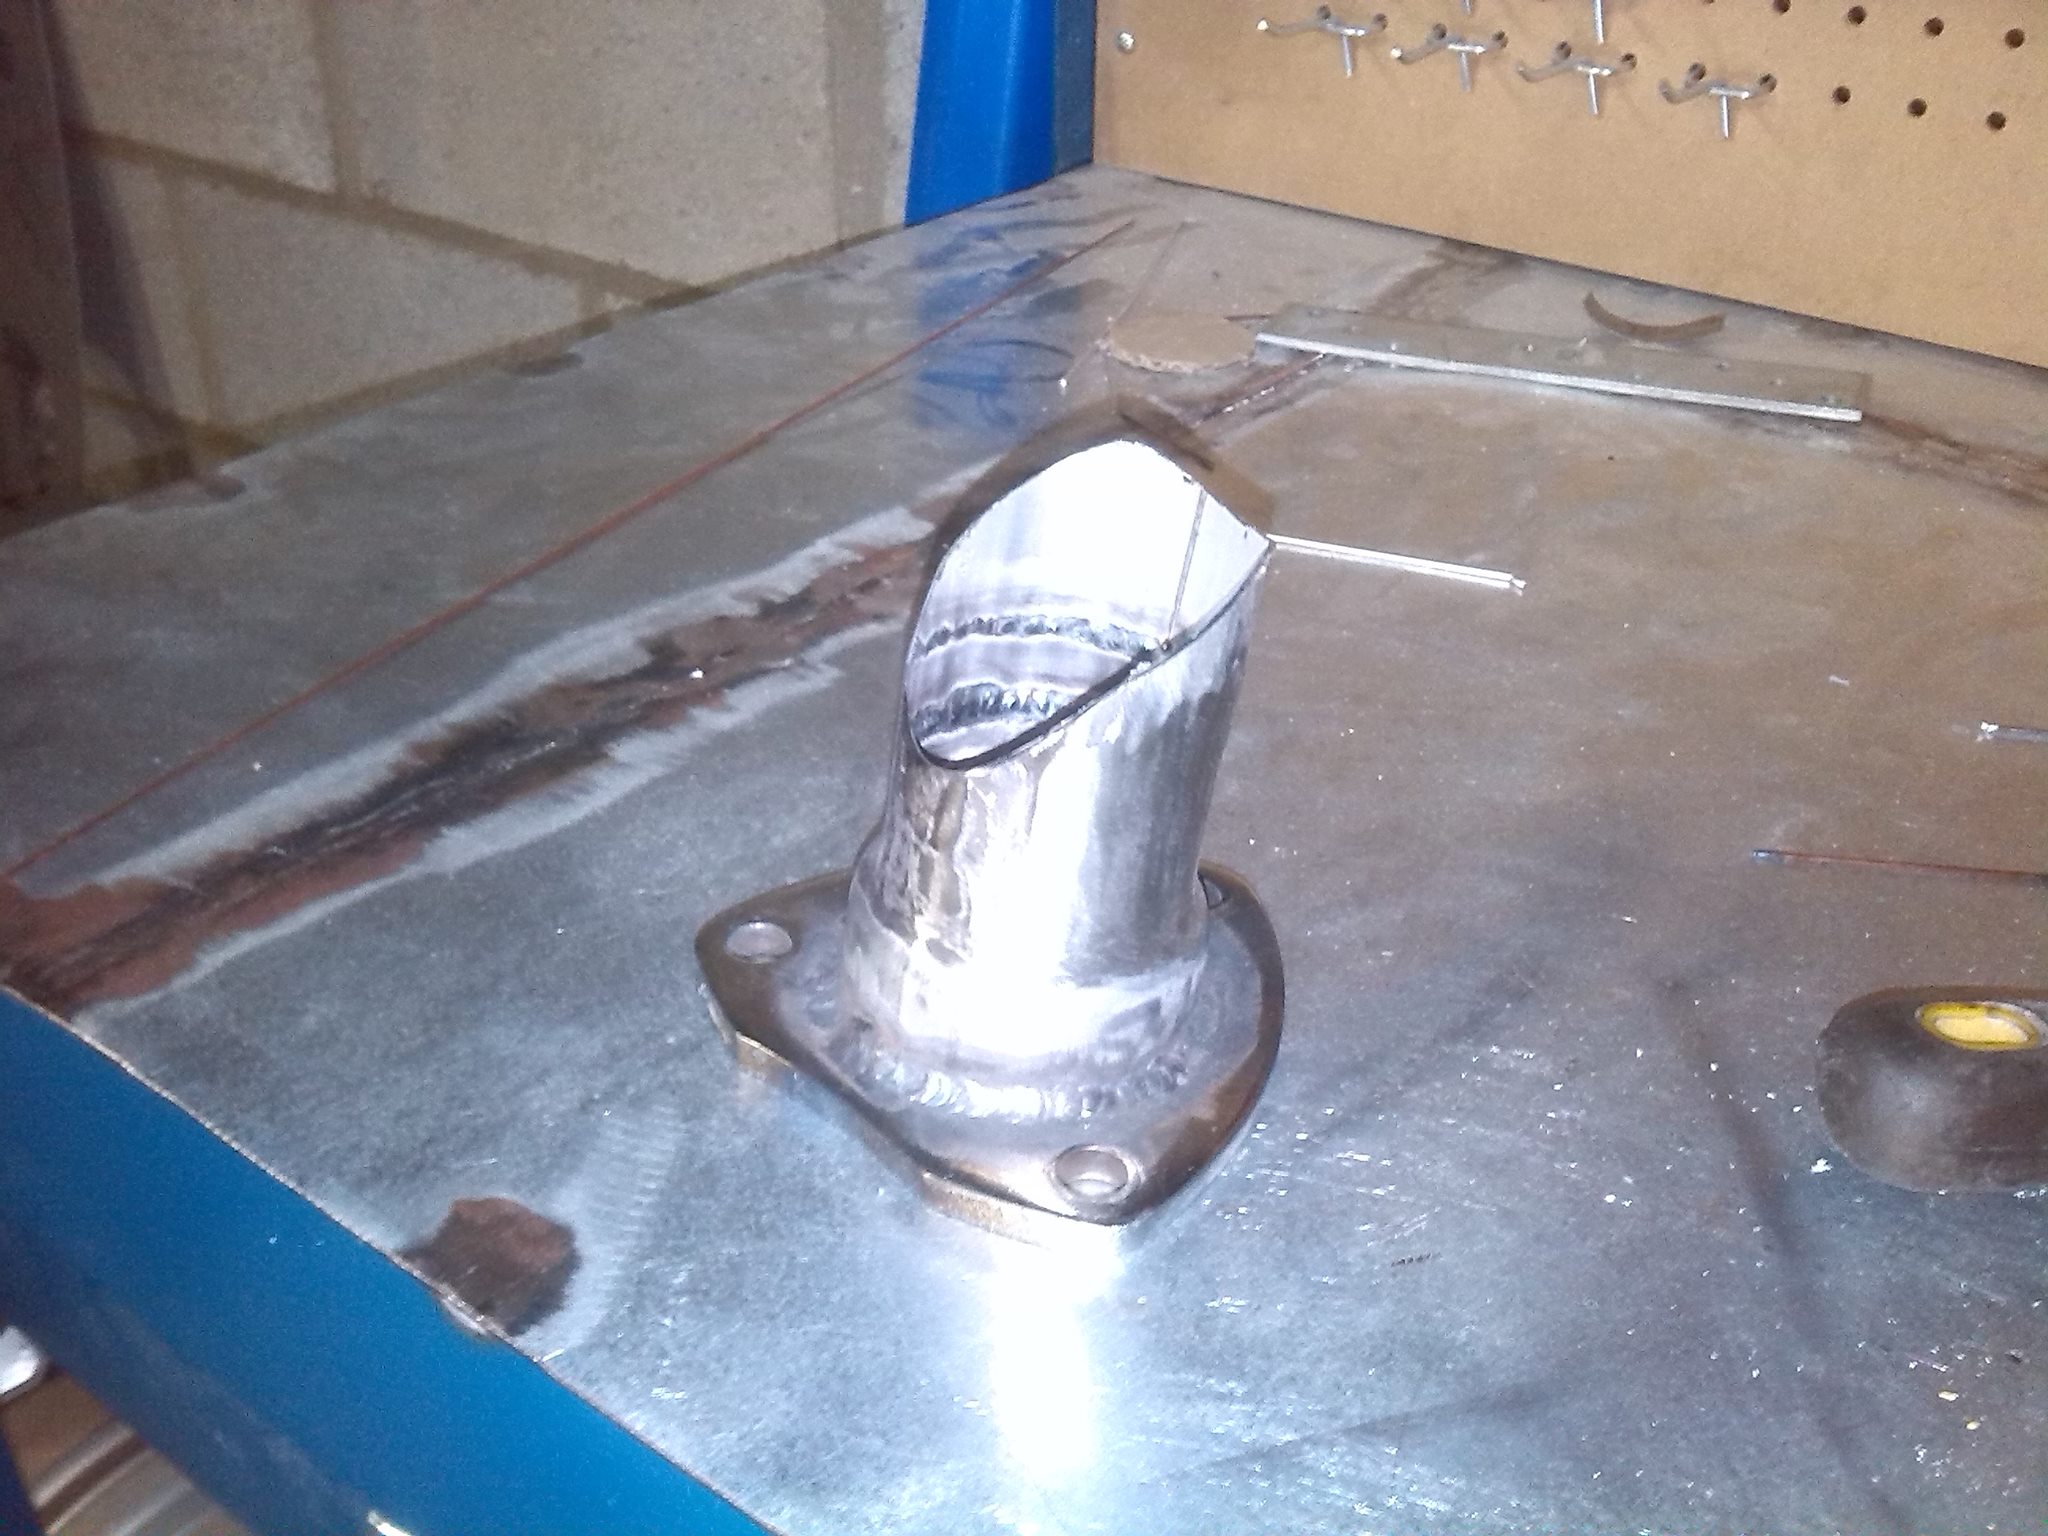 Step 4.8 : Make more unique sculptures 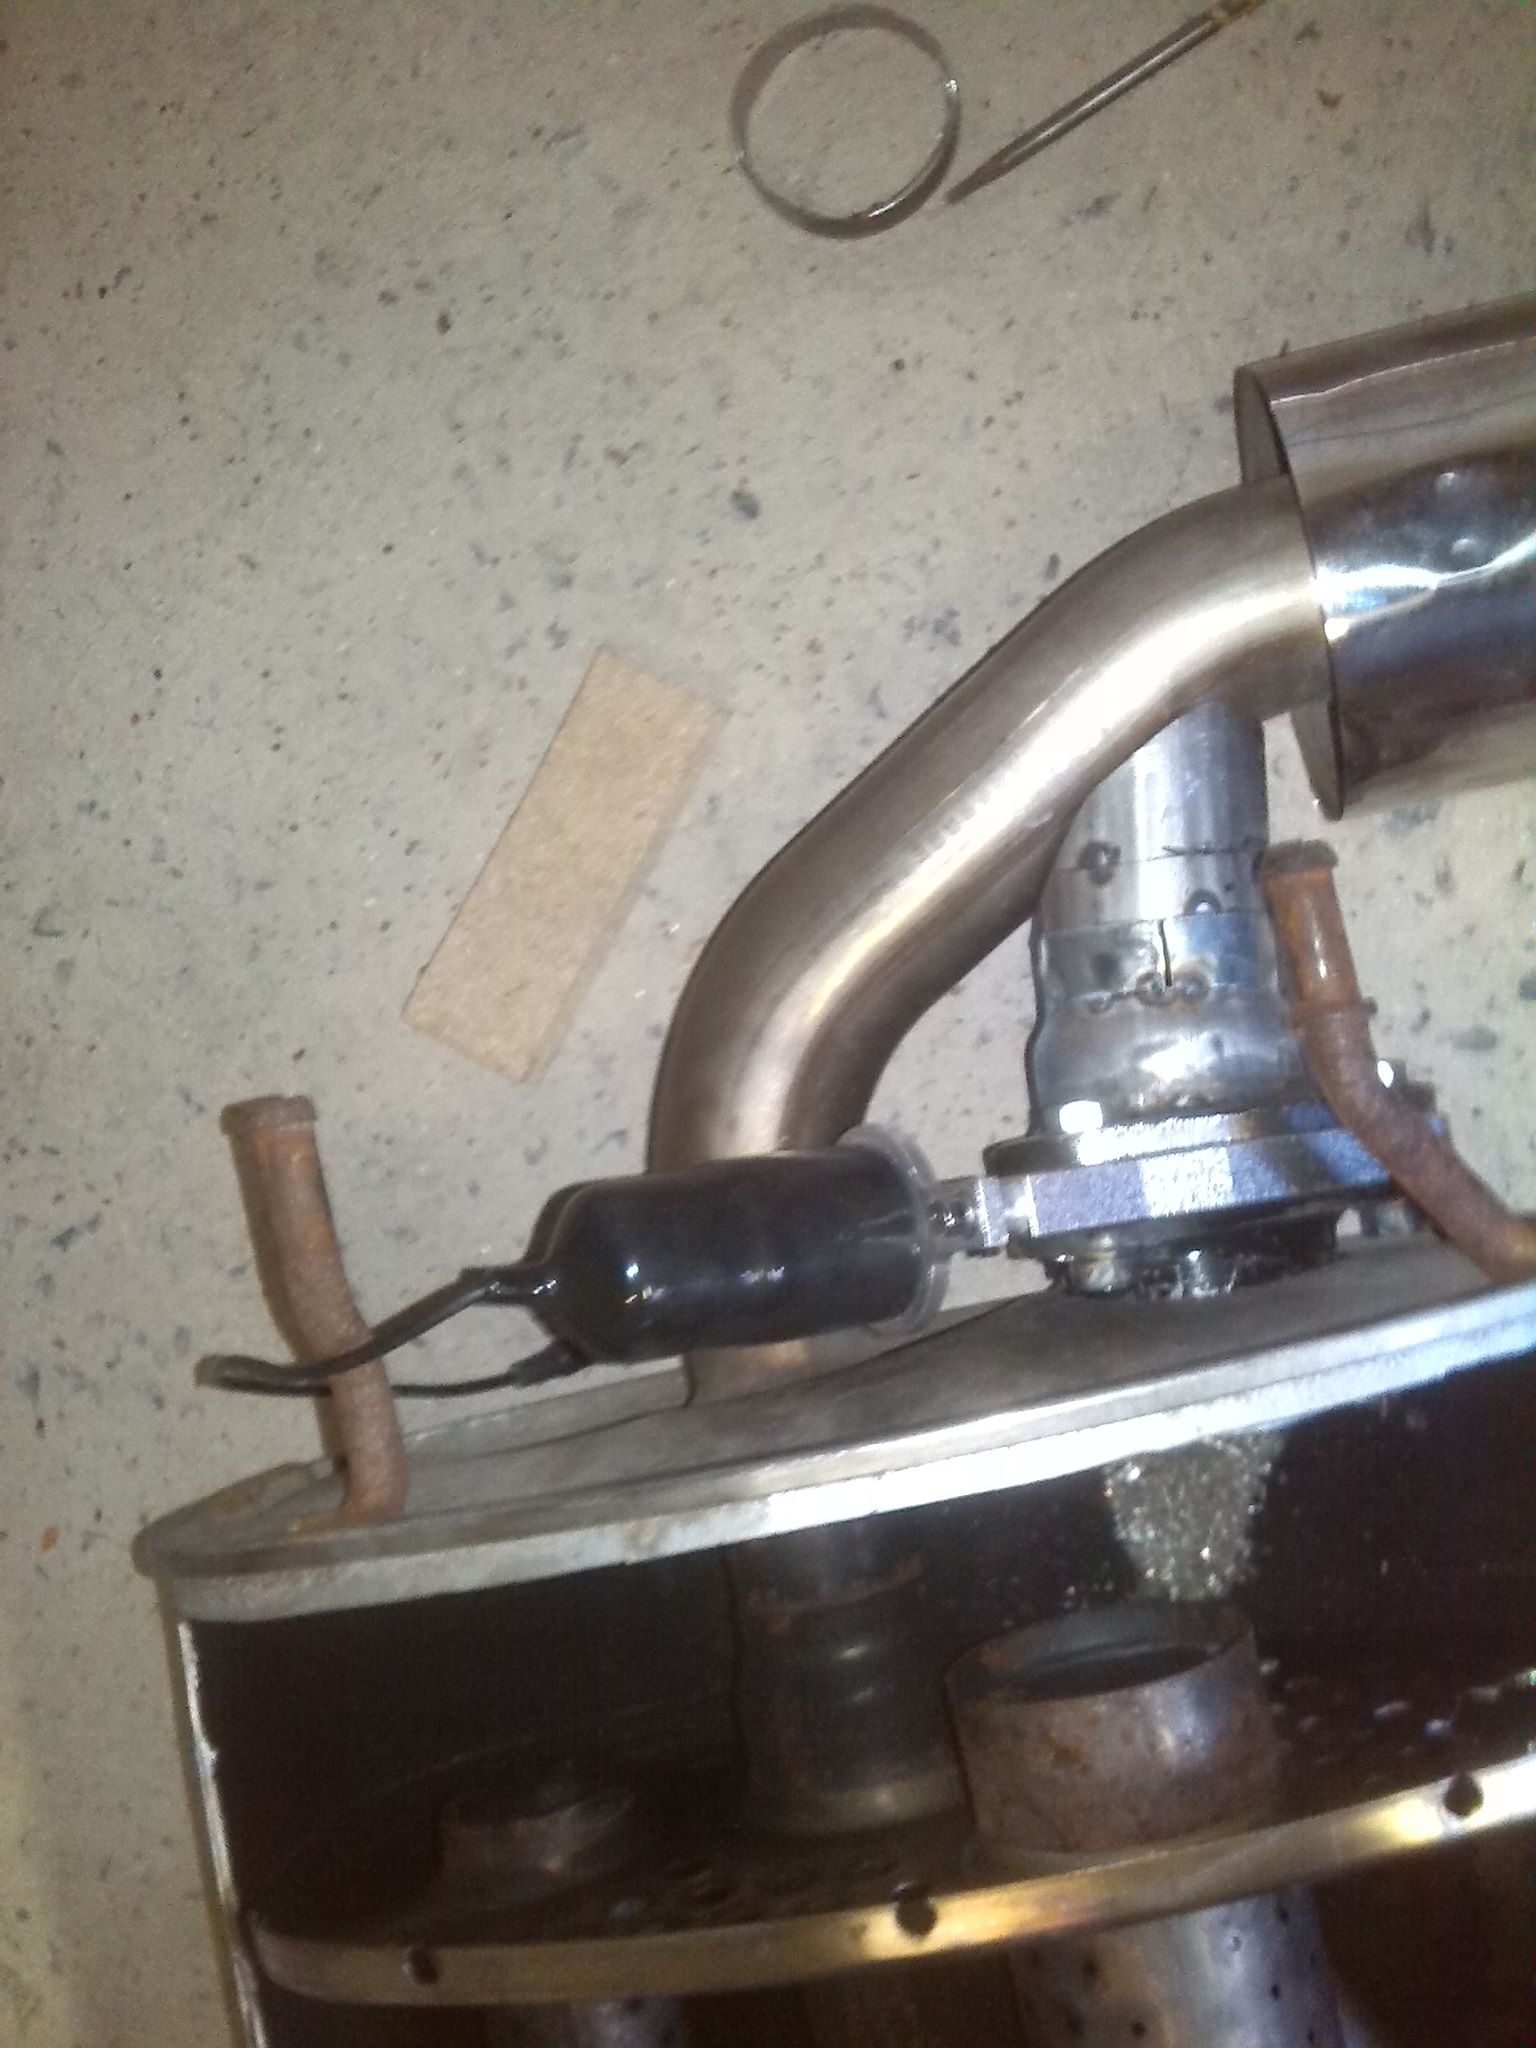 Upcoming step 4 : Soldering everything. Close the muffler. Step 5 : Wiring the electronics. I wanted to go with a switch rather than a remote. Only for reliability concerns. Once again, the great question was: where to put it? My GT86 being equipped with a manual gearbox, it features a unused slot between the traction control and VSC button.  Step 5.1 : (No pictures for these steps for the moment) Run the provided extension wire from the valve to the glove box. Plug it in the valve, then, make it run over the muffler heat shield so it can enter the lower part of the trunk (remove the spare wheel if you have any + the grommet that lays at the bottom of the trunk floor). Run the wire in the transmission tunnel (by just pushing it under the plastic cover until it reaches the floor mat on the passenger side. Then, plug the 12V adapter in the 12V power source (Yes, just like that). Hide the control box somewhere in the glove box. Step 5.2 (If you want a custom exhaust switch between the VSC and traction control buttom): Take apart the traction control unit. Remove your gear knob and pull the gear lever trim part up to make it pop out of its slot. Unscrew the two screws that hold the traction control unit to the trim part  Once you have the traction control unit disassembled. Place spacers in the yellow zones and pull like indicated by the green arrows 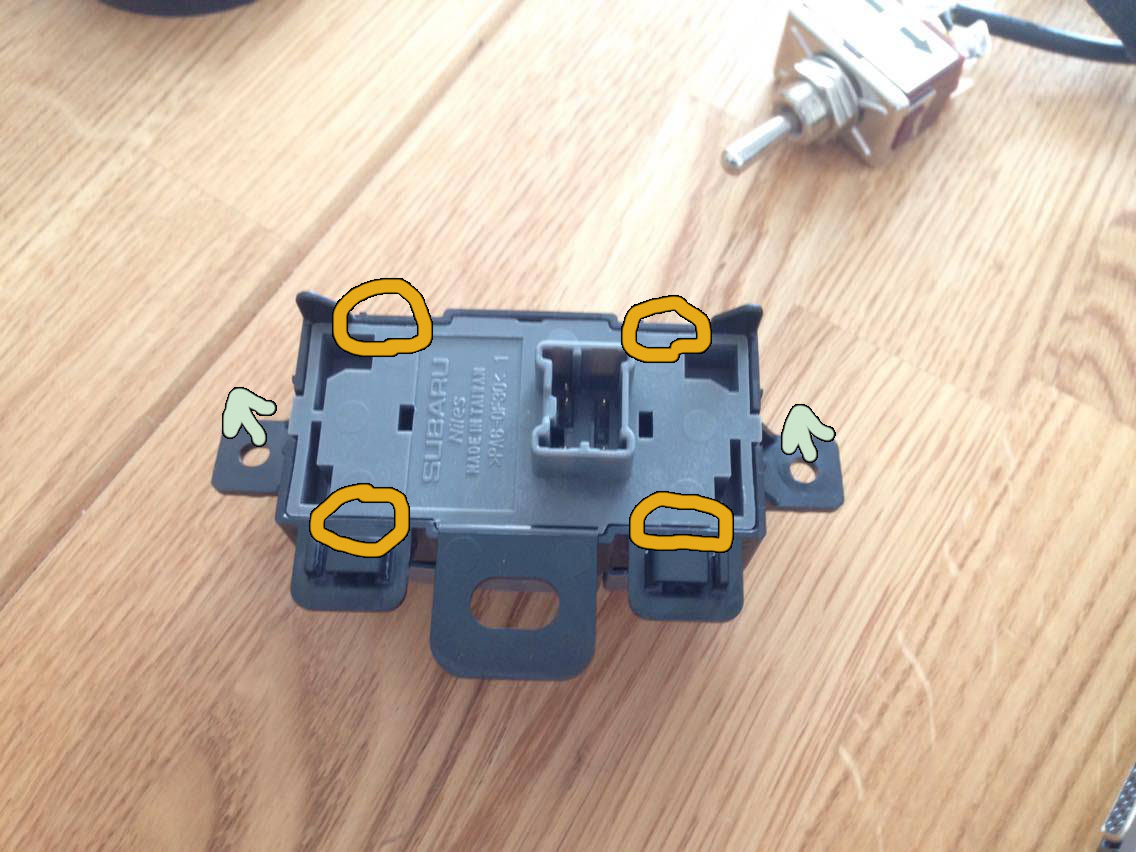 Remove the PCB and the rubber insert. (these switches are proximity-sensor-equipped one, I believe. Much more reliable than mechanical ones). Look for two small plastic legs on the central plastic cap to remove it 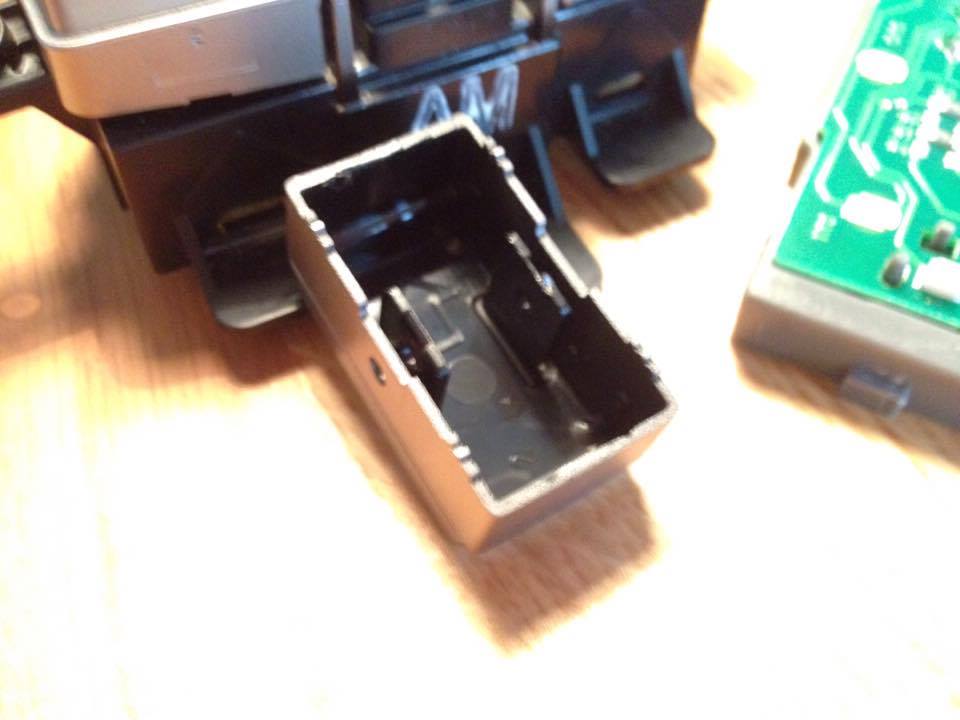 Then, just drill in the plastic cap to fit the switch of your choice. I do recommend to go with something as small as possible because there's not a lot of room. Then, just make hole in the PCB and the plastic cover on the upper left side of the control unit (when face down) so you can make the wires of your switch go through. If you buy the same valve kit as I did, you will need a SPDT (on)-off-(on) momentary switch. I'd go with a rocker style one. Upcoming step 5 with pictures Make the hole for the new switch Bolt the switch (order an OEM control unit, as spare...) Wire everything. Put everything into place Most important upcoming step: VIDEOS! (Mid october) That's all for the moment Thank you for reading. Last edited by Wil; 10-03-2016 at 11:13 AM. |

|

|
| The Following 10 Users Say Thank You to Wil For This Useful Post: | DAEMANO (10-18-2016), freerunner (10-19-2016), GT86meMR2 (10-03-2016), guybo (11-15-2016), JDM4E (10-03-2016), radroach (11-15-2016), ricotheraccoon (10-03-2016), Teseo (10-19-2016), Timmy_Jones (11-18-2016), Turdinator (10-03-2016) |
|
10-18-2016, 07:44 PM
|
#2 |
|
Senior Member

Join Date: Aug 2014
Drives: 2013 BRZ
Location: North Carolina
Posts: 695
Thanks: 195
Thanked 139 Times in 113 Posts
Mentioned: 2 Post(s)
Tagged: 0 Thread(s)
|
Look forward to the videos
__________________
Yeah its an auto, deal with it.
|
|
|
|
|
11-15-2016, 10:50 AM
|
#3 | |
|
Senior Member
Join Date: Jun 2015
Drives: Drives like a crab.
Location: Belgium
Posts: 101
Thanks: 2
Thanked 42 Times in 14 Posts
Mentioned: 2 Post(s)
Tagged: 0 Thread(s)
|
Quote:
[ame="https://www.youtube.com/watch?v=Zmd7ugUVn7Y"]Toyota GT86 - Exhaust Cutout Valve | Petrolistes.com - YouTube[/ame] More to come! |
|
|
|
|
|
11-15-2016, 11:02 AM
|
#4 |
|
Senior Member
Join Date: Jun 2014
Drives: frs
Location: Gunsai
Posts: 4,880
Thanks: 7,185
Thanked 2,922 Times in 1,769 Posts
Mentioned: 23 Post(s)
Tagged: 2 Thread(s)
|
Somewhere in Mexico...
Any chane you will add catless header? |
|
|
|
|
11-15-2016, 01:23 PM
|
#5 |
|
Senior Member
Join Date: Feb 2013
Drives: car
Location: usa
Posts: 2,162
Thanks: 1,028
Thanked 867 Times in 530 Posts
Mentioned: 35 Post(s)
Tagged: 1 Thread(s)
|
Good sound!
|
|
|
|
|
11-17-2016, 08:32 AM
|
#6 |
|
Senior Member
Join Date: Dec 2012
Drives: Sterling Silver BRZ
Location: Belgium
Posts: 303
Thanks: 100
Thanked 74 Times in 49 Posts
Mentioned: 2 Post(s)
Tagged: 1 Thread(s)
|
Cool project with a great result !
I see you're from Belgium. If you're on FB, make sure to join our community page. I'm sure the guys and gals over there would love to see your build |
|
|
|
|
11-18-2016, 06:53 PM
|
#7 |
|
Señor Member

Join Date: Jun 2013
Drives: BRZ SWP
Location: BC Canada
Posts: 192
Thanks: 22
Thanked 109 Times in 54 Posts
Mentioned: 3 Post(s)
Tagged: 0 Thread(s)
|
i did this along time ago but in the midpipe. with the ebay cutout it cost me less than $300 CAD
https://www.instagram.com/p/0c1UyHRDyD/ |
|
|
|
|
|
|
|
|
|
|
 Similar Threads
|
||||
| Thread | Thread Starter | Forum | Replies | Last Post |
| OEM Exhaust Mod-Cutting the Stock muffler open | continuecrushing | Engine, Exhaust, Transmission | 17 | 03-16-2020 12:15 PM |
| FS: Stock exhaust muffler and mid pipe $80 | AustinTCLN | NY / NJ / CT / PA | 7 | 11-05-2017 08:23 PM |
| P0420, stock exhaust with muffler delete | Kwaziekeller | Issues | Warranty | Recalls / TSB | 3 | 06-26-2014 02:59 AM |
| Keep stock muffler with other exhaust mods? | jordanrw260 | Engine, Exhaust, Transmission | 51 | 03-23-2013 10:38 AM |
| Greddy SP Elite Exhaust vs. Stock (vs. w/o muffler for reference) | FR-anco89 | FR-S & 86 Photos, Videos, Wallpapers, Gallery Forum | 16 | 02-11-2013 10:13 PM |


