


|
||||||
| DIY (Do-It-Yourself) Guides For all DIYs. |
 |
|
|
Thread Tools | Search this Thread |
 06-22-2012, 02:34 PM
|
#1 |
|
Join Date: Jan 2012
Drives:
Location: San Francisco, Bay Area, CA
Posts: 514
Thanks: 37
Thanked 108 Times in 66 Posts
Mentioned: 6 Post(s)
Tagged: 0 Thread(s)
|
automationLED: DIY LED interior + license plate conversion
For questions or tips, you could contact me by PM or email at automationLED@gmail.com
For the dome light on the car, it's very simple, you have 2 notches on the plastic cover where you would insert a flat head screw driver and lightly pry out the cover. It'll pop off and you will see the DE3175 bulb exposed. Be careful as the bulb might be a little warm to handle, so let it cool down for about 5 minutes. After it has cooled down, remove the bulb from the housing assembly and set it aside. Take the new LED bulb and insert it into the housing, if it does not light up the first time, remove it and turn it 180* and re-insert. The LED bulbs have a POS and NEG end, unlike the factory incandescent bulbs. 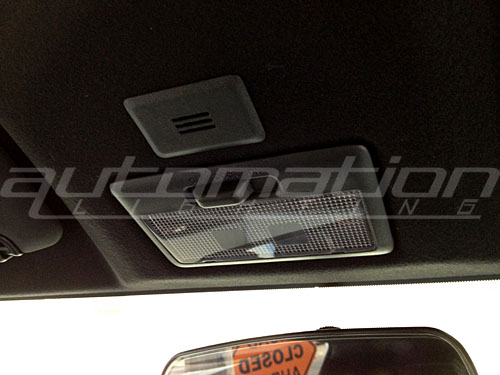 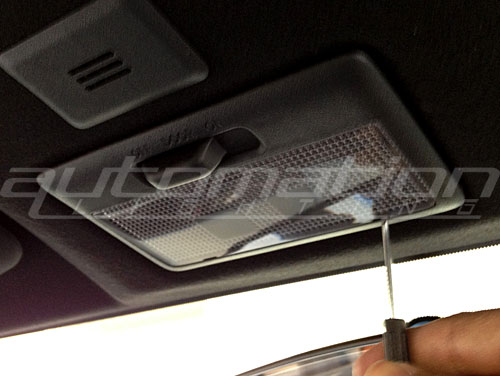  Package 1 dome light (similar brightness to OEM, bright white color) 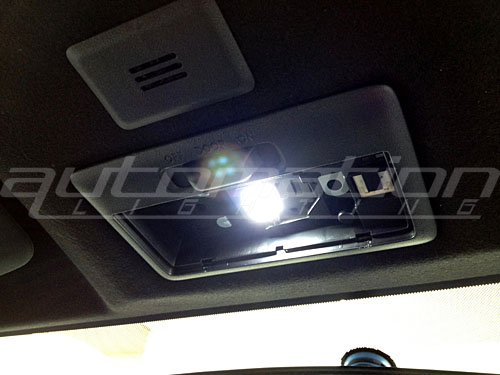 Package 2 dome light (3x brighter than OEM) 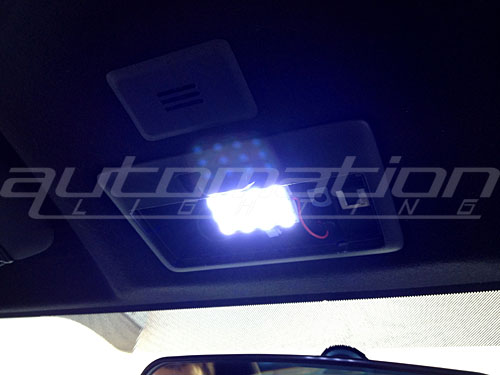 All done  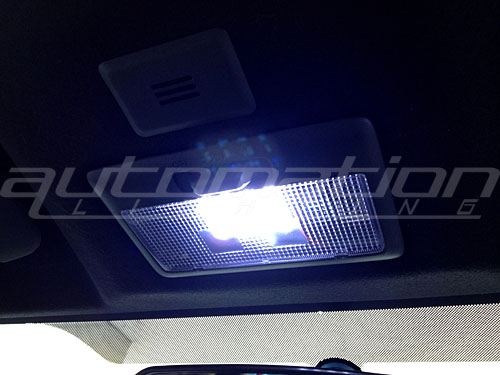 The trunk light is very simple, you just pop open the trunk and you'll see a small white cover. Remove that and place aside (or you can leave it off, for a brighter glow). Remove the wedge bulb and insert the new one. For the license plate light, you'll access them from the inside of the trunk lid. You'll see the 2 light sockets on the inside, just twist and remove these lights, pull the wedge light and replace them with the new ones. Again, if they do not turn on the first time, remove them, flip it 180*, and re-insert.  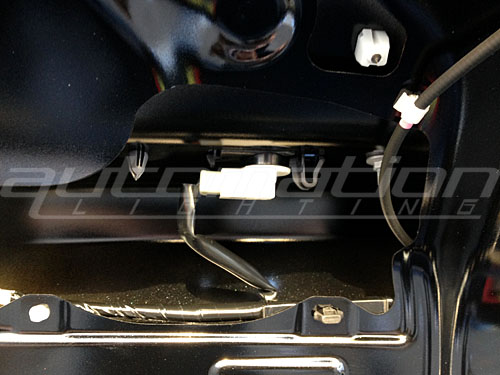  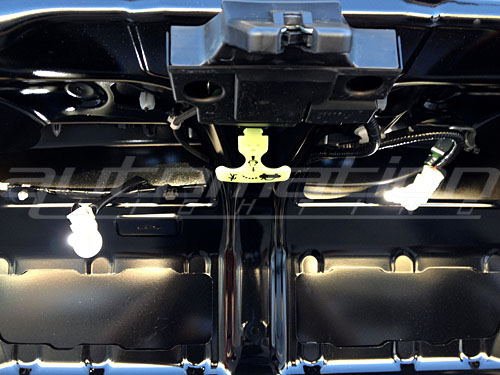 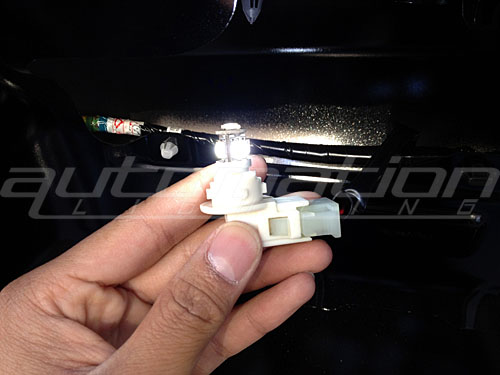 For the reverse lights, you might want to do these last. Since you'll access the light sockets from underneath the bumper, it is very close to the muffler and you don't want to touch that when it's hot. After it has cooled down, reach from exhaust tip side of the lower valence, and feel for the light socket. Twist that one and remove the bulb, and insert the new LED. *NOTE* The CREE LED's might not seem that bright compared to the OEM light because of the way the light bulb is positioned. It points upwards towards the center of the car, and with LED's being a directional light, it will rely on reflecting on the inside housing to be bright. During the day time, it might not seem as bright, but at night time, it is a very nice bright white.  [/center] [/center]
Last edited by jjdrivesajazz; 08-03-2012 at 01:31 PM. |

|

|
|
06-22-2012, 02:35 PM
|
#2 | ||||||||||
|
Join Date: Jan 2012
Drives:
Location: San Francisco, Bay Area, CA
Posts: 514
Thanks: 37
Thanked 108 Times in 66 Posts
Mentioned: 6 Post(s)
Tagged: 0 Thread(s)
|
USER SUBMITTED PHOTOS
12SMD GODZILLA DOME LIGHT (OUR PACKAGE 2 KIT)        DOOR STEP LIGHTS (BRZ ONLY)  TRUNK LIGHT   LICENSE PLATE LIGHTS   HIGH POWER REVERSE LIGHTS 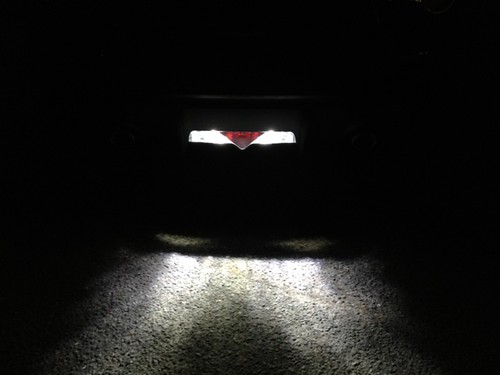  When you buy from Automation Lighting, you're not only getting the best product I can offer, you're also getting BEST CUSTOMER SERVICE and BEST PRICING out there, WE WILL NOT BE UNDERSOLD!!! LOOK WHAT OUR CUSTOMERS HAVE TO SAY Quote:
Quote:
Quote:
Quote:
Quote:
Quote:
Quote:
Quote:
Quote:
Quote:
Last edited by jjdrivesajazz; 06-23-2012 at 01:49 PM. |
||||||||||
|
|
|
| The Following 2 Users Say Thank You to jjdrivesajazz For This Useful Post: | BarDown (04-17-2014), NRGBalanced (06-22-2012) |
|
06-22-2012, 02:49 PM
|
#3 |
|
Senior Member

Join Date: Mar 2012
Drives: 2013 Ultramarine 86
Location: Bay Area, CA
Posts: 338
Thanks: 156
Thanked 125 Times in 79 Posts
Mentioned: 35 Post(s)
Tagged: 1 Thread(s)
|
It would be great if you could also do a courtesy light diy on the door of the FR - S. Thanks for the write up!

|
|
|
|
|
06-22-2012, 04:10 PM
|
#4 | |
|
Join Date: Jan 2012
Drives:
Location: San Francisco, Bay Area, CA
Posts: 514
Thanks: 37
Thanked 108 Times in 66 Posts
Mentioned: 6 Post(s)
Tagged: 0 Thread(s)
|
Quote:
|
|
|
|
|
| The Following User Says Thank You to jjdrivesajazz For This Useful Post: | Khalis (06-22-2012) |
|
06-22-2012, 04:30 PM
|
#5 |
|
Senior Member

Join Date: May 2012
Drives: Silver AT Limited
Location: Seattle
Posts: 823
Thanks: 145
Thanked 344 Times in 159 Posts
Mentioned: 17 Post(s)
Tagged: 0 Thread(s)
|
The brz is easy. Just use a screw driver on the side of the door light and pry it open. Disconnect the light housing from the wire. Then you need to open the light housing by pressing on a clip to separate the two halves. Then pull out thw bulb and replace. Reverse the directions to put back in. The bulbs are the same as the licenseplate lights and trunk light
|
|
|
|
|
06-22-2012, 04:37 PM
|
#6 |
|
Member
Join Date: Jun 2012
Drives: 2013 FR-S hot lava
Location: Mesa , AZ
Posts: 49
Thanks: 1
Thanked 7 Times in 6 Posts
Mentioned: 0 Post(s)
Tagged: 0 Thread(s)
|
Order is placed
|
|
|
|
|
06-22-2012, 06:23 PM
|
#7 |
|
Senior Member

Join Date: Mar 2012
Drives: '13 Subaru BRZ Limited WRB
Location: Boston, MA
Posts: 139
Thanks: 55
Thanked 53 Times in 29 Posts
Mentioned: 5 Post(s)
Tagged: 0 Thread(s)
|
Thanks a lot for the instructions! Going out today to put them on. Shipping and packaging was great.
__________________
 |
|
|
|
|
06-23-2012, 01:50 PM
|
#8 | |
|
Join Date: Jan 2012
Drives:
Location: San Francisco, Bay Area, CA
Posts: 514
Thanks: 37
Thanked 108 Times in 66 Posts
Mentioned: 6 Post(s)
Tagged: 0 Thread(s)
|
Quote:
|
|
|
|
|
|
06-23-2012, 02:47 PM
|
#9 |
|
Senior Member
Join Date: Dec 2011
Drives: 2011 Outlander XLS, 2013 FR-S Blue
Location: Calgary, Canada
Posts: 634
Thanks: 129
Thanked 168 Times in 102 Posts
Mentioned: 3 Post(s)
Tagged: 0 Thread(s)
|
I'm in for a full order once you get the white turn signal package as well.
|
|
|
|
|
06-23-2012, 03:22 PM
|
#10 |
|
NW Region Moderator

Join Date: Mar 2010
Drives: FR-S No More
Location: Portland OR
Posts: 5,156
Thanks: 1,134
Thanked 3,187 Times in 1,091 Posts
Mentioned: 300 Post(s)
Tagged: 4 Thread(s)
|
Added to the DIY Directory:
http://www.ft86club.com/forums/showthread.php?t=7365
__________________
|
|
|
|
|
06-24-2012, 02:15 AM
|
#11 |
|
Senior Member
Join Date: Mar 2012
Drives: '13 Subaru BRZ Limited WRB
Location: Boston, MA
Posts: 139
Thanks: 55
Thanked 53 Times in 29 Posts
Mentioned: 5 Post(s)
Tagged: 0 Thread(s)
|
DIY for BRZ in-door courtesy lights
Thought I'd throw up the pictures from installing LED door courtesy lights here after someone asked about it. The pieces seemed somewhat fragile. I did it this afternoon. (pictures link to larger version)
I had some pry tools lying around from work on small electronics and iPods. They look like this:  I used a couple of them to get in between the door and the lens. The lens will pop out from the right side (the lights are identical on each side) I managed to bust one of the pry tools while doing this, so don't pry too hard on the wrong side:  After it popped out, I pulled the light away from the door and pushed in on the gray tab in the center of the connector. Then you can disconnect the power and let the bulb cool.   Once you've removed the light assembly from the door, squeeze the plastic part where my thumb is in the picture and gently rotate up. The part below has a little notch that has to be disengaged. After it's released, do the same for the small tab on the other side (gently!). Then pull the whole bulb cover off:  Once that's off, stick a screwdriver behind the bulb to pop it out. Careful, it will go flying (location shown after LED was installed):  Replace the bulb with the LED, but make sure the LED wires touch the contacts. Now is a good time to plug it in again to make sure the polarity on the LED is correct. Replace the plastic bulb cover. It will be snug now:  Then reverse the installation in the door (pop the right side in last):   That's it! Squeezing that plastic piece was a little nerve-wracking, but it's tough!
__________________
|
|
|
|
| The Following 3 Users Say Thank You to NRGBalanced For This Useful Post: |
|
06-24-2012, 02:19 AM
|
#12 |
|
Senior Member
Join Date: Mar 2012
Drives: '13 Subaru BRZ Limited WRB
Location: Boston, MA
Posts: 139
Thanks: 55
Thanked 53 Times in 29 Posts
Mentioned: 5 Post(s)
Tagged: 0 Thread(s)
|
And the results, using jjdrivesajazz's instructions for the rest.
All the lights are far brighter than stock, with the door lights especially providing more usable light:   Ignore the yellowish garage light:  
__________________
|
|
|
|
| The Following User Says Thank You to NRGBalanced For This Useful Post: | Mx5racer (07-24-2015) |
|
06-24-2012, 02:20 AM
|
#13 | |
|
Senior Member

Join Date: Apr 2012
Drives: 86 ZN6
Location: SF Bay Area, NorCal
Posts: 4,682
Thanks: 1,317
Thanked 2,072 Times in 1,222 Posts
Mentioned: 126 Post(s)
Tagged: 1 Thread(s)
|
Quote:
|
|
|
|
|
|
06-25-2012, 06:47 PM
|
#14 |
|
Join Date: Jan 2012
Drives:
Location: San Francisco, Bay Area, CA
Posts: 514
Thanks: 37
Thanked 108 Times in 66 Posts
Mentioned: 6 Post(s)
Tagged: 0 Thread(s)
|
Read about our comparison when it comes to LED chip quality from other sellers
and see why our LED's are the BEST, read all about it -> here <- |
|
|
|
|
|
|
|
|
|
 Similar Threads
|
||||
| Thread | Thread Starter | Forum | Replies | Last Post |
| License plate ideas | Laika | Off-Topic Lounge [WARNING: NO POLITICS] | 142 | 06-13-2015 09:17 PM |
| SG886 license plate | ToxicSneakers | Off-Topic Lounge [WARNING: NO POLITICS] | 0 | 06-18-2012 06:35 PM |
| Another license plate idea.... | michaelahess | Cosmetic Modification (Interior/Exterior/Lighting) | 4 | 06-07-2012 09:24 PM |
| Front License Plate Replacements | Bonburner | Cosmetic Modification (Interior/Exterior/Lighting) | 14 | 05-14-2012 07:25 PM |
| Front License Plate Location | Polish Person | Scion FR-S / Toyota 86 GT86 General Forum | 44 | 12-16-2011 12:04 PM |


 2013 Subaru BRZ
