


 04-25-2019, 10:23 AM
|
#1135 |
|
Senior Member

Join Date: Apr 2014
Drives: 2013 Ultramarine FR-S
Location: Springfield, MO
Posts: 1,948
Thanks: 2,539
Thanked 1,414 Times in 804 Posts
Mentioned: 31 Post(s)
Tagged: 3 Thread(s)
|
Engine is somewhat Ready to go back in. I hope to have it installed tonight, running by tomorrow night.
Crank Pulley was a nightmare. 2 different installer kits and neither worked. Autozone ended up having the "Long Reach Harmonic Balancer Install kit" that worked. Though I had to come up with a spacer to be able to reach the nut for tightening it. Almost slid on by hand turning the nut, which I think means I didn't mess up the woodruff key.  I went ahead and marked each bolt after checking each torque, also to make sure they don't move:  Clutch installed. Bolts I have weren't exactly the same as before. Seems the Thread pitch and length are the same, but the width of the head is not. I don't think it will cause an issue, and the clutch was balanced using these bolts. I can change them out in the car need be.  Trans is on, just need front accessories  
__________________
 |

|

|
|
04-25-2019, 11:02 AM
|
#1136 |
|
Senior Member
Join Date: Jul 2014
Drives: 14 BSP Edelbrock BRZ
Location: Lon Gisland
Posts: 806
Thanks: 113
Thanked 450 Times in 256 Posts
Mentioned: 12 Post(s)
Tagged: 0 Thread(s)
|
It's amazing how fast you can get when you do something repeatedly. My first clutch install took about 7 hours with an ACT that I hated so 2 weeks later I did it again, added a bunch of other tasks to the work and still finished in less than 3.
You're going to be like a NASCAR pit crew soon. |
|
|
|
| The Following User Says Thank You to toast For This Useful Post: | DustinS (04-25-2019) |
|
04-25-2019, 11:10 AM
|
#1137 | |
|
Senior Member
Join Date: Apr 2014
Drives: 2013 Ultramarine FR-S
Location: Springfield, MO
Posts: 1,948
Thanks: 2,539
Thanked 1,414 Times in 804 Posts
Mentioned: 31 Post(s)
Tagged: 3 Thread(s)
|
Quote:

__________________
|
|
|
|
|
|
04-25-2019, 09:08 PM
|
#1138 |
|
Senior Member
Join Date: Sep 2015
Drives: 2015 frs
Location: Ca
Posts: 511
Thanks: 426
Thanked 196 Times in 148 Posts
Mentioned: 5 Post(s)
Tagged: 0 Thread(s)
|
What kind of installer did you use? The one I bought was a piece of allthread, and a couple of washers with a nut. It worked pretty well.
__________________
|
|
|
|
|
04-26-2019, 09:20 AM
|
#1139 | |
|
Senior Member
Join Date: Apr 2014
Drives: 2013 Ultramarine FR-S
Location: Springfield, MO
Posts: 1,948
Thanks: 2,539
Thanked 1,414 Times in 804 Posts
Mentioned: 31 Post(s)
Tagged: 3 Thread(s)
|
Quote:
 Engine was installed last night. 
__________________
Last edited by DustinS; 04-26-2019 at 11:53 AM. |
|
|
|
|
|
04-26-2019, 09:55 AM
|
#1140 |
|
Senior Member
Join Date: Sep 2015
Drives: 2015 frs
Location: Ca
Posts: 511
Thanks: 426
Thanked 196 Times in 148 Posts
Mentioned: 5 Post(s)
Tagged: 0 Thread(s)
|
That kit is way nicer than what I used. I did buy a bearing to place under the nut to make it easier to turn. They wanted you to use 2 washers with grease in-between them.
__________________
|
|
|
|
|
04-29-2019, 09:27 AM
|
#1141 |
|
Senior Member
Join Date: Apr 2014
Drives: 2013 Ultramarine FR-S
Location: Springfield, MO
Posts: 1,948
Thanks: 2,539
Thanked 1,414 Times in 804 Posts
Mentioned: 31 Post(s)
Tagged: 3 Thread(s)
|
Started off the weekend making new radiator mounts as the ATI crank pulley sits out further than my old one and the radiator didn't fit with the engine in the car.
   They still need finalized and cleaned up, but I like them so far. Glad I had to redo them, the welds were garbage with little to no penetration. Need to set it up better for the thicker material. Moved on to new steam lines 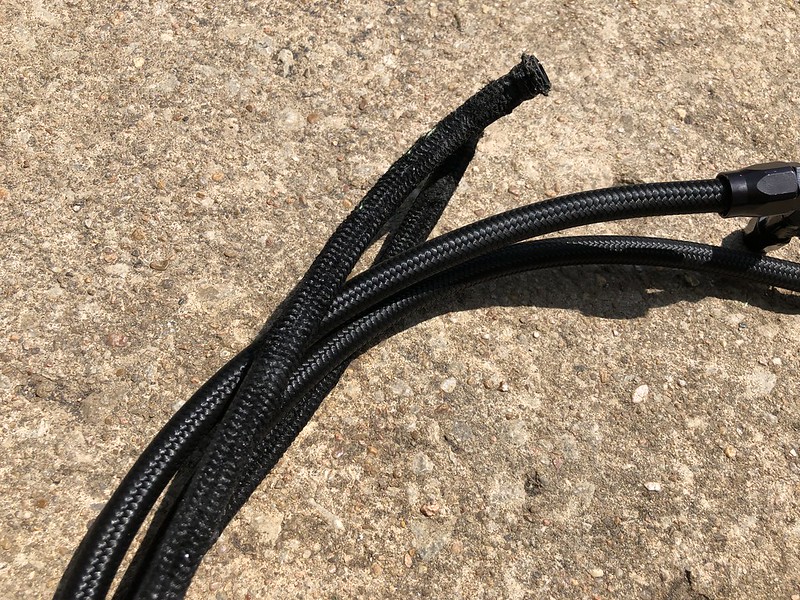 Old ones were pretty shot:  Finalized placement of the oil filter relocation. That sucked to install with the engine in the car, but I made it work. I installed rivnuts to make removing it a lot easier. The tool fit just enough to get them seated.  Lines routed out of the way of the heat from the manifolds.  Made an adapter for the factory oil temp sensor so I can use the one in my cluster.  I really need to change the steam port setup. They suck to install and it looks like a mess. I'm also afraid it's going to leak really bad.  Engine is almost all wired/plummed up. Just waiting on the 45 degree -20an fittings. 
__________________
|
|
|
|
| The Following 4 Users Say Thank You to DustinS For This Useful Post: |
|
05-01-2019, 02:06 PM
|
#1142 |
|
Senior Member
Join Date: Apr 2014
Drives: 2013 Ultramarine FR-S
Location: Springfield, MO
Posts: 1,948
Thanks: 2,539
Thanked 1,414 Times in 804 Posts
Mentioned: 31 Post(s)
Tagged: 3 Thread(s)
|
Hopefully these turn out how I want. 18hr print a piece, I have to print them in 4 parts to fit on my printer (sounds like I needed the bigger printer haha!).
 
__________________
|
|
|
|
| The Following User Says Thank You to DustinS For This Useful Post: | zeal86 (05-02-2019) |
|
05-02-2019, 03:50 AM
|
#1143 |
|
Senior Member
Join Date: Sep 2015
Drives: 2015 frs
Location: Ca
Posts: 511
Thanks: 426
Thanked 196 Times in 148 Posts
Mentioned: 5 Post(s)
Tagged: 0 Thread(s)
|
What are they for?
__________________
|
|
|
|
|
05-02-2019, 09:32 AM
|
#1144 | |
|
Senior Member
Join Date: Apr 2014
Drives: 2013 Ultramarine FR-S
Location: Springfield, MO
Posts: 1,948
Thanks: 2,539
Thanked 1,414 Times in 804 Posts
Mentioned: 31 Post(s)
Tagged: 3 Thread(s)
|
Quote:
 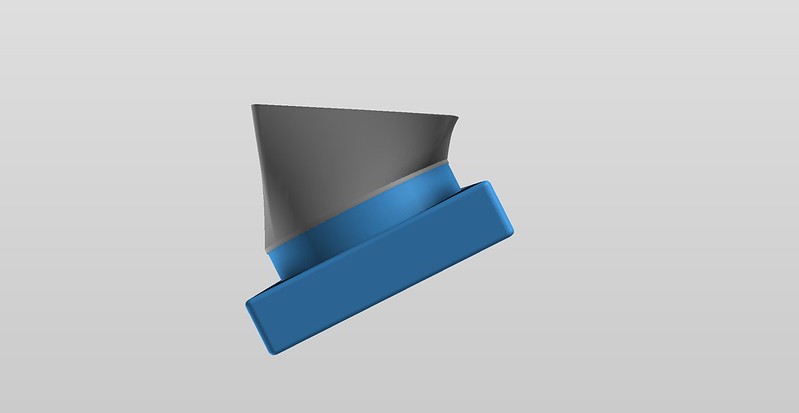  They will need clearanced for the radiator lines, but easy enough to do. As long as it help direct the air up into the hood vents.
__________________
|
|
|
|
|
| The Following 2 Users Say Thank You to DustinS For This Useful Post: | Sportsguy83 (05-02-2019), zeal86 (05-02-2019) |
|
05-02-2019, 09:41 AM
|
#1145 | |
|
Senior Member

Join Date: Jul 2014
Drives:
Posts: 1,947
Thanks: 1,149
Thanked 1,773 Times in 872 Posts
Mentioned: 23 Post(s)
Tagged: 0 Thread(s)
|
Quote:
Yours is one of the few builds I follow... lots of embedded knowledge and experience in your posts. IG @zeal.eightsix |
|
|
|
|
| The Following User Says Thank You to zeal86 For This Useful Post: | DustinS (05-02-2019) |
|
05-02-2019, 09:59 AM
|
#1146 |
|
Senior Member
Join Date: Sep 2015
Drives: 2015 frs
Location: Ca
Posts: 511
Thanks: 426
Thanked 196 Times in 148 Posts
Mentioned: 5 Post(s)
Tagged: 0 Thread(s)
|
That's what they looked like. Damn how big is your 3D printer? The size they would be threw me off. I thought it was ducting for the radiator but didn't think you could do them even in 4 parts at home.
__________________
|
|
|
|
|
05-02-2019, 10:26 AM
|
#1147 | ||
|
Senior Member
Join Date: Apr 2014
Drives: 2013 Ultramarine FR-S
Location: Springfield, MO
Posts: 1,948
Thanks: 2,539
Thanked 1,414 Times in 804 Posts
Mentioned: 31 Post(s)
Tagged: 3 Thread(s)
|
Quote:
Quote:
__________________
|
||
|
|
|
| The Following 2 Users Say Thank You to DustinS For This Useful Post: | Sportsguy83 (05-02-2019), Zer0 (05-02-2019) |
|
05-02-2019, 10:30 AM
|
#1148 |
|
Senior Member
Join Date: Jul 2014
Drives:
Posts: 1,947
Thanks: 1,149
Thanked 1,773 Times in 872 Posts
Mentioned: 23 Post(s)
Tagged: 0 Thread(s)
|
So do you design your printed parts in a program or do you 3D scan them? Or both?
IG @zeal.eightsix |
|
|
|
|
|
|
|
 |
|
|
 Similar Threads
|
||||
| Thread | Thread Starter | Forum | Replies | Last Post |
| Pentosin Trans Fluid Swap | Motul 300 Diff Swap | Impressions | Dezoris | Mechanical Maintenance (Oil, Fluids, Break-In, Servicing) | 15 | 06-06-2017 10:54 PM |
| Ls or 2jz swap? | sgoldberg01 | BRZ First-Gen (2012+) -- General Topics | 13 | 03-22-2016 03:07 PM |
| Rod Swap | protpibe | Engine, Exhaust, Transmission | 6 | 10-21-2015 11:38 PM |
| AT-->MT swap | AlwaysSideways | Want-To-Buy Requests | 3 | 12-15-2014 11:14 AM |
| Should I swap? | michaelahess | BRZ First-Gen (2012+) -- General Topics | 8 | 06-12-2012 07:32 PM |


