


 12-02-2018, 01:02 PM
|
#141 |
|
Senior Member
Join Date: Sep 2015
Drives: 2015 frs
Location: Ca
Posts: 511
Thanks: 426
Thanked 196 Times in 148 Posts
Mentioned: 5 Post(s)
Tagged: 0 Thread(s)
|
Can't wait to see this chassis completed. Keep up the good work.
|

|

|
| The Following User Says Thank You to Zer0 For This Useful Post: | DIY (12-02-2018) |
|
12-09-2018, 04:45 AM
|
#142 |
|
Senior Member
Join Date: Jul 2016
Drives: BRZ, WRX
Location: Sydney, Australia
Posts: 291
Thanks: 105
Thanked 962 Times in 233 Posts
Mentioned: 2 Post(s)
Tagged: 0 Thread(s)
|
I spent the afternoon measuring all the pivot points in the rear suspension so I could enter them into my software and see how it compares to what I have designed for the front.
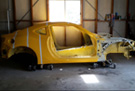
 The car is super low in this photo but you wouldn't know it from the angles on the control arms. This is at my lowest possible setting but I found the roll center and camber gains where much better with the car raised about 20mm from this position. Actually the camber gain numbers almost mirrored my front design but the roll center was slightly lower.
__________________
|
|
|
|
| The Following 3 Users Say Thank You to DIY For This Useful Post: |
|
12-16-2018, 05:53 AM
|
#143 |
|
Senior Member
Join Date: Jul 2016
Drives: BRZ, WRX
Location: Sydney, Australia
Posts: 291
Thanks: 105
Thanked 962 Times in 233 Posts
Mentioned: 2 Post(s)
Tagged: 0 Thread(s)
|
So I did all my measurements of the rear suspension to see what the camber is doing in roll, bump or both which is basically what happens in a corner.
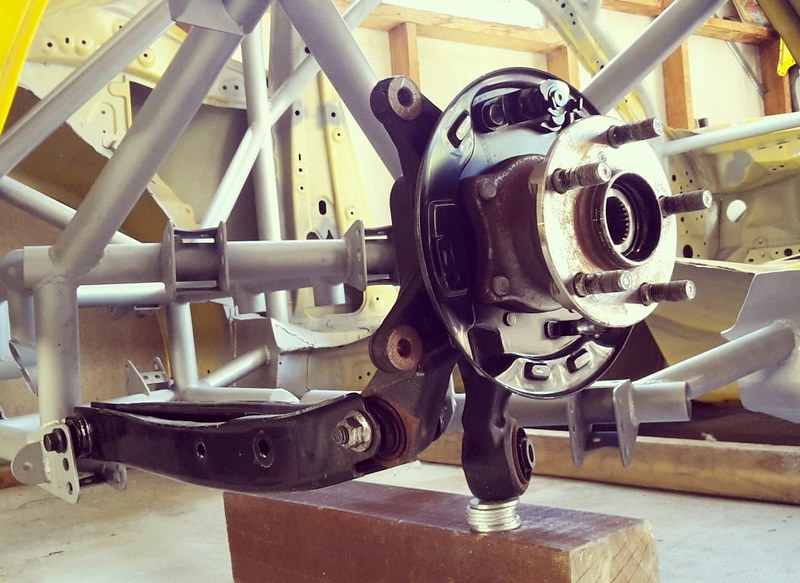
With the car sitting at my lowest ride height it was giving a fair amount of camber gain in bump which is probably not ideal. What I found though was that at this low ride height which is like super low (90mm to the pinch welds under the sills) is that my drive shaft angles for the diff would be a little extreme and maybe at risk of fouling on the frame. Luckily I built the diff mounts with the ability to raise the diff 25mm if needed. So with the diff raised and the ride height lifted about 20mm everything was looking perfect again. This is an old photo to show how removing one spacer allows me to raise the diff. 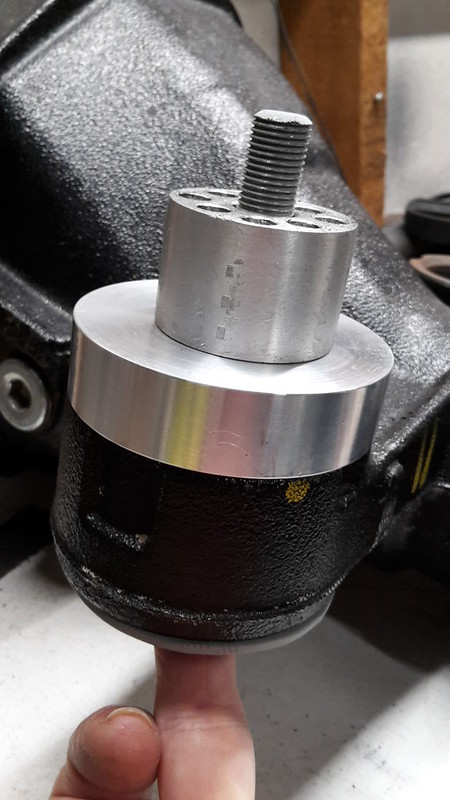 at the rear mounts it simply moves up one hole. 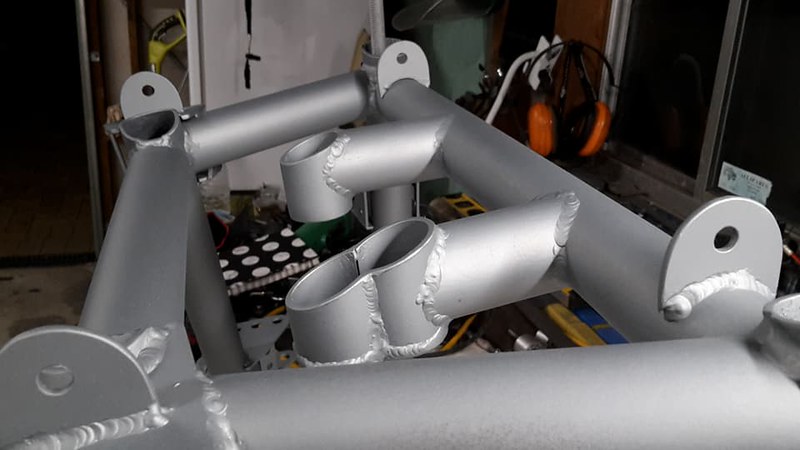 So here it is with the slightly lifted rear ride height and the mock up drive shaft showing zero degrees at the position it would be in with the diff lifted. 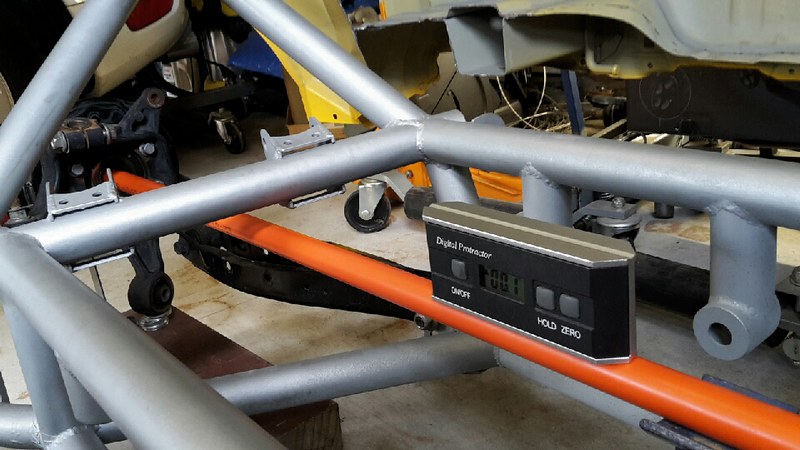 With the new ride height I re-measured the inner pivot positions and put them in my software. The camber gain is now much better. Moving to the front of the car now. I have been going round in circles with my suspension design for many weeks but I am now at a point where I think I am happy enough to start with the fabrication side of things. I will build enough adjustability into it anyway so I can fine tune it later. Similar to how I did the rear end. Today I measured where my tyres would be sitting and begun removing metal that would foul on the tyres. Under the rules I must retain the strut towers but I am free to remove material for tyre clearance. In this photo you can see black dotted marks where the tyres would hit on the left of this line. Note everything in front of the strut towers will come off at a later date and be replaced with tube but I need to keep it for now so I can mount the standard panels and make fiberglass molds. 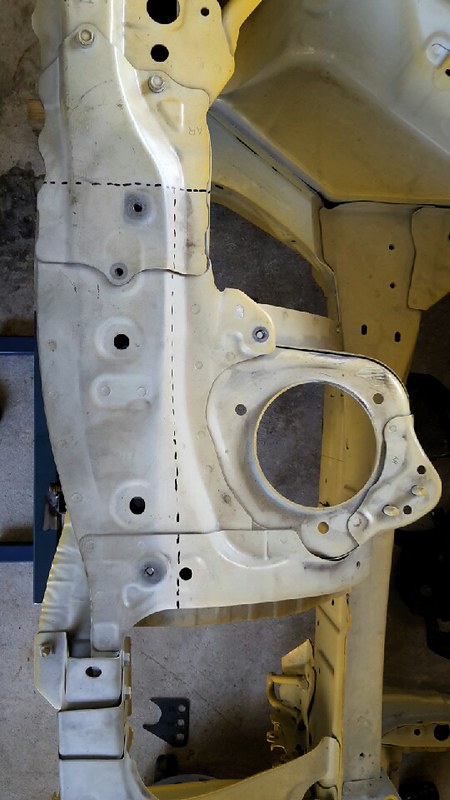 After lots of cutting and drilling of spot welds. 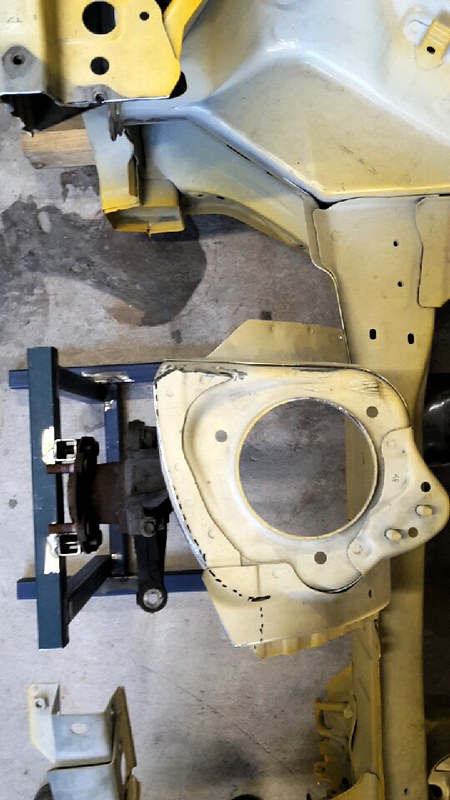 Side view. 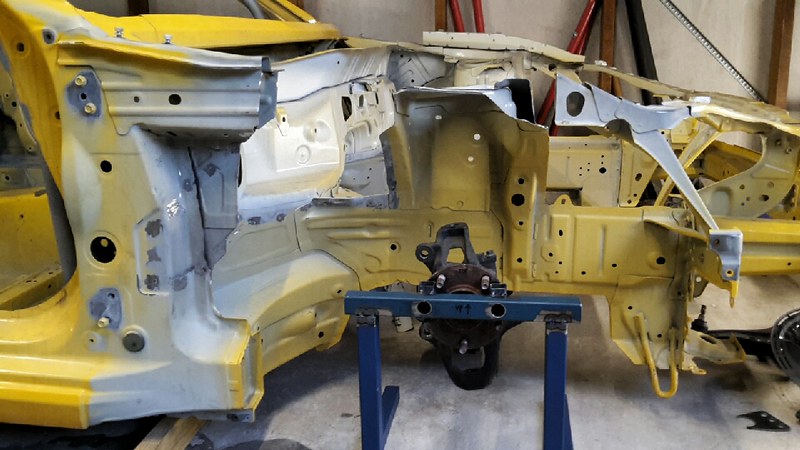 With that gone it will be much easier to work on as I make the new control arm mounts. The plan is to run tube from the roll cage up to the strut towers and back down to the main chassis rails to triangulate everything. This will also help with venting the wheel wells for better aero. I will be doing a bit more trimming around that area to create some smooth transitions for air to escape.
__________________
|
|
|
|
| The Following 4 Users Say Thank You to DIY For This Useful Post: |
|
01-05-2019, 08:25 PM
|
#144 |
|
Senior Member
Join Date: Jul 2016
Drives: BRZ, WRX
Location: Sydney, Australia
Posts: 291
Thanks: 105
Thanked 962 Times in 233 Posts
Mentioned: 2 Post(s)
Tagged: 0 Thread(s)
|
Happy new year to you all.
Not a lot has been happening with the car with Christmas and all that but yesterday I did manage a full day of work on the front suspension. After lots of back and forth on the design I finally came up with a method to attach the inner control arms to the chassis. Similar to the rear I wanted to be able to adjust the geometry as much as possible. I started out with cutting up some 75mm x 50mm x 3mm rectangular box steel. 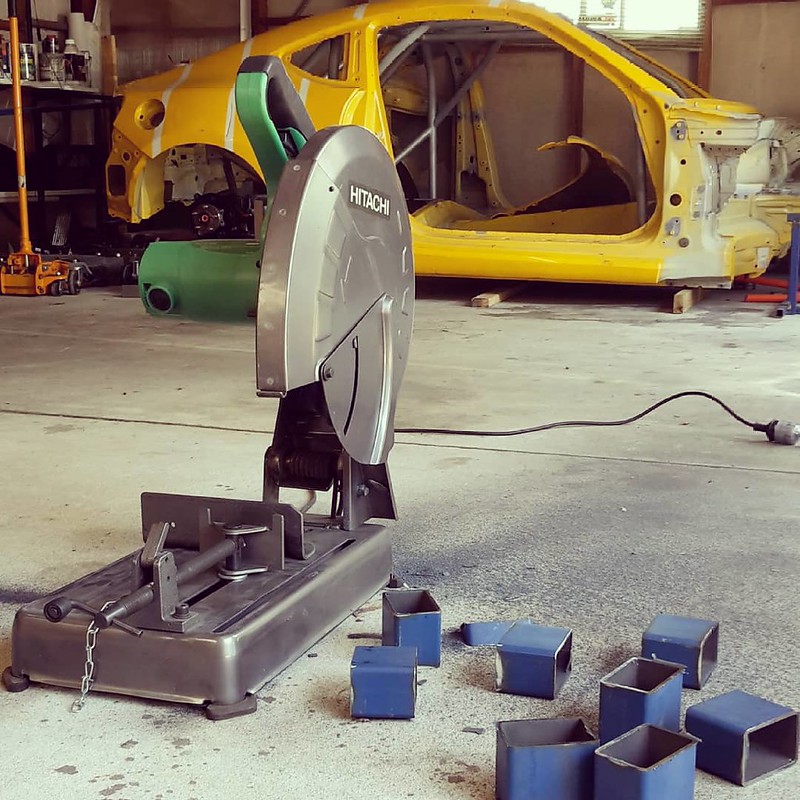 Then I cut out one face of the box. There are 8 in total which is enough to do upper and lower control arm mounts on both sides of the car. 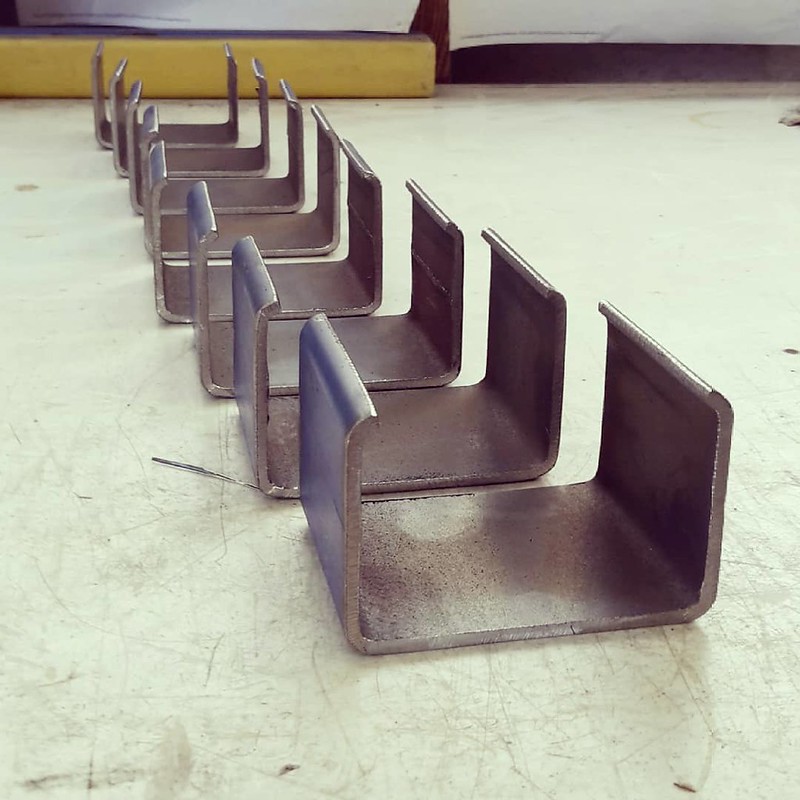 Then I had to cut out 16 squares from 3mm sheet to box in the open faces.  I then tig welded them all and it took a really long time! I calculated after I had finished that I had welded 2.8m in length. Anyway it was really good practice and by the time I welded a couple my settings were dialed in perfectly and my welds were very consistent. 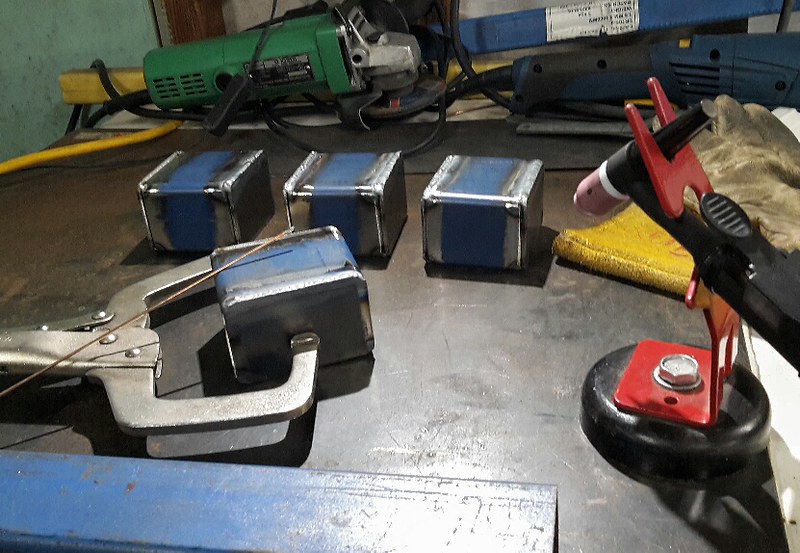 I also beveled both faces before welding for maximum penetration. 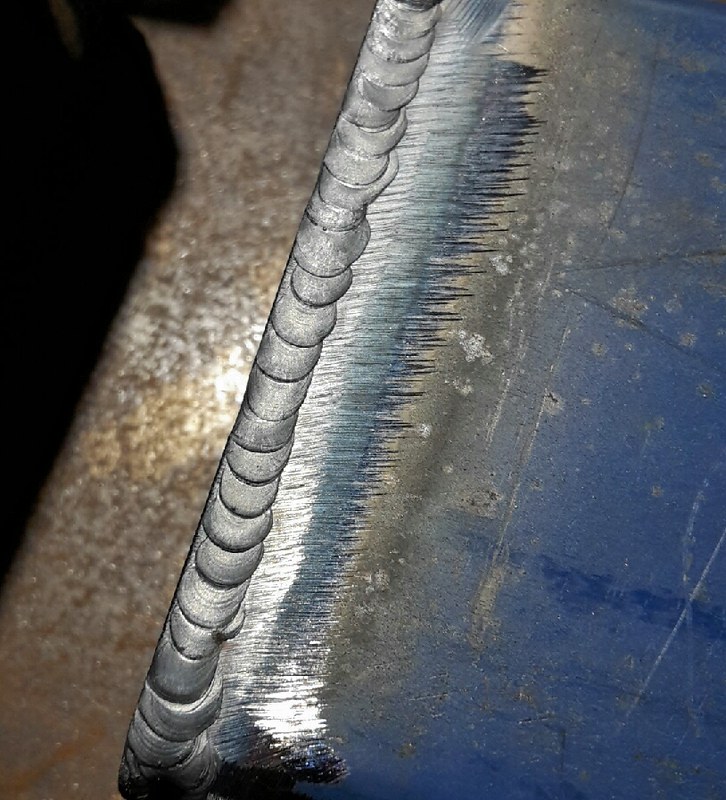 So this is the finished product before it gets welded into the chassis. The rod end is just an old one I had from my wrx to show how it works. I will be using one size smaller than this when I do my bulk order for all the control arms. 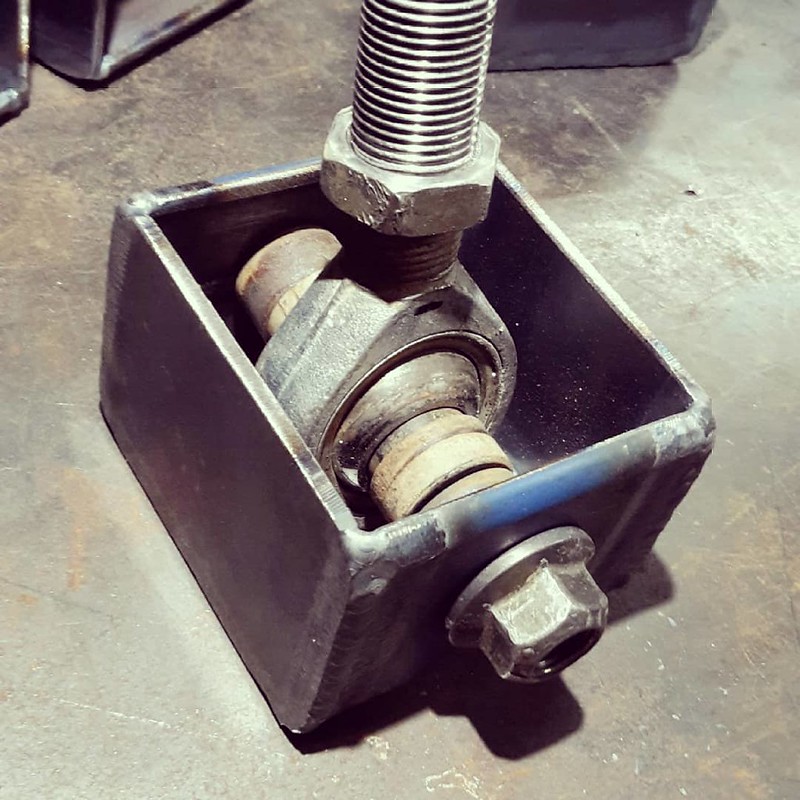 They will be mounted in the chassis with the bolt running vertical so the rod end is sitting horizontal. This will allow me to use spacers to position the rod end on the bolt at different heights to adjust the pivot height which changes control arm angles for camber gain and roll center. Using the rod ends also allows me to adjust the length of the arms for static camber and caster adjustment.
__________________
|
|
|
|
| The Following 5 Users Say Thank You to DIY For This Useful Post: | Ash_89 (03-02-2021), BigFatFlip (04-25-2019), NoHaveMSG (01-13-2019), RToyo86 (02-25-2019), Zer0 (01-06-2019) |
|
02-25-2019, 05:08 PM
|
#145 |
|
Senior Member
Join Date: Apr 2014
Drives: 2013 Ultramarine FR-S
Location: Springfield, MO
Posts: 1,948
Thanks: 2,539
Thanked 1,414 Times in 804 Posts
Mentioned: 31 Post(s)
Tagged: 3 Thread(s)
|
Just a small thing. I remembered you mentioning RX8 suspension. Watching an overview of the HKS TRB-03 car and it had a shot of the front suspension. Seems they are using RX8 upper and lower front control arms.
[ame="http://youtu.be/fqf0Os5xoao?t=433"]http://youtu.be/fqf0Os5xoao?t=433[/ame]
__________________
 |
|
|
|
|
02-25-2019, 10:22 PM
|
#146 | |
|
Senior Member
Join Date: Jul 2016
Drives: BRZ, WRX
Location: Sydney, Australia
Posts: 291
Thanks: 105
Thanked 962 Times in 233 Posts
Mentioned: 2 Post(s)
Tagged: 0 Thread(s)
|
Quote:
Yeah I am aware, I brought this up in the suspension model thread which is a sticky in the suspension forum and that is my comment in the youtube video too.
__________________
|
|
|
|
|
| The Following User Says Thank You to DIY For This Useful Post: | DustinS (02-26-2019) |
|
02-26-2019, 02:53 AM
|
#147 |
|
Senior Member
Join Date: Jan 2019
Drives: 2017 BRZ PP , 2005 Saab 97X
Location: CA
Posts: 1,052
Thanks: 754
Thanked 721 Times in 405 Posts
Mentioned: 4 Post(s)
Tagged: 0 Thread(s)
|
Subbed, this looks potent... its making me want to try stuffing a renesis in the chassis..
|
|
|
|
|
02-26-2019, 04:11 AM
|
#148 | |
|
Senior Member
Join Date: Jul 2016
Drives: BRZ, WRX
Location: Sydney, Australia
Posts: 291
Thanks: 105
Thanked 962 Times in 233 Posts
Mentioned: 2 Post(s)
Tagged: 0 Thread(s)
|
Quote:
__________________
|
|
|
|
|
|
02-26-2019, 06:12 AM
|
#149 |
|
Senior Member
Join Date: Jan 2019
Drives: 2017 BRZ PP , 2005 Saab 97X
Location: CA
Posts: 1,052
Thanks: 754
Thanked 721 Times in 405 Posts
Mentioned: 4 Post(s)
Tagged: 0 Thread(s)
|
its regarded as lame because of the oil ports they had fewer and ran a lower oil pressure than the 09+ models, which last a lot long.. a lot. . it also never came turbo'd and therefore uncool compared to the FC/FD chassis
I owned a 2010 and loved the almost every moment of it. it makes 240 hp ish out of the gate. but yeah to make power youd need to update it with stuff from the 13B-rew and then you are looking custom hybrid... im insane enough to still think it would be a whicked idea. I like your 207 better for feasibility reasons. I had wished I got one back when I had my GM6 coupe |
|
|
|
|
02-26-2019, 06:43 AM
|
#150 |
|
Senior Member
Join Date: Jul 2016
Drives: BRZ, WRX
Location: Sydney, Australia
Posts: 291
Thanks: 105
Thanked 962 Times in 233 Posts
Mentioned: 2 Post(s)
Tagged: 0 Thread(s)
|
Fair enough.
The 207 idea is gone though, all will be revealed this weekend when I pick up the new engine 
__________________
|
|
|
|
|
03-03-2019, 06:26 AM
|
#151 |
|
Senior Member
Join Date: Jul 2016
Drives: BRZ, WRX
Location: Sydney, Australia
Posts: 291
Thanks: 105
Thanked 962 Times in 233 Posts
Mentioned: 2 Post(s)
Tagged: 0 Thread(s)
|
Engine Purchased
Alright some big news for those not following on Instagram, the engine for this project has been selected, purchased and collected.
After a lot of consideration I decided to go with a Honda K24 which will be turbocharged. Bang for buck you can not beat this engine especially here in Australia where these motors are dirt cheap and readily available. I paid $450 for this engine with only 90k km's on it at a wrecking yard. After getting it home I removed the intake and exhaust manifolds and gave it a pressure wash.  Under the WTAC rules I am building to the engine is allowed to be moved back so that the rear of the engine is no more than 50mm rearward of the original firewall. 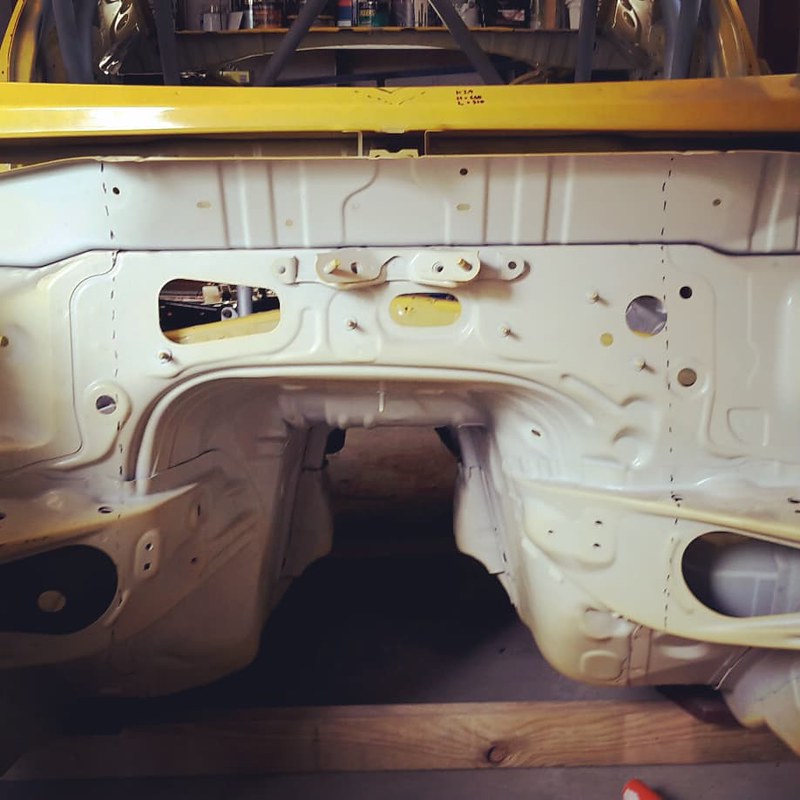 So to make the most of this rule I basically cut the original firewall out and once the motor is in its final position I will have to make up a new firewall from sheet metal.  With that done I then slid the engine into its intended final position. 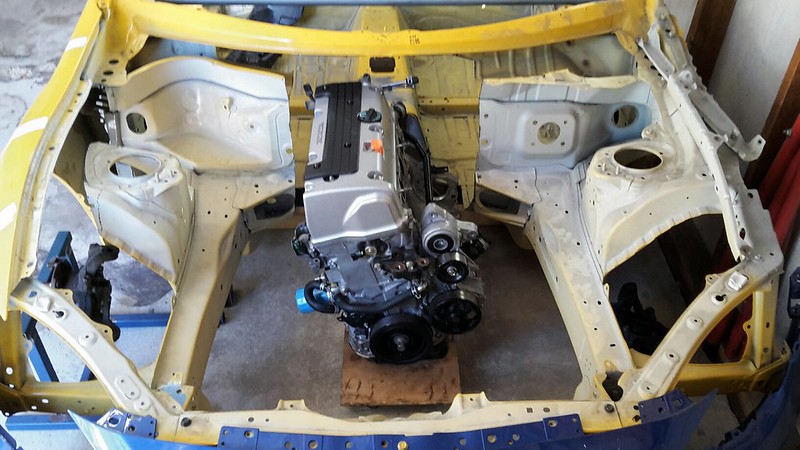 I am really happy with where it is sitting, most of the weight is behind the front wheels and there is loads of space for a really well ducted intercooler/radiator combo. It will also leave me enough space for the steering rack to sit in front of the engine. 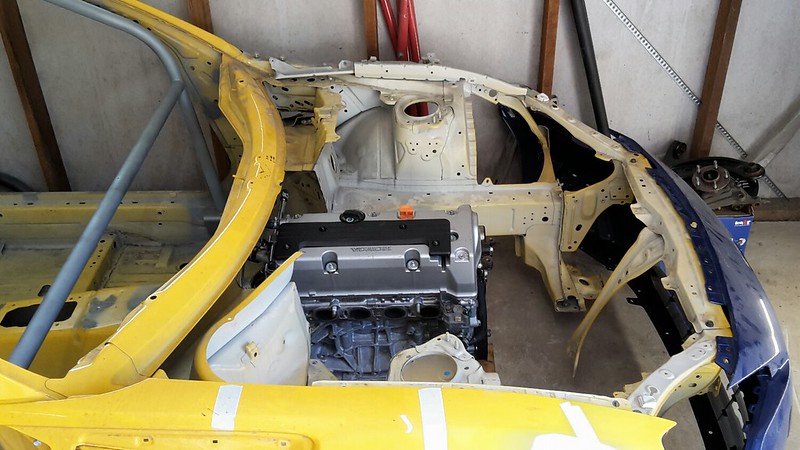 The reason I have purchased the motor before finishing the front suspension is that the lower control arm mounts will be part of the front cross-member which will also contain the engine mounts. So I basically had to buy an engine to get that finished.
__________________
|
|
|
|
| The Following 7 Users Say Thank You to DIY For This Useful Post: | Ash_89 (03-02-2021), BigFatFlip (04-25-2019), DustinS (03-04-2019), FirstWinter (03-03-2019), SuperTom (03-03-2019), Viper8 (03-03-2019), yberther (05-31-2019) |
|
03-03-2019, 10:55 AM
|
#152 |
|
Driver

Join Date: Sep 2013
Drives: 16 Subaru BRZ
Location: San Diego, CA
Posts: 183
Thanks: 35
Thanked 45 Times in 41 Posts
Mentioned: 0 Post(s)
Tagged: 0 Thread(s)
|
nice progress, glad to see you're still working on it
__________________
BRZ Build Thread
See you space cowboy... |
|
|
|
| The Following User Says Thank You to EdBoy For This Useful Post: | DIY (03-04-2019) |
|
03-03-2019, 03:45 PM
|
#153 | |
|
Senior Member
Join Date: Jul 2016
Drives: BRZ, WRX
Location: Sydney, Australia
Posts: 291
Thanks: 105
Thanked 962 Times in 233 Posts
Mentioned: 2 Post(s)
Tagged: 0 Thread(s)
|
Quote:
__________________
|
|
|
|
|
|
03-04-2019, 08:54 AM
|
#154 |
|
Senior Member
Join Date: Sep 2015
Drives: 2015 frs
Location: Ca
Posts: 511
Thanks: 426
Thanked 196 Times in 148 Posts
Mentioned: 5 Post(s)
Tagged: 0 Thread(s)
|
Nice update. I like that your pushing the motor towards the rear of the car. Looking good can't wait to see your crossmember completed.
|
|
|
|
| The Following User Says Thank You to Zer0 For This Useful Post: | DIY (03-04-2019) |
|
|
|
|
 |
|
|


