


|
||||||
| Member's Car Journals Car journals by our members. |
 |
|
|
Thread Tools | Search this Thread |
 07-27-2015, 02:18 PM
|
#1 |
|
Member
Join Date: Jun 2013
Drives: Toyota GT86
Location: Western Australia
Posts: 63
Thanks: 36
Thanked 61 Times in 36 Posts
Mentioned: 0 Post(s)
Tagged: 0 Thread(s)
|
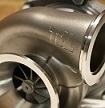
As most people on here, I've been quietly collecting parts over the years and have finally almost obtained most things that I've wanted. Originally intended to keep the 86 fairly standard since I've had a few modified cars before and did not want another low, loud and police attention car again. But it didn't last long until the mod bug hit and small upgrades started to arrive. The standard 197hp did not satisfy my need for power so the search for forced induction was on.
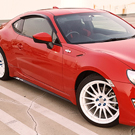
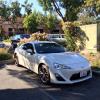
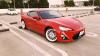
Fast forward 18 months and almost every corner of the car has been upgraded in someway or somehow. Turbo kit will be installed in the coming week and I'll update as I go. How it looked on its last outting (before turbo prep teardown) - 12-7-15 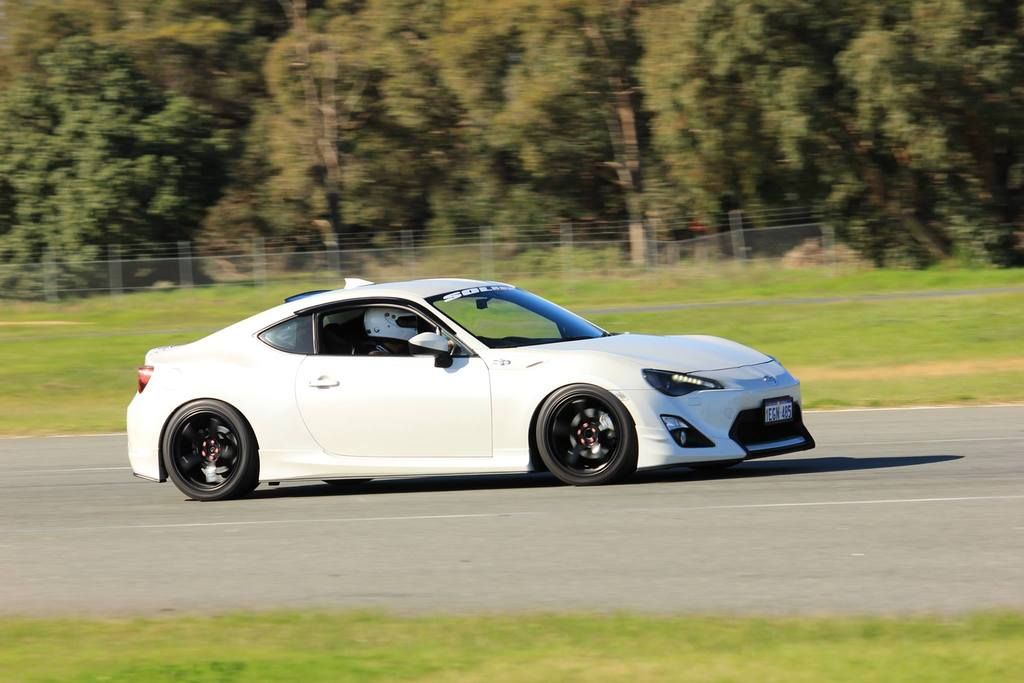 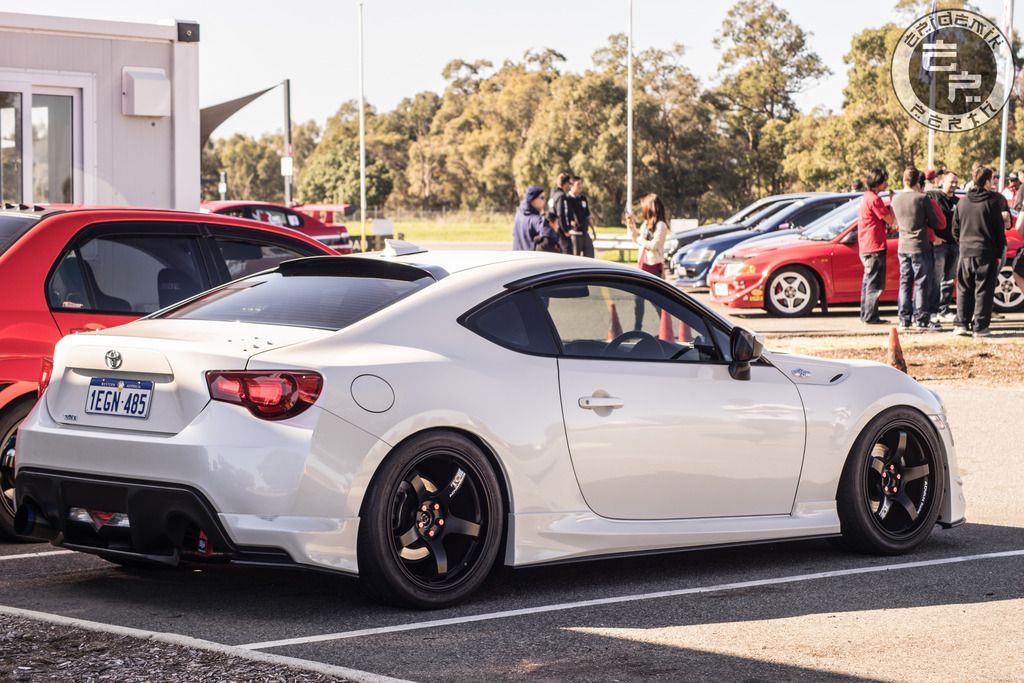 and how it sits now.....  | ENGINE | Custom Equal Length SS Manifold with 3” dump Garrett GTX2867R 0.63 Turbo Turbosmart Comp Gate40 Turbosmart BOV Dual Port 38mm Hypertune Aluminium Intercooler FullBlownMotorsports Cast Sump FullBlownMotorsports Aluminium Radiator + Shroud + SPAL Fans OEM Subaru ‘Laminova’ Type Oil Cooler Kit SpeedFlow Fittings & Hoses SME 3” Over Pipe SME 3” Front Pipe Tomei 80R Titanium 3” Exhaust TRD Oil Temperature/Pressure Sandwich Plate TRD Water Temperature Adapter Raceseng Cam Plate | TRANSMISSION | HKS Light Action Clutch with Lightened Flywheel STI Group-N Engine Mounts STI Group-N Transmission Mount | SUSPENSION & BRAKES | MCA Red Coilovers Whiteline Adjustable Front Swaybar + endlinks Whiteline Adjustable Rear Swaybar + endlinks Whiteline Rear Swaybar Mount Brace Whiteline Front Roll Center & Bump Correction Kit Whiteline Diff Mount Cradle Insert Bushings Whiteline Subframe Mount Insert Bushings SPL Adjustable Toe Arms SPL Adjustable Traction Arms Carbing Titanium Front Strut Bar Carbing Titanium Front Tower Braces Carbing Aluminium Rear Strut Bar Motul RBF660 Brake Fluid Bendix Ultimate Brake Pads Front *** BBK to come | ECU & FUEL SYSTEM | Ecutek RaceRom ECU Injector Dynamics 1300cc Stainless Steel Injectors FullBlownMotorsports 485 E85 Fuel Pump Kit Delicious Tuning BT Flex Fuel Kit | INTERIOR | Defi Advance BF Boost Gauge Defi Advance BF Oil Pressure Gauge Defi Advance BF Oil Temperature Gauge Defi Advance BF Water Temperature Gauge Defi Advance BF Fuel Pressure Gauge– Defi Advance Control Box Blitz Dash Panel Gauge Holder Blockhead Dual 60mm Gauge Holder R Magic Gear Knob Cusco Drift Button | WHEELS & TIRES | Advan TC3 18x9.5 +40 ‘Square Setup’ Nitto Invo 265/35/18 Street Advan AD08R 265/35/18 Track | EXTERIOR | TOM’s Red Tail Lights TRD Rear Window Air Stabilizer Beatsonic Version 2 Shark Fin HIC Window Visors HIC Roof Wing Stay Tuned! 
Last edited by wnt3d; 08-03-2015 at 11:01 AM. |

|

|
|
08-02-2015, 01:45 PM
|
#2 |
|
Member
Join Date: Jun 2013
Drives: Toyota GT86
Location: Western Australia
Posts: 63
Thanks: 36
Thanked 61 Times in 36 Posts
Mentioned: 0 Post(s)
Tagged: 0 Thread(s)
|
Since the stock clutch is known to slip with forced induction I decided to upgrade it while doing a gearbox oil change which was due soon anyway. I didn't want to choose anything too heavy duty like a twin plate or something that's either on/off, and some what similar to the stock pedal feel. The HKS LA (Light Action) clutch kit comes with a lightened flywheel, and is rated at 400Nm (41Kgm / 295lbft) which approximates to 295kw (400ps) while supposedly retaining stockish pedal weight.
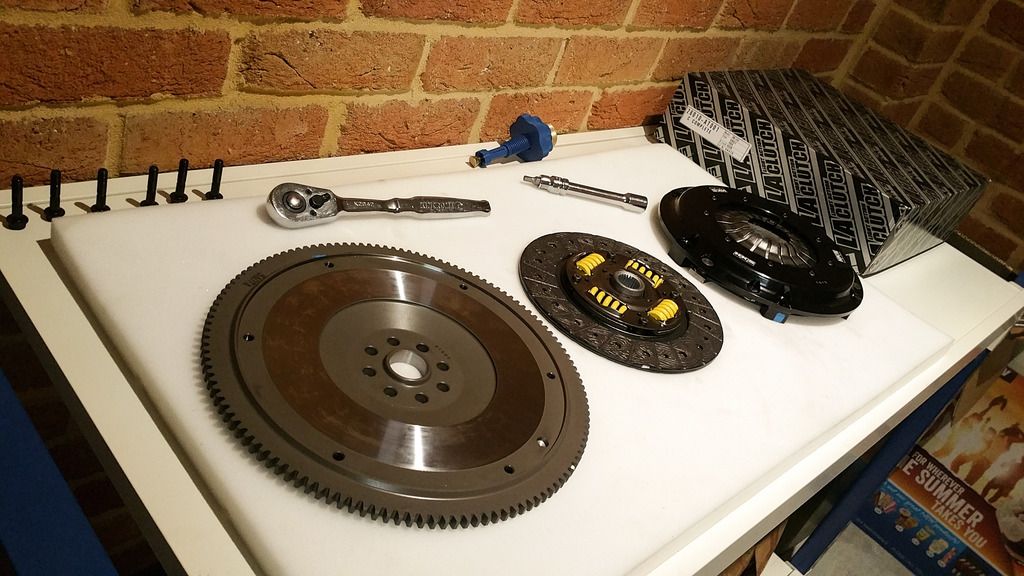 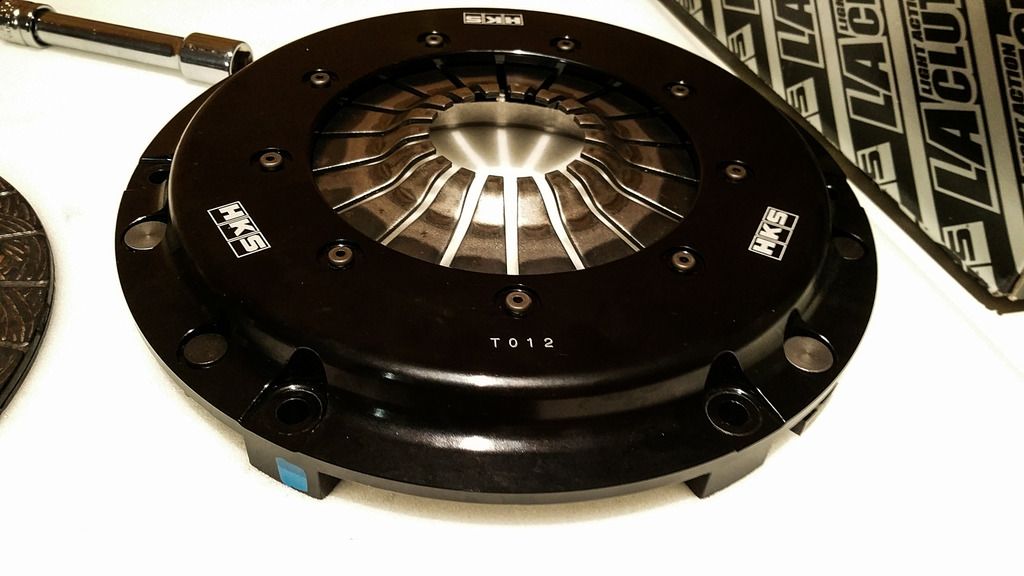  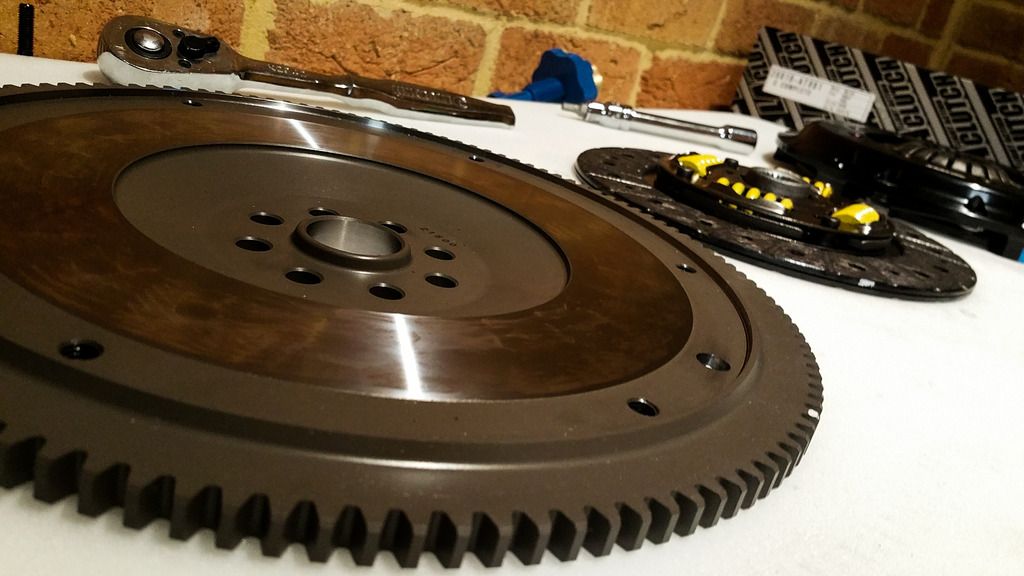  Stock clutch removed and all cleaned up 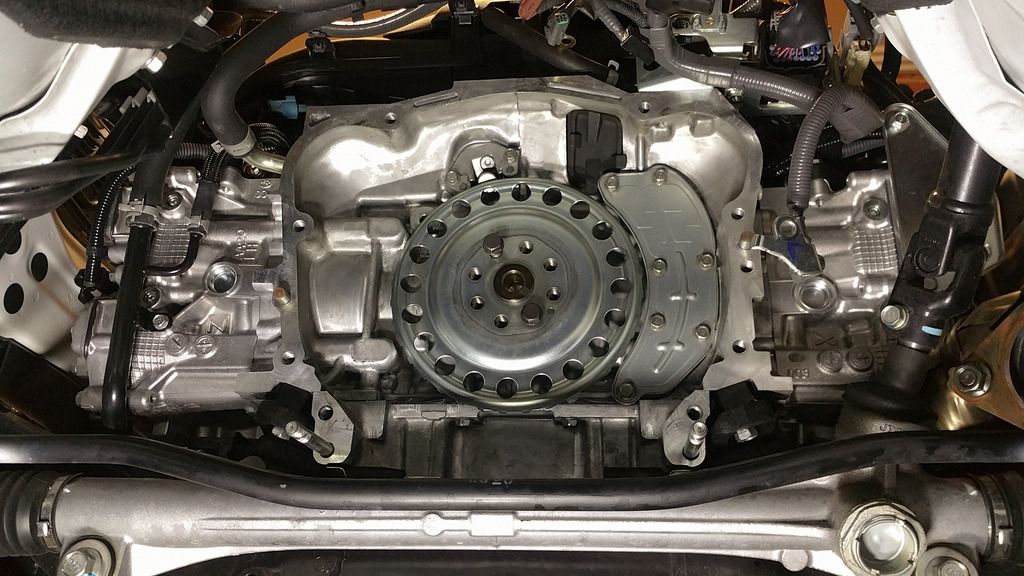 Clutch installed along with Raceseng Cam Plate 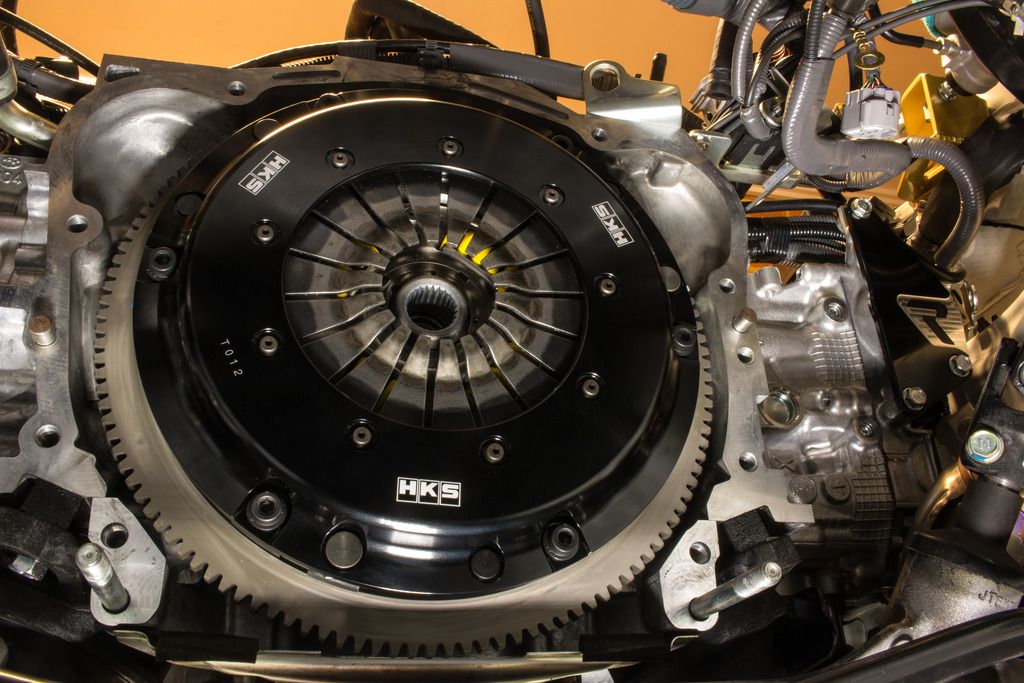
__________________
Last edited by wnt3d; 08-03-2015 at 11:39 AM. |
|
|
|
| The Following User Says Thank You to wnt3d For This Useful Post: | mrk1 (08-02-2015) |
|
08-03-2015, 10:58 AM
|
#3 |
|
Member
Join Date: Jun 2013
Drives: Toyota GT86
Location: Western Australia
Posts: 63
Thanks: 36
Thanked 61 Times in 36 Posts
Mentioned: 0 Post(s)
Tagged: 0 Thread(s)
|
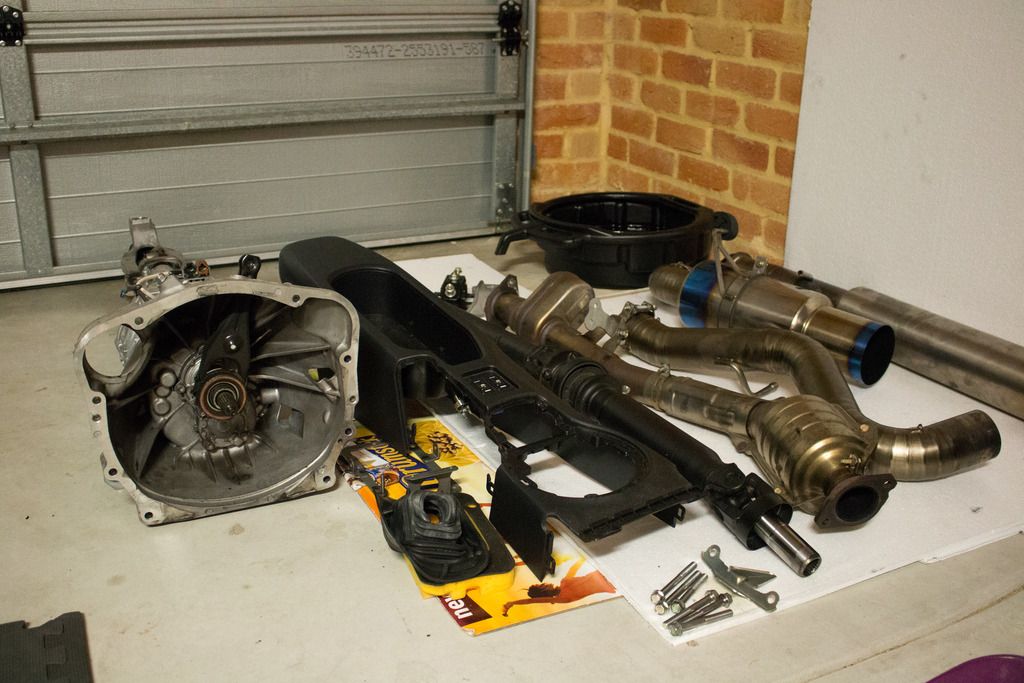
Also forgot to add that whilst the car was up on stands with the gearbox out I ended up installing STI engine & transmission mounts, whiteline suspension goodies, subaru oem oil cooler and finished off running the wires and sensors for the defi gauges.
STI Engine and Transmission Mounts 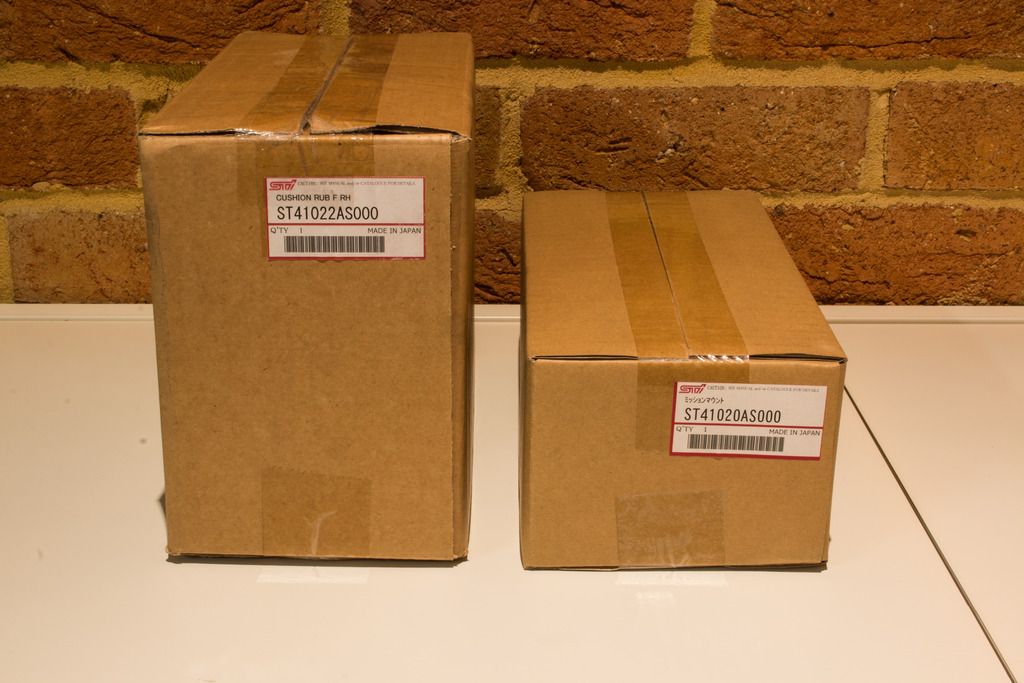 STI Engine Mounts   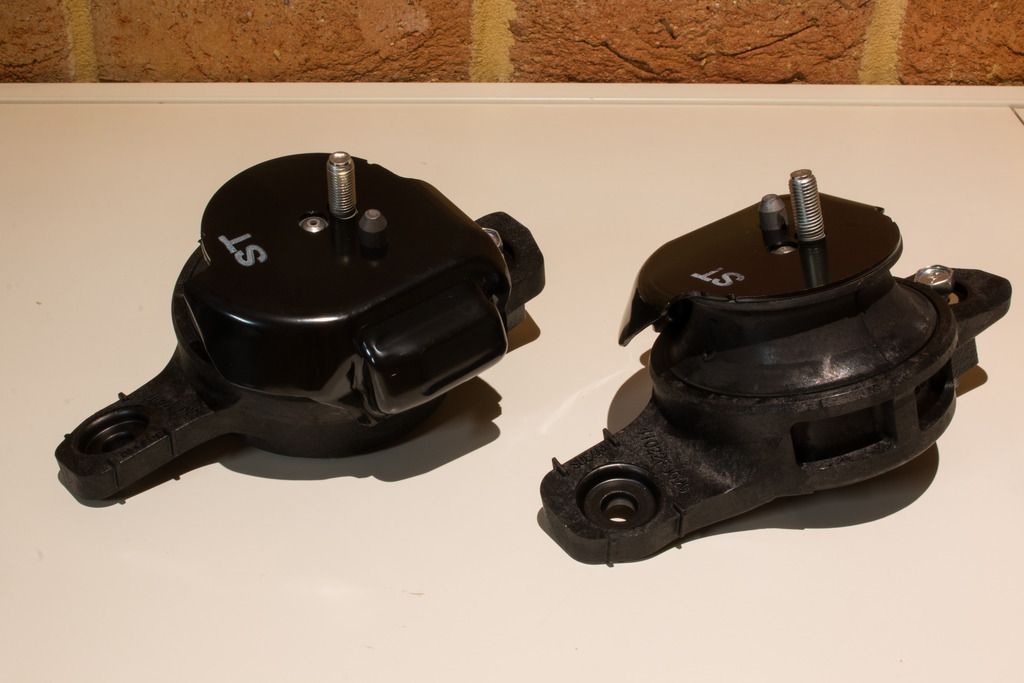 STI Transmission Mount 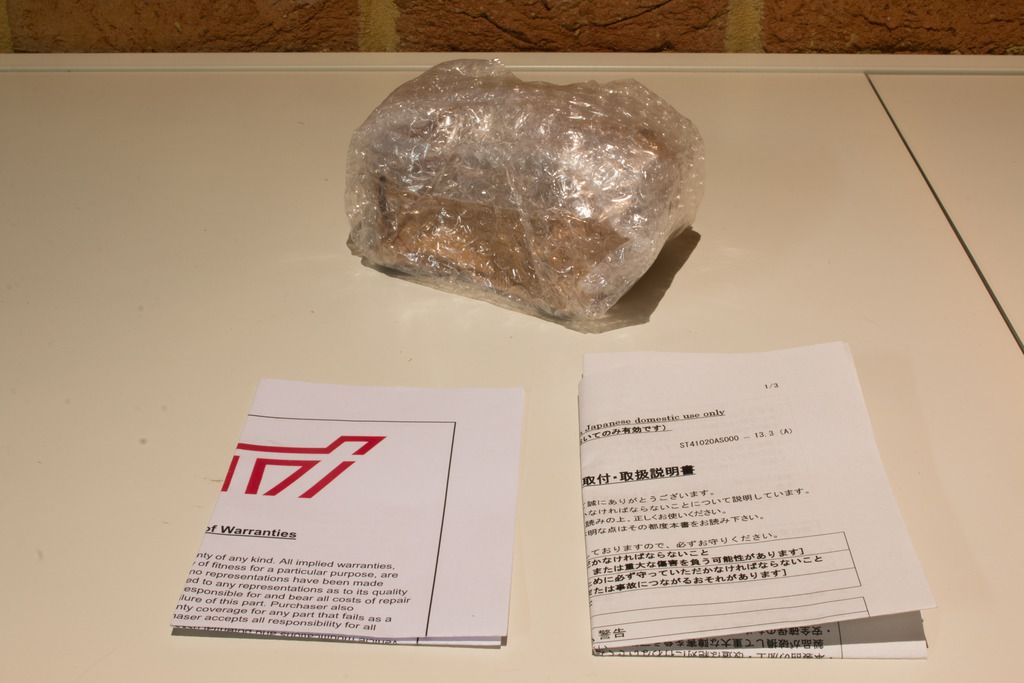 STI mount on the left VS stock mounts on the right 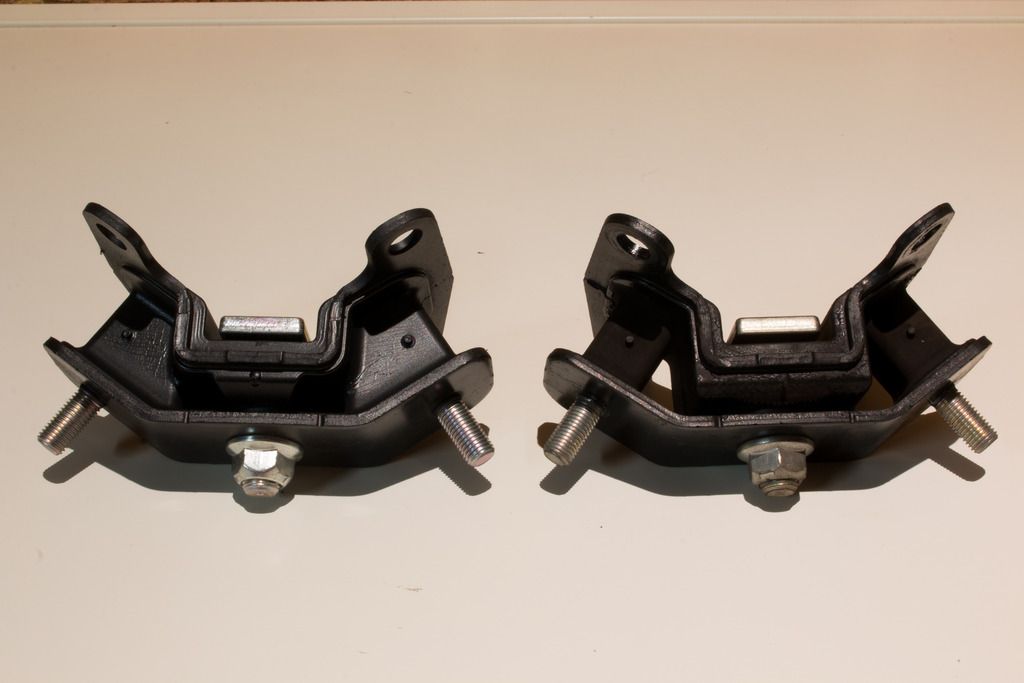 Whiteline Front Swaybar & endlinks  Swaybar thickness closeup 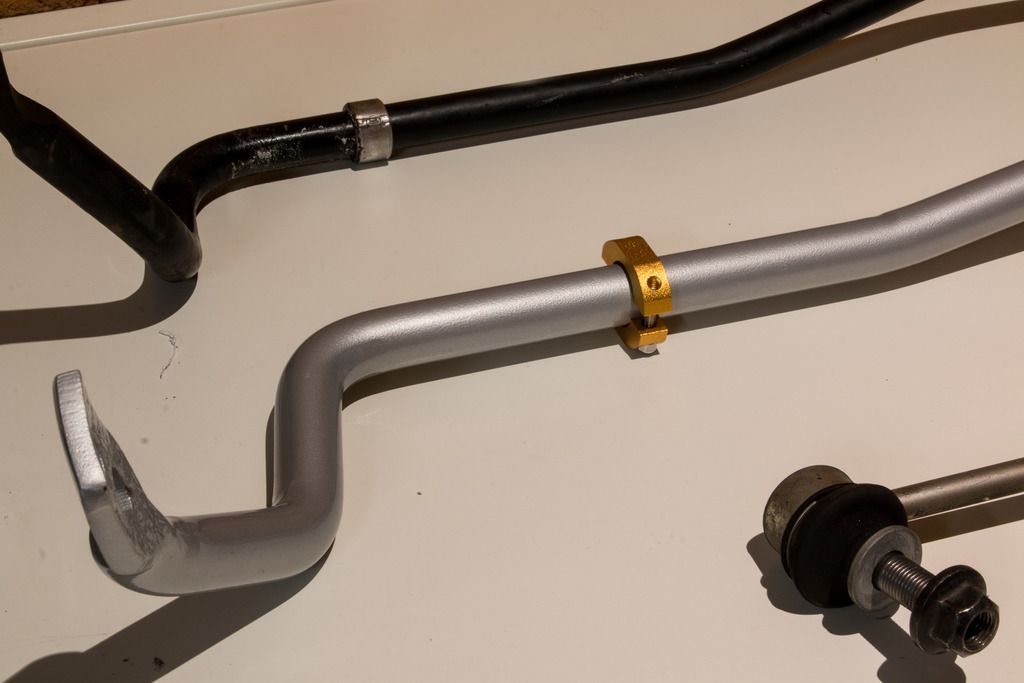 Endlink thickness close up 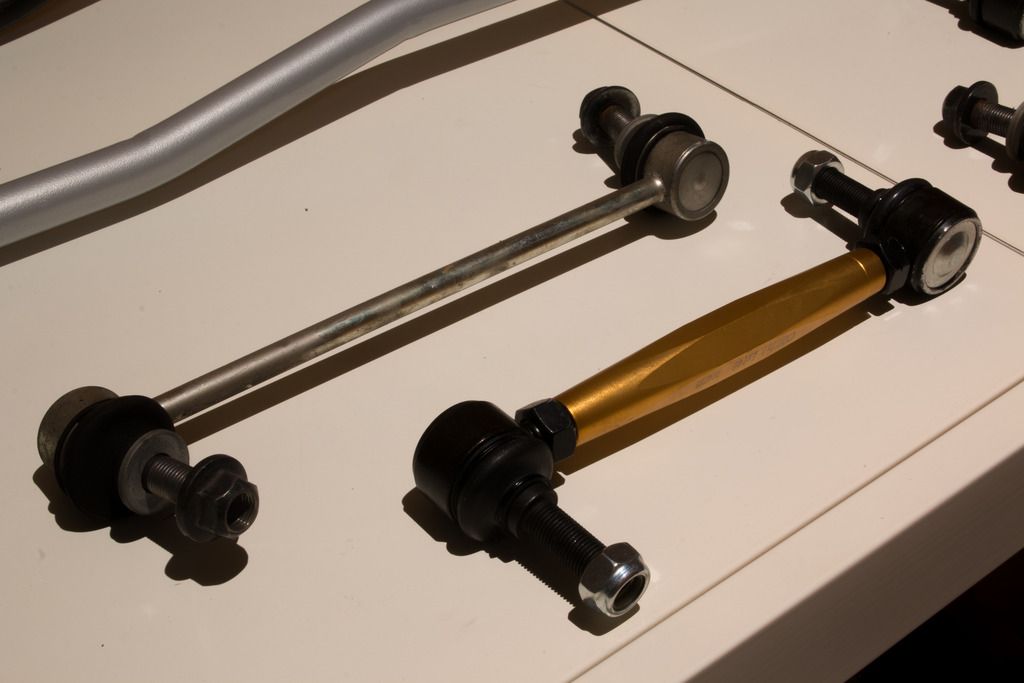 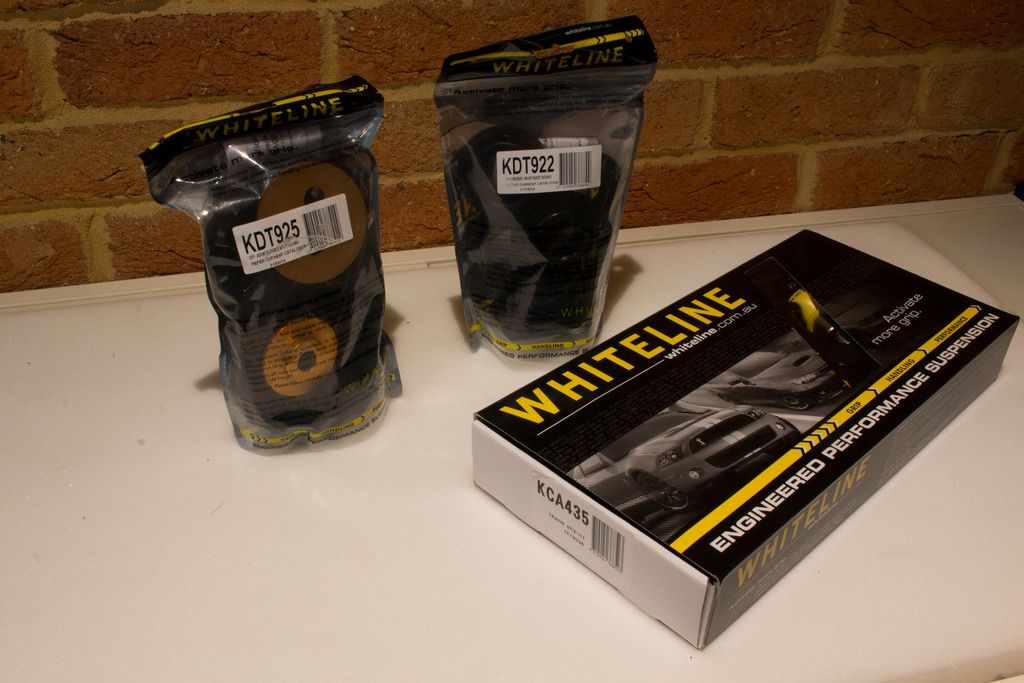 Whiteline KCA435 - front roll centre/bump steer correction kit 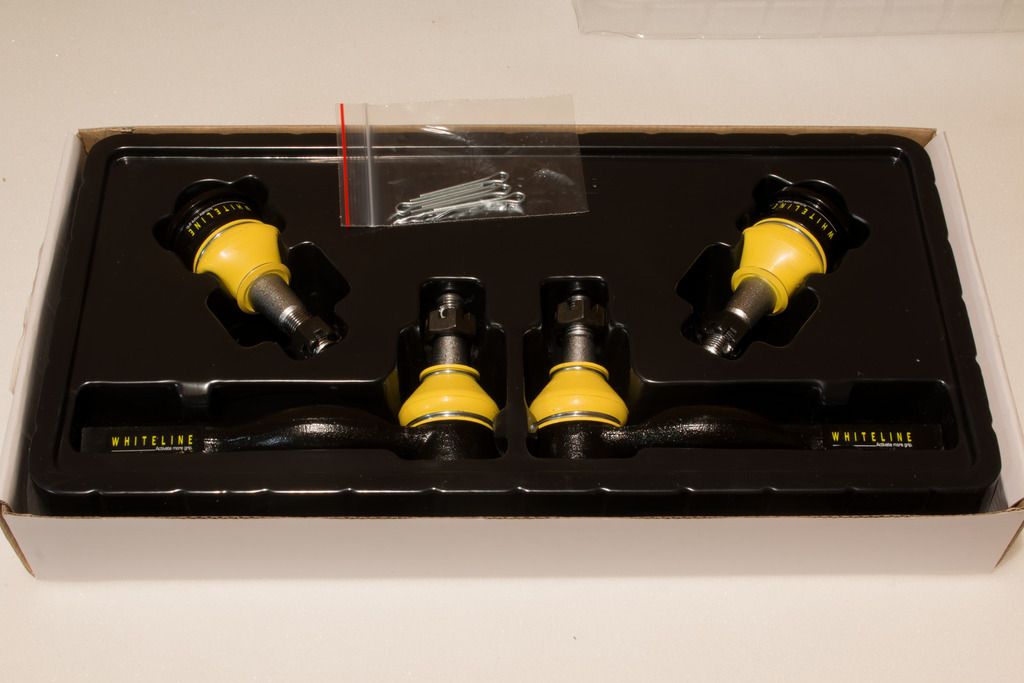 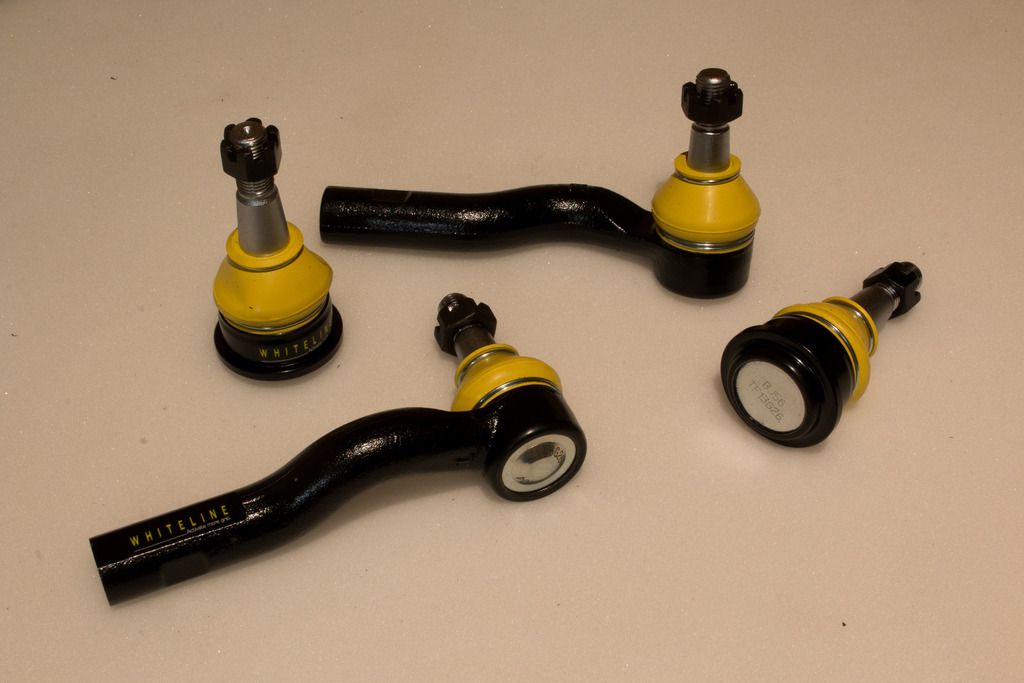 Whiteline KDT925 - rear differential cradle & outrigger insert bushings 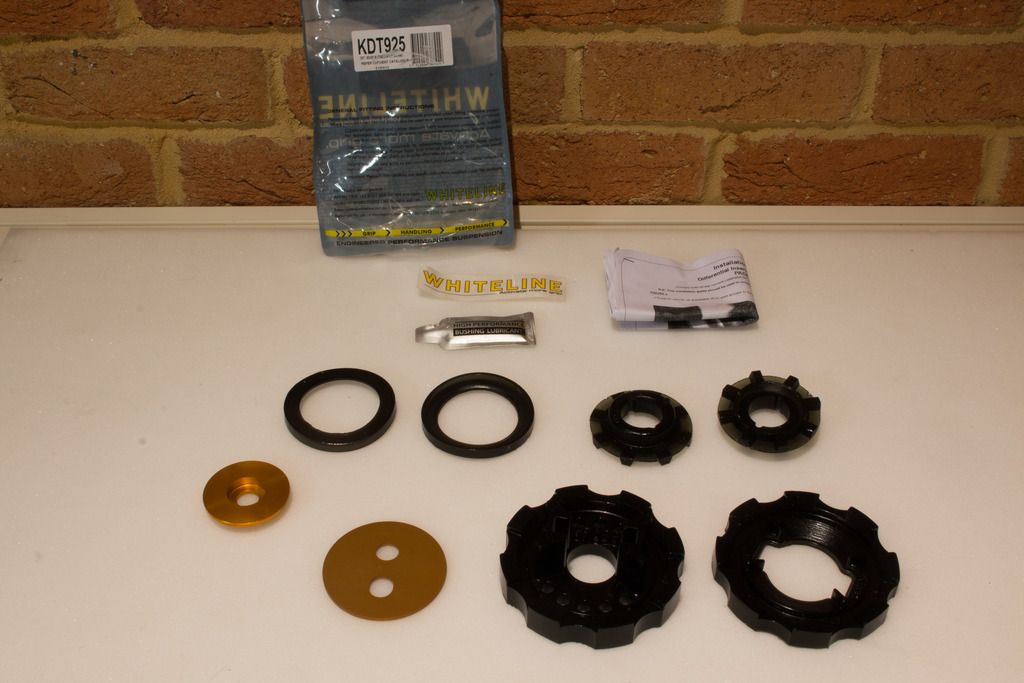 Whiteline KDT922 - rear crossmember insert bushings 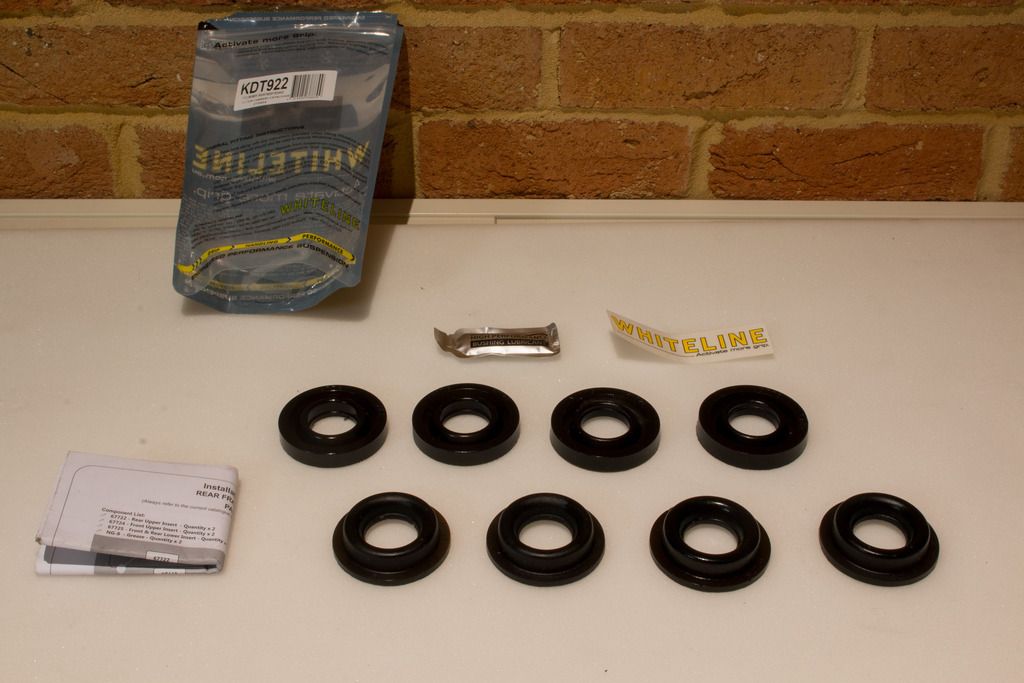 OEM Subaru 'Laminova' Type oil cooler kit 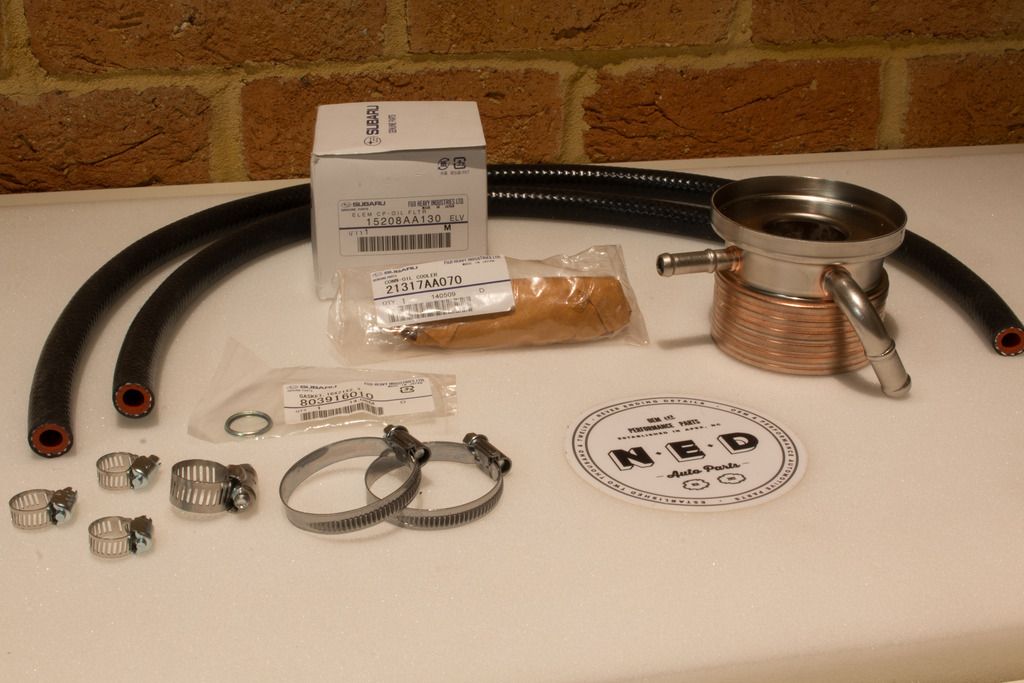 I ended up routing the wires along side the main engine harness under the intake plenum and through the firewall via the main rubber grommet. A TRD water temp adapter and oil sandwhich plate were used to mount the water temp and oil temp sensors. The oil pressure sensor is connected directly to the top oil gallery port next to the throttle body. The fuel pressure sensor is connected via a flare tee fitting with 1/8 NPT thread, clamped between one of the fuel rail supply hoses. Routing the wires from drivers side grommet to advance control box behind the glove box 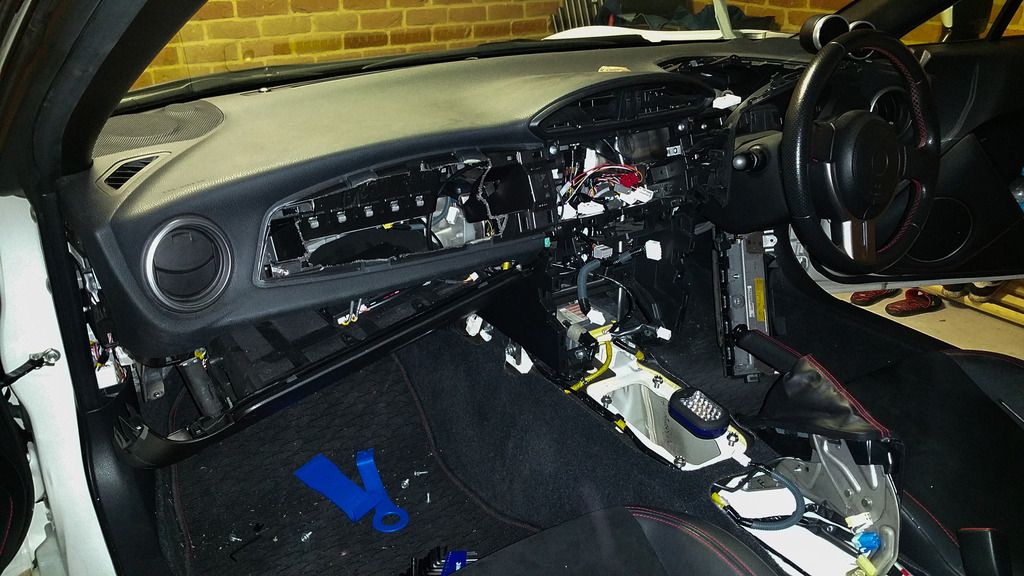 Gauge wiring and sensors 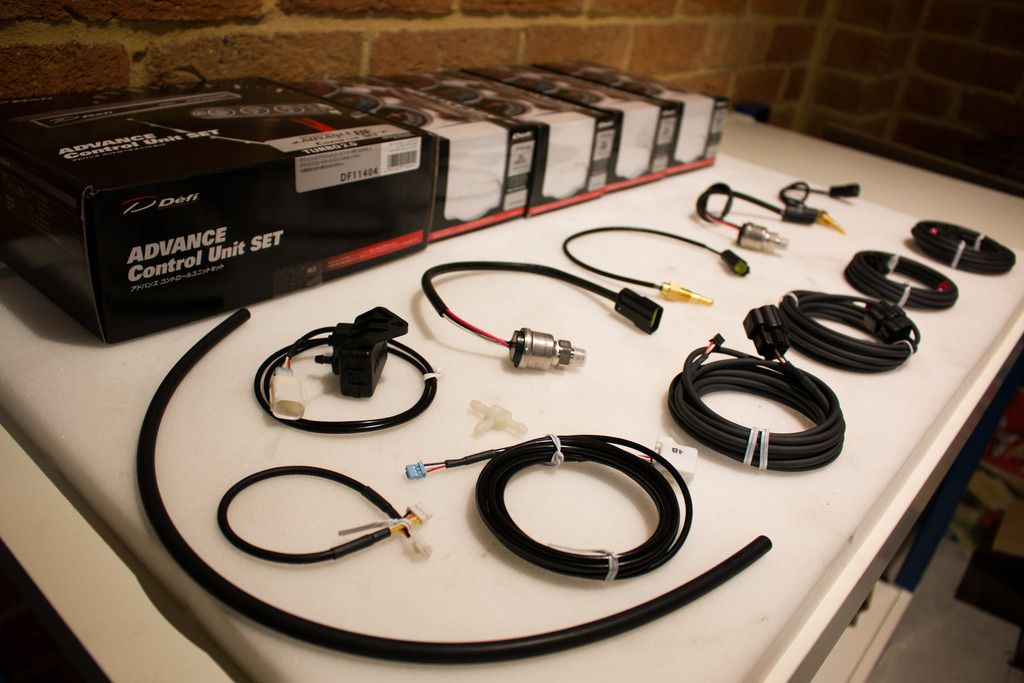 TRD Water temp adapter + Oil sandwhich plate 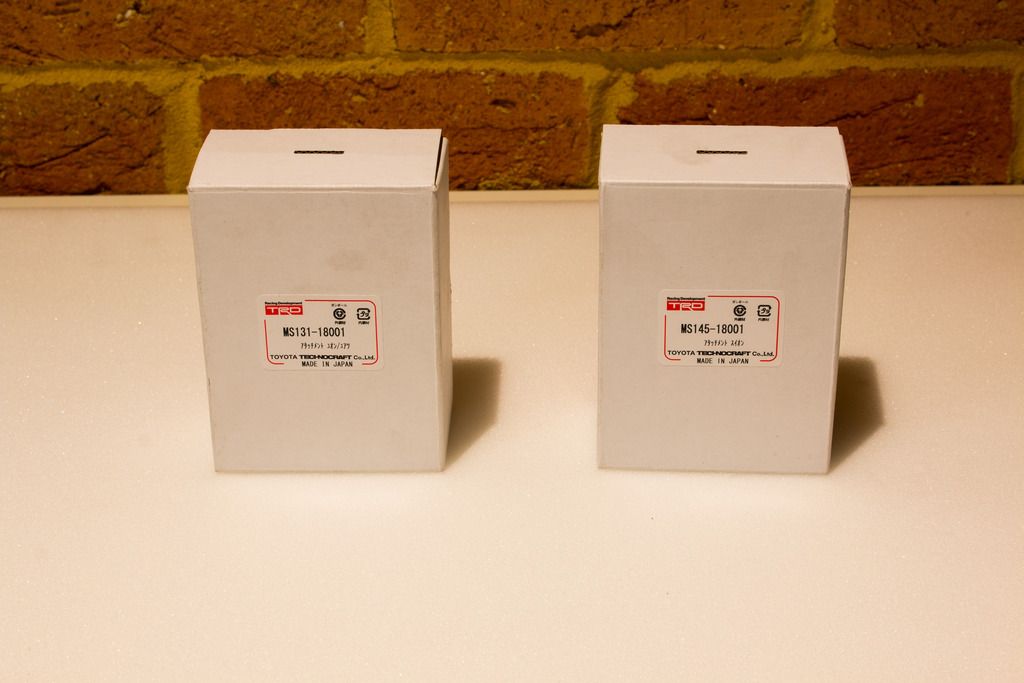 Oil sandwhich plate - front 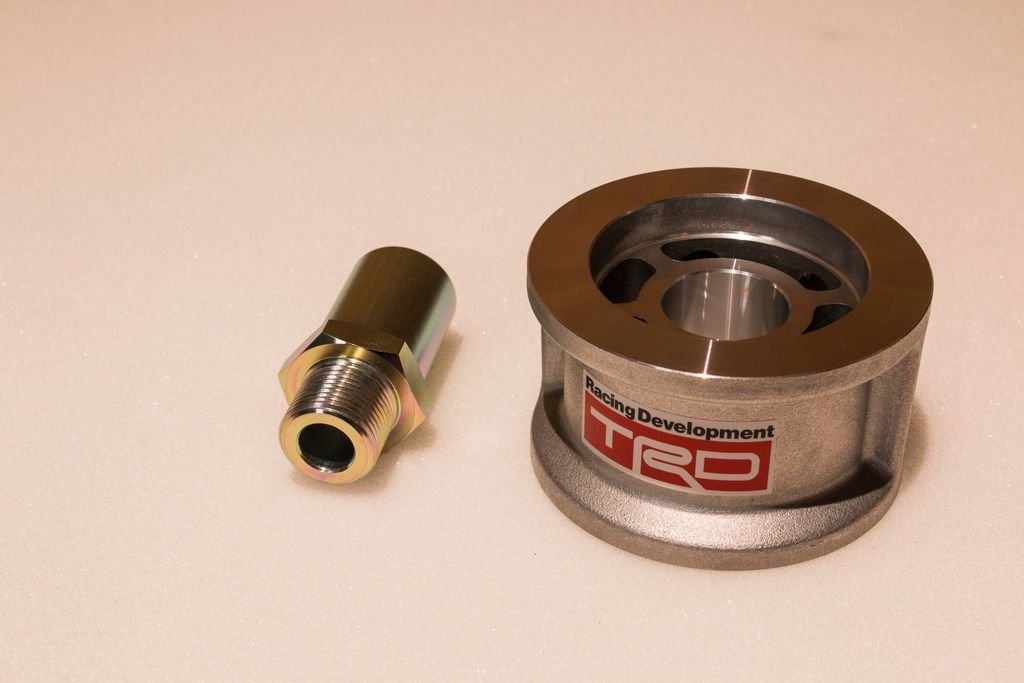 Oil sandwhich plate - back 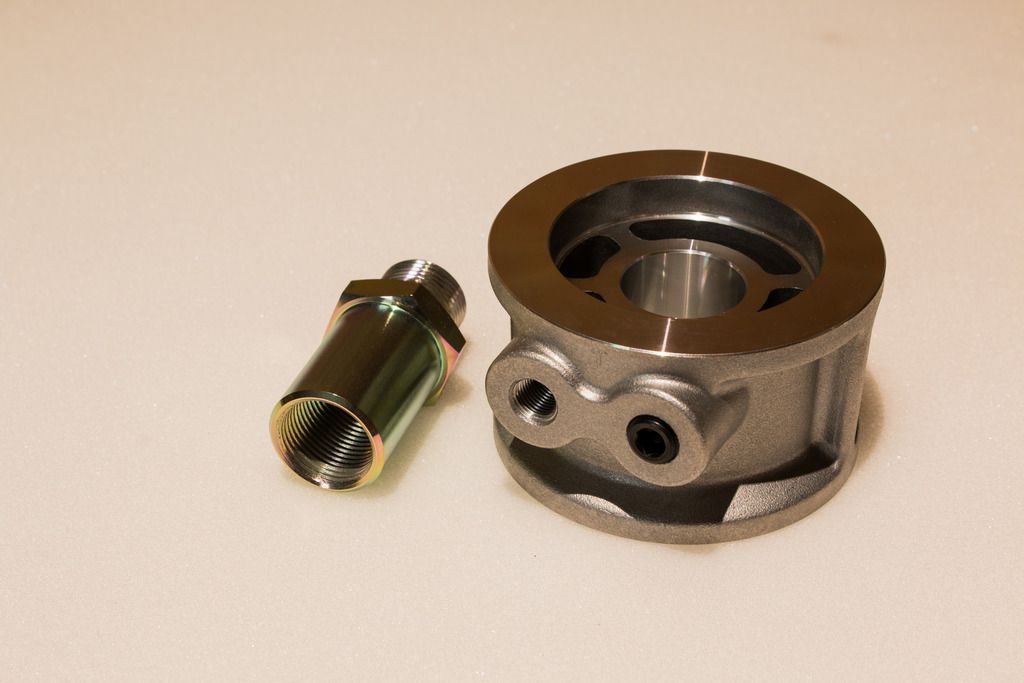 Water temp adapter 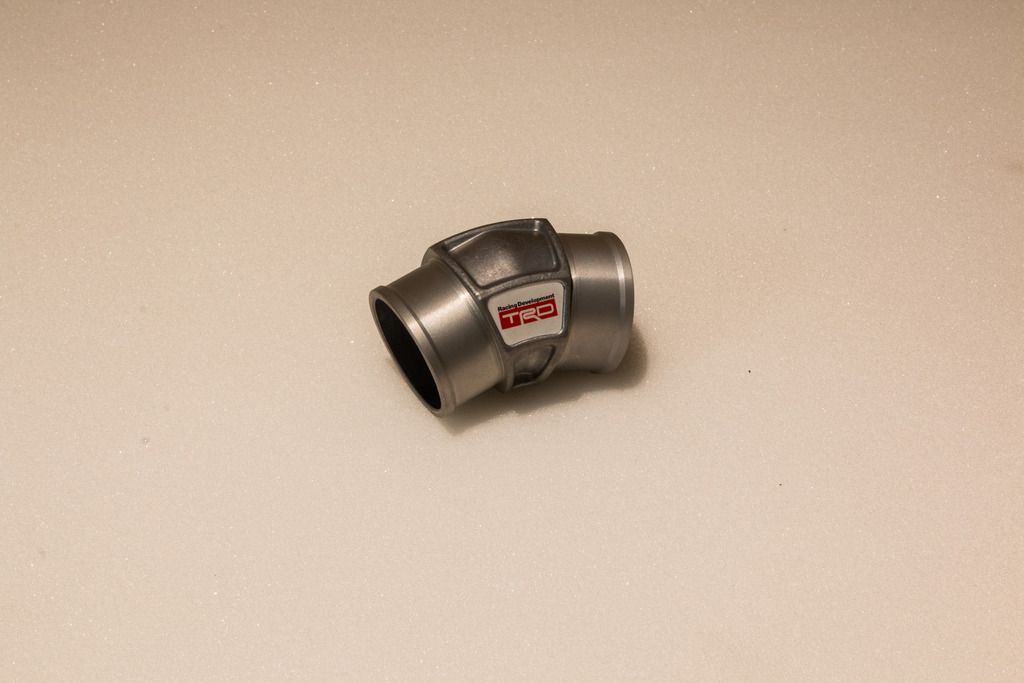 Speedflow -4 Flare Tee with 1/8 NPT branch : fuel pressure sensor adapter  Diagram with the wires coloured in to illustrate my routing method 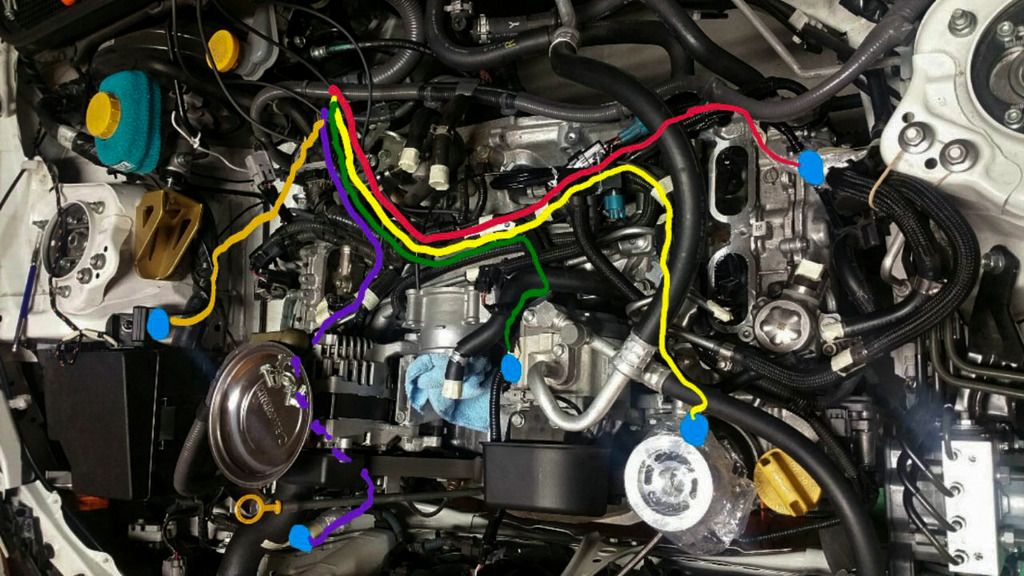 Wires enter through grommet within a 'self closing braided wire wrap'. - It made it alot easier to run 1 bundle of wires behind the dash instead of 5 individual ones.  And the end result, exactly how I wanted it. I know to alot of people its not their cup of tea to have so many gauges when you can have many alternate methods to display the same parameters with less difficulty, but I've always loved the old jdm race car feel with gauges everywhere! 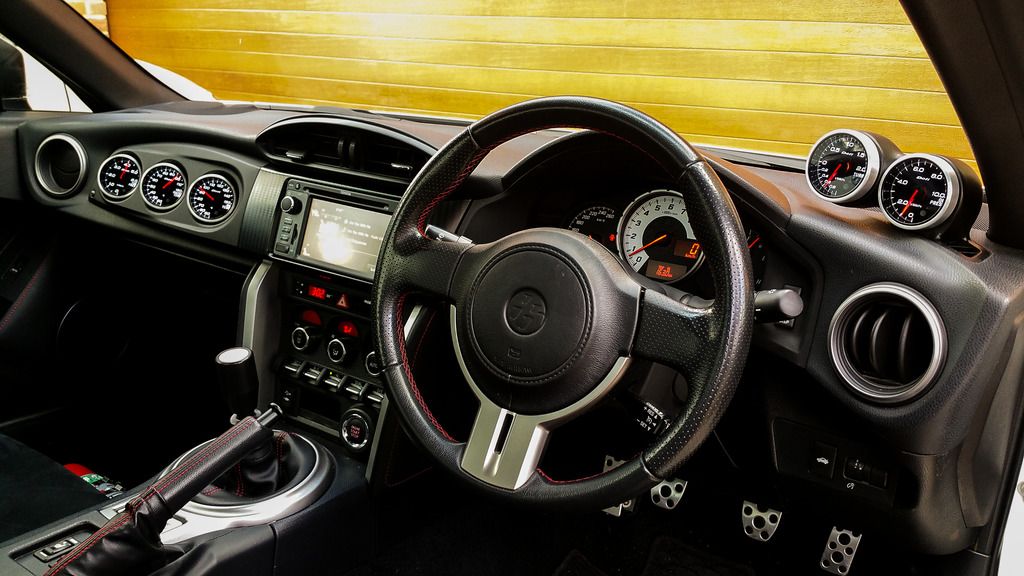
__________________
Last edited by wnt3d; 08-03-2015 at 12:10 PM. |
|
|
|
| The Following 4 Users Say Thank You to wnt3d For This Useful Post: |
|
08-03-2015, 11:08 AM
|
#4 |
|
Senior Member
Join Date: Jul 2012
Drives: 2013 FRS Whiteout
Location: MIA
Posts: 1,545
Thanks: 557
Thanked 469 Times in 340 Posts
Mentioned: 33 Post(s)
Tagged: 5 Thread(s)
|
Wow certainly took your time and did things right. Lot of work and money into the ride, love the look and the quality of work done. Big two thumbs up.
__________________
GTX2867R, moto-tuned , tomei op , motiv fp , Invidia Q300 ti , Rota titan 17x9 +42 , nt555 255/40 , ST coilovers w/cascam , Hotchkis sways
|
|
|
|
|
08-04-2015, 12:09 AM
|
#5 | |
|
Member
Join Date: Jun 2013
Drives: Toyota GT86
Location: Western Australia
Posts: 63
Thanks: 36
Thanked 61 Times in 36 Posts
Mentioned: 0 Post(s)
Tagged: 0 Thread(s)
|
Quote:
I've been following your JDL 4854 install/review thread for good photos and install shots before I started mine, was of great help! Question - where did you plum the crank case ventilation hose that usually goes into the intake if (a) your not running a catch can setup, yet (b) my alloy intake piping doesn't have a a fitting point for the hose?
__________________
|
|
|
|
|
|
08-04-2015, 08:11 AM
|
#6 | |
|
Senior Member
Join Date: Jul 2012
Drives: 2013 FRS Whiteout
Location: MIA
Posts: 1,545
Thanks: 557
Thanked 469 Times in 340 Posts
Mentioned: 33 Post(s)
Tagged: 5 Thread(s)
|
Quote:
It, pretty messy experience lol. Heres my line route, one from pcv to can and the crankcase line also to can. 
__________________
GTX2867R, moto-tuned , tomei op , motiv fp , Invidia Q300 ti , Rota titan 17x9 +42 , nt555 255/40 , ST coilovers w/cascam , Hotchkis sways
Last edited by yomny; 08-04-2015 at 08:25 AM. |
|
|
|
|
| The Following User Says Thank You to yomny For This Useful Post: | wnt3d (08-05-2015) |
|
08-04-2015, 09:59 AM
|
#7 |
|
NASA SpecE30 Racer
Join Date: May 2012
Drives: 2006 Honda S2000
Location: Gulf Breeze, FL
Posts: 7,279
Thanks: 607
Thanked 5,759 Times in 3,055 Posts
Mentioned: 274 Post(s)
Tagged: 10 Thread(s)
 |
Very awesome build.
__________________
- King Tut
Street/Track Car: 2006 Honda S2000 TT3 || Race Car: 1987 BMW 325is SpecE30 || Tow Vehicle: 2014 RAM 1500 EcoDiesel Sold Cars: 2012 BMW M3 || 2013 Subaru BRZ || 2012 Porsche Cayman R || 2009 Chevrolet Z06 || 2009 BMW M3 || 2004 BMW M3 || 2004 Nissan 350Z |
|
|
|
| The Following User Says Thank You to King Tut For This Useful Post: | wnt3d (08-05-2015) |
|
08-04-2015, 10:13 AM
|
#8 |
|
Senior Member
Join Date: Jul 2012
Drives: 2013 FRS Whiteout
Location: MIA
Posts: 1,545
Thanks: 557
Thanked 469 Times in 340 Posts
Mentioned: 33 Post(s)
Tagged: 5 Thread(s)
|
Keep us posted on the track experience and how the cooler handles it. I've been dying to jump on the track but afraid, still need my oil cooler though.
__________________
GTX2867R, moto-tuned , tomei op , motiv fp , Invidia Q300 ti , Rota titan 17x9 +42 , nt555 255/40 , ST coilovers w/cascam , Hotchkis sways
|
|
|
|
| The Following User Says Thank You to yomny For This Useful Post: | wnt3d (08-05-2015) |
|
08-04-2015, 11:14 AM
|
#9 | |
|
Killed Scion

Join Date: Jun 2015
Drives: 2013 FR-S Whiteout
Location: East Bay, CA
Posts: 7,721
Thanks: 8,285
Thanked 7,307 Times in 4,485 Posts
Mentioned: 334 Post(s)
Tagged: 185 Thread(s)
|
 Thats one sexy lookin car you got there! Definately subscribing to this thread. Keep us posted on the turbo set up and any more tack days you'll end up doing. Keep up the good work! 
__________________
Miyuki みゆき "Beautiful Snow" The Whiteout FR-S Instagram: trevor.parque Quote:
|
|
|
|
|
|
08-04-2015, 01:53 PM
|
#10 |
|
Senior Member
Join Date: Mar 2014
Drives: FRS monogram
Location: victoria BC
Posts: 184
Thanks: 10
Thanked 147 Times in 42 Posts
Mentioned: 3 Post(s)
Tagged: 0 Thread(s)
|
very clean work. keep it up
and more pictures 
|
|
|
|
| The Following User Says Thank You to Top-Secret For This Useful Post: | wnt3d (08-05-2015) |
|
08-05-2015, 05:33 AM
|
#11 |
|
Senior Member
Join Date: Sep 2014
Drives: 14 Subaru BRZ Limited WRB
Location: Bionis
Posts: 133
Thanks: 273
Thanked 54 Times in 40 Posts
Mentioned: 2 Post(s)
Tagged: 1 Thread(s)
|
Quality build right here.
That Nur spec looks so good without the wing. |
|
|
|
| The Following User Says Thank You to 10Stars For This Useful Post: | wnt3d (08-05-2015) |
|
08-05-2015, 05:57 AM
|
#12 |
|
Member
Join Date: Nov 2014
Drives: GT86
Location: Japan / UK
Posts: 286
Thanks: 17
Thanked 318 Times in 130 Posts
Mentioned: 4 Post(s)
Tagged: 0 Thread(s)
|
I have to ask, after replacing the clutch did the marbles-rolling-down-a-pipe sound when the engine is labouring become reduced/disappear?
|
|
|
|
| The Following User Says Thank You to Futaba For This Useful Post: | wnt3d (08-05-2015) |
|
08-05-2015, 10:45 AM
|
#13 | |
|
Member
Join Date: Jun 2013
Drives: Toyota GT86
Location: Western Australia
Posts: 63
Thanks: 36
Thanked 61 Times in 36 Posts
Mentioned: 0 Post(s)
Tagged: 0 Thread(s)
|
Quote:

__________________
|
|
|
|
|
|
08-05-2015, 10:47 AM
|
#14 | |
|
Member
Join Date: Jun 2013
Drives: Toyota GT86
Location: Western Australia
Posts: 63
Thanks: 36
Thanked 61 Times in 36 Posts
Mentioned: 0 Post(s)
Tagged: 0 Thread(s)
|
Quote:
- thank you everyone for the kind feedback, just waiting for some titanium heat wrap to arrive and I'll wrap up the manifold and have more pretty pictures of the install as I go. In the mean time I still need to plug in the injectors, fuel pump and ebc.
__________________
|
|
|
|
|
|
|
|
|
|
| Tags |
| boost, e85 |
|
|
 Similar Threads
|
||||
| Thread | Thread Starter | Forum | Replies | Last Post |
| Red GT86 from Europe - Slow build - Daily+track. | Iceman | Member's Car Journals | 53 | 12-22-2020 02:59 PM |
| Pacific Auto Films' Daily/Track Build | Pacific Auto | Member's Car Journals | 9 | 10-29-2015 09:48 AM |
| FRS slow daily/ drift build | SciOnDrifTtSlIdeR | Member's Car Journals | 7 | 04-19-2015 01:50 AM |
| Daily Driver + Autocross/Track Car build on a Budget | ToyoburuBRZ | Member's Car Journals | 29 | 12-19-2014 09:32 AM |


 Miyuki みゆき
 Celica 86