


|
||||||
| DIY (Do-It-Yourself) Guides For all DIYs. |
 |
|
|
Thread Tools | Search this Thread |
 03-05-2013, 09:42 PM
|
#1 |
|
Negative Mass

Join Date: May 2012
Drives: Orange Metallic AVO Turbo GT86 6MT
Location: Arlington VA
Posts: 702
Thanks: 272
Thanked 345 Times in 201 Posts
Mentioned: 56 Post(s)
Tagged: 1 Thread(s)
|
DIY Install Mach V Carbon Fiber Hood Dampers:
Hey guys,
I decided to make this DIY half way into my install. I was following the simple set of instructions provided with the dampers themselves, and the pictures that @Mach V Dan provides in their for sale thread. I realized, about 30 minutes into what was supposed to be a 30 minute install, that I had made a lot of very stupid assumptions, and I was having difficulty seeing the exact mounting points in the pictures provided. So, if you're as much of an idiot as I am, this guide should help you out a bit. Installation The install requires only a 12mm socket wrench, some cleaning solution, and some wits (I did not bring the last thing, hence the DIY). Nice-to-haves are a flashlight (it's damn hard to see that lower mounting point), some nice working gloves because you're going to need some elbow grease to get those bolts off initially, and some needle-nose pliers because if you're like me you drop things a lot... The order of operations for the right (passenger) damper is as follows: 1. Identify the lower mounting point 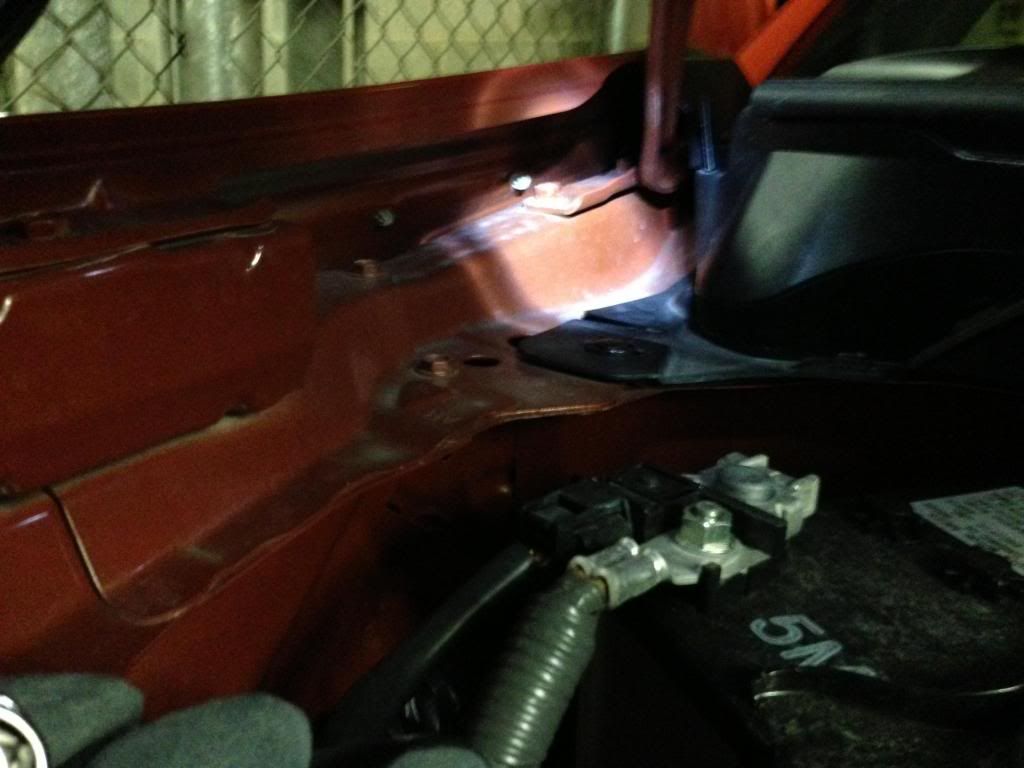 2. Separate the socket from the exposed metal end of the strut and remove the locking pin from the socket 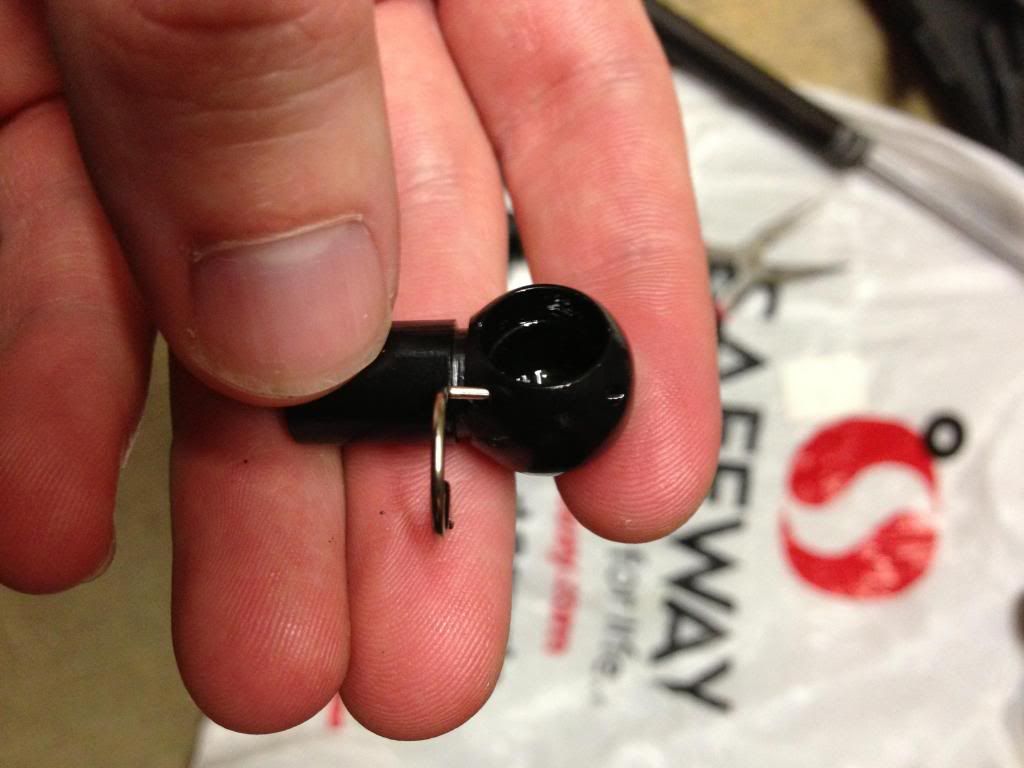 3. Attach the socket to the mounting bracket and insert locking pin 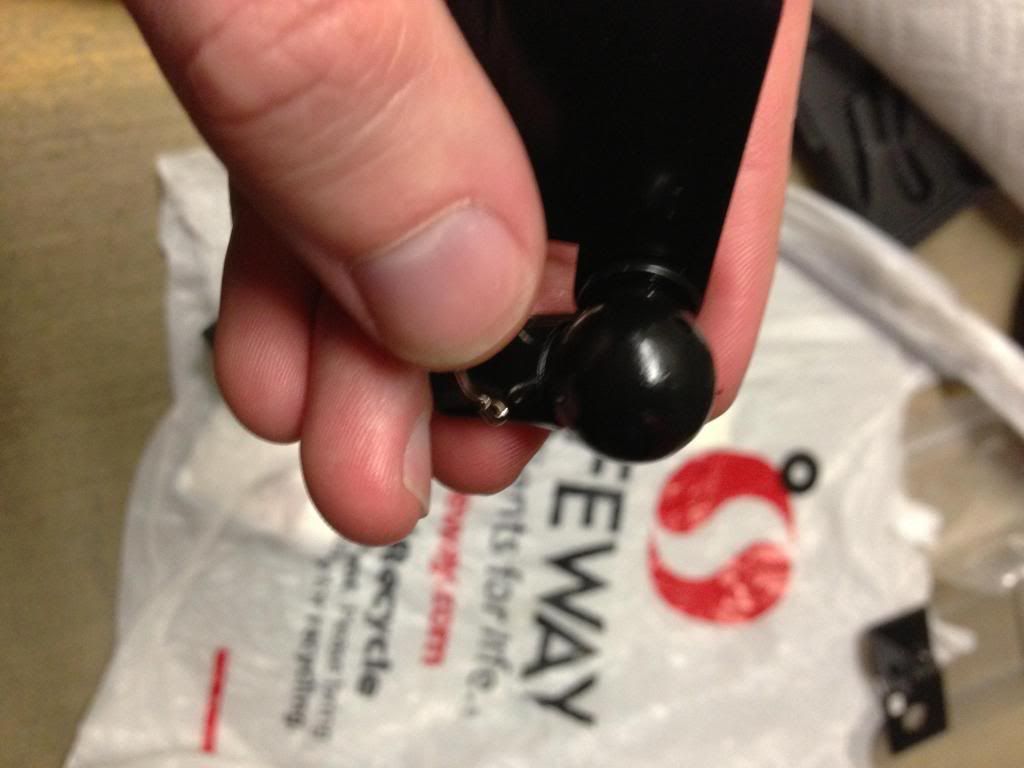 4. Remove the bolt from the fender 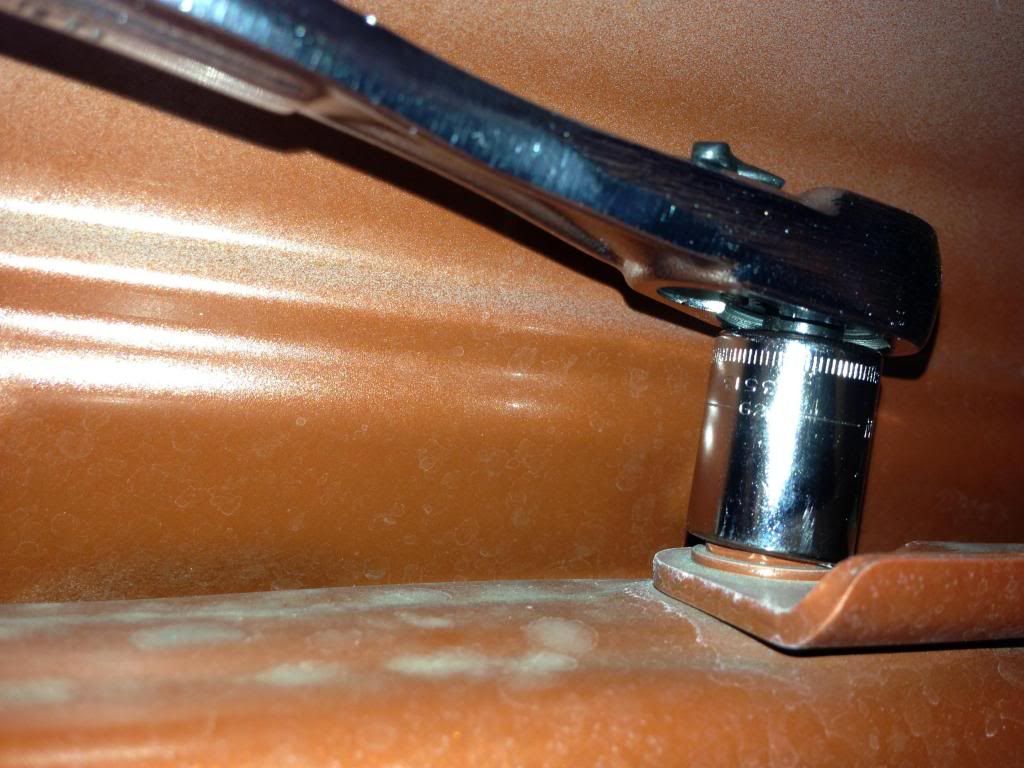 5. Poisition the lower mounting bracket 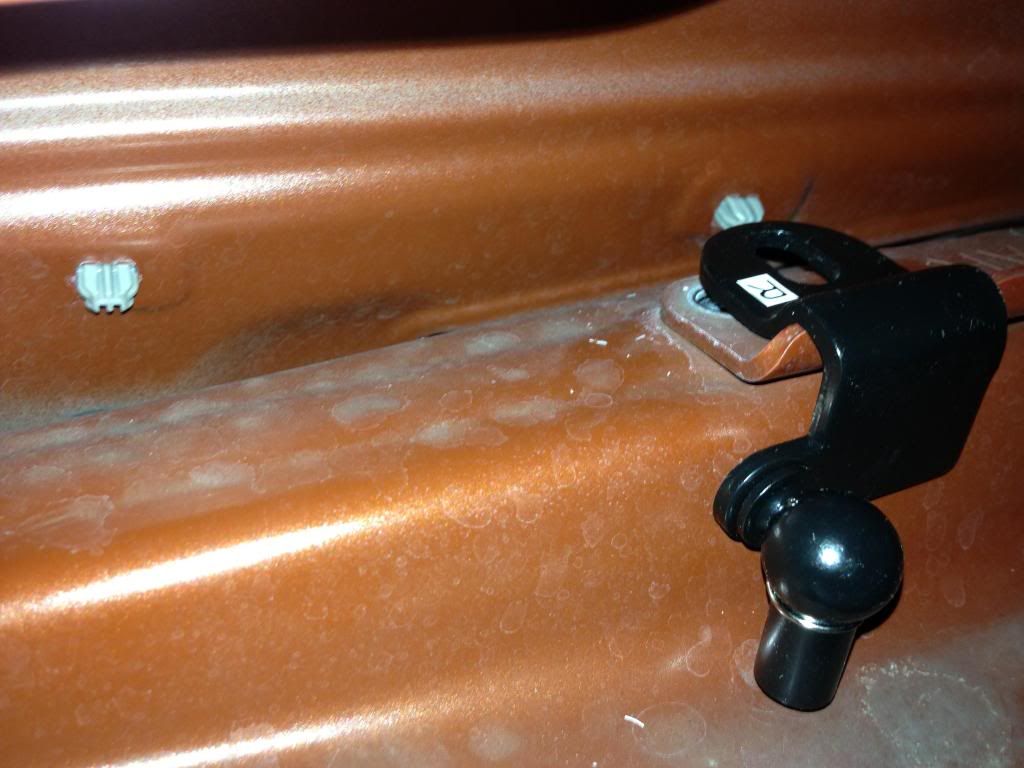 6. Put one of the provided washers on the bolt and bolt on the mounting bracket 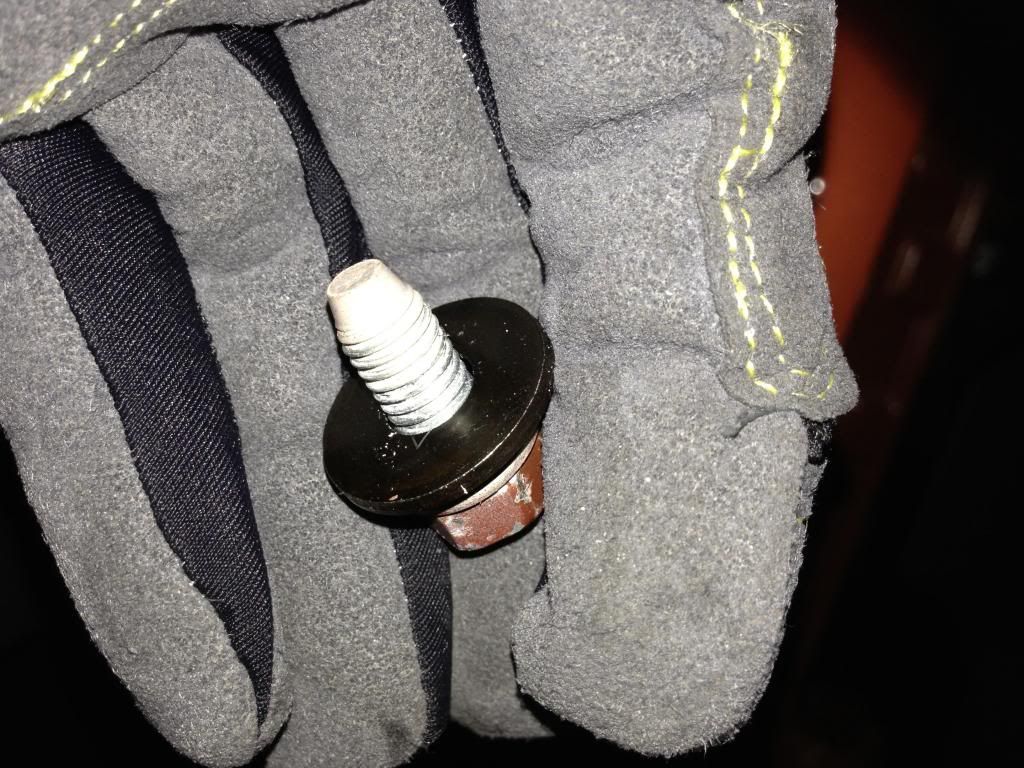 7. Screw the damper into the lower ball/socket joint 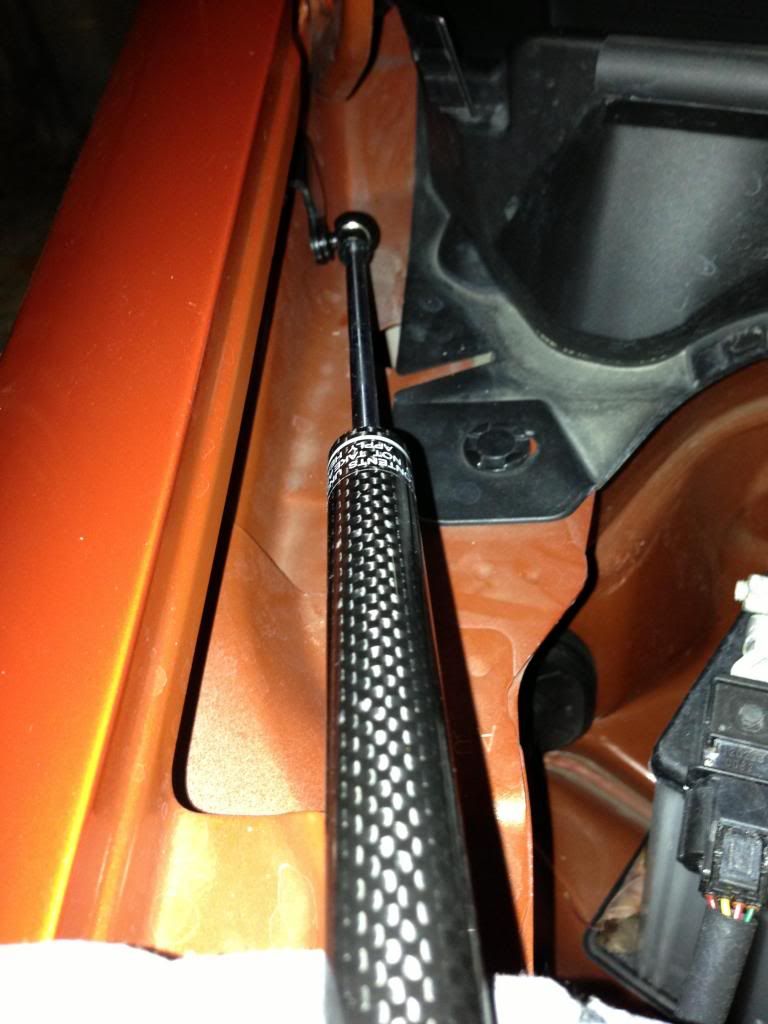 8. Identify the upper mounting position (the upper bolt in this picture) 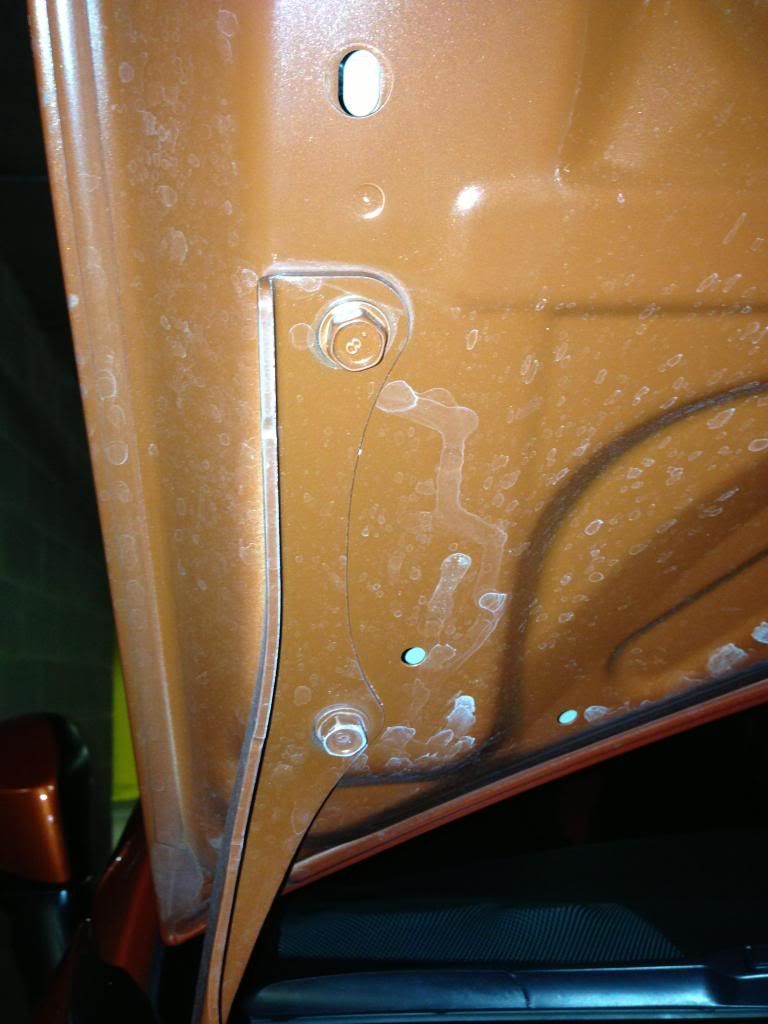 9. Remove the bolt 10. Throughly clean above the bolt position (I used isopropyl and it seemed to take just a tad of color with it, don't know if it was paint. There might be something safer). 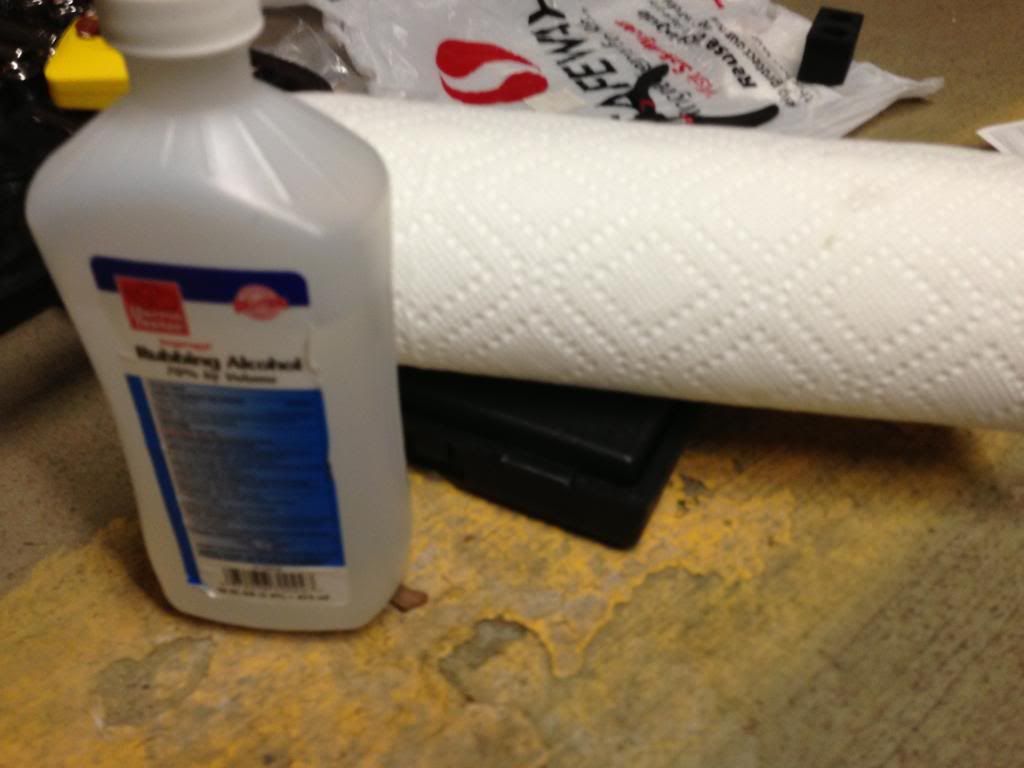 11. Remove protective film from VHB tape end of upper mounting bracket and push it into position 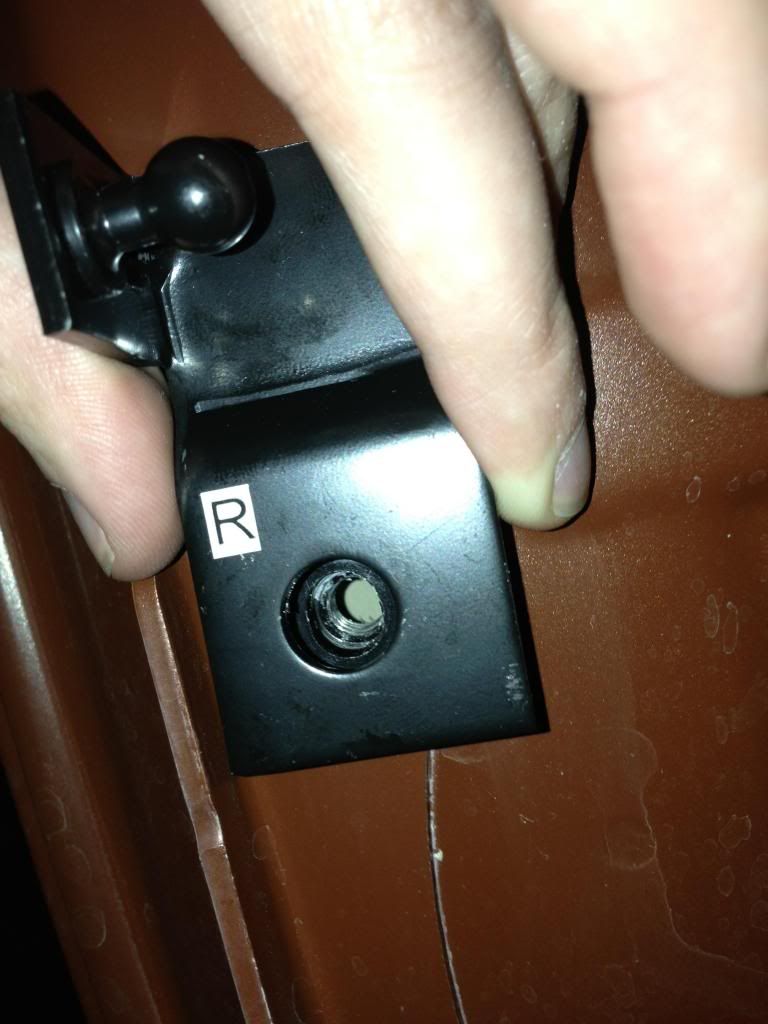 12. Add the provided washer to the bolt and screw it on hand tight (careful not to be too tight as it will pull against the tape for now) 13. Remove the locking pin from the upper socket 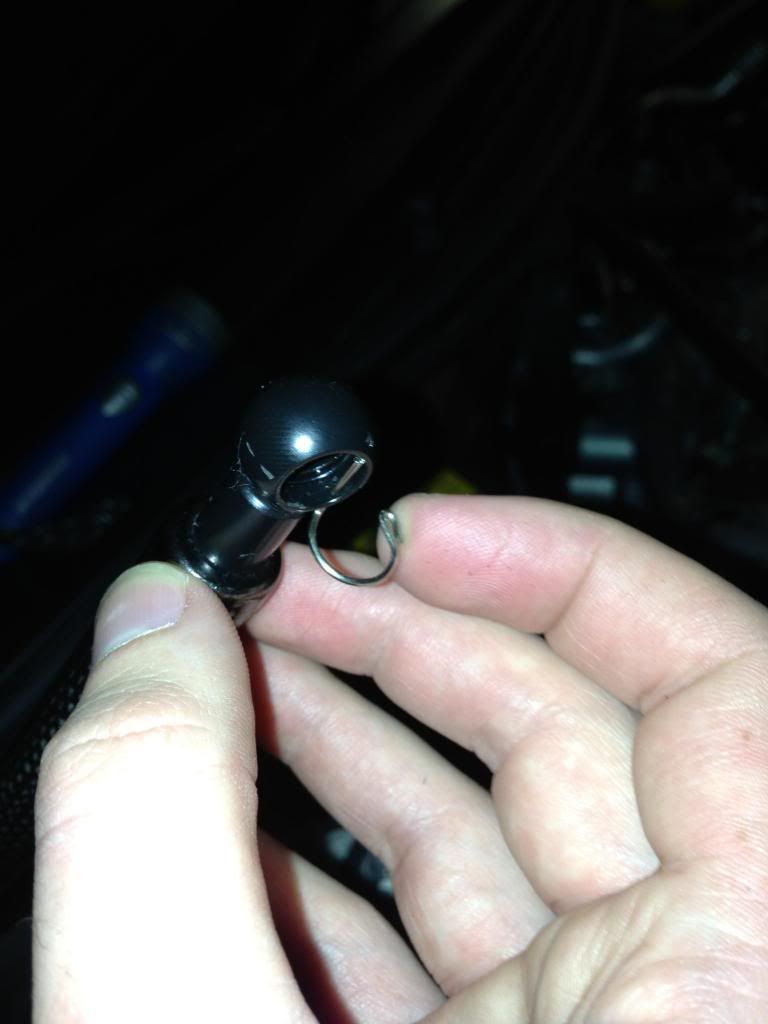 14. Lift hood with your left shoulder and hold the support rod on your right shoulder 15. Press the upper socket on the damper onto the ball attached to the upper mounting bracket and insert the locking pin 16. Tighten bolt The left side installation is an exact mirror, but it can be a bit tedious because the support rod might catch when you're on step 14. Also, because I'm right handed I had a much easier time with the lower bolt on the passenger side. Some final thoughts The bolts are very, very tight at first as they were painted in place. Be ready to really press against them hard to crack that initial lock. The lower bolts are nigh impossible to deal with without a socket wrench (don't even bother ugh...). You should have a 1/2 inch or 12mm normal wrench handy to tighten the upper bracket when you're done (the socket can't fit behind the damper). Sorry about a lack of pictures at a couple key points, those tended to require both my hands making it hard to take a photo. And a short review The product is awesome, looks awesome. I will say the dampers seem a bit anemic when you first open the hood, but if you give them a little help until the hood is about half-way open they can do the rest, and they hold it open for you! Of course, you should probably still use the support rod if you're really safety conscious... Finally, enjoy the end product on each side! 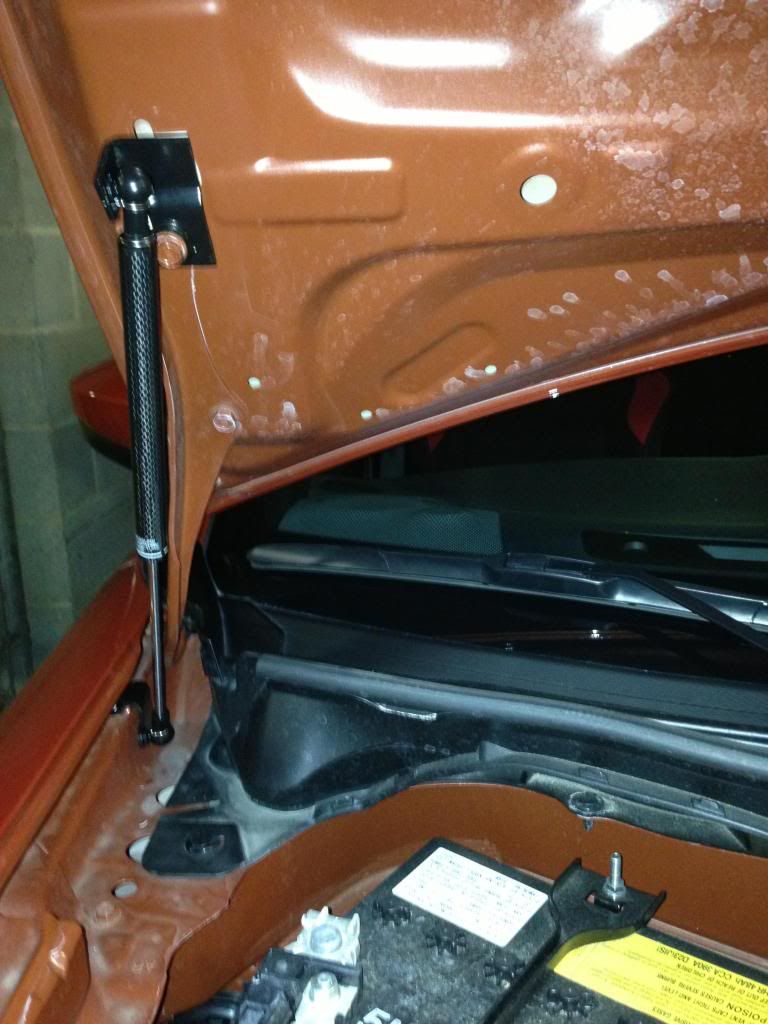 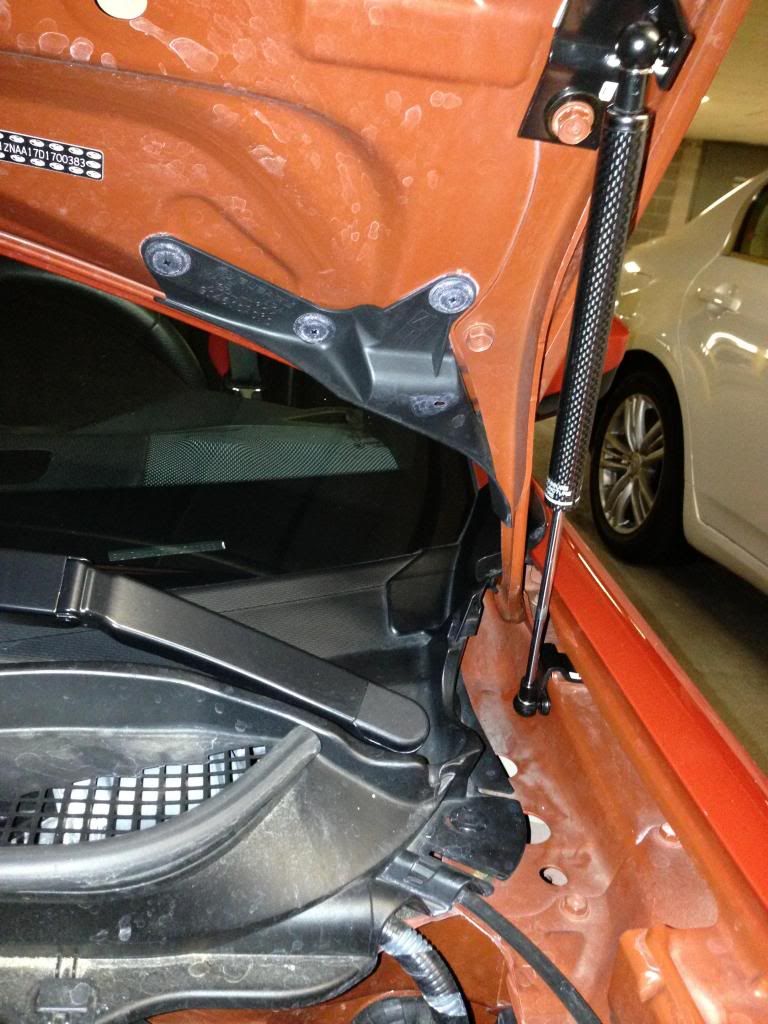 Hope the guide helped you! Matt |

|

|
| The Following User Says Thank You to nataku For This Useful Post: | calis5nest (05-11-2013) |
|
04-10-2013, 08:17 PM
|
#2 |
|
Member

Join Date: Sep 2012
Drives: Scion FR-S
Location: Coamo, Puerto Rico
Posts: 99
Thanks: 31
Thanked 48 Times in 28 Posts
Mentioned: 2 Post(s)
Tagged: 0 Thread(s)
 |
Dampers
Do you know how much weight do the dampers support; I change my hood and is a little bit havier than the OEM
|
|
|
|
|
04-10-2013, 09:44 PM
|
#3 |
|
Negative Mass
Join Date: May 2012
Drives: Orange Metallic AVO Turbo GT86 6MT
Location: Arlington VA
Posts: 702
Thanks: 272
Thanked 345 Times in 201 Posts
Mentioned: 56 Post(s)
Tagged: 1 Thread(s)
|
That's more a question for @Mach V Dan. I would guess anything near the weight of the OEM hood should be fine, but I don't wanna speak on something I'm not sure of. They old the hood up without issue, once it's more than 30% open they take care of it.
|
|
|
|
| The Following User Says Thank You to nataku For This Useful Post: | Juan_Ri (04-19-2013) |
|
|
|
|
|
|
|
 Similar Threads
|
||||
| Thread | Thread Starter | Forum | Replies | Last Post |
| Seibon Carbon Fiber OEM Hood Install w/ Weight Comparison and PICS! | TyperRspec789 | Cosmetic Modification (Interior/Exterior/Lighting) | 23 | 02-12-2023 05:15 AM |
| FS: Rexspeed carbon fiber hood dampers | serial gixxer | Exterior Parts (Aero, Lighting, Etc.) | 1 | 03-02-2013 03:40 AM |
| Greddy Carbon Hood Dampers instock!!! | Evasive Motorsports | Exterior Parts - The Rest | 2 | 01-03-2013 08:33 PM |


