


 04-27-2021, 10:30 AM
|
#127 | |
|
Senior Citizen Member

Join Date: Jul 2018
Drives: Then-1977 Celica GT Now-2017 860SE
Location: In A Galaxy Far Far Away
Posts: 393
Thanks: 145
Thanked 385 Times in 201 Posts
Mentioned: 12 Post(s)
Tagged: 1 Thread(s)
|
Quote:
https://www.thingiverse.com/thing:4840911 Is the number correct or has the project been removed? Thanks! |
|

|

|
|
04-27-2021, 01:40 PM
|
#128 |
|
Senior Member
Join Date: Jun 2015
Drives: BRZ Limited
Location: GA
Posts: 128
Thanks: 9
Thanked 36 Times in 31 Posts
Mentioned: 1 Post(s)
Tagged: 0 Thread(s)
|
I've always been interested in Innovated Dynamics's FR-S brake ducts and but since I own a BRZ, I've never purchased them. But with contemplation of swapping to a FR-S front bumper, I've thought about those ducts again. Unfortunately Innovated Dynamics has now shut down. Of course, there are other brake duct kits on the market such as the one made by APR, and others, but in terms of design, I liked the Innovated Dynamics version.
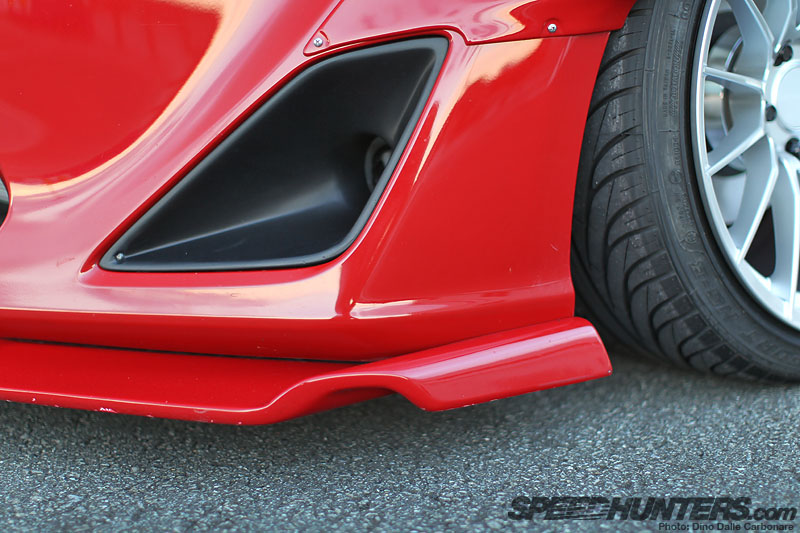 Another one that I like, but has never been brought to production, are the ML24 brake ducts.  What I'm thinking is that maybe we can 3D scan or laser scan an FR-S fog light bezel piece so that we can have the edge shape as a 3D model along with the snap on edges. 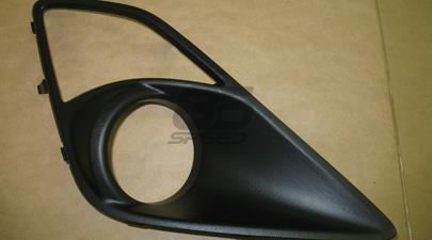 Then we can bring it into SolidWorks or an equivalent program and remodel the interior part so that it has a nice concaving duct, similar to the ML24 one. Afterward, we 3D print a mold for the piece and then cast our trim piece using that mold, and sand it afterward. I would then skin it in carbon fiber using resin, carbon fiber fabric, and clear coat, and wet sand it. How difficult would the process of scanning, and then manipulating the model, and then either 3D-printing the piece or 3D-printing a mold for the piece be? I reckon we can do one and then mirror the object for the other side. |
|
|
|
|
04-27-2021, 07:13 PM
|
#129 | |
|
Senior Member
Join Date: Jul 2016
Drives: '13 BRZ Limited
Location: League City, TX
Posts: 195
Thanks: 16
Thanked 100 Times in 60 Posts
Mentioned: 3 Post(s)
Tagged: 0 Thread(s)
|
Quote:
I had just joined thingiverse to upload this. It showed up for me with that link, but it also tells me I need to wait 24 hrs to publish as a new member. I went back and published it. Let me know if it doesn't work now - sorry for the hassle. |
|
|
|
|
| The Following User Says Thank You to 86league For This Useful Post: | LimitedSlip (04-27-2021) |
|
04-27-2021, 07:26 PM
|
#130 | |
|
1st86 Driver!

Join Date: Feb 2012
Drives: '13 FR-S (#3 of 1st 86)
Location: Powder Springs, GA
Posts: 19,811
Thanks: 38,817
Thanked 24,936 Times in 11,375 Posts
Mentioned: 182 Post(s)
Tagged: 4 Thread(s)
|
Quote:
__________________
 Visit my Owner's Journal where I wax philosophic on all things FR-S Post your 86 or see others in front of a(n) (in)famous landmark. What fits in your 86? Show us the "Junk In Your Trunk". |
|
|
|
|
|
04-27-2021, 08:15 PM
|
#131 | |
|
Senior Citizen Member
Join Date: Jul 2018
Drives: Then-1977 Celica GT Now-2017 860SE
Location: In A Galaxy Far Far Away
Posts: 393
Thanks: 145
Thanked 385 Times in 201 Posts
Mentioned: 12 Post(s)
Tagged: 1 Thread(s)
|
Quote:
|
|
|
|
|
|
05-21-2021, 08:13 PM
|
#132 |
|
Member
Join Date: Apr 2020
Drives: 2018 Subaru BRZ Ts
Location: Columbus, OH
Posts: 26
Thanks: 10
Thanked 2 Times in 1 Post
Mentioned: 0 Post(s)
Tagged: 0 Thread(s)
|
Has anyone made an .stl file for exhaust covers before? I feel like someone wouldve made one in the past by now.
|
|
|
|
|
05-24-2021, 09:27 AM
|
#133 | |
|
Senior Member

Join Date: Jun 2014
Drives: 13 Subaru BRZ
Location: Maryland
Posts: 345
Thanks: 121
Thanked 135 Times in 99 Posts
Mentioned: 3 Post(s)
Tagged: 0 Thread(s)
|
Quote:
What do you mean by exhaust covers? Most of the people in here are ringing and designing for plastic based printers, which Im doubting would hold up against anything exhaust related Sent from my iPhone using Tapatalk |
|
|
|
|
|
05-24-2021, 09:33 AM
|
#134 | |
|
LMGTFY

Join Date: Mar 2016
Drives: 13 FRS, 91 Miata
Location: Lava Town, HI
Posts: 2,776
Thanks: 5,561
Thanked 3,646 Times in 1,625 Posts
Mentioned: 15 Post(s)
Tagged: 0 Thread(s)
|
Quote:

|
|
|
|
|
|
05-24-2021, 09:34 AM
|
#135 | |
|
Senior Member
Join Date: Jun 2014
Drives: 13 Subaru BRZ
Location: Maryland
Posts: 345
Thanks: 121
Thanked 135 Times in 99 Posts
Mentioned: 3 Post(s)
Tagged: 0 Thread(s)
|
Quote:
Ahhh point taken Sent from my iPhone using Tapatalk |
|
|
|
|
|
06-02-2021, 02:37 AM
|
#136 | |
|
Undisputed El Presidente

Join Date: Jun 2012
Drives: Zenki 37J ZN6
Location: Stockton, CA
Posts: 11,571
Thanks: 9,382
Thanked 9,397 Times in 5,261 Posts
Mentioned: 374 Post(s)
Tagged: 33 Thread(s)
|
Quote:
__________________
 "Just like how a strut bar somehow enables you to corner 20MPH faster around a cloverleaf on-ramp, when the reality is, you can do it already but you just don't have to balls to do it." - CSG David |
|
|
|
|
|
06-02-2021, 10:52 AM
|
#137 | |
|
Senior Member
Join Date: Jul 2016
Drives: '13 BRZ Limited
Location: League City, TX
Posts: 195
Thanks: 16
Thanked 100 Times in 60 Posts
Mentioned: 3 Post(s)
Tagged: 0 Thread(s)
|
Quote:
|
|
|
|
|
| The Following User Says Thank You to 86league For This Useful Post: | Dadhawk (06-02-2021) |
|
06-15-2021, 09:56 AM
|
#138 |
|
1st86 Driver!
Join Date: Feb 2012
Drives: '13 FR-S (#3 of 1st 86)
Location: Powder Springs, GA
Posts: 19,811
Thanks: 38,817
Thanked 24,936 Times in 11,375 Posts
Mentioned: 182 Post(s)
Tagged: 4 Thread(s)
|
For those of you that are way more of a 3D print expert than I am, can you use a 3D pen (which is basically just a hot glue gun sized for filament) to "weld" 3d printed pieces together?
It seems like it should work either on its own or as a "spot welder" to hold pieces together while glue dries but I was curious to see if anyone has experience doing it.
__________________
Visit my Owner's Journal where I wax philosophic on all things FR-S Post your 86 or see others in front of a(n) (in)famous landmark. What fits in your 86? Show us the "Junk In Your Trunk". |
|
|
|
|
06-15-2021, 04:41 PM
|
#139 | |
|
Senior Member
Join Date: Feb 2018
Drives: 2017 86 860 Special Edition
Location: Toronto
Posts: 559
Thanks: 198
Thanked 461 Times in 241 Posts
Mentioned: 3 Post(s)
Tagged: 0 Thread(s)
|
Quote:
I would practice on dud prints before you attempt something precious. |
|
|
|
|
| The Following User Says Thank You to RayRay88 For This Useful Post: | Dadhawk (06-15-2021) |
|
06-15-2021, 07:14 PM
|
#140 | |
|
1st86 Driver!
Join Date: Feb 2012
Drives: '13 FR-S (#3 of 1st 86)
Location: Powder Springs, GA
Posts: 19,811
Thanks: 38,817
Thanked 24,936 Times in 11,375 Posts
Mentioned: 182 Post(s)
Tagged: 4 Thread(s)
|
Quote:
__________________
Visit my Owner's Journal where I wax philosophic on all things FR-S Post your 86 or see others in front of a(n) (in)famous landmark. What fits in your 86? Show us the "Junk In Your Trunk". |
|
|
|
|
|
|
|
|
 |
| Thread Tools | Search this Thread |
|
|
 Similar Threads
|
||||
| Thread | Thread Starter | Forum | Replies | Last Post |
| Official DTM Autobody Services Thread for FT86Club! | DTMAUTOBODY | Southern California | 9 | 12-31-2013 02:09 PM |
| Official FT86Club Chatroom? | wrxgoose | Site Announcements / Questions / Issues | 13 | 09-15-2012 05:26 PM |
| Official FT86Club decal idea? | Hanzo | Scion FR-S / Toyota 86 GT86 General Forum | 71 | 06-21-2012 08:09 PM |


