


|
||||||
| Engine, Exhaust, Transmission Discuss the FR-S | 86 | BRZ engine, exhaust and drivetrain. |
 |
|
|
Thread Tools | Search this Thread |
 03-14-2016, 08:59 AM
|
#29 |
|
Senior Member

Join Date: Dec 2015
Drives: 2015 86 GTS + Mitsi Lancer GSR
Location: Lismore AUS
Posts: 215
Thanks: 127
Thanked 93 Times in 68 Posts
Mentioned: 3 Post(s)
Tagged: 0 Thread(s)
|
I was actually going to get my own muffler delete made up, possibly even do it as an axle back cannon or something, but have it as V-Band clamps and change the stock muffler to suit so I can just swap it over with ease. Or butterfly that changes it to a dump straight down.
I just love the sound of the supercharger and stock catback sometimes |

|

|
| The Following User Says Thank You to COO86L For This Useful Post: | Joyride86 (03-14-2016) |
|
03-14-2016, 12:55 PM
|
#30 | |
|
Senior Member
Join Date: Mar 2015
Drives: 2015 FRS - FFR GTM
Location: Key Largo, FL
Posts: 785
Thanks: 240
Thanked 817 Times in 378 Posts
Mentioned: 9 Post(s)
Tagged: 0 Thread(s)
|
Quote:
I'm afraid not,,,, got side tracked after looking for a cheap local muffler for a while and not finding one. It's amazing the number of guys that want $200 for a used muffler. I've got some time now,,, so let me look again. Still would like to do this. As a sidebar,,, I've driven my FRS 25K miles this last year. A super little car. I'm shoping for springs and rims/tires now.
__________________
 2015 FR-S - One Day I'll Finish The Swap |
|
|
|
|
|
03-14-2016, 01:15 PM
|
#31 |
|
Senior Member
Join Date: Mar 2015
Drives: 2015 FRS - FFR GTM
Location: Key Largo, FL
Posts: 785
Thanks: 240
Thanked 817 Times in 378 Posts
Mentioned: 9 Post(s)
Tagged: 0 Thread(s)
|
__________________
2015 FR-S - One Day I'll Finish The Swap |
|
|
|
|
03-16-2016, 05:47 PM
|
#32 | |
|
Senior Member
Join Date: Mar 2015
Drives: 2015 FRS - FFR GTM
Location: Key Largo, FL
Posts: 785
Thanks: 240
Thanked 817 Times in 378 Posts
Mentioned: 9 Post(s)
Tagged: 0 Thread(s)
|
Quote:
Picked this one up today for $30,,,, let the fun begin. I've been thinking about how to do this,,, but no decision as of yet. Maybe the first pass I'll just keep it simple and see how it sounds. If anyone has any ideas as to how these mods should go I'm all ears. Keep in mind it's a stock exhaust.
__________________
2015 FR-S - One Day I'll Finish The Swap |
|
|
|
|
| The Following User Says Thank You to gtpvette For This Useful Post: | ort895 (03-28-2016) |
|
03-16-2016, 06:56 PM
|
#33 |
|
Mountain Runner

Join Date: Jan 2014
Drives: 2013 Subaru BRZ Limited 6MT
Location: Boone, NC and Charlotte area NC
Posts: 714
Thanks: 489
Thanked 142 Times in 105 Posts
Mentioned: 8 Post(s)
Tagged: 2 Thread(s)
|
I can take a picture when I get home but a friend and I both just spaced out our mufflers a ways from the mid pipe. I have about an inch long gap there. Some gas still hits the muffler and at higher speeds it exhibits less drone than a track pipe. The degree of spacing affects both the acoustics and the volume.
A lot of people are probably thinking "you're an idiot and will melt your bumper or something" but my friend has one of the first FR-S' and has had it that way since just after purchase, with absolutely no issues whatsoever, sounds great too. We both intend to get really good aftermarket cat-backs (nameless is my intent) at some point and didn't see the point in spending limited college funds on something that wouldn't be very good (cheaply made aftermarket parts aren't fun). ANYWAY to the brief tutorial. Parts: further explanation in the steps Two bolts at about 2.5 inches long Two nuts of equal threads 2-6 quarter inch nuts for use as washers A few regular washers for fine tuning the gap. Two wrenches, I want to say that the OE nuts/bolts are 13mm but I'm not 100% sure and I am out of town at the moment so I can update later if necessary. Remove the two bolts that connect the mid pipe to the muffler. You can jack the back left up for this and make it super easy, or you can just crawl under. Breaking everything loose is the only hard part of this whole process. Be careful to not strip the nuts, I could see someone doing that if they weren't a little careful. Fetch some bolts of equal diameter (to OE) but about 2.5 inch length at a hardware store. If you're worried about them rusting or getting damaged get spares, I did but haven't used them in over a year of use so far. Buy some nuts that are just barely larger in inside diameter to the outside diameter of your bolts, so that they can slide over the bolt but don't have too much play. These are your spacers; my friend used powder-coated spacers from his Legends racecar when he did his, so if you have those laying around too then more power to you. If you want things to be perfect than also grab a few regular washers so you can fine-tune your preferred sound. While you have the muffler uncoupled, be sure to remove the gasket that sits between the two pipes, that *can* melt slowly over time, but won't hurt anything if it does (my friend didn't remove his and I did remove mine, his pipes are dirtier… he doesn't care). Bolt everything back together with whatever spacing you choose, anything more than like an inch and a quarter starts to push the left exhaust tip out a tiny bit (noticeably): but you'll be approaching track pipe loud after that point anyway. If you don't like it, oh no! You can just put it all back together in a few minutes. Congratulations, you spent about $8 and don't need to chop up a muffler..? I am curious how the chopping will go for you though! Edit: Hope I didn't thread jack you too hard -_-'
__________________
2013 BRZ 6MT Limited: "Quick as Hell, on a Budget" Build Ceramic Coated Gruppe-S UEL/OP Konig Hypergrams RS4 200tw Koni Yellows, Eibach Springs Ferodo DS2500's
Last edited by Keenercarguy; 03-16-2016 at 07:18 PM. |
|
|
|
| The Following User Says Thank You to Keenercarguy For This Useful Post: | COO86L (03-28-2016) |
|
03-27-2016, 08:04 PM
|
#34 |
|
Senior Member
Join Date: Mar 2015
Drives: 2015 FRS - FFR GTM
Location: Key Largo, FL
Posts: 785
Thanks: 240
Thanked 817 Times in 378 Posts
Mentioned: 9 Post(s)
Tagged: 0 Thread(s)
|
Ok,, finally got around to cutting open the muffler. All cuts within the spot welds. I'm thinking I'll put a plate that covers the whole right side,,, and also cover the left side non-issue holes.
Cutting the pipes off was a bit of a problem. My 4.5" grinder/chop saw couldn't get in there. I ended up using a reciprocating saw to chop off the pipes. It was PITA. I left a flap on the muffler skin as it'll make it easier to weld it up. You'll notice in the first picture that internally those larger sections that run to the tips have perforations and sound absorbing material. Not a lot,, but some. As a sidebar,, got my 949Racing 17x9 rims, BFG tires and Racecomp springs this week! Sweet.
__________________
2015 FR-S - One Day I'll Finish The Swap Last edited by gtpvette; 03-28-2016 at 06:56 AM. |
|
|
|
| The Following User Says Thank You to gtpvette For This Useful Post: | FRSBRZGT86FAN (03-27-2016) |
|
03-28-2016, 08:03 AM
|
#35 |
|
Senior Member

Join Date: Aug 2014
Drives: 2013 BRZ
Location: North Carolina
Posts: 695
Thanks: 195
Thanked 139 Times in 113 Posts
Mentioned: 2 Post(s)
Tagged: 0 Thread(s)
|
keep it coming

__________________
Yeah its an auto, deal with it.
|
|
|
|
|
03-28-2016, 08:25 AM
|
#36 | |
|
Senior Member
Join Date: Dec 2015
Drives: 2015 86 GTS + Mitsi Lancer GSR
Location: Lismore AUS
Posts: 215
Thanks: 127
Thanked 93 Times in 68 Posts
Mentioned: 3 Post(s)
Tagged: 0 Thread(s)
|
Quote:
How much gap did you have? About 1 nut width? I need pictures. I'm going to try this on my other car. |
|
|
|
|
|
03-28-2016, 08:36 AM
|
#37 | |
|
Senior Member
Join Date: Aug 2014
Drives: 2013 BRZ
Location: North Carolina
Posts: 695
Thanks: 195
Thanked 139 Times in 113 Posts
Mentioned: 2 Post(s)
Tagged: 0 Thread(s)
|
Quote:
__________________
Yeah its an auto, deal with it.
|
|
|
|
|
|
03-28-2016, 10:03 AM
|
#38 |
|
Senior Member
Join Date: Mar 2015
Drives: 2015 FRS - FFR GTM
Location: Key Largo, FL
Posts: 785
Thanks: 240
Thanked 817 Times in 378 Posts
Mentioned: 9 Post(s)
Tagged: 0 Thread(s)
|
Ordered a couple of these from ebay this AM,, $7 shipped. They're galvinzed post caps with a 2.5" ID. These should slip over the open unused pipes and I'll put a couple of tacks on them to keep them in place.
As a sidebar,,, anyone ever use a Decibel App on the Iphone??
__________________
2015 FR-S - One Day I'll Finish The Swap Last edited by gtpvette; 03-28-2016 at 10:26 AM. |
|
|
|
| The Following User Says Thank You to gtpvette For This Useful Post: | ort895 (03-28-2016) |
|
03-28-2016, 01:47 PM
|
#39 | |
|
Member
Join Date: Feb 2013
Drives: 13 BRZ SSM
Location: PA
Posts: 98
Thanks: 148
Thanked 55 Times in 36 Posts
Mentioned: 0 Post(s)
Tagged: 0 Thread(s)
|
Quote:
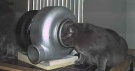
I purchased a used OEM stock Axel Back from a Scion TC 2nd gen. Its a Stainless Steel spun case form, Bullet type muffler. It is straight through design. It is also considerably lighter than the Stock muffler. I flipped it over to fit our cars exhaust configuration. I cut off the TC inlet pipe. Welded on a section of 90* SS pipe, and a new 2 bolt flange. Then added two exhaust hangers to fit up to two of the stock locations. Its still a work in progress, and my welds are ugly. Im still deciding on an exhaust tip. It sounds really good. Low mellow tone, no rasp, no drone.  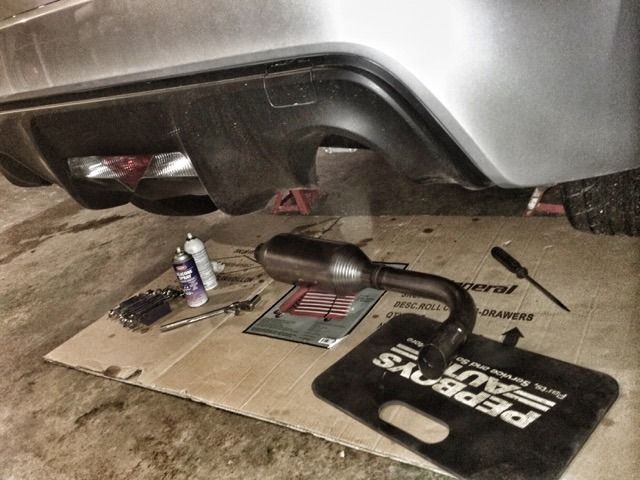 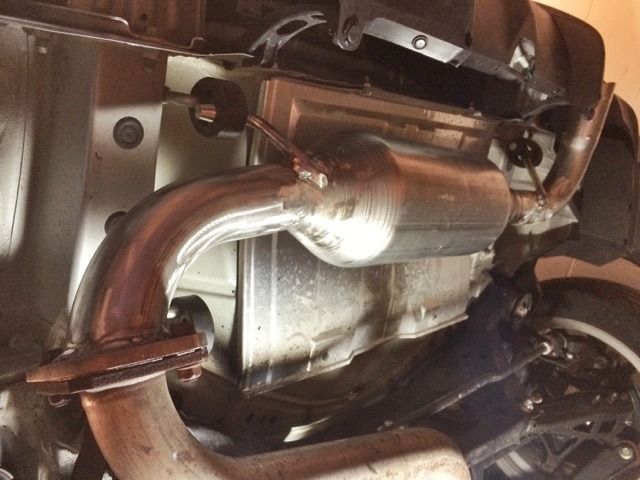 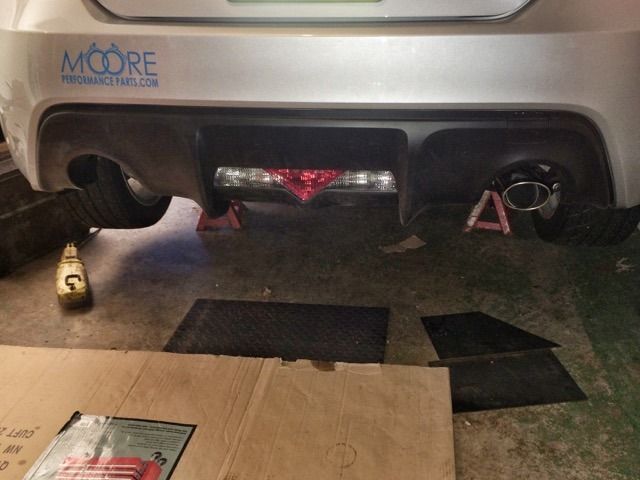
|
|
|
|
|
|
03-28-2016, 01:52 PM
|
#40 | |
|
Mountain Runner
Join Date: Jan 2014
Drives: 2013 Subaru BRZ Limited 6MT
Location: Boone, NC and Charlotte area NC
Posts: 714
Thanks: 489
Thanked 142 Times in 105 Posts
Mentioned: 8 Post(s)
Tagged: 2 Thread(s)
|
Quote:
@ort895. I can take a sound clip with my iPhone once I pick the car up, but unfortunately I don't have a real mic of any kind. Sorry OP for the thread jack, and I bet you'll love the RCE Springs!
__________________
2013 BRZ 6MT Limited: "Quick as Hell, on a Budget" Build Ceramic Coated Gruppe-S UEL/OP Konig Hypergrams RS4 200tw Koni Yellows, Eibach Springs Ferodo DS2500's
|
|
|
|
|
| The Following User Says Thank You to Keenercarguy For This Useful Post: | ort895 (03-28-2016) |
|
03-28-2016, 03:48 PM
|
#41 | |
|
Senior Member
Join Date: Aug 2014
Drives: 2013 BRZ
Location: North Carolina
Posts: 695
Thanks: 195
Thanked 139 Times in 113 Posts
Mentioned: 2 Post(s)
Tagged: 0 Thread(s)
|
Quote:
__________________
Yeah its an auto, deal with it.
|
|
|
|
|
|
03-29-2016, 07:26 AM
|
#42 | |
|
Senior Member
Join Date: Mar 2015
Drives: 2015 FRS - FFR GTM
Location: Key Largo, FL
Posts: 785
Thanks: 240
Thanked 817 Times in 378 Posts
Mentioned: 9 Post(s)
Tagged: 0 Thread(s)
|
Quote:
No worries,,, the more the merrier. It's a pretty clever solution you came up with BTW. I've got a couple of projects around the house to finish before the springs go in,, so it'll be a couple of weeks before I have time. Happy wife = happy life. TURBOCAT,,, nice work on the refit. That's just a flow through with perforated tube and some type of sound suppressor I guess?? Makes me think I should cover all the holes in the baffles on mine. I picked up a small lightweight steel plate at Home Depot last night for $10 that will make the baffle covers. I'll try to cut it to fit tonight. I'm $47 into this at this point. $3 more and I'm over budget
__________________
2015 FR-S - One Day I'll Finish The Swap |
|
|
|
|
| The Following User Says Thank You to gtpvette For This Useful Post: | turbocat (03-30-2016) |
|
|
|
|
|
|
|
 Similar Threads
|
||||
| Thread | Thread Starter | Forum | Replies | Last Post |
| FS: OEM Muffler | bobsacamenoh | Engine, Exhaust, Bolt-Ons | 3 | 12-08-2015 06:49 PM |
| Which muffler to get? | BabY-dOh | Scion FR-S / Toyota 86 GT86 General Forum | 9 | 03-09-2015 06:18 AM |
| TRD Muffler? | Nafe | AUSTRALIA | 0 | 09-29-2013 09:52 PM |
| Ready for a new muffler! | birel | Scion FR-S / Toyota 86 GT86 General Forum | 8 | 04-30-2013 01:22 PM |
| Muffler Delete sound without deleting muffler | sw20kosh | Engine, Exhaust, Transmission | 10 | 01-30-2013 05:09 PM |


