|
|
#113 |
|
Senior Member
Join Date: Jul 2012
Drives: 2013 Scion FRS
Location: Corinth, Mississippi
Posts: 107
Thanks: 92
Thanked 51 Times in 32 Posts
Mentioned: 12 Post(s)
Tagged: 0 Thread(s)
|
Alright guys I did some testing and investigation on my car Just now with my base model frs and here's the results.
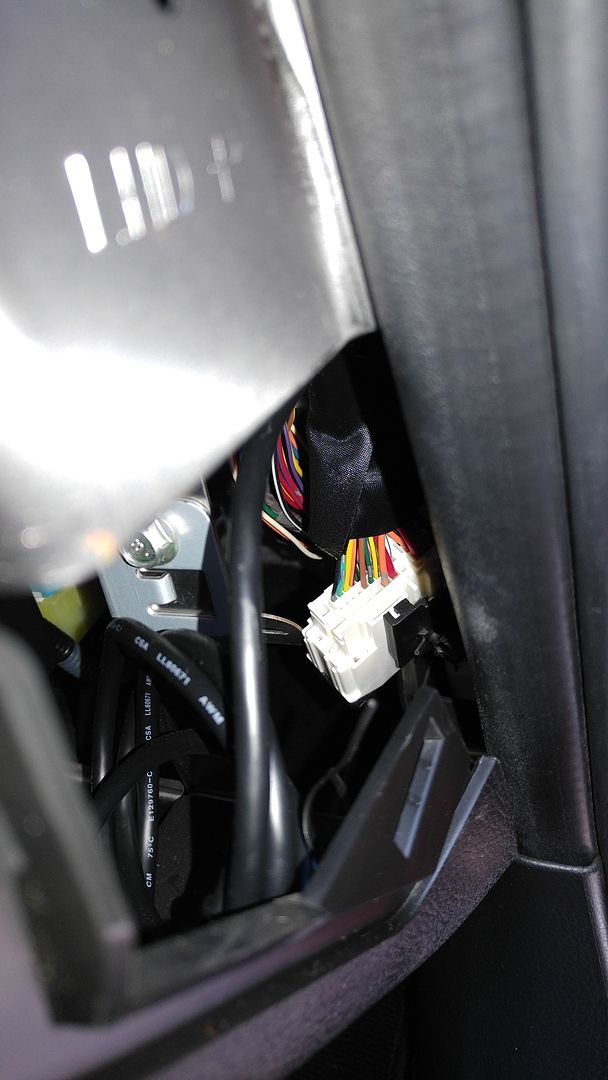
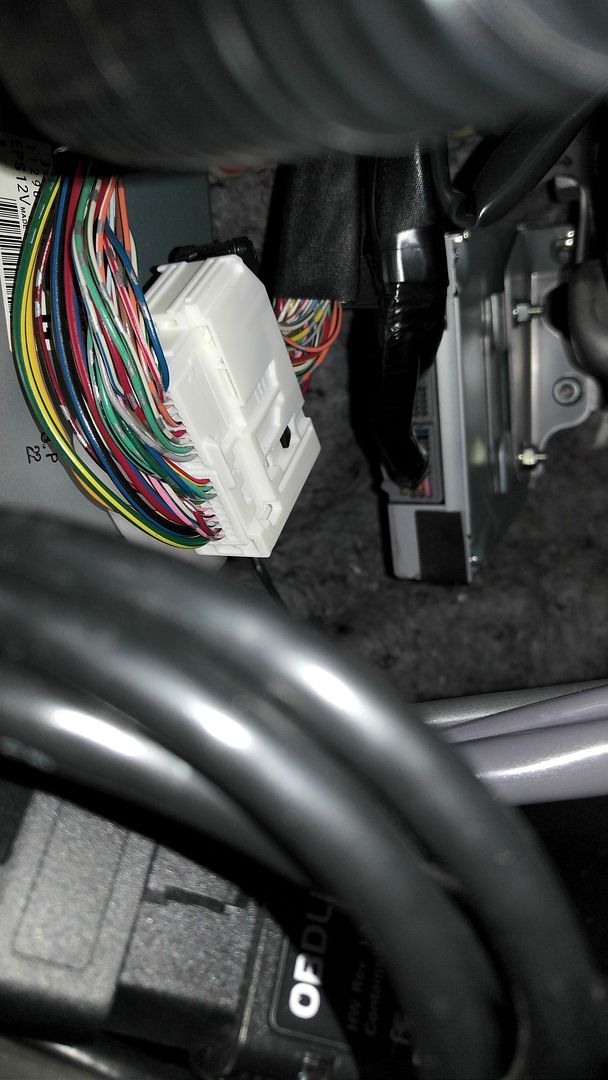
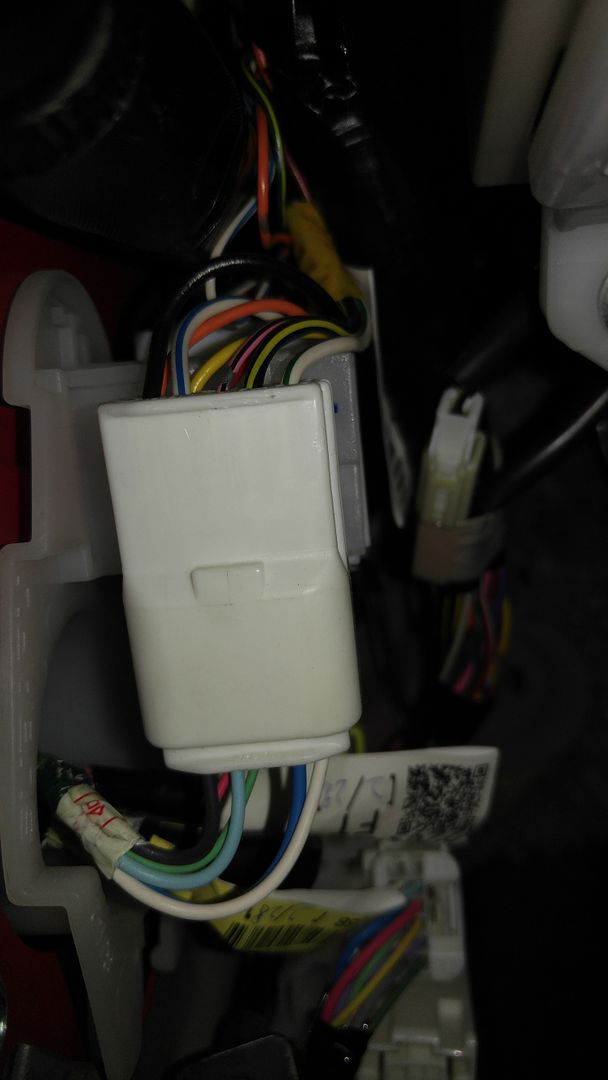
I didn't take any pictures of this part but if you like I can upload some. The first test was to see if the relay pins under the hood was powered and both pins that @NahumCC tested ealer in this thread showed 11.xx volts ( I didn't start the car Just powered it up) Now to look at the AD1 and the AD2 connectors. This is the AD2 connector on the passenger side  As you can see there's a yellow and black wire on this connector in front of the Orange and Gray stripped wire. Now for the AD1 connector.  And here you can see the pink and black wire coming out of this connector middle row forth from the bottom so we can assume the yellow and black wire is going into this connector also. And for future reference the AD1 connector is located left of the steering coloum, remove the lower dash panel and you will see it. Better view of ED1 connector  And on this connector you can see the pink and black wire going in the top. And last connector FD1 ( sorry it was difficult to get a good picture of it)  If you look closely in between the two red wires you will see the yellow and black wire going in it. WARNING I'm updating my post with correct info stay tuned with possibly good news.
__________________
Last edited by Silent_Dan; 03-22-2016 at 01:50 PM. Reason: Updated with correct info |
|
|

|
|
|
#114 |
|
Senior Member
Join Date: Jan 2014
Drives: 2013 FR-S 10 Series
Location: Columbus, OH
Posts: 349
Thanks: 41
Thanked 174 Times in 108 Posts
Mentioned: 10 Post(s)
Tagged: 2 Thread(s)
|
@Silent_Dan, awesome photos. I think you just have the wrong connector photo'd there for AD1. The call out looks like you were looking right below the shelf that AD1 sits on.
On to the analysis of your photo of AD2. So yes, that wire you got a photo of looks like it matches up with pin 24 and the best part is since that's going up that's not the harness from the engine bay now. That's the side of the connector for the interior dash harness. So to me this says you have the wiring and what differs are the individual door harness's. Light Blue: Engine bay harness coming into the car. Green: Interior Dash harness Dark Blue: Driver side door harness Grey: Passenger side door harness So you should be able to just look up the connectors in the Toyota Wire Harness repair manual for the mirrors and ED1 and FD1, order the appropriate terminal repair sections, insert into the connectors spliced with your own section of wire you run to the ends of each repair terminal. Once you do that then order everything else I pointed out and viola. Last edited by NahumCC; 03-21-2016 at 10:41 PM. Reason: Updated post after responding to PM and taking a more indepth look at both the photo and the connector location guide. |
|
|

|
| The Following User Says Thank You to NahumCC For This Useful Post: | CxG (03-25-2016) |
|
|
#115 |
|
Senior Member
Join Date: Jan 2014
Drives: 2013 FR-S 10 Series
Location: Columbus, OH
Posts: 349
Thanks: 41
Thanked 174 Times in 108 Posts
Mentioned: 10 Post(s)
Tagged: 2 Thread(s)
|
Can one of you get a better picture at the top of ED1 or FD1 to verify if the wire is coming in on the top at pin 8 to verify what I wrote above, thanks.
FD1 should have a yellow with black stripe coming into pin 8 at the top. ED1 should have a pink with black stripe coming into pin 8 at the top. If they do my previous post for base FR-S and BRZ will be correct. Sent from my SAMSUNG-SM-G870A using Tapatalk |
|
|

|
|
|
#116 |
|
Senior Member
Join Date: Jun 2011
Drives: Scion FRS
Location: Michigan
Posts: 216
Thanks: 17
Thanked 58 Times in 39 Posts
Mentioned: 1 Post(s)
Tagged: 0 Thread(s)
|
Thanks for doing the hard work guys. I have access to a bunch of crimp tools and pins/sockets. If someone can get me identifying marks from each of the connectors I can try to find the pins and make wires.
@NahumCC Can you see if there are any markings on the mirror's connector? |
|
|

|
|
|
#117 | |
|
Senior Member
Join Date: Jan 2014
Drives: 2013 FR-S 10 Series
Location: Columbus, OH
Posts: 349
Thanks: 41
Thanked 174 Times in 108 Posts
Mentioned: 10 Post(s)
Tagged: 2 Thread(s)
|
Quote:
|
|
|
|

|
|
|
#118 |
|
Senior Member
Join Date: Jun 2011
Drives: Scion FRS
Location: Michigan
Posts: 216
Thanks: 17
Thanked 58 Times in 39 Posts
Mentioned: 1 Post(s)
Tagged: 0 Thread(s)
|
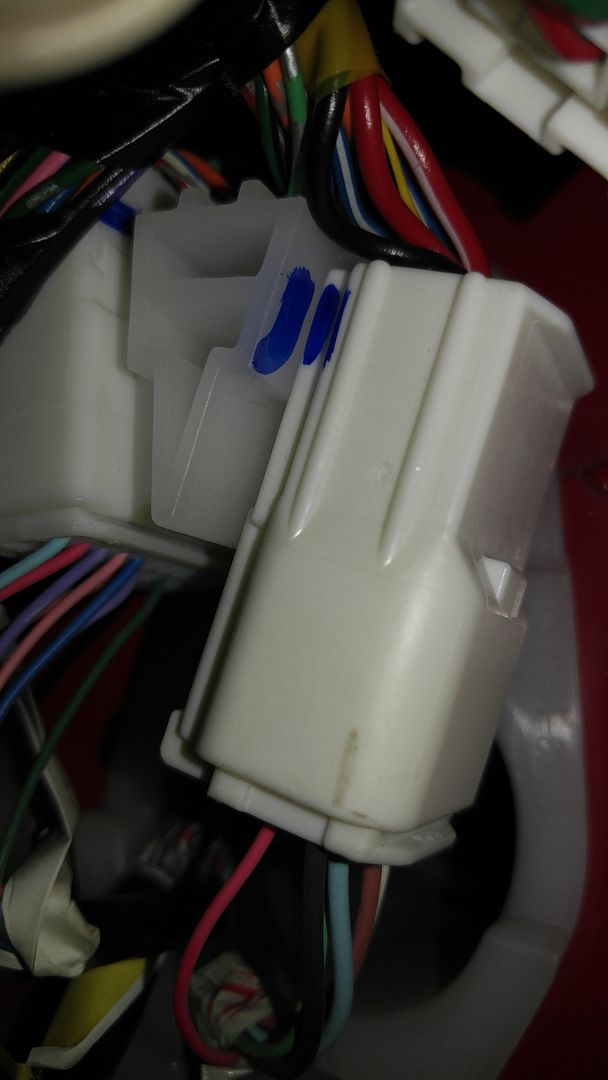
I pulled the passanger side to look and used a sharpie to make the part number show up in a picture. They are usually on the back of the connector. This is on the passenger side going into the door. Unfortunately that is toyota part number, but the markings on the front look like an AMP, so now I just need to find the pin they use.
I'm guessing something like this: but I'm going to go back in and check the size at least. http://www.te.com/usa-en/product-1376700-1.html Last edited by markitect; 04-02-2016 at 03:18 PM. |
|
|

|
| The Following User Says Thank You to markitect For This Useful Post: | jliongh (08-31-2016) |
|
|
#119 | |
|
Senior Member
Join Date: Jan 2014
Drives: 2013 FR-S 10 Series
Location: Columbus, OH
Posts: 349
Thanks: 41
Thanked 174 Times in 108 Posts
Mentioned: 10 Post(s)
Tagged: 2 Thread(s)
|
Quote:
Sent from my SAMSUNG-SM-G870A using Tapatalk |
|
|
|

|
|
|
#120 | |
|
Senior Member
Join Date: Jun 2011
Drives: Scion FRS
Location: Michigan
Posts: 216
Thanks: 17
Thanked 58 Times in 39 Posts
Mentioned: 1 Post(s)
Tagged: 0 Thread(s)
|
Quote:
https://www.theplugdealer.com/shop/p...rass-tin-25190 |
|
|
|

|
| The Following User Says Thank You to markitect For This Useful Post: | DocWalt (04-04-2016) |
|
|
#121 | |
|
Senior Member
Join Date: Jan 2014
Drives: 2013 FR-S 10 Series
Location: Columbus, OH
Posts: 349
Thanks: 41
Thanked 174 Times in 108 Posts
Mentioned: 10 Post(s)
Tagged: 2 Thread(s)
|
Quote:
|
|
|
|

|
|
|
#122 | |
|
Senior Member
Join Date: Jun 2011
Drives: Scion FRS
Location: Michigan
Posts: 216
Thanks: 17
Thanked 58 Times in 39 Posts
Mentioned: 1 Post(s)
Tagged: 0 Thread(s)
|
Quote:
My current parts list per side is: 1 Female pin going into door 1 Male and and 1 Female for door to mirror harness 1 tap to attach to the ground wire in the mirror harness 2 spade terminals for the mirrors. 20 awg wire mirror |
|
|
|

|
|
|
#123 |
|
Senior Member
Join Date: Jan 2014
Drives: 2013 FR-S 10 Series
Location: Columbus, OH
Posts: 349
Thanks: 41
Thanked 174 Times in 108 Posts
Mentioned: 10 Post(s)
Tagged: 2 Thread(s)
|
I wasn't knocking your plan. Just making sure you accounted for the wiring you would need to add from the mirror pigtail to the back of the mirror itself in addition to what you'll be adding from the door harness to the connector for the mirror.
Sent from my SAMSUNG-SM-G870A using Tapatalk |
|
|

|
|
|
#124 |
|
Senior Member
Join Date: Jun 2011
Drives: Scion FRS
Location: Michigan
Posts: 216
Thanks: 17
Thanked 58 Times in 39 Posts
Mentioned: 1 Post(s)
Tagged: 0 Thread(s)
|
That's why I'm trying to find a part number for the connector on the mirror harness or in the door. I just hate taking the door panel off more then I have to.
|
|
|

|
|
|
#125 |
|
Senior Member
Join Date: Jul 2014
Drives: 2020 Hakone
Location: London, Ont
Posts: 69,845
Thanks: 61,656
Thanked 108,283 Times in 46,456 Posts
Mentioned: 2495 Post(s)
Tagged: 50 Thread(s)
|
I will be at my dealer on Friday and will ask for a part number. The Canadian cars come stock with this so I would think they would have a number. Could even pick a couple up (if they stock them which I doubt) and send them to you if you want.
__________________
Racecar spelled backwards is Racecar, because Racecar.
|
|
|

|
|
|
#126 |
|
Senior Member
Join Date: Jan 2014
Drives: 2013 FR-S 10 Series
Location: Columbus, OH
Posts: 349
Thanks: 41
Thanked 174 Times in 108 Posts
Mentioned: 10 Post(s)
Tagged: 2 Thread(s)
|
Took the connector apart to look over everything on the female side and didn't come up with any number that matched a part number in repair manual. Hopefully TCoat has a an awesome parts manager.
|
|
|

|
|
|
|
|
 |
| Tags |
| must do this |
|
|
 Similar Threads
|
||||
| Thread | Thread Starter | Forum | Replies | Last Post |
| heated seats | debs0712 | Cosmetic Modification (Interior/Exterior/Lighting) | 47 | 04-08-2018 09:06 PM |
| anyone else love APR GT3 Mirrors ???? | ESBjiujitsu | Cosmetic Modification (Interior/Exterior/Lighting) | 23 | 04-10-2016 12:13 PM |
| Adding heated mirrors to US spec FR-S | @Art_Mighty | Cosmetic Modification (Interior/Exterior/Lighting) | 8 | 09-18-2012 02:35 PM |
| Fr-s Power Folding Mirrors? | Koolkiid | Cosmetic Modification (Interior/Exterior/Lighting) | 19 | 09-15-2012 12:31 AM |
| Retrofit heated seats to Premium? | blalor | BRZ First-Gen (2012+) -- General Topics | 4 | 05-31-2012 07:50 AM |