


|
||||||
| DIY (Do-It-Yourself) Guides For all DIYs. |
 |
|
|
Thread Tools | Search this Thread |
 11-11-2012, 12:33 AM
|
#1 |
|
FT86Club Vancouver

Join Date: Jun 2012
Drives: BRZ Sport-Tech; Drove: MR-S, AE86
Location: Vancouver, BC
Posts: 2,532
Thanks: 391
Thanked 1,178 Times in 633 Posts
Mentioned: 16 Post(s)
Tagged: 2 Thread(s)
|
*DIY* Winter Tire Mode Transformation
Summer tires -> Winter tires
Tools you will need:
First thing's first; you will need to jack the vehicle up to remove each wheel. ALSO; this would be the BEST time to add those mud guards/mud flaps for the winter! Try NOT to jack the vehicle up by its body pinch weld (as they recommend) because as doing so will result in the paint peeling/rubbing off even with soft wood or vulcanized rubber puck. (Subaru's ridiculous soft paint...sucks) As seen below. 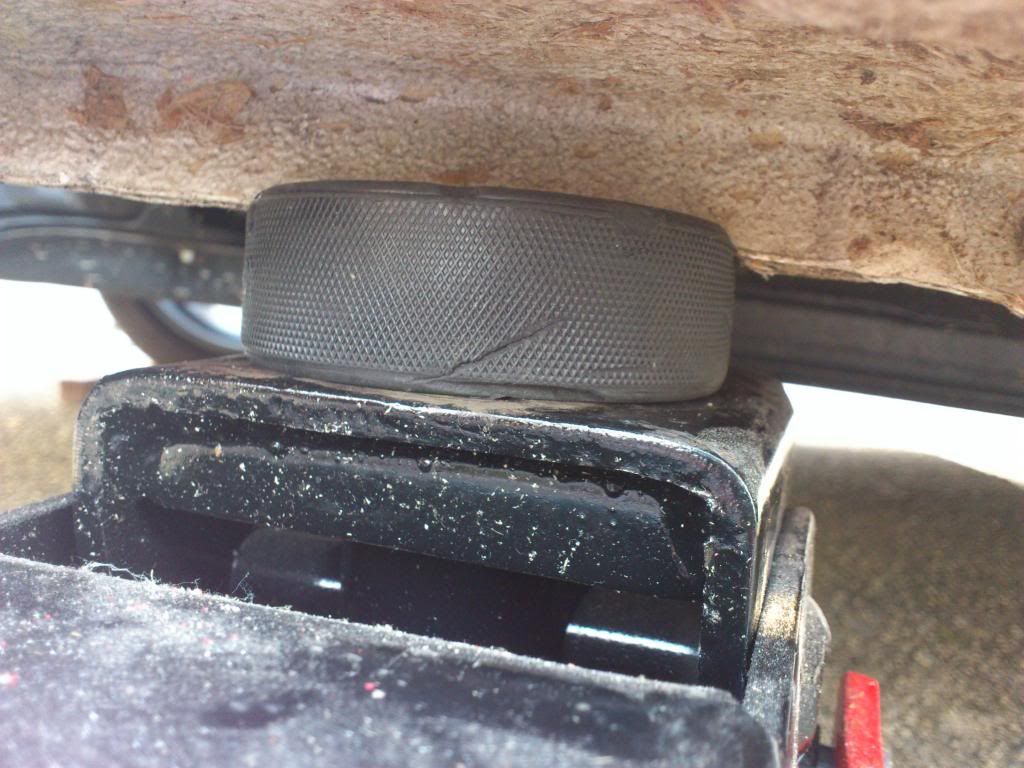 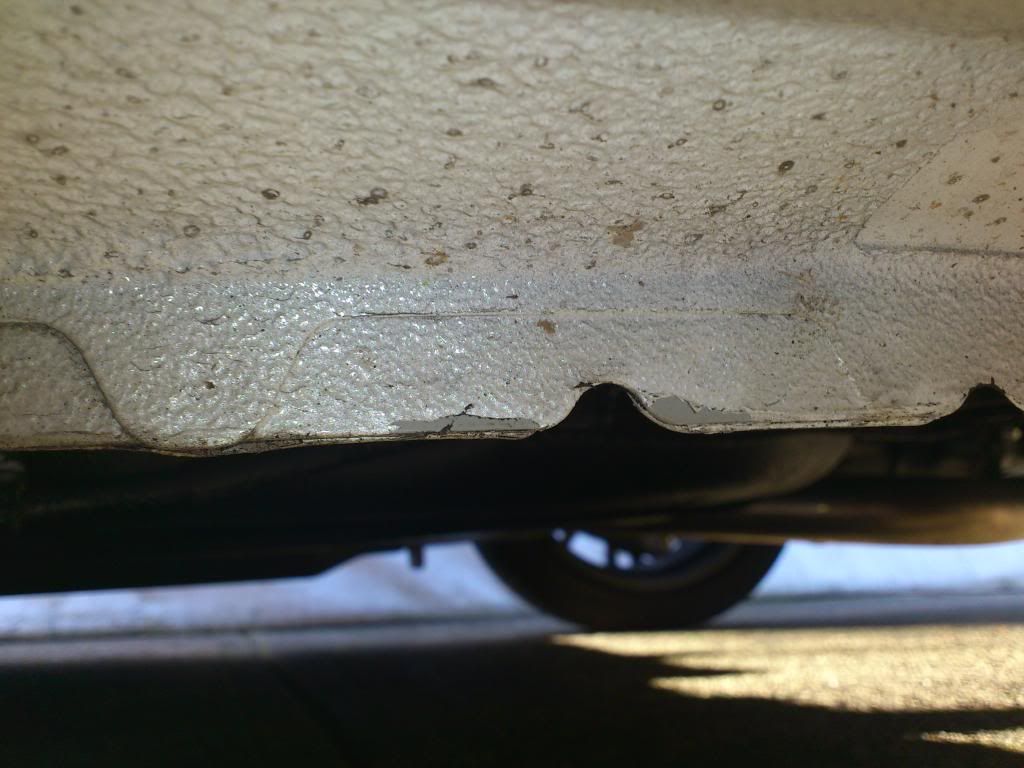 ================================================== ================================================== ===== Instead; I chose a safer location with strong support... REMEMBER pull your handbrake up and use tire chocks for the rear if you have them! For the front, I jacked the vehicle up with the puck just behind the radiator support, where the aluminum oil pan "skid" plate is attached to the body frame. (**WARNING** DO NOT jack the vehicle up by the aluminum oil pan skid plate or any plastic trim as they WILL NOT support the weight of the vehicle.) As seen below.  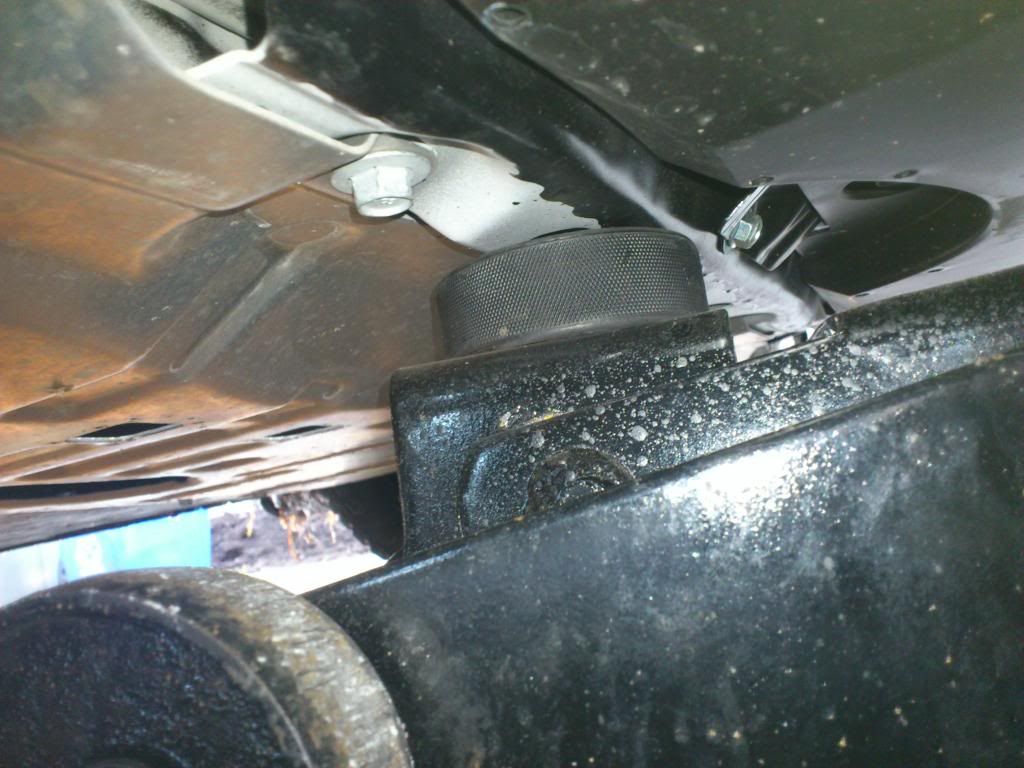 ================================================== ================================================== ===== Before the vehicle is fully hoisted up; go ahead and use the 19mm socket along with the breaker bar to loosen up all the lug nuts on the wheel. After that; raise the vehicle's front end up high enough to take the wheel off. ================================================== ================================================== ===== After taking the wheel off; because I am using steelies, the hub would be exposed to all the road salt and elements. This step is completely optional, but I did this just because I had the grease available. (Repeat for both front wheels)  As seen below. As seen below.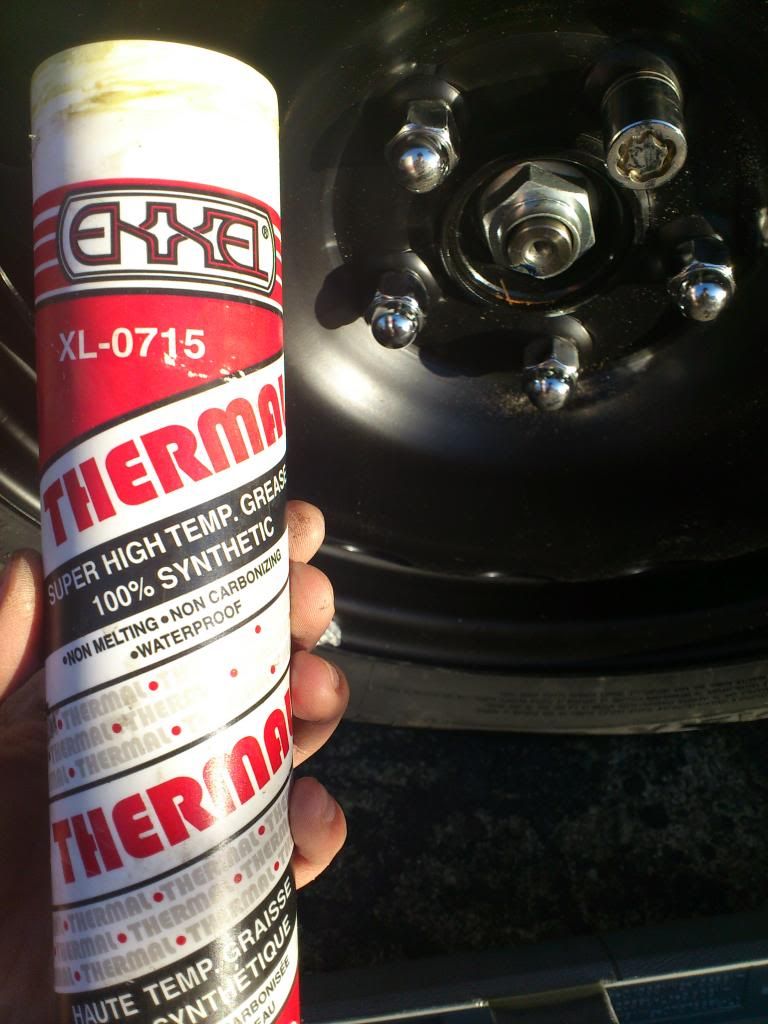 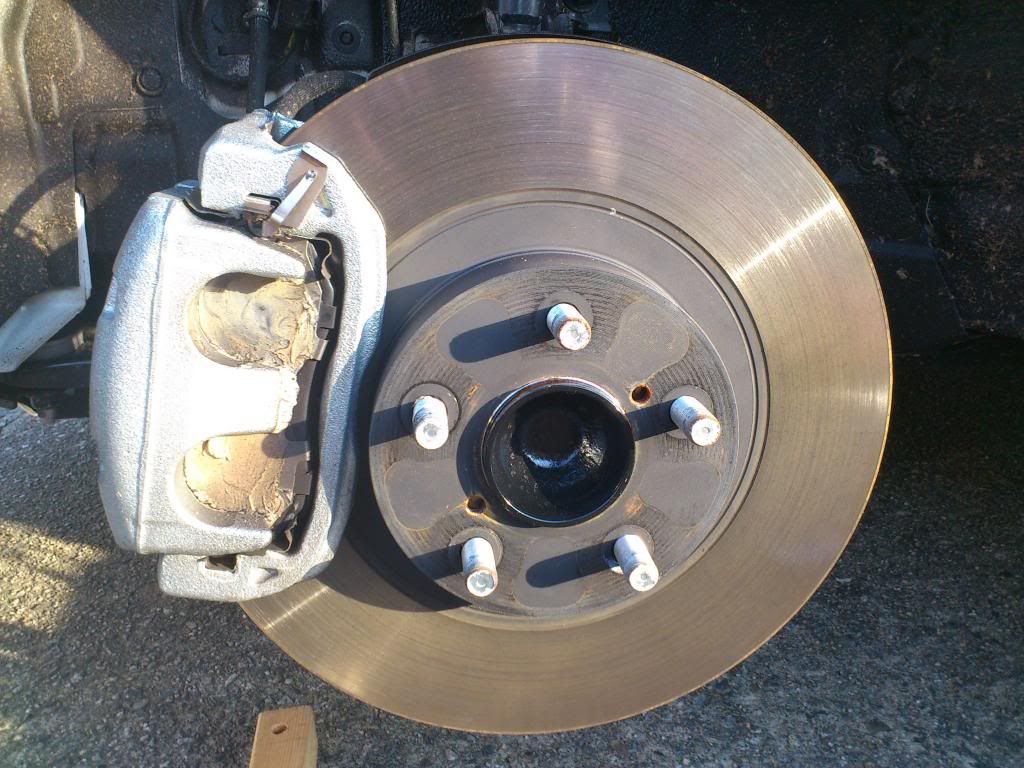 ================================================== ================================================== ===== I would also grease up all the backing of the steelies too; just to prevent it from rusting against the disc brake rotors. (Try not to get any onto the rotors and wheel studs; wipe it off if you do) As seen below. 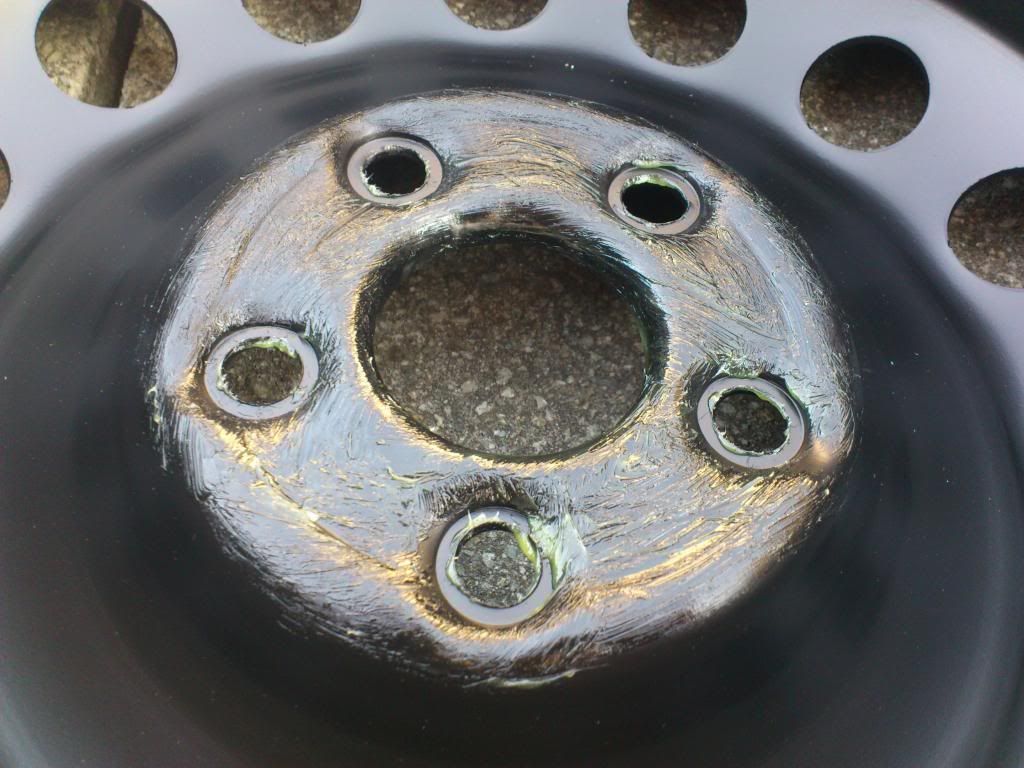 ================================================== ================================================== ===== Now that everything is greased (optional); you can mount the wheels on and hand tight the lug nuts as tight as your hands can. Go to the other side and repeat the process. Once both front wheels are on and tightened snugly by hand; go ahead and lower the vehicle slowly. Use the torque wrench along with the 1/2 inch drive extension and set it to 89 ft-lbs. Torque the lug nuts down in a star pattern to ensure evenly torqued and check it twice to make sure you've tighten all the nuts down for both sides. As seen below. 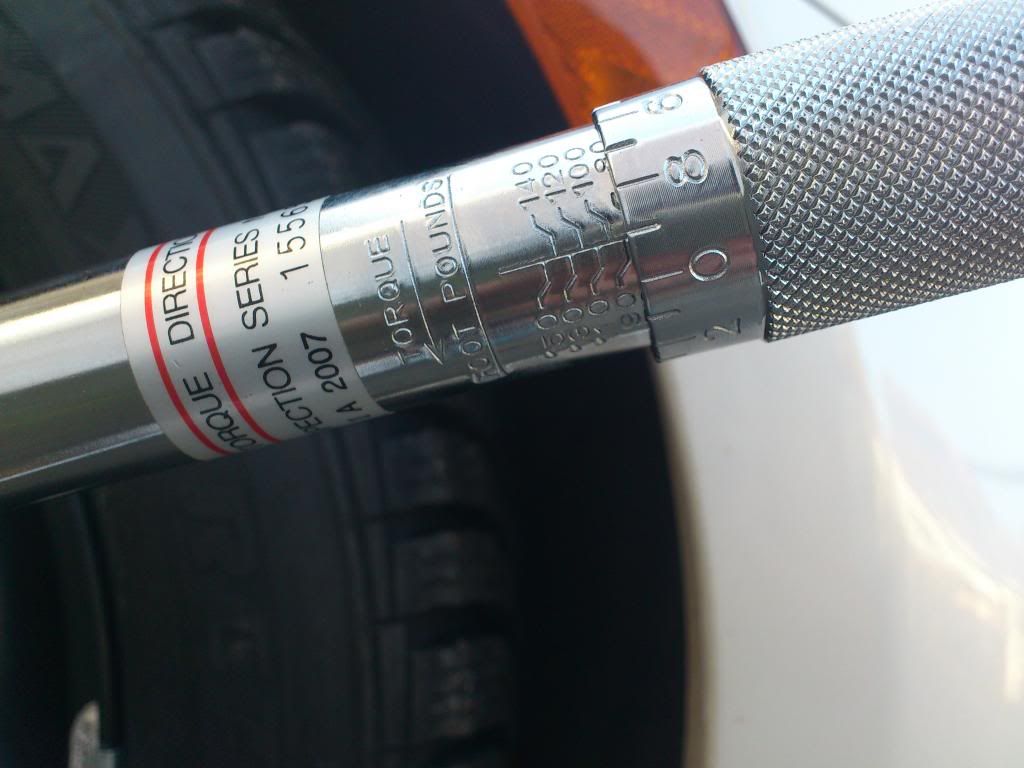 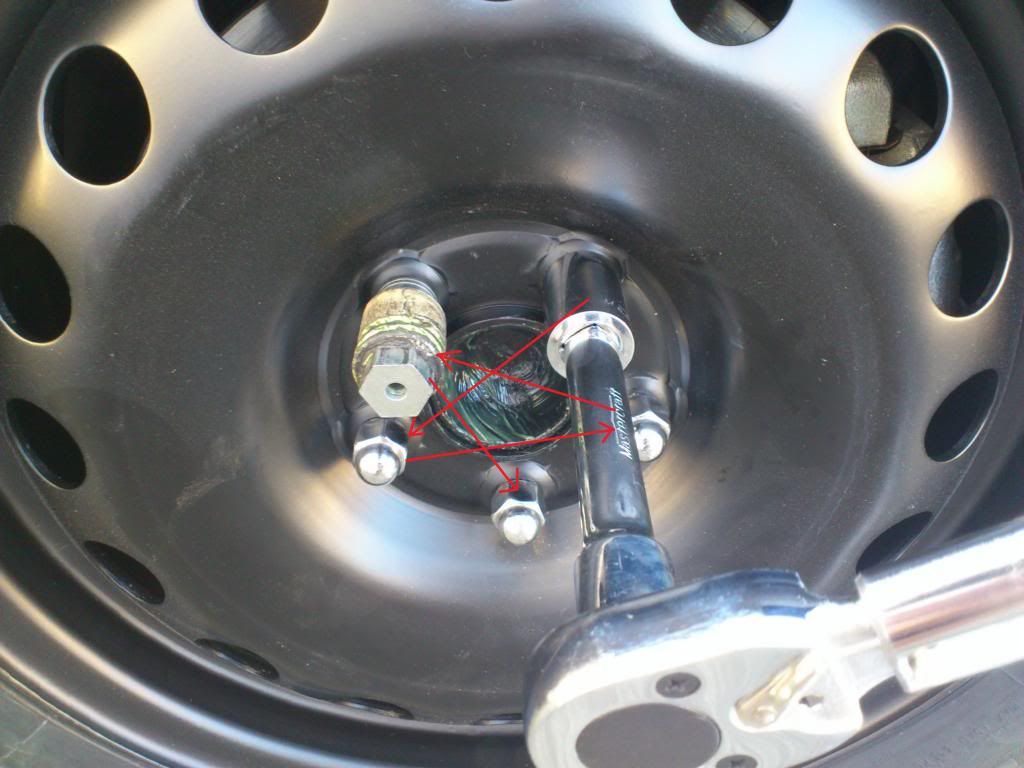 ================================================== ================================================== ===== Lower the jack and bring it to the rear. CHOCK the front wheels before continuing! I hoisted the rear end up by the rear sub frame as it was the safest and strongest spot (Best to use the puck or wood so you don't dent anything). As seen below. 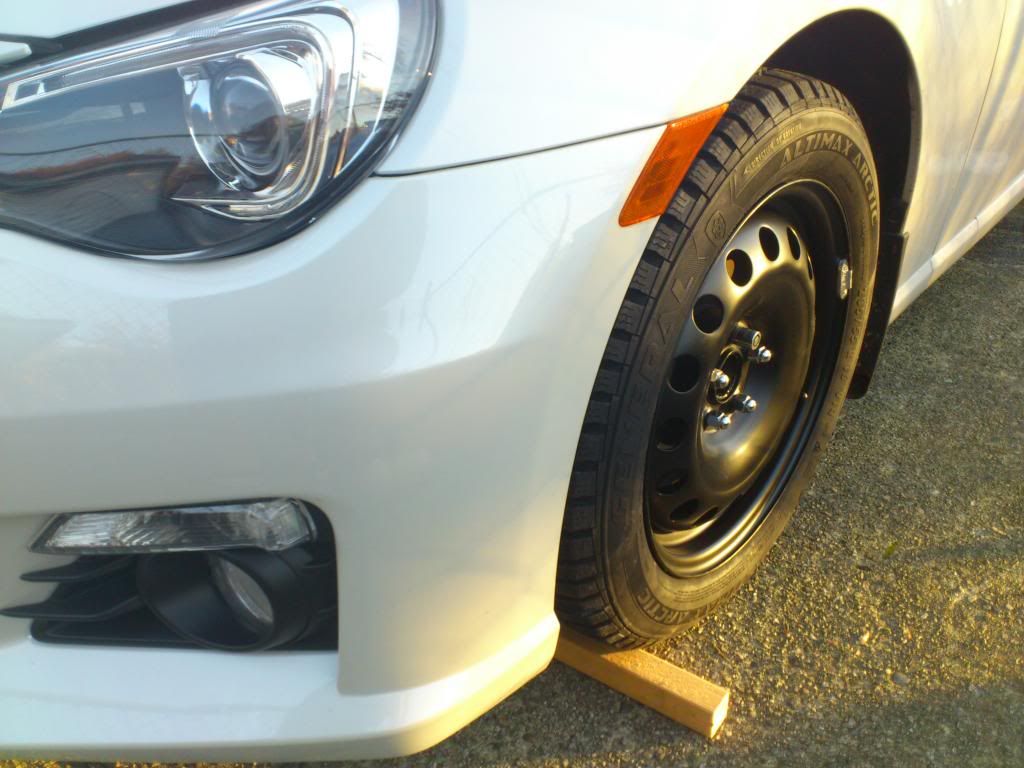 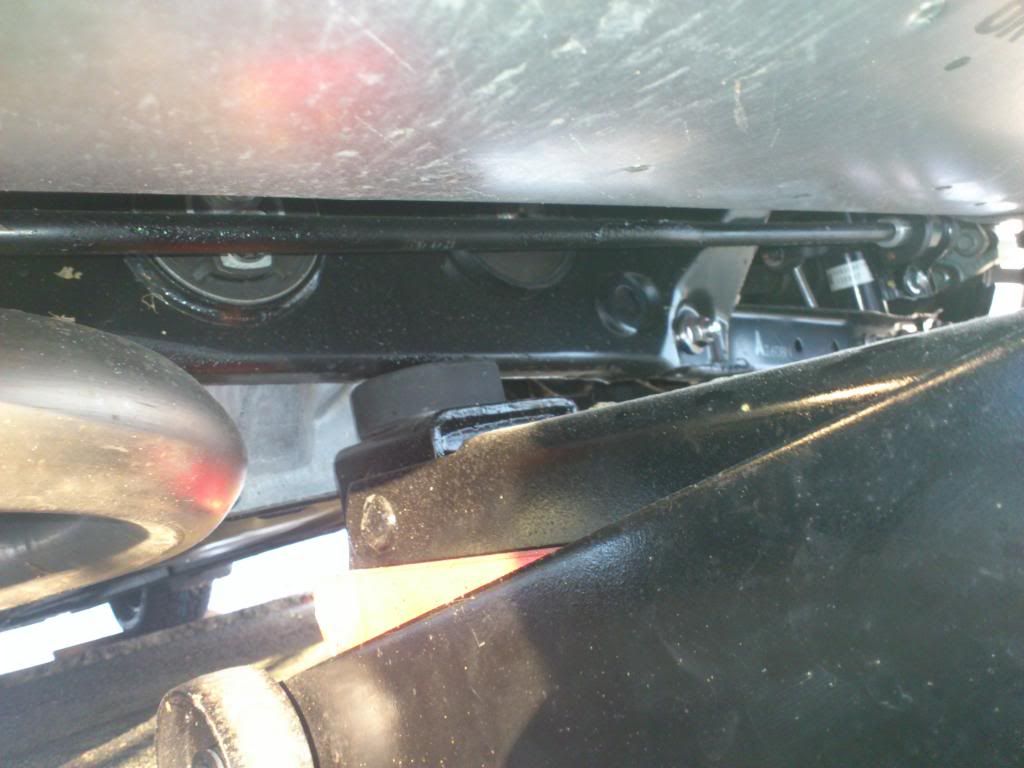 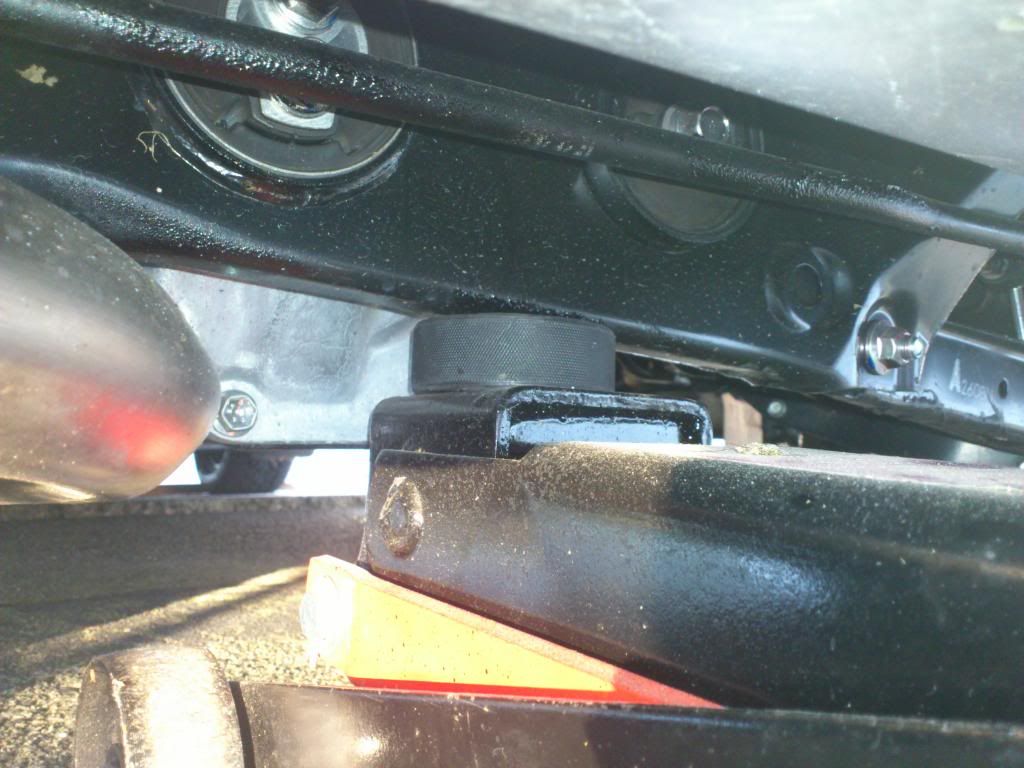 ================================================== ================================================== ===== Now that the rear of the vehicle is hoisted up; do exactly what you did to the front X2. As seen below. 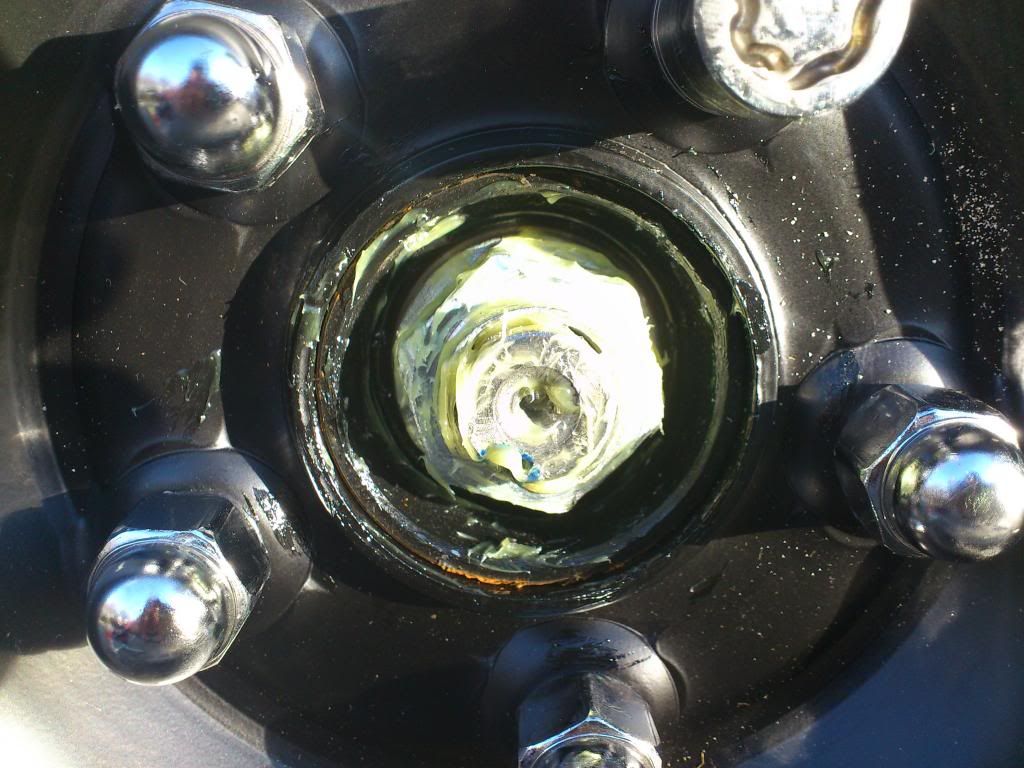 ================================================== ================================================== ===== After torquing down both rear wheels, let the jack down and you're pretty done! I would then double check all the tire pressures just to make sure they are up to spec; if not inflate/deflate as accordingly. As seen below. 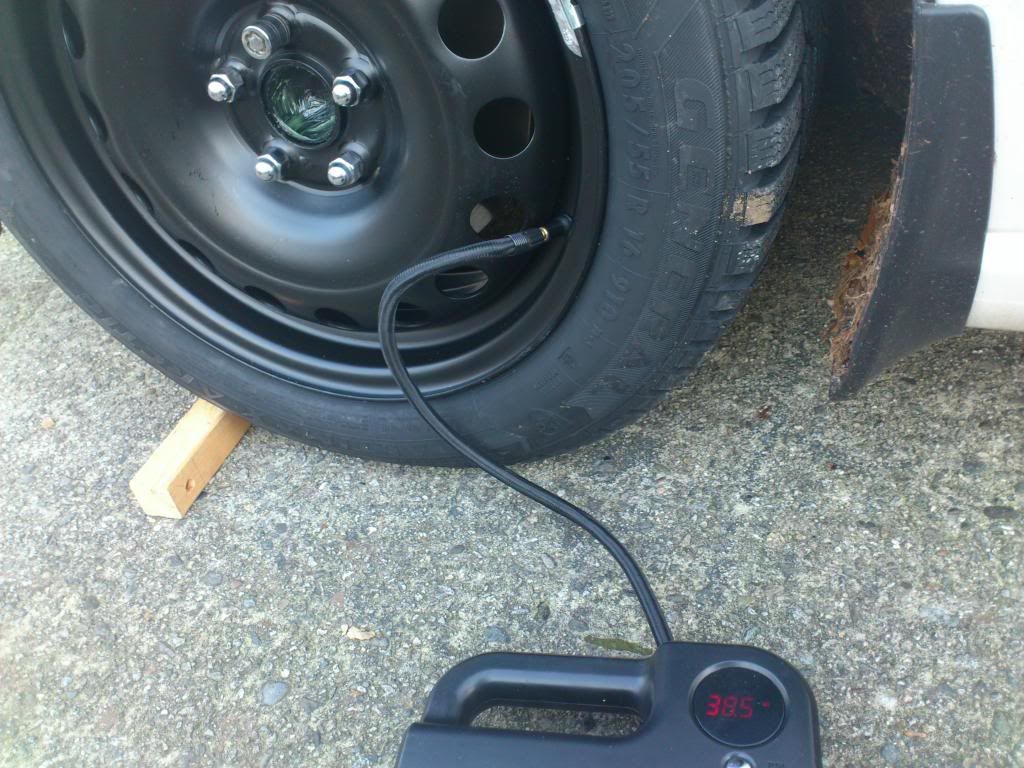 ================================================== ================================================== ===== For the stock wheels, I keep them organized by using masking tape and a sharpie just to note which wheel belongs to where. (Ex. Right rear, Left rear, Right front, Left front...) As seen below. 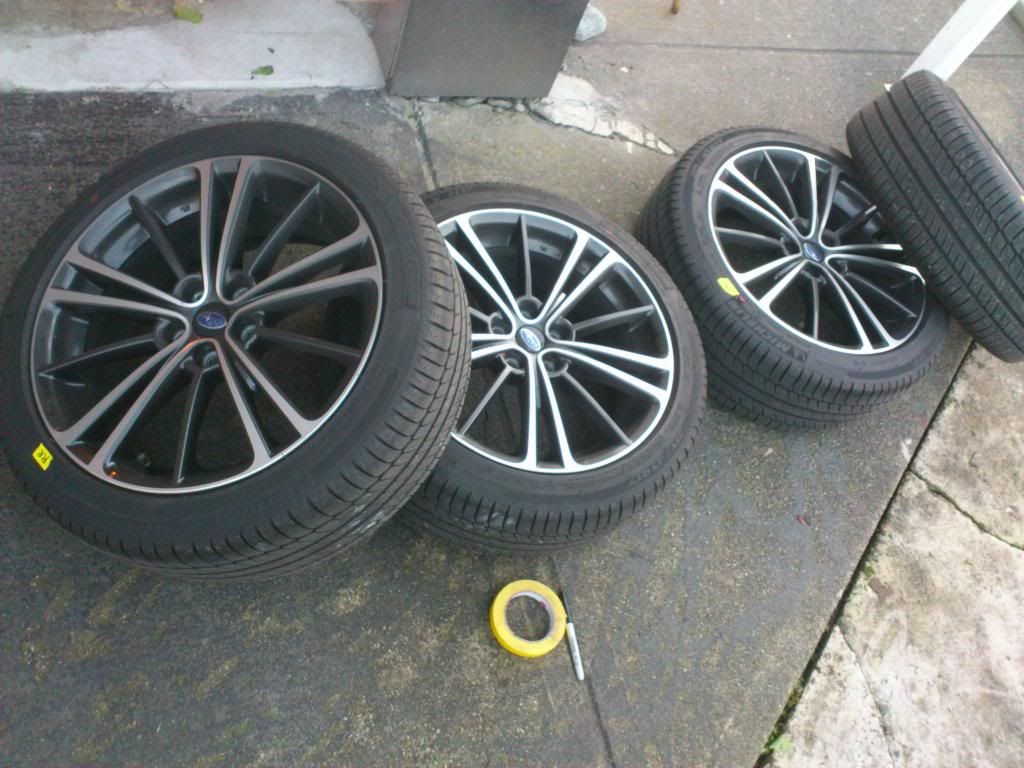 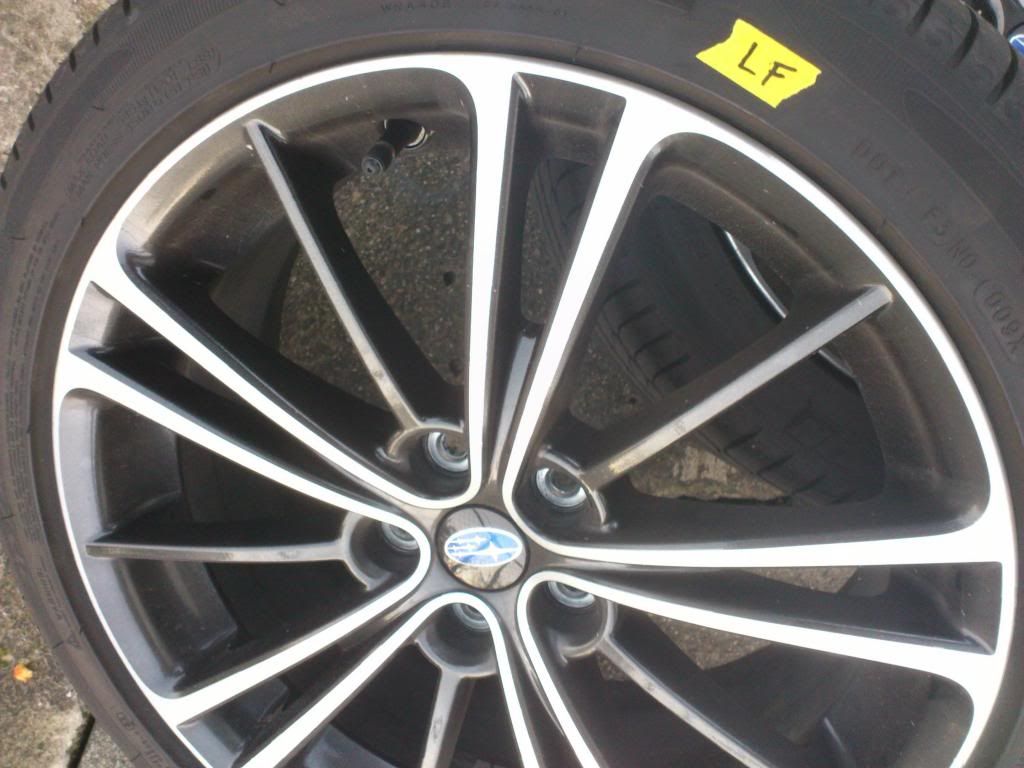 ================================================== ================================================== ===== That's it! You're done! Enjoy the winter season and drive safe out there with all your nannies on! 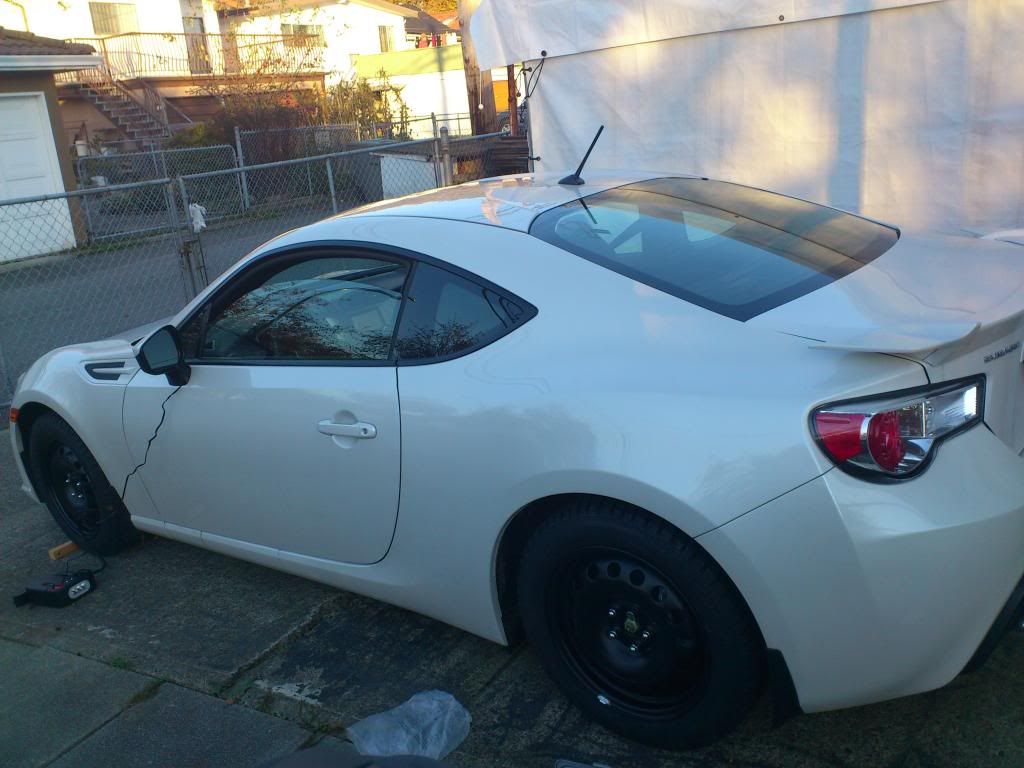 Cheers :happy0180: David
__________________
1984 AE86 BT 20V 5MT 2007-2012
2000 MR-S 5MT 2010-2012 2013 BRZ Sport-Tech 6AT Since '12 (OEM+ STI tS Build) 2015 Lexus IS250 AWD F-Sport 2 2015-2018 2018 Lexus NX300 F-Sport 3 Since '18 Last edited by DaJo; 11-12-2012 at 02:27 AM. |

|

|
|
11-11-2012, 12:56 AM
|
#2 |
|
Senior Member
Join Date: Jun 2012
Drives: Scion FR-S | 6MT | Ultramarine
Location: CT
Posts: 410
Thanks: 36
Thanked 98 Times in 60 Posts
Mentioned: 1 Post(s)
Tagged: 1 Thread(s)
|
I thought the differential was the preferred point of contact for jacking up the rear? Good guide though. I didn't think to grease some of the contact points.
__________________
|
|
|
|
|
11-11-2012, 12:59 AM
|
#3 | |
|
FT86Club Vancouver
Join Date: Jun 2012
Drives: BRZ Sport-Tech; Drove: MR-S, AE86
Location: Vancouver, BC
Posts: 2,532
Thanks: 391
Thanked 1,178 Times in 633 Posts
Mentioned: 16 Post(s)
Tagged: 2 Thread(s)
|
Quote:
__________________
1984 AE86 BT 20V 5MT 2007-2012
2000 MR-S 5MT 2010-2012 2013 BRZ Sport-Tech 6AT Since '12 (OEM+ STI tS Build) 2015 Lexus IS250 AWD F-Sport 2 2015-2018 2018 Lexus NX300 F-Sport 3 Since '18 |
|
|
|
|
|
11-11-2012, 01:23 AM
|
#4 |
|
USMC Veteran Semper Fi

Join Date: Aug 2012
Drives: 2010 WR Blue STi
Location: NM it's part of the US
Posts: 955
Thanks: 801
Thanked 378 Times in 243 Posts
Mentioned: 8 Post(s)
Tagged: 1 Thread(s)
|
Where did you get the hub centric steelies and do you have a part number for them?
__________________
 |
|
|
|
|
11-11-2012, 01:36 AM
|
#5 | |
|
FT86Club Vancouver
Join Date: Jun 2012
Drives: BRZ Sport-Tech; Drove: MR-S, AE86
Location: Vancouver, BC
Posts: 2,532
Thanks: 391
Thanked 1,178 Times in 633 Posts
Mentioned: 16 Post(s)
Tagged: 2 Thread(s)
|
Quote:

__________________
1984 AE86 BT 20V 5MT 2007-2012
2000 MR-S 5MT 2010-2012 2013 BRZ Sport-Tech 6AT Since '12 (OEM+ STI tS Build) 2015 Lexus IS250 AWD F-Sport 2 2015-2018 2018 Lexus NX300 F-Sport 3 Since '18 |
|
|
|
|
|
11-11-2012, 01:49 PM
|
#6 | |
|
Senior Member
Join Date: Dec 2011
Drives: 2013 White Scion FRS
Location: Ontario
Posts: 198
Thanks: 24
Thanked 22 Times in 20 Posts
Mentioned: 0 Post(s)
Tagged: 0 Thread(s)
|
Quote:
|
|
|
|
|
|
11-11-2012, 02:12 PM
|
#7 |
|
When In Doubt...

Join Date: May 2011
Drives: Slowww
Location: PA215
Posts: 1,844
Thanks: 1,023
Thanked 752 Times in 412 Posts
Mentioned: 20 Post(s)
Tagged: 0 Thread(s)
|
Hmm I never heard of using grease to prevent rust on the wheels. Brilliant!
For anyone wondering, tirerack offers hubcentric steel wheels.
__________________
Join the Galaxy Blue Silica BRZ registry below: https://docs.google.com/spreadsheet/...2c&usp=sharing |
|
|
|
|
11-11-2012, 03:11 PM
|
#8 |
|
Senior Member

Join Date: Mar 2011
Drives: FRS :D
Location: Vancouver BC
Posts: 2,985
Thanks: 545
Thanked 699 Times in 438 Posts
Mentioned: 18 Post(s)
Tagged: 0 Thread(s)
|
greasing is soo simple I would way I never thought of it haha
glad to see people doing DIY for easy stuff too cause of these little nuggets of gold Just order my winters today! Going with the Generals
__________________
Out of the FRS game
|
|
|
|
|
11-11-2012, 03:16 PM
|
#9 |
|
Senior Member

Join Date: Dec 2011
Drives: Whiteout FR-S
Location: Vancouver B.C
Posts: 241
Thanks: 8
Thanked 44 Times in 20 Posts
Mentioned: 2 Post(s)
Tagged: 0 Thread(s)
|
Good DIY. Glad to see they fit. LOL!!!! I just ordered the same setup from Garage Five.
|
|
|
|
|
11-11-2012, 11:33 PM
|
#10 |
|
Senior Member
Join Date: Jan 2012
Drives: 2013 Satin White Pearl BRZ Limited
Location: Poughkeepsie, NY
Posts: 2,310
Thanks: 751
Thanked 696 Times in 464 Posts
Mentioned: 47 Post(s)
Tagged: 1 Thread(s)
|
Your car almost looks exactly like mine! Except I went with Rally Armor mudflaps instead of the Toyota ones. High five though! :happy0180:
__________________
|
|
|
|
|
11-12-2012, 12:06 AM
|
#11 |
|
Senior Member
Join Date: May 2012
Drives: 13' SSM BRZ
Location: Alaska
Posts: 250
Thanks: 21
Thanked 72 Times in 52 Posts
Mentioned: 6 Post(s)
Tagged: 0 Thread(s)
|
im rocking steelies for winter too!
|
|
|
|
|
11-12-2012, 02:13 AM
|
#12 | ||
|
FT86Club Vancouver
Join Date: Jun 2012
Drives: BRZ Sport-Tech; Drove: MR-S, AE86
Location: Vancouver, BC
Posts: 2,532
Thanks: 391
Thanked 1,178 Times in 633 Posts
Mentioned: 16 Post(s)
Tagged: 2 Thread(s)
|
Quote:
Quote:
__________________
1984 AE86 BT 20V 5MT 2007-2012
2000 MR-S 5MT 2010-2012 2013 BRZ Sport-Tech 6AT Since '12 (OEM+ STI tS Build) 2015 Lexus IS250 AWD F-Sport 2 2015-2018 2018 Lexus NX300 F-Sport 3 Since '18 |
||
|
|
|
|
11-12-2012, 02:18 AM
|
#13 |
|
Senior Member

Join Date: Sep 2012
Drives: '13 BRZ Ltd WRB
Location: Vista, CA
Posts: 1,351
Thanks: 508
Thanked 570 Times in 412 Posts
Mentioned: 15 Post(s)
Tagged: 0 Thread(s)
|
Yes, you can jack from the diff. I always use a block of wood, but the puck would be fine, too.
Why are there no jack stands on your list of items?? I would not even consider working on a car supported only by a floor jack. Jack stands are cheap and will likely last longer than you will.
__________________
|
|
|
|
|
11-12-2012, 02:21 AM
|
#14 | |
|
FT86Club Vancouver
Join Date: Jun 2012
Drives: BRZ Sport-Tech; Drove: MR-S, AE86
Location: Vancouver, BC
Posts: 2,532
Thanks: 391
Thanked 1,178 Times in 633 Posts
Mentioned: 16 Post(s)
Tagged: 2 Thread(s)
|
Quote:
So you people who are doing this; use those jack stands as a safety measure! For myself; personally, I use them on all my vehicles...but this time I said "eff this" after seeing what the jack and hockey puck did to my pinch welds. Also... since I did not have to crawl under the vehicle, I did not feel the need to use the stands...although it is recommended; and of course, would be safer for you and the vehicle.
__________________
1984 AE86 BT 20V 5MT 2007-2012
2000 MR-S 5MT 2010-2012 2013 BRZ Sport-Tech 6AT Since '12 (OEM+ STI tS Build) 2015 Lexus IS250 AWD F-Sport 2 2015-2018 2018 Lexus NX300 F-Sport 3 Since '18 |
|
|
|
|
|
|
|
|
|
|
|
 Similar Threads
|
||||
| Thread | Thread Starter | Forum | Replies | Last Post |
| BRZ in Full Winter Mode! | tawheed | BRZ Photos, Videos, Wallpapers, Gallery Forum | 64 | 02-06-2014 01:58 PM |
| Winter tire experiences? | smbrm | CANADA | 10 | 11-06-2012 04:42 PM |
| What Winter Tire for NY Weather? | ScionFR-S | Wheels | Tires | Spacers | Hub -- Sponsored by The Tire Rack | 84 | 10-29-2012 07:02 PM |
| Winter tire | Dub666 | Wheels | Tires | Spacers | Hub -- Sponsored by The Tire Rack | 1 | 09-12-2012 01:32 AM |
| Need some help picking a winter tire... | jm1681 | Wheels | Tires | Spacers | Hub -- Sponsored by The Tire Rack | 19 | 08-29-2012 01:14 PM |


 Emma
Emma Morgan