


 10-09-2014, 12:26 PM
|
#43 |
|
Member
Join Date: Jul 2013
Drives: An old Citroen Xantia TD
Location: France
Posts: 66
Thanks: 0
Thanked 21 Times in 12 Posts
Mentioned: 1 Post(s)
Tagged: 0 Thread(s)
|
Is it not for the fuel pump?
|

|

|
|
10-09-2014, 04:12 PM
|
#44 |
|
Senior Member

Join Date: Mar 2012
Drives: 2018 Golf R
Location: Richmond, VA
Posts: 2,807
Thanks: 5,386
Thanked 1,095 Times in 647 Posts
Mentioned: 68 Post(s)
Tagged: 7 Thread(s)
|
It is for the fuel pump. I wouldn't remove those

__________________
Parting out HERE
|
|
|
|
| The Following User Says Thank You to civicdrivr For This Useful Post: | mixtape (05-05-2016) |
|
02-17-2015, 07:18 PM
|
#45 | |
|
Senior Member

Join Date: Dec 2014
Drives: anything you let me
Location: NY
Posts: 465
Thanks: 259
Thanked 237 Times in 165 Posts
Mentioned: 6 Post(s)
Tagged: 2 Thread(s)
|
Quote:
First I wanted to say to Poormansracing, EXCELLENT write up! Can't wait for the snow to melt so I can get to installing my kit! About the new version of the kit, they only sell it WITH the additional sound deadening material for one price. It's actually a VERY nice kit. Poor, or anyone else that has the older version, perhaps you could explain your kit pieces so we could compare. Mine came with 2 spare pieces of that multi-color insulation material standard in cars measuring 25" x 25" x 3/8". These can be applied anywhere. The individual covers for the seat bases have an 18" x 14" piece of this same material glued to their underside. The panel that separates the cabin from the trunk also has (I would assume) this same material on the trunk side but it is further covered by the same material used on the cabin side to give a finished look. A lot of thought went into this kit. I haven't had the chance to install the kit yet so I'm not sure the actual weight savings of the pieces that will be removed. However, the entire components of this kit with all the extra material came in at 14lbs 6.8oz. Hopefully there's a nice day this weekend to install the kit then I'll give you guys the total removal weight / savings. -Mike |
|
|
|
|
| The Following User Says Thank You to Uplink For This Useful Post: | mixtape (05-05-2016) |
|
02-18-2015, 09:48 AM
|
#46 | |
|
Senior Member
Join Date: Mar 2012
Drives: 2018 Golf R
Location: Richmond, VA
Posts: 2,807
Thanks: 5,386
Thanked 1,095 Times in 647 Posts
Mentioned: 68 Post(s)
Tagged: 7 Thread(s)
|
Quote:
Sent from my XT1095
__________________
Parting out HERE
|
|
|
|
|
|
02-18-2015, 11:20 AM
|
#47 | |
|
Senior Member
Join Date: Dec 2014
Drives: anything you let me
Location: NY
Posts: 465
Thanks: 259
Thanked 237 Times in 165 Posts
Mentioned: 6 Post(s)
Tagged: 2 Thread(s)
|
Quote:
|
|
|
|
|
| The Following User Says Thank You to Uplink For This Useful Post: | civicdrivr (02-18-2015) |
|
02-18-2015, 12:43 PM
|
#48 |
|
Senior Member

Join Date: May 2014
Drives: 2013 Ultramarine FR-S
Location: Toledo Ohio
Posts: 132
Thanks: 3
Thanked 34 Times in 29 Posts
Mentioned: 2 Post(s)
Tagged: 0 Thread(s)
|
I installed mine last week, and I love it. Great fit and finish. The sound deadener is like almost carpet padding you would get for your house, or sort of like whats inside your doors in your car to kill sounds and stuff.
This is what the stuff looks like... 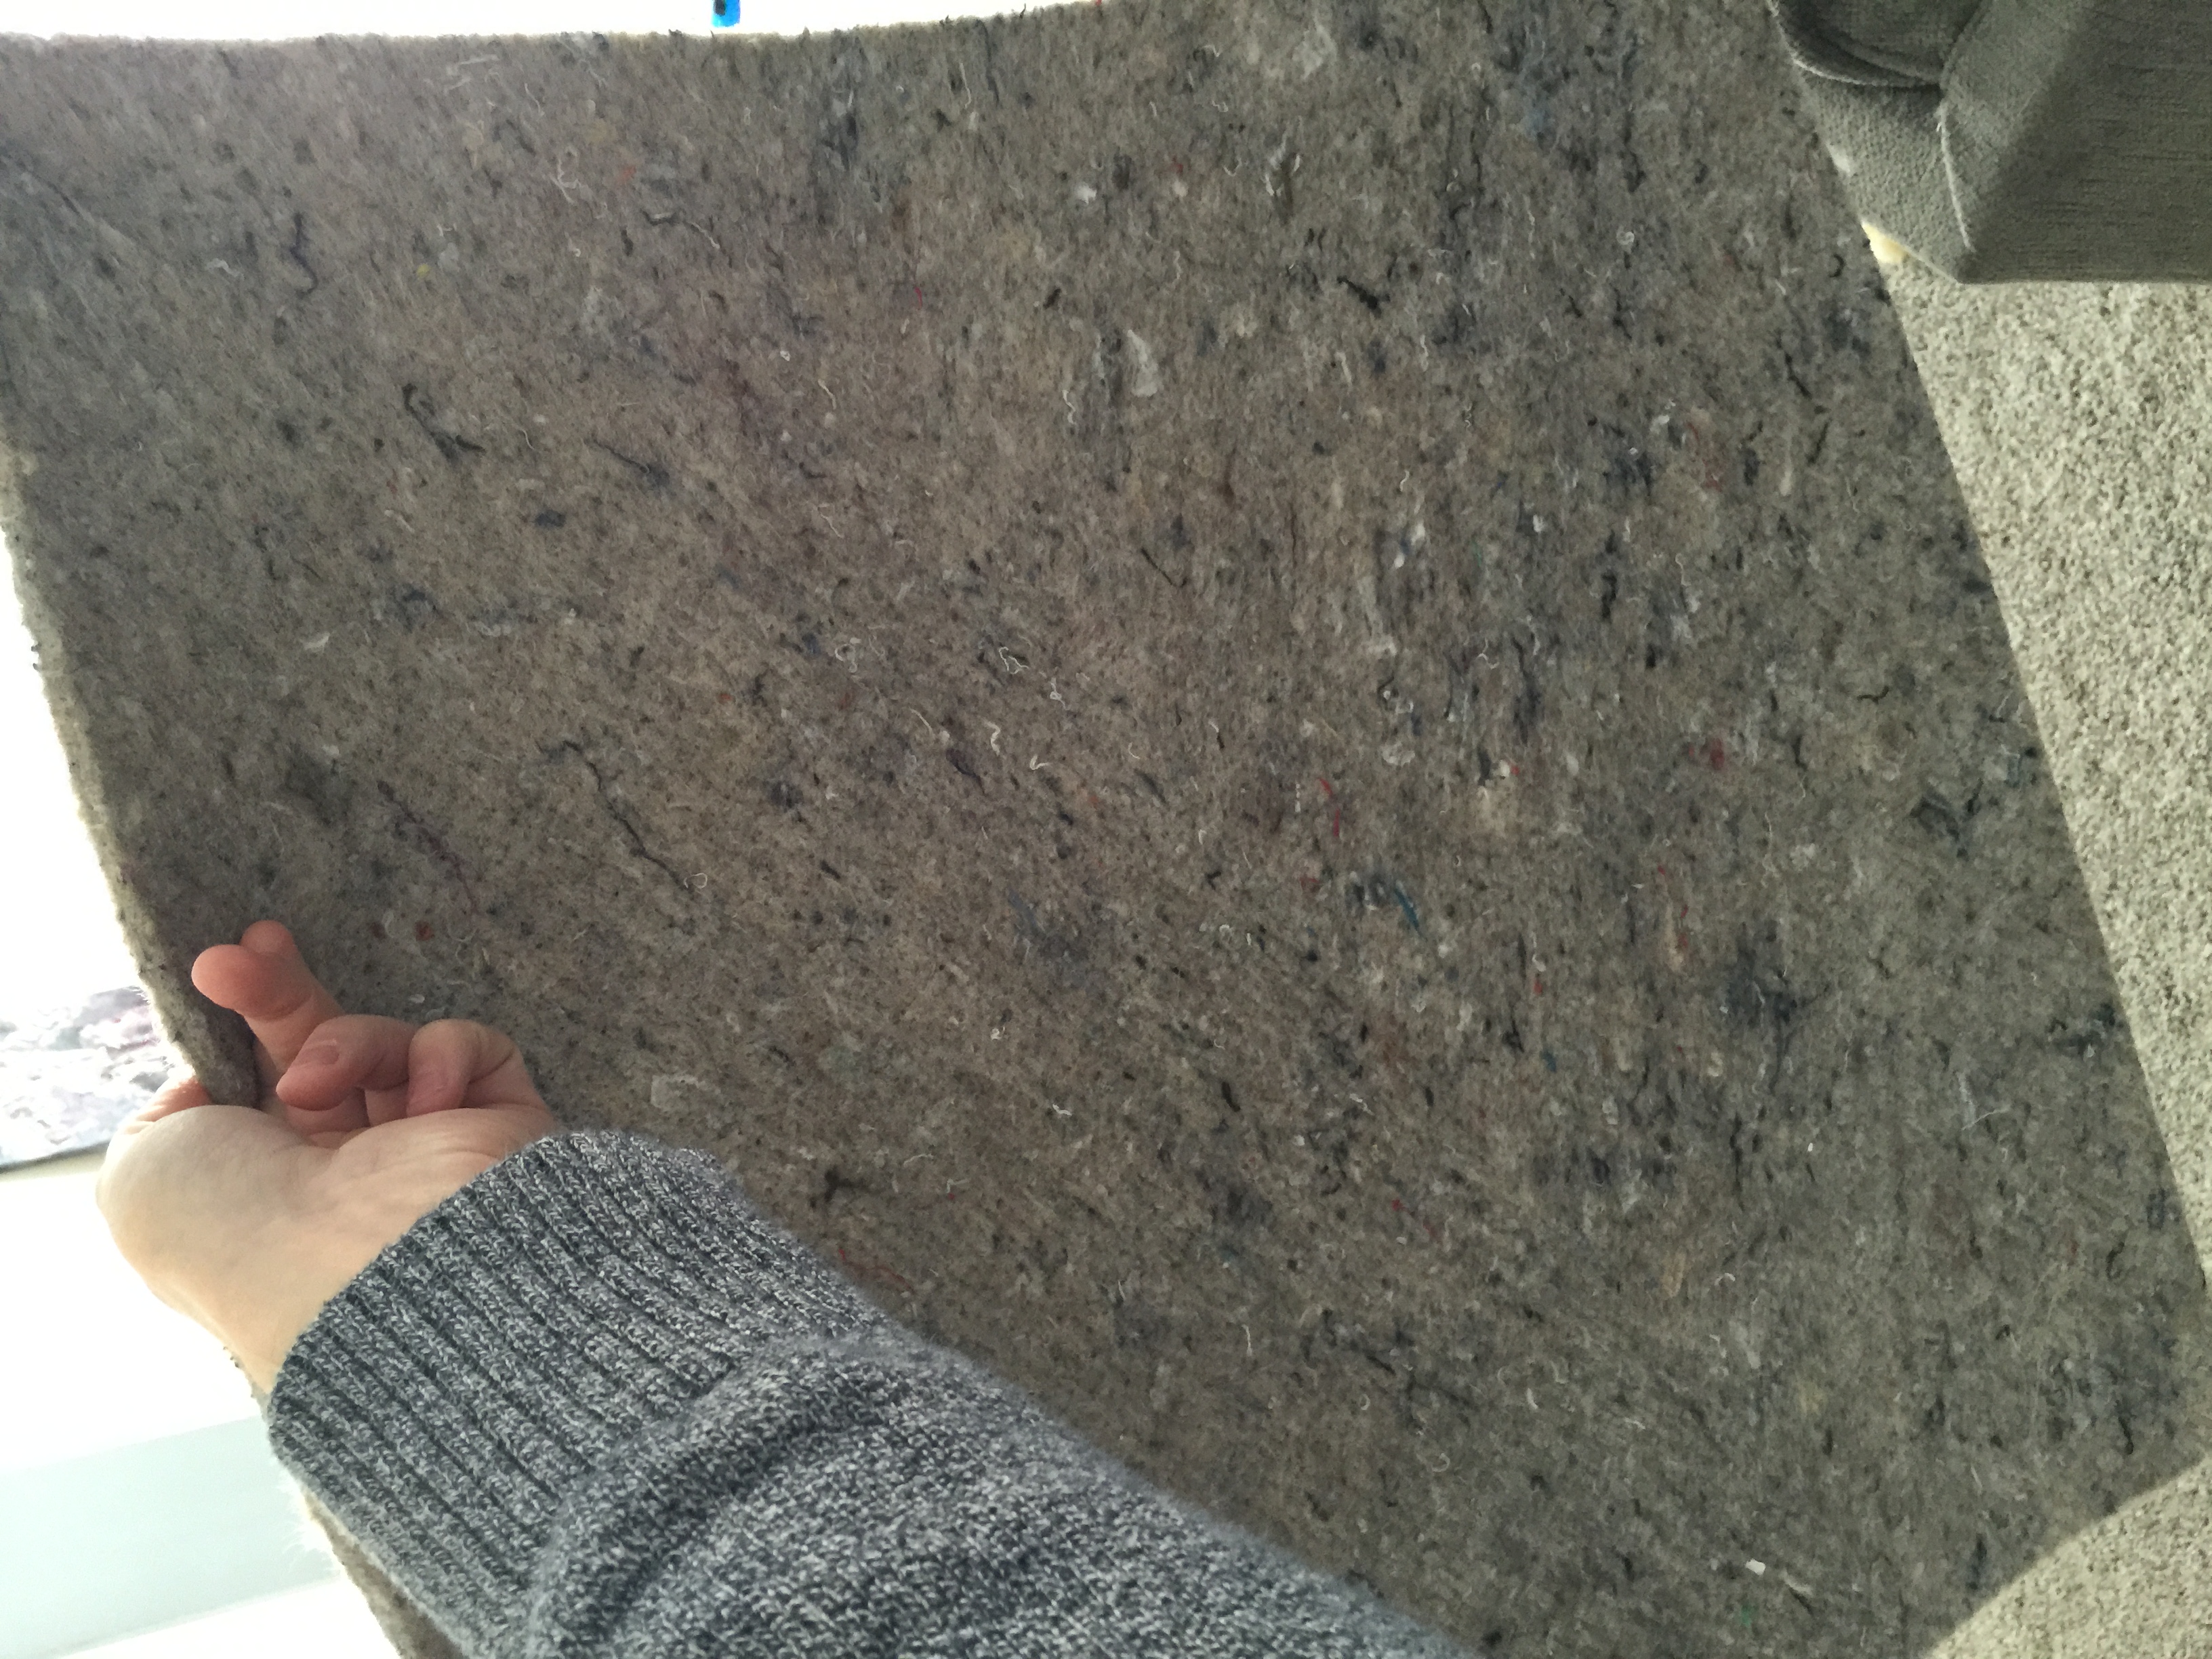 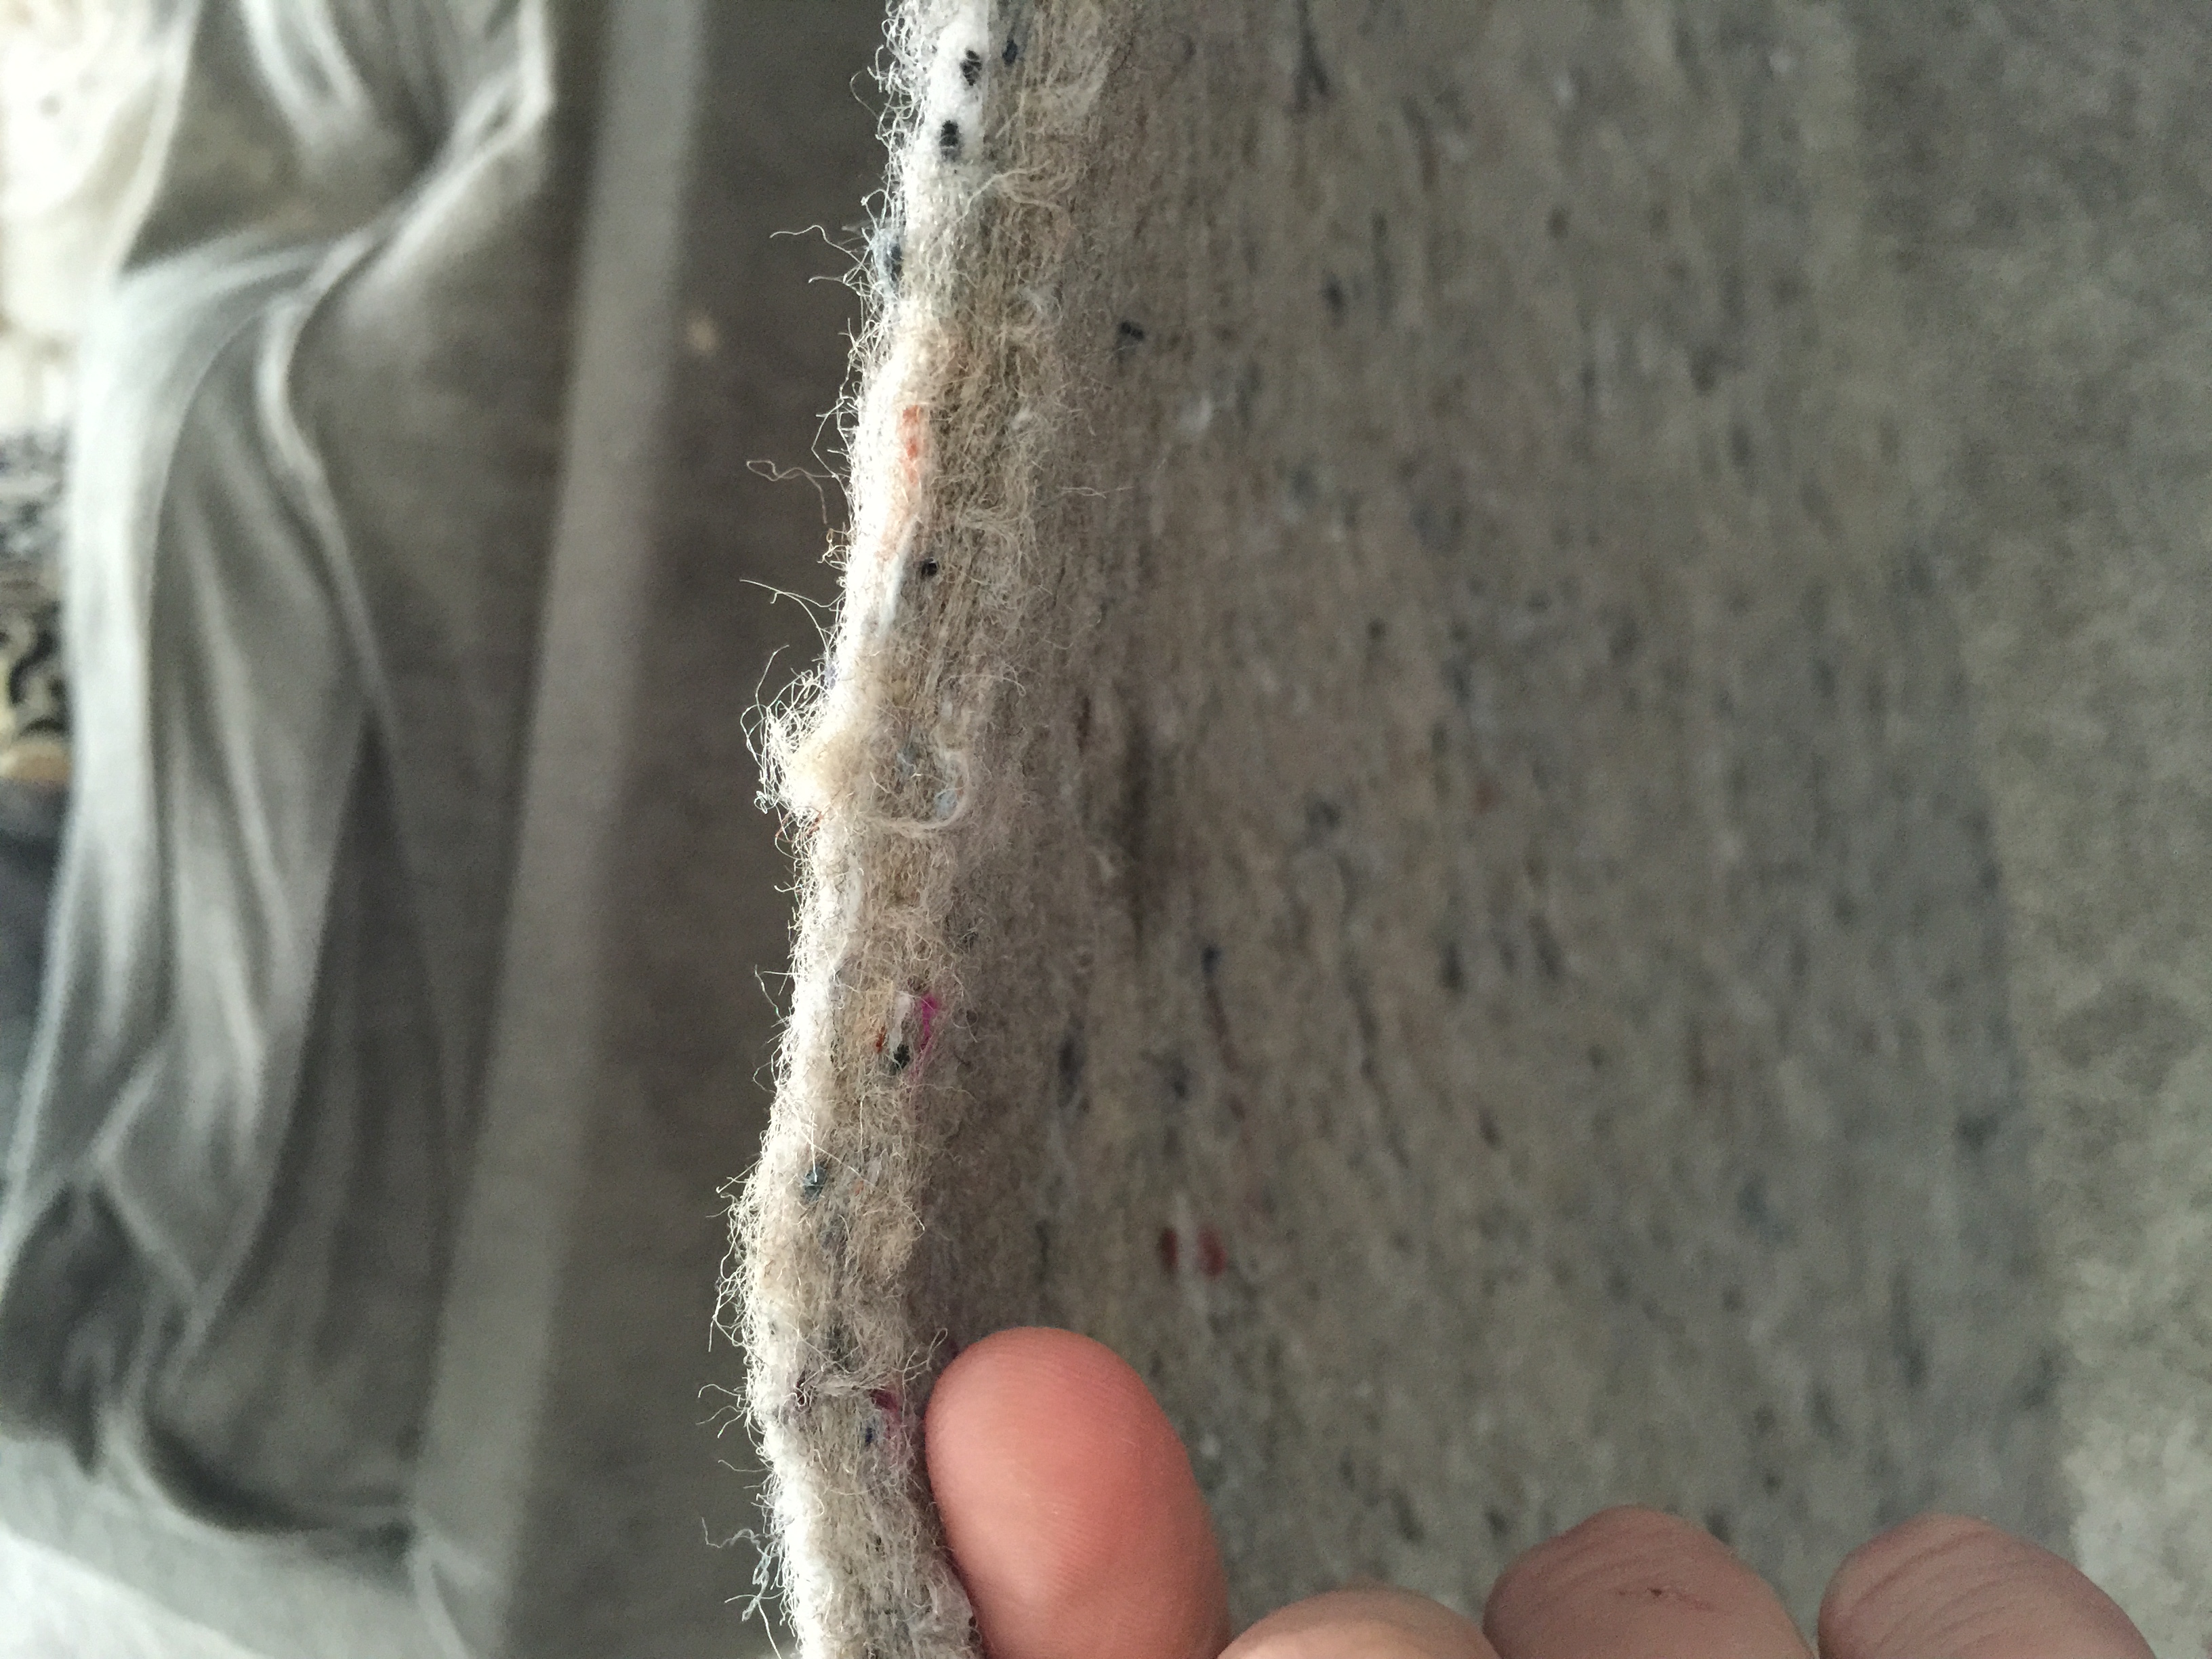
|
|
|
|
| The Following 2 Users Say Thank You to gl2filmerguy For This Useful Post: | civicdrivr (02-18-2015), Uplink (02-20-2015) |
|
02-18-2015, 02:07 PM
|
#49 |
|
Senior Member
Join Date: Dec 2014
Drives: anything you let me
Location: NY
Posts: 465
Thanks: 259
Thanked 237 Times in 165 Posts
Mentioned: 6 Post(s)
Tagged: 2 Thread(s)
|
Thanks GL, saved me some work.
 Civic, mine came with the same stuff. 2 squares free floating, 2 rectangles glued and unfinished to the underside of the 'seat bottoms' and one rectangle on the backside of the upright panel finished with the nice material that covers the rest of the kit. |
|
|
|
| The Following User Says Thank You to Uplink For This Useful Post: | civicdrivr (02-18-2015) |
|
02-18-2015, 02:15 PM
|
#50 |
|
Senior Member
Join Date: Jan 2013
Drives: 2013 Asphalt FR-S
Location: Orange County
Posts: 1,639
Thanks: 632
Thanked 981 Times in 537 Posts
Mentioned: 100 Post(s)
Tagged: 0 Thread(s)
|
i keep waiting for someone to make a delete like the OEM 2nd gen rx7 had when you got the factory 2 seat rather than 4.. it had locking flip top storage bins where the rear seat bases used to be... those were tits.
I guess I will have to try and make something myself. Thanks for the post, this is certainly a better option that then $1,000 carbon fiber kit.
__________________
~Namaste~ |
|
|
|
|
02-18-2015, 02:35 PM
|
#51 |
|
Senior Member
Join Date: Dec 2014
Drives: anything you let me
Location: NY
Posts: 465
Thanks: 259
Thanked 237 Times in 165 Posts
Mentioned: 6 Post(s)
Tagged: 2 Thread(s)
|
Honestly, it would add a few bucks but if they wanted to perfect the kit they could make the lower pieces out of carbon fiber with plastic for a hinge. It would support cargo with no issues while keeping the weight down. Then all it would need is a small carbon fiber or molded plastic insert tray to fit over the raw seatwell and it's done. They could rig up a lock to the bolt hole that held the front of the seat bottom if they wanted to get fancy like the RX7's.
All that said, had I known the quality was as good as it is, I would have bought this sooner without hesitation. The jury is still out on the weight reduction claim but I'm still very happy with it. Shrader did a fantastic job. |
|
|
|
|
02-18-2015, 11:04 PM
|
#52 |
|
Senior Member
Join Date: Mar 2012
Drives: 2018 Golf R
Location: Richmond, VA
Posts: 2,807
Thanks: 5,386
Thanked 1,095 Times in 647 Posts
Mentioned: 68 Post(s)
Tagged: 7 Thread(s)
|
Thanks @gl2filmerguy & @Uplink. I have the older kit that doesn't have the free floating sound deadener, but it does have it on the rear panel. Admittedly, I've been driving around without the rear panel in place, and its starting to annoy me at highway cruising. I need to toss that panel on before I install the header.
Sent from my XT1095
__________________
Parting out HERE
|
|
|
|
|
02-20-2015, 10:59 PM
|
#53 |
|
Senior Member
Join Date: Dec 2014
Drives: anything you let me
Location: NY
Posts: 465
Thanks: 259
Thanked 237 Times in 165 Posts
Mentioned: 6 Post(s)
Tagged: 2 Thread(s)
|
Just a quick update, I'm going to say the claim of 23lbs shed is... optimistic. I'll post some pics when all is said and done but here's where we stand:
My car is a 2015 and some weights are slightly different than the Official Component Weights Thread. In that thread, both rear seat bases total 6.2lbs. Mine clocked in at 8.375lbs. Conversely they show the seat back as 15lbs while mine was 14.375lbs. My total delete kit components are 14.425lbs. So let's call that a wash with the seatback. Anything else is reduction. I removed both buckle receivers, both child seat brackets, the driver side seat hinge and driver side belt system along with all driver side nuts/bolts that weren't needed so far. That totaled 5lbs on the nose. It got too dark/cold to get the rest so let's estimate double that to include the passenger side. 10lbs + the seat bottoms gives 18.375 lbs removed. Hopefully the weather holds up tomorrow and I'll get exact figures on everything and post some scale pics. I'm still firmly convinced this is a worthwhile purchase just thought you guys should have an exact measurement to go by. One other note to anyone who hasn't attempted this yet... there are a LOT of pins in the side panels. 8 to be exact. Take your time and work the panel free slowly. It helps if you have or know someone with thin arms that can reach inside to apply leverage so you don't bend the panel. |
|
|
|
| The Following User Says Thank You to Uplink For This Useful Post: | juliog (08-16-2015) |
|
09-29-2015, 01:38 AM
|
#54 |
|
Senior Member

Join Date: Jun 2013
Drives: 2023 GR SUPRA,15 FR-S (SOLD)
Location: Philadelphia, PA
Posts: 4,235
Thanks: 3,086
Thanked 2,100 Times in 1,397 Posts
Mentioned: 31 Post(s)
Tagged: 2 Thread(s)
|
@Uplink @gl2filmerguy & @PoorMansRacing :
How's the kit been for you guys long term now? Is it still worth the buy?
__________________
*SOLD*OFT Stage 2 UEL E85/Nameless Performance 3 inch axleback with 5 inch mufflers/ TRD CAI / CNT UEL/ Cusco Strut BAR & LHD Brake Stop / "JDM" Toyota Badges / WinJet JDM headlights - DRL MOD from fteightysix.com - 5000K Diode Dynamics HID kit / Diode Dynamics LED interior Lights and sidemarker bulbs / JDM Clear Sidemarkers / Diode Dynamics LED switchbacks/ OLM LED rear turn signals / Tap Turn Relay*SOLD*
|
|
|
|
|
09-29-2015, 02:07 AM
|
#55 | |
|
Senior Member
Join Date: Dec 2014
Drives: anything you let me
Location: NY
Posts: 465
Thanks: 259
Thanked 237 Times in 165 Posts
Mentioned: 6 Post(s)
Tagged: 2 Thread(s)
|
Quote:
If I'm honest, I've run into 2 issues with it. The first is the back panel (which is light, flexible plastic) only secures at the top and rests on the bottom piece. That means under moderate or greater breaking, unsecured things in the trunk begin to make their way into the cabin. That can be fixed by securing items or driving carefully. The other issue is that the lower panels are so form fitted (not a bad thing) that when I try to access the compartments for storage, the pins holding them to the cross piece wind up popping out. This could be remedied by using threaded fasteners instead of the supplied push pins. Otherwise, the kit looks great, has no issues supporting distributed weight (suitcases, backpacks with a few laptops, etc.), and gets lots of 'That's not stock?!' comments. I would absolutely do it again. Wish I knew you were interested, I was in South Jersey last week, could have let you check it out. Last edited by Uplink; 09-29-2015 at 02:13 AM. Reason: Phone dropped extra emoticon in. |
|
|
|
|
|
09-29-2015, 03:08 AM
|
#56 | |
|
Senior Member
Join Date: Jun 2013
Drives: 2023 GR SUPRA,15 FR-S (SOLD)
Location: Philadelphia, PA
Posts: 4,235
Thanks: 3,086
Thanked 2,100 Times in 1,397 Posts
Mentioned: 31 Post(s)
Tagged: 2 Thread(s)
|
Quote:
__________________
*SOLD*OFT Stage 2 UEL E85/Nameless Performance 3 inch axleback with 5 inch mufflers/ TRD CAI / CNT UEL/ Cusco Strut BAR & LHD Brake Stop / "JDM" Toyota Badges / WinJet JDM headlights - DRL MOD from fteightysix.com - 5000K Diode Dynamics HID kit / Diode Dynamics LED interior Lights and sidemarker bulbs / JDM Clear Sidemarkers / Diode Dynamics LED switchbacks/ OLM LED rear turn signals / Tap Turn Relay*SOLD*
|
|
|
|
|
|
|
|
|
 |
| Tags |
| diy, rear seat delete, weight, weight loss |
| Thread Tools | Search this Thread |
|
|
 Similar Threads
|
||||
| Thread | Thread Starter | Forum | Replies | Last Post |
| Rear Seat Delete kit | ender2664 | Cosmetic Modification (Interior/Exterior/Lighting) | 53 | 10-04-2017 02:10 PM |
| REAR SEAT DELETE SUB BOX | NYCsubaruBRZ | NY / NJ / CT / PA | 19 | 01-28-2014 02:38 AM |
| Company in NC wants to make a rear seat delete | Lonewolf | Southeast | 33 | 12-23-2013 05:44 PM |
| Rear seat removal? | Shizuma | BRZ First-Gen (2012+) -- General Topics | 34 | 04-01-2013 03:36 AM |


