


|
||||||
| DIY (Do-It-Yourself) Guides For all DIYs. |
 |
|
|
Thread Tools | Search this Thread |
 03-14-2016, 01:01 AM
|
#1 |
|
Senior Member
Join Date: Jan 2014
Drives: 2013 FR-S 10 Series
Location: Columbus, OH
Posts: 349
Thanks: 41
Thanked 174 Times in 108 Posts
Mentioned: 10 Post(s)
Tagged: 2 Thread(s)
|
10 Series owners can add factory heated mirrors.
Going to consolidate here and will update if we find you can do the same for a base FR-S.
For all 10 Series owners. You can add heated mirrors to your FR-S by adding the missing relay in the fuse box and a set of heated mirror assemblies. You can see the thread whole thread here, http://www.ft86club.com/forums/showthread.php?t=17954, where I slowly worked through this or follow the photos below. I came into the thread at post 40. I haven't verified this for a base model FR-S but based on the post of one person who said he installed them it didn't work. However I won't know for certain till I have a photo of his ED1 (driver side) or FD1 (passenger side) connector. Parts needed: 1. Relay: Subaru part number is 82501AG041 and will cost you about $19 bucks on eBay (cheapest route) 2. Mirror assemblies Subaru part numbers 91036CA081 (right side) and 91036CA091 (left side) will give us factory heated mirrors with no additional wire routing. Subaru lists at $163 per side. Ebay will get you $110 per side or some combination listing of $140. Just make sure you get a good look at the connector to ensure all 5 pins are there on the mirrors pigtail. Proof of concept: The first photo shows the voltage flow being controlled by the main body ECU to pulse the rear defroster window. This is the pin that feeds the mirror heater relay to energize this circuit. 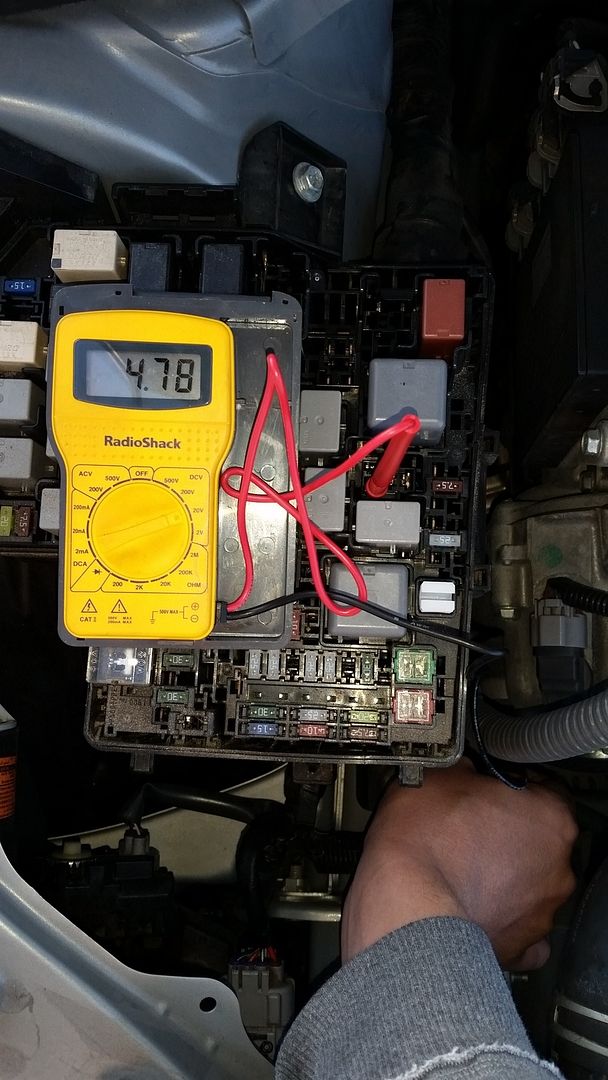 Photo 2 is the test to see the positive power supply from the main bus to run over to the wiring for the mirror heaters. 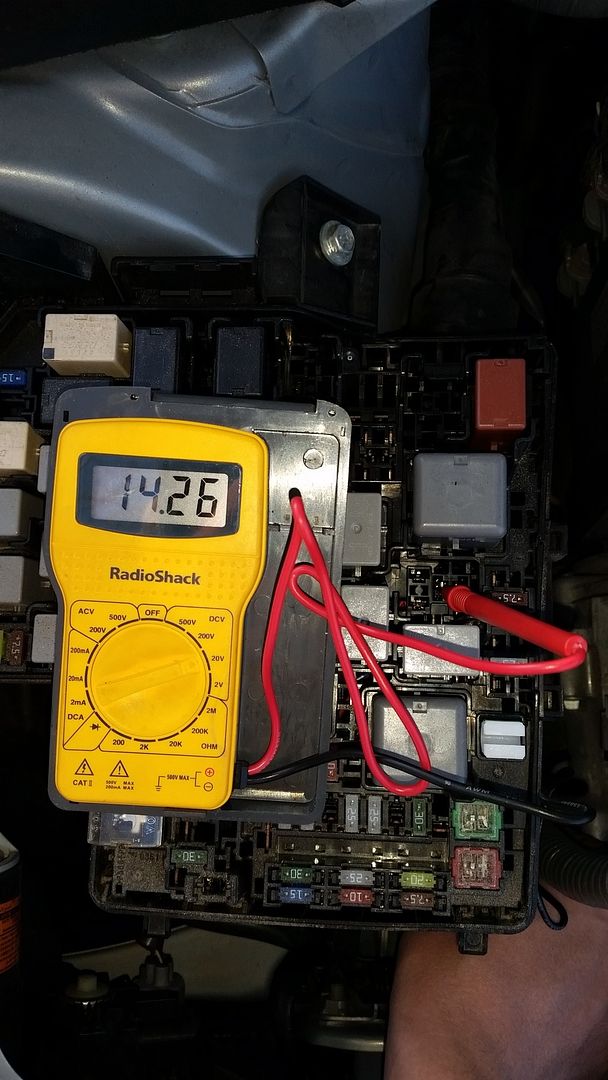 Photo 3 shows the relay installed. Photo 4 shows connector ED1 (the 10 pin connector on the left) in the driver footwell. The pink wire is the mirror heater positive power signal going from the car to the door.  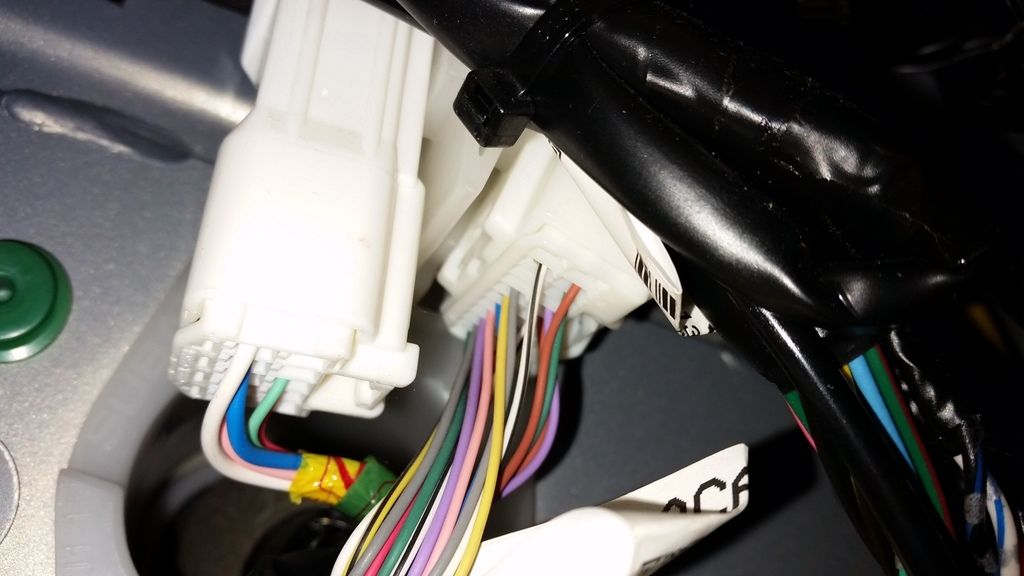 Also, in case anyone gets confused looking at the connector location callout on the full color PDF of the BRZ wiring they have connector ED1 and ED2 labled in reverse. Proof that ED1 is the one on the left in the photo is as follows. Pin 10 (white wire): Door speaker Pin 9 (blue wire): Door speaker Pin 8 (pink wire): Heated mirror wire (which from the wiring diagram goes all the way to the mirror) Pin 7 (light blue): Power window (can't see in the photo) Pin 6 (black wire): Ground (Can't see in the photo) Pin 5 not used Pin 4 not used Pin 3 (light green): Unlock signal Pin 2 (red wire): Lock signal Pin 1 not used A search in the FR-S or BRZ wiring diagram will show this to be true. Photo 5 and 6 show me testing for continuity of wiring and power flow from fuse box in the engine bay with the rear defroster energized. When turned off voltage dropped to zero as expected. 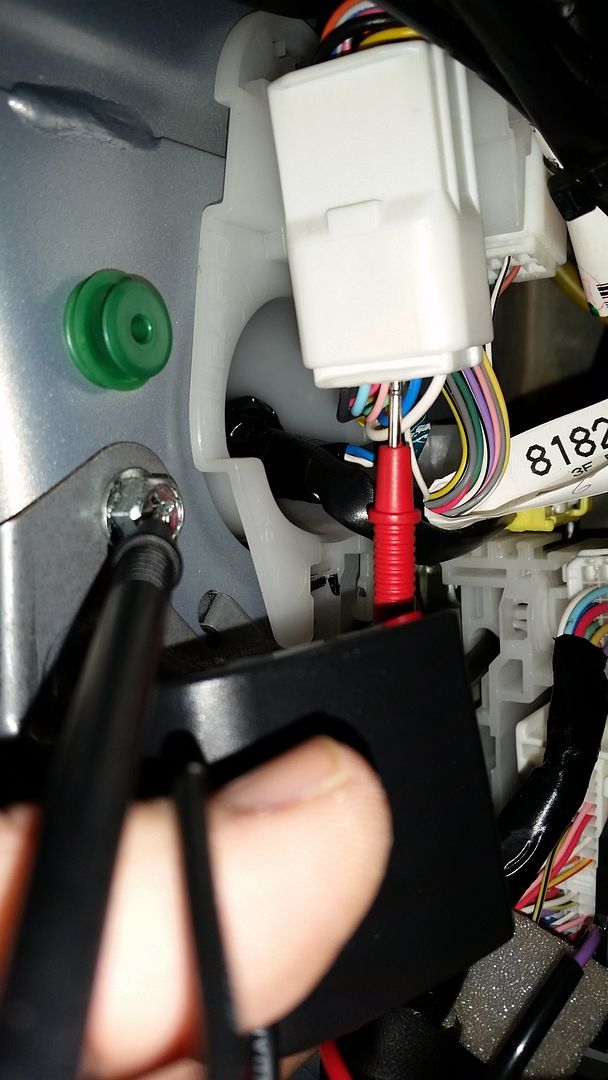 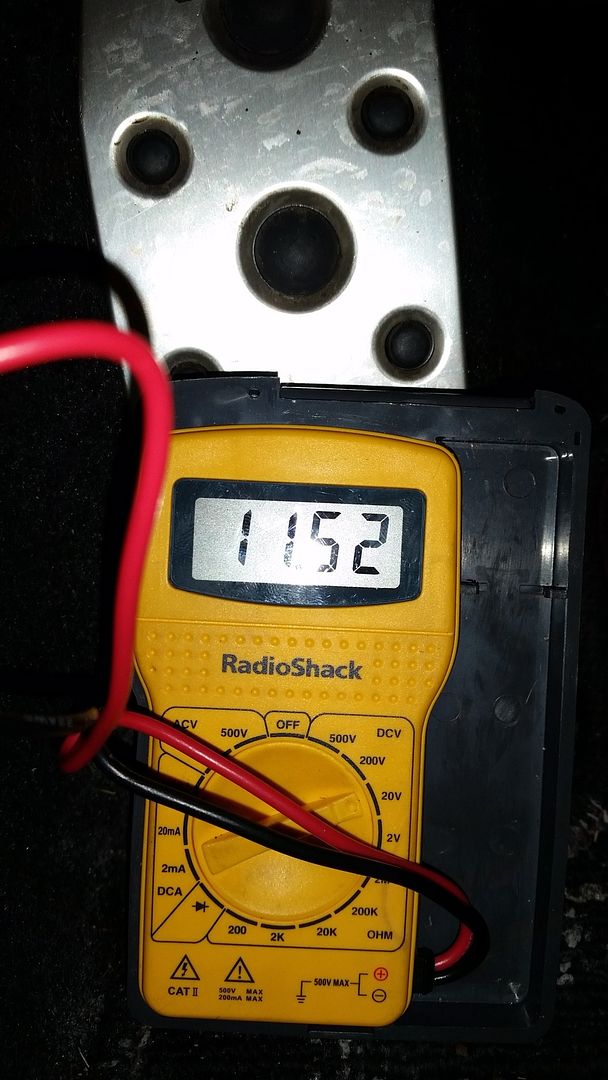 Photo 7 is the drivers door card pulled off looking at connector E7 (mirror assembly connector) that the wiring runs all the way to where the mirror assembly pig tail gets connected. Replace the base FR-S mirrors with ones from a monogram or BRZ premium and you'll have heated mirrors in the winter. 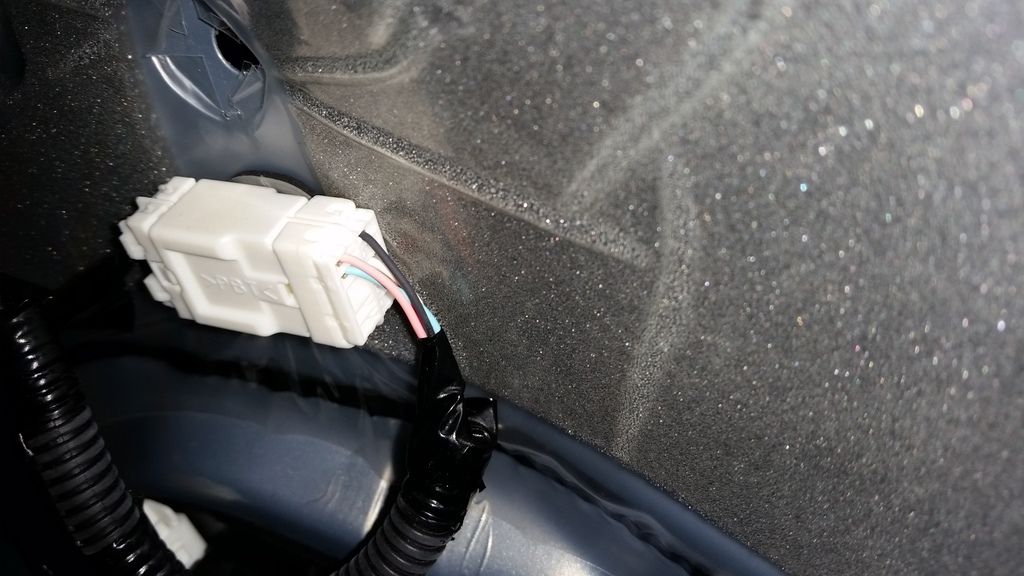   
|

|

|
|
03-17-2016, 12:34 AM
|
#2 |
|
Senior Member
Join Date: Jan 2014
Drives: 2013 FR-S 10 Series
Location: Columbus, OH
Posts: 349
Thanks: 41
Thanked 174 Times in 108 Posts
Mentioned: 10 Post(s)
Tagged: 2 Thread(s)
|
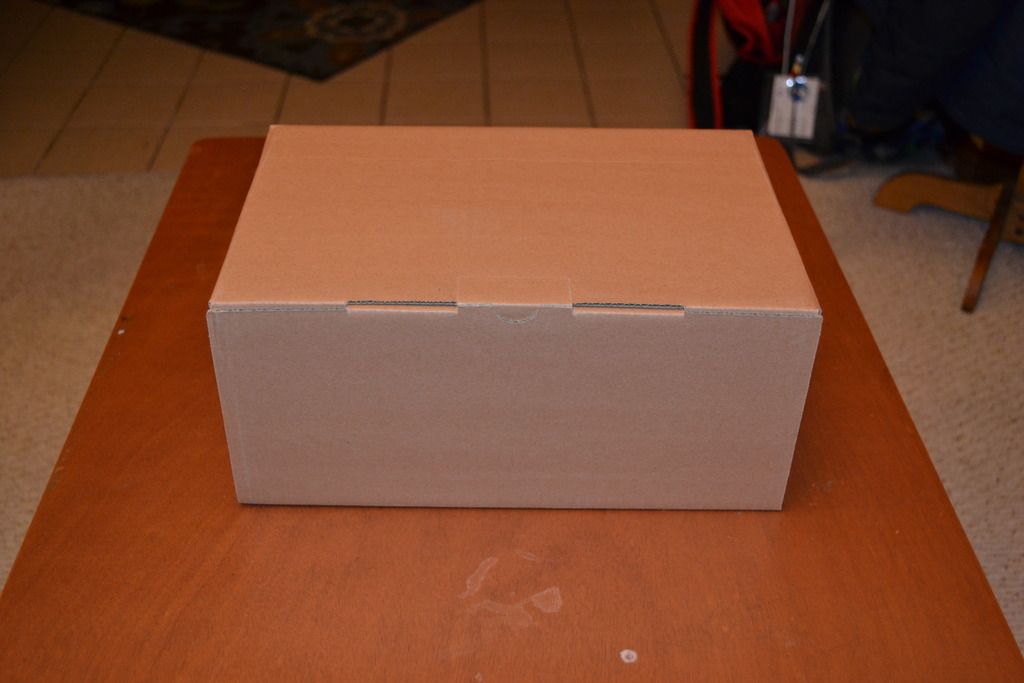
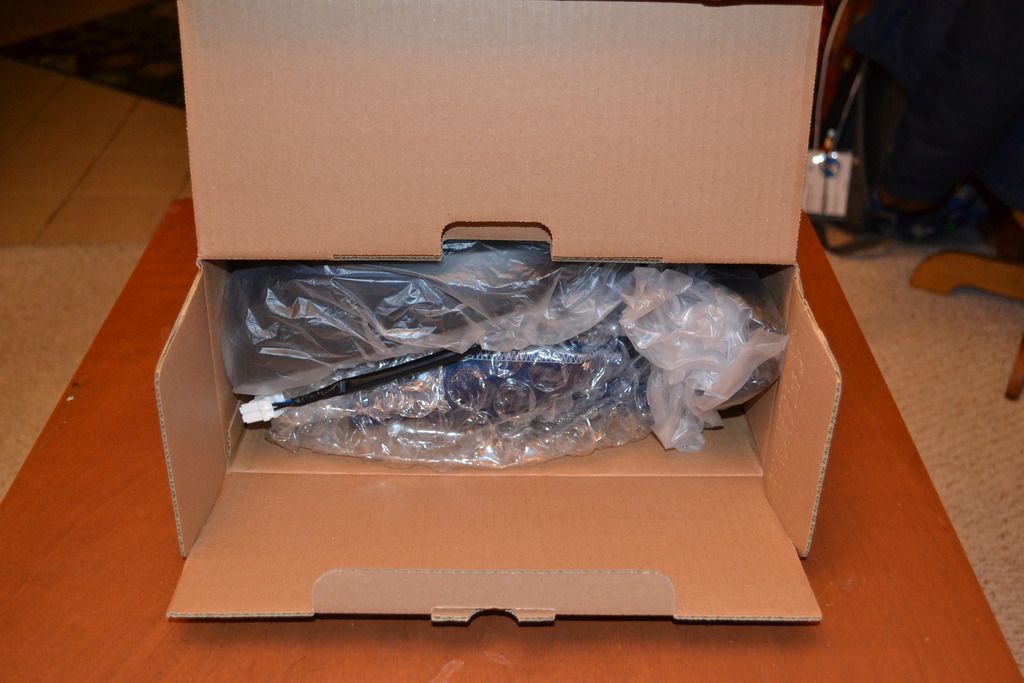
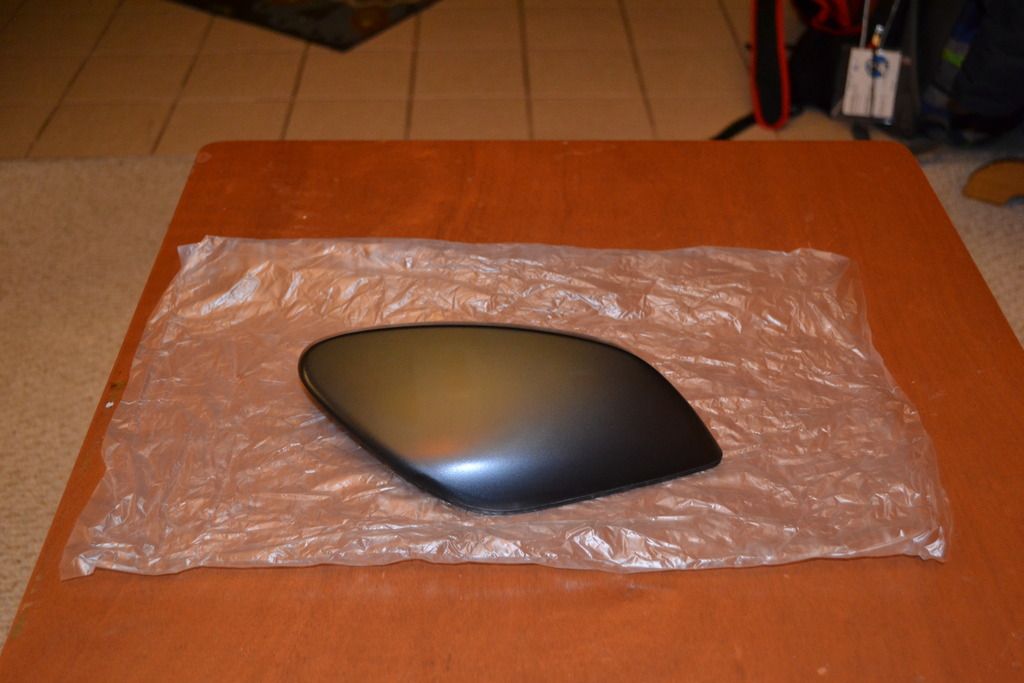
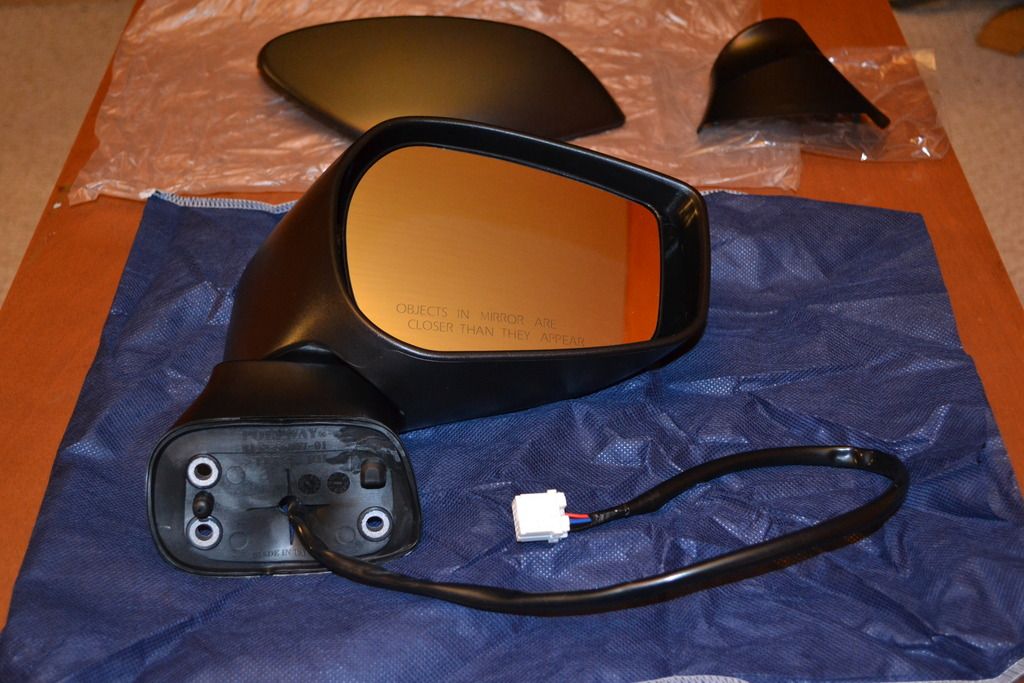
Got my mirrors in from 1A Auto. Got the pair for $139.90 and was pleasantly surprised at how they arrived. Each mirror was in its own box, completely disassembled ready for install. I can definitely recommend purchasing from this firm. The quality appears to be there and its both sides for less than the cost of one assembly from Subaru for the BRZ limited with heated mirrors.
|
|
|
|
| The Following User Says Thank You to NahumCC For This Useful Post: | Knshro13 (03-17-2016) |
|
03-17-2016, 01:25 AM
|
#3 |
|
Senior Member
Join Date: Feb 2013
Drives: 10 series FRS
Location: San Gabriel Valley
Posts: 259
Thanks: 52
Thanked 314 Times in 110 Posts
Mentioned: 12 Post(s)
Tagged: 0 Thread(s)
|
Thats awesome!
So it might be safe to assume that monogram, and RS models have the same wires. Either way, I have a 10series so I'm good. Great job! |
|
|
|
|
03-17-2016, 10:36 AM
|
#4 | |
|
Senior Member

Join Date: Apr 2013
Drives: 2005 Toyota Camry
Location: 91745
Posts: 6,562
Thanks: 493
Thanked 6,093 Times in 3,029 Posts
Mentioned: 95 Post(s)
Tagged: 3 Thread(s)
|
Quote:
|
|
|
|
|
| The Following User Says Thank You to mav1178 For This Useful Post: | Knshro13 (03-17-2016) |
|
03-17-2016, 11:05 PM
|
#5 |
|
Senior Member
Join Date: Jan 2014
Drives: 2013 FR-S 10 Series
Location: Columbus, OH
Posts: 349
Thanks: 41
Thanked 174 Times in 108 Posts
Mentioned: 10 Post(s)
Tagged: 2 Thread(s)
|
So all I can say is while this job is straight forward (removal of the old mirror and install of the new one) it would have been great had the service manual given a hint about how to get the pig tail out because it wasn't immediately obvious.
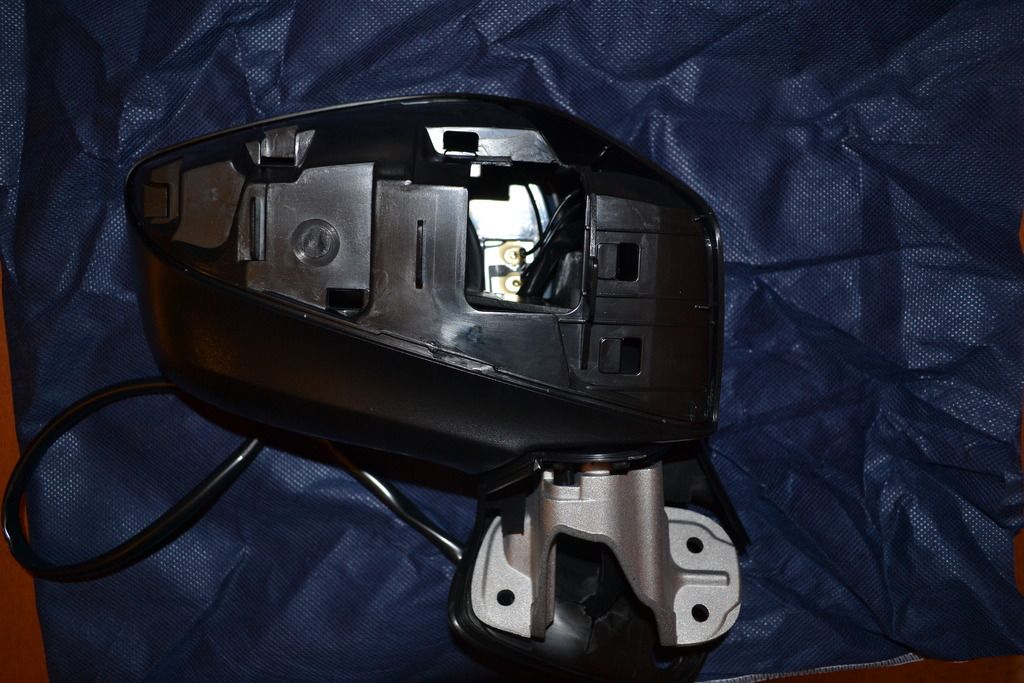
Onto the hints. For the drivers side door panel its almost impossible to remove the top connector from the mirror and lock control panel. There are four phillips head screw drivers and one plastic clip holding it in place. It makes it easier to undo the clips or you could remove and just leave it hanging if you want. 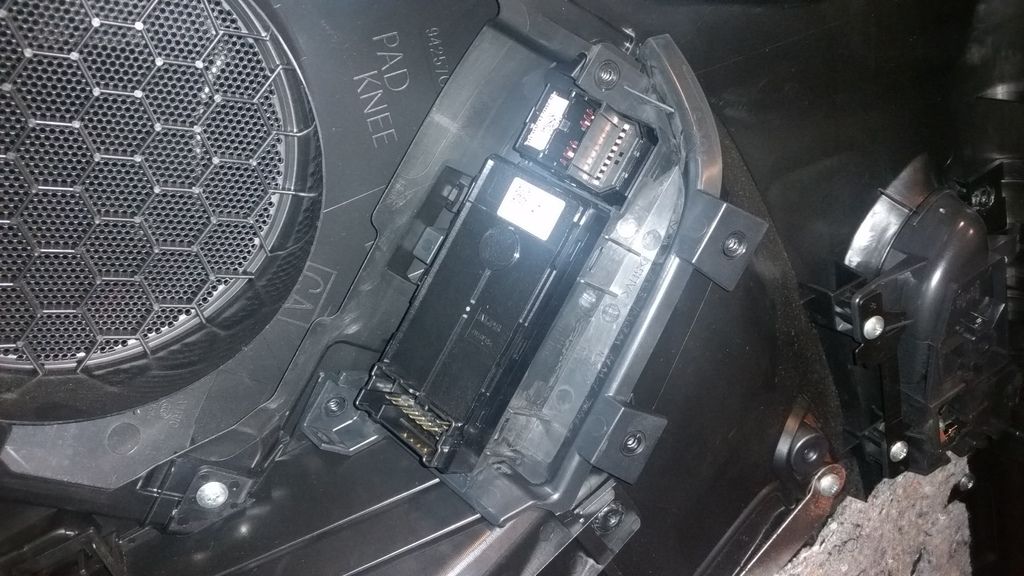 Getting the pig tail out could definitely frustrate you. The secret is you have to bring the pig tail forward in the door and then up to/above where the fixed window and guide mount are. Once there, pull it out while keeping it in that area and it'll be out cleanly in no time. 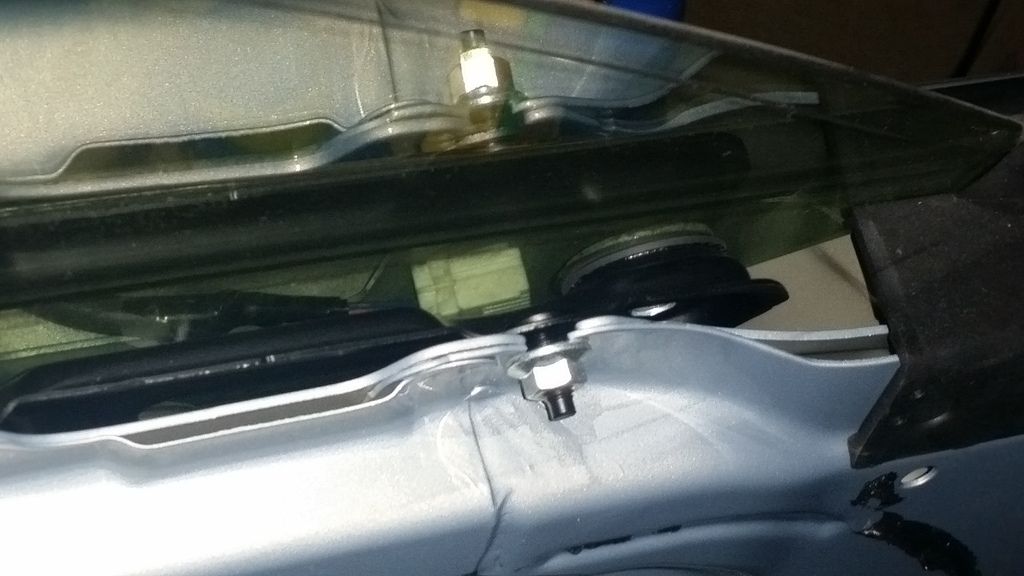 This is what blocks you from going out the way you think its supposed to route it when your blindly reaching inside the guts of the door.  Comparison of the two housings. My OEM housing is on the right and the replacement on the left. They are about 99% the same short of a few finishing details from the mold they were removed from but none of that impacts fit and finish. 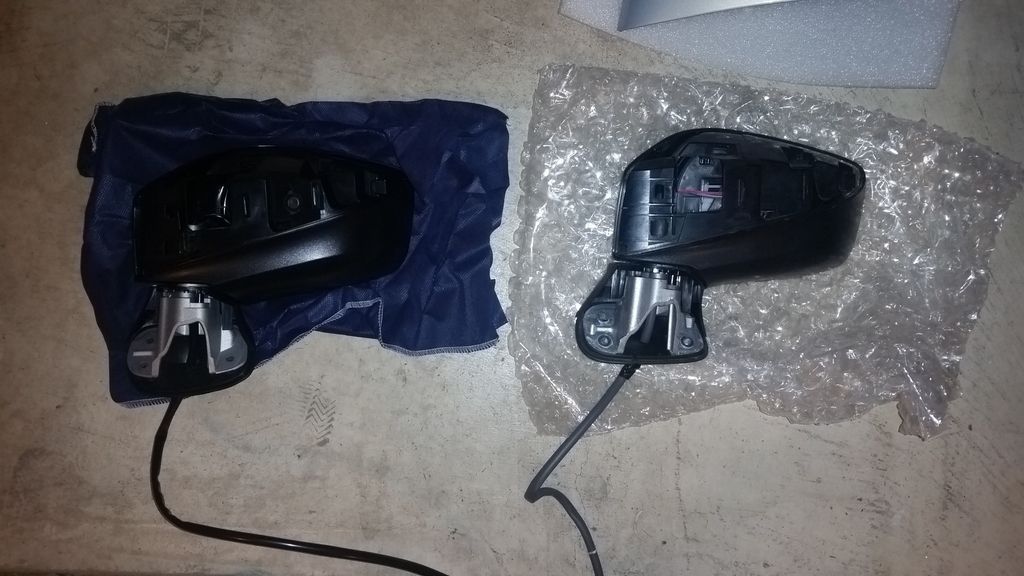 They work perfectly, both the motor adjustment and heated feature. They got hot within a few seconds and it was noticeable to the back of the hand. No more useless mirrors on foggy/iced over mornings. Last edited by NahumCC; 03-18-2016 at 01:52 PM. |
|
|
|
|
|
|
|
|
|
|
 Similar Threads
|
||||
| Thread | Thread Starter | Forum | Replies | Last Post |
| heated mirrors? | gxgn | DIY (Do-It-Yourself) Guides | 141 | 11-15-2016 08:27 AM |
| Heated Mirrors | DashRipRock | CANADA | 20 | 11-23-2015 10:50 AM |
| Heated mirrors | mid_life_crisis | Electronics | Audio | NAV | Infotainment | 1 | 09-25-2013 12:47 PM |
| heated mirrors | mwlhrh | Scion FR-S / Toyota 86 GT86 General Forum | 9 | 08-06-2013 01:55 PM |


