


|
||||||
| Cosmetic Modification (Interior/Exterior/Lighting) Discussions about cosmetic mods. |
 |
|
|
Thread Tools | Search this Thread |
 06-30-2017, 12:51 AM
|
#29 | |
|
Senior Member
Join Date: Jun 2017
Drives: 2017 86, 2012 Tundra, 1999 Integra
Location: Southeast Pennsylvania
Posts: 120
Thanks: 296
Thanked 93 Times in 41 Posts
Mentioned: 1 Post(s)
Tagged: 0 Thread(s)
|
Quote:
One additional thing you might consider: look at the pictures on the first page of the thread "One piece dash and other 2017 parts". There is a clear plastic circle on the trunk under the center spoiler brace, probably to keep the spoiler from scratching the trunk since the center brace just rests on the lid. I think that brace keeps the thin spoiler from bending in case you close the trunk and held onto the spoiler while doing it. Its a little thing, but I bet it does a world of good in the long run to prevent scratches and rust. One by one my reasons for holding out on making the big purchase are fading. Now that I know the new spoiler can fit on the 86, I really just might have to take the plunge. The agony of car shopping! If only I weren't so cheap! I look at my old Integra and think, "Maybe just one more year... Screw it the 86 is awesome. But the old girl still runs well...But I can get a great deal right now..." Sigh. Myriad |
|

|

|
|
07-06-2017, 10:53 PM
|
#30 |
|
Senior Member
Join Date: May 2016
Drives: 2017 Toyota 86
Location: Kirkland, WA
Posts: 206
Thanks: 24
Thanked 108 Times in 70 Posts
Mentioned: 5 Post(s)
Tagged: 0 Thread(s)
|
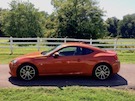
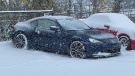
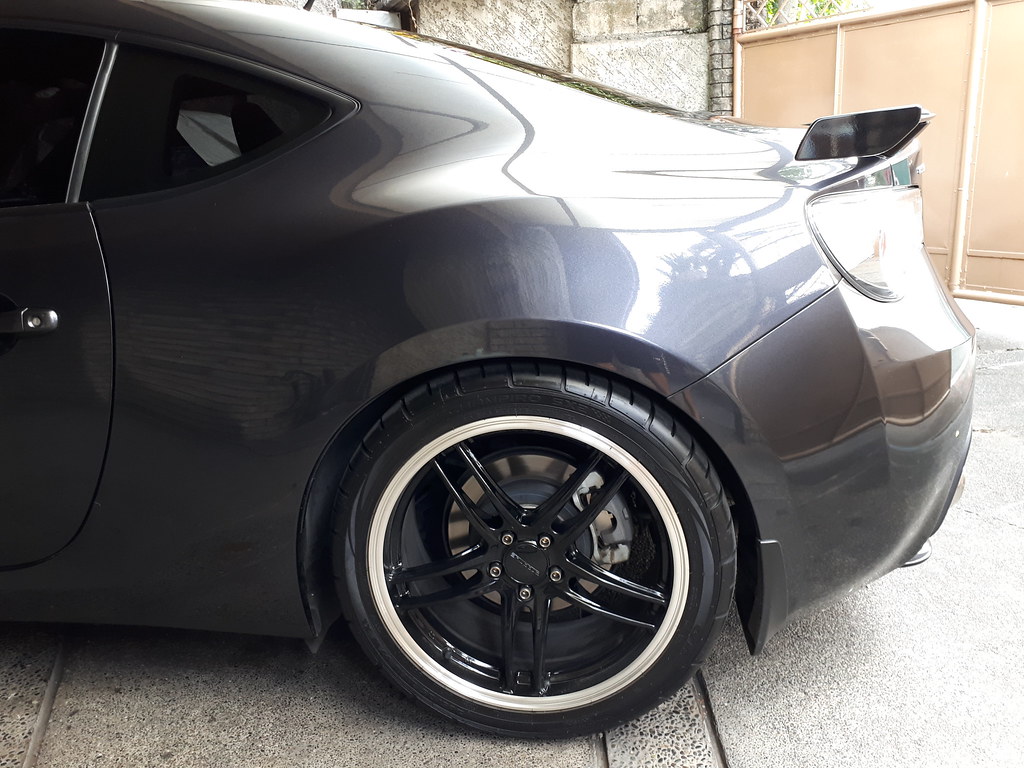
It is done! I got the spoiler installed. No normal body shop would take on the job, seeing it as a hassle, I ended up going to a custom shop called Eurotech Bodywerkes, they did it for me for $200 and it's damn perfect, they even sealed the holes, I washed the car just to check for that and the trunk had no leaks. Here's some pictures, the carbon fiber pattern really pops in the sun, I bet it'll look sick in the rain, too!
 
Last edited by Borchert97; 07-09-2017 at 12:01 AM. |
|
|
|
| The Following User Says Thank You to Borchert97 For This Useful Post: | Myriad (07-09-2017) |
|
01-08-2018, 03:35 AM
|
#31 |
|
Member

Join Date: Oct 2013
Drives: BRZ
Location: Manila
Posts: 18
Thanks: 0
Thanked 16 Times in 7 Posts
Mentioned: 0 Post(s)
Tagged: 0 Thread(s)
|
I'd like to contribute to this thread regarding how I installed the 2017 BRZ OEM spoiler to my 2015 BRZ
1. I made a template of the base brackets 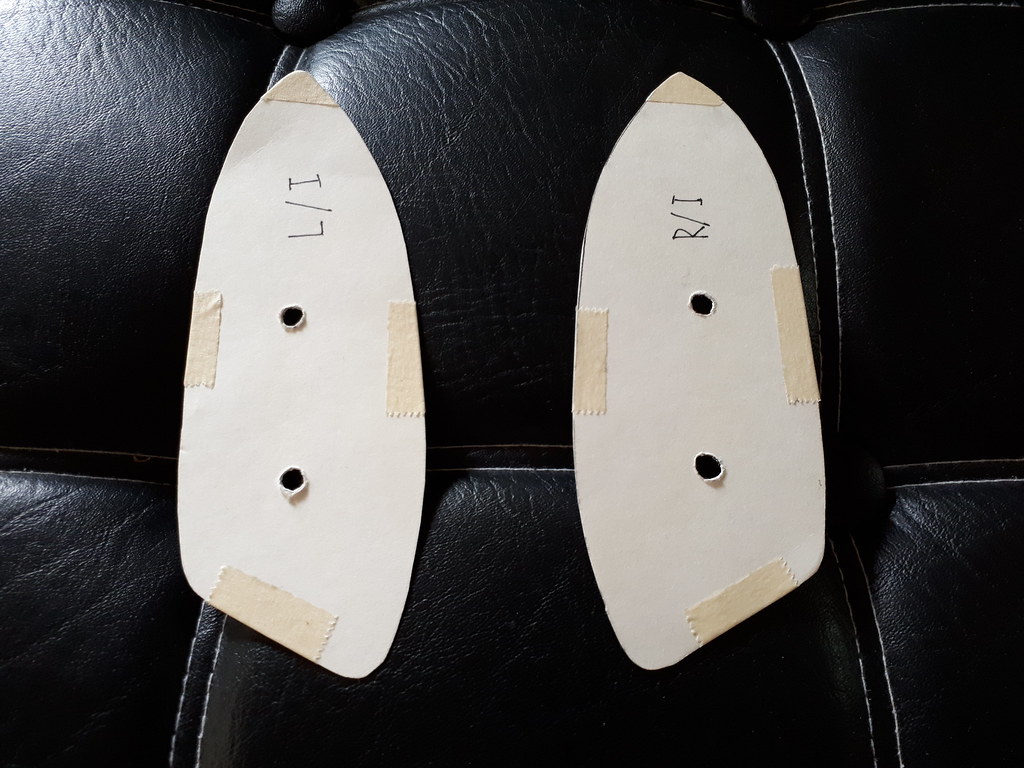 20180108_130134 by marlonmercado77, on Flickr 20180108_130134 by marlonmercado77, on Flickr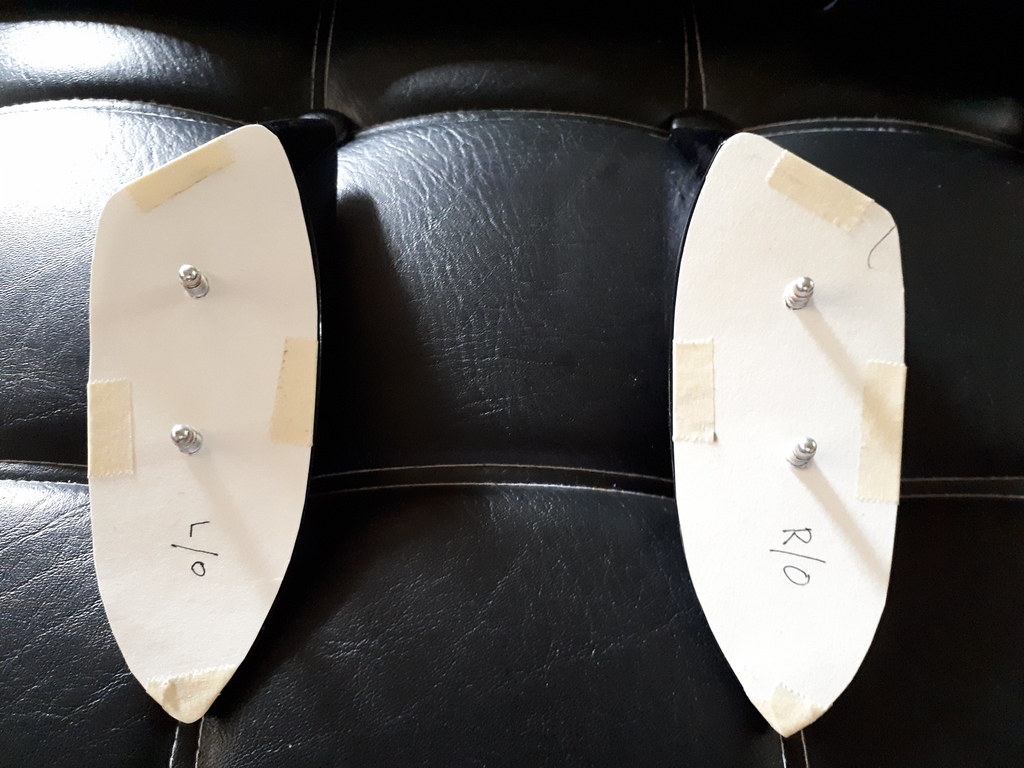 20180108_130226 by marlonmercado77, on Flickr 20180108_130226 by marlonmercado77, on Flickr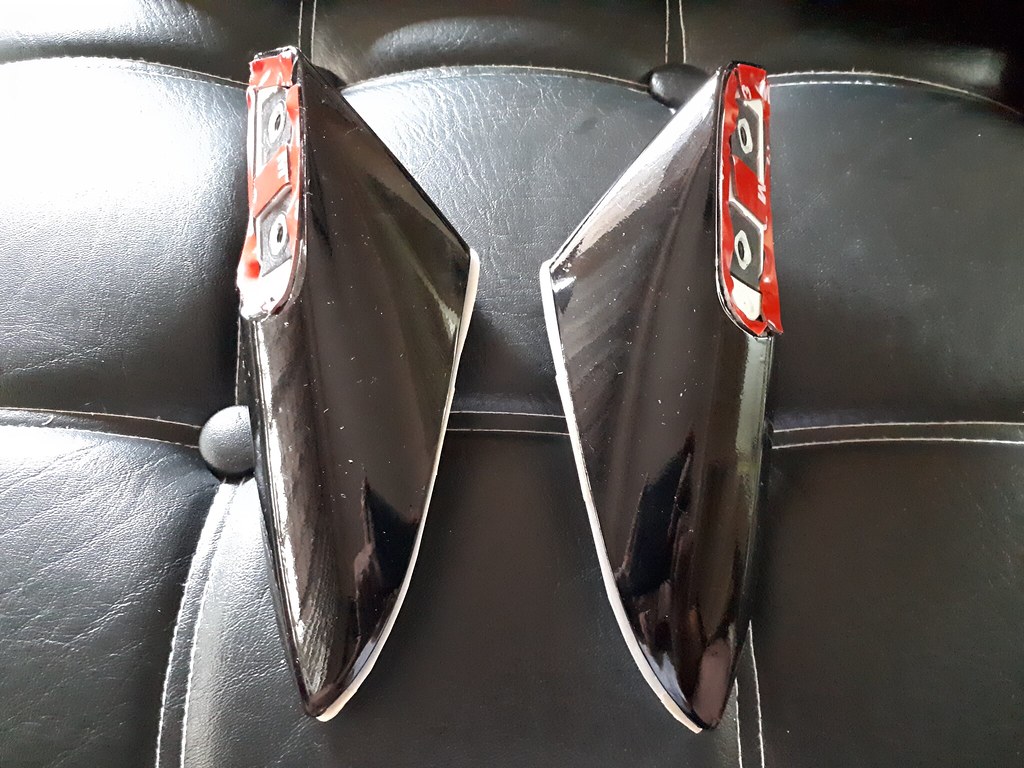 20180108_130415 by marlonmercado77, on Flickr 20180108_130415 by marlonmercado77, on Flickr2. I used this template to trace where the position of the spoiler base on the trunk 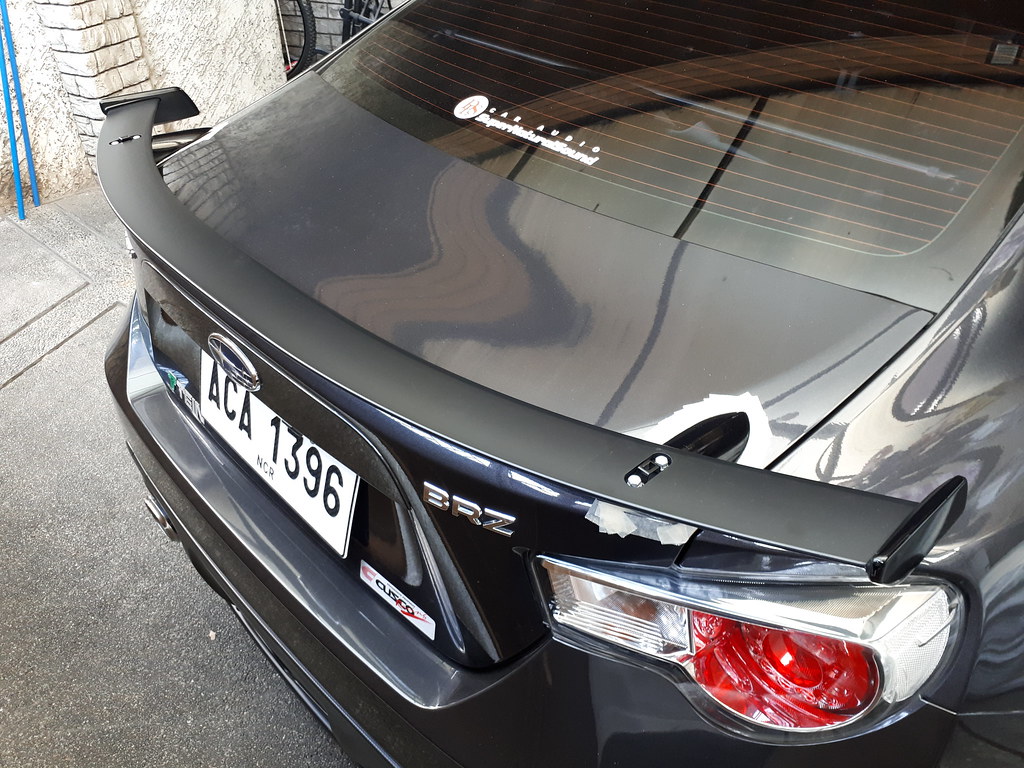 20180108_134256 by marlonmercado77, on Flickr 20180108_134256 by marlonmercado77, on Flickr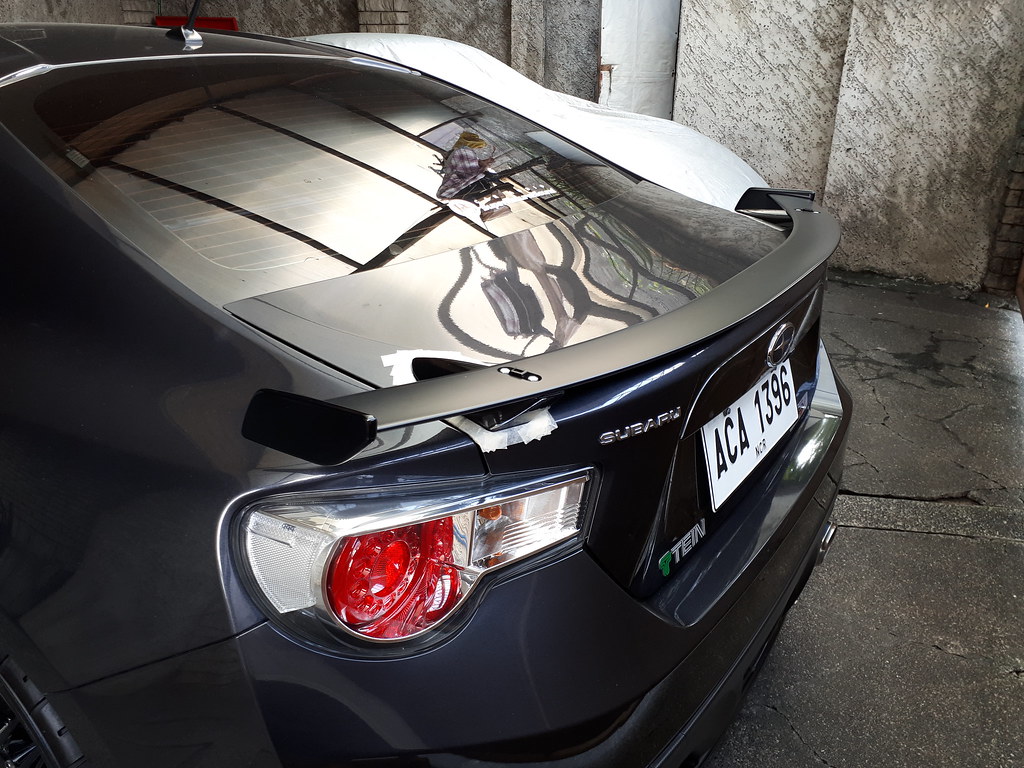 20180108_134245 by marlonmercado77, on Flickr 20180108_134245 by marlonmercado77, on Flickr3. I then removed the aluminum wing to trace the actual base as it is correctly positioned on the trunk 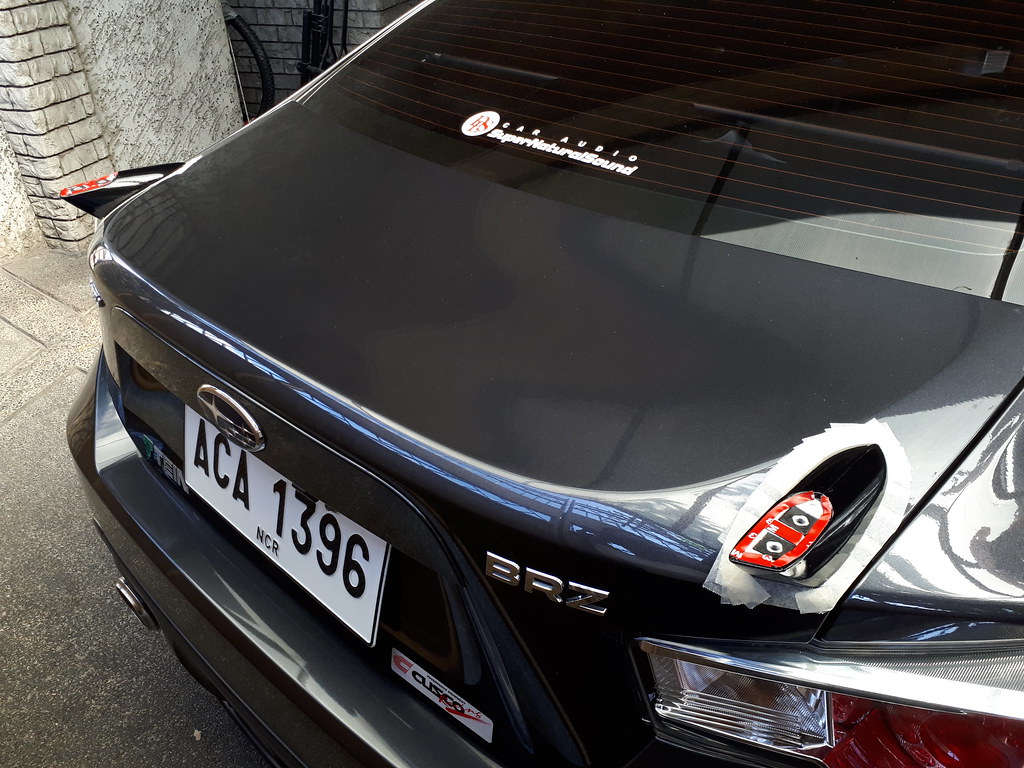 20180108_133043 by marlonmercado77, on Flickr 20180108_133043 by marlonmercado77, on Flickr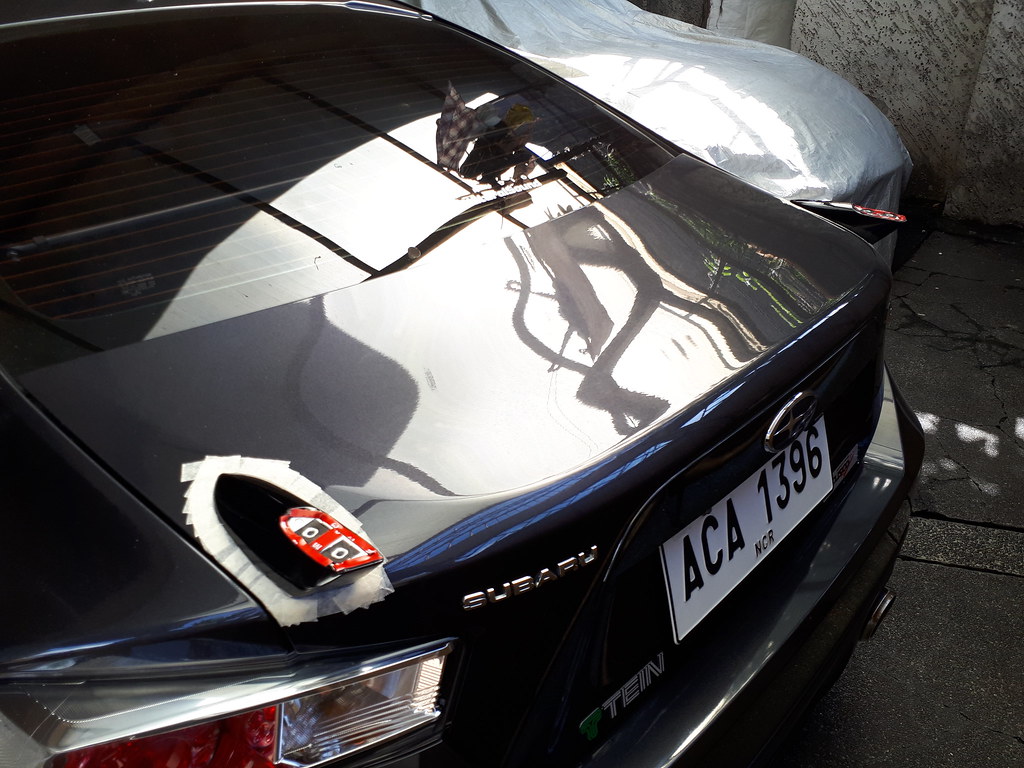 20180108_133034 by marlonmercado77, on Flickr 20180108_133034 by marlonmercado77, on Flickr
|
|
|
|
|
01-08-2018, 03:51 AM
|
#32 |
|
Member
Join Date: Oct 2013
Drives: BRZ
Location: Manila
Posts: 18
Thanks: 0
Thanked 16 Times in 7 Posts
Mentioned: 0 Post(s)
Tagged: 0 Thread(s)
|
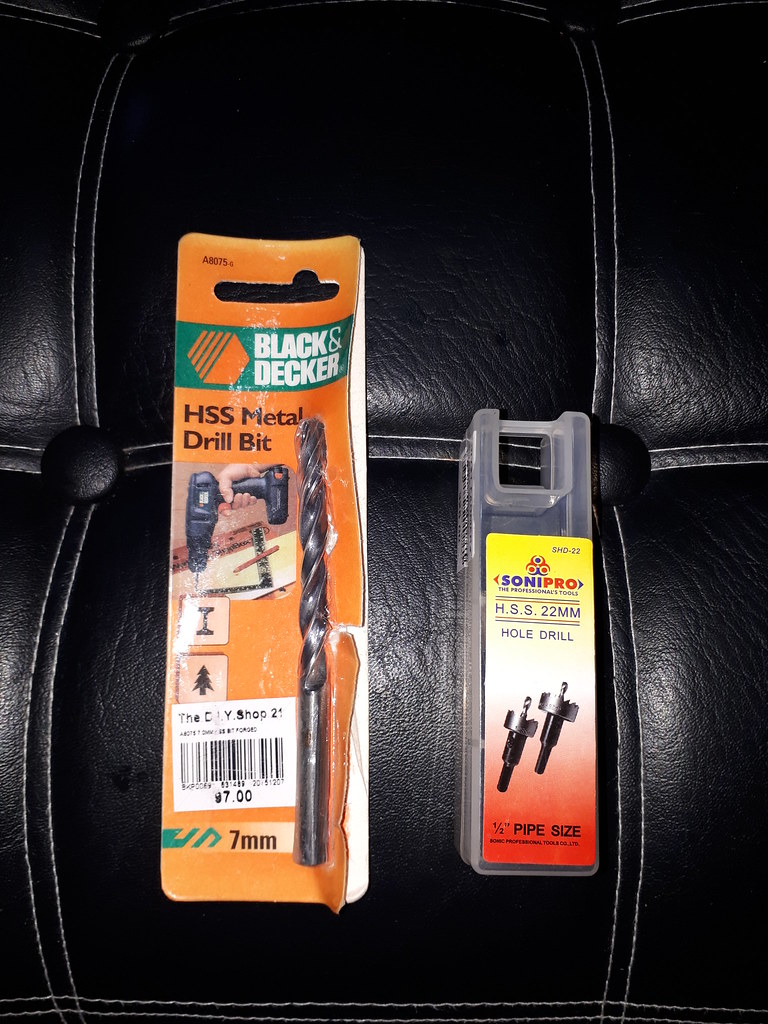
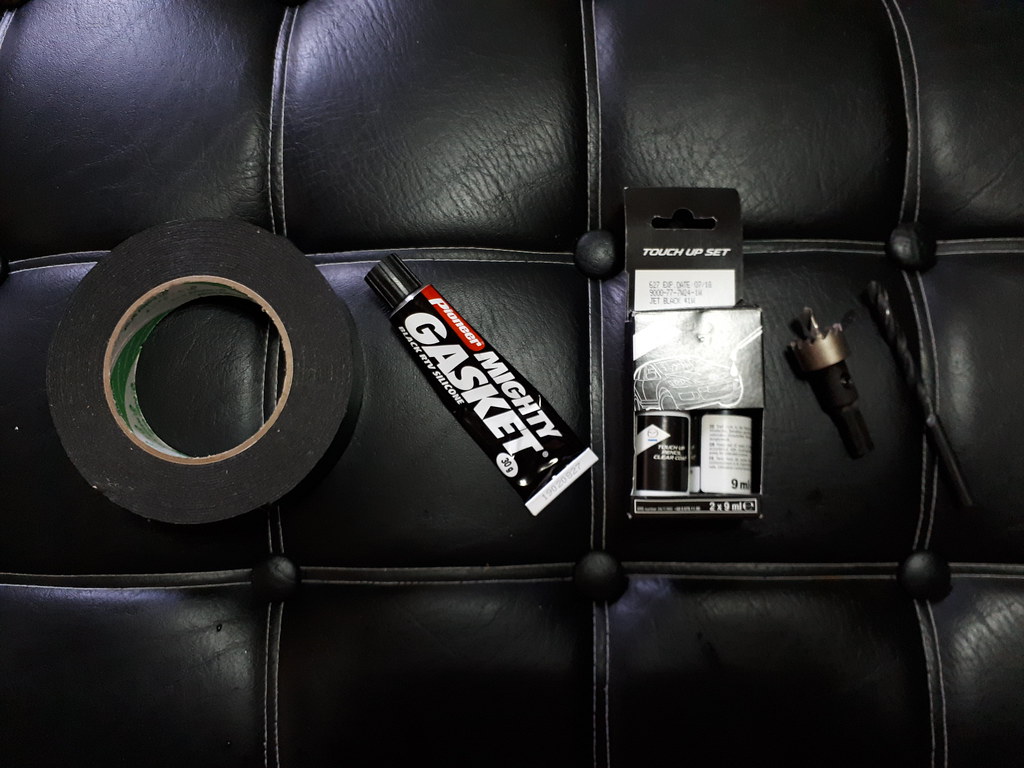
4. Time to drill the holes. I used a 7mm drill bit for the outside of the trunk and a 22mm hole saw for the inside
 20180108_150708 by marlonmercado77, on Flickr 20180108_150708 by marlonmercado77, on Flickr5. Drilled outside right portion 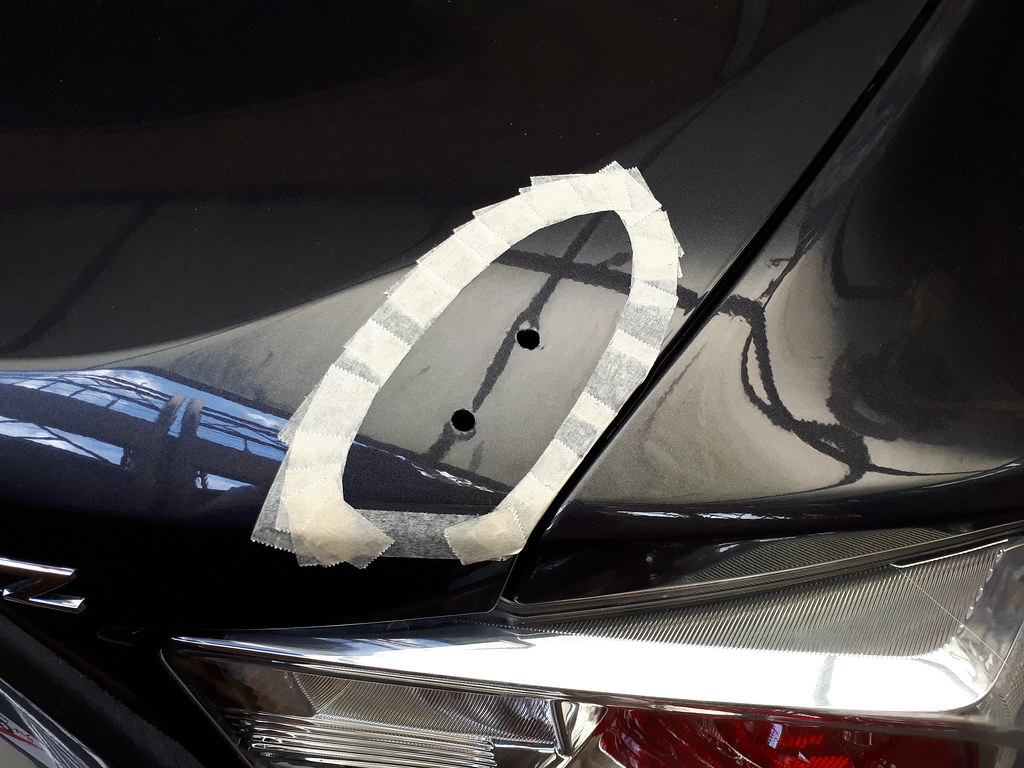 20180108_125650 by marlonmercado77, on Flickr 20180108_125650 by marlonmercado77, on Flickrright portion 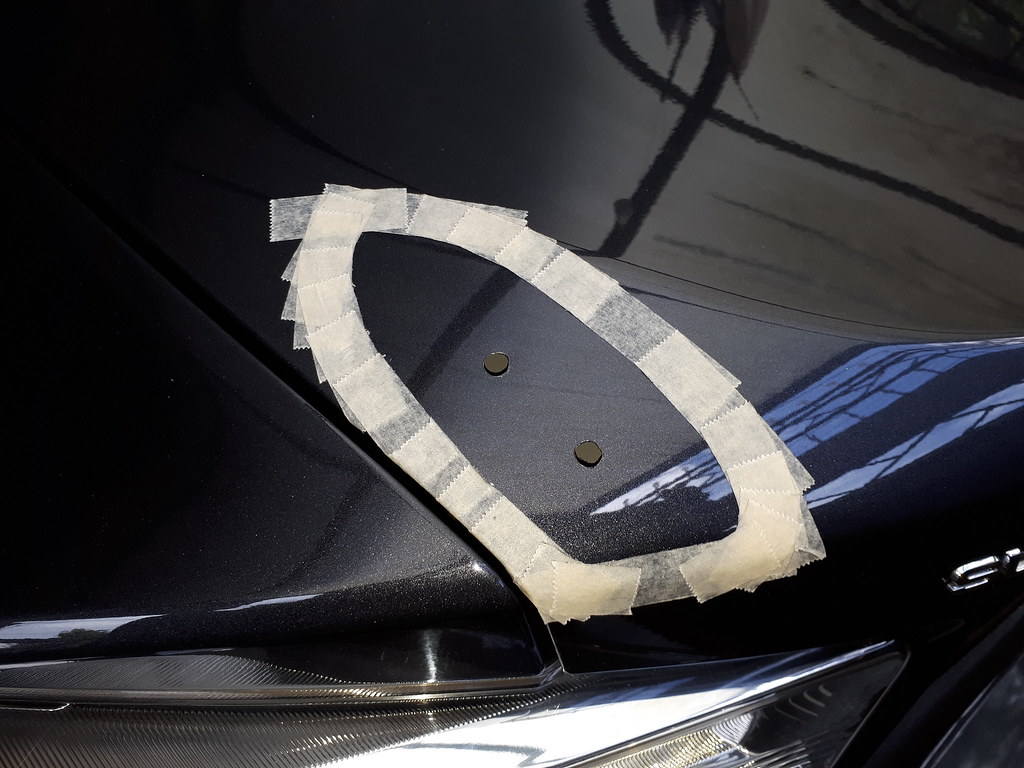 20180108_125616 by marlonmercado77, on Flickr 20180108_125616 by marlonmercado77, on Flickr6. Drilled inside left and right portion 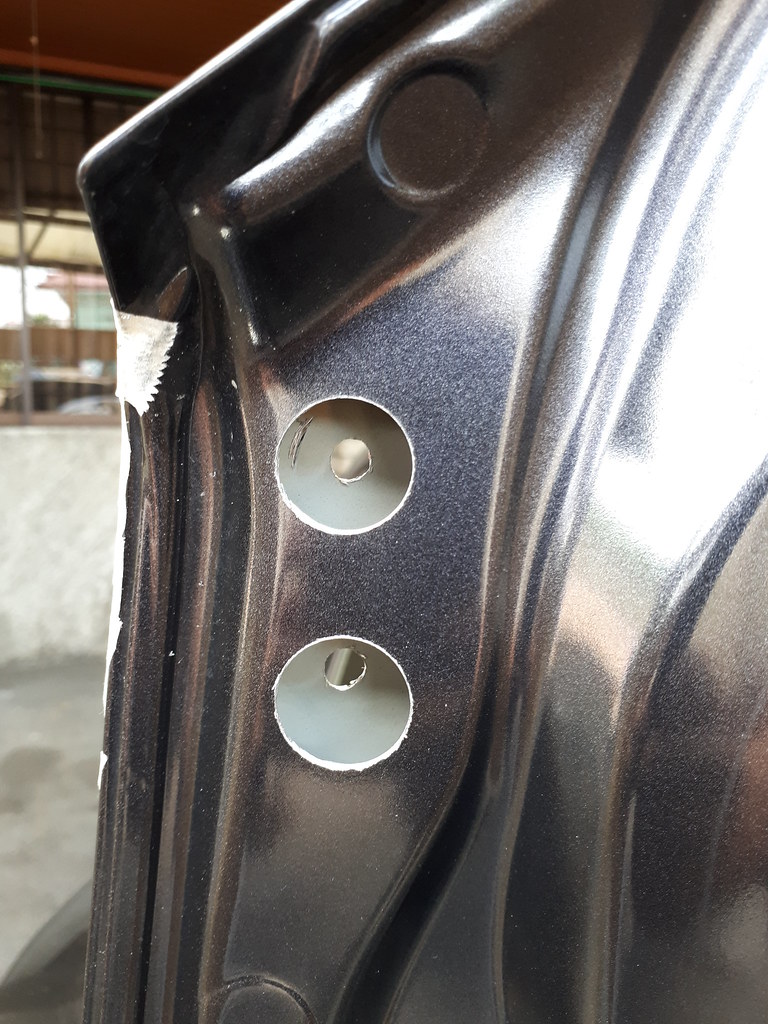 20180108_125721 by marlonmercado77, on Flickr 20180108_125721 by marlonmercado77, on Flickr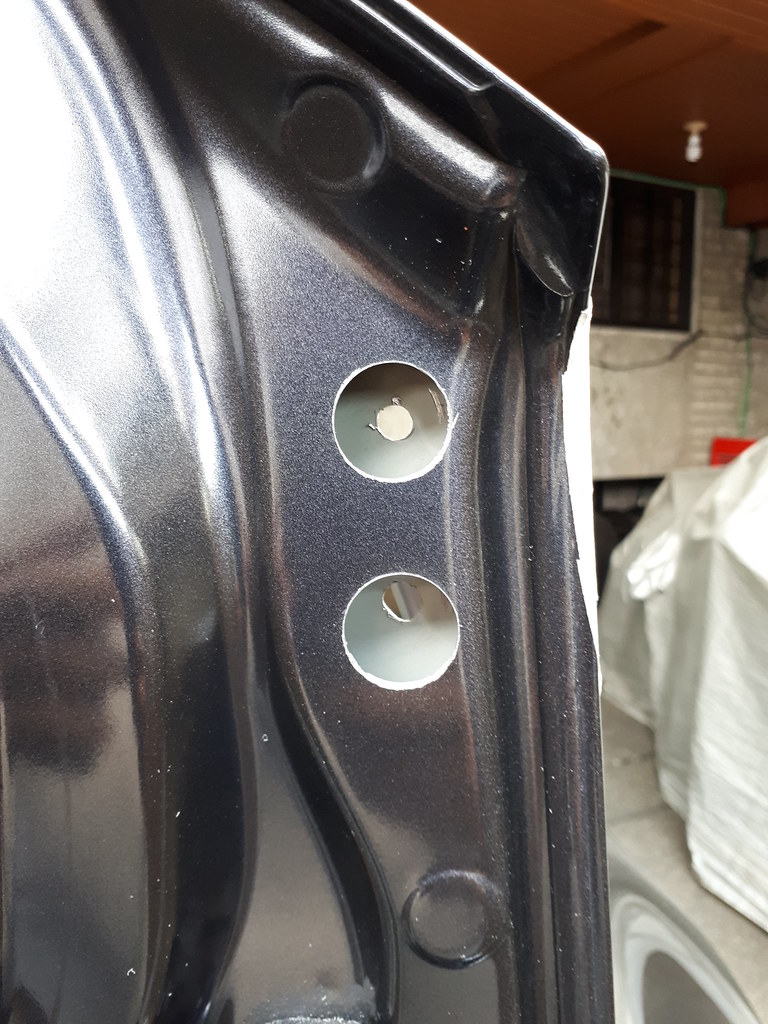 20180108_125707 by marlonmercado77, on Flickr 20180108_125707 by marlonmercado77, on Flickr7. Placed Black Silicone Gasket around the outside holes as sealant. Wait for about 10-15 minutes for the sealant to at least harden before actually placing the spoiler. This way the sealant becomes semi rubber enough to be sandwiched between the trunk and the inner portion of the spoiler but not to hard as a rubber otherwise you'll have a big gap. 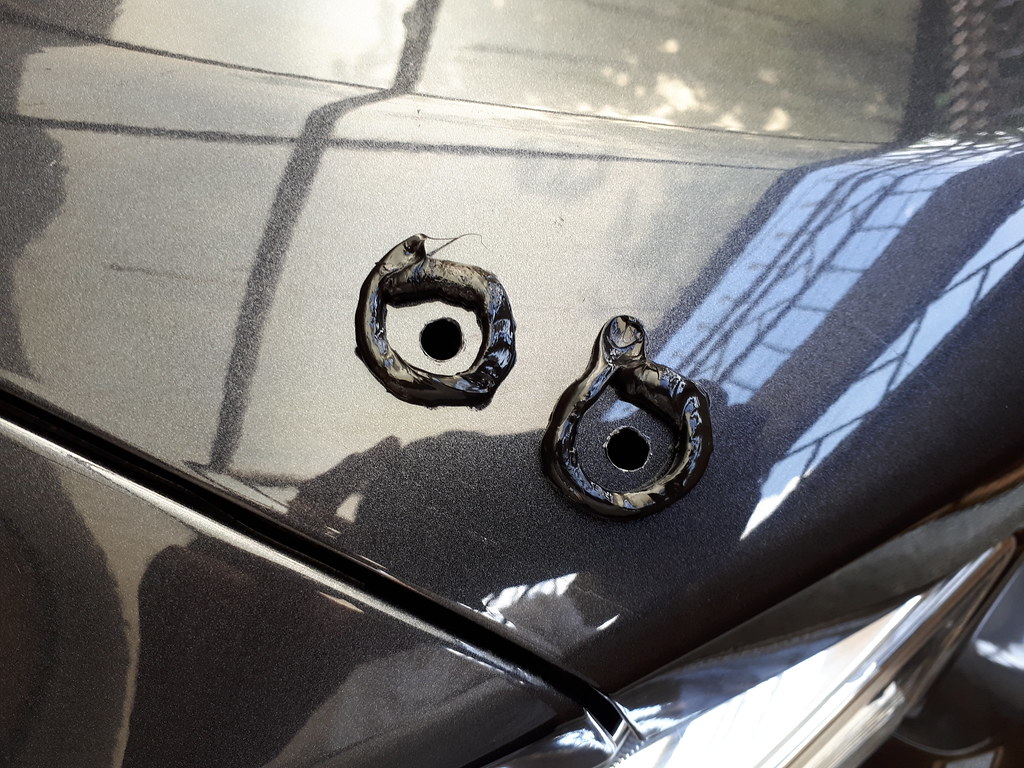 20180108_141204 by marlonmercado77, on Flickr 20180108_141204 by marlonmercado77, on Flickr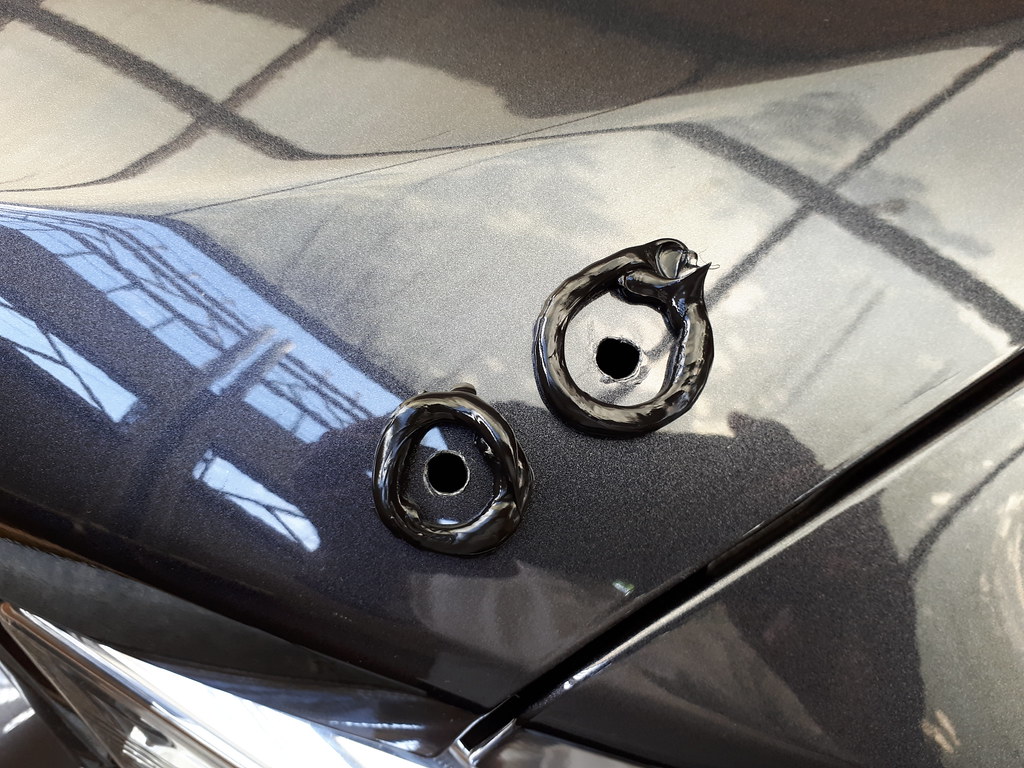 20180108_141211 by marlonmercado77, on Flickr 20180108_141211 by marlonmercado77, on Flickr8. Install the spoiler. tighten the bolts so as to further squeeze the sealant and prevent possible water leaks. 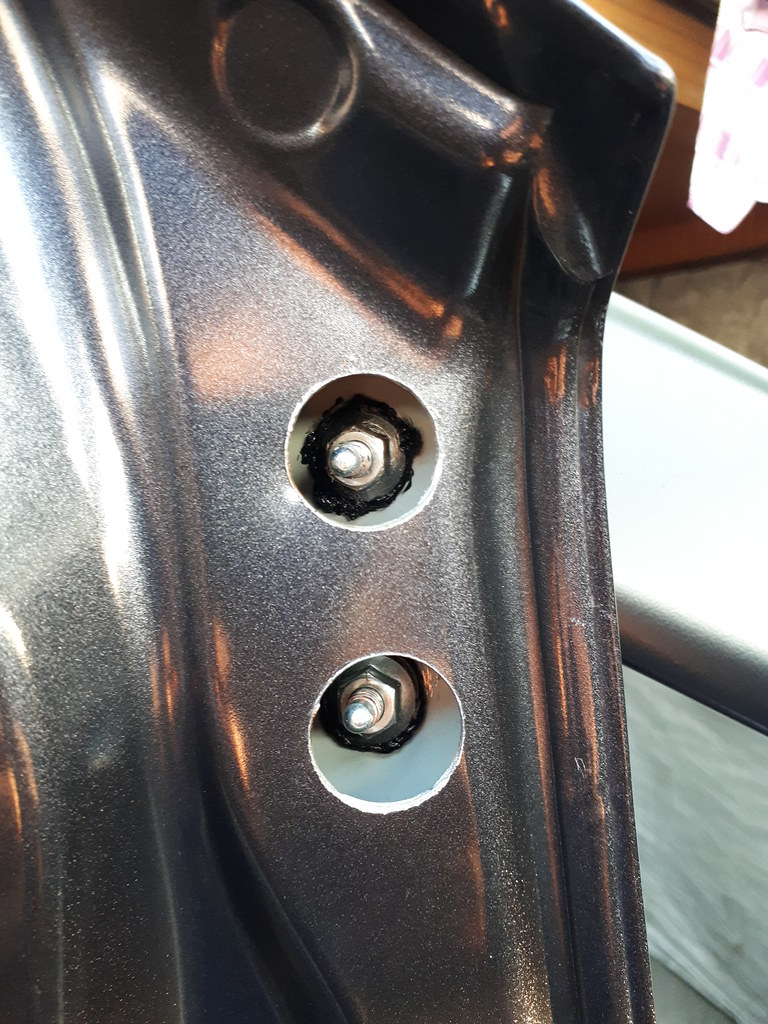 20180108_164701 by marlonmercado77, on Flickr 20180108_164701 by marlonmercado77, on Flickr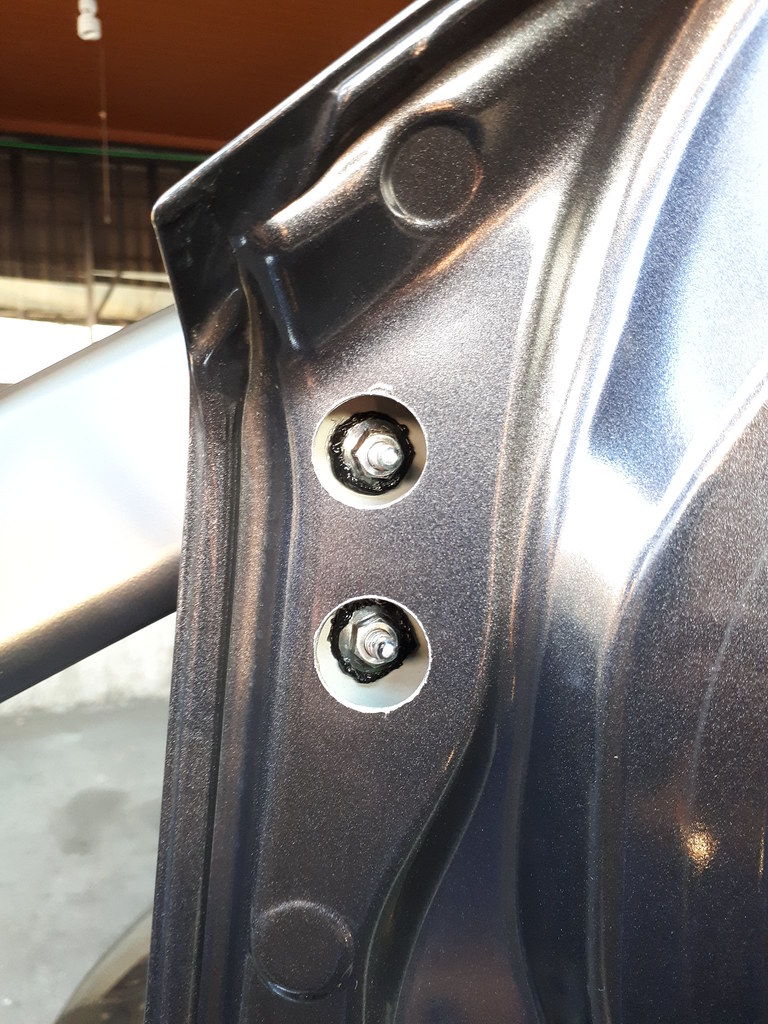 20180108_164650 by marlonmercado77, on Flickr 20180108_164650 by marlonmercado77, on Flickr9. enjoy your new spoiler 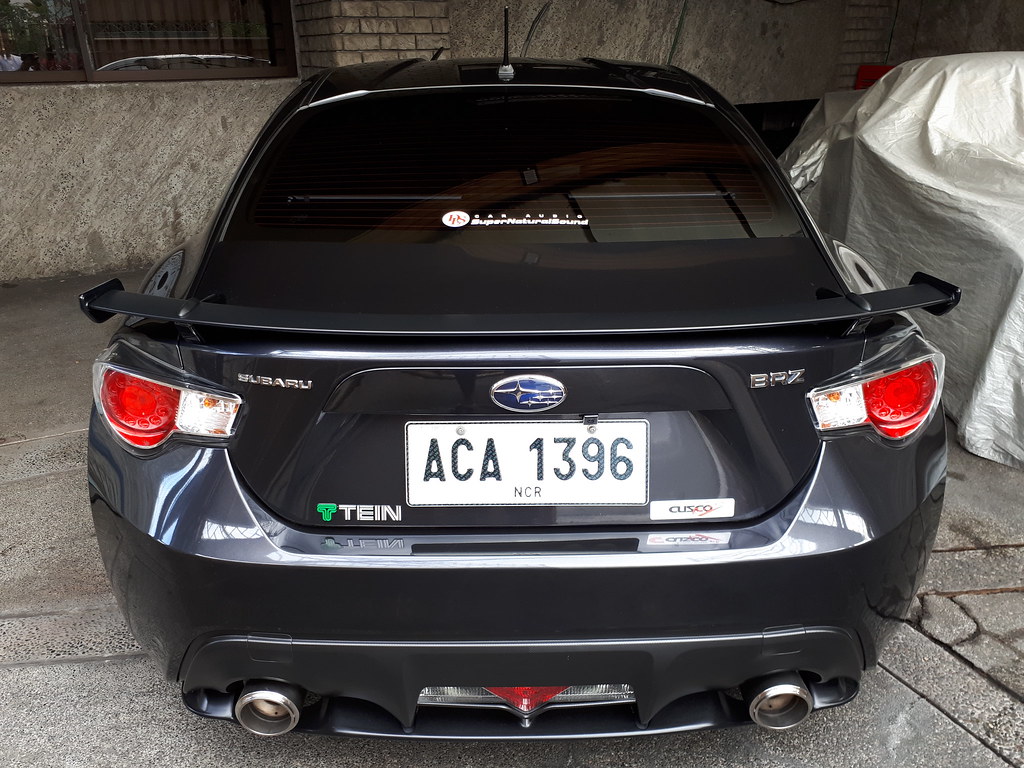 20180108_144903 by marlonmercado77, on Flickr 20180108_144903 by marlonmercado77, on Flickr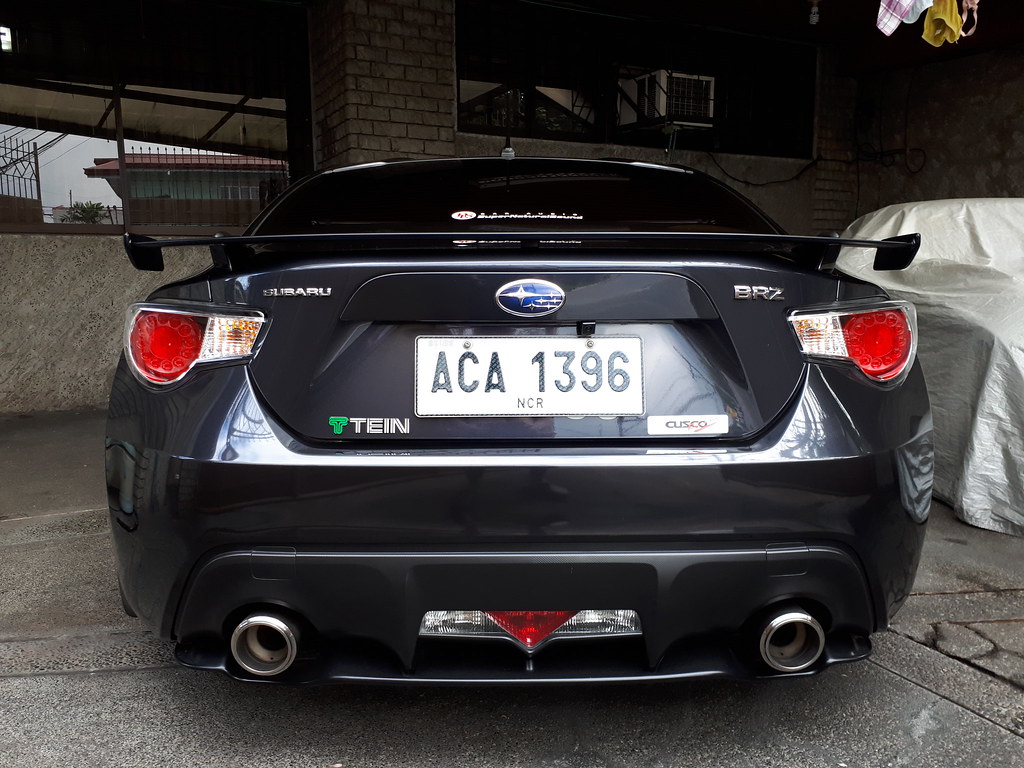 20180108_144913 by marlonmercado77, on Flickr 20180108_144913 by marlonmercado77, on Flickr
|
|
|
|
|
01-08-2018, 03:52 AM
|
#33 |
|
Member
Join Date: Oct 2013
Drives: BRZ
Location: Manila
Posts: 18
Thanks: 0
Thanked 16 Times in 7 Posts
Mentioned: 0 Post(s)
Tagged: 0 Thread(s)
|
20180108_144903 by marlonmercado77, on Flickr20180108_144913 by marlonmercado77, on Flickr 20180108_144932 by marlonmercado77, on Flickr 20180108_144932 by marlonmercado77, on Flickr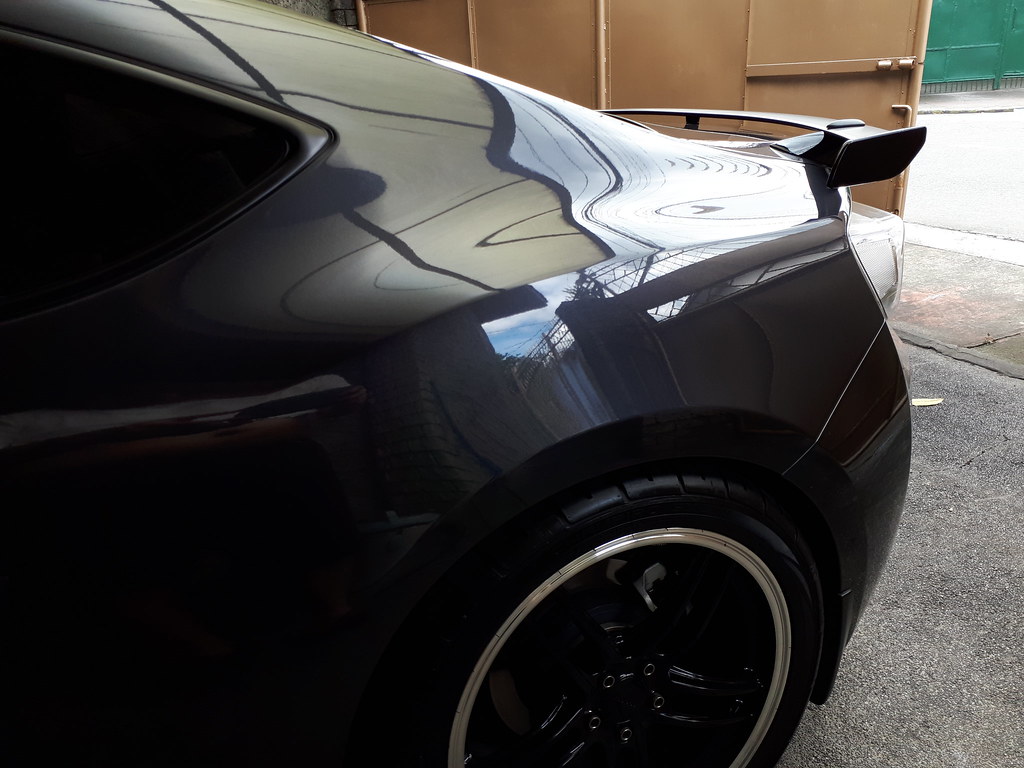 20180108_144954 by marlonmercado77, on Flickr 20180108_144954 by marlonmercado77, on Flickr
|
|
|
|
|
01-08-2018, 03:53 AM
|
#34 |
|
Member
Join Date: Oct 2013
Drives: BRZ
Location: Manila
Posts: 18
Thanks: 0
Thanked 16 Times in 7 Posts
Mentioned: 0 Post(s)
Tagged: 0 Thread(s)
|
 20180108_145006 by marlonmercado77, on Flickr 20180108_145006 by marlonmercado77, on Flickr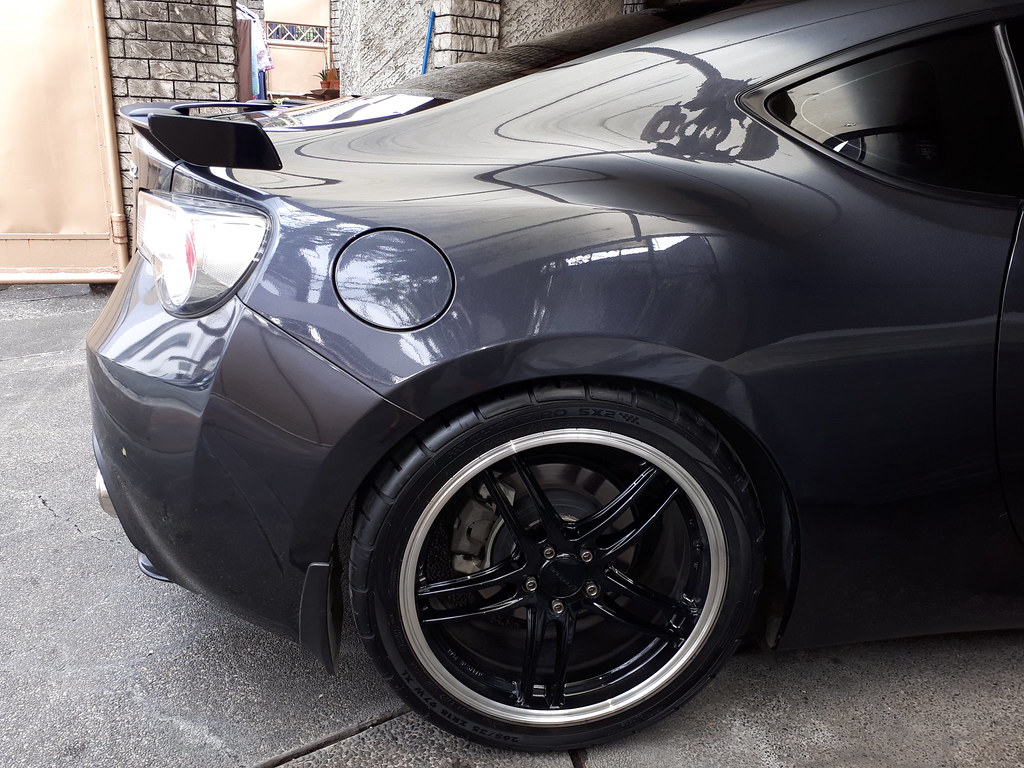 20180108_145251 by marlonmercado77, on Flickr 20180108_145251 by marlonmercado77, on Flickr 20180108_145159 by marlonmercado77, on Flickr 20180108_145159 by marlonmercado77, on Flickr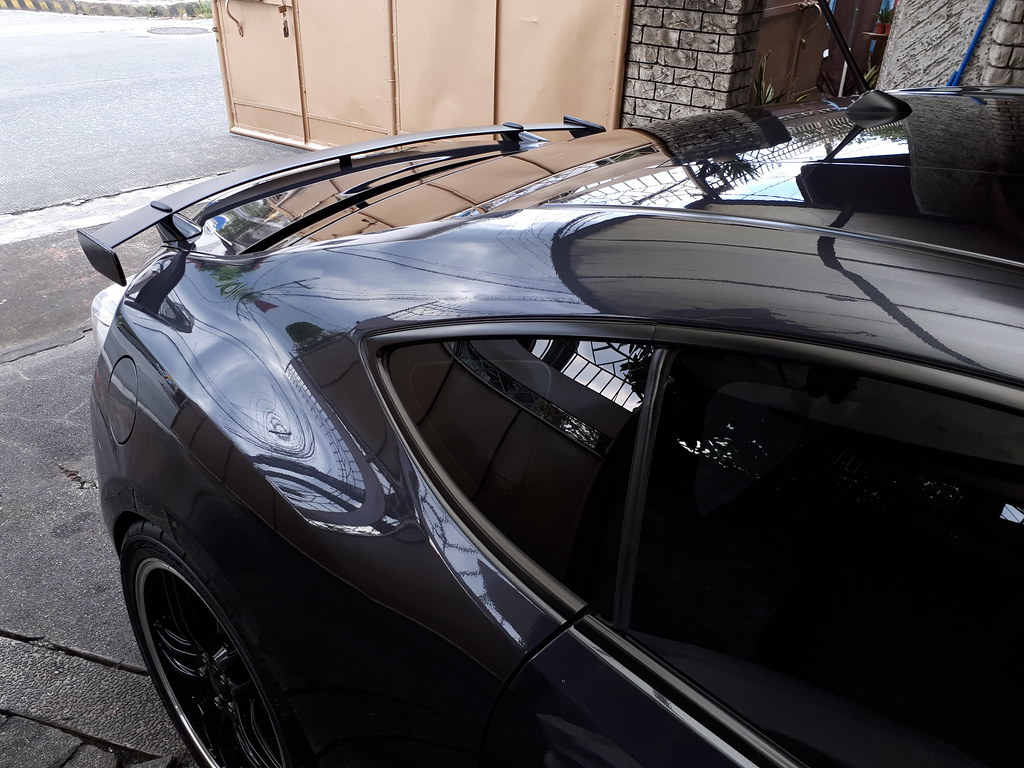 20180108_145219 by marlonmercado77, on Flickr 20180108_145219 by marlonmercado77, on Flickr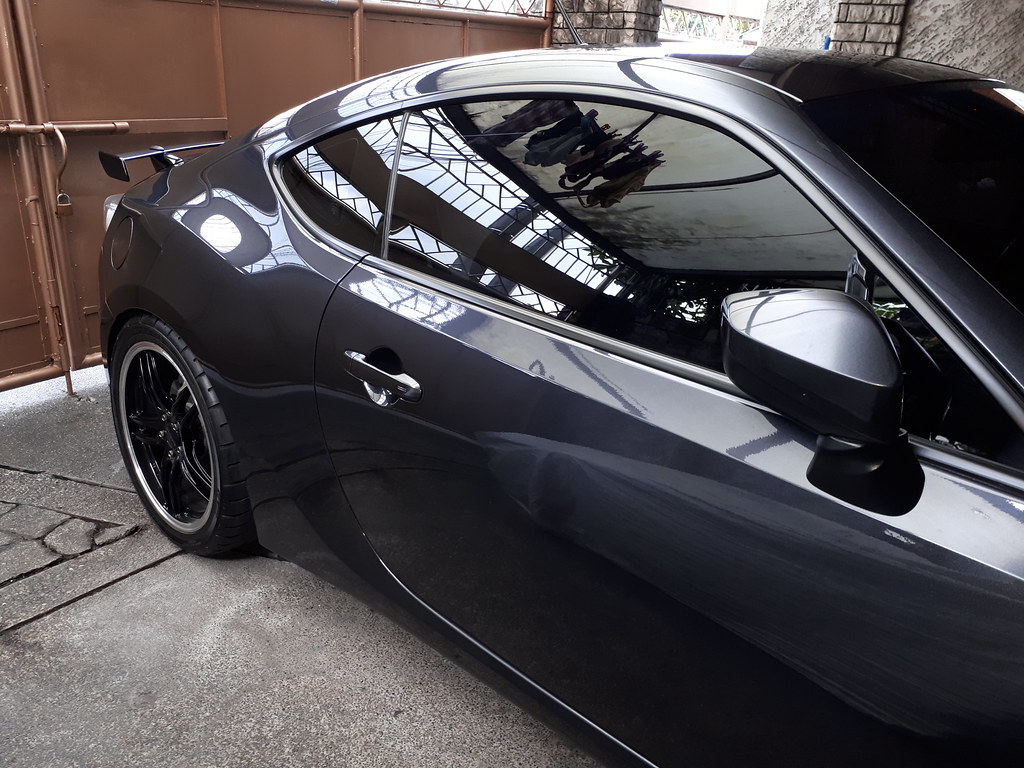 20180108_145807 by marlonmercado77, on Flickr 20180108_145807 by marlonmercado77, on Flickr
|
|
|
|
| The Following User Says Thank You to marlonthegreat For This Useful Post: | Myriad (01-08-2018) |
|
01-08-2018, 03:57 AM
|
#35 |
|
Member
Join Date: Oct 2013
Drives: BRZ
Location: Manila
Posts: 18
Thanks: 0
Thanked 16 Times in 7 Posts
Mentioned: 0 Post(s)
Tagged: 0 Thread(s)
|
additional parts that I used. Touch up paint/top coat was used to cover the edges of the holes in order to prevent rust
 20180108_150556 by marlonmercado77, on Flickr 20180108_150556 by marlonmercado77, on Flickr
|
|
|
|
| The Following User Says Thank You to marlonthegreat For This Useful Post: | Myriad (01-08-2018) |
|
01-08-2018, 01:24 PM
|
#36 | |
|
義理チョコ

Join Date: Sep 2014
Drives: a 13 e8h frs
Location: vantucky, wa
Posts: 31,872
Thanks: 52,139
Thanked 36,522 Times in 18,923 Posts
Mentioned: 1107 Post(s)
Tagged: 9 Thread(s)
|
Quote:
__________________
|
|
|
|
|
|
03-22-2018, 05:13 PM
|
#37 | |
|
Senior Member
Join Date: Jun 2011
Drives: Scion FRS
Location: Michigan
Posts: 216
Thanks: 17
Thanked 58 Times in 39 Posts
Mentioned: 1 Post(s)
Tagged: 0 Thread(s)
|
Quote:
I'm curious too, is it holding up ok? |
|
|
|
|
|
07-15-2018, 04:40 PM
|
#39 |
|
Junior Member
Join Date: Jul 2018
Drives: GT86
Location: GER
Posts: 1
Thanks: 0
Thanked 0 Times in 0 Posts
Mentioned: 0 Post(s)
Tagged: 0 Thread(s)
|
I'm currently swapping the spoiler (along with trunk lid) on my 2012 86 to the 2017 spoiler. For a better paint job I would like to remove the side caps of the spoiler. Does anyone know how to remove these?
Any help is much appreciated 
|
|
|
|
|
07-15-2018, 05:38 PM
|
#40 | |
|
Senior Member

Join Date: May 2017
Drives: 2014 Subaru Forester
Location: Upstate SC
Posts: 441
Thanks: 501
Thanked 338 Times in 178 Posts
Mentioned: 20 Post(s)
Tagged: 0 Thread(s)
|
Quote:
Should be able to remove the side caps after you remove the two bolts on the underside of the spoiler. |
|
|
|
|
|
07-15-2018, 10:09 PM
|
#41 |
|
Senior Member
Join Date: Oct 2016
Drives: Black 17 BRZ LT MT PP
Location: NYC
Posts: 470
Thanks: 499
Thanked 518 Times in 202 Posts
Mentioned: 30 Post(s)
Tagged: 0 Thread(s)
|
Super clean install!
|
|
|
|
|
08-17-2018, 11:18 PM
|
#42 |
|
Senior Member

Join Date: Feb 2017
Drives: 2013 Subaru BRZ Premium MT
Location: Portland OR
Posts: 271
Thanks: 32
Thanked 64 Times in 38 Posts
Mentioned: 4 Post(s)
Tagged: 0 Thread(s)
|
Followed the guys tutorial, and it turned out quite nice.
 Sent from my iPhone using Tapatalk |
|
|
|
| The Following User Says Thank You to Sergeb96 For This Useful Post: | markitect (08-18-2018) |
|
|
|
|
|
|
|
 Similar Threads
|
||||
| Thread | Thread Starter | Forum | Replies | Last Post |
| Greetings Earthlings - 2017 86 Bumper Swap! | SquadRon | Scion FR-S / Toyota 86 GT86 General Forum | 70 | 10-26-2018 04:04 AM |
| 2017 BRZ Front bumper swap | BRZoomTX | Cosmetic Modification (Interior/Exterior/Lighting) | 16 | 06-01-2018 02:55 PM |
| 2017 Lights, Spoiler on the 2013-2015 | Is Always Angry | Cosmetic Modification (Interior/Exterior/Lighting) | 4 | 12-14-2016 05:10 PM |
| 2017 BRZ without spoiler? | vroomvroom1 | BRZ First-Gen (2012+) -- General Topics | 9 | 07-18-2016 10:46 AM |
| Trunk Swap for Spoiler - DFW TX | Acree | Southwest | 11 | 01-22-2013 08:42 PM |


