|
||||||
| Member's Car Journals Car journals by our members. |
 |
|
|
Thread Tools | Search this Thread |
 12-22-2015, 08:35 PM
|
#29 |
|
Canada Eh!
Join Date: Nov 2013
Drives: '13 FRS
Location: Calgary, AB
Posts: 447
Thanks: 156
Thanked 230 Times in 120 Posts
Mentioned: 3 Post(s)
Tagged: 0 Thread(s)
|
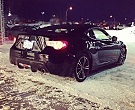
Avest Japan Clear LED Side Markers! 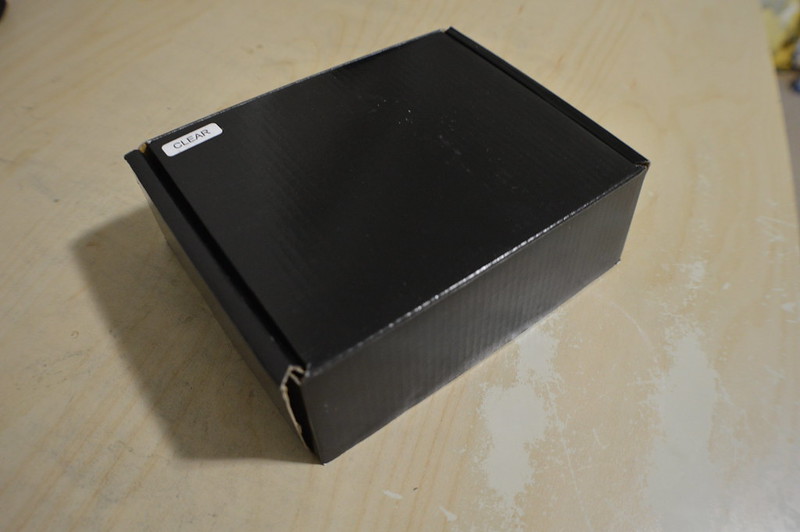 DSC_0003 by joeag., on Flickr 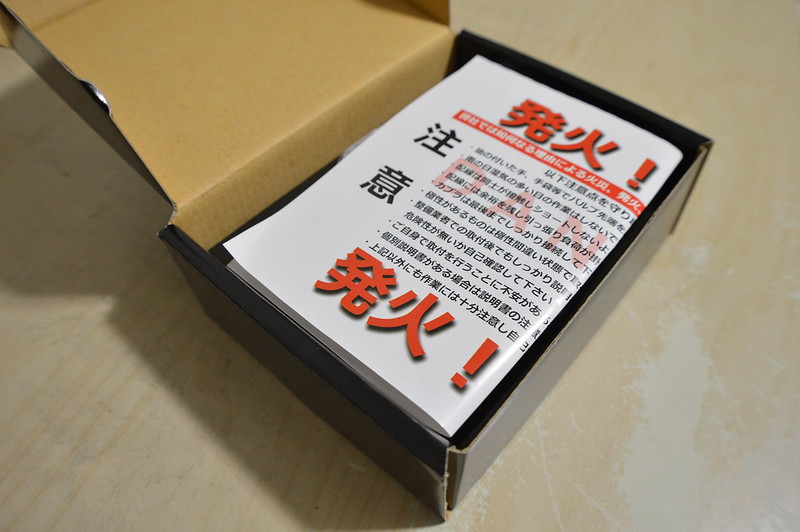 DSC_0004 by joeag., on Flickr Some Japanese warning... Hope its nothing too serious... 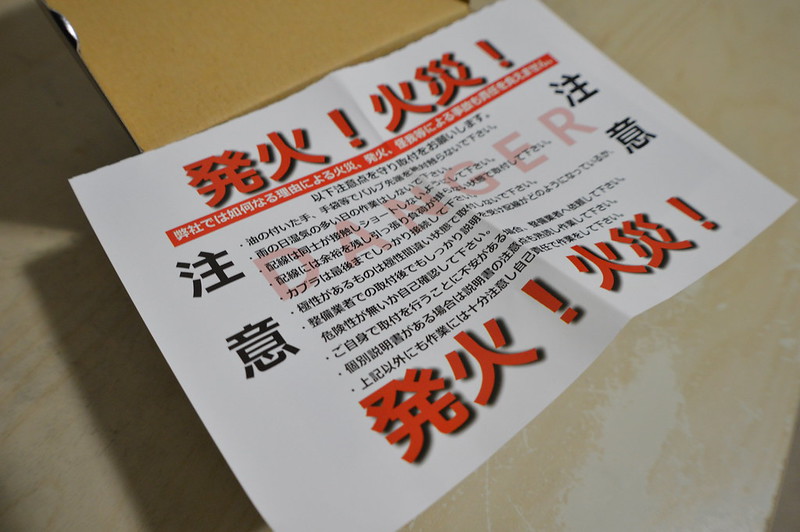 DSC_0005 by joeag., on Flickr 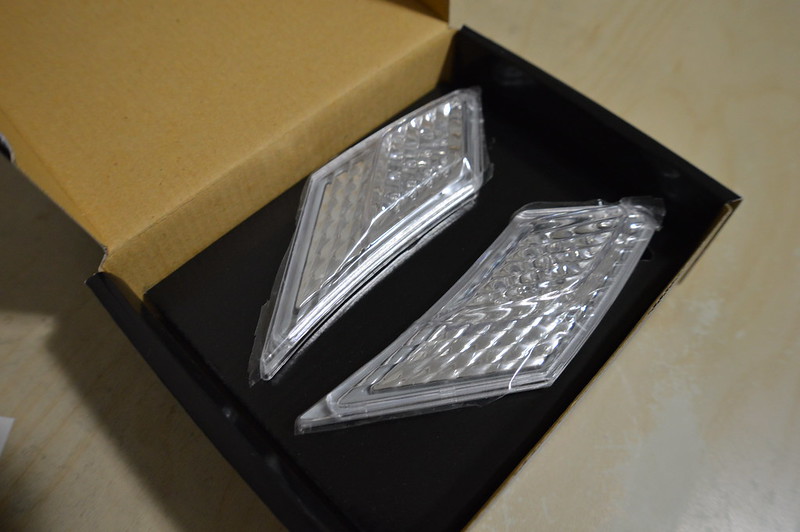 DSC_0006 by joeag., on Flickr 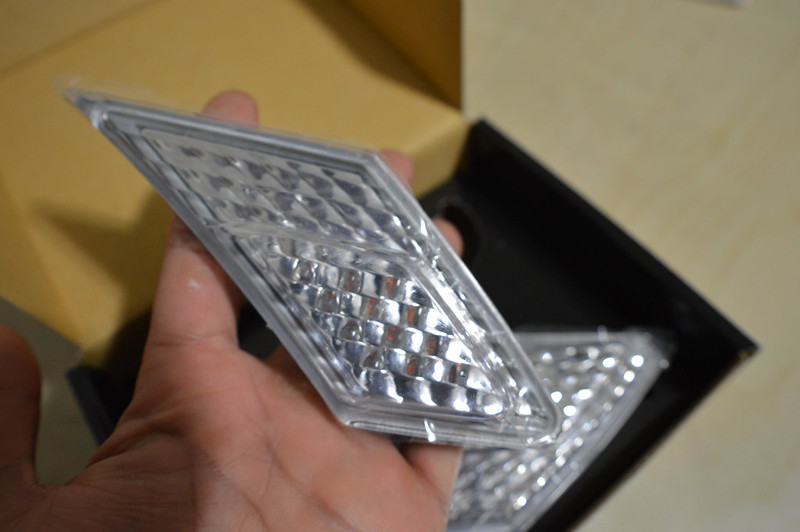 DSC_0012 by joeag., on Flickr 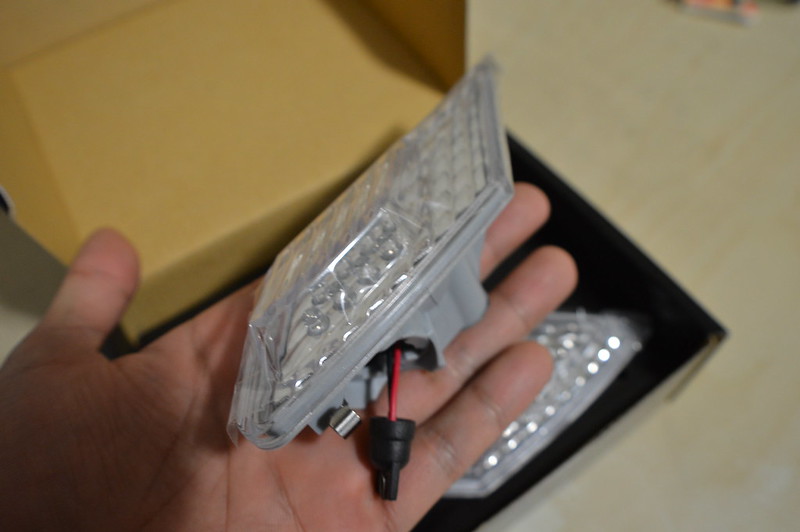 DSC_0011 by joeag., on Flickr  DSC_0010 by joeag., on Flickr
__________________
 Last edited by Joe-G; 01-04-2016 at 11:28 AM. |

|

|
|
01-03-2016, 11:14 PM
|
#30 | |
|
Canada Eh!
Join Date: Nov 2013
Drives: '13 FRS
Location: Calgary, AB
Posts: 447
Thanks: 156
Thanked 230 Times in 120 Posts
Mentioned: 3 Post(s)
Tagged: 0 Thread(s)
|
Quote:
__________________
|
|
|
|
|
|
01-03-2016, 11:41 PM
|
#31 |
|
Canada Eh!
Join Date: Nov 2013
Drives: '13 FRS
Location: Calgary, AB
Posts: 447
Thanks: 156
Thanked 230 Times in 120 Posts
Mentioned: 3 Post(s)
Tagged: 0 Thread(s)
|
So my drivers side mirror has had a crack in it for awhile now. I gather it was caused by using an automated cloth wash at the dealership I used to work at...
Since I've recently been in the spirit of making some DIY pieces (ie. Front splitter), I figured I'd try fitting a set of universal mirrors. If it turns out looking like ass, I can always put the stock ones back on. All you really need is cardboard, sheet metal, and tin snips (or dremel). Mirrors Removed. What a PITA. Trying to fish the plug through the hole was a nightmare. Its easier to de-pin the connector (preferred method), or cut the plug off (and re-wire later if needed). 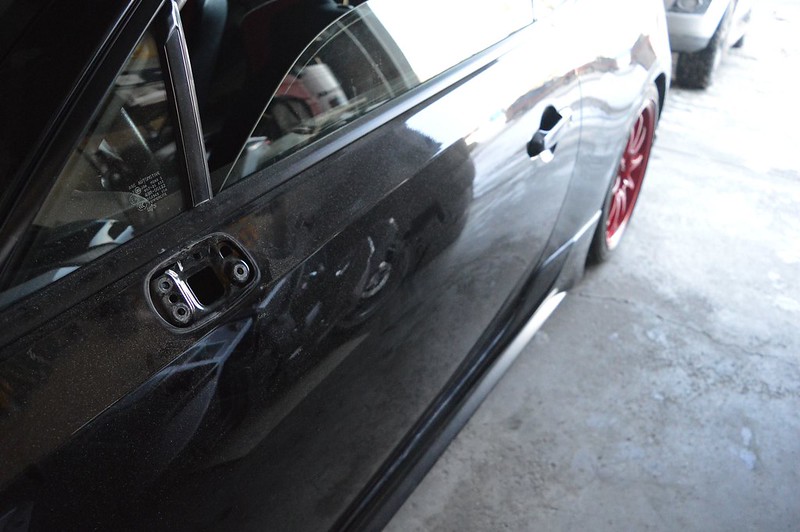 12401830_10156497610015347_7606791784173115987_o by joeag., on FlickrFlickr Carboard dreams 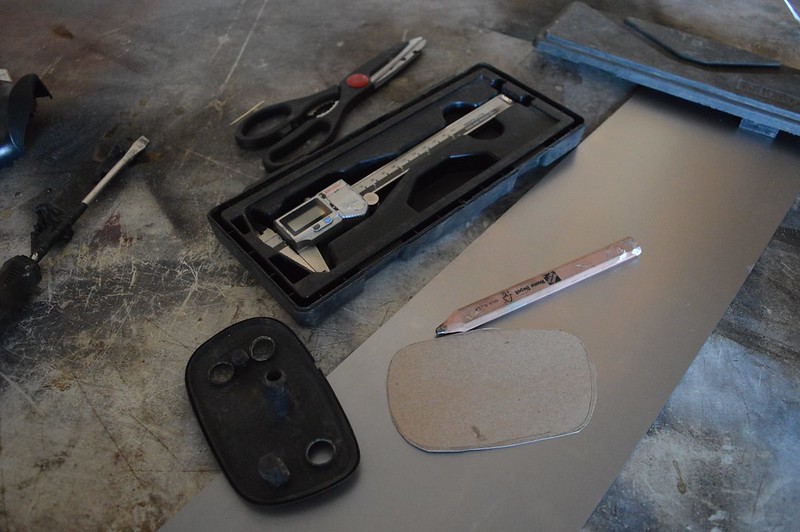 12473968_10156497612605347_4446761771655950194_o by joeag., on Flickr Fitting the cardboard template  DSC_0141 by joeag., on Flickr Transferred onto sheet metal 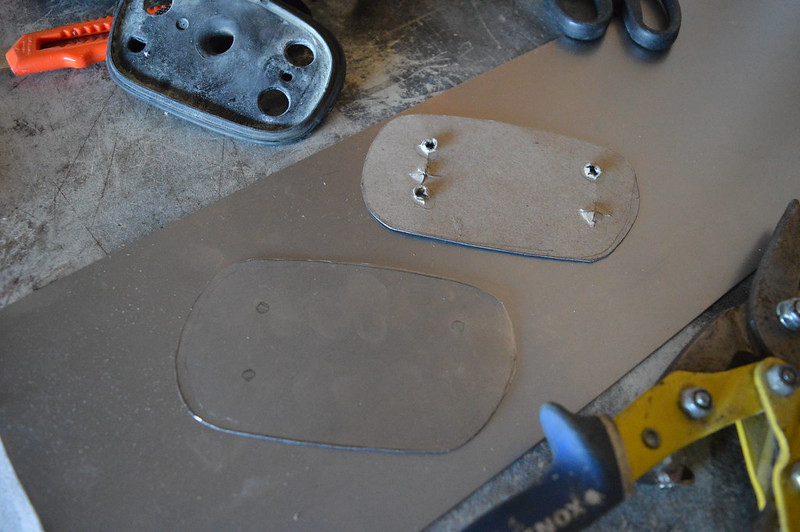 DSC_0145 by joeag., on Flickr Doubled it up! 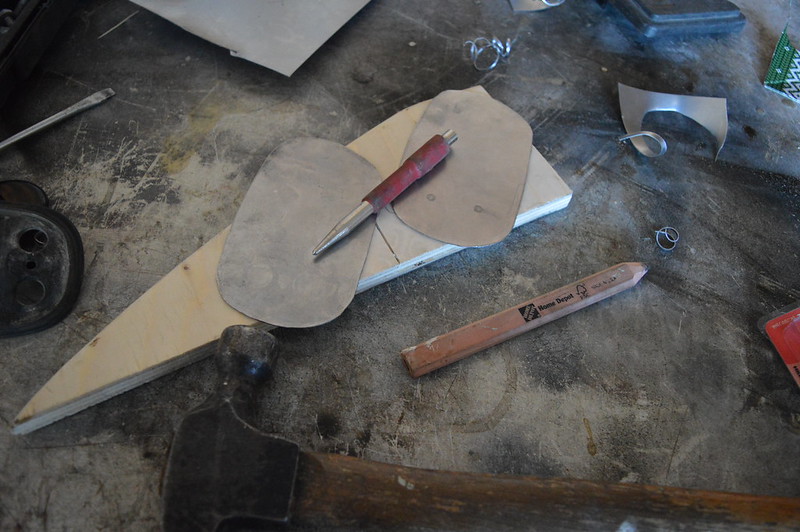 DSC_0147 by joeag., on Flickr Measured the bolt for hole size (M6x1.25 I beleive) 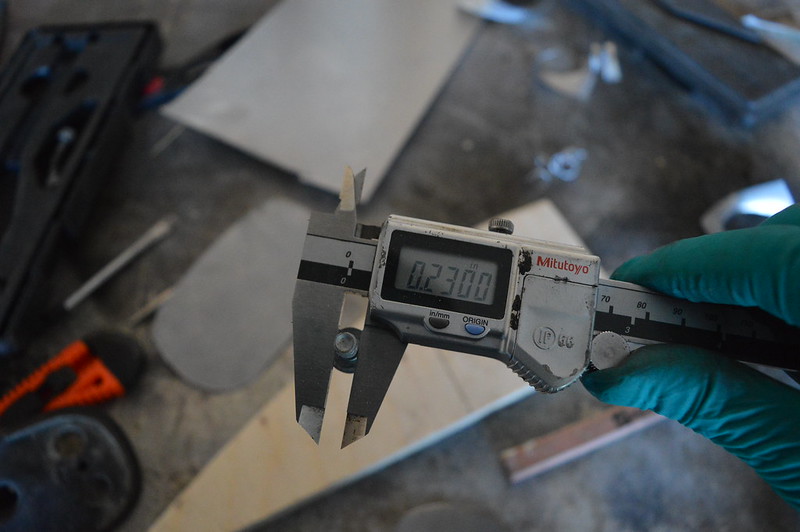 DSC_0149 by joeag., on Flickr Didn't really fit so great without a gasket. Ended up being a little too big 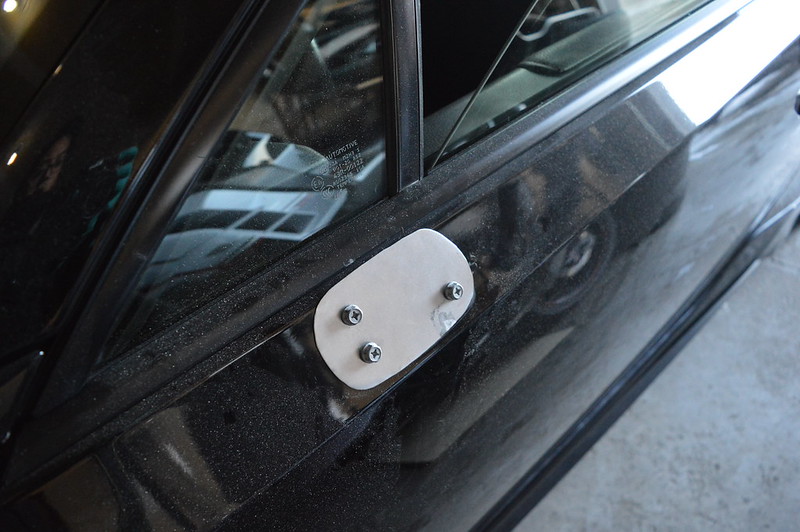 DSC_0150 by joeag., on Flickr So I trimmed both down, and fitted the oem gasket. 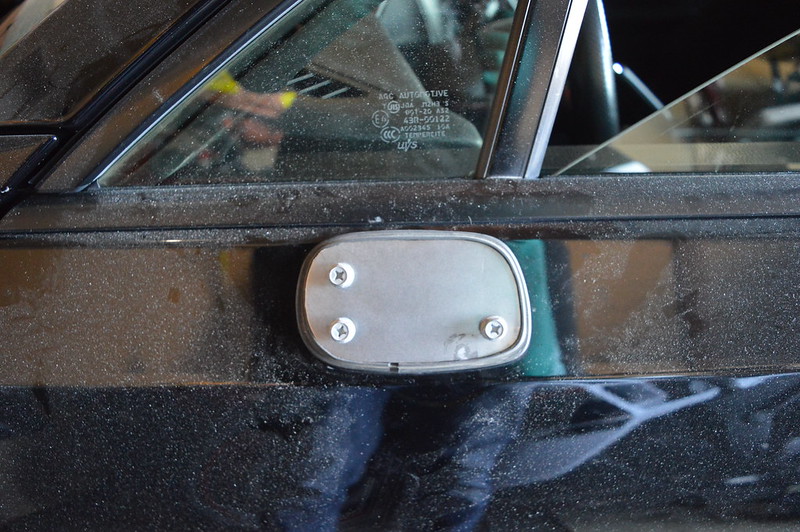 DSC_0154 by joeag., on Flickr Right side 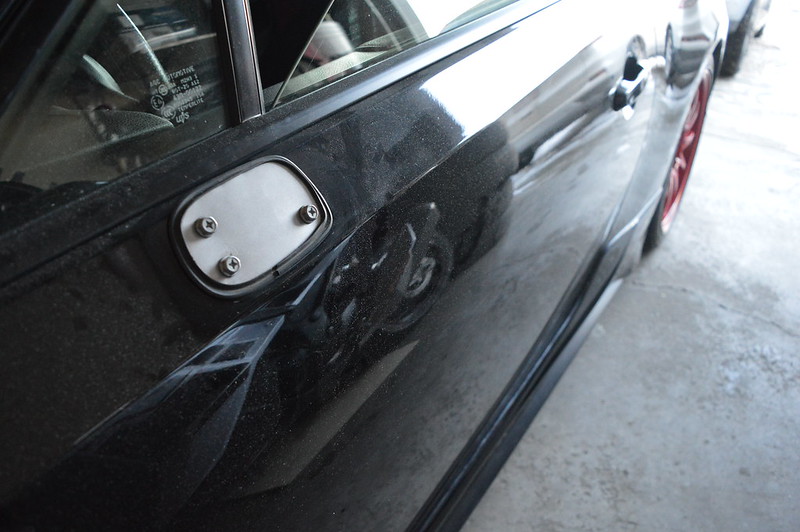 DSC_0159 by joeag., on Flickr and the left! 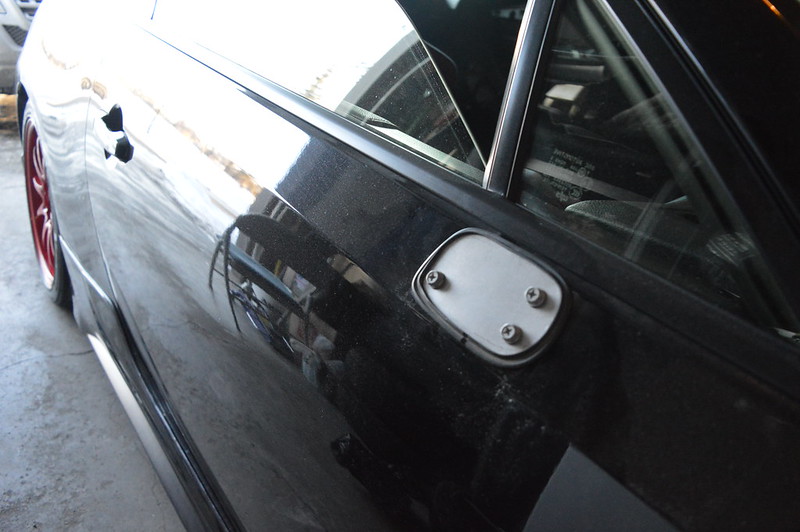 DSC_0158 by joeag., on Flickr Now I'm just waiting for the mirrors to come in, so I can mount them up to the base plates and get better looking hardware. Mirrors and base plates will probably be color matched and painted the same time I get my wing. Thanks to @Tye300 and his DIY thread. Couldn't have made it any easier =).
__________________
|
|
|
|
| The Following User Says Thank You to Joe-G For This Useful Post: | Tye300 (01-05-2016) |
|
01-04-2016, 07:07 PM
|
#32 |
|
Canada Eh!
Join Date: Nov 2013
Drives: '13 FRS
Location: Calgary, AB
Posts: 447
Thanks: 156
Thanked 230 Times in 120 Posts
Mentioned: 3 Post(s)
Tagged: 0 Thread(s)
|
__________________
Last edited by Joe-G; 01-05-2016 at 12:53 AM. |
|
|
|
|
01-04-2016, 08:36 PM
|
#33 |
|
Senior Member
Join Date: Aug 2015
Drives: Asphalt 2015 FRS
Location: Seattle, WA
Posts: 444
Thanks: 292
Thanked 218 Times in 133 Posts
Mentioned: 5 Post(s)
Tagged: 0 Thread(s)
|
That wing really matches the lines of the car! If it turns out that good in reality, I would say it has to be my the best wing I've seen!
|
|
|
|
|
01-04-2016, 09:35 PM
|
#34 |
|
Senior Member

Join Date: Oct 2013
Drives: 2013 Scion FR-S
Location: ONTARIO CA
Posts: 650
Thanks: 208
Thanked 393 Times in 213 Posts
Mentioned: 6 Post(s)
Tagged: 2 Thread(s)
|
subbed!
|
|
|
|
|
01-05-2016, 09:08 AM
|
#35 |
|
Senior Member
Join Date: Apr 2014
Drives: Subaru BRZ Limited
Location: Colorado
Posts: 354
Thanks: 477
Thanked 222 Times in 118 Posts
Mentioned: 5 Post(s)
Tagged: 0 Thread(s)
|
I was with you until you fitted a sheet of plywood to the front. maybe I'm being too judgmental but does that really do anything except look like a sheet of plywood on the front?
It looks like you're having fun with the car though. It's all good. |
|
|
|
|
01-05-2016, 11:15 AM
|
#36 | |
|
Canada Eh!
Join Date: Nov 2013
Drives: '13 FRS
Location: Calgary, AB
Posts: 447
Thanks: 156
Thanked 230 Times in 120 Posts
Mentioned: 3 Post(s)
Tagged: 0 Thread(s)
|
Quote:
For what its worth, plenty of teams use plywood. From what it looks like, even the Rasty 86 
__________________
|
|
|
|
|
|
01-05-2016, 09:40 PM
|
#37 |
|
Canada Eh!
Join Date: Nov 2013
Drives: '13 FRS
Location: Calgary, AB
Posts: 447
Thanks: 156
Thanked 230 Times in 120 Posts
Mentioned: 3 Post(s)
Tagged: 0 Thread(s)
|
So the mirrors showed up... amongst some other goodies if you can spot it  Overnight from...Taiwan! haha 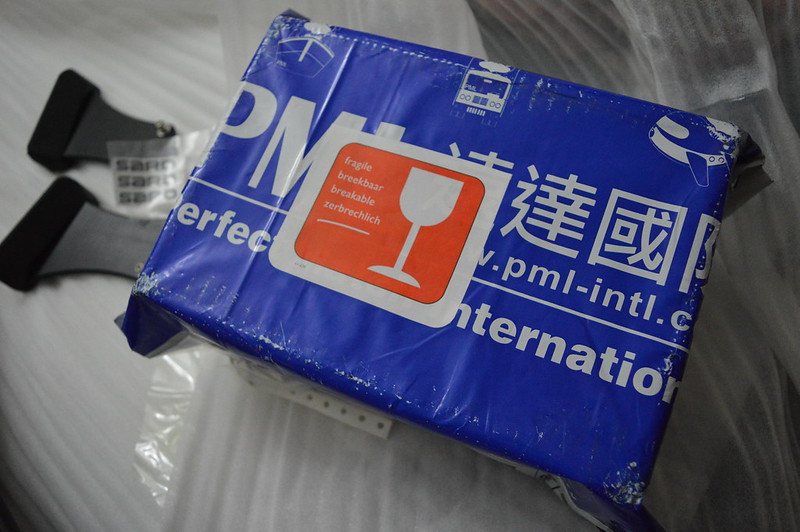 DSC_0205 by joeag., on Flickr Nice packing! 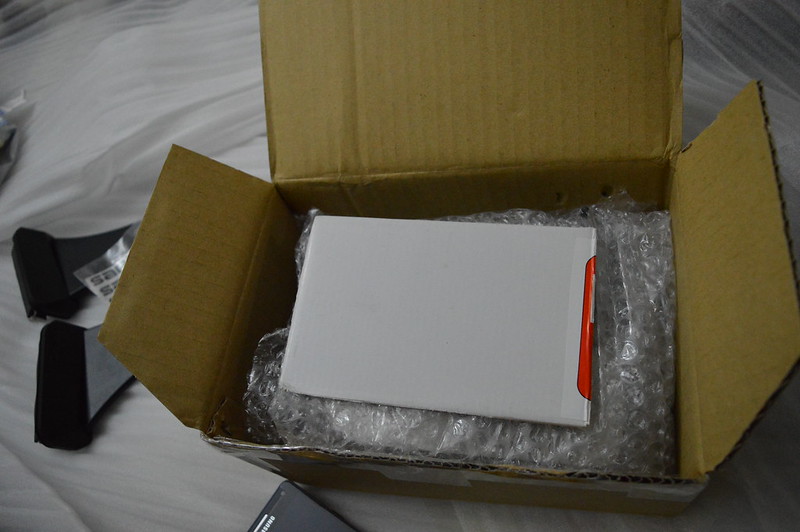 DSC_0211 by joeag., on Flickr Not bad for under $100 USD! 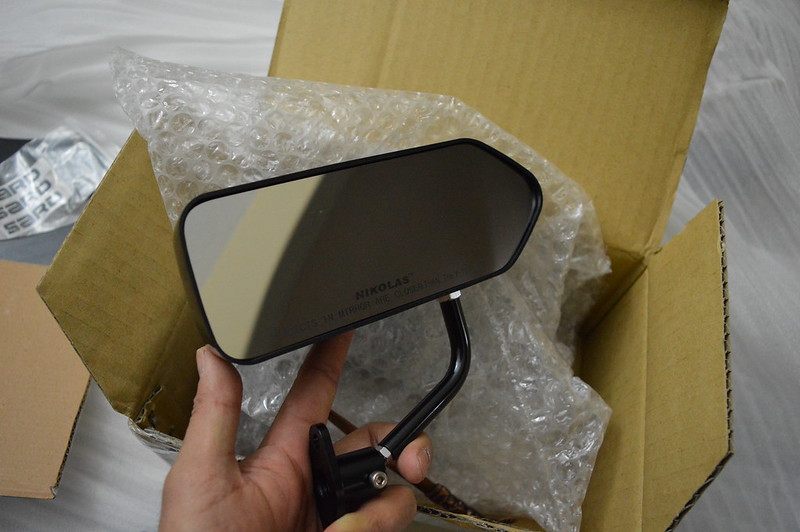 DSC_0213 by joeag., on Flickr And the weight! 7.70oz 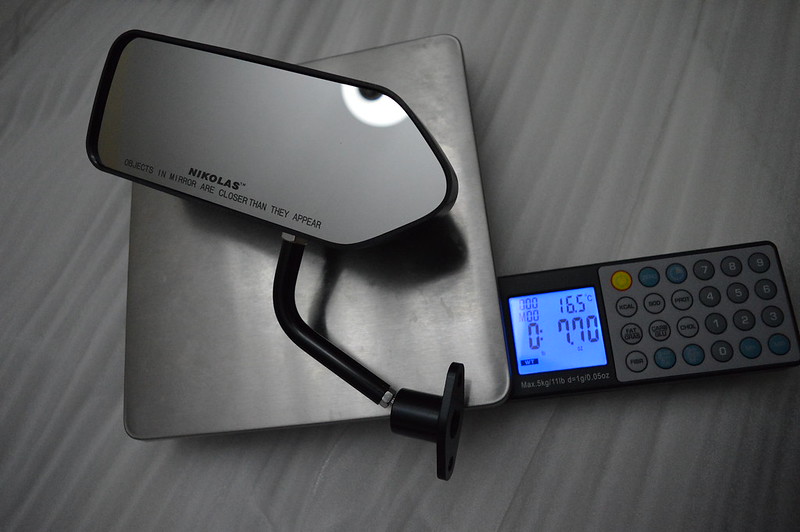 DSC_0220 by joeag., on Flickr Or 219g 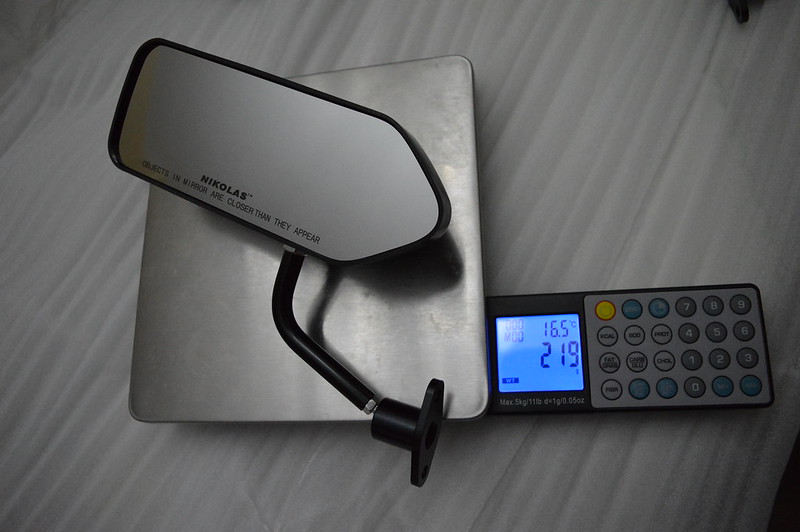 DSC_0222 by joeag., on Flickr and mocked up.. Will probably get it all bolted down properly on the weekend... 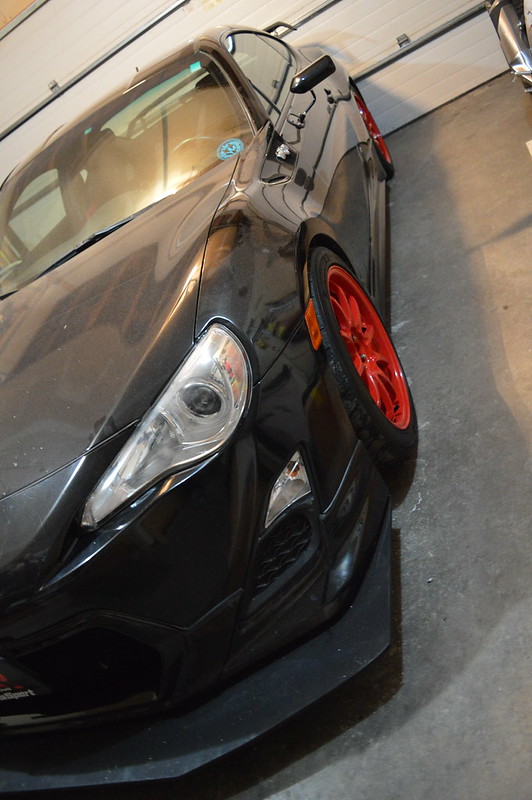 DSC_0246 by joeag., on Flickr  DSC_0243 by joeag., on Flickr Also found a set of replacement decals for the CE28. They're reproductions. 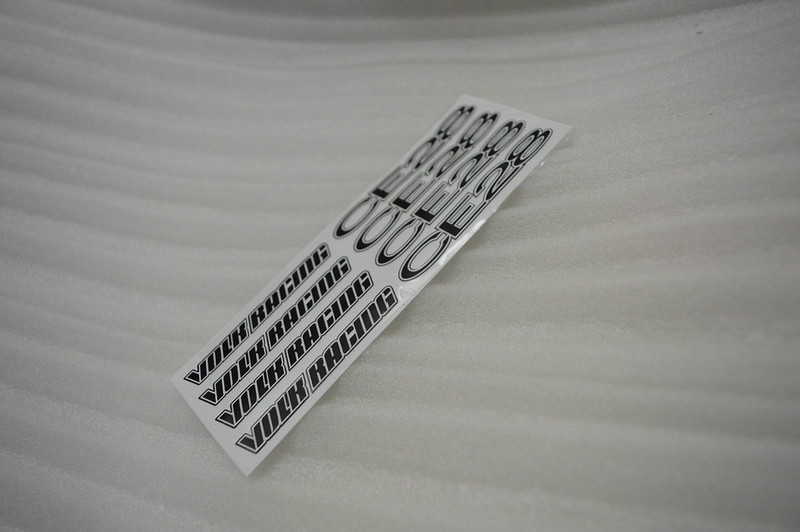 DSC_0249 by joeag., on Flickr
__________________
Last edited by Joe-G; 01-05-2016 at 10:18 PM. |
|
|
|
|
01-05-2016, 10:05 PM
|
#38 |
|
Senior Member
Join Date: Apr 2014
Drives: Subaru BRZ Limited
Location: Colorado
Posts: 354
Thanks: 477
Thanked 222 Times in 118 Posts
Mentioned: 5 Post(s)
Tagged: 0 Thread(s)
|
I dig the mirrors! I think the mounting plates will look better painted black. Also, will you be able to attach the mirrors to the center of the plates?
|
|
|
|
|
01-05-2016, 10:16 PM
|
#39 | ||
|
Canada Eh!
Join Date: Nov 2013
Drives: '13 FRS
Location: Calgary, AB
Posts: 447
Thanks: 156
Thanked 230 Times in 120 Posts
Mentioned: 3 Post(s)
Tagged: 0 Thread(s)
|
Quote:
Bottom right Similar to Quote:
__________________
|
||
|
|
|
|
01-05-2016, 10:26 PM
|
#40 |
|
Senior Member
Join Date: Apr 2014
Drives: Subaru BRZ Limited
Location: Colorado
Posts: 354
Thanks: 477
Thanked 222 Times in 118 Posts
Mentioned: 5 Post(s)
Tagged: 0 Thread(s)
|
You're probably right about the sturdiness being able to use an existing mounting point.
(also, i just noticed you are joe-g and I'm joec, hahha) |
|
|
|
|
01-10-2016, 04:16 PM
|
#41 |
|
Canada Eh!
Join Date: Nov 2013
Drives: '13 FRS
Location: Calgary, AB
Posts: 447
Thanks: 156
Thanked 230 Times in 120 Posts
Mentioned: 3 Post(s)
Tagged: 0 Thread(s)
|
__________________
|
|
|
|
|
01-11-2016, 01:33 AM
|
#42 |
|
Canada Eh!
Join Date: Nov 2013
Drives: '13 FRS
Location: Calgary, AB
Posts: 447
Thanks: 156
Thanked 230 Times in 120 Posts
Mentioned: 3 Post(s)
Tagged: 0 Thread(s)
|
Grazzio & Co. Style Tail Light DIY
Itching to do something to the car this weekend, I went ahead and tinted my rear tail lights. It's always been something that I've wanted to try, but I've never really had much patience or skill when it came to painting and taping.
It came out ok... Not perfect, but idk I guess we can let the pictures speak for themselves. I used 4-5 coats of Red Duplicolor Metalcast, and 2-3 coats of Duplicolor Acrylic Clear Coat. I also used some autobody grade wax and grease remover I had laying around from a previous project. However, I didn't bother to scuff up the housings... Others seem to have no problems, but I guess only time will tell... All taped up... Should have taken more time during this step. Oh well... 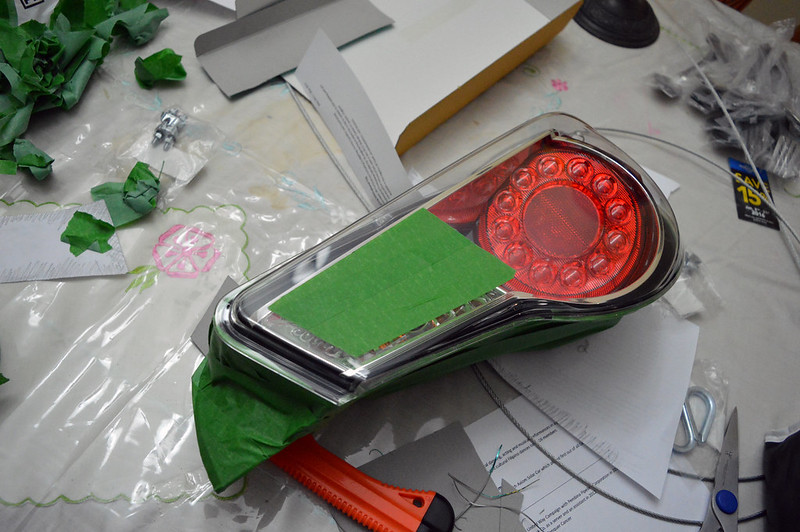 Right. After a few light coats of Metalcast. 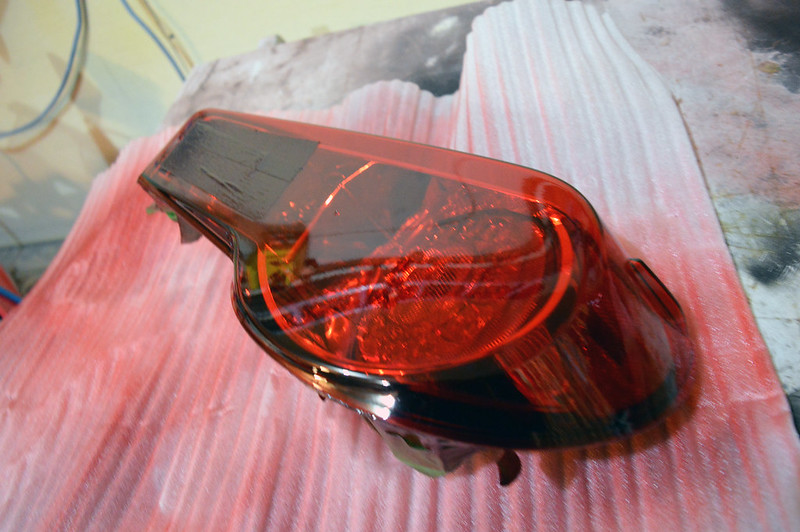 2-1 by joeag., on Flickr Left, also after a few light coats of Metalcast. 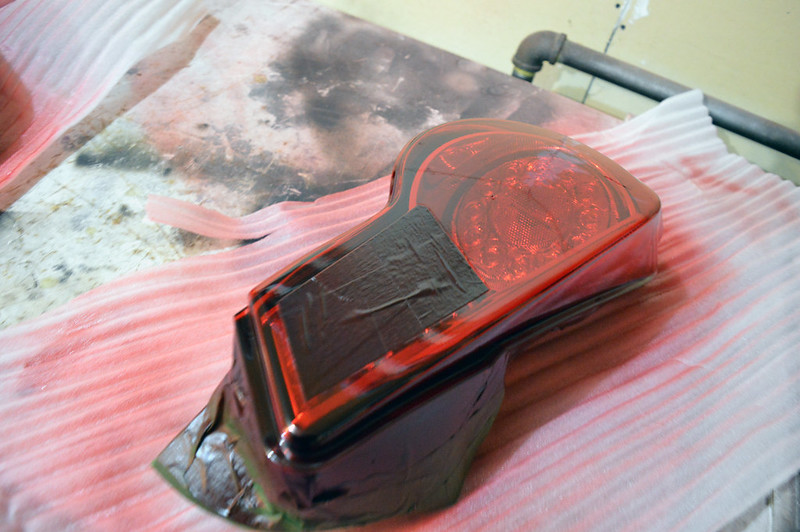 3-1 by joeag., on Flickr Couple coats of clear, and after drying. Color came out OK! Here's the left side 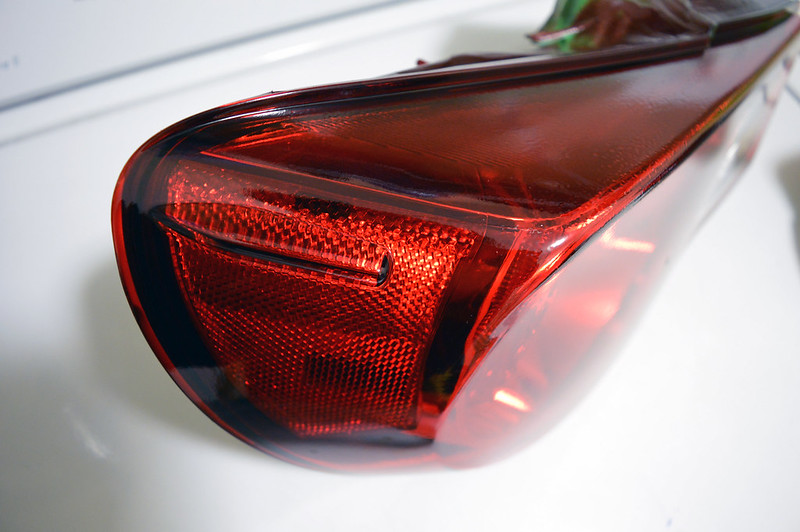 4-1 by joeag., on Flickr 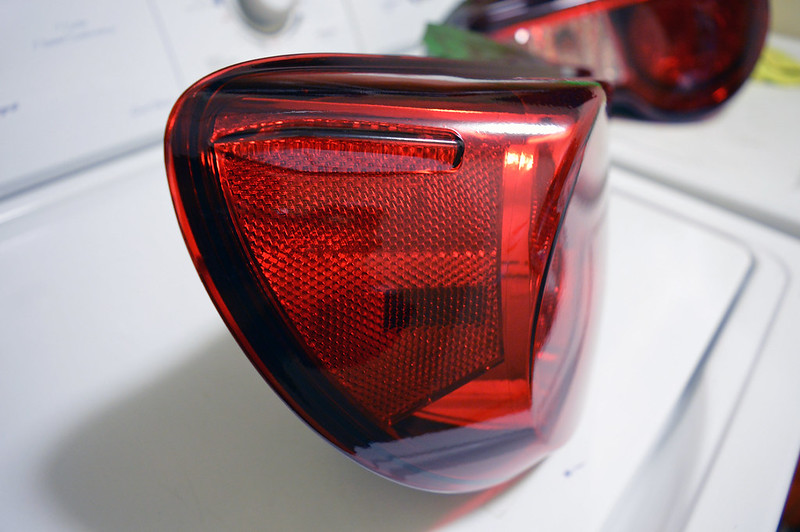 5-1 by joeag., on Flickr 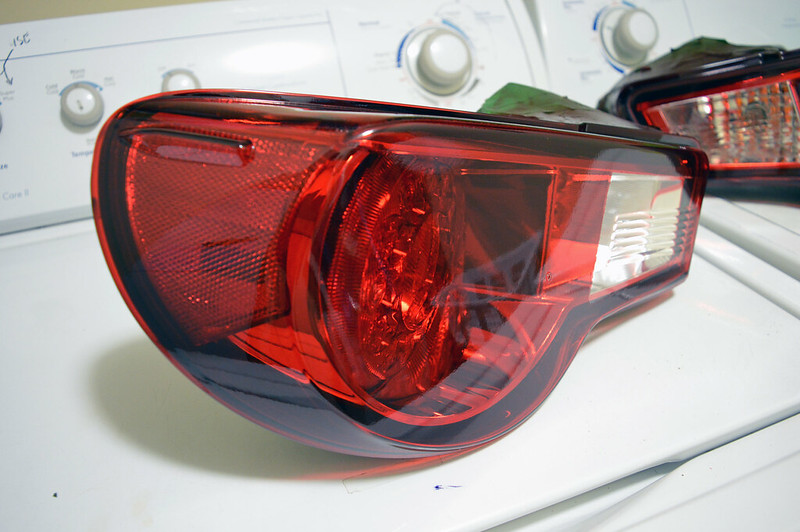 6-1 by joeag., on Flickr 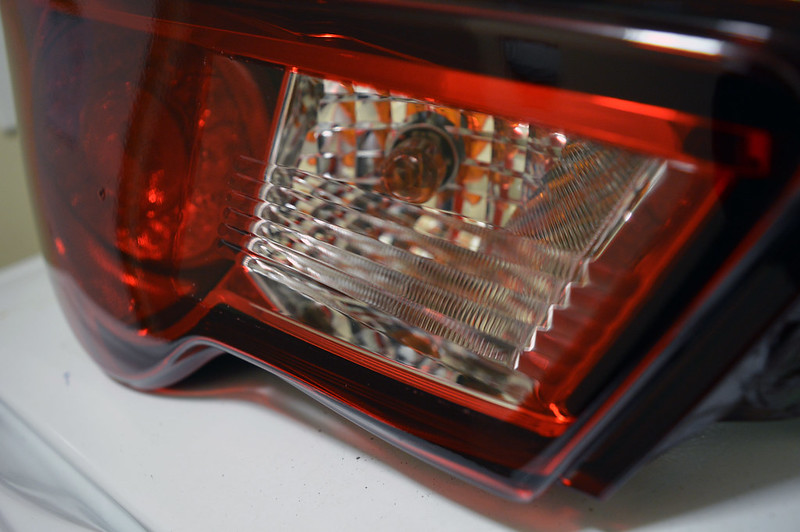 7-1 by joeag., on Flickr Right Side 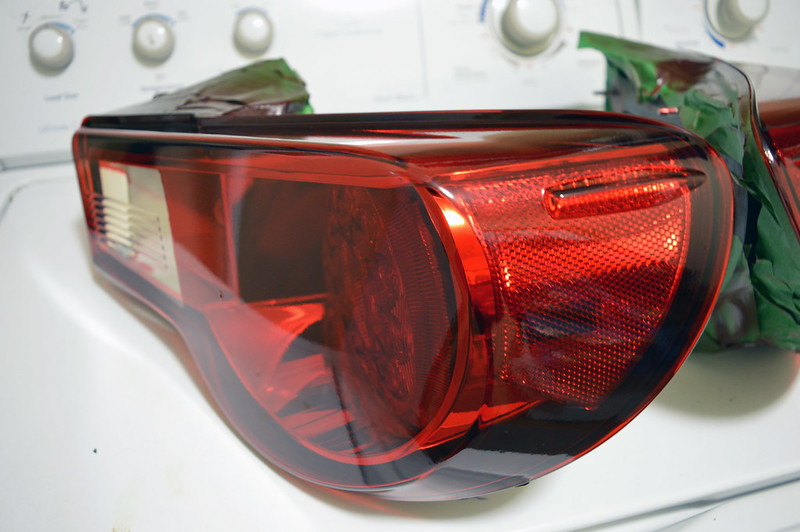 8-1 by joeag., on Flickr 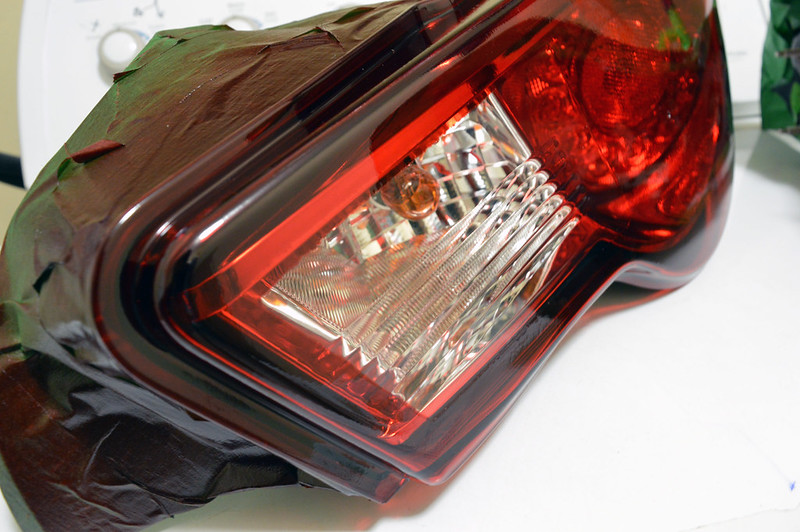 9-1 by joeag., on Flickr Side by Side  10-1 by joeag., on Flickr 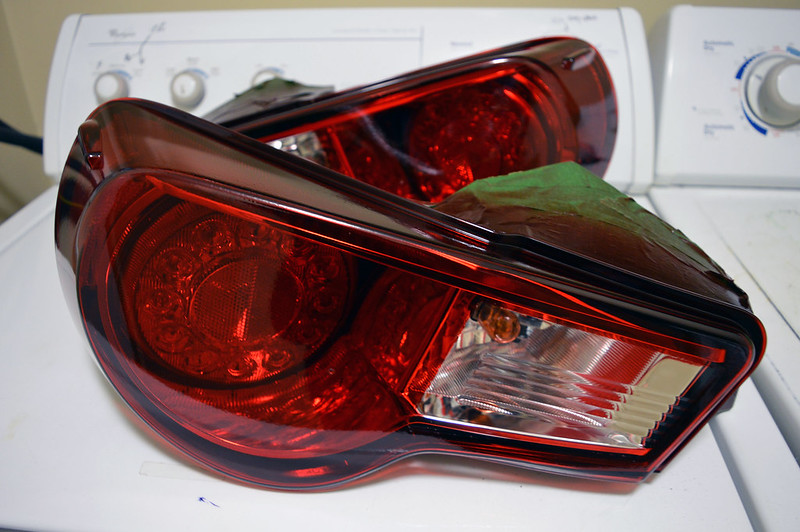 11-1 by joeag., on Flickr 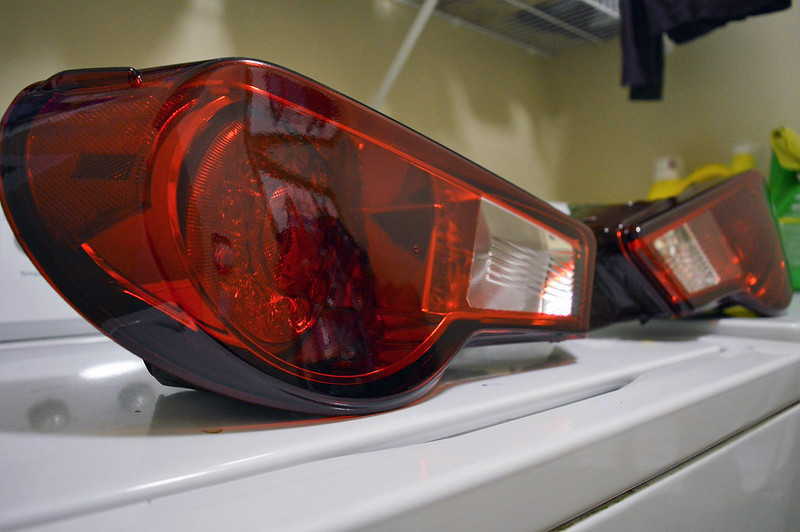 12-1 by joeag., on Flickr 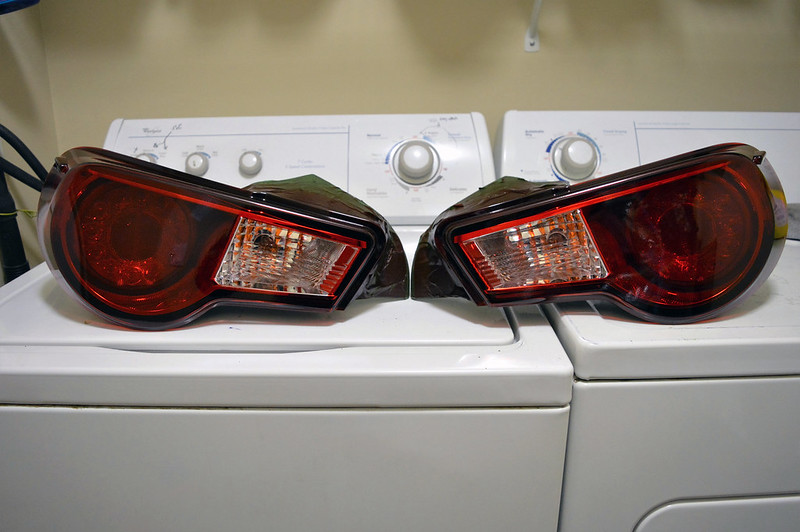 13-1 by joeag., on Flickr And sitting indoors to cure! (Garage is a little too cold up on this side of the border) 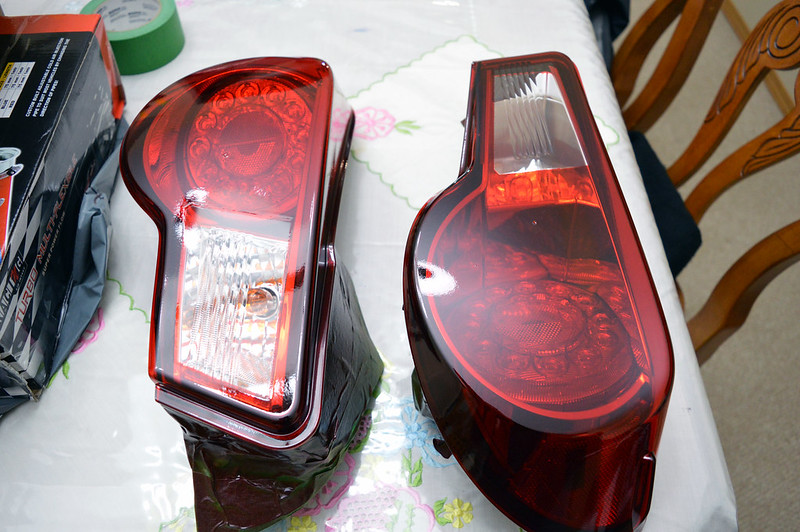 15-1 by joeag., on Flickr
__________________
|
|
|
|
|
|
|
|
|
|
|
 Similar Threads
|
||||
| Thread | Thread Starter | Forum | Replies | Last Post |
| My Journal | Weasel Soup | Member's Car Journals | 27 | 10-03-2016 04:07 PM |
| < RYO > Car Journal | RYO | Member's Car Journals | 3 | 04-16-2015 12:48 PM |
| EWY's Raven FR-S Build Journal | EWY | Member's Car Journals | 22 | 02-25-2015 09:30 AM |
| 1 SIK FRS Raven FRS Build Journal | 1SIKFRS | Member's Car Journals | 20 | 01-19-2014 02:58 AM |
| Duder's BRZ Mod Journal | duder | Member's Car Journals | 17 | 06-26-2013 10:54 PM |


 Greta
Greta