


 02-15-2021, 03:53 PM
|
#1261 | |
|
pessimistic skeptic

Join Date: Apr 2016
Drives: '14 FR-S Monogram AT JRSC
Location: Upstate NY
Posts: 1,767
Thanks: 1,695
Thanked 1,035 Times in 684 Posts
Mentioned: 14 Post(s)
Tagged: 0 Thread(s)
|
Quote:
|
|

|

|
|
03-22-2021, 06:28 PM
|
#1262 |
|
Senior Member

Join Date: Apr 2014
Drives: 2013 Ultramarine FR-S
Location: Springfield, MO
Posts: 1,948
Thanks: 2,538
Thanked 1,409 Times in 803 Posts
Mentioned: 31 Post(s)
Tagged: 3 Thread(s)
|
Returned my order and decided to just run OEM valve covers for now. Those are easy enough to add later.
Got my stainless intake/exhaust manifold studs installed as well. A lot of the exhaust studs were seized and were a pain to remove. A mixture of heat and a couple good whacks with a hammer got them enough to remove.   Found a block off that isn't used on my head, so will need to chop that off before powercoat.  Box full of goodies showed up. 6x GTR coils, and a Bosch 82mm Throttle body, I meant to order the 74mm but must have selected the wrong porsche. Just going to roll with it.  The Throttle body is quite a bit smaller than the 90mm mustang style throttle body, so I designed an adapter. Hopefully pointed in the correct direction as well to help with intercooler routing. Going to print a test part first, then have my friend mill one up for me.  Last few pieces of the transmission puzzle are coming together. Domiworks wiring PCB and Blink Marine can keypad are on their way. TF-Works should be sending my external trans harness here this week as well. Get the trans done and I can slap the engine and trans into the car.
__________________
 |

|
|
| The Following User Says Thank You to DustinS For This Useful Post: | Irace86.2.0 (03-31-2021) |
|
09-10-2021, 11:58 AM
|
#1263 |
|
Senior Member
Join Date: Apr 2014
Drives: 2013 Ultramarine FR-S
Location: Springfield, MO
Posts: 1,948
Thanks: 2,538
Thanked 1,409 Times in 803 Posts
Mentioned: 31 Post(s)
Tagged: 3 Thread(s)
|
Well it's been awhile since I updated this. Not a ton of progress has been made as I have had a lot of other stuff going on (Mostly helping my friend get his car back together as it's one of their daily drivers)
Printed the throttle body adapter. I wish I could just run this, would make life easier and be much cheaper than having to get one machined from aluminum.      Keypad mount    Printed some test Coil Mounts. I think I might be able to get away with these being printed in ASA. Though I think I want to try and get shorter stalks for them.   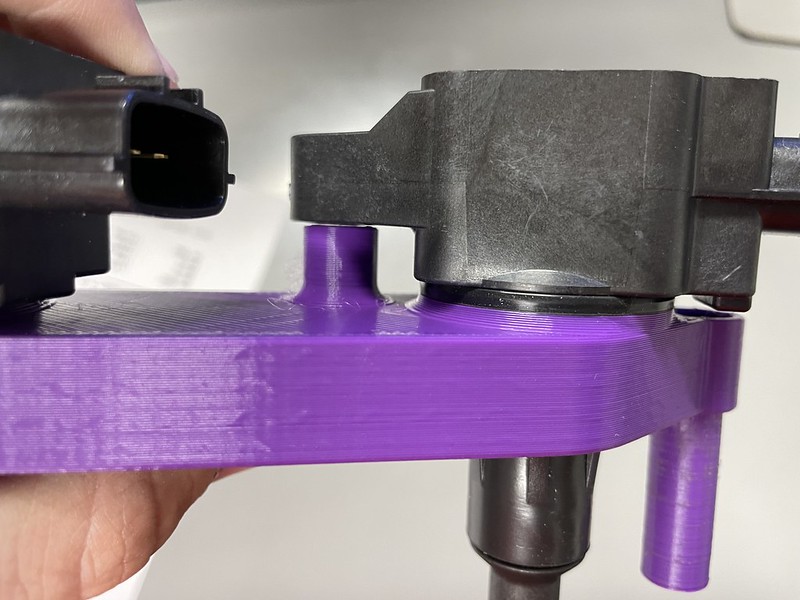  they sit just a bit too tall with the factory stalks  Got a bit of Powder Coating done, the valve covers in the other pictures as well as the pulleys and compressor housing. I needed to add more powder to the compressor housing as the texture is quite aggressive and shows through. I'm just going to leave it for now.  Transmission is all wired up and pretty much ready to go. Purchased the $200 oil filters from BWM (That's employee cost  ) and just waiting to get it on the hoist to replace the pan filter ) and just waiting to get it on the hoist to replace the pan filter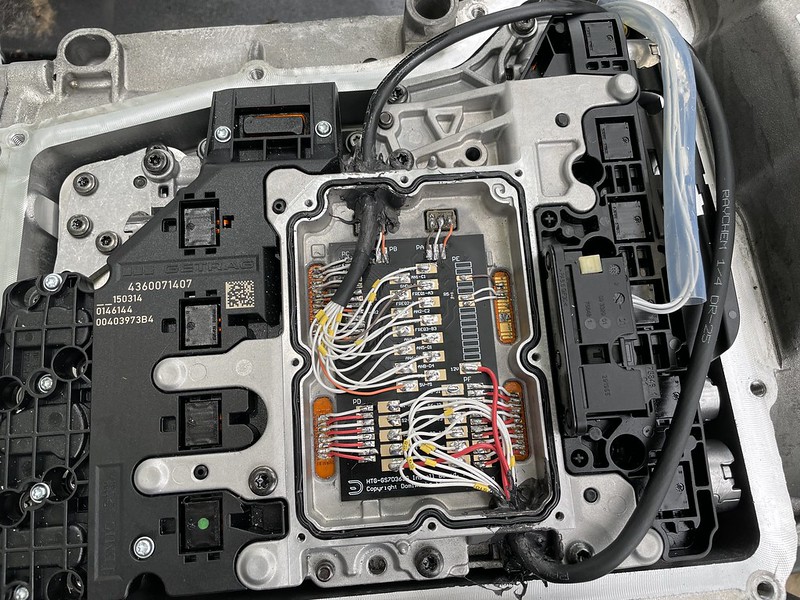    Going to need to rethink my alternator mount...  I also got my Tubular subframe in (don't mind how messy it is, needs a good cleaning).  Which required drilling the stock bushing out to accept larger hardware. I decided to upgrade to poly bushings at the same time. Since everything was coming apart, I went ahead and installed whiteline roll center kit as well.   Now comes the super fun part... Rewiring the chassis. I am putting the fuse box in the cabin, running the wires that normally run along the firewall under the dash, and tucking the harness a little better (Thats the plan anyway). I bought a second engine bay harness to steal wire from while I extend everything.  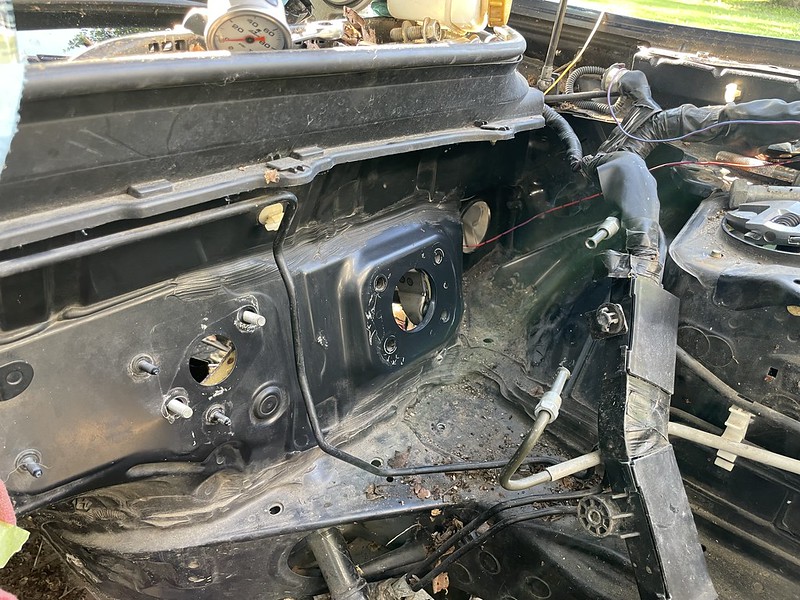 I have a lot to go on the wiring, but luckily engine and transmission can be in the car to finish that. Hoping to have them in the car in the next couple of weekends while the weather is decent during the days.
__________________
|
|
|
|
| The Following 2 Users Say Thank You to DustinS For This Useful Post: | gtpvette (09-13-2021), Irace86.2.0 (09-10-2021) |
|
09-10-2021, 12:21 PM
|
#1264 |
|
Senior Member

Join Date: Mar 2017
Drives: Q5 + BRZ + M796
Location: Santa Rosa, CA
Posts: 7,883
Thanks: 5,668
Thanked 5,804 Times in 3,299 Posts
Mentioned: 70 Post(s)
Tagged: 0 Thread(s)
|
Why can’t you? Not strong enough? The FA20 intake manifold is plastic. No reason the spacer couldn’t be plastic. You could make a cast piece yourself out of aluminum from soda cans, but the time isn’t worth it probably. It isn’t too hard to do. Seen it on YouTube channels.
If this doesn’t work out, you could join the K24 swap team. Third time is a charm, they say.
__________________
My Build | K24 Turbo Swap | *K24T BRZ SOLD*
|
|
|
|
|
09-10-2021, 04:57 PM
|
#1265 | |
|
Senior Member
Join Date: Apr 2014
Drives: 2013 Ultramarine FR-S
Location: Springfield, MO
Posts: 1,948
Thanks: 2,538
Thanked 1,409 Times in 803 Posts
Mentioned: 31 Post(s)
Tagged: 3 Thread(s)
|
Quote:
My old boss has a 5 axis CNC machine, so getting it milled shouldn't be an issue, just costly for such a large chunk of aluminum. Especially for a one off part. Though then if anyone else needed one, they could get it made pretty easy.
__________________
|
|
|
|
|
| The Following User Says Thank You to DustinS For This Useful Post: | Irace86.2.0 (09-11-2021) |
|
09-10-2021, 05:37 PM
|
#1266 | |
|
Senior Member

Join Date: Jan 2018
Drives: Crapcan
Location: Oregon
Posts: 11,145
Thanks: 18,142
Thanked 16,304 Times in 7,368 Posts
Mentioned: 107 Post(s)
Tagged: 0 Thread(s)
|
Quote:
__________________
"Experience is the hardest kind of teacher. It gives you the test first and the lesson afterward." -Oscar Wilde.
|
|
|
|
|
| The Following User Says Thank You to NoHaveMSG For This Useful Post: | DustinS (09-10-2021) |
|
09-11-2021, 02:01 AM
|
#1267 | |
|
Senior Member
Join Date: Mar 2017
Drives: Q5 + BRZ + M796
Location: Santa Rosa, CA
Posts: 7,883
Thanks: 5,668
Thanked 5,804 Times in 3,299 Posts
Mentioned: 70 Post(s)
Tagged: 0 Thread(s)
|
Quote:
https://airwolf3d.com/polycarbonate-3d-printing/
__________________
My Build | K24 Turbo Swap | *K24T BRZ SOLD*
|
|
|
|
|
|
09-11-2021, 08:58 AM
|
#1268 | |
|
Senior Member
Join Date: Apr 2014
Drives: 2013 Ultramarine FR-S
Location: Springfield, MO
Posts: 1,948
Thanks: 2,538
Thanked 1,409 Times in 803 Posts
Mentioned: 31 Post(s)
Tagged: 3 Thread(s)
|
Quote:
__________________
|
|
|
|
|
|
09-11-2021, 09:17 AM
|
#1269 | |
|
Senior Member
Join Date: Mar 2017
Drives: Q5 + BRZ + M796
Location: Santa Rosa, CA
Posts: 7,883
Thanks: 5,668
Thanked 5,804 Times in 3,299 Posts
Mentioned: 70 Post(s)
Tagged: 0 Thread(s)
|
Quote:

__________________
My Build | K24 Turbo Swap | *K24T BRZ SOLD*
|
|
|
|
|
| The Following User Says Thank You to Irace86.2.0 For This Useful Post: | NoHaveMSG (09-11-2021) |
|
09-11-2021, 07:12 PM
|
#1270 | |
|
Senior Member
Join Date: Jan 2018
Drives: Crapcan
Location: Oregon
Posts: 11,145
Thanks: 18,142
Thanked 16,304 Times in 7,368 Posts
Mentioned: 107 Post(s)
Tagged: 0 Thread(s)
|
Quote:
Not good with gasoline IIRC Sent from my iPhone using Tapatalk
__________________
"Experience is the hardest kind of teacher. It gives you the test first and the lesson afterward." -Oscar Wilde.
|
|
|
|
|
| The Following User Says Thank You to NoHaveMSG For This Useful Post: | Irace86.2.0 (09-11-2021) |
|
09-11-2021, 11:11 PM
|
#1271 |
|
Senior Member
Join Date: Apr 2014
Drives: 2013 Ultramarine FR-S
Location: Springfield, MO
Posts: 1,948
Thanks: 2,538
Thanked 1,409 Times in 803 Posts
Mentioned: 31 Post(s)
Tagged: 3 Thread(s)
|
The ASA filament should do quite well for mild use.
I have also been looking into how to run the water/oil lines for the turbo. Being it’s a GE block it causes some slight complications. Mostly because there really isn’t any coolant/oil ports on the exhaust side. Plan is to copy Rad Dan’s setup he posted not long ago for his GS build. I’ll run my turbo feed from my sandwich plate on the intake side and coolant feed from the coolant port slightly above that. I am looking at using Nicopp hardline with tube nuts. Make it super clean looking and not have to worry about softlines. 1/4" line with -4an for the oil feed (looking at incorporating the turbosmart turbo oil pressure regulator) and -6an for the oil feed/return. I also am looking doing a lot of the fuel/oil lines in the engine bay with Nicopp hardline. Mostly because PTFE AN hose is very expensive. So using the least amount works better for me.
__________________
|
|
|
|
|
09-25-2021, 10:48 AM
|
#1272 |
|
Senior Member
Join Date: Apr 2014
Drives: 2013 Ultramarine FR-S
Location: Springfield, MO
Posts: 1,948
Thanks: 2,538
Thanked 1,409 Times in 803 Posts
Mentioned: 31 Post(s)
Tagged: 3 Thread(s)
|
Started designing the sensor brackets. The cam sensor has had quite a few revisions. Mostly trying to figure out how I wanted the O-Rings to be implemented. From First design to pretty much ready. The crank sensor came out good first time, just needed to be made thicker. Cam sensor needed the bolt holes moved further out from center, and I had to make a couple changes to make the sensor sit correctly and fit the head. I think I have a good one now though.
Cam:   1.5mm of clearance when cold.  Crank:   0mm of cold clearance. Thicken it 1.5mm and be golden  Had to tear it back down to get the crank sensor on and measure clearance.  Filters and driveshaft adapter taken care of on the transmission side of things. Ready to get attached to engine. Just need to get an oil cooler adaper (or drill and tap for -8an orb) and fill up the trans.   Got the two bolt to v-band wastegate adapter mocked up. Had some extra stainless intake studs, so I cut them to fit. Trying to decide how to seal the threads.    Mocking up the FRS A/C compressor. Figured if I already had it, why not save a bit of money and weight. Though I don't care for how far it sticks out. 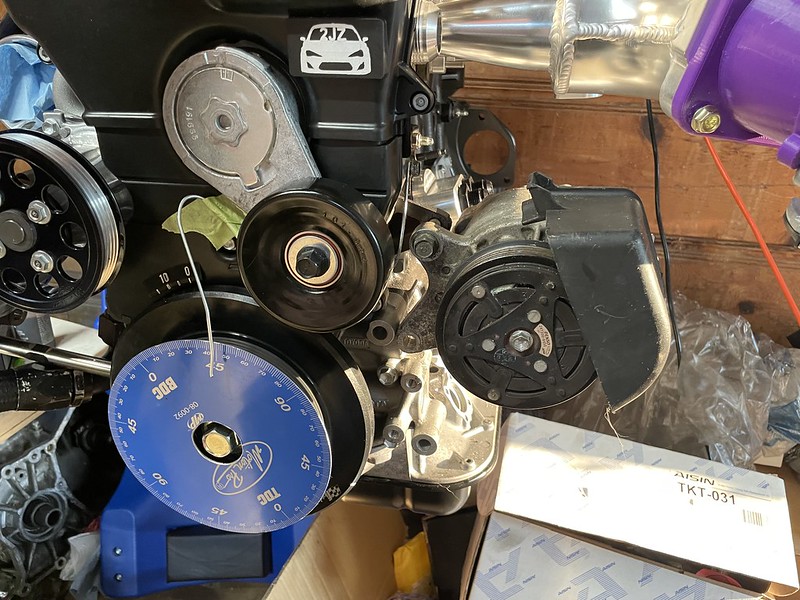 Alternator mount clearance with Rad hose. Think I may go a different direction on alternator. Was just trying to use it as it had a good amperage rating and I already had it, but again... It stick out too far for my liking and really makes it a pain with radiator hose routing. We will see what happens when it sits in the car.  I realized while looking around with the intake manifold on that the factory VVTI hardline may be a bit of a pain to get fit correctly (and the fact I can't find mine and would need to buy a new one) so I think I am going to use the 3/8" NICOPP line I have coming to run new VVTI hardline.  Started cleaning up the engine bay to get ready for engine and trans to go in. Current plan is to have most of what needs done finished up by the first of the year. I really need/want this car running. Needs washed/waxed now and all the extra hardware to go into the extras bin. This is all the wire that will be sent through for the most part. Other than engine harness, but I think I may try tuck it in the center of the bay somewhere somewhat hidden.  I've had quite a few parts arrive, so more updates should be coming today or tomorrow
__________________
|
|
|
|
| The Following User Says Thank You to DustinS For This Useful Post: | Irace86.2.0 (11-25-2021) |
|
11-07-2021, 11:45 PM
|
#1273 |
|
Senior Member
Join Date: Apr 2014
Drives: 2013 Ultramarine FR-S
Location: Springfield, MO
Posts: 1,948
Thanks: 2,538
Thanked 1,409 Times in 803 Posts
Mentioned: 31 Post(s)
Tagged: 3 Thread(s)
|
Haven't got too much done. Had a bit of a scare with the valve spring seats which turned out to be fine, but I had a lot of downtime as I waited on parts (that I didn't end up needing) and then finding the time to do all the head work over again. I originally thought that the machine shop forgot to install valve spring seats as I had found most of the old ones in one of my boxes. I ordered all brand new ones and prepped to tear down the head to install them... until the seats I ordered came in...
 Quite the difference (old on left, new on right). Not exactly sure why, but I have double checked everything and the ones I got are correct. I got one valve spring out and checked to see if maybe they had installed new seats that look like the ones I got, and they did. So I have been dreading to work on it and pushing off the work for really nothing. So after buttoning up the engine, I set off to test fit the engine w/ transmission into the car. Here are pictures from when I did just the engine: New starter and adapter installed. Transmission has to come off to remove start bolts   Engine set it with exhaust manifold/turbo on the check clearance:  Pretty crazy the amount of room here. Had multiple people voice concerns on how far out the turbo is from the engine and hitting strut tower. Miles of room thankfully.   Throttle body adapter didn't quite work out. Throttle body sits in the core support, so I will probably modify both to work a little better with each other.   Fitting the engine showed me the heater hoses, chassis brace mounts, and those small studs at the back needed to be removed. So out they came: (got painted but didn't get pictures, then destroyed the paint today. More on that later)     Will be moving the heater hoses to the side with some -10an fittings On to todays Fiasco: 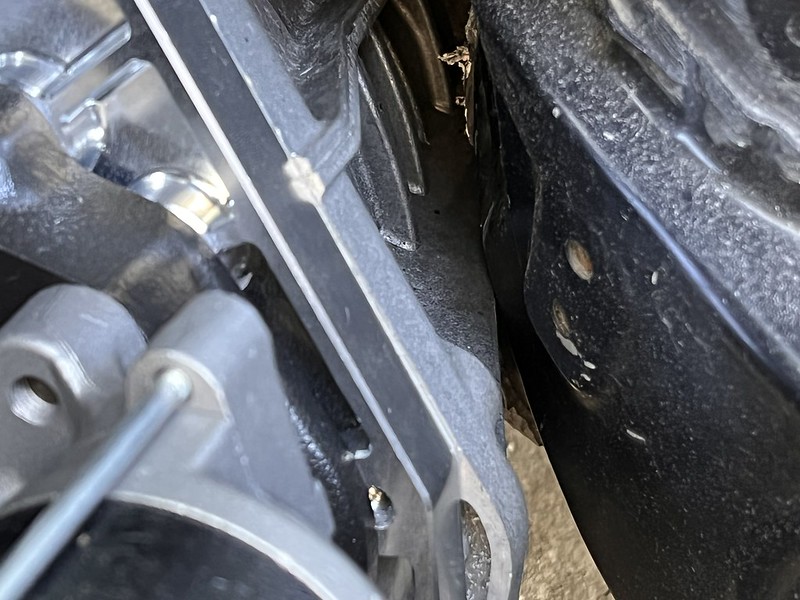 Hits pretty bad here. Needed to go back and up, both up which is not possible.   Took care of the clearance issues with a grinder and BFG    Fighting to get the combo out of the car causes some damage:  Will have to take care of this later :/ So after I clearanced the transmission, I went to try fitting it back in and the engine hoist wouldn't lift the combo more than 1 foot off the ground. I spent 2 hours trying to get it bled correctly or filled with fluid correctly all for nothing. So now on the hunt for a replacement ram which is apparently out of stock at both local harbor freights...  Waiting on engine hoist so I can continue and see whats next. Lot of wiring to still do, figuring out transmission mount, driveshaft, and hunt down some missing sensors 
__________________
|
|
|
|
| The Following 3 Users Say Thank You to DustinS For This Useful Post: |
|
11-18-2021, 12:01 AM
|
#1274 |
|
Senior Member
Join Date: Apr 2014
Drives: 2013 Ultramarine FR-S
Location: Springfield, MO
Posts: 1,948
Thanks: 2,538
Thanked 1,409 Times in 803 Posts
Mentioned: 31 Post(s)
Tagged: 3 Thread(s)
|
Broke down and bought the oil cooler adapter. looks good, just need to get some fittings for it. Most likely going to run banjo fittings.
 With a lot more fiddling and a lot of BFH to the trans tunnel I finally got the engine and transmission in the correct spot. Come to find out the DCT ends right at my old Vorshlag Transmission mounts so I had to remove them to get it in. After that I was able to get it jacked into a good position. Pinion angles are opposite at -1 degree on the trans, and +1 degree on the diff. There is a small spot left to sand a little on one of the transmission fins, but very minor.   Hood even still closes  I have been working on a shifter originally made for a sim rig, modified it to my liking and printed in carbon fiber nylon. Not sure if it will make it into the car, but it was a fun project:  Just need to get some metal to start making the transmission bracket and then I can start working on wiring and the rest of the important stuff.
__________________
|
|
|
|
| The Following 2 Users Say Thank You to DustinS For This Useful Post: | Irace86.2.0 (11-18-2021), kevaughan (01-31-2022) |
|
|
|
|
 |
| Thread Tools | Search this Thread |
|
|
 Similar Threads
|
||||
| Thread | Thread Starter | Forum | Replies | Last Post |
| Pentosin Trans Fluid Swap | Motul 300 Diff Swap | Impressions | Dezoris | Mechanical Maintenance (Oil, Fluids, Break-In, Servicing) | 15 | 06-06-2017 10:54 PM |
| Ls or 2jz swap? | sgoldberg01 | BRZ First-Gen (2012+) -- General Topics | 13 | 03-22-2016 03:07 PM |
| Rod Swap | protpibe | Engine, Exhaust, Transmission | 6 | 10-21-2015 11:38 PM |
| AT-->MT swap | AlwaysSideways | Want-To-Buy Requests | 3 | 12-15-2014 11:14 AM |
| Should I swap? | michaelahess | BRZ First-Gen (2012+) -- General Topics | 8 | 06-12-2012 07:32 PM |


 2014 Scion FR-S AT


