|
||||||
| DIY (Do-It-Yourself) Guides For all DIYs. |
 |
|
|
Thread Tools | Search this Thread |
|
|
#1 |
|
Anorexic
Join Date: Oct 2013
Drives: 2003 Honda S2000 Suzuka Blue
Location: Washington, DC
Posts: 341
Thanks: 598
Thanked 175 Times in 95 Posts
Mentioned: 8 Post(s)
Tagged: 0 Thread(s)
|
DIY: Shrader Performance Rear Seat Delete Kit & Rear Seat Removal
Hey fellow 86 enthusiasts,
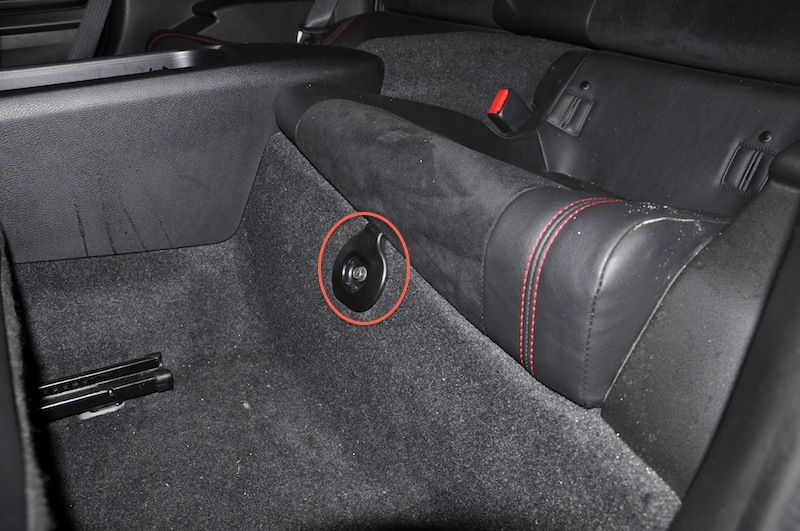
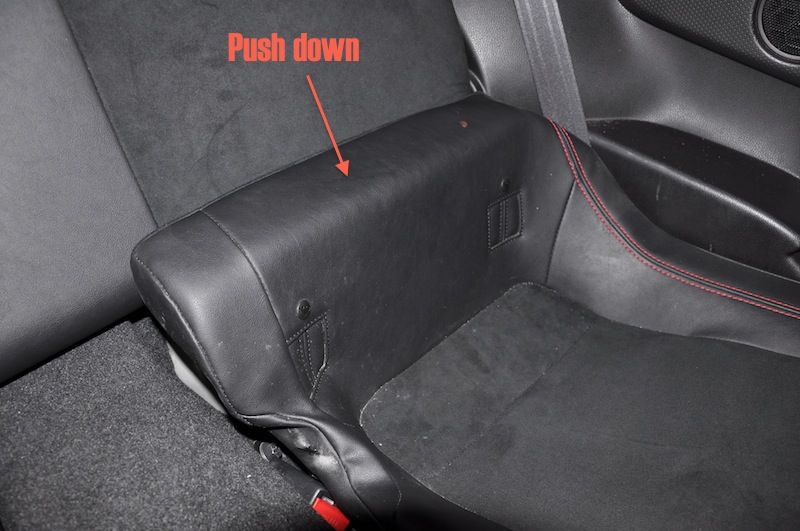
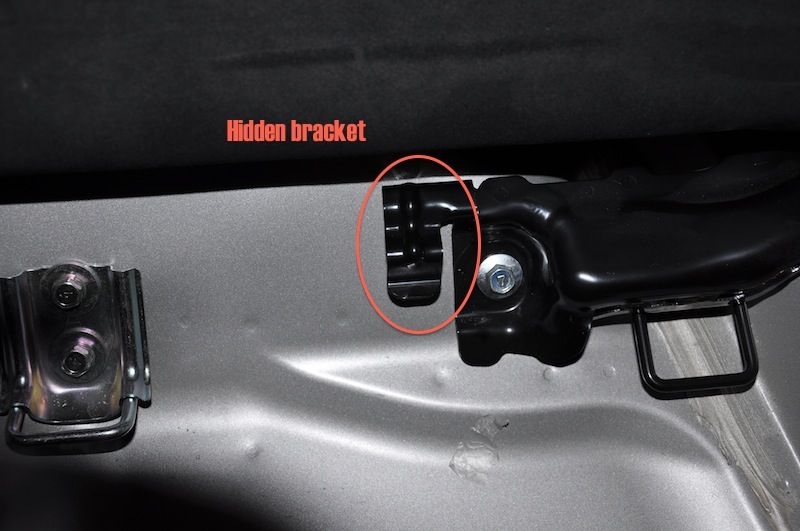
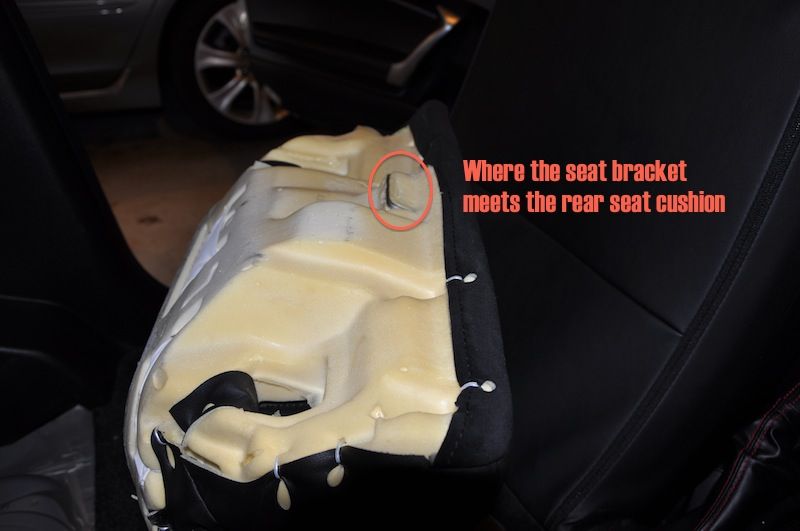
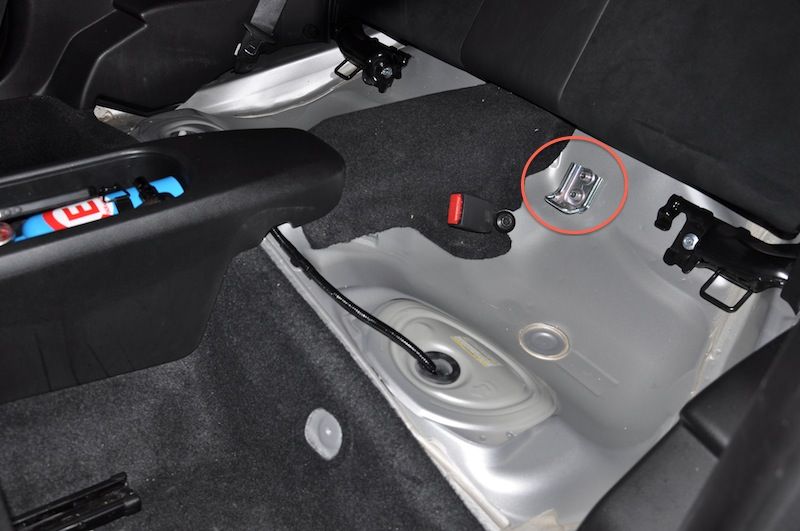
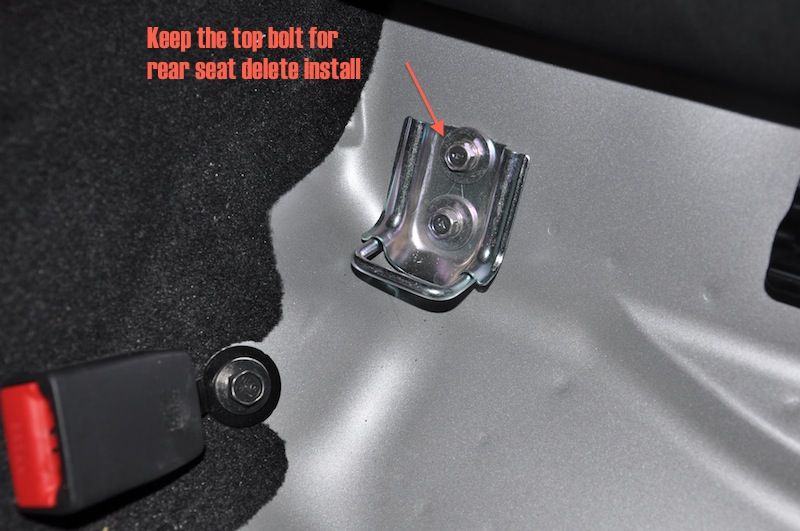
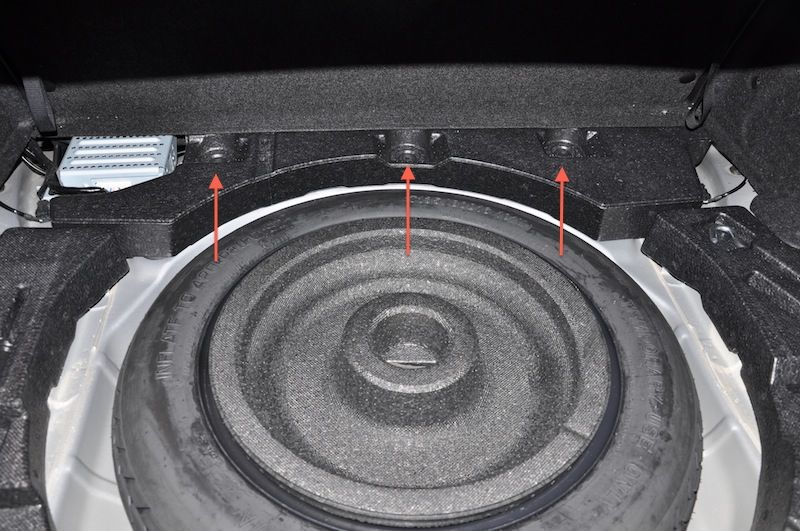
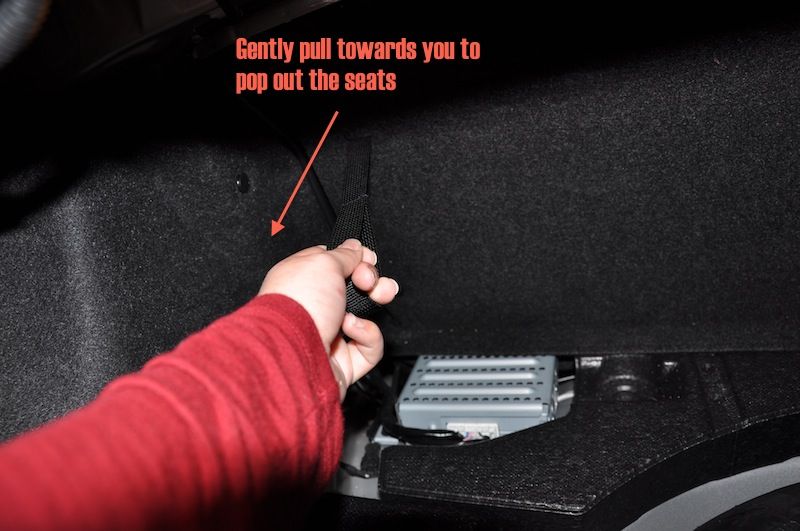
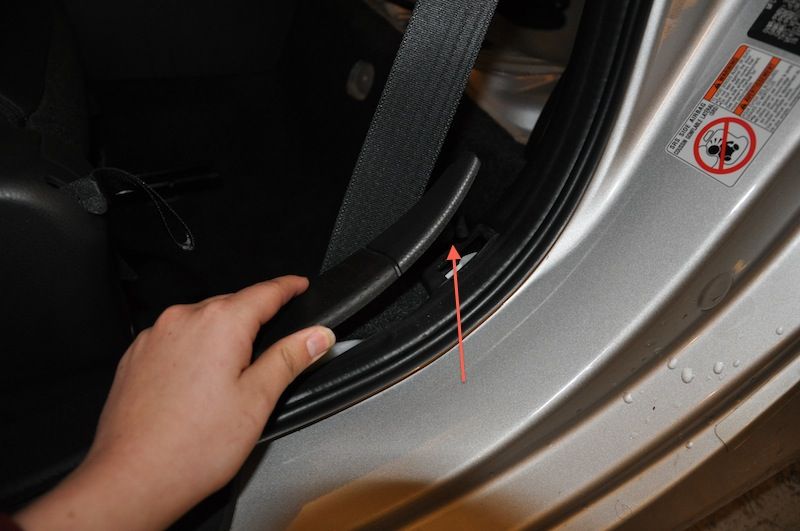
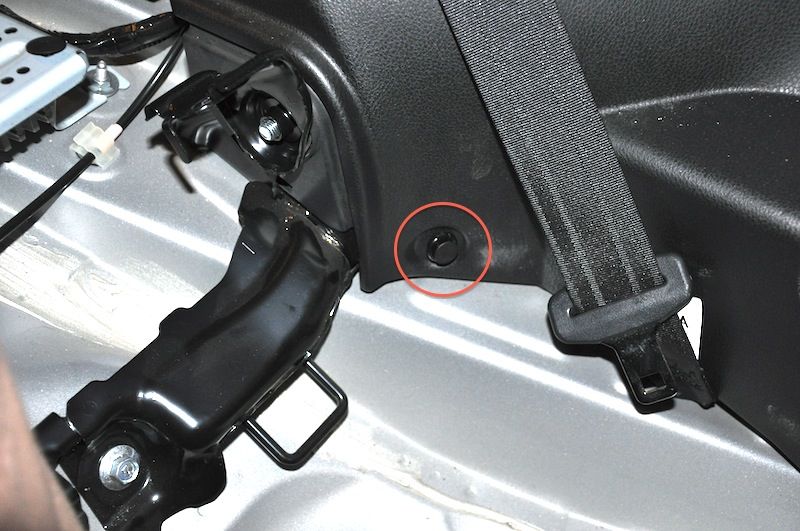
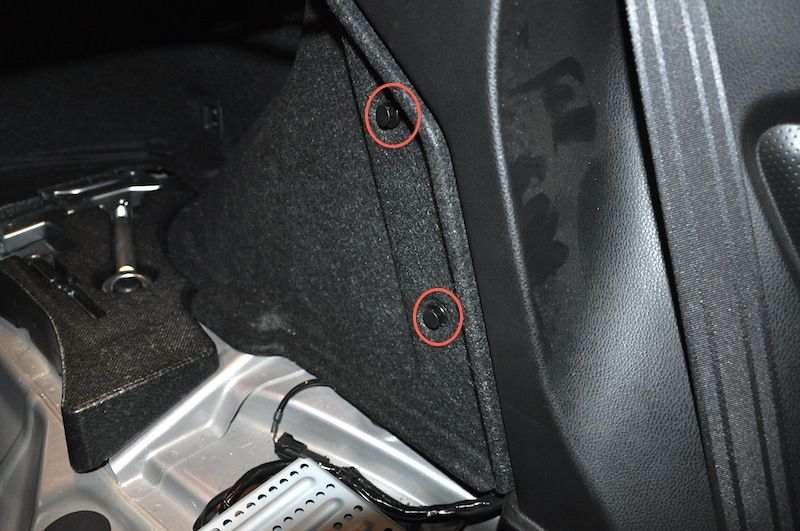
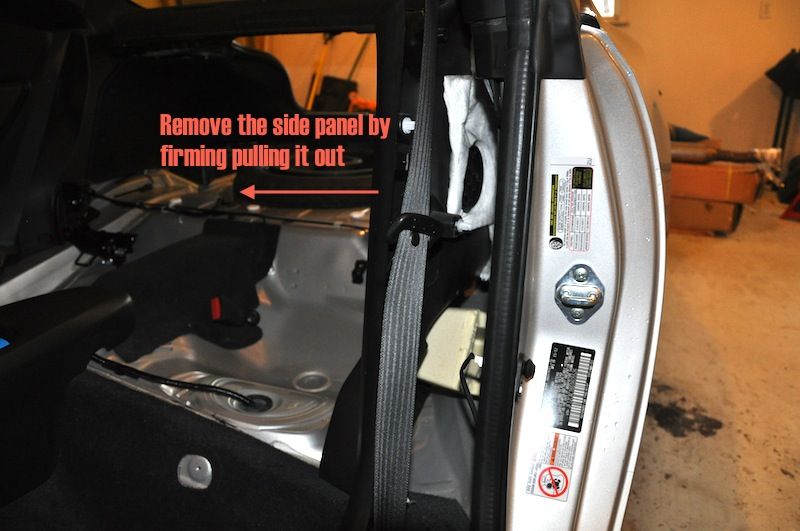
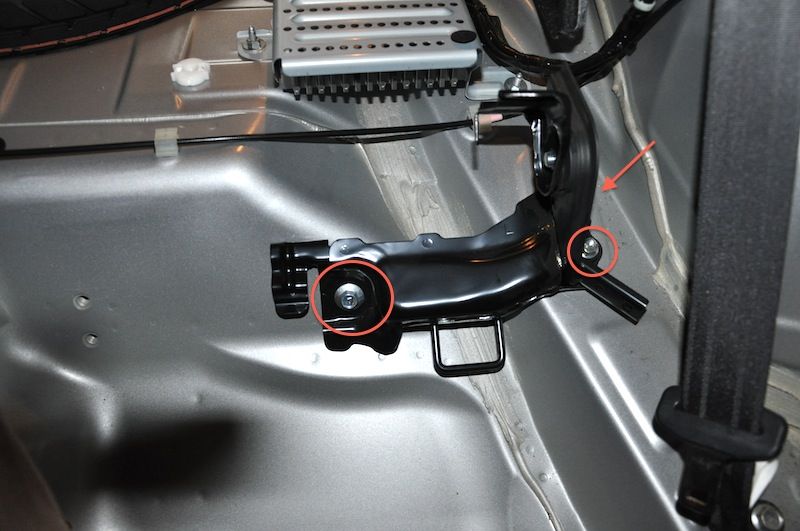
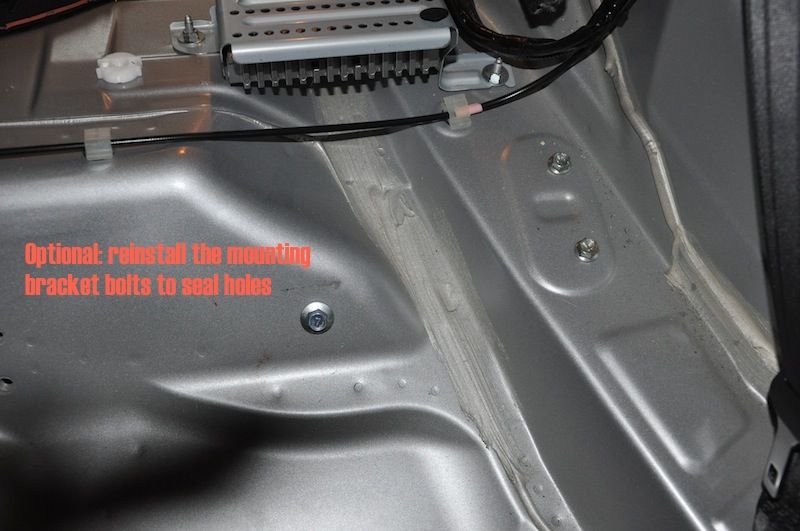
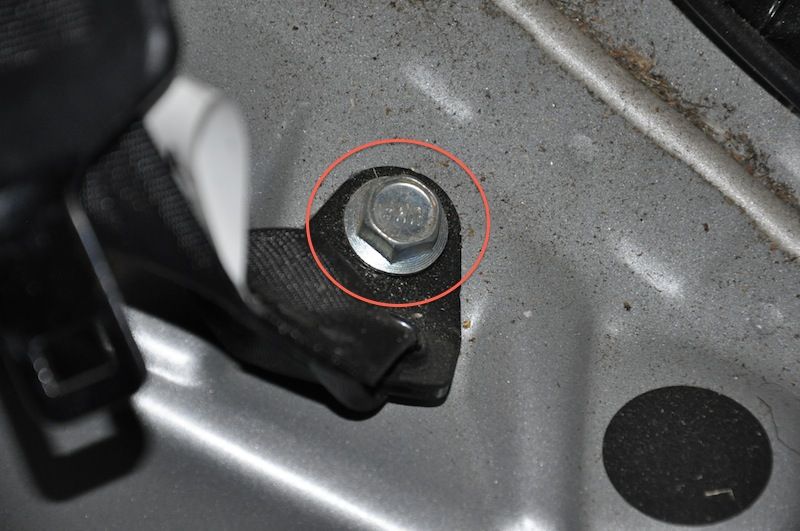
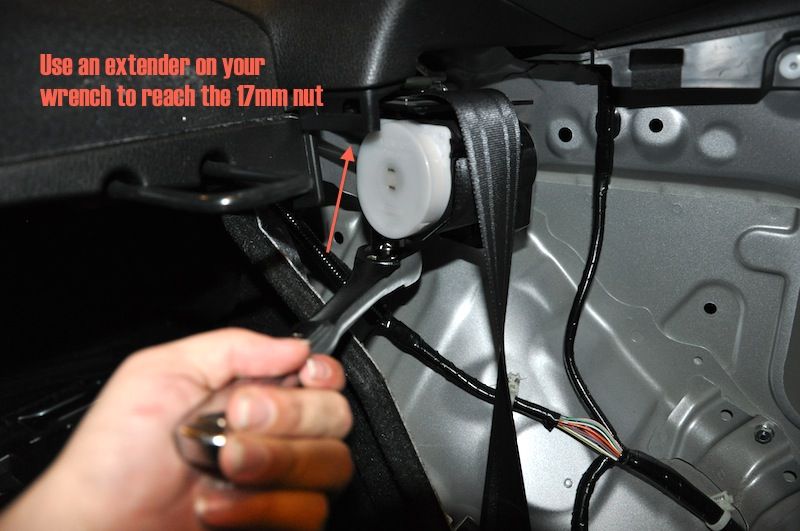
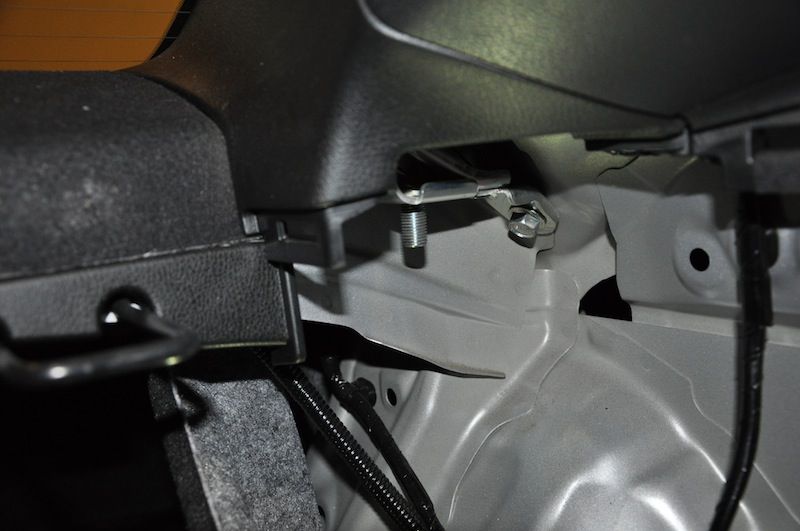
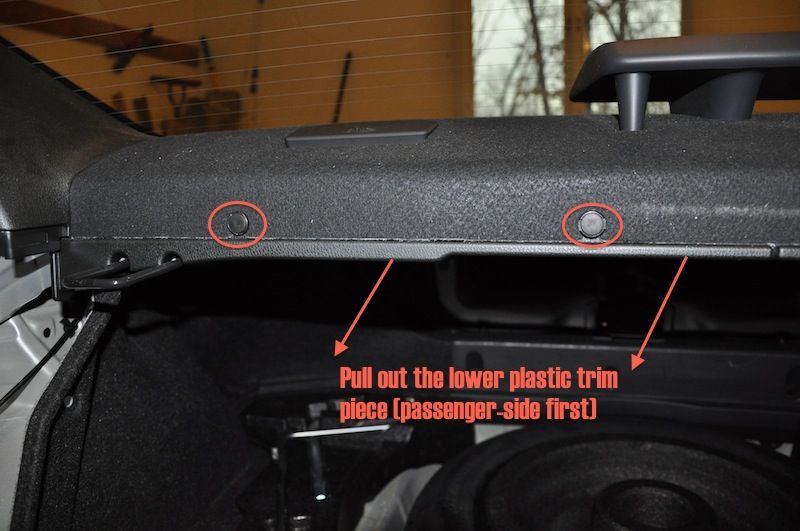
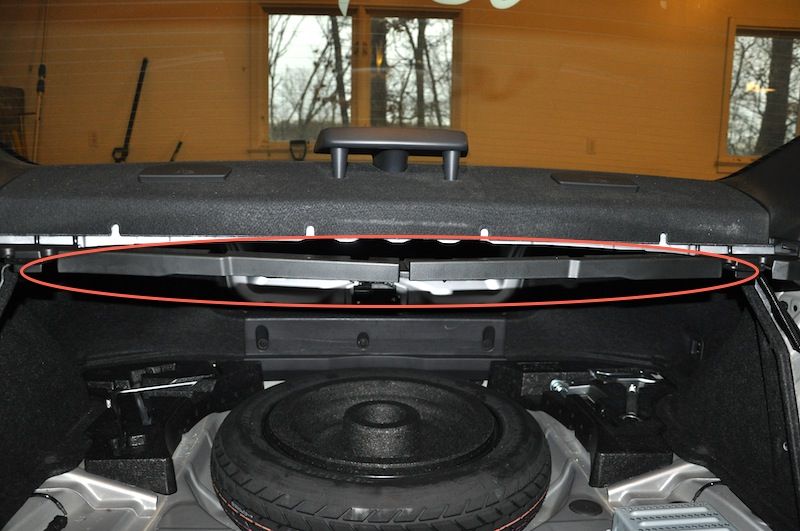
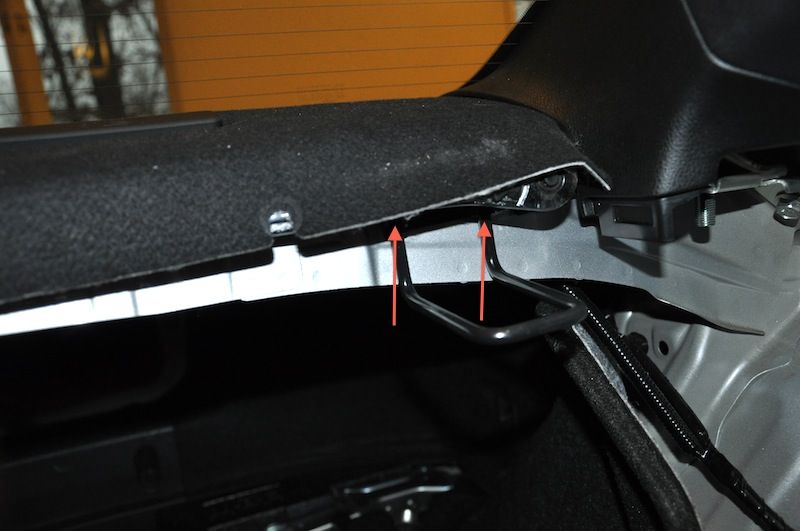
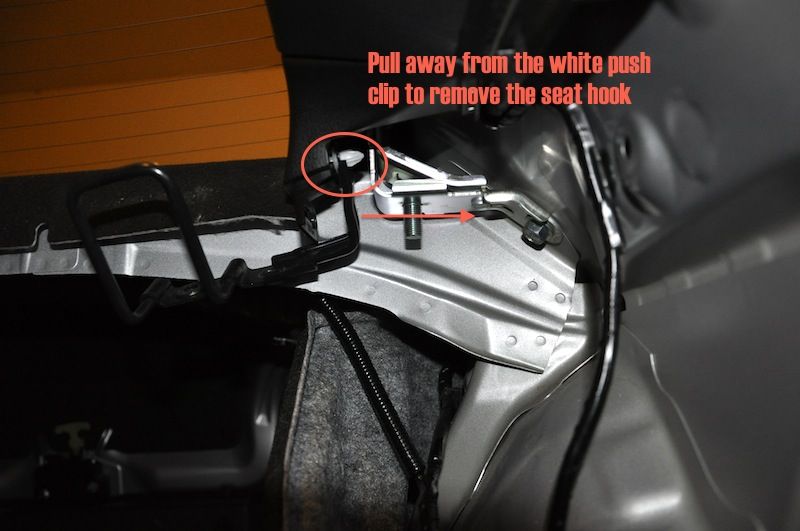
This is a two-part DIY guide: rear seat removal and the Shrader Performance rear seat delete kit installation. I’ve been seeing a decent number of requests for removing the rear seats, and I wanted to contribute to the discussion. Rear seat and seatbelt assembly removal: 1.5 hours Shrader Performance rear seat delete installation: 10 minutes Difficulty: Easy Tools Needed: Socket wrench – 10mm, 12mm, 14mm, 17mm Panel/trim removal tool Weight Reduction: 23 lbs. (according to Shrader Performance) Note: I will follow-up with specific weights for all pieces removed and installed. Rear Seat Removal:
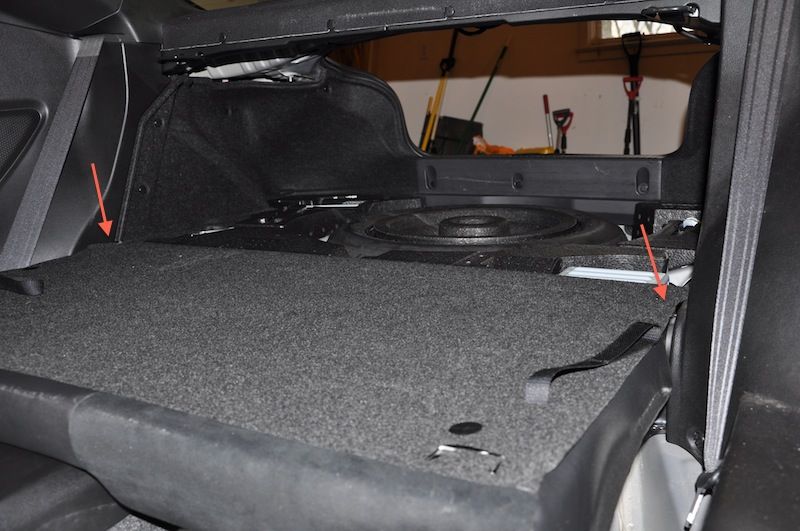 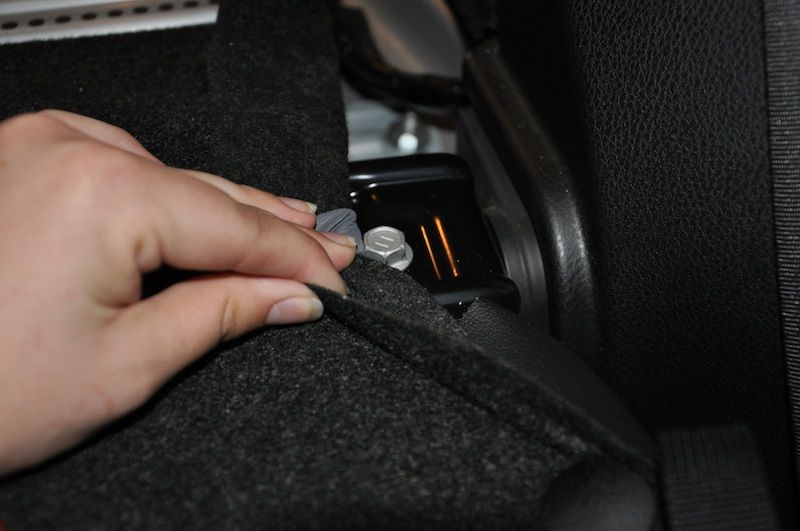
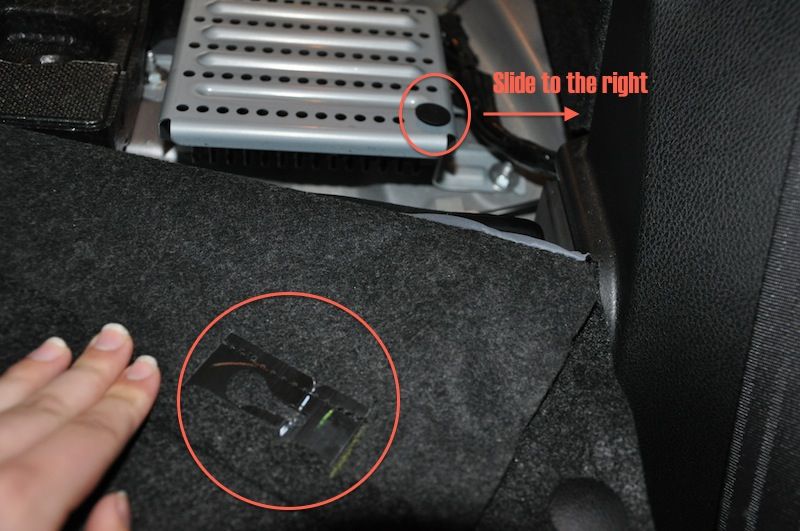 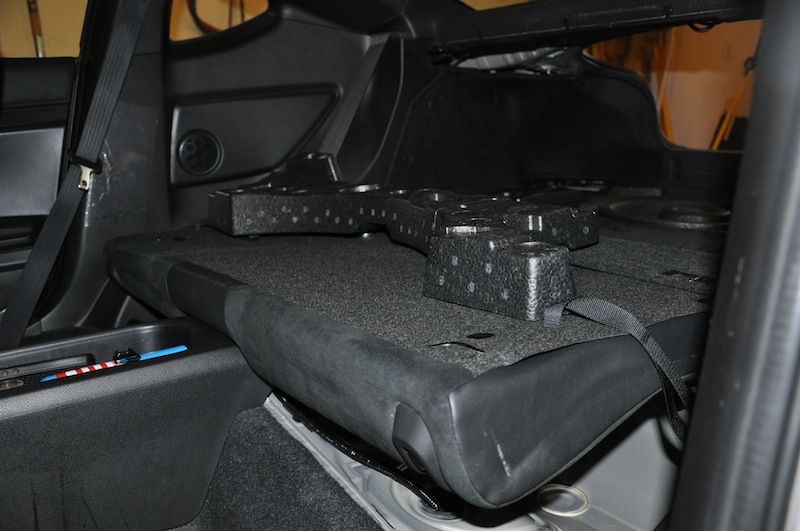
Shrader Performance Rear Seat Delete Install:
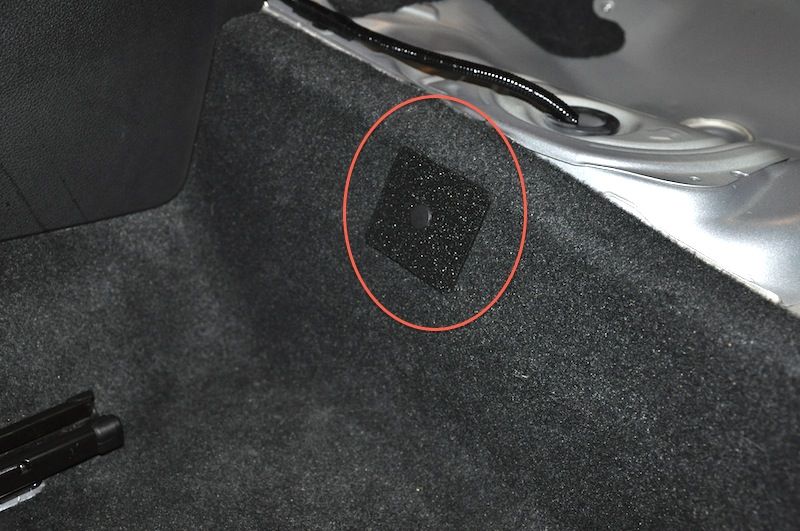
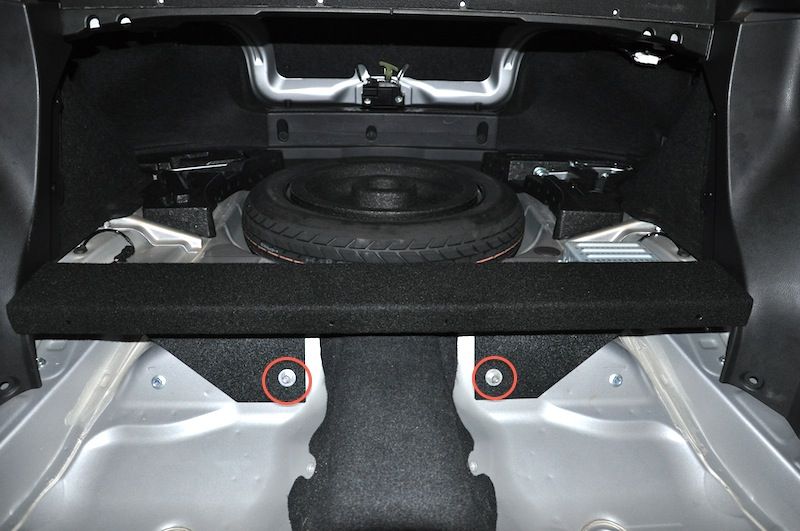
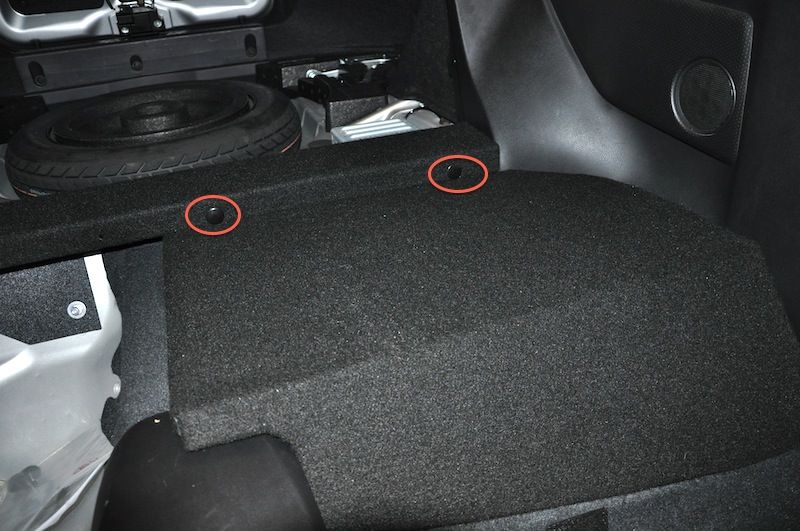 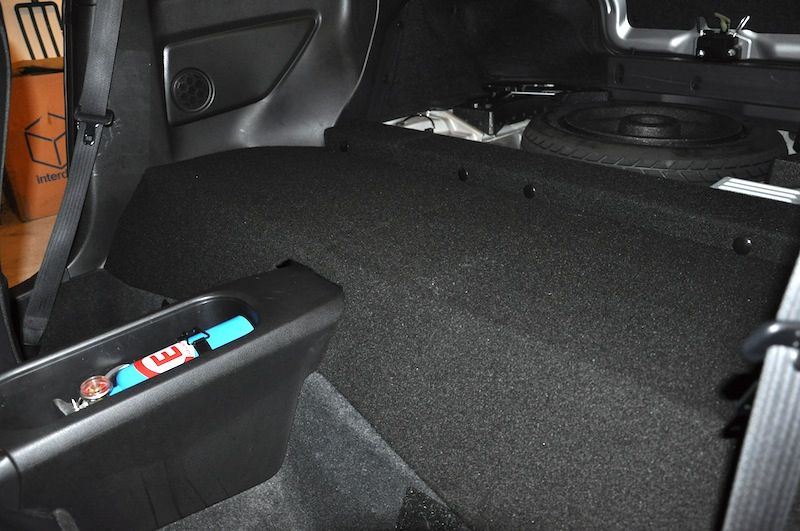
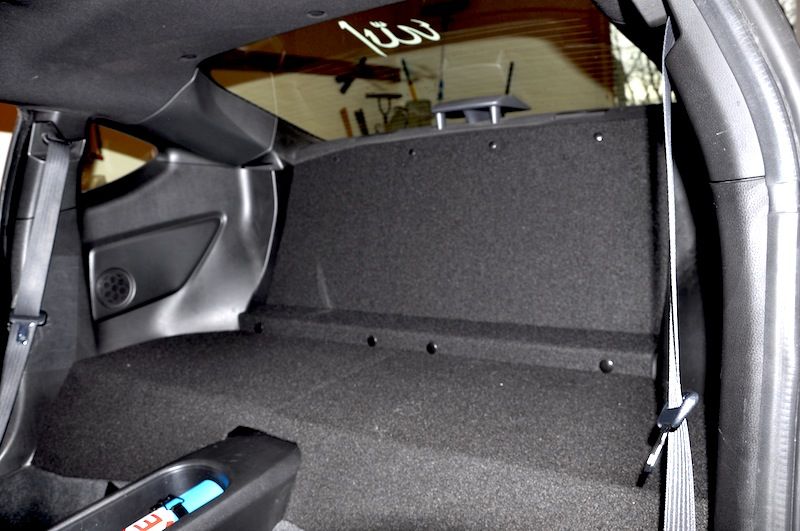 And you’re done! Please feel free to ask me any questions. Last edited by PoorMansRacing; 12-23-2013 at 05:39 PM. |
|
|

|
| The Following 20 Users Say Thank You to PoorMansRacing For This Useful Post: | Anthonytpt (01-06-2014), axelo (11-03-2015), BabaYaga (10-11-2014), Black Tire (03-22-2014), CJB (07-23-2014), FT_86_SM_GP (10-04-2015), garfull (01-06-2014), jcw99 (02-13-2016), jliongh (09-24-2016), JMon85 (05-20-2018), Lonewolf (12-23-2013), MaximeT (02-13-2016), notout86 (12-14-2014), pcuerpo (02-25-2017), RehabJeff86 (01-05-2014), Ryaquinn (12-24-2013), scionfrs2014 (05-01-2014), SoCal80six (11-02-2015), TheBatman (01-05-2014), Yamaha_R6 (03-28-2014) |
|
|
#2 |
|
Anorexic
Join Date: Oct 2013
Drives: 2003 Honda S2000 Suzuka Blue
Location: Washington, DC
Posts: 341
Thanks: 598
Thanked 175 Times in 95 Posts
Mentioned: 8 Post(s)
Tagged: 0 Thread(s)
|
Reserved for weight calculations.
|
|
|

|
|
|
#3 |
|
Senior Member
Join Date: Jan 2013
Drives: frs
Location: garden grove
Posts: 241
Thanks: 249
Thanked 81 Times in 45 Posts
Mentioned: 7 Post(s)
Tagged: 0 Thread(s)
|
Can you still put things on it? The kit is just matts or its strong enough to support some weight
|
|
|

|
|
|
#4 |
|
Senior Member
Join Date: May 2013
Drives: FR-S 10 #103 AT
Location: NC
Posts: 1,519
Thanks: 101
Thanked 599 Times in 347 Posts
Mentioned: 5 Post(s)
Tagged: 0 Thread(s)
|
It is fairly solid plastic but it is plastic. You can put stuff on it but I'm not sure I trust it with real weight. I'm going to have 50 lbs of puppy on it for 2 hours tomorrow. I'll let you know how it does.
__________________
Necessity may be the mother of Invention but Desperation is quite often the father.
“Sex is like Bridge. If you don't have a good partner, you'd better have a good hand.” - Mae West Papa said, "son there's a lot of evil temptations out there. Best to try 'em all so you know which ones to avoid." |
|
|

|
| The Following 3 Users Say Thank You to mid_life_crisis For This Useful Post: |
|
|
#5 |
|
Senior Member
Join Date: Dec 2011
Drives: Moped
Location: CA
Posts: 4,298
Thanks: 4,897
Thanked 2,128 Times in 1,193 Posts
Mentioned: 21 Post(s)
Tagged: 0 Thread(s)
|
Thank you for taking the time to do this!
|
|
|

|
|
|
#6 |
|
Anorexic
Join Date: Oct 2013
Drives: 2003 Honda S2000 Suzuka Blue
Location: Washington, DC
Posts: 341
Thanks: 598
Thanked 175 Times in 95 Posts
Mentioned: 8 Post(s)
Tagged: 0 Thread(s)
|
I wouldn't feel comfortable putting a ton of weight on the kit. That's the biggest drawback to the RSD - the kit is very lightweight
 but it also bends easily. You are able to lift the panels up to store things underneath (where the seat cushions used to be). If storing items is an issue, the kit can easily be removed. Make sure all the wires are safely secured. but it also bends easily. You are able to lift the panels up to store things underneath (where the seat cushions used to be). If storing items is an issue, the kit can easily be removed. Make sure all the wires are safely secured.If you store items in your trunk, also note that after the rear seatback is removed, the styrofoam surrounding the spare tire is removed as well. Therefore, weight shouldn't be applied to the absolute rear of the trunk. You can remove the styrofoam from the seatback trim and reinstall it in the trunk to maintain the weight it can support. But I'll be gutting the trunk once the season starts, so I didn't do that. |
|
|

|
| The Following 2 Users Say Thank You to PoorMansRacing For This Useful Post: | jliongh (09-24-2016), vincent201089 (12-24-2013) |
|
|
#7 | |
|
Senior Member
Join Date: Sep 2012
Drives: 13 White MT FR-S
Location: Gastonia, NC
Posts: 1,840
Thanks: 975
Thanked 1,127 Times in 521 Posts
Mentioned: 41 Post(s)
Tagged: 0 Thread(s)
|
Quote:
__________________
|
|
|
|

|
|
|
#8 |
|
Just drive it
Join Date: Mar 2013
Drives: 13' FR-S
Location: Maryland
Posts: 1,122
Thanks: 97
Thanked 321 Times in 218 Posts
Mentioned: 10 Post(s)
Tagged: 3 Thread(s)
|
It's a good design, but I think it would've been better if they made with the mind of rear storage, like CR-Z. Flat is fine I guess, but any stuff you put back will slide.
|
|
|

|
| The Following User Says Thank You to frslee For This Useful Post: | that_guy (12-30-2013) |
|
|
#9 |
|
Senior Member
Join Date: May 2013
Drives: FR-S 10 #103 AT
Location: NC
Posts: 1,519
Thanks: 101
Thanked 599 Times in 347 Posts
Mentioned: 5 Post(s)
Tagged: 0 Thread(s)
|
I didn't remove mine either. The instructions say to take it out for easier access during installation but I didn't find it necessary. Maybe he misunderstood and didn't realize it should go back in?
__________________
Necessity may be the mother of Invention but Desperation is quite often the father.
“Sex is like Bridge. If you don't have a good partner, you'd better have a good hand.” - Mae West Papa said, "son there's a lot of evil temptations out there. Best to try 'em all so you know which ones to avoid." |
|
|

|
|
|
#10 | |
|
Senior Member
Join Date: May 2013
Drives: FR-S 10 #103 AT
Location: NC
Posts: 1,519
Thanks: 101
Thanked 599 Times in 347 Posts
Mentioned: 5 Post(s)
Tagged: 0 Thread(s)
|
Quote:
I like the look of it: as far as I'm concerned, this is the way it should have been built to begin with except for the whole insurance thing.
__________________
Necessity may be the mother of Invention but Desperation is quite often the father.
“Sex is like Bridge. If you don't have a good partner, you'd better have a good hand.” - Mae West Papa said, "son there's a lot of evil temptations out there. Best to try 'em all so you know which ones to avoid." |
|
|
|

|
| The Following 2 Users Say Thank You to mid_life_crisis For This Useful Post: | jimmer1290 (05-10-2016), jliongh (09-24-2016) |
|
|
#11 |
|
blowhard
Join Date: Jun 2013
Drives: frs, project forester
Location: ma
Posts: 980
Thanks: 53
Thanked 604 Times in 316 Posts
Mentioned: 5 Post(s)
Tagged: 0 Thread(s)
|
Nice writeup, thanks for doing it.
Strength was one of the things that seemed would be iffy about the plastic. Kind of a tradeoff on weight vs strength. |
|
|

|
| The Following User Says Thank You to utekineir For This Useful Post: | PoorMansRacing (01-06-2014) |
|
|
#12 |
|
Senior Member
Join Date: May 2012
Drives: 2013 BRZ Limited
Location: Earth
Posts: 1,029
Thanks: 45
Thanked 235 Times in 157 Posts
Mentioned: 2 Post(s)
Tagged: 0 Thread(s)
|
I like it. I'm thinking on the two panels that go where the rear seat were, to measure a piece of wood or metal and fortify it underneath for stability. This would also allow me to move my box and amp into the car and make real room/use of my trunk. Interested. Any picture from the rear of the car trunk view?
|
|
|

|
|
|
#13 |
|
Dances with Cones
Join Date: Oct 2012
Drives: 2013 Scion FR-S Raven
Location: Barrie, ON
Posts: 479
Thanks: 55
Thanked 222 Times in 122 Posts
Mentioned: 9 Post(s)
Tagged: 0 Thread(s)
|
Well said. We own a CR-Z as well and as useless as a 2-seater hybrid seems, it's pretty practical when you consider the rear seats in the FR-S will never hold more than a pair of gloves.
__________________
2013 Scion FR-S - Raven
2011 Scion tC - Cement - SOLD |
|
|

|
|
|
|
|
 |
| Tags |
| diy, rear seat delete, weight, weight loss |
| Thread Tools | Search this Thread |
|
|
 Similar Threads
|
||||
| Thread | Thread Starter | Forum | Replies | Last Post |
| Rear Seat Delete kit | ender2664 | Cosmetic Modification (Interior/Exterior/Lighting) | 53 | 10-04-2017 02:10 PM |
| REAR SEAT DELETE SUB BOX | NYCsubaruBRZ | NY / NJ / CT / PA | 19 | 01-28-2014 02:38 AM |
| Company in NC wants to make a rear seat delete | Lonewolf | Southeast | 33 | 12-23-2013 05:44 PM |
| Rear seat removal? | Shizuma | BRZ First-Gen (2012+) -- General Topics | 34 | 04-01-2013 03:36 AM |