|
||||||
| DIY (Do-It-Yourself) Guides For all DIYs. |
 |
|
|
Thread Tools | Search this Thread |
|
|
#1 |
|
Join Date: Mar 2013
Drives: 2013 Firestorm FRS
Location: Lake Elsinore, CA
Posts: 2,707
Thanks: 1,231
Thanked 2,144 Times in 1,003 Posts
Mentioned: 73 Post(s)
Tagged: 2 Thread(s)
|
DIY-Installing JDM Underpanels-FRS/BRZ
So, you participated in a GB that your local community put together. You waited 2-5 weeks for the panels to be delivered from Japan. You paid a small, and unexpected duty/fee. Now you have 2 big and 2 medium sized under-panels, a handful of screws, nuts and clips. What now? There's no instructions! Read on!
Things you'll need: 10mm socket 12mm socket Flathead screwdriver Box cutter/exacto knife Body clip panel remover Pliers(if you don't have body panel clip remover) This is a pretty easy install, but from browsing through the various GB threads, it seemed many people would just like some photos of the install. Note: The silver/aluminum skid plate DOES NOT GET TOUCHED during this install. I mean, go ahead and touch it if you want, but its not necessary for the install of these panels. Start off by jacking up the car. You might be able to do it without raising it, but it would be a massive PITA. I chose to get the car as high off the ground as I could, while still being safe. The boxes you see the rear tires on are solid wood fyi. When using jack stands, be careful of placement, as one of my jack stands was blocking a clip that I had to pop out. Nothing major, but an inconvenience that you can hopefully avoid. There is NO particular panel you need to install first. Start with the larger panels, OR the smaller gas tank panels-your choice. Included in your parts to install are: Large black clips(red arrow) Small black clips(green arrow) nuts(orange arrow) screws/bolts(gray arrow) Note: Items in picture below are NOT to scale.  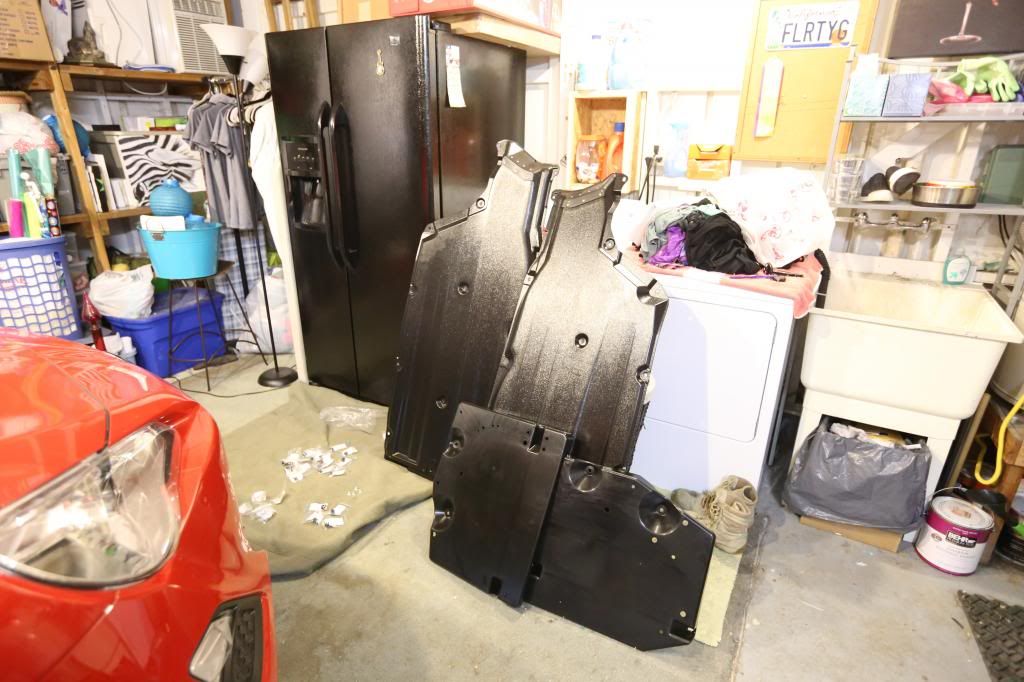 I personally started with the smaller/rear gas tank covers/panels. Start off by removing bolt(s) and plastic clip on passenger side securing plate to the tank. It is outlined in Yellow. Solicite help from gf/wife/buddy/dog. Well, maybe not dog, as he was not much help during the install.   Next, take the new panel, and prepare to install. The panels are marked "LH" and "RH" so you know which spot/side they go on. 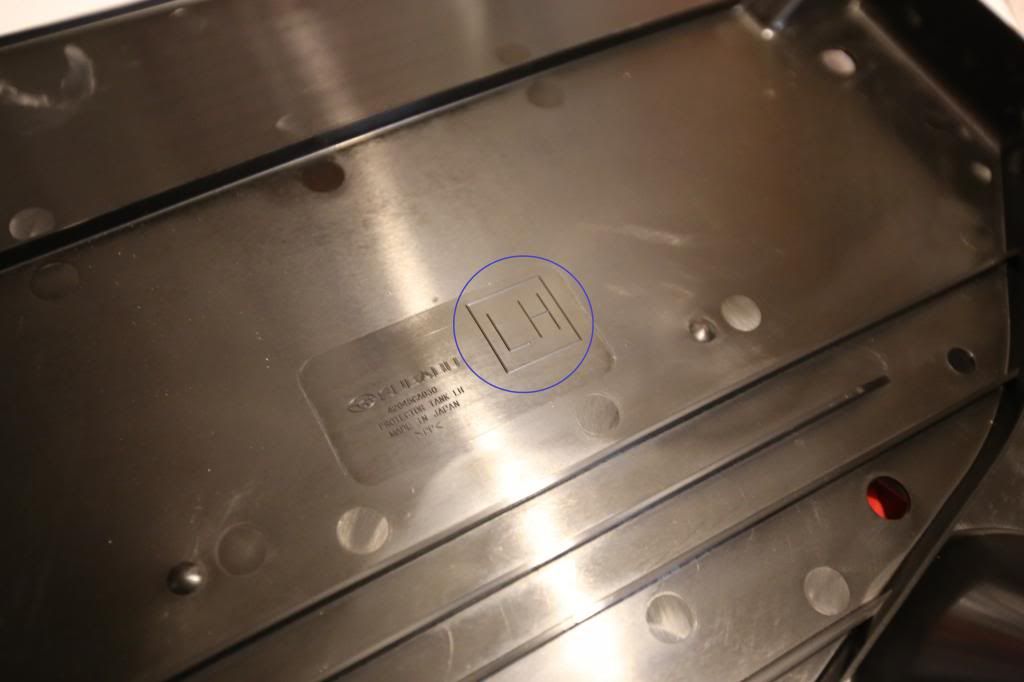 The rear panels each require (2) nuts, and (2) large black clips. The nuts go on the areas marked by orange, and the large black clips go into the areas marked red. I did not take a photo of both panels, but they are nearly identical.  Now, onto the drivers side. There is no panel to remove on the driver rear, but there is a small rubber grommet that needs to be removed. On my car, it had "10" on it. See photo, with lime green arrow pointing to rubber grommet. 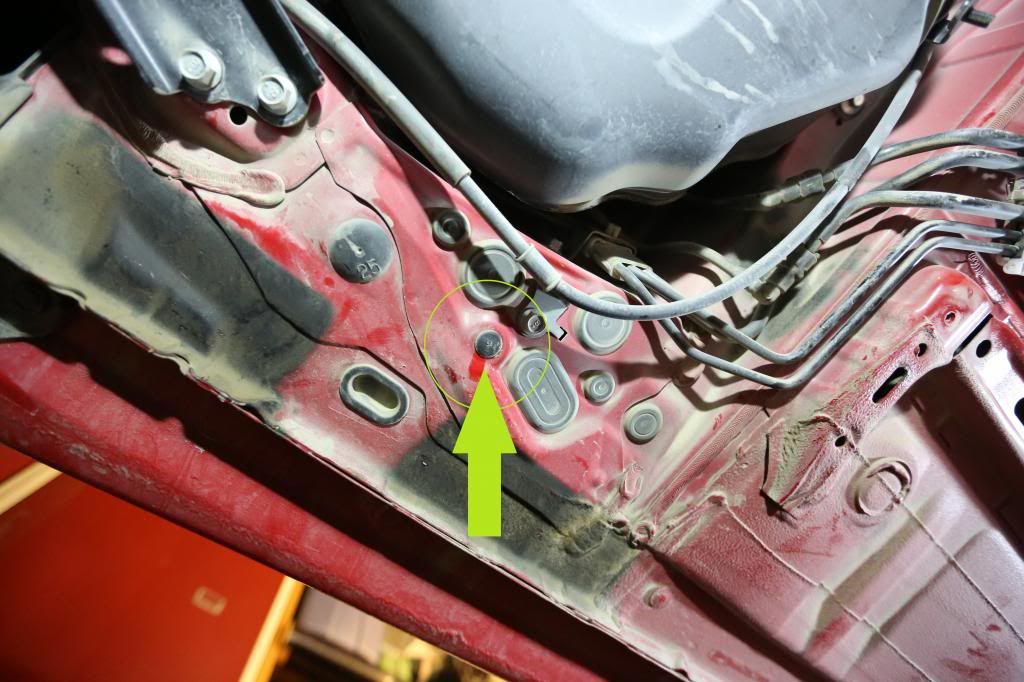 Now, onto the larger panels. Start off by using your flathead screw driver to pry the black plastic clips off that hold on the factory panel. 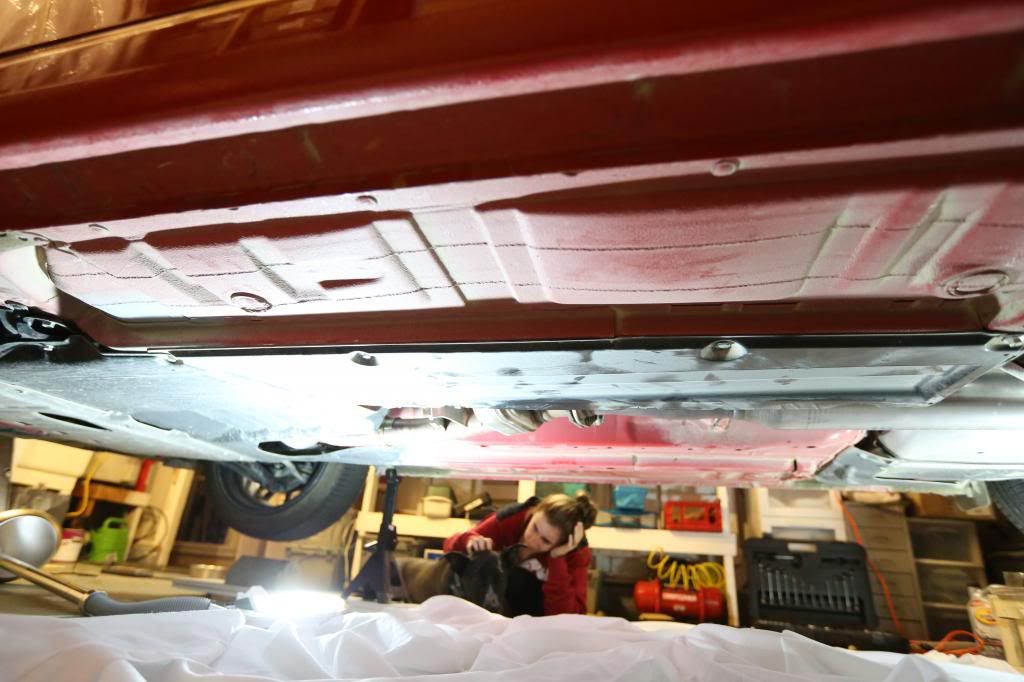 Comparison of old panel vs new. 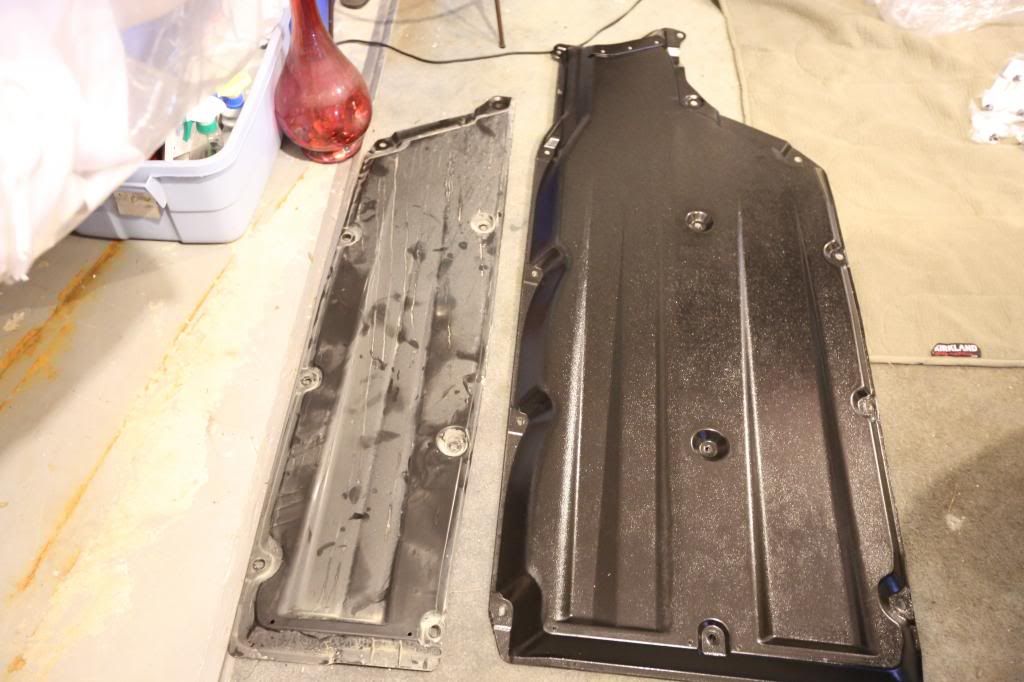 Now, starting with the passenger side, remove (3) bolts from the existing black panel. If you hold up the passenger side under-body piece, you will see which holes overlap. They are indicated as purple stars in photos. 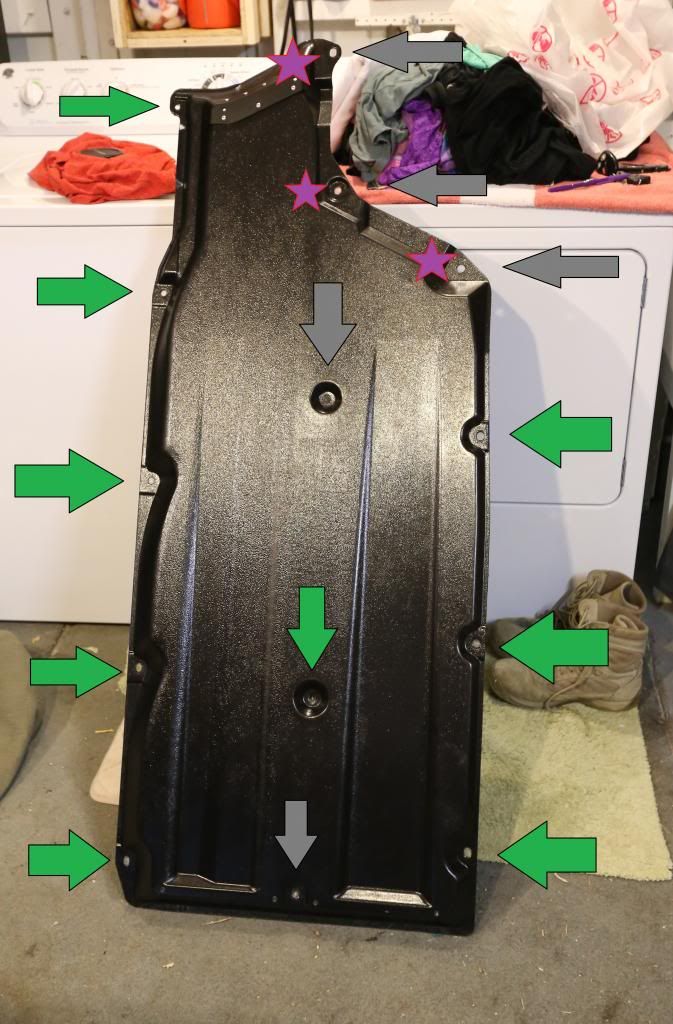 The next step, is probably the hardest part of this install. There are (4) plastic clips on each side of the car that need to be removed. However, they were installed prior to the underbody being sprayed with a protective layer of paint/foam/gel/whatever, so they require some "convincing" to remove. Located right on the otherside of the jacking points of the car. Seen as green in photos below. 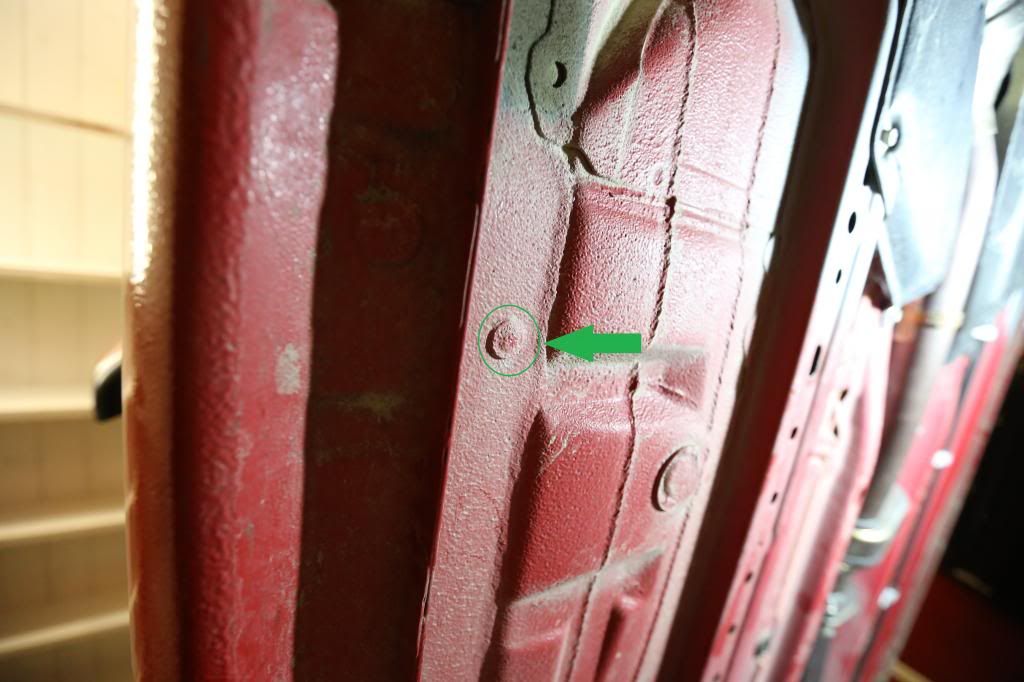 I used a box cutter to slice the material around the plug, and then used pliers to pull it out. Other members have suggested pulling the plug on the sides until you can see the "wings" on the clips, and pressing on it with a small object to "unlock" the clip from the hole, making it easier to remove. I chose the banshee method of pulling, twisting and cursing. *Note: Since there is now the body/frame exposed to the elements, you can choose to spray some paint on the metal parts exposed if you live in wet/salty areas to try and prevent future issues. If you choose to paint these areas, it is under the car, under the panels so no one would ever see/know. But ultimately it is up to you. I did not paint the exposed metal. There are (4) on each side you need to remove. 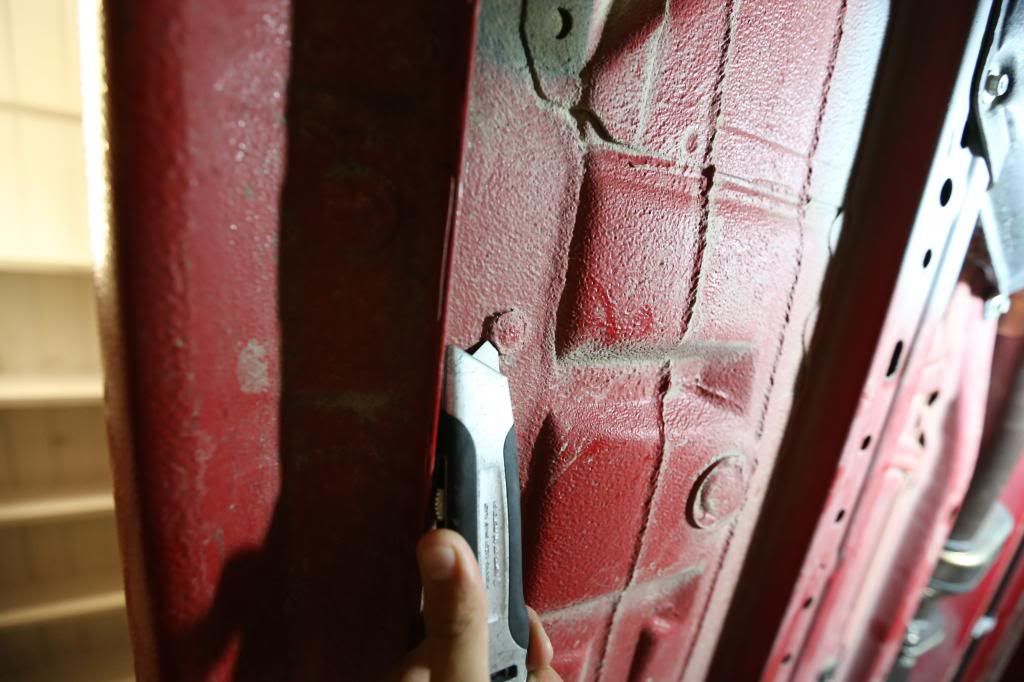 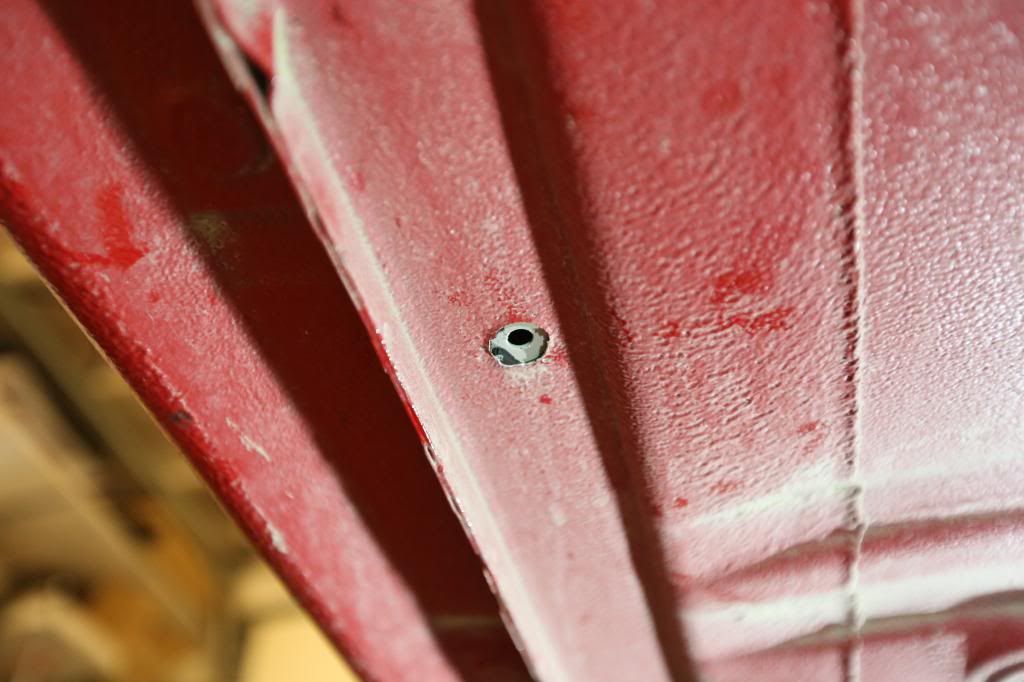 Once those are removed, you can install your panel. Starting with the front first, place the new under-body panel on top of the black transmission cover. So, it would be body, JDM under-body panel then the transmission cover. There are (3) total points/bolts that are shared by the two covers. Once again, they are indicated by purple stars in the photos. 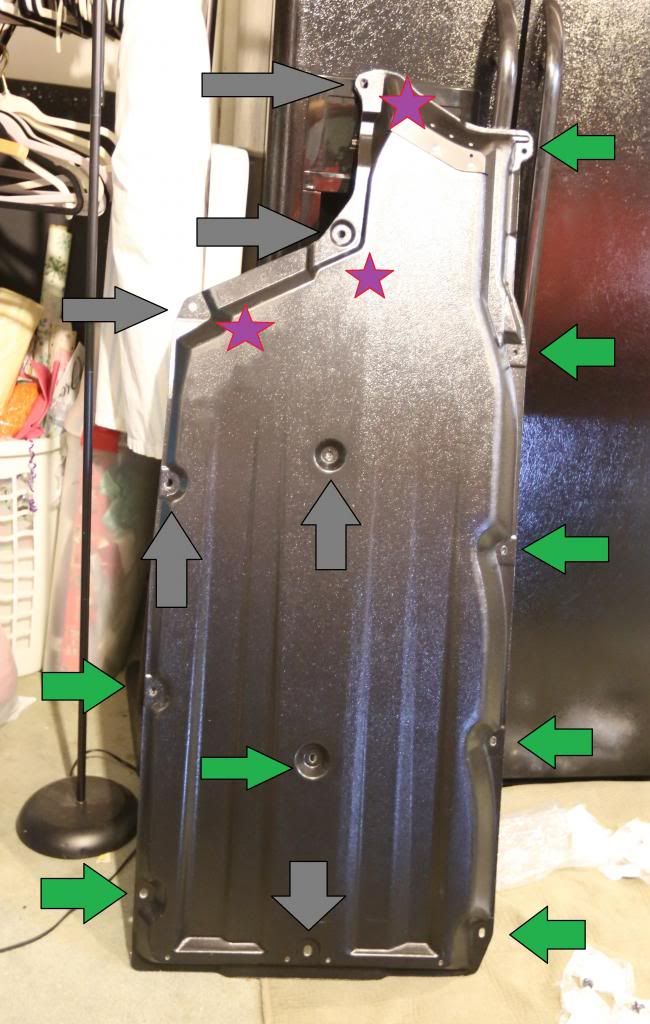 After that, install screws into areas marked by gray arrows, and small black clips into areas marked by green arrows. Passenger side:  Repeat for the drivers side as well.  Congrats, you've just installed JDM under-body panels that we didnt get from the factory! 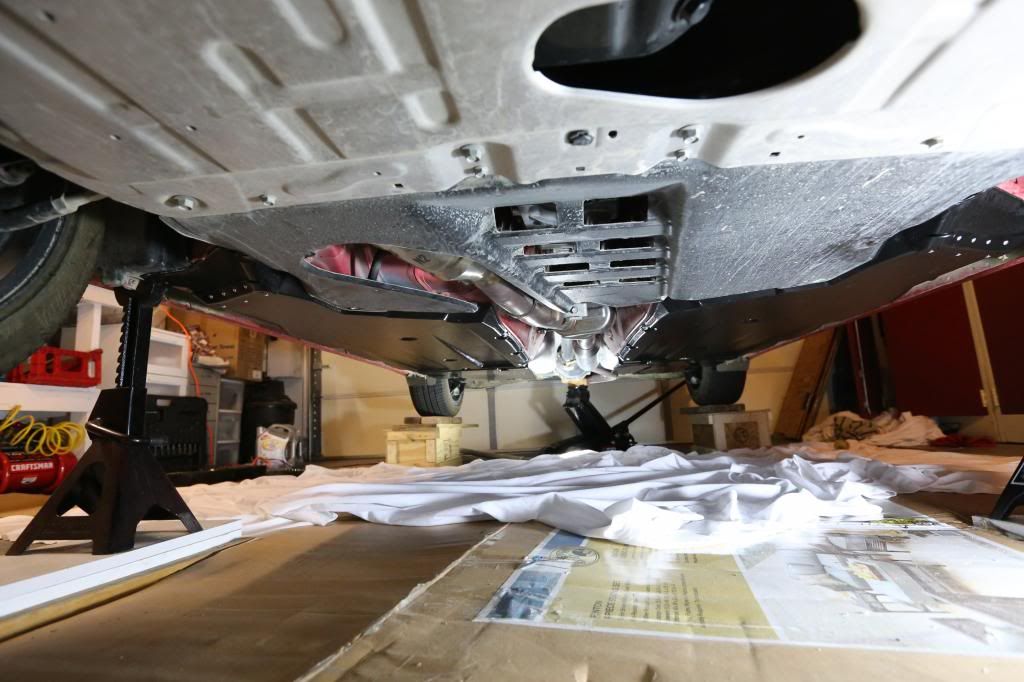
|
|
|

|
| The Following 47 Users Say Thank You to continuecrushing For This Useful Post: | Ammunition (08-07-2014), Anal0g (12-27-2015), BatStig (10-03-2014), bestwheelbase (11-09-2013), BirdTRD (02-06-2018), Burrcold (06-13-2013), Choco (02-05-2015), Cop (11-08-2015), Elkton86er (11-30-2014), EndlessAzure (02-05-2024), F1point4 (06-12-2013), fazm (11-07-2013), firestorm252 (12-16-2016), FrX (06-12-2013), fstlane (11-02-2014), GhostOp86 (11-20-2014), gibby (06-20-2013), Guff (11-01-2014), Hyper4mance2k (03-20-2015), JARunning (03-18-2016), JS + BRZ (05-21-2015), juliog (09-06-2014), Keenercarguy (10-03-2015), Nails (02-02-2018), neutron256 (06-14-2013), normancw (07-06-2013), Ornelas66 (02-03-2015), Overdrive (10-31-2020), P3tras (02-11-2015), pcuerpo (09-20-2016), Prodigalson (04-18-2019), R2RO (06-12-2013), RallySport Direct (06-13-2013), Re_Invention (06-12-2013), sidnacious (06-18-2013), SmartedPanda (05-26-2016), stevesnj (03-20-2015), SuperTom (09-29-2018), swarb (01-10-2015), tonystewart (11-21-2013), voyager2285 (06-12-2013), weederr33 (03-01-2017), WRB-DZA-BRZ (08-22-2016), wsites (09-14-2014), xn7485 (06-15-2020), Zaku (08-28-2014), zdr93523 (03-30-2015) |
|
|
#2 |
|
Sideways and smiling!
Join Date: Jan 2012
Drives: First 86 FRS 5/8/2012 (second US)
Location: Oregon
Posts: 941
Thanks: 17
Thanked 273 Times in 179 Posts
Mentioned: 15 Post(s)
Tagged: 0 Thread(s)
|
Good write up!
__________________
|
|
|

|
|
|
#3 |
|
Senior Member
Join Date: Jul 2012
Drives: Scion FR-S (Raven)
Location: Hayward, CA
Posts: 158
Thanks: 18
Thanked 72 Times in 32 Posts
Mentioned: 3 Post(s)
Tagged: 1 Thread(s)
|
The pic of you under the car with the dog is adorable.
__________________
2013 Raven FR-S MT + Sparco Assetto 18x8 + Michelinn Pilot Super Sprot 225/40/r18 + Takeda CAI + Fortune Auto 500 coilovers + Tanabe Sustec front and Rear strut tower brace + Carbeau FX1 / 6 point harness / Harness Bar + Nameless front pipe + Perrin cat back + FA20club E85 tune + Wilwood front & rear brakes
|
|
|

|
| The Following User Says Thank You to Vonsamhain For This Useful Post: | continuecrushing (06-13-2013) |
|
|
#4 |
|
Join Date: Mar 2013
Drives: 2013 Firestorm FRS
Location: Lake Elsinore, CA
Posts: 2,707
Thanks: 1,231
Thanked 2,144 Times in 1,003 Posts
Mentioned: 73 Post(s)
Tagged: 2 Thread(s)
|
Haha, he kept bringing in tennis balls that squeak, and dropping it near us to play. At first he wasn't too sure about going under the car, but once I went under he came under as well and started sniffing the undercarriage. |
|
|

|
| The Following User Says Thank You to continuecrushing For This Useful Post: | Vincenttam (07-07-2015) |
|
|
#5 |
|
Senior Member
Join Date: Nov 2011
Drives: ex500r
Location: AR
Posts: 859
Thanks: 13
Thanked 105 Times in 77 Posts
Mentioned: 2 Post(s)
Tagged: 0 Thread(s)
|
Wow how much did this cost you guys? it looks great.
|
|
|

|
|
|
#6 |
|
Join Date: Mar 2013
Drives: 2013 Firestorm FRS
Location: Lake Elsinore, CA
Posts: 2,707
Thanks: 1,231
Thanked 2,144 Times in 1,003 Posts
Mentioned: 73 Post(s)
Tagged: 2 Thread(s)
|
It depends on when you do it(its ordered from Japan, so there's currency rates to check) and how many people are in the group buy! But you should expect to pay between $240-$300
Shipping is expensive, so the group buy is really to split that up amongst 4 or more people. Also, there's plenty of pictures of our car without these panels, but ill throw up a before shot in the beginning. |
|
|

|
|
|
#7 |
|
Member
Join Date: Apr 2013
Drives: 2013 Subaru BRZ Premium
Location: Ladera Ranch, CA
Posts: 26
Thanks: 9
Thanked 29 Times in 10 Posts
Mentioned: 0 Post(s)
Tagged: 0 Thread(s)
|
Thank you for the great write up! If you don't mind me asking, in your last picture, where did you place the jack to lift the car through the middle? Also, what was the process of carefully sliding the blocks under those wheels? Instead of blocks, can we also use another set of jack stands?
|
|
|

|
|
|
#8 |
|
Senior Member
Join Date: Dec 2012
Drives: FR-S Whiteout
Location: California
Posts: 2,863
Thanks: 1,808
Thanked 790 Times in 611 Posts
Mentioned: 42 Post(s)
Tagged: 0 Thread(s)
|
Use this cheap tool to make it a 15 minute job.
http://www.autozone.com/autozone/acc...questid=357918 I used a flat tipped screwdriver to help the tool slide under the clips. The clips pops right off. Little to no damage to paint. |
|
|

|
|
|
#9 | |
|
Join Date: Mar 2013
Drives: 2013 Firestorm FRS
Location: Lake Elsinore, CA
Posts: 2,707
Thanks: 1,231
Thanked 2,144 Times in 1,003 Posts
Mentioned: 73 Post(s)
Tagged: 2 Thread(s)
|
Quote:
As far as the blocks go, I used two jacks on either side of the car to lift the front/back up at the same time. It requires two people, or one person jacking up each side a little bit and running over to the other side. You may use another set of jack stands as well, of course. Note: Using the crates/blocks are semi dangerous, as the car could theoretically roll off if you weren't careful. Before my next use of the blocks, I will be making "stoppers" on each side to prevent that from happening. I would highly suggest jack stands/proper car lift ramps. |
|
|
|

|
| The Following User Says Thank You to continuecrushing For This Useful Post: | gibby (12-30-2013) |
|
|
#11 |
|
Senior Member
Join Date: Jul 2012
Drives: White Out FR-S
Location: Canada
Posts: 672
Thanks: 31
Thanked 511 Times in 242 Posts
Mentioned: 1 Post(s)
Tagged: 0 Thread(s)
|
Nothing turns me on more than a lady who can put the wrench on her car. Sorry for being creepy.
|
|
|

|
| The Following User Says Thank You to ST185RC For This Useful Post: | Squishy86 (07-07-2013) |
|
|
#12 |
|
Senior Member
Join Date: Apr 2012
Drives: FR-S
Location: California
Posts: 1,956
Thanks: 294
Thanked 673 Times in 390 Posts
Mentioned: 11 Post(s)
Tagged: 2 Thread(s)
|
Off topic but what is holding up the rear tires? It looks like wooden boxes.
|
|
|

|
|
|
#13 |
|
Join Date: Mar 2013
Drives: 2013 Firestorm FRS
Location: Lake Elsinore, CA
Posts: 2,707
Thanks: 1,231
Thanked 2,144 Times in 1,003 Posts
Mentioned: 73 Post(s)
Tagged: 2 Thread(s)
|
|
|
|

|
|
|
#14 |
|
Senior Member
Join Date: Oct 2013
Drives: 2015 WRX
Location: NC
Posts: 987
Thanks: 186
Thanked 624 Times in 364 Posts
Mentioned: 24 Post(s)
Tagged: 0 Thread(s)
|
uggh.. I'm a sucker for aero mods. It was painful to pay $120 in shipping but JDM aero factory panels are sexy!
|
|
|

|
| The Following User Says Thank You to Malt For This Useful Post: | Weapon86 (12-08-2014) |
|
|
|
|
 |
| Tags |
| skid plate, underbody, underpanels |
|
|
 Similar Threads
|
||||
| Thread | Thread Starter | Forum | Replies | Last Post |
| SoCal JDM Underpanels Set Groupbuy | JDKane527 | Southern California | 109 | 10-31-2013 08:29 PM |
| FS: JDM OEM Underpanels (LI Local Pickup) | Perihelion | NY / NJ / CT / PA | 30 | 07-26-2013 07:20 AM |
| SoCal JDM Underpanels Groupbuy Round 2 | Trojan_SC | Southern California | 99 | 06-21-2013 12:35 AM |
| FS: JDM OEM Underpanels (LI, NY Local Pickup) | Perihelion | Exterior Parts (Aero, Lighting, Etc.) | 8 | 05-09-2013 02:45 PM |
| Interest in JDM underpanels GB? | sittinSideways | Northwest | 3 | 04-04-2013 12:57 AM |