


|
||||||
| Tracking / Autocross / HPDE / Drifting What these cars were built for! |
 |
|
|
Thread Tools | Search this Thread |
 05-23-2020, 10:03 PM
|
#1 |
|
Senior Member
Join Date: Oct 2016
Drives: 2016 Scion FRS / Chevy Colorado
Location: Ohio
Posts: 638
Thanks: 51
Thanked 535 Times in 298 Posts
Mentioned: 9 Post(s)
Tagged: 0 Thread(s)
|
Verus Engineering UCW Rear Wing Install + Testing
Hey all,
If some of you are unaware - Verus Engineering has been putting a ton of time developing and testing their UCW Rear Wing. It's basically a universal application type wing but properly designed for specific applications like our FRS/BRZ/86 Chassis. Verus a couple weeks ago put out an offer to submit an application to be chosen 1 of 5 to get early access to the first 5 production units of the UCW Rear Wing for our chassis to help test and get some lap time comparisons. I threw my name in the hat and was lucky enough to get chosen to be able to participate (Thanks again for the opportunity Verus!). I received the wing this week, and of course naturally wanted to get in on ASAP. Set aside the day today to get it on and figured I'd show you guys how easy Verus made it for us to install such a critical Aero piece of the puzzle. Aside from this DIY, I'll be hitting some track events in June, starting with NCM June 6-7. The whole idea is to get some Apples to Apples comparisons with wing vs no wing. Since I purchased a whole spare trunk to mount the wing, it'll be pretty easy for me throughout the year as I visit new track to test back to back and hopefully show some pretty good data from an enthusiast perspective. Clearly, we know all the testing Verus has done on their end to validate their design. I'll be running a RaceCapture Track MK2 and I'll be pulling back all available CAN data @ 50hz as well as GPS at 25hz. I'll be able to record lap times and everything else, so hopefully we can show the value what Verus has brought to the table. Onto the install! (Warning - this install is pre-Verus manual release. If anything as far as washer/bolt location is incorrect with their official release I'll be sure to edit accordingly) If anyone has purchased anything from Verus in the past, you know their packaging of components is pretty convenient. As you can see this is pretty much everything you get + the wing which is secretly hiding     Verus provides some really nice drilling templates printed on some paper that you cut out and overlay onto the trunk. There are a lot of bends and angles to the trunk where this mount is going to go, so take your time and pay attention to where you end up.   From there, after I was fairly confident on my location for the template locations I went ahead and grabbed my brackets for the left and ride side respectively and overlaid them onto the holes. Sure enough, everything seemed to line up...for one exception however:    The top hole (on both sides) is slightly off center from the bracket hole location. No big deal, but this did throw me for a loop because I kept on thinking my template was laid wrong. Ideally, the hole should about 1/4" lower to center that hole, which..after a ton of time measuring and ensuring that this was the ok thing to do, I plotted a new center hole  Next thing you want to do is simply use a center punch to tap the sheet metal on our drill locations. This helps the drill bit not wander when it comes time to drill, which is going to be pretty critical.  I started out with a 1/8" drill bit. Specifically a Milwaukee Red Helix Cobalt drill bit. Super sharp, and honestly went through the sheet metal like butter. Really highly recommend buying a bit like this for clean pilot holes.   Time for the actual enlargement of the holes to accommodate the rivets provided in the kit. The shoulders on these rivets are pretty small (if you're at all familiar with the rivets used in the front splitter for example those have a much wider shoulder). It's really important to keep this hole as tight as possible. So I decided to mic the rivet and drill a hole just enough to fit.  I used a spiral step drill bit that I just purchased off Amazon. Including the awful non-focused picture below. I taped a diameter just below the actual mic'd diameter seen above to make sure I don't over drill. Then after the initial drill I went back to slowly enlarge the holes to their final diameter.    After test fitting the rivets. I did come into a small snag. The rivets for the lower bracket mounts would not fit flush with the trunk lid. After further investigation, the inner sheet metal kind of is in the way of the rivet. I took a small screw driver (probably should have used something else...) and hammered this sheet metal out of the way. Be careful to make sure you don't mistakenly hit your hole you just made and cause that diameter to increase  To make sure no rust forms, I took some touch up paint and roughly coated the exposed metal. No need for it to be pretty, this stuff is going to get covered up anyways  Time to install the Rivets. Verus included a hand tool to install the rivets. Personally I bought a tool to make it a bit easier. I know there is concerns with thread galling and didn't really want to mess around. This tool was ~$50 of so via Amazon and let me tell you, best investment ever. These rivets are pretty hefty and even using the tool it was some work to clamp them down. I would imagine using the hand tool and trying to turn with an allen wrench via their kit method would have been a tad more difficult. The one thing not in the photo that is a MUST. Make sure you coat the top of each Rivet with RTV Sealant for waterproofing   Use the provided 3M stickers to overlay the Rivets. I decided to put them over the bolt hole locations vs the actual mounting bracket because I figured it would be easier. Use your discretion.  Hardwork at this point is pretty much done. Time to attach the bracket with the provided hardware:  Assemble your uprights  You can now throw the wing on. The fit and finish and clearances between the uprights and mounts on the underneath of the wing is literally perfect. Goes to show all the time at the front of this install pays off big time now.  Throw on your endplates. I chose to upgrade my endplates to the CF offered version because why not?  At this point, you're ready to install the trunk back onto the car...or in my case swap trunks. If you've gotten this far with the wing install...4 bolts for the trunk is a breeze and I hope I don't need to cover that here.  And that's it! Time to admire your work, and thank Verus for offering something to our platform that I think a lot of people are going to enjoy.        Thanks guys. Hope you enjoyed!
__________________
Kyle H. - #89 STX
|

|

|
| The Following 4 Users Say Thank You to M0nk3y For This Useful Post: |
|
05-23-2020, 10:04 PM
|
#2 |
|
Senior Member
Join Date: Oct 2016
Drives: 2016 Scion FRS / Chevy Colorado
Location: Ohio
Posts: 638
Thanks: 51
Thanked 535 Times in 298 Posts
Mentioned: 9 Post(s)
Tagged: 0 Thread(s)
|
Reserved for Testing Data @ NCM June 6-7
__________________
Kyle H. - #89 STX
|
|
|
|
|
05-23-2020, 10:04 PM
|
#3 |
|
Senior Member
Join Date: Oct 2016
Drives: 2016 Scion FRS / Chevy Colorado
Location: Ohio
Posts: 638
Thanks: 51
Thanked 535 Times in 298 Posts
Mentioned: 9 Post(s)
Tagged: 0 Thread(s)
|
I had to opportunity to get out with 3 Balls Racing at Mid-Ohio June 15th and be able to test the UCW Wing at my home track. This particular track is a track I've spent the most time with and really familiar with the surface and racing line.
 We ran the Club Configuration, which if you're not familiar I put an image of the track map below, so I'll be referencing corner numbers throughout my "analysis"  I'll cut right to the chase and basically give you the summary No Aero - 1:43.50 Verus Street Splitter with Race Upgrade + Verus UCW Rear Wing: 1:42.23 (Wing at 6 Degrees AOA) Time shaved with Aero: 1.27 Seconds The biggest difference between No Aero vs Aero is the overall stability of the car in the higher speed sections, which I'll show you with some data below. T1 and T12 are the hardest corners on the track to take at speed and a lot can go wrong with either corner (T12 especially). I'll start with Steering Angle:  Colors are awful I know, and I can't change them so this is what we get to deal with. The salmon color is No Aero while Pink is Aero. You can see, pretty much throughout every corner steering angle with No Aero there is a lot of second guessing of the steering wheel and/or corrections being made mid-corner. Big ones to pay attention to are at T3, where I had a massive slide requiring correction and T11 into thunder valley over the hump. Compared to Aero, the peaks of the steering angle curves are rather all the same (with exception to T1 and entry into T2). I suspect T1 is a bit more steering angle due to some scrub and exit corner push I was having on Aero setup that wasn't tuned out at the time of this lap. Next, speed.  Green is No Aero, Pink is Aero So, as we all know Aero adds drag. You can pretty much see at the end of each straight away (T1, T7, T12) the top speeds are the same if not FASTER with no Aero. The biggest delta on top speeds would be the end of the straight away into China beach. No Aero reaching 122.21 MPH vs No Aero at 120.59. So give or take 2-3 MPH or so. Honestly not as bad as I was thinking. So, clearly the time gained on lap wasn't from straights...it was in the corners. Higher speed corners were a huge speed differential. Mid corner speed differences: T1 - 2.58 MPH T2/3 - 9.29 MPH T8 - 1.11 MPH T11 - 1.64 MPH T12 - 4.99 MPH T13 - 2.87 MPH Interesting enough, perhaps due to slower entry speeds or more stability - I was able to brake later into every high speed corner. For example. China Beach pre Aero was about right at 400 Board. Post Aero I was going 375ish. Lastly, for this I'll show AccelY (which is remapped for my datalogger as the AccelX value. This will be our lateral force.  Grey is pre Aero - Purple is Post Aero So, as you'd kind of expect - carrying more speed through high speed turns is going to yield a higher G Loading. T1, T2/3, T12 all saw substantial increases in G Loading. What's kind of more interesting, is that the G loading is a wider arc...meaning turn-in is happening sooner, car is able to stick and utilize grip a bit more efficiently (at least this is how I see it). Couple highlights on G Loading change T1 - .24 G Increase T2/3 - .21 G Increase T12 - .30 G Increase T13 - .48 G Increase (This lateral loading was all accomplished under braking while going into Carousel....pretty impressive change here) If you know Mid-Ohio, it's not too grippy of a surface. Utilizing some addition grip in the 0.2 to 0.3 Gs per corner is pretty substantial. Fun fact, peak grip we saw 1.45Gs which on street tires is pretty awesome. Here's the lap of my 1:42.23. I hope you enjoy!
__________________
Kyle H. - #89 STX
Last edited by M0nk3y; 06-18-2020 at 02:46 PM. |
|
|
|
| The Following 7 Users Say Thank You to M0nk3y For This Useful Post: | AllThePeat (07-28-2020), ATL BRZ (06-30-2020), ayoshioka1 (07-14-2020), DarkSunrise (07-24-2020), Pat (06-18-2020), RT-BRZ (12-15-2023), WORKS (07-24-2020) |
|
05-23-2020, 10:04 PM
|
#4 |
|
Senior Member
Join Date: Oct 2016
Drives: 2016 Scion FRS / Chevy Colorado
Location: Ohio
Posts: 638
Thanks: 51
Thanked 535 Times in 298 Posts
Mentioned: 9 Post(s)
Tagged: 0 Thread(s)
|
Reserved for Testing Data @ Pitt Race June 10th/July 4-5th
__________________
Kyle H. - #89 STX
|
|
|
|
|
05-23-2020, 10:10 PM
|
#5 |
|
Senior Member

Join Date: Mar 2018
Drives: Bone stock
Location: Windsor, CT
Posts: 767
Thanks: 535
Thanked 232 Times in 162 Posts
Mentioned: 8 Post(s)
Tagged: 0 Thread(s)
|
I was wondering when they would have released this wing. Looks amazing. I see a lot adjustability. How much downforce would this add to the car?
Sent from my SM-N960U using Tapatalk |
|
|
|
|
05-24-2020, 12:31 PM
|
#6 | |
|
Senior Member
Join Date: Oct 2016
Drives: 2016 Scion FRS / Chevy Colorado
Location: Ohio
Posts: 638
Thanks: 51
Thanked 535 Times in 298 Posts
Mentioned: 9 Post(s)
Tagged: 0 Thread(s)
|
Quote:
Heres a summary of what their testing has shown.  Sent from my iPhone using Tapatalk
__________________
Kyle H. - #89 STX
|
|
|
|
|
|
05-28-2020, 12:47 PM
|
#7 |
|
Senior Member

Join Date: Jun 2017
Drives: BRZ Yellow, 2019 Ranger, 2011 Evora
Location: Dallas
Posts: 1,685
Thanks: 352
Thanked 1,475 Times in 771 Posts
Mentioned: 14 Post(s)
Tagged: 1 Thread(s)
|
Looks good and and a simple install. Have been happy with every Verus product I have purchased.
|
|
|
|
|
06-18-2020, 02:44 PM
|
#8 |
|
Senior Member
Join Date: Oct 2016
Drives: 2016 Scion FRS / Chevy Colorado
Location: Ohio
Posts: 638
Thanks: 51
Thanked 535 Times in 298 Posts
Mentioned: 9 Post(s)
Tagged: 0 Thread(s)
|
Updated post #3 with my Mid-Ohio testing. Will get around to NCM hopefully by this weekend.
__________________
Kyle H. - #89 STX
|
|
|
|
|
06-18-2020, 03:52 PM
|
#9 |
|
Senior Member

Join Date: Feb 2014
Drives: 2023 BRZ
Location: Denver, CO
Posts: 1,808
Thanks: 1,483
Thanked 1,250 Times in 676 Posts
Mentioned: 34 Post(s)
Tagged: 2 Thread(s)
|
Thanks for updating post #3. That is pretty consistent with what I've seen in a friend's car recently with similar aero. Thanks for sharing. Good stuff!
__________________
Director of Rocky Mountain 86CUP
|
|
|
|
|
07-23-2020, 03:58 PM
|
#10 |
|
Senior Member
Join Date: Oct 2016
Drives: 2016 Scion FRS / Chevy Colorado
Location: Ohio
Posts: 638
Thanks: 51
Thanked 535 Times in 298 Posts
Mentioned: 9 Post(s)
Tagged: 0 Thread(s)
|
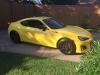
I've really been slacking on this, but just got done with Gingerman SCCA TT last weekend and figured I'd share a pic of me jumping the curbing at 11

__________________
Kyle H. - #89 STX
|
|
|
|
|
07-24-2020, 01:48 PM
|
#11 |

Join Date: Feb 2014
Drives: WORKS CARB Legal Turbo BRZ
Location: Sonoma Raceway - Bay Area
Posts: 980
Thanks: 407
Thanked 646 Times in 350 Posts
Mentioned: 31 Post(s)
Tagged: 2 Thread(s)
|
Good stuff! We love seeing raw data behind a well designed product. Nice job on the install and props to Verus for designing a sweet aero package!
- WORKS Team |
|
|
|
|
07-24-2020, 03:01 PM
|
#12 |
|
Senior Member

Join Date: Jan 2018
Drives: Crapcan
Location: Oregon
Posts: 11,145
Thanks: 18,142
Thanked 16,305 Times in 7,369 Posts
Mentioned: 107 Post(s)
Tagged: 0 Thread(s)
|
How much trunk flex do you get with this setup?
__________________
"Experience is the hardest kind of teacher. It gives you the test first and the lesson afterward." -Oscar Wilde.
|
|
|
|
|
07-25-2020, 07:35 PM
|
#13 | |
|
Senior Member
Join Date: Oct 2016
Drives: 2016 Scion FRS / Chevy Colorado
Location: Ohio
Posts: 638
Thanks: 51
Thanked 535 Times in 298 Posts
Mentioned: 9 Post(s)
Tagged: 0 Thread(s)
|
Quote:
Nothing more than a stock trunk. You have stoppers installed which helps limit compression travel. They work really well...   Sent from my iPhone using Tapatalk
__________________
Kyle H. - #89 STX
|
|
|
|
|
| The Following User Says Thank You to M0nk3y For This Useful Post: | NoHaveMSG (07-25-2020) |
|
07-27-2020, 08:47 PM
|
#14 | |
|
Senior Member

Join Date: Sep 2012
Drives: 2013 SWP BRZ Ltd. / E60 M5
Location: DE
Posts: 136
Thanks: 25
Thanked 76 Times in 42 Posts
Mentioned: 1 Post(s)
Tagged: 0 Thread(s)
|
Quote:
__________________
2013 BRZ Limited | SWP | Verus Ventus 1 and High-Efficiency Rear Wing | Invidia N1 Ti | JR Oil Cooler | RCE T2 | RaceSeng Cas/Cam | SPL LCA & TA | Wilwood/RR Racing Stage II/Sport Performance | XP10 | Apex ARC-8 | Toyo R888R | 245/40-17 | Sparco Ergo II/Evo II | AIM MXP | SmartyCam GP HD 2.2
|
|
|
|
|
|
|
|
|
|
|
|
 Similar Threads
|
||||
| Thread | Thread Starter | Forum | Replies | Last Post |
| Verus Engineering Brake Cooling Kit | VerusEric | Suspension | Chassis | Brakes -- Sponsored by 949 Racing | 100 | 07-15-2023 10:18 PM |
| Modular Hood Louver Kit - Verus Engineering | VerusEric | Cosmetic Modification (Interior/Exterior/Lighting) | 276 | 07-08-2023 04:03 PM |
| Verus Engineering Rear Wing Development | VerusEric | Tracking / Autocross / HPDE / Drifting | 203 | 07-05-2021 09:15 AM |
| SOLD Versus Engineering - High-Efficiency Rear Wing | PolskiHooligan | Exterior Parts (Aero, Lighting, Etc.) | 9 | 05-15-2020 01:23 AM |
| Front Splitter Endplates - Verus Engineering | VerusEric | Cosmetic Modification (Interior/Exterior/Lighting) | 46 | 08-10-2016 10:54 PM |


 Minion