


|
||||||
| Member's Car Journals Car journals by our members. |
 |
|
|
Thread Tools | Search this Thread |
 05-10-2020, 01:50 PM
|
#113 |
|
Sittin' Sideways

Join Date: Nov 2016
Drives: 2016 Toyota FR-S
Location: United States
Posts: 830
Thanks: 885
Thanked 530 Times in 342 Posts
Mentioned: 9 Post(s)
Tagged: 0 Thread(s)
|
Hey, Ichi. I was just thinking, looking at your rear camera, do you think you could figure out a way to mount it in that center hole of where the original 3rd brake light used to be? You'll still get your centered view out the rear, and it won't be as much of a rear view blockage as the brake light spaceship used to be.
__________________
-O/D
2016 FR-S, Hot Lava |

|

|
|
05-10-2020, 02:03 PM
|
#114 | ||
|
Site Moderator

Join Date: Oct 2009
Drives: ichi 86 Project
Location: Middle of No where
Posts: 20,965
Thanks: 7,663
Thanked 19,051 Times in 8,326 Posts
Mentioned: 677 Post(s)
Tagged: 27 Thread(s)
|
Quote:
Quote:
__________________
 |
||
|
|
|
|
05-10-2020, 03:24 PM
|
#115 |
|
Sittin' Sideways
Join Date: Nov 2016
Drives: 2016 Toyota FR-S
Location: United States
Posts: 830
Thanks: 885
Thanked 530 Times in 342 Posts
Mentioned: 9 Post(s)
Tagged: 0 Thread(s)
|
What about going under the headliner and then down one of the sidesfrom there? I know that's where the curtain airbags come to an end, but could you still access the area under that shelf from there to run wire? I definitely get what you're saying, though, it makes for a more complicated job no matter how you go.
__________________
-O/D
2016 FR-S, Hot Lava |
|
|
|
| The Following User Says Thank You to Overdrive For This Useful Post: | ichitaka05 (05-10-2020) |
|
05-15-2020, 05:34 PM
|
#116 |
|
Site Moderator
Join Date: Oct 2009
Drives: ichi 86 Project
Location: Middle of No where
Posts: 20,965
Thanks: 7,663
Thanked 19,051 Times in 8,326 Posts
Mentioned: 677 Post(s)
Tagged: 27 Thread(s)
|
Package came Wednesday, but due to work I wasn't able to install some of em til now.
 These are parts I have... but sadly, I cannot install 2 of em, due to still waiting for more parts to come in THEN I can install em.  First in the list, I installed was Beat-sonic shark fin. I had Beat-sonic Blaid antenna aka Zaku, but wanted to change thing around.  Installation wasn't THAT hard. Hardest part was to make sure they're all straight. 
__________________
|
|
|
|
| The Following User Says Thank You to ichitaka05 For This Useful Post: | Busybee (05-15-2020) |
|
05-16-2020, 05:40 PM
|
#117 |
|
Site Moderator
Join Date: Oct 2009
Drives: ichi 86 Project
Location: Middle of No where
Posts: 20,965
Thanks: 7,663
Thanked 19,051 Times in 8,326 Posts
Mentioned: 677 Post(s)
Tagged: 27 Thread(s)
|
I thought, I've posted this... but I was wrong. Back in mid Jan, I got my new shift knob from Raceseng. Raceseng do make good parts plus and they support 86/BRZ from the beginning, so I want to support their business much as I can.
As always, they pack their goods nicely.  They have new shift knob called Stratose. They have 3 different options, alcantara, perforated leather and solid leather. 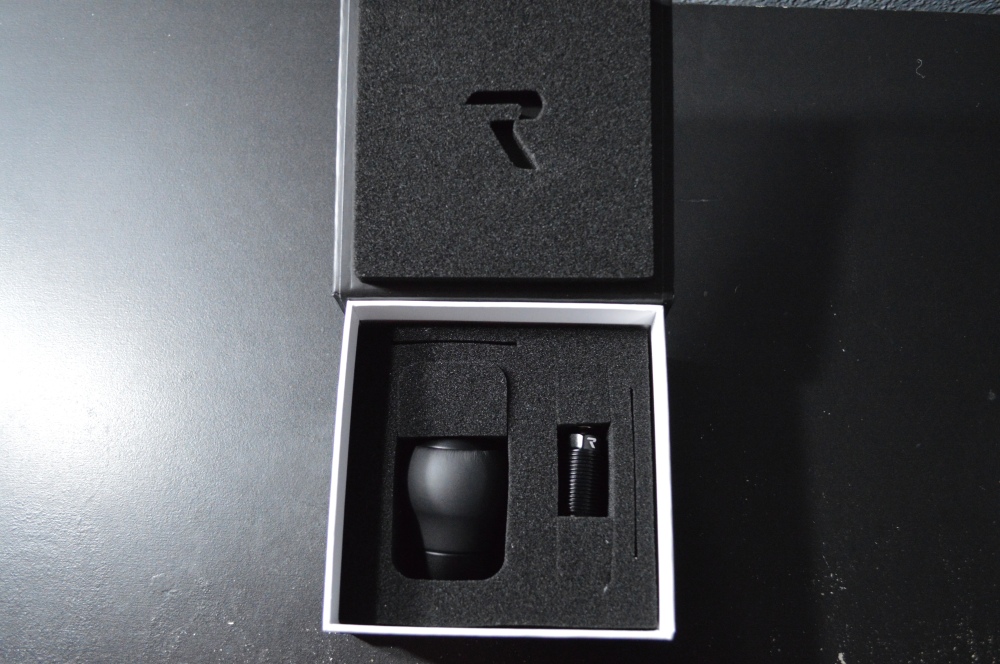  I got with solid leather. Reason why I went to leather is, I love the feeling of leather when I'm driving.    It have nice weight compared to stock one. Built and leather quality is def nice. Design... could of been lil bit more better.  Here are before and after pics Before: 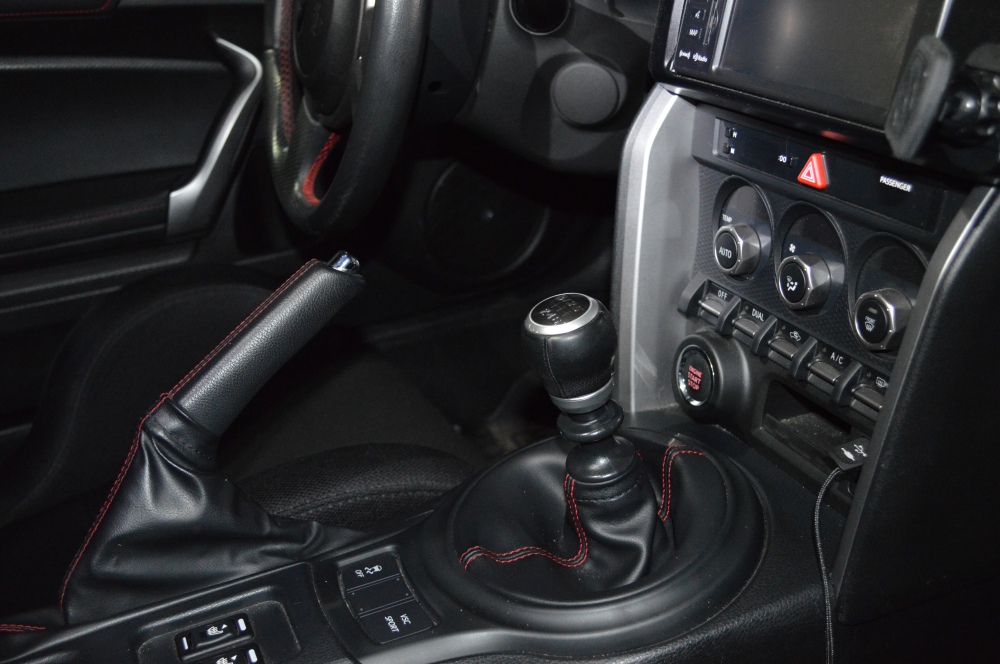 After: 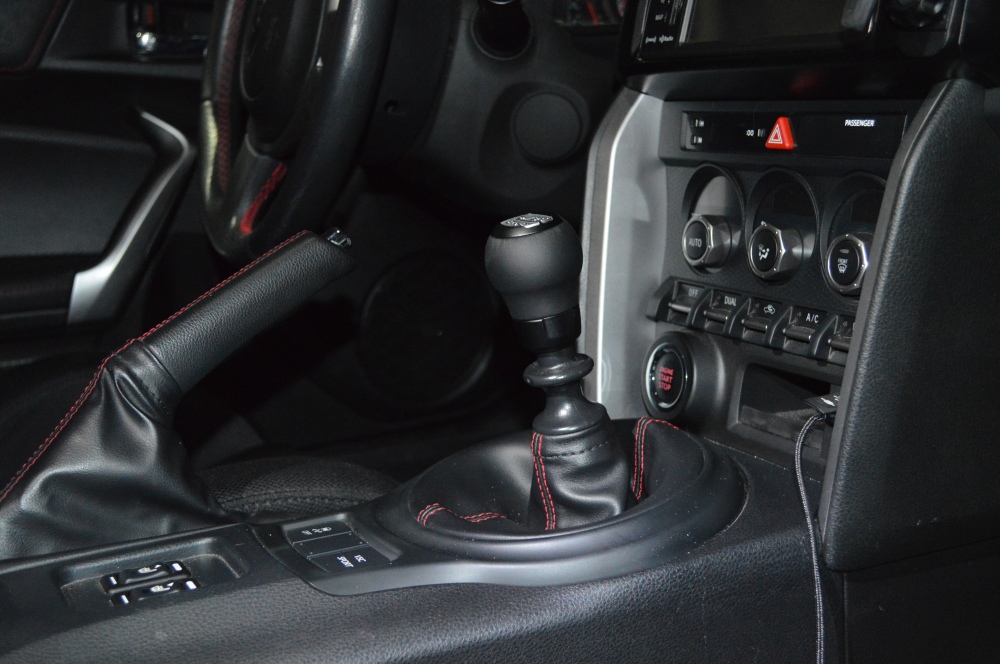 It's kinda hard to see it, but Stratose raise the shift knob position fraction higher, as you can see from this pic  Now, lets get down to the real talk here. Price: Raceseng Stratose cost $180~$190, depends on material you go with. That price tag is more than TRD/STI shift knob ($170 or so). There are other universal leather shift knobs that's cheaper. Quality: Stratose quality is superb, good weight on it... but better? Questionable. Stratose leather quality is good, but it's a bit thin for my liking. This sounds a bit horrible to say, but it feels like leather was painted on. Yes, I know, you can't "paint" the leather. It's that thin leather. Not sure you know this feeling, but there's no softness from leather when you squeeze the shift knob. From OEM shift knob, it have that feel and even TRD/STI shift knob have that. Design: This vary, but raceseng make cool looking shift knob. My wife have Sphereology on her WRX and do love the design. It fits wife's hand and even my hand nicely. Stratose? Hm... can't same the same. Conclusion: Is it good? Yes. Is it worth the price? For me, no. I hope they update and make better ones. When it does, I'll buy it again.
__________________
|
|
|
|
|
05-17-2020, 04:10 PM
|
#118 |
|
Site Moderator
Join Date: Oct 2009
Drives: ichi 86 Project
Location: Middle of No where
Posts: 20,965
Thanks: 7,663
Thanked 19,051 Times in 8,326 Posts
Mentioned: 677 Post(s)
Tagged: 27 Thread(s)
|
Now for some performance update.
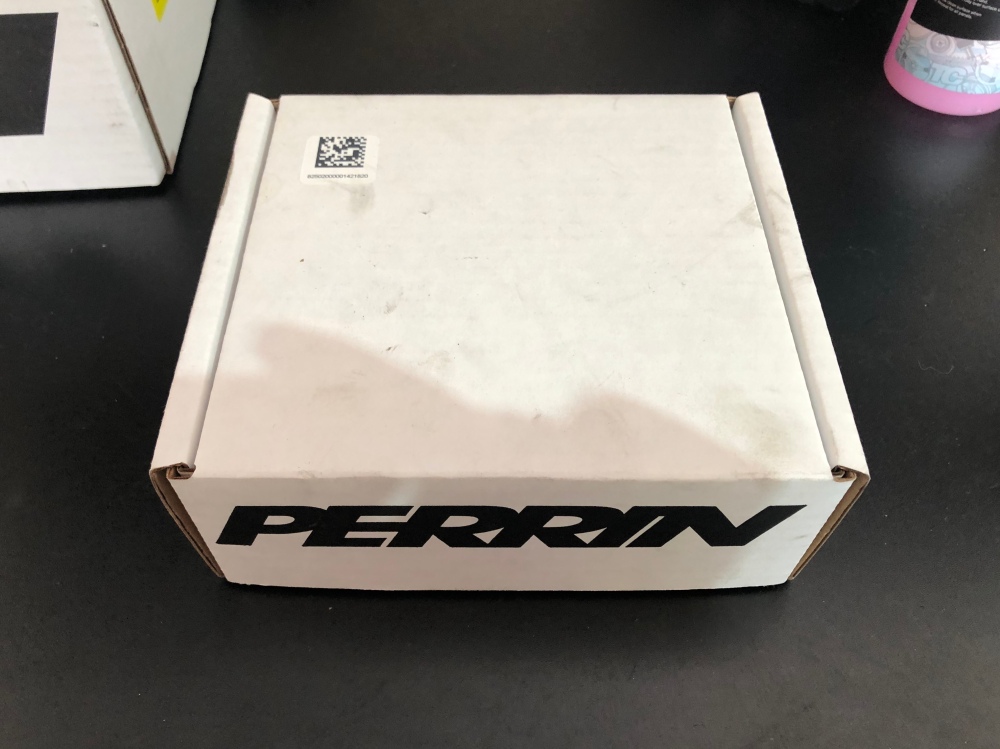 Got myself a Perrin steering rack lockdown. There have been good amount of positive reviews without the years. Only complain I've heard is NVH. I haven't able to drive too long to test this out. I'm hoping to find out this summer. 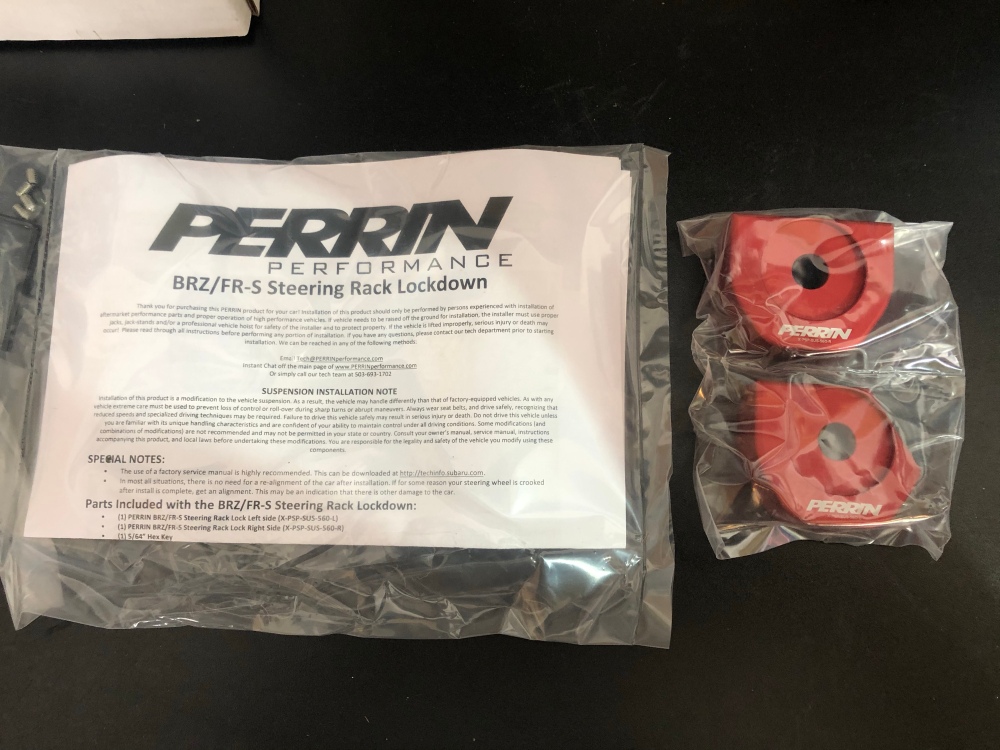 Installation wasn't too hard. Just need to uninstall one of the under cover to see the steering rack. Hardest part was breaking the steering rack bolts loose. In the installation, they claim you just need 65ft/tq to tighten those 2 bolts... but I swear it was more than 65ft/tq, it was harder to loosen. But whatever, I'm no engineer. I'll do what the instruction tells me to do. 
__________________
|
|
|
|
|
05-20-2020, 10:52 PM
|
#119 |
|
Site Moderator
Join Date: Oct 2009
Drives: ichi 86 Project
Location: Middle of No where
Posts: 20,965
Thanks: 7,663
Thanked 19,051 Times in 8,326 Posts
Mentioned: 677 Post(s)
Tagged: 27 Thread(s)
|
Random Ideas
After installing rear lip for my car... one thing kinda bugs me. How's the bottom flow? I'm pretty sure it's not good having aftermarket exhaust as is, adding lip ads more drag. Ideally, you want rear diffuser (like Verus Engineering), but having the lip doesn't help.  So next option is make your own... Yay for making more custom parts IDK what I'm doing  Materials Carbon Fiber: Using carbon fiber would be cool. It's lightweight, strong and bling factor def is there. BUT let's be real here, can I afford that huge sheet of CF? Yes, but is it worth it? Prob not. Fiberglass: I can try to mold something to fit nicely... but using fiberglass under there is just asking to get broken into pieces. Metal: Stainless Steel? Pretty heavy. Steel? It rust. Aluminum? Need decently thick to not bend. Out of all those options, best one I can think is aluminum (5052-H32). Now, what would be the best thickness? Gotta do a bit more research...
__________________
|
|
|
|
|
05-21-2020, 01:51 AM
|
#120 |
|
Geo Tyrebighter Esq

Join Date: Mar 2013
Drives: '13 scion fr-s
Location: pnw
Posts: 4,185
Thanks: 6,318
Thanked 4,981 Times in 2,197 Posts
Mentioned: 39 Post(s)
Tagged: 1 Thread(s)
|
O ... IC
Kinda why they didn't run a smooth bottom to begin with. Going to have to notch the panel to clear the active suspension parts. At ludicrous speed there's going to be a lot of air load and deformation potential behind the suspension arms. If you bend a panel to clear around when fully unloaded, it's always going to be in the air stream even when squatted down. Eh. You do you  edit: I'm out of the industry for a number of years, so not up on the latest alloy specs. Find samples you can whack with an ice axe to see what they do and go from there.
__________________
--
"I gotta rock." -- Charley Brown |
|
|
|
| The Following User Says Thank You to bcj For This Useful Post: | ichitaka05 (05-21-2020) |
|
05-25-2020, 05:02 PM
|
#121 |
|
Site Moderator
Join Date: Oct 2009
Drives: ichi 86 Project
Location: Middle of No where
Posts: 20,965
Thanks: 7,663
Thanked 19,051 Times in 8,326 Posts
Mentioned: 677 Post(s)
Tagged: 27 Thread(s)
|
Bought cardboard to make a rough design of rear diffuser.
 Sheet was bout 20”x28” and had to use about 2 & 1/2 sheet to cover the whole rear bumper. Had to make sure I have space for exhaust to come out.  I don’t want to make it too low to the ground, so I made sure to get it up much as I can. Which means, I had to cut out between 2 fins.  Now to secure the diffuser, I looked at few of other brands installation to see how they’re mounting them. Front, I’m thinking of using lower bolt of sway bar mount.  Side, I’ll prob need to put some few rivets and Mount w the plastics. Rear, there were few options. Verus was mounting to the bracket where fins are connected and have extension bracket to connect the diffuser. Driveway Lab is just mounting to the fins. I’m pretty sure it’ll work fine, but I don’t want to put too much stress on the bumper, so I’m planning to make a long bracket to connect directly to the chassis. There are 2 screw holes where it used to mount heat shield. I’ll be using that to connect the brackets.  As for the metal I’m using to make the rear diffuser, I’ll be using 0.63 thickness aluminum (5052-H32). Noticed that most brands are using that thickness plus quality of aluminum, so I assumed that’ll be the best thickness to go with.
__________________
|
|
|
|
|
06-03-2020, 01:01 PM
|
#122 |
|
Site Moderator
Join Date: Oct 2009
Drives: ichi 86 Project
Location: Middle of No where
Posts: 20,965
Thanks: 7,663
Thanked 19,051 Times in 8,326 Posts
Mentioned: 677 Post(s)
Tagged: 27 Thread(s)
|
Update:
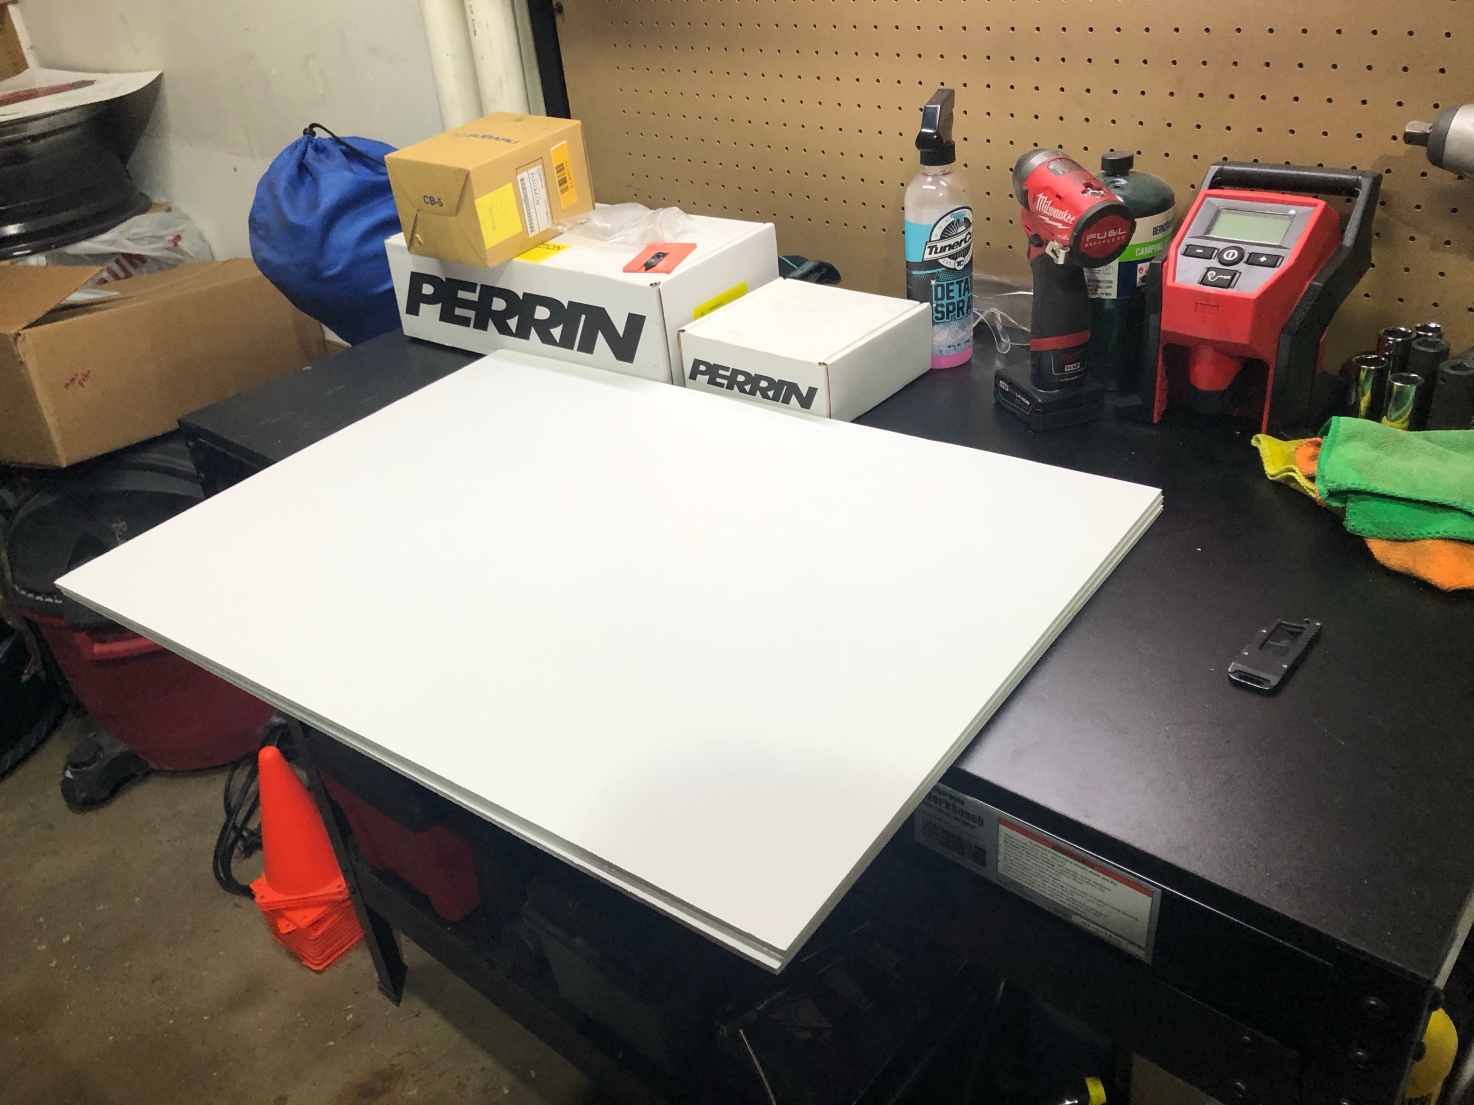
Quick Perrin steering rack lockdown review. Haven't had a chance to go to local autox, but just regular driving I did feel the change. Steering feels a bit more heavy? Stiff? I have kouki electric power steering ecu, so it's lighter than zenki. Now, it feels like it's back to zenki steering weight feel to it. In return how's the driving? It response faster, but is it a night and day difference? Not really. Worth <$90 mod? Def!  Diode Dynamics was having a sale, so got myself few bulbs. Side park lights, front turn sig and door lights. I already have turn & door lights... but they're not bright as I like, so I went with brighter ones. As for the side park lights, I just bought simple cheap ones. Don't feel need to buy brightest one.  Riveting tool came~ I'll be using M6 bolts. I was thinking of using M4 or smaller... but didn't want too small, so decided to go with M6.  As for the rear diffuser, I'm still waiting for the aluminum sheet to come in. It's taken a lot longer than I've expected... so bought extra tools at Harbor Freight to get started on other hobbies. 
__________________
Last edited by ichitaka05; 06-03-2020 at 01:43 PM. |
|
|
|
|
06-24-2020, 05:14 PM
|
#123 |
|
Site Moderator
Join Date: Oct 2009
Drives: ichi 86 Project
Location: Middle of No where
Posts: 20,965
Thanks: 7,663
Thanked 19,051 Times in 8,326 Posts
Mentioned: 677 Post(s)
Tagged: 27 Thread(s)
|
TRD have this cool rear aero stabilizer.
 But... they're not cheap. They're around $175~$250 (depends on where you buy it). SuperTom made an alternative option. Using universal fender rubber cover. 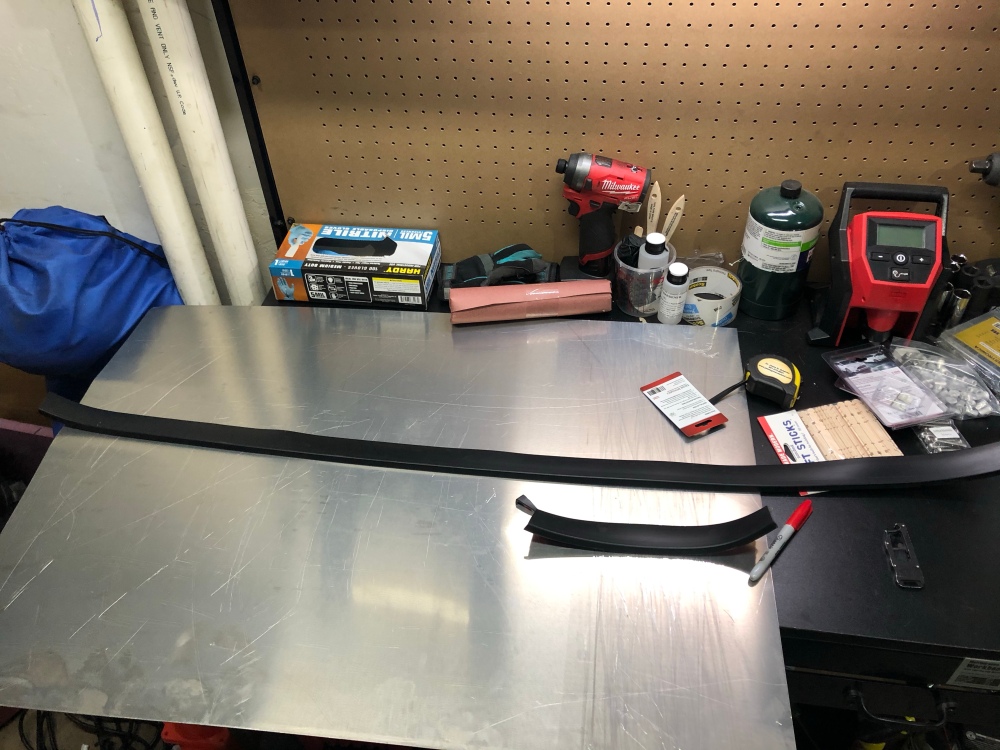 It's kinda hard to see it, but it's not that thick.  Got 1.5m long, so had to cut it to the length that I need.  Here's how it looks after installing them.  Of course, it's not perfect looking. If you look closly, you can see the cut line at the edge. 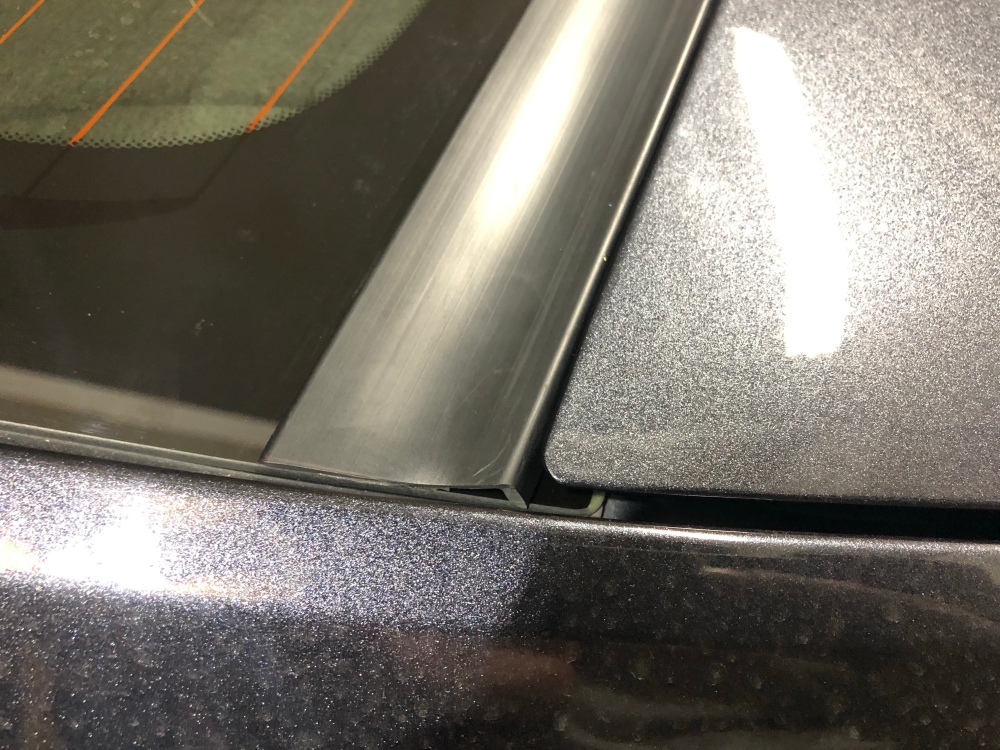
__________________
|
|
|
|
| The Following 2 Users Say Thank You to ichitaka05 For This Useful Post: | bhmax (06-24-2020), DarkPira7e (06-24-2020) |
|
06-25-2020, 12:21 PM
|
#124 |
|
Site Moderator
Join Date: Oct 2009
Drives: ichi 86 Project
Location: Middle of No where
Posts: 20,965
Thanks: 7,663
Thanked 19,051 Times in 8,326 Posts
Mentioned: 677 Post(s)
Tagged: 27 Thread(s)
|
Finally one of the thing I've ordered have came, so was able to start doing FXT water/oil cooler.
I read a lot of thread which way to do the water/oil cooler. I decided to go with TB route. Overall it wasn't hard to install. Biggest struggle was looping the hose under the AC took a bit of work and putting the clamp on the TB side.  I also took this chance to install Perrin intake pipe. Don't like having bling looking under the hood, so kept it black. Overall it still look like OEM. 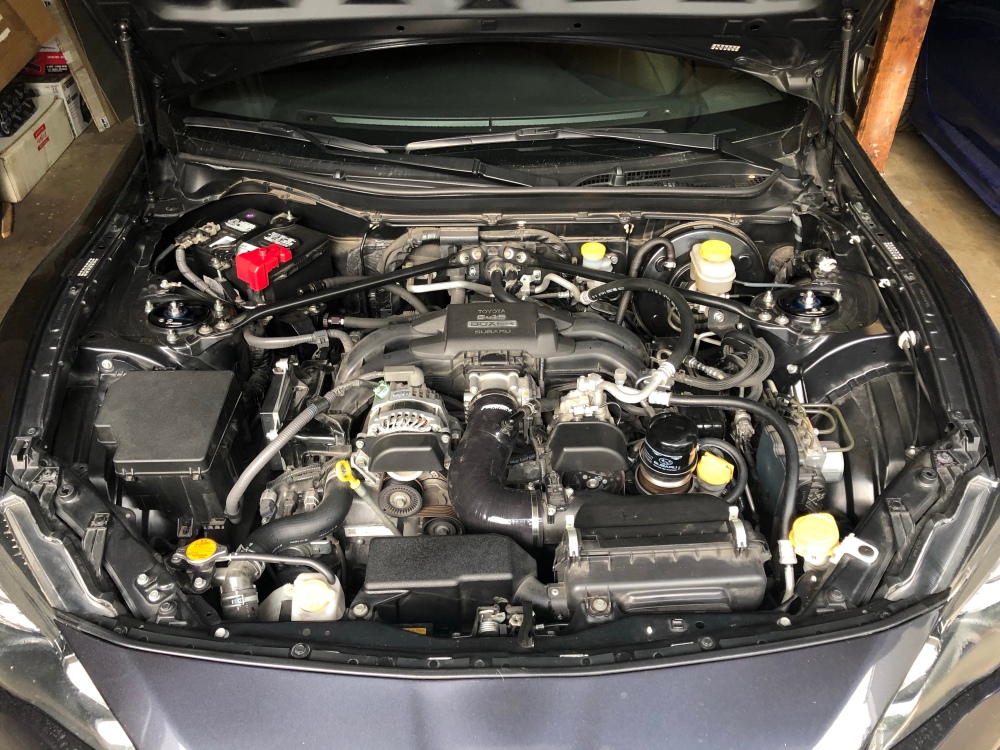
__________________
|
|
|
|
|
07-23-2020, 05:34 AM
|
#125 | |
|
Senior Member

Join Date: Apr 2019
Drives: 86 GT
Location: Malaysia
Posts: 358
Thanks: 218
Thanked 205 Times in 105 Posts
Mentioned: 2 Post(s)
Tagged: 0 Thread(s)
|
Quote:
|
|
|
|
|
| The Following User Says Thank You to Compelica For This Useful Post: | Ghost of Akina (07-23-2020) |
|
07-23-2020, 12:12 PM
|
#126 | |
|
Site Moderator
Join Date: Oct 2009
Drives: ichi 86 Project
Location: Middle of No where
Posts: 20,965
Thanks: 7,663
Thanked 19,051 Times in 8,326 Posts
Mentioned: 677 Post(s)
Tagged: 27 Thread(s)
|
Quote:
__________________
|
|
|
|
|
|
|
|
|
|
|
|
 Similar Threads
|
||||
| Thread | Thread Starter | Forum | Replies | Last Post |
| Nige's wide body poject | Nigelr32 | Member's Car Journals | 222 | 03-27-2018 03:06 PM |
| Project F.I.R.E.S.T.O.R.M. | Tvars | Member's Car Journals | 2 | 08-26-2015 02:39 PM |
| AJR Project BRZ ! | AJ PwR | Member's Car Journals | 8 | 10-25-2014 12:13 PM |
| 86-X project | phenom86 | Scion FR-S / Toyota 86 GT86 General Forum | 1 | 07-11-2012 02:57 PM |


 Ginger

