


|
||||||
| DIY (Do-It-Yourself) Guides For all DIYs. |
 |
|
|
Thread Tools | Search this Thread |
 07-05-2014, 02:27 AM
|
#1 |
|
Senior Member

Join Date: Dec 2013
Drives: 2013 Asphalt 6spd
Location: Mid GA
Posts: 780
Thanks: 259
Thanked 363 Times in 238 Posts
Mentioned: 18 Post(s)
Tagged: 0 Thread(s)
|
DIY Battery Relocation - pic heavy
I don't expect anyone to do it exactly how I did it, but maybe this DIY will provide some tips. I am assuming you know how to remove most of the interior panels, or will look up more detailed instructions.
There are much higher quality universal kits out there, that are track legal, more secure and air tight, but they are expensive, and require drilling holes through the body to mount. My goals were to: 1. Move the battery out of the way to make room in the engine compartment, to fit two, 24V dump packs for the Phantom ESC. 2. Minimize alteration/damage to the car, and allow a return to like stock condition. 3. Allow access to the spare tire with no tools. 4. Do it as cheaply as I could. Moving the battery could better balance the weight, but unlike my old 240sx, the battery is not at the very front of the car, it's behind the front axle, right next to the firewall. If you relocate it to the trunk, it complicates access to the spare tire. IMO it's not worth doing for what little weight balance you will gain on a daily driver. However, if you need/want more room in the engine compartment; I don't know where you can open up this much space, this easily. For my purposes, Rob(who makes the Phantom ESC) is selling a 1.5 dump kit that requires the purchase of a mounting kit, and a compact starter battery. It looks clean, everyone seems happy with it, and the performance it and Shiv's OFT Phantom 1.5 tune provide. Were I not so stubborn and cheap, I would have gone that direction. I am attempting to maximize performance, as well as "future proof" my setup for any ESC system advancements to come. Plus as a bonus, I can still use my perfectly good stock battery until it dies of old age, at which time I will upgrade to a sealed, or compact replacement. my materials list: ~ 12 feet of 2 ga positive welding cable ~ 03 feet of 2 ga negative welding cable cost: I already had this bought from Northern Supply or Harbor Freight to relocate my 240 battery, just never got around to it, I don't remember the price. 2 battery posts from an auto parts store, you can also pick up ring terminals here. (~$5) 2 ring terminals (3rd optional) / positive-negative battery terminal clamps. I picked all this up for about $6 at a local battery/alternator repair shop. 140V ANL fuses, and fuse holder. I got both off Amazon for $20 shipped (optional) 3 feet of fuel line to be used as grommet and battery vent(I had laying around) two 3/8" x 1" bolts plus lock and flat washers, to thread into battery posts. 1/4" sheet metal U clip 12" of 1/4" X 20 threaded rod two 1/4" butterfly nuts, and about four 1/4'' x 20 nuts and flat washers 1/8" x 1-1/4" x 3ft flat steel (optional, some foam weather stripping tape) I picked all this up at Lowes for about $20 (optional ~ I also used12ft of 4ga braided ground sleeve, some braided nylon sleeve, and heat shrink Y's), and some primer and paint (I already had) Total cost: $50 to $80 depending on what you have available. Weight: I weighed myself on the bathroom scale before and after holding everything, and it came out to about 8 pounds. It's not very accurate but it gives a general idea. 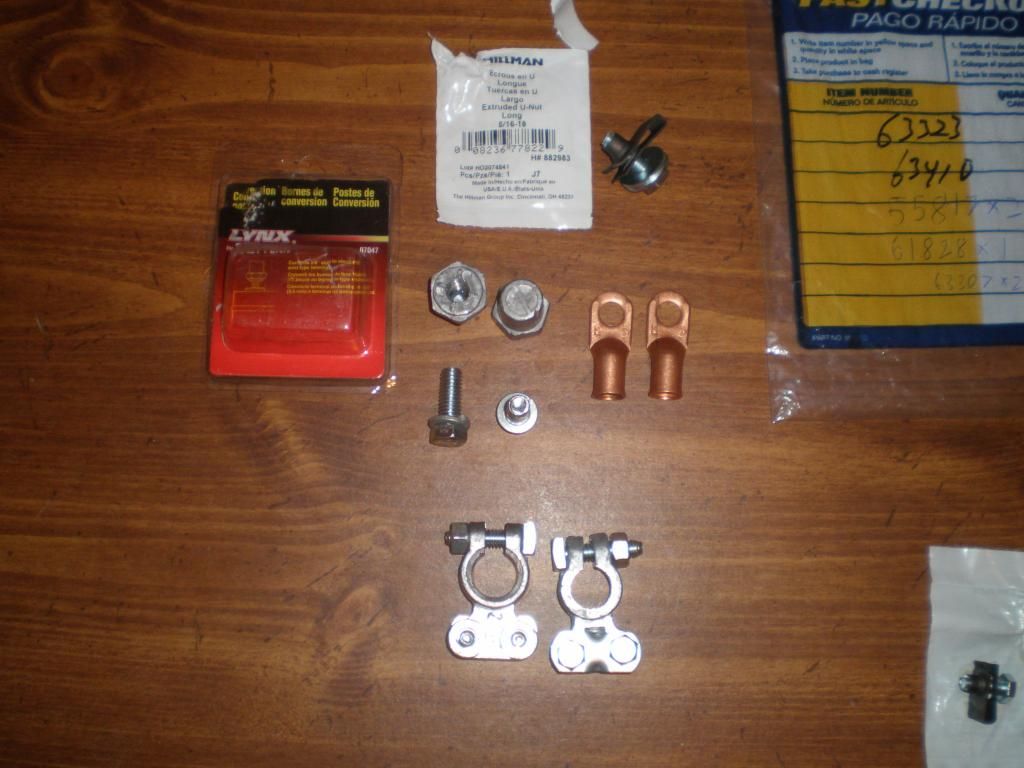 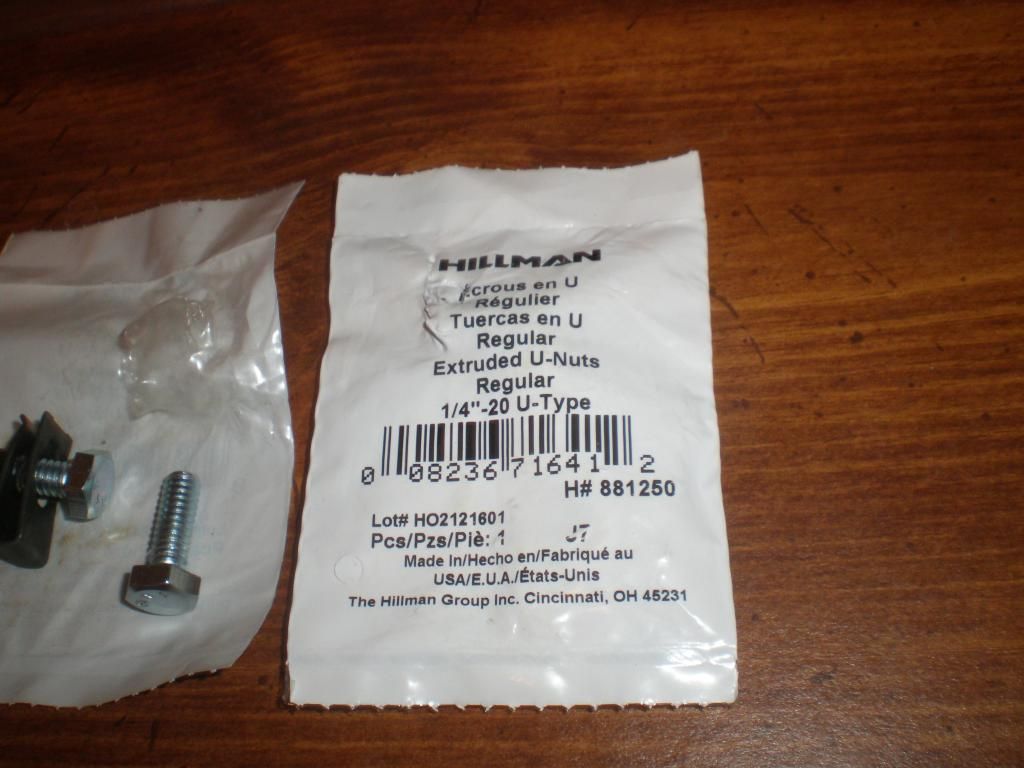 I'f I had to do it again, I would replace most of battery tie down hardware with a piece of nylon strapping with some industrial grade Velcro sewn on it. In fact I may go back and do this later. It would be lighter, easier to install/remove the battery, doesn't need paint, won't require the foam tape, all It would need is 2 1/4" x 20t x 1" bolts and some large washers to bolt to the straps to the battery support, 2ft of strap and some Velcro to sew on to the straps. Oh well, hindsight and all that. To start off with, I made a cardboard box the size of the stock battery. This is my DD, and I didn't want to have to keep resetting the ecu every time I wanted to test fit. I moved the box around the trunk till I was satisfied. Once this was done I started working out how to hold it there without major cutting or drilling of the interior, and while still allowing access to the spare tire in case I needed it. First I removed the trunk mat, and passenger side trunk panel. Near the back seats in the lower mounting point for the trunk panel is a mounting bracket that's spot welded onto the fender well. This is not the most secure point but it works for support. You can pull the plastic trim away from it and using some pliers bend the top lip up. Then snap your 1/4'' U-clip over the top 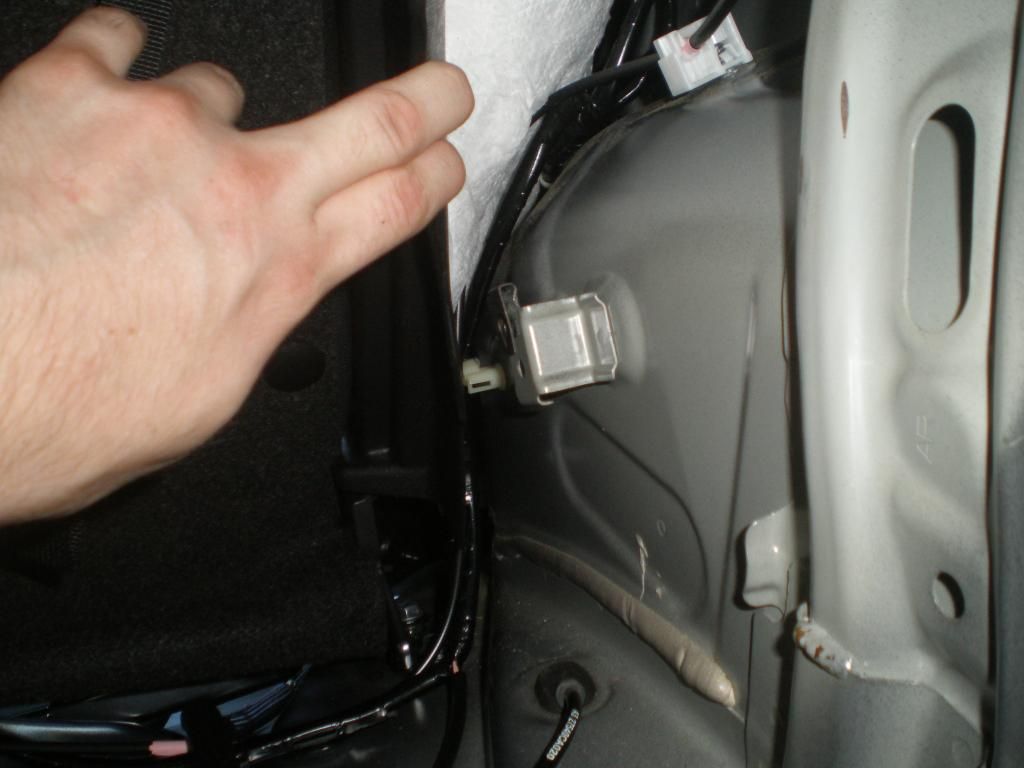 Then screw the 1/4'' threaded rod into the U-clip Take your flat steel:  drill a 1/4'' hole near the end. You can bevel the corners to clean them up. Measure the distance between your threaded rod and a point at or the same height over or slightly past your back rear shock mount nut. Then with a hack saw cut to length. Slide the hole you drilled over the threaded rod(I used a short bolt). 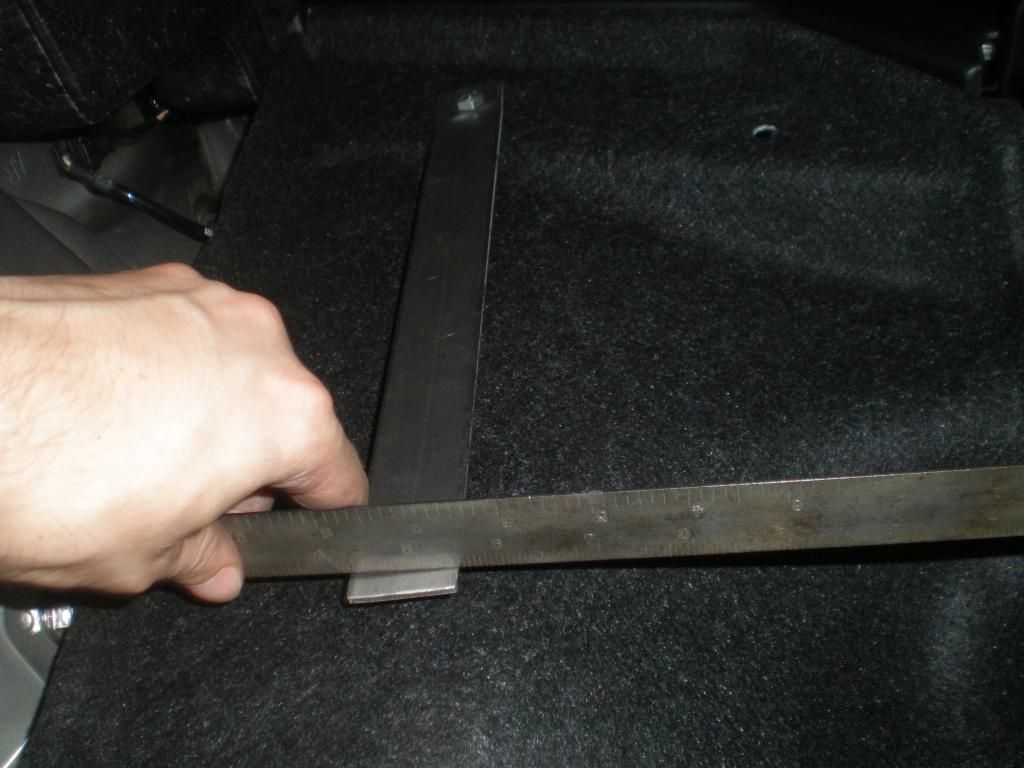 With a vice and hammer you can easily bend a small tab on the remaining piece of flat steel. This will be the Main mount point for the battery brace. Be careful to make sure it is straight up and down in the vice or the tab will be at an angle. 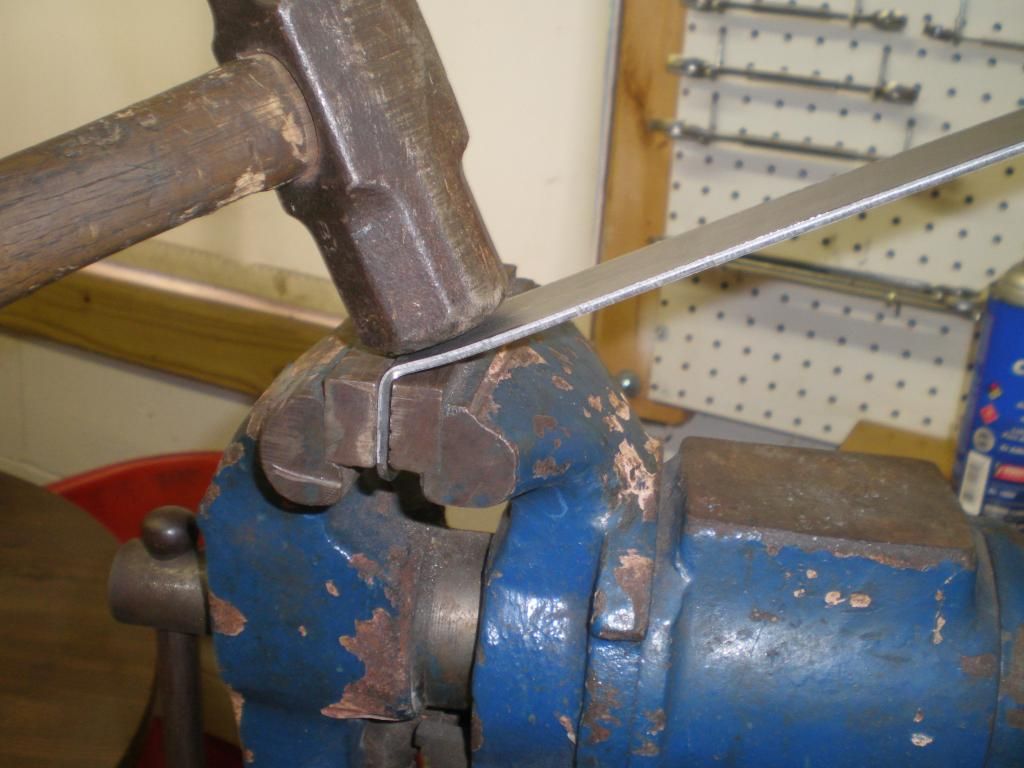 After you are happy with the bend, you need to drill the hole in the tab you just bent. I think it is a 14mm socket to remove the rear shock mount nut. Use the nut to help size the drill bit. Drill your hole, then bolt it in place, and bend, modify till you are happy.  Install and hold both pieces at the desired position, and mark or clamp together. Then remove from the car. 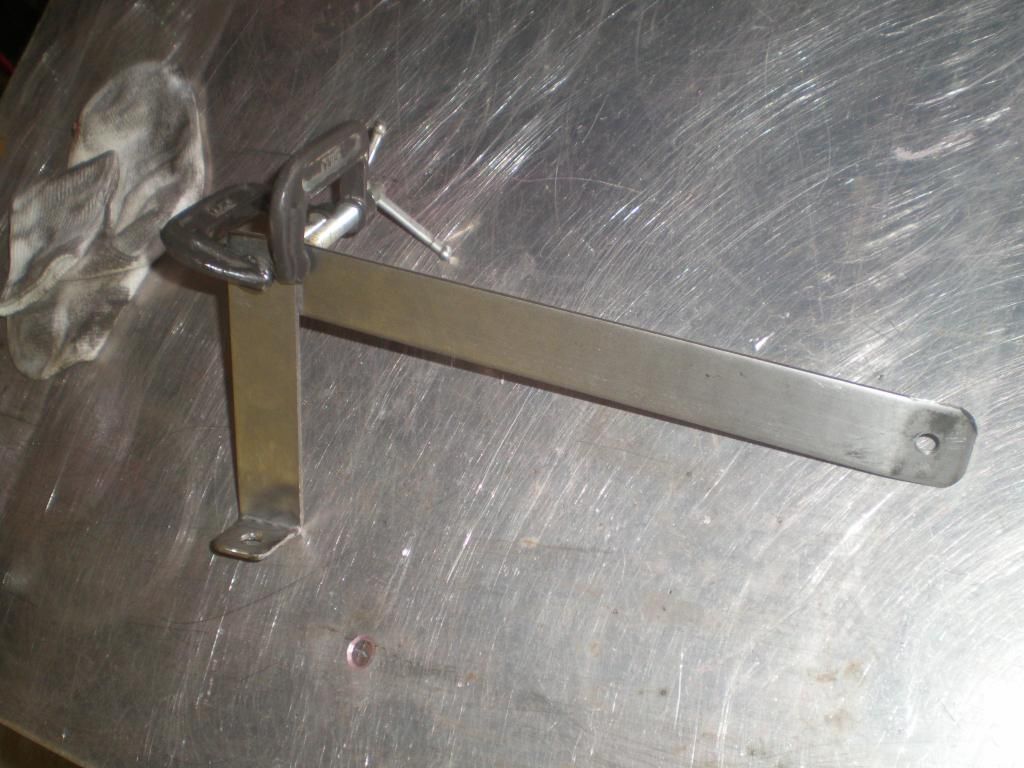 I welded it up, confirmed the fit, and pulled it back out. Then I drilled and tapped a 1/4" x 20 hole where the two pieces of flat steel were welded, this is directly above the shock tower nut. The next part I don't really have pictures for, It took a lot of fiddling, bolting, unbolting etc., to get what I have. This is were I would change almost everything, and try the strap and Velcro. Just an fyi, I went back and took pictures later, so some thing may look out of order. I used my box/battery analog, and the vice/hammer/drill to make the tie down bracket. Just a large U with tabs on the ends with holes in them. I needed the long rod because this was all that was left of by flat steel. If I would have went with 4ft of flat steel, I would have had enough to completely surround the battery. I cut the threaded rod in half with a hacksaw then threaded half the rod in to the U clip till it was just coming out the back side of the clip. I loosely threaded some(3) nuts down to the plastic panel, then sweadged them together so they would not move. This will be used to space the battery bracket away from the interior panel. I unscrewed the threaded rod, added a washer and a rubber washer over the side that threads into the U-clip in order to protect the the panel.(the 4th nut is to bolt to the other side of the battery bracket) 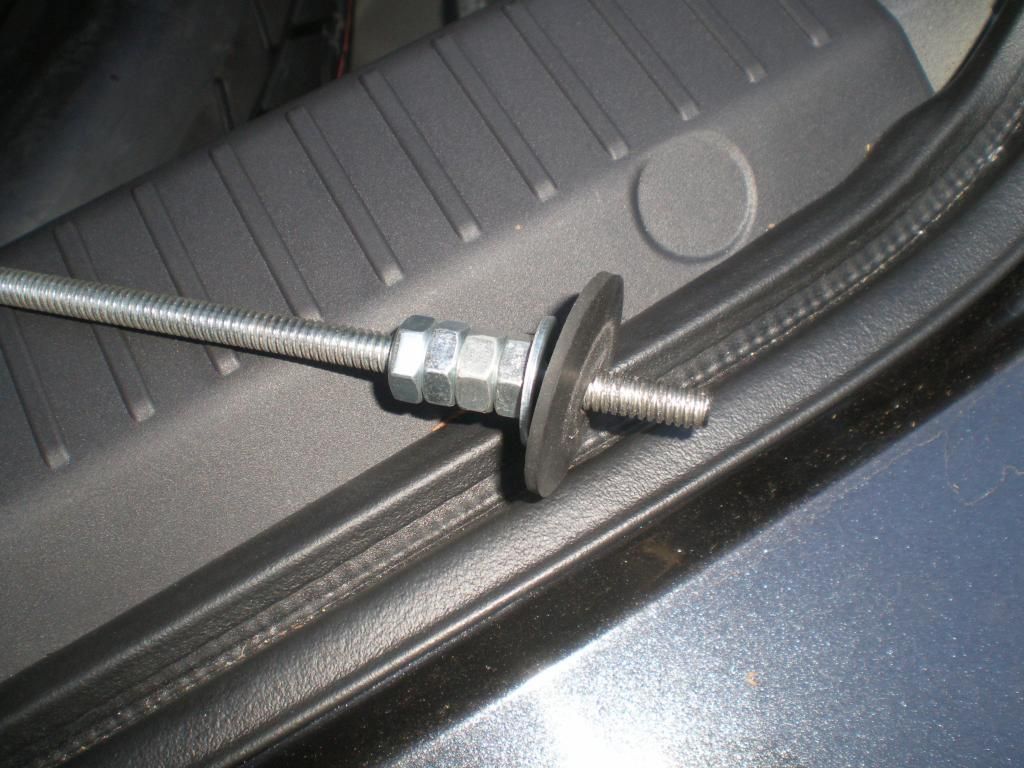 Next I replaced the interior panel. I used the sweadged nuts to tighten the rod into the U-clip. This will not get very tight, so don't go too far or you will crush the brace and bottom out on the fender well. 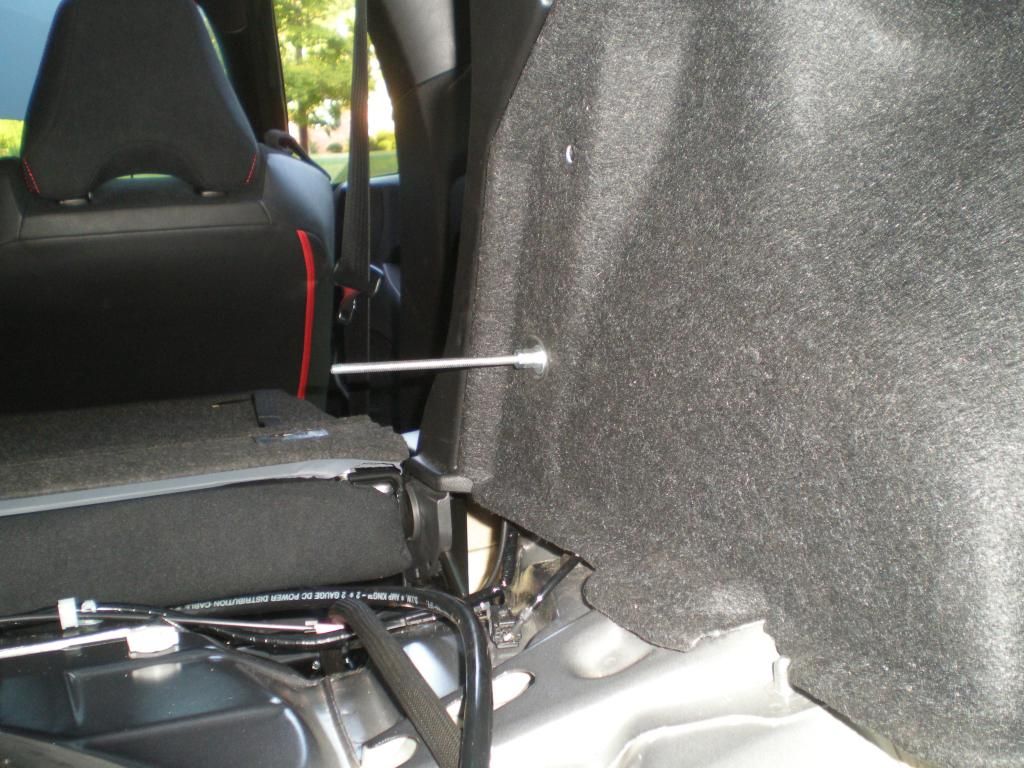 I reinstalled the brace. (The interior panel will have to be flexed out of the way of the rear shock mount) then put a nut on the outside of the brace to support it(the 4th nut in the picture above)  Now is a good time to cut the interior panels, but first, clip in a few of the plastic clips on the side panel to make sure it's in the right place. (I did not do this and I had to go back and make a third cut) With some scissors I made some small strait cuts to the panel on either side of the bracket that comes up from the shock nut. It's pretty flexible so I just rolled it up under the the back side of the panel. Next I installed the hard trunk mat, marked and cut it on either side of the battery bracket. Then I just folded it up.  With the interior back in, I put my cardboard battery in place and slid the battery tie down piece over the threaded rod coming out of the U-clip, then a washer and a butterfly nut to hold it in place.  On the trunk side of the bracket, I lined up the tie down and the brace I welded, and screwed in the threaded rod till It just came out the back of the hole I threaded. Next came a washer, and a nut. I tightened the nut down to remove all the play between the bracket and the battery(box). I then threaded on a butterfly nut. Using pliers, and a wrench, I sweadged the nut and butterfly nut together to keep them from moving. Now I can use the butterfly nut to install/remove the threaded rod.  So to access the spare, all I have to do is unscrew the butterfly nut from the side closest to the back seats, and un-thread the whole rod from the side closest to the trunk. (already done in the pictures, but then I pulled everything back out, sanded, primed, painted, then added some strips of foam tape to the inside of the brackets, and set it to the side) I highly recommend the primer at least. 1 day later and the surface rust was pretty bad. Next up I added the ground post. On the shock tower near the battery, there is a ground wire, and an empty slotted hole. I decided to place my negative post here. (inspiration by jpit). You may want to place your post in position then tape off around it to protect the other paint.You will want to sand this part down to the bare metal. Sand it first so you will have a nice flat piece to work on. You need to drill this out slightly, to 3/8''. Be careful, the drill bit will try to thread the hole and and slam the bit through the fender. This will also bend/warp the metal, causing it to be a pain in the ass to sand. If you have some type of conical grinding bit, use it instead. Clean everything up. (optional. I added a 4ga ring terminal to ground my optional braided shielding. If you do this you will want to put the ring on the 3/8" bolt first, with the flat side up so it will clear the lip on the mounting point. I followed this with a lock washer, and two flat washers to space it out.) The bottom of the post has some nubs on it which I easily filed off (it's lead) for a full contact patch. Next I bolted it down, and covered over any exposed metal with a marker. Some primer and an OEM color paint pen would be better, but I just did this on the spur of the moment.  I decided to run the cables through the main harness hole. (one of the reasons I did the optional grounding was to keep any noise out of the harness wires). I did not want to cut into the rubber harness seal, my wire was just too big. If you are going with 4ga and grounding in the trunk, you should be fine. Remember, if you cut through the seal, you will want to use some sort of black silicone or rtv or something around wire. Someone recently found a flood in their floor from water running down their amp wire. With the way I did it, It leaves the rubber seal is touching the firewall from the top to about half way down. This should keep water from getting in from above, but after testing, with the bottom pulled out, it allows noise and other things into the cabin, so I will have to cut some foam to stuff around the wires to block it up. First I pulled the rubber harness seal off the white plastic grommet which is clipped into the firewall. some small screwdrivers to un-clip it from around the harness. (this was a pain in the @$$ with the battery in the way. Better just to take it out before doing this part. this is after I removed the plastic grommet. 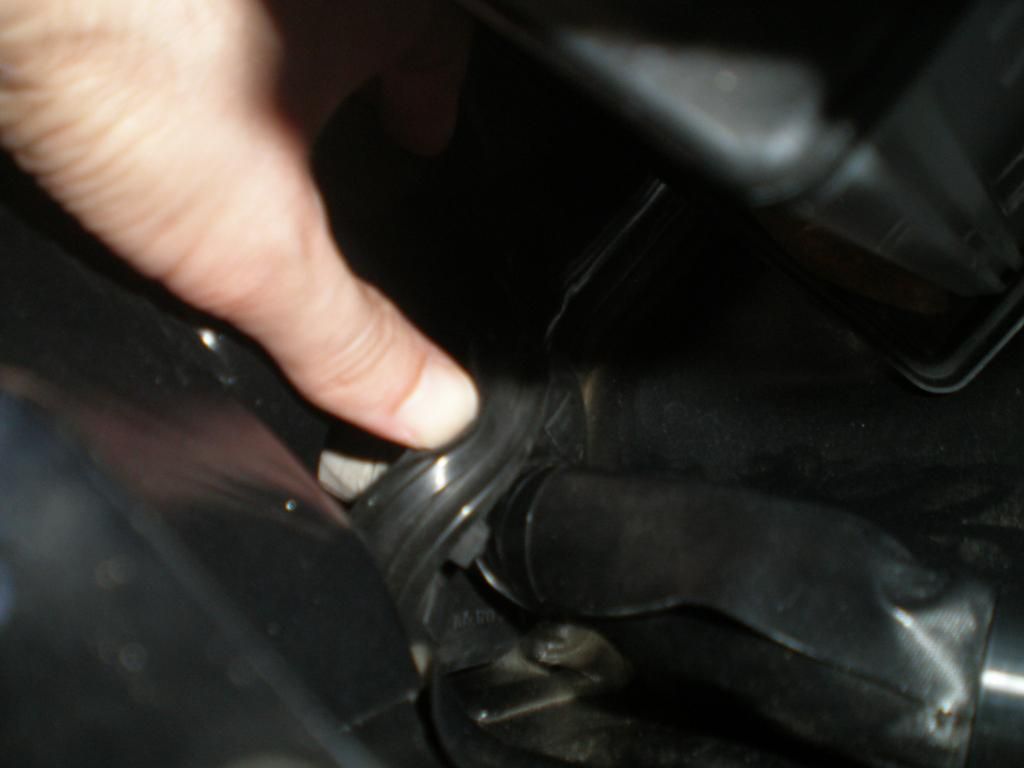 Next I took the fuel line and split it down one side with a knife 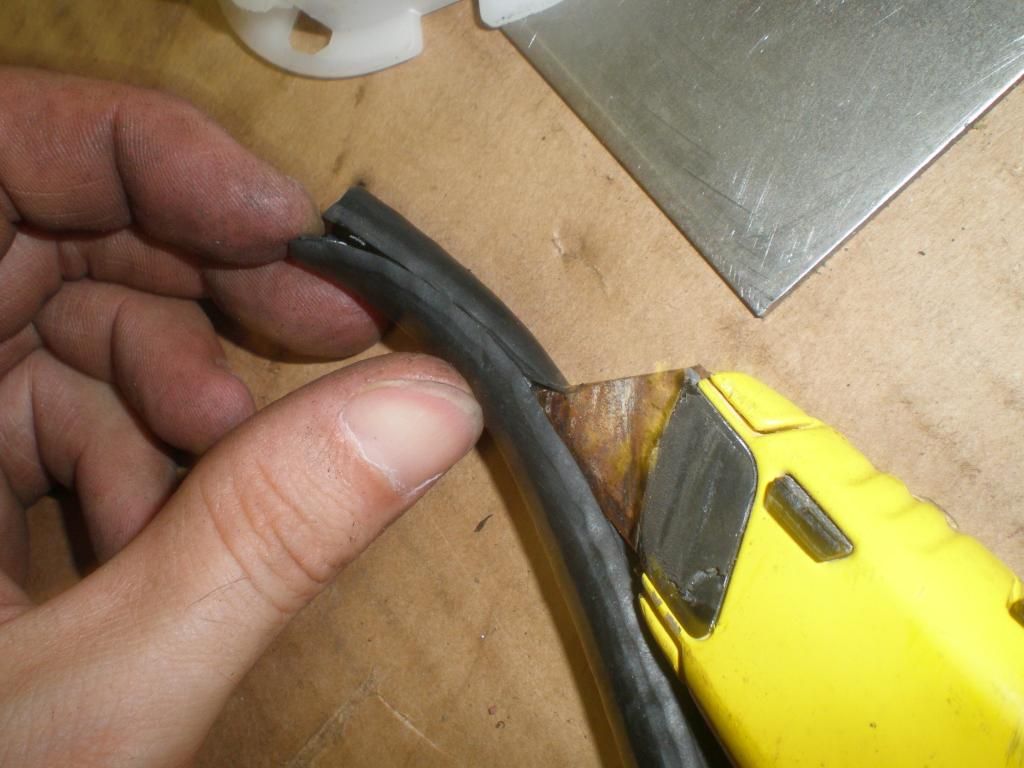 I slipped this around the exposed metal edge of the firewall to protect my power wires. 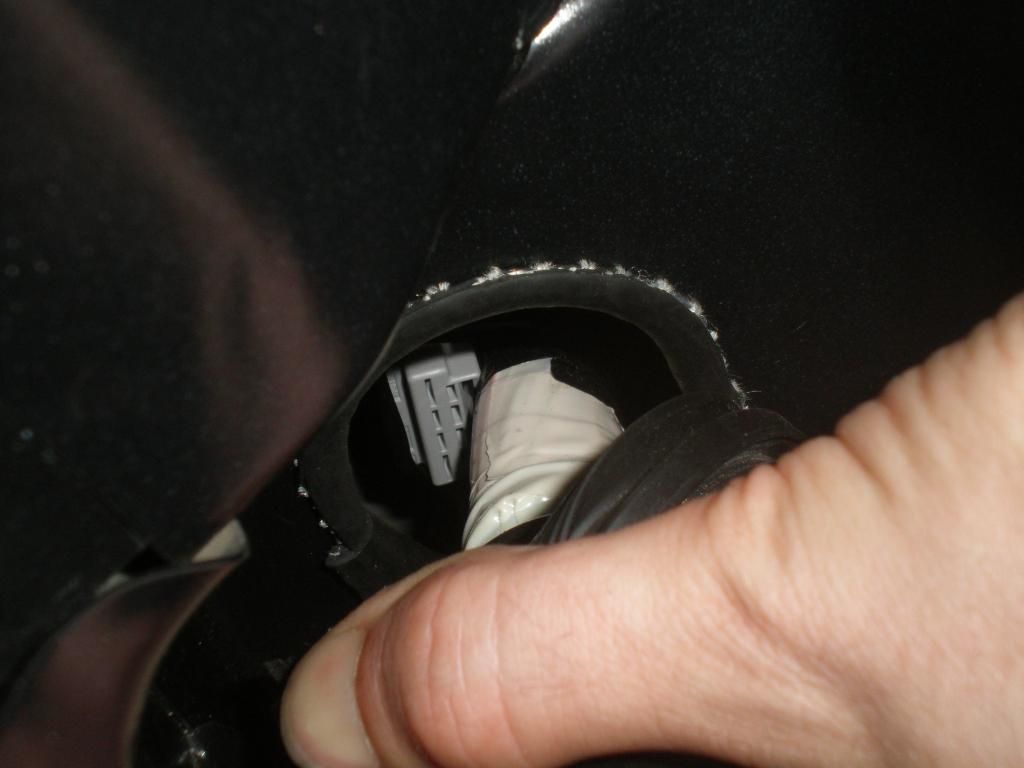 Now onto the harness. I took my red 2ga, and slipped it into the braided ground. 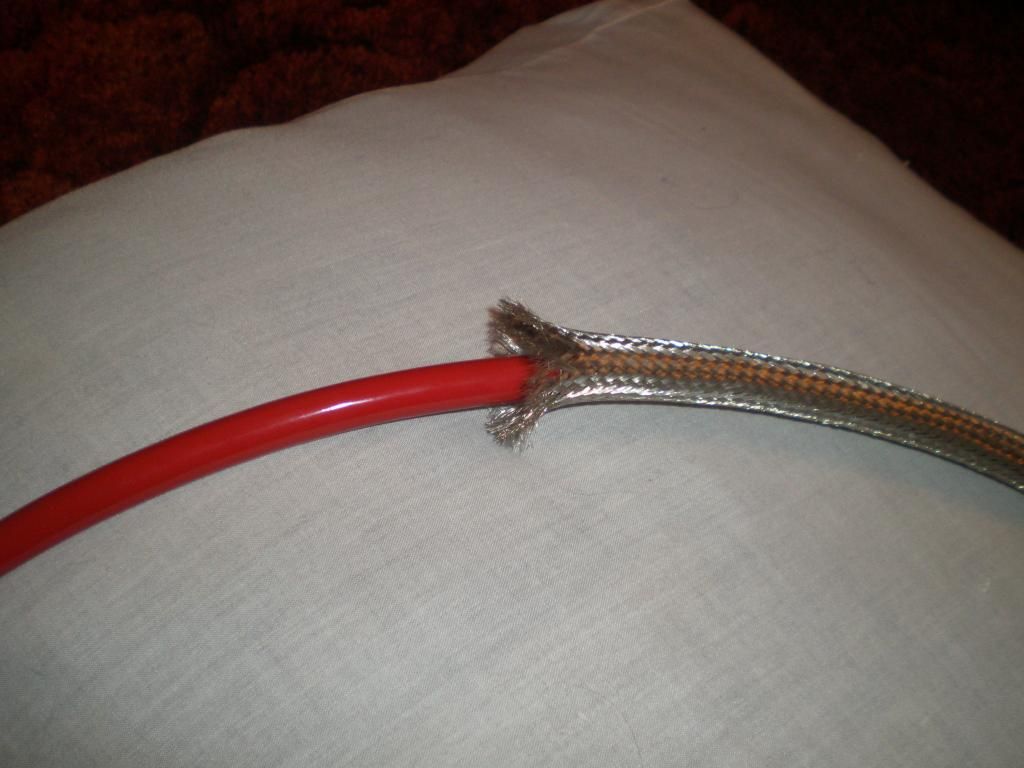 I picked about a foot from the end of the braid, and spread a hole out in the braid with a pick. Then I poked my positive wire out that hole. 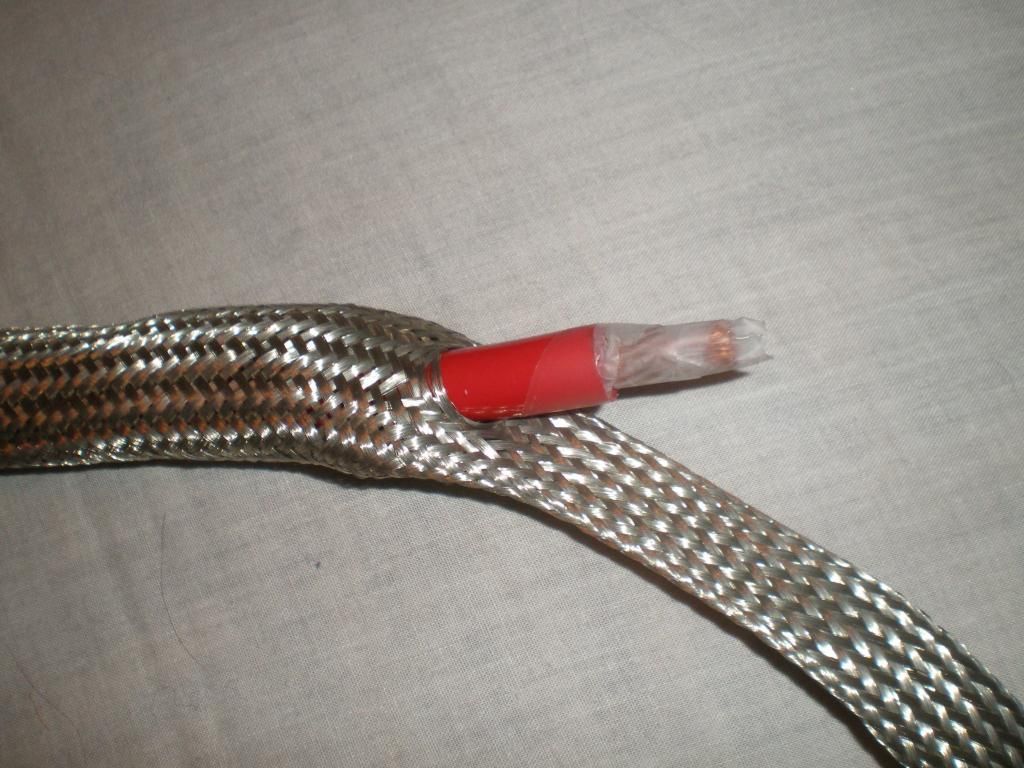 The braiding is optional, but If you decide to do this, remember you will have to slide the other side of the cable out of another hole in the braiding before you tie off, or use any heat shrink. My total cable length is about 12 ft. In the trunk it doesn't have to be as precise as under the hood, so you can Y it two or more feet from the end. this will give you extra room to place the fuse. If you skipped all this and just went with a single 4ga wire, you will save yourself some time. I tied everything off with some lacing cord, ran my nylon braid on my cable, then put on my heat shrink Y's 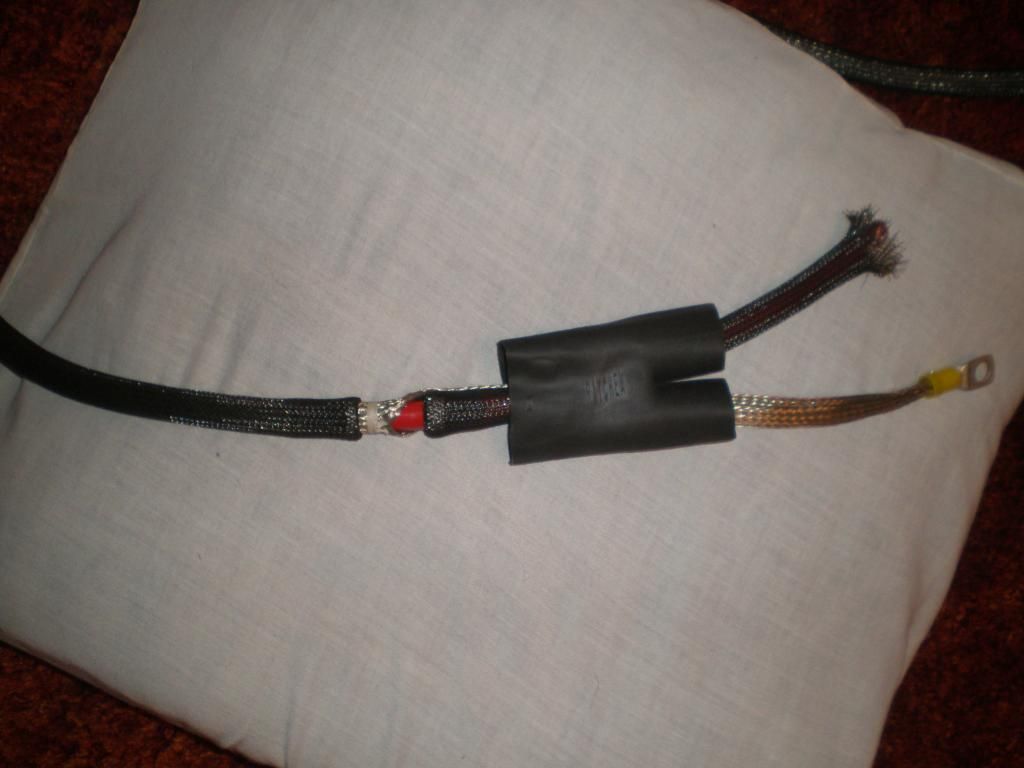 So here we have the kit. Ignore the weird thing with the hole in it in the upper right hand corner. Phantom cooling mod I made and painted with the battery brackets. 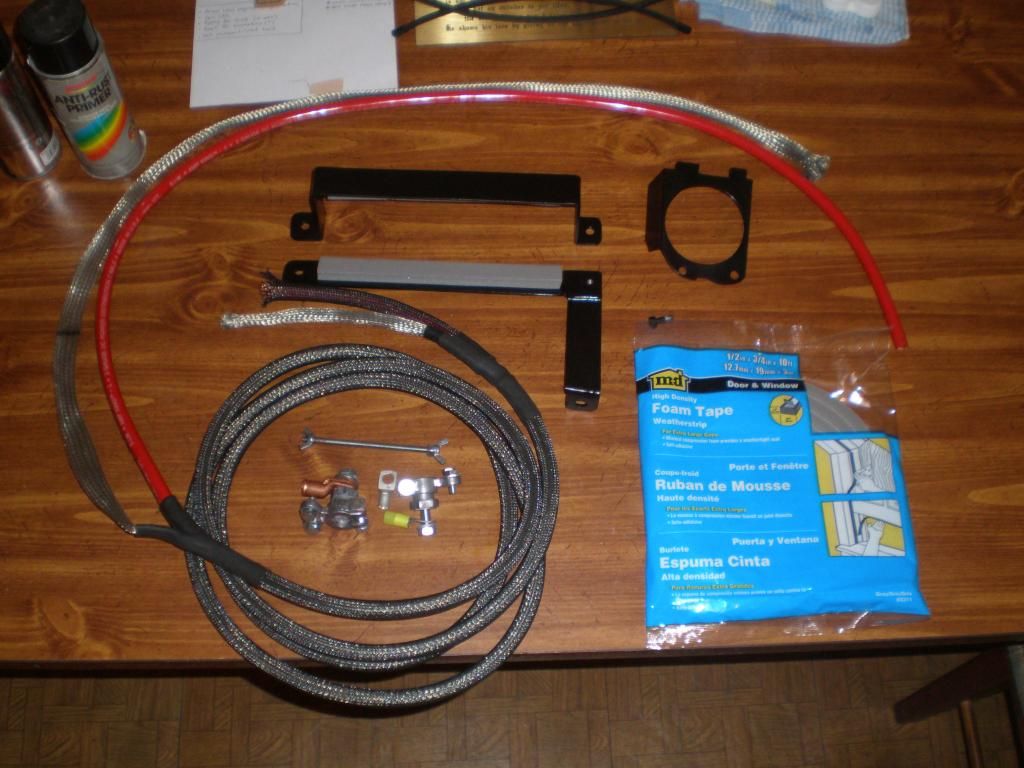 I ran the harness out through the hole in the firewall, and made sure I had enough sticking through to reach the stock battery cables. I crimped the ring terminals on my ground, and positive wire, and put on some heat shrink. I bolted up my negative post, and did a test fit. This is my finished product, I will secure the positive battery post to the dump pack bracket when I install them, but for now it is stable and covered. 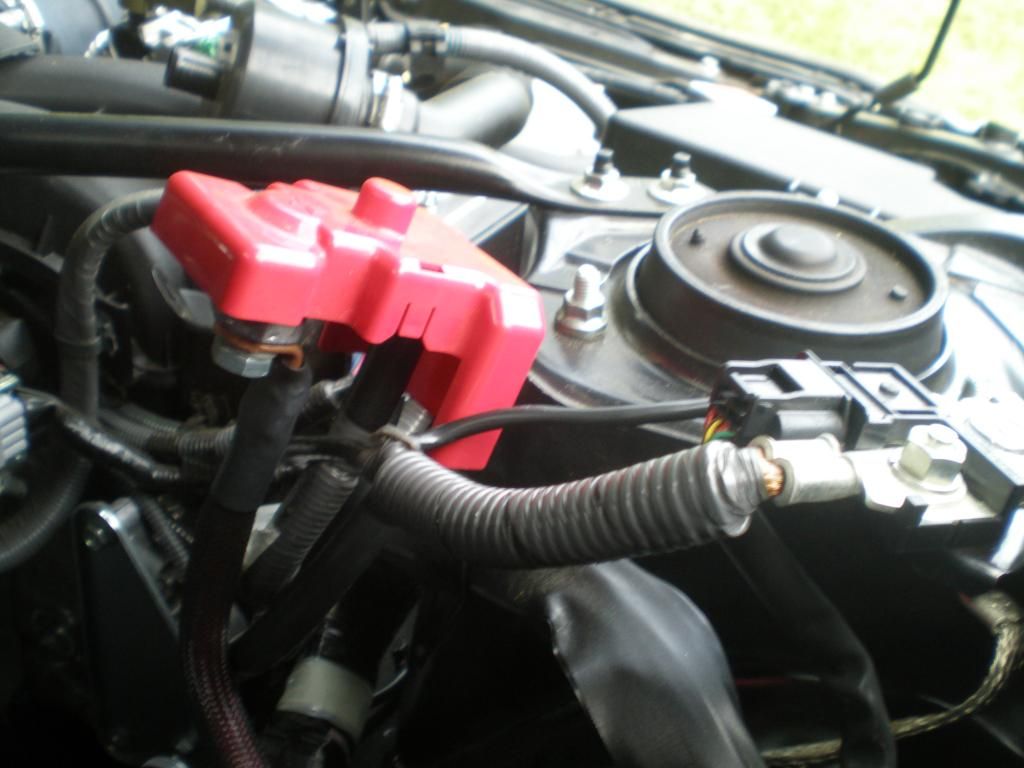 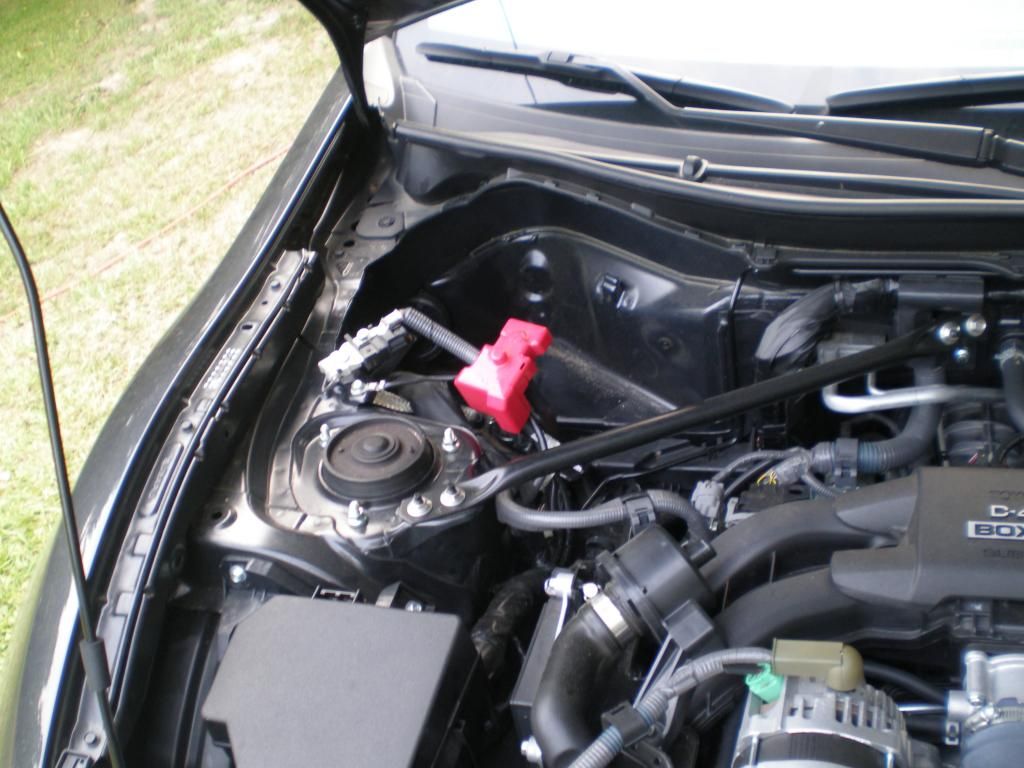 Next I took off my passenger side kick panel, door sill, and back seat bottom. The kick panel has 1 clip at the very front, and two slide clips that you just have to pull the panel strait to the back of the car and it pops right off. I worked the door sill off from the back of the car forward. The clips on the bottom only have a hook facing the outside of the car, so pulling up from the inside lip helps. 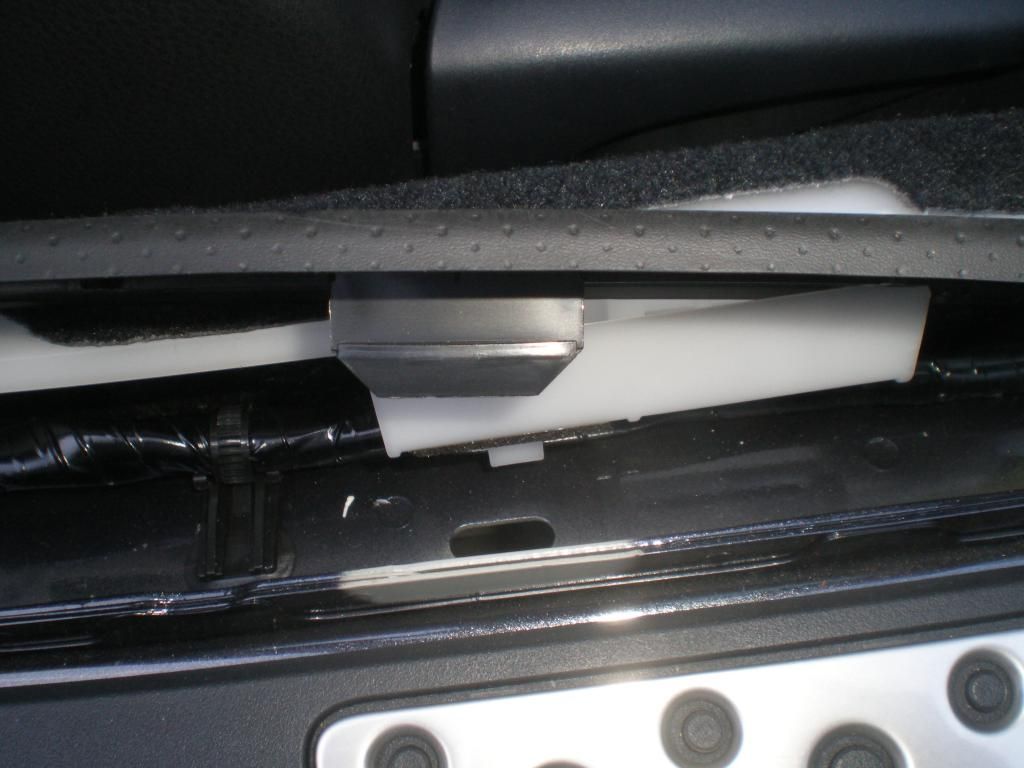 The back seat bottom comes out with a single bolt in the center. and pulling the back part down out of the clip. Next I pulled the rubber door seal up the length of the door, this lets you pop out the white trim piece that holds the carpet away from the factory wiring. 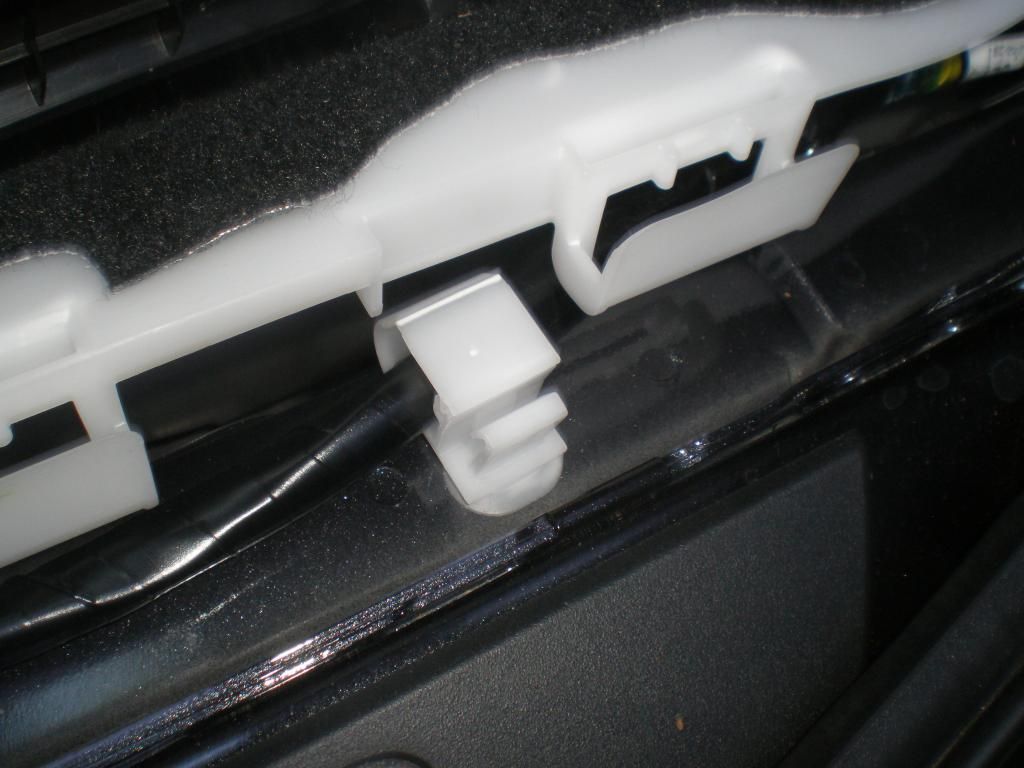 The white piece pops up really easy, until you get to the back part which is stuck under the B pillar/back seat arm rest. But with some pulling and twisting you can get it and the carpet out of the way. 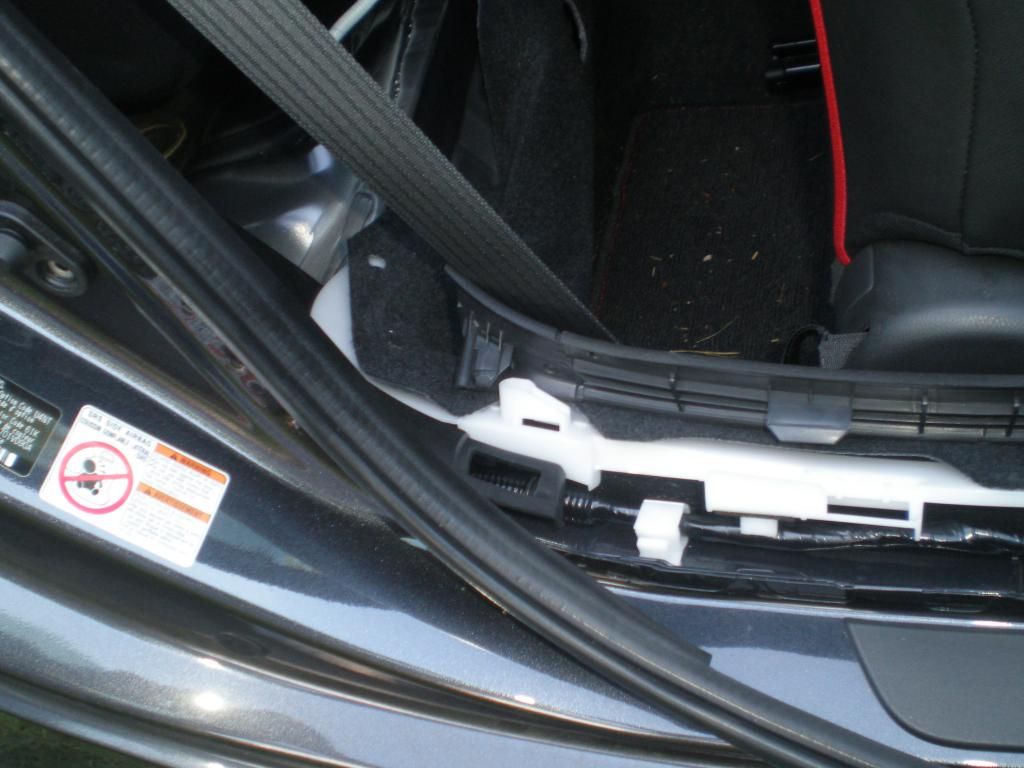 Now with everything out of the way, you can start running the harness. I tucked the wire right behind the factory harness block in the pass foot well. Ran it between that white plastic piece and the body, along the other factory wires.  The harness comes out from under the carpet at the back seat and I pulled it out from under the B pillar trim at the little gap, and ran it up this trench into the trunk. Reinstall your door sill, seal, and kick panel. 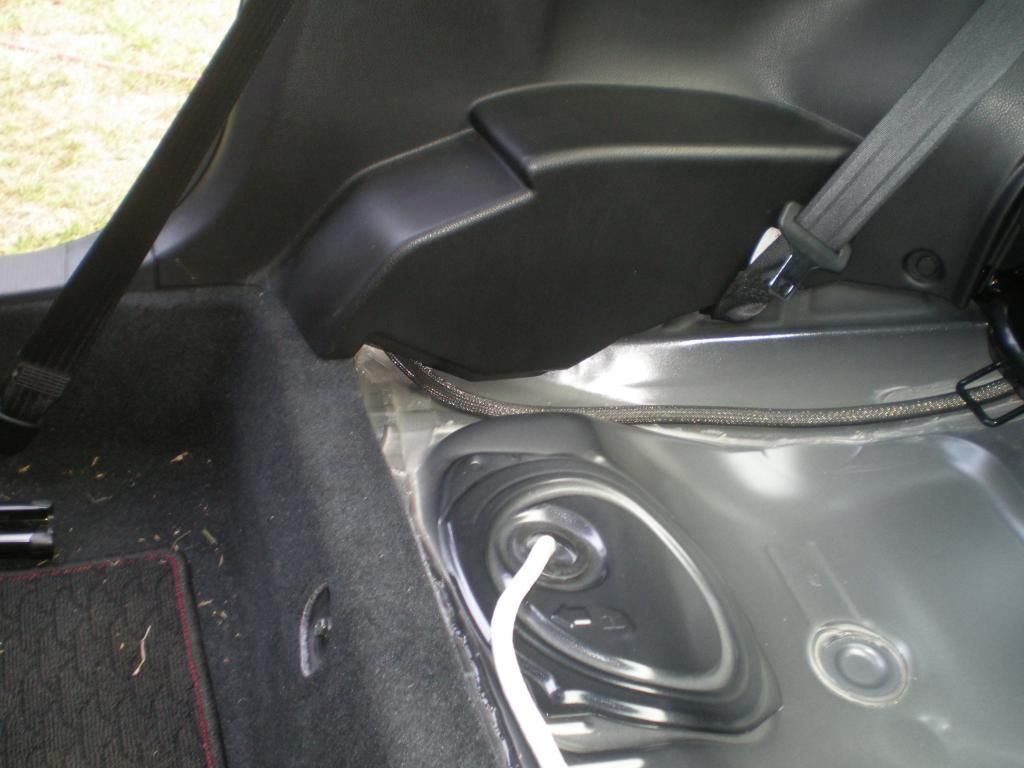 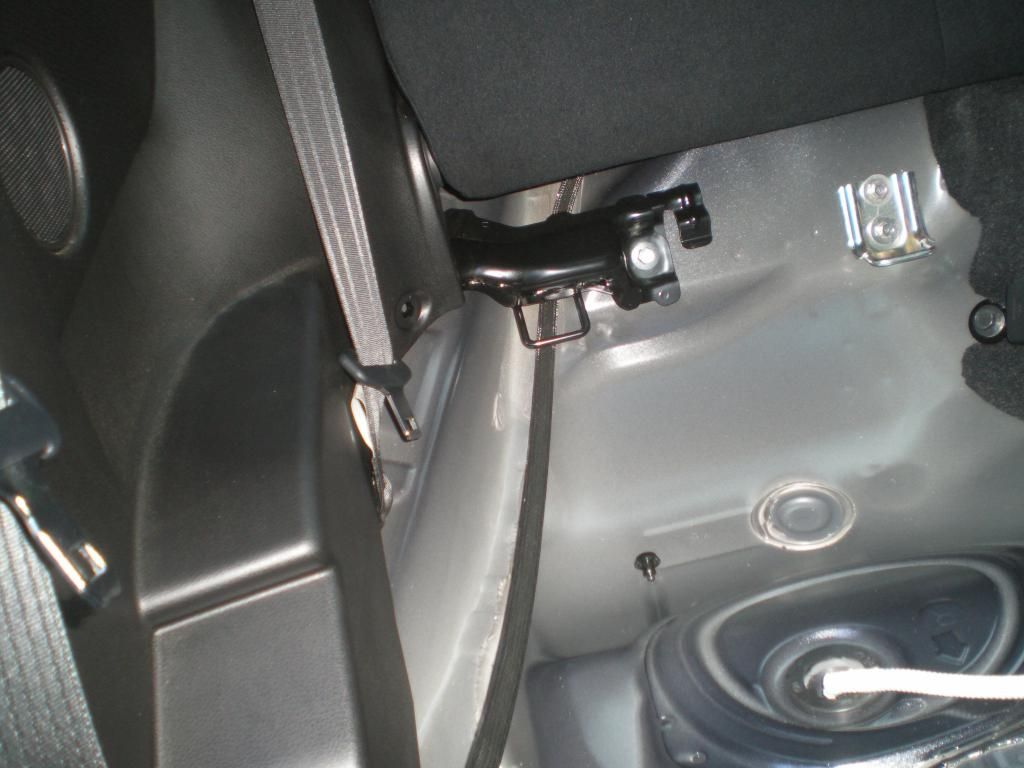 With the back seat out I added my battery ground. Just take your negative cable, cut back the insulation, and crimp on your ring terminal. (my crimping wasn't go so hot so I beat it with a large hammer), install and run it to the trunk beside your positive. I picked this spot because the bracket is bare metal so no extra sanding was required, and it has 2 bolts grounding it to the body. 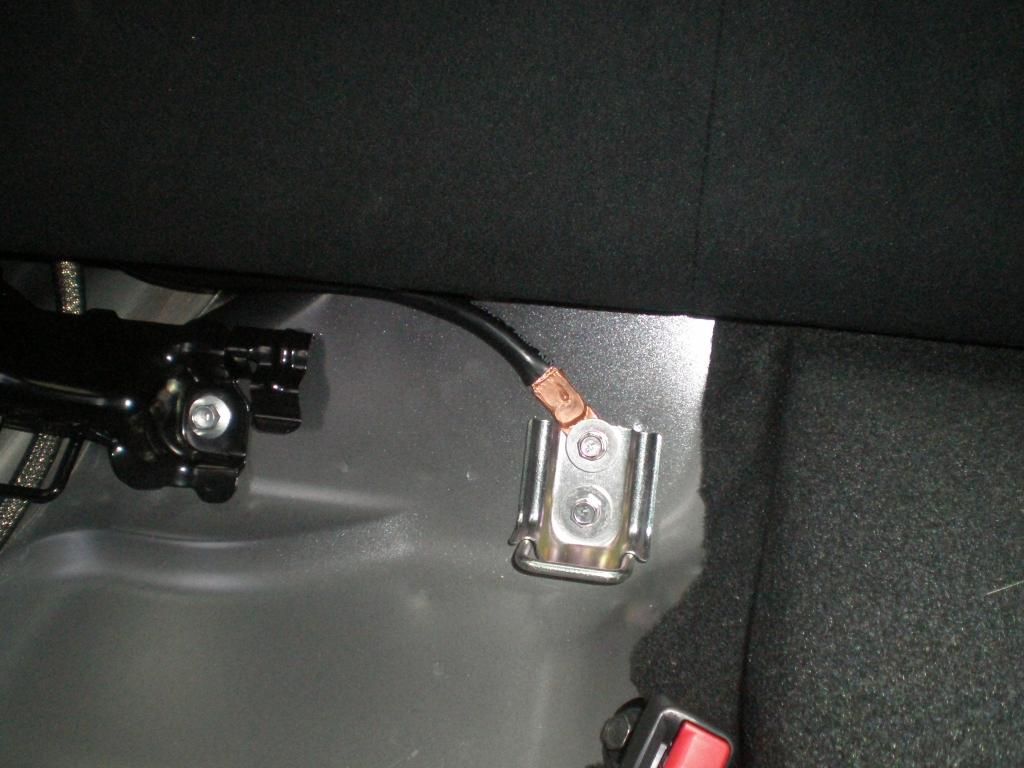 This part is easier if you pull the carpet off of the clips like I did, but you can just fold the corner back out of the way. You can zip tie your cables together or not, but here you need to cut a trench in the corner of the styrofoam.You don't need to cut as far as I did to the bottom, just the top and corner, to get under the carpet. 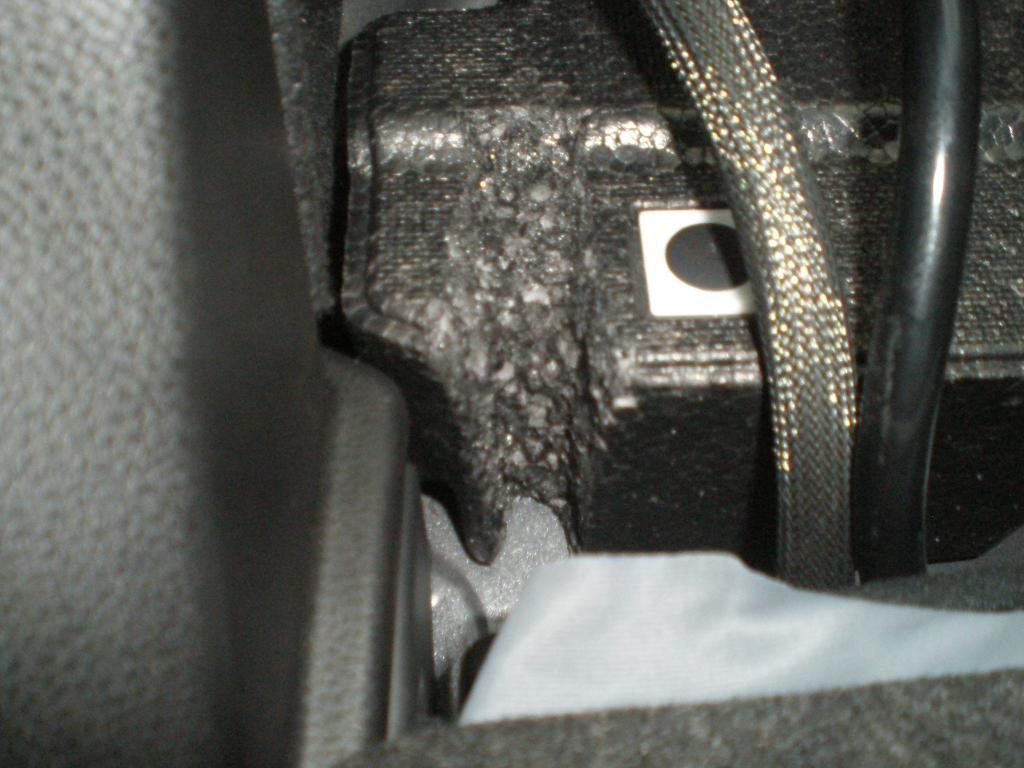  The trunk mat runs all the way to the back so I had to cut it. I would cut the flap differently if I could do it again. Just make 1 cut from the passenger side about 2 inches long about 1 inch from the back seat and fold it up to clear the cables. Mine works, but would look better if cut from the other side. We are in the home stretch. Since I spaced the bracket away from the side panel, I had room to run the cables behind the battery, to keep them out of the way. I used my factory battery tray, and put some foam under(cut two small holes around the bumps in tray so it will sit flat) Then I tied it down. From here just take your measurement of where to cut the excess cables, cut, strip, and bolt on your battery terminals. On your positive cable, pick a spot and cut it off some distance away from the terminal you just installed. Strip it, and fit it into your fuse block, and tighten it down.(you may need more ring terminals depending on the style of fuse/breaker you get) I got the kind with set screws. Now just run the other side of the cable you just cut to the empty side of your fuse block. Hook up your battery positive side first, and there you go. 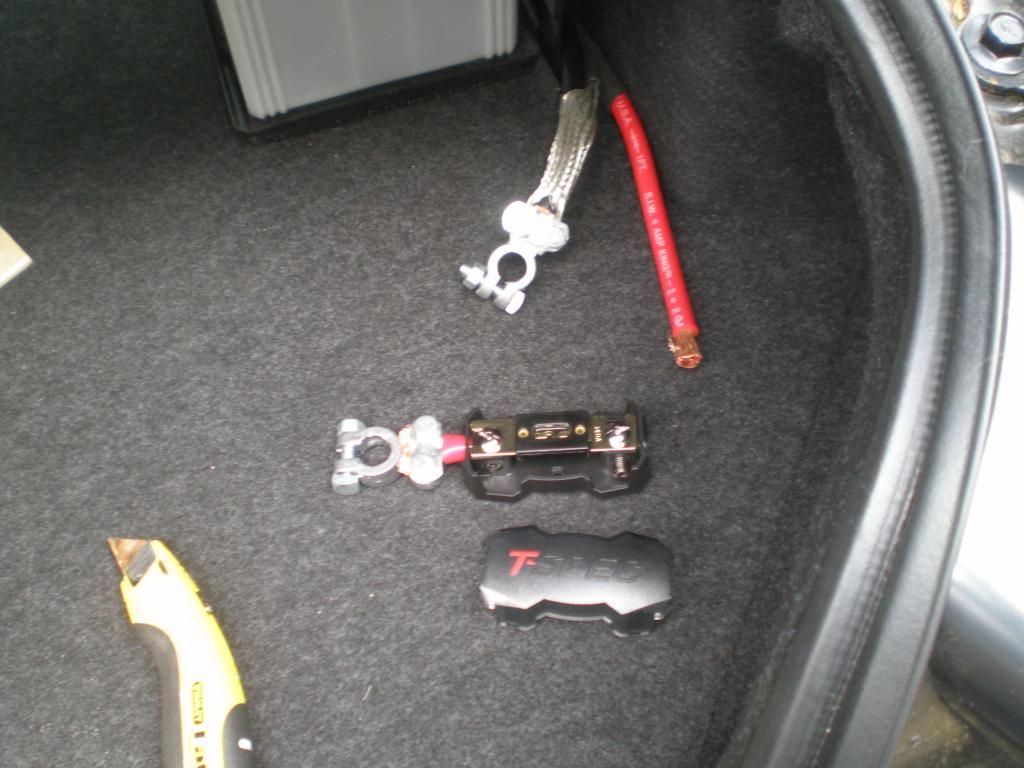 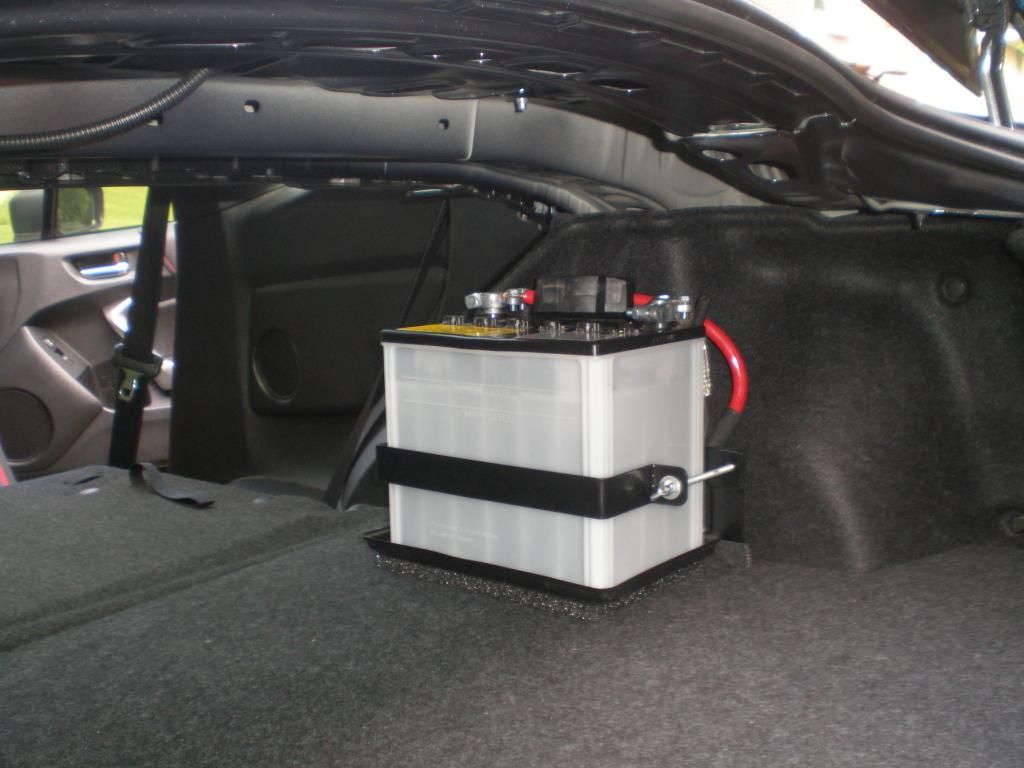 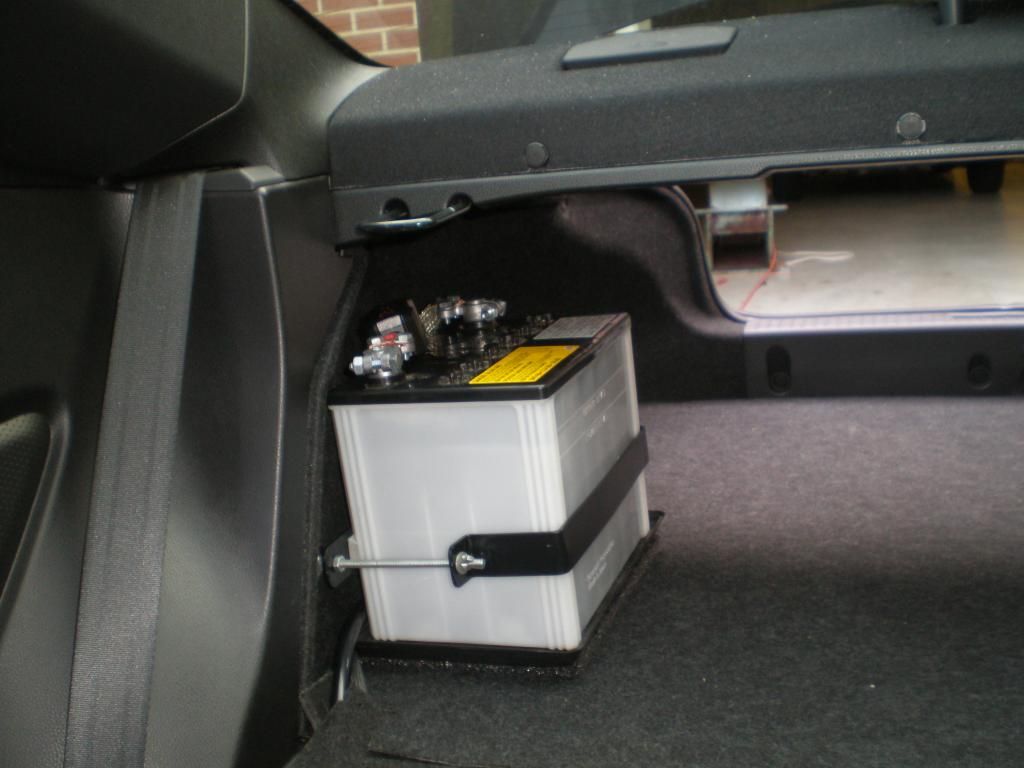 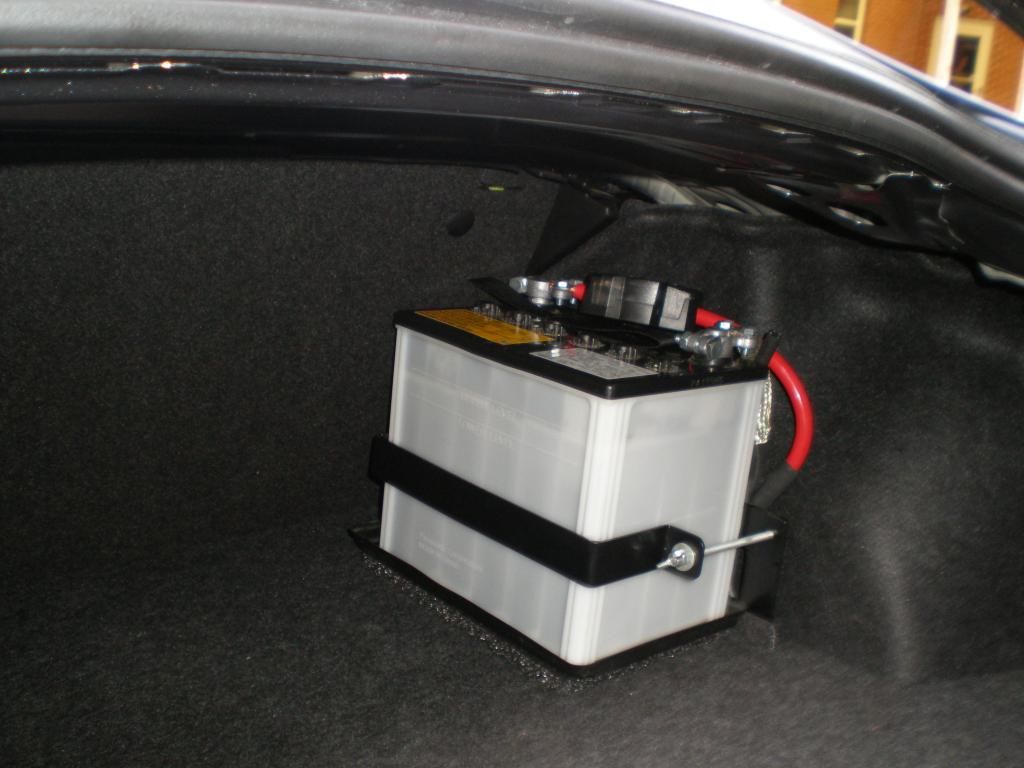 Buuuuuuuut. I am using the factory lead acid which might vent gasses into the car. So being cheap I will use some (4mil construction plastic that I have lying around) to wrap the battery. put all my cables in and then tape it up. But first I had to run a vent line. You can see the vent line running up right behind the battery in the last pic. To run this line, I pulled out the tool holder piece in the back passenger side corner of the trunk, Pulled up the black round sticker covering a hole, took my remaining fuel line, and wrapped the end with electrical tape till it fit the hole snugly. Cut a small notch out of the bottom of the tool foam and ran the vent line to the back then around the outside of it. I could have run a more direct line, but was trying to cut as little as I could. 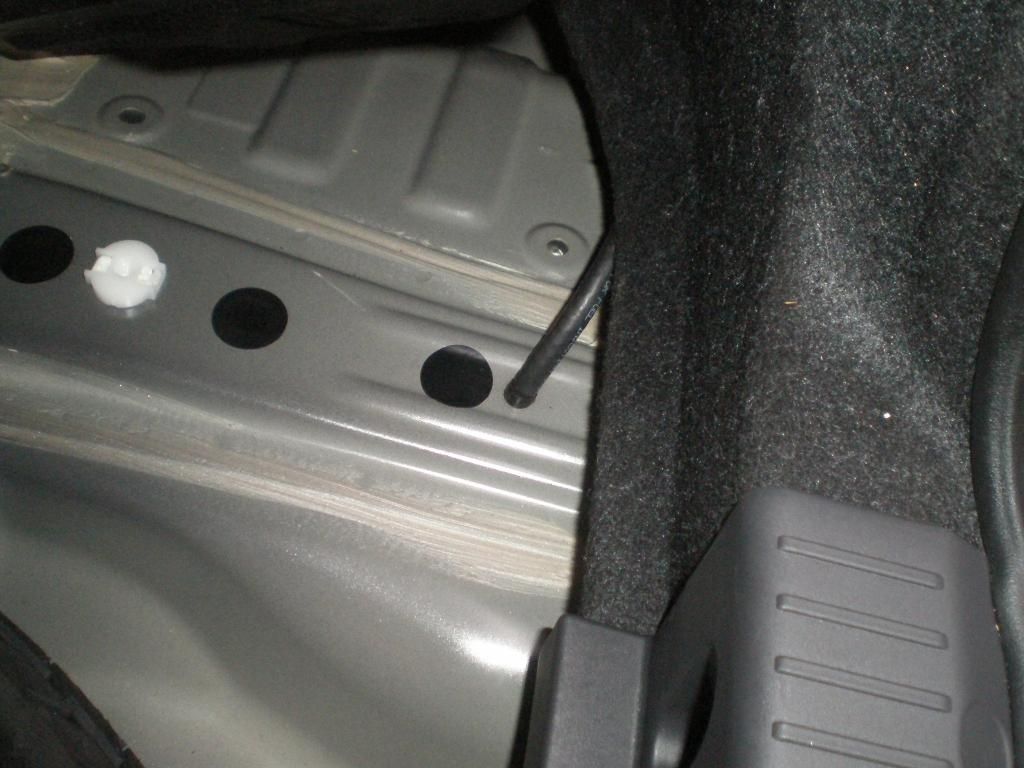 some closing thoughts: get a smaller battery. I thought about relocating to the back seat behind the driver, but the stock battery is to big to completely lower the seats. Also with the smaller battery Rob recommends with the Phantom, It looks like I could fab a bracket to mount right behind the bell-housing on the top of the transmission. There looks to be a ton of room between the tranny and the tunnel. I think that the 3" thick compact battery would fit, and allow the full 2.0 dump to fit in the the stock battery location. This would mean no running through the firewall, no wasted trunk space. with such a short run, you wouldn't need an additional fuse. just a thought. Last edited by Target70; 07-05-2014 at 02:40 AM. |

|

|
| The Following 5 Users Say Thank You to Target70 For This Useful Post: | FRSfan111 (07-07-2014), Mikem53 (07-11-2014), neutron256 (07-05-2014), RSKYBZ (06-01-2017), swarb (01-25-2017) |
|
|
|
 Similar Threads
|
||||
| Thread | Thread Starter | Forum | Replies | Last Post |
| Rally Armor Mud Flaps, Grimmspeed Plate Relocation Kit, Oil Caps and Battery Tie Down | OAKOS Automotive | Exterior Parts - The Rest | 170 | 01-20-2015 11:47 AM |
| Shorai Lightweight Battery and KCMachine CNC Machined Battery Tray Package | KCMachine | Brakes, Suspension, Chassis | 111 | 10-08-2014 08:26 AM |
| USB/aux relocation | TheBatman | Cosmetic Modification (Interior/Exterior/Lighting) | 12 | 05-29-2014 06:43 AM |
| Battery tray for Braille 21lb battery? | lordtakuban | Engine, Exhaust, Transmission | 4 | 09-10-2013 08:55 AM |
| TR-B1500 battery and billet battery tray install. | mines13 | DIY (Do-It-Yourself) Guides | 8 | 12-07-2012 03:59 PM |


