|
||||||
| DIY (Do-It-Yourself) Guides For all DIYs. |
 |
|
|
Thread Tools | Search this Thread |
 11-19-2012, 05:17 PM
|
#1 | |
|
@theexquisite86

Join Date: Nov 2012
Drives: 2013 Firestorm FR-S
Location: Beaumont, Tx
Posts: 122
Thanks: 17
Thanked 47 Times in 28 Posts
Mentioned: 2 Post(s)
Tagged: 0 Thread(s)
|
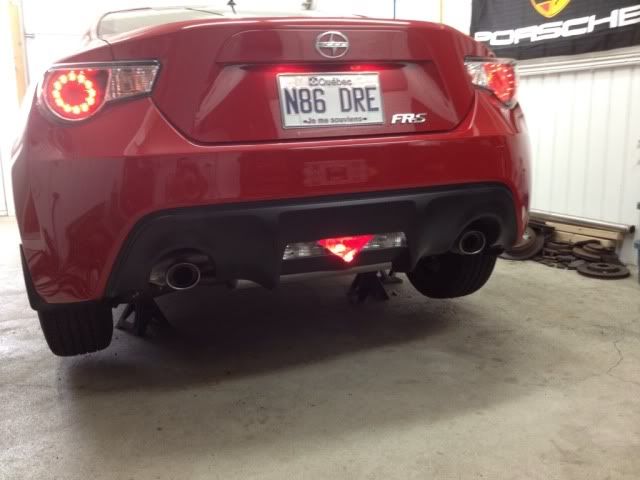
how to turn that rear triangle reflector into working brake light
I found this how-to guide on his to do this here
Quote:
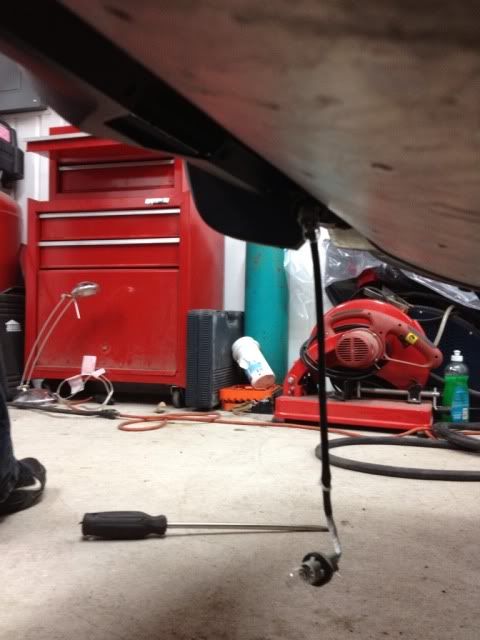
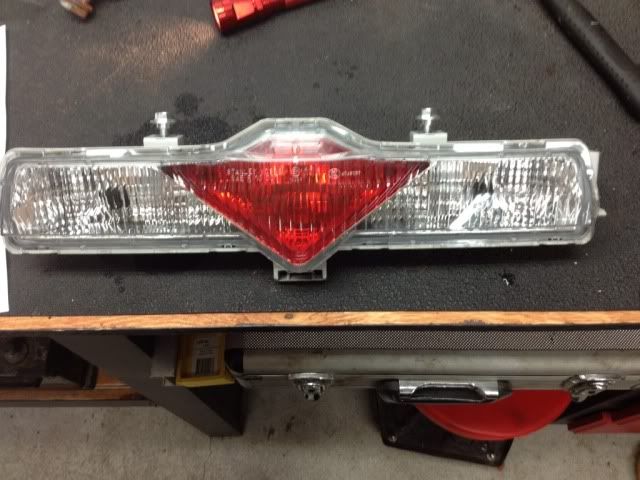
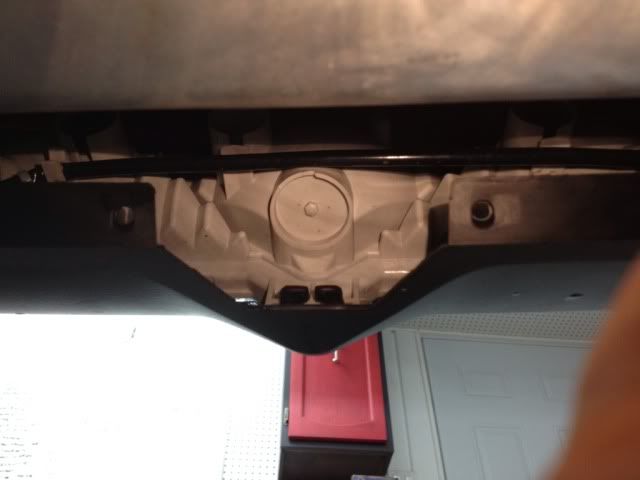
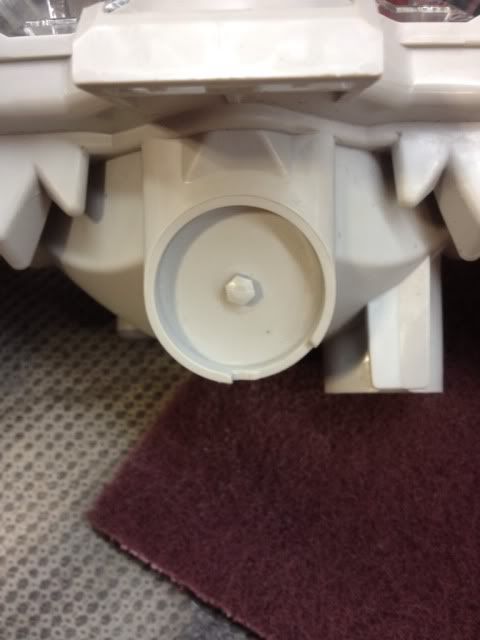
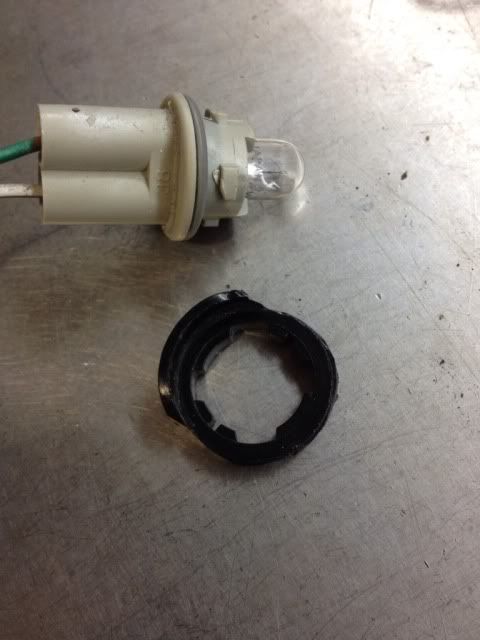
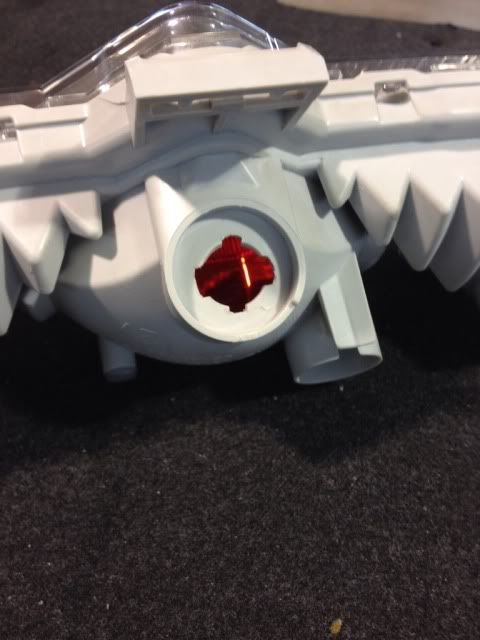
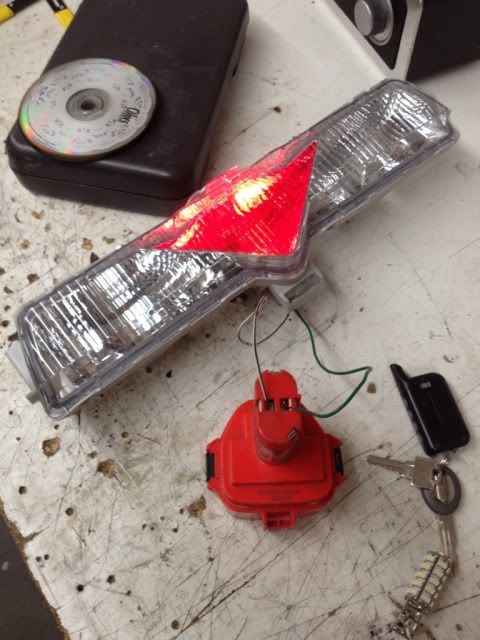
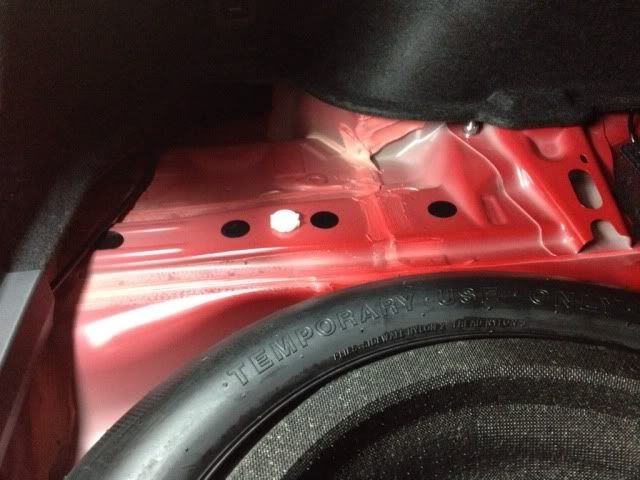
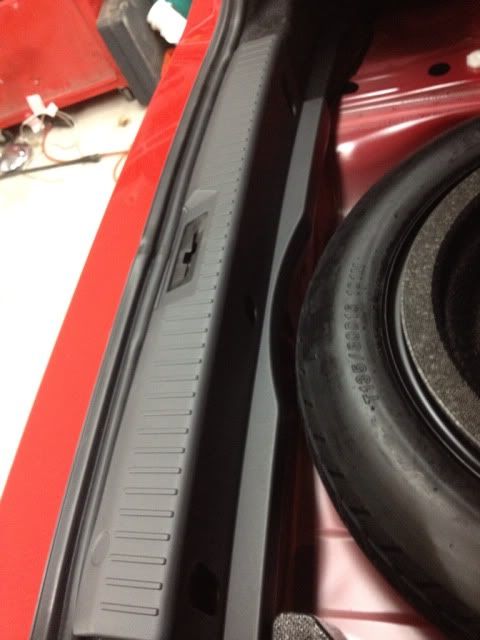
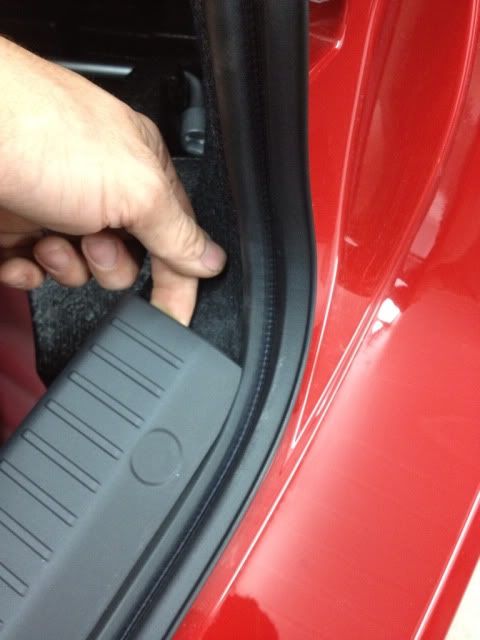
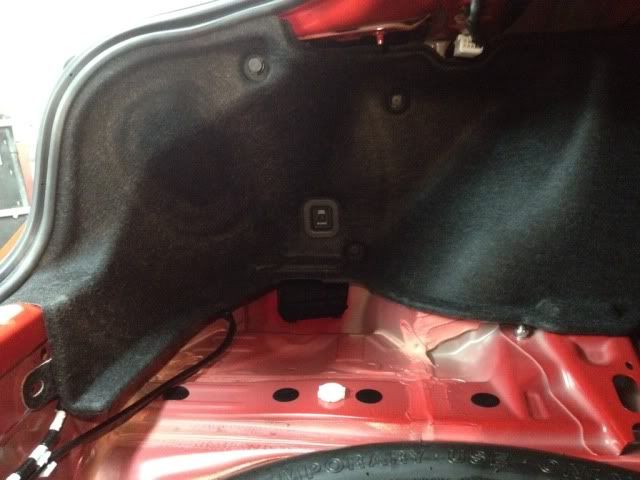
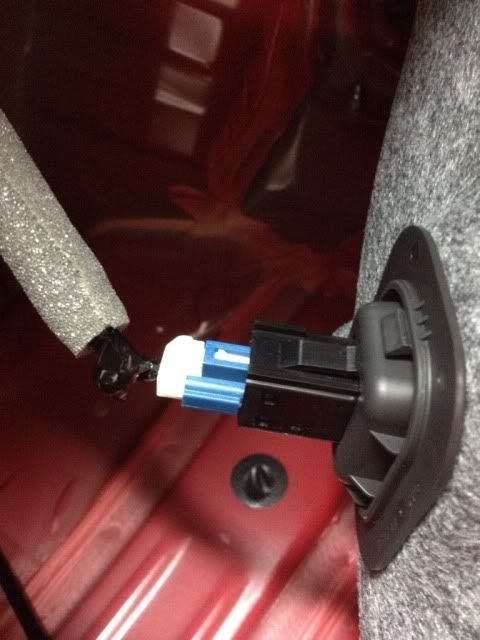
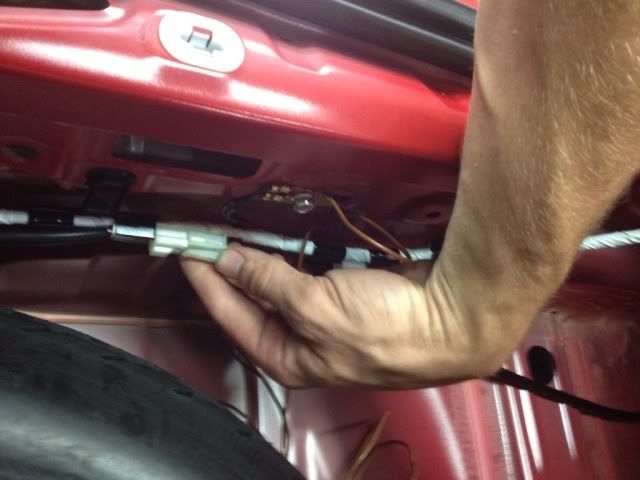
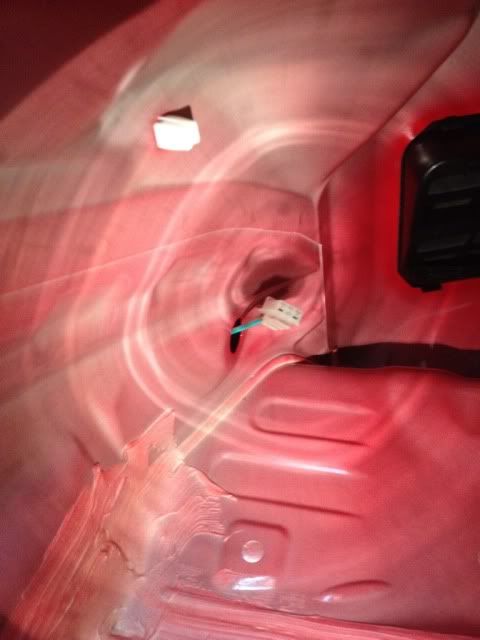
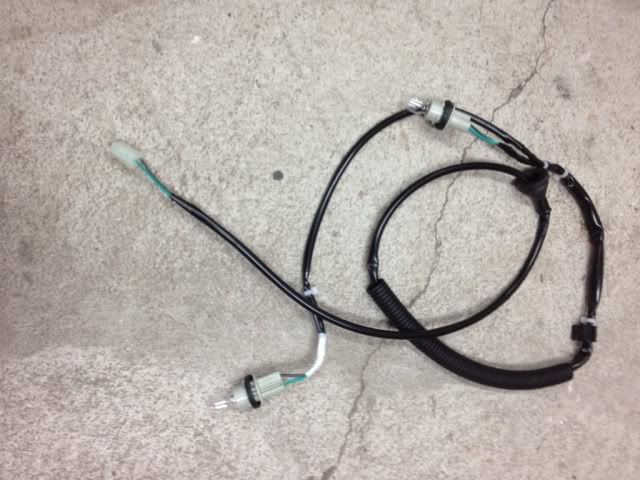
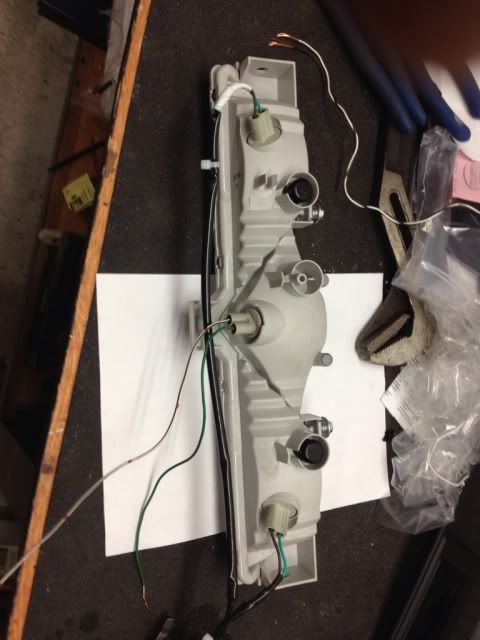
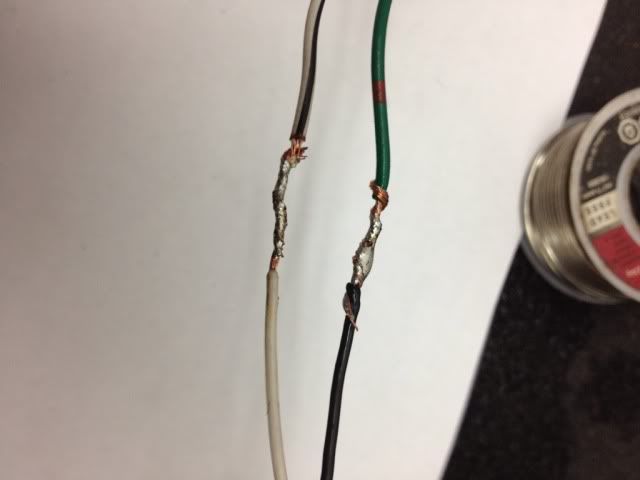
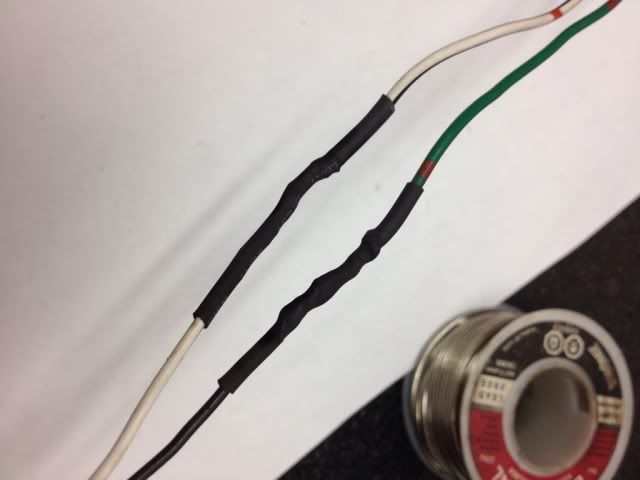
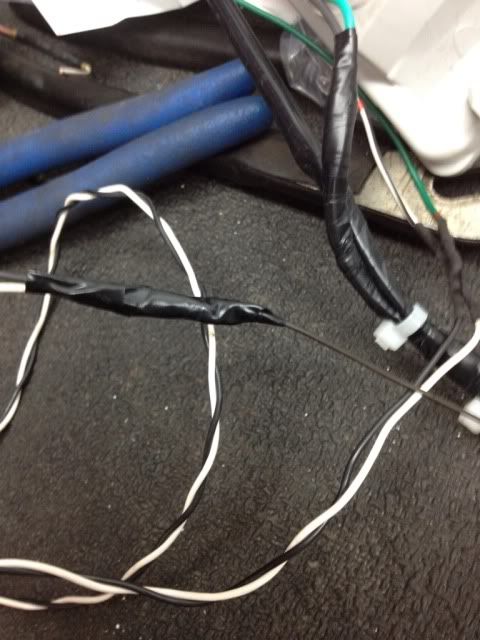
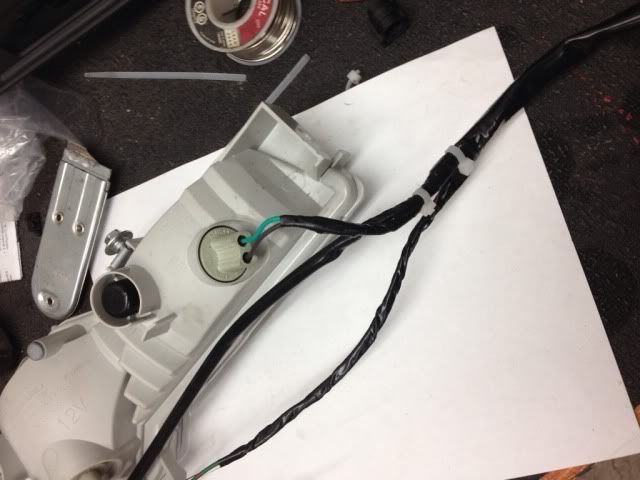
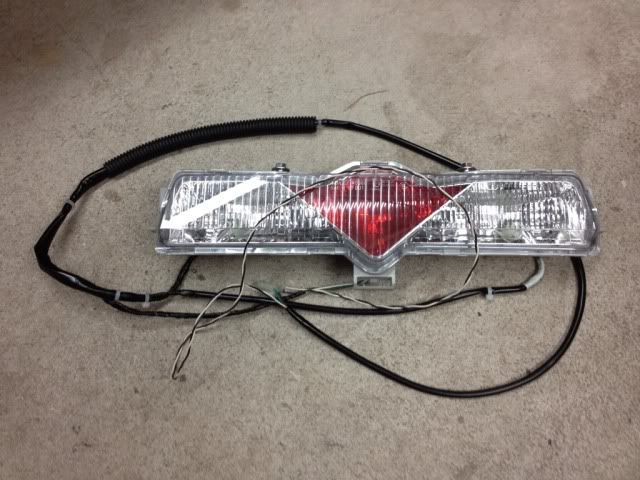
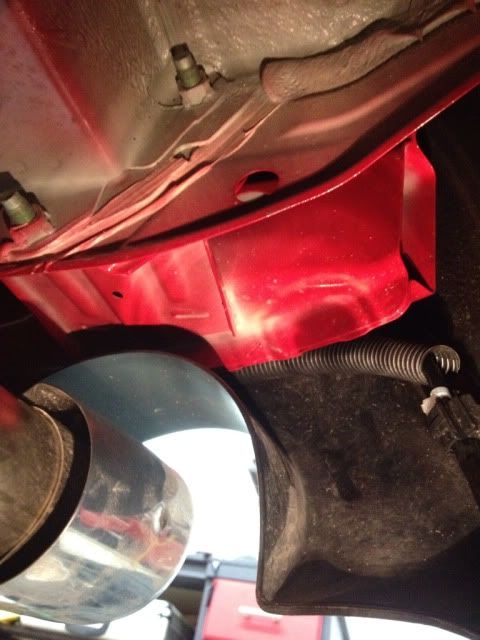
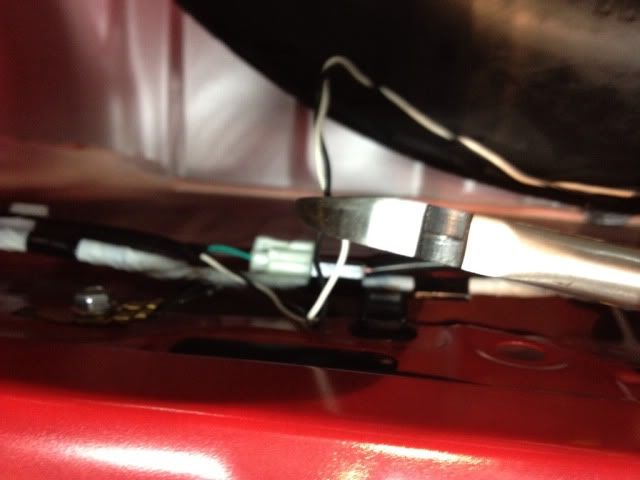
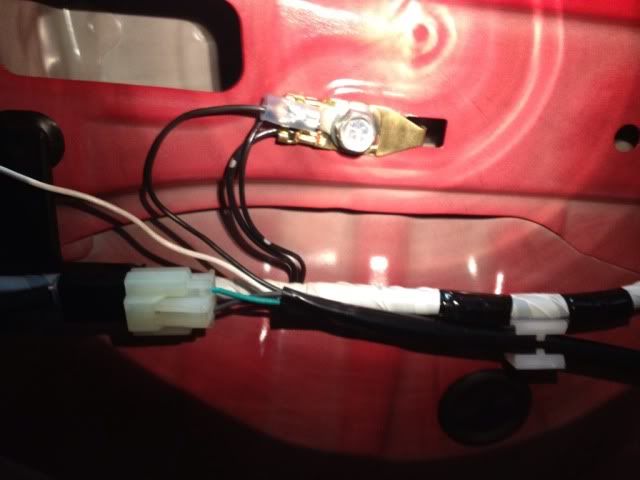
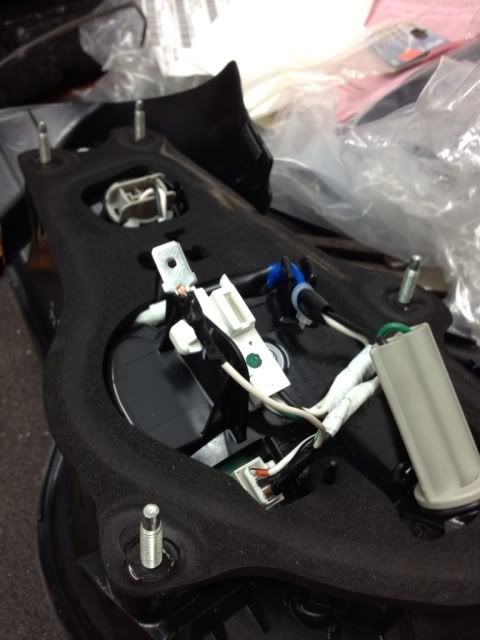
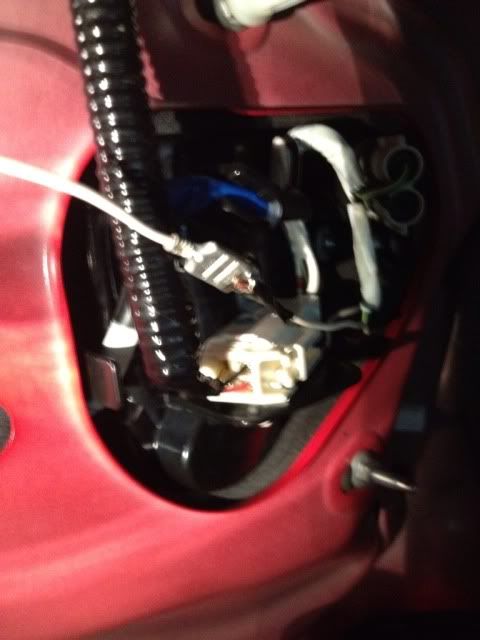
But there is a couple things to add If you want your new brake light to stay lit and get brighter when brakes ar pressed connect to the wire that it shows in the guide, but if you want to have it only light up when brakes are pressed this is how Disconnect the 4 pin plug from the left brake light, peel back the plastic protector, find the solid green wire and that's where your positive wire needs to be connected, you can strip a little section and solder the wire to it or use on of those quick crimps. Also you do not have to pull the existing harness out the way he does just run your wires and zip tie or tape your new wires to the old ones The two silver screws on top of the reflector are a bit tricky to get but just work at it, they are 3/8in screws or Phillips screwdriver I also wired up a toggle to kill the light when I feel I dont need it just buy a basic toggle and cut your power wire, put some wire connectors that fit the toggle on each piece of the cut hook it up and your good to go I've completed mine and will add a link to a video when it's darker to show y'all mine Last edited by chris's fr-s; 11-28-2012 at 12:15 PM. |
|

|

|
| The Following 6 Users Say Thank You to chris's fr-s For This Useful Post: | avusblue (11-28-2012), BabaYaga (12-02-2014), Chinadian (05-28-2013), microbionic (12-11-2012), racecaresuaceb (11-19-2012), soros151 (12-02-2012) |
|
11-19-2012, 06:26 PM
|
#2 |
|
Senior Member
Join Date: Oct 2012
Drives: Asphalt Scion Frs 6MT
Location: New York
Posts: 1,044
Thanks: 101
Thanked 564 Times in 286 Posts
Mentioned: 14 Post(s)
Tagged: 0 Thread(s)
|
Well there was a guy on here doing retrofits until the mods got overzealous and banned him.
I'll see if i can help you out
__________________
|
|
|
|
|
11-20-2012, 01:40 AM
|
#3 |
|
Member
Join Date: Nov 2012
Drives: Don't have one
Location: Union City, CA
Posts: 20
Thanks: 0
Thanked 6 Times in 4 Posts
Mentioned: 0 Post(s)
Tagged: 0 Thread(s)
|
cool beans
|
|
|
|
|
11-28-2012, 12:19 AM
|
#4 |
|
STAGE 1
Join Date: Nov 2012
Drives: GT86/2T HONDA RUCKUS/86 HONDA SPREE
Location: SoCal
Posts: 5
Thanks: 0
Thanked 0 Times in 0 Posts
Mentioned: 0 Post(s)
Tagged: 0 Thread(s)
|
Very nice!

|
|
|
|
|
11-28-2012, 09:41 AM
|
#5 | |
|
I Love custom Turbo kits
Join Date: Mar 2012
Drives: Limited BRZ
Location: Miami
Posts: 10,770
Thanks: 20,004
Thanked 8,344 Times in 4,361 Posts
Mentioned: 441 Post(s)
Tagged: 12 Thread(s)
|
Quote:

__________________
|
|
|
|
|
|
11-28-2012, 11:23 AM
|
#6 | |
|
@theexquisite86
Join Date: Nov 2012
Drives: 2013 Firestorm FR-S
Location: Beaumont, Tx
Posts: 122
Thanks: 17
Thanked 47 Times in 28 Posts
Mentioned: 2 Post(s)
Tagged: 0 Thread(s)
|
Quote:
|
|
|
|
|
| The Following User Says Thank You to chris's fr-s For This Useful Post: | Sportsguy83 (11-28-2012) |
|
11-28-2012, 11:46 AM
|
#7 |
|
Senior Member

Join Date: Aug 2012
Drives: FR-S
Location: IL
Posts: 2,857
Thanks: 519
Thanked 2,997 Times in 1,095 Posts
Mentioned: 159 Post(s)
Tagged: 1 Thread(s)
|
Good work. I'd honestly prefer turning it into a rain light for track use that flashes on it's own every .25 seconds. I assume the process would be similar?
__________________
|
|
|
|
|
11-28-2012, 12:01 PM
|
#8 | |
|
I Love custom Turbo kits
Join Date: Mar 2012
Drives: Limited BRZ
Location: Miami
Posts: 10,770
Thanks: 20,004
Thanked 8,344 Times in 4,361 Posts
Mentioned: 441 Post(s)
Tagged: 12 Thread(s)
|
Quote:
 [ame="http://www.youtube.com/watch?v=ycS5aTbF9I0"]Scion fr-s backlight #2 - YouTube[/ame]
__________________
|
|
|
|
|
|
11-28-2012, 12:09 PM
|
#9 | |
|
@theexquisite86
Join Date: Nov 2012
Drives: 2013 Firestorm FR-S
Location: Beaumont, Tx
Posts: 122
Thanks: 17
Thanked 47 Times in 28 Posts
Mentioned: 2 Post(s)
Tagged: 0 Thread(s)
|
Quote:
If you have any questions just pm me |
|
|
|
|
|
11-28-2012, 12:14 PM
|
#10 | |
|
Senior Member
Join Date: Aug 2012
Drives: FR-S
Location: IL
Posts: 2,857
Thanks: 519
Thanked 2,997 Times in 1,095 Posts
Mentioned: 159 Post(s)
Tagged: 1 Thread(s)
|
Quote:
__________________
|
|
|
|
|
|
11-29-2012, 12:16 PM
|
#11 |
|
Senior Member

Join Date: Nov 2012
Drives: BRZ Premium Black
Location: NC, USA
Posts: 122
Thanks: 33
Thanked 20 Times in 14 Posts
Mentioned: 1 Post(s)
Tagged: 0 Thread(s)
|
Wait wait wait... You're from Beaumont, TX and you have a Québec license plate? lol
You sure travelled far to get screwed on taxes and registration fees. |
|
|
|
|
11-29-2012, 04:32 PM
|
#12 | |
|
Senior Member
Join Date: Jun 2012
Drives: 2013 Scion FR-S Asphalt
Location: Toronto
Posts: 241
Thanks: 47
Thanked 44 Times in 25 Posts
Mentioned: 0 Post(s)
Tagged: 0 Thread(s)
|
Quote:
|
|
|
|
|
|
11-30-2012, 05:08 AM
|
#13 | |
|
@theexquisite86
Join Date: Nov 2012
Drives: 2013 Firestorm FR-S
Location: Beaumont, Tx
Posts: 122
Thanks: 17
Thanked 47 Times in 28 Posts
Mentioned: 2 Post(s)
Tagged: 0 Thread(s)
|
Quote:
no i found this diy and shared it, added a little bit |
|
|
|
|
|
11-30-2012, 08:07 AM
|
#14 | |
|
Senior Member
Join Date: Nov 2012
Drives: BRZ Premium Black
Location: NC, USA
Posts: 122
Thanks: 33
Thanked 20 Times in 14 Posts
Mentioned: 1 Post(s)
Tagged: 0 Thread(s)
|
Quote:
|
|
|
|
|
|
|
|
|
|
|
|
 Similar Threads
|
||||
| Thread | Thread Starter | Forum | Replies | Last Post |
| ZILLA: (How-To) *REAR FOG LIGHT WITH BRAKE LIGHT* MOD! | ZILLA | DIY (Do-It-Yourself) Guides | 117 | 09-19-2017 10:17 AM |
| Third brake light not working....what should i do before bringing it in? | Hotlava86 | Issues | Warranty | Recalls / TSB | 11 | 03-10-2016 12:12 PM |
| Red triangle on rear, fog light? | eriktherod | Scion FR-S / Toyota 86 GT86 General Forum | 50 | 12-22-2012 07:22 PM |
| rear triangle red light | ncbluefr-s | Cosmetic Modification (Interior/Exterior/Lighting) | 2 | 07-14-2012 11:46 PM |
| FR-S Rear brake light... | MF_DEUCE | FR-S & 86 Photos, Videos, Wallpapers, Gallery Forum | 70 | 05-05-2011 03:53 PM |


 The One