


 11-18-2021, 03:07 PM
|
#1275 |
|
Senior Member
Join Date: Jul 2014
Drives: 14 BSP Edelbrock BRZ
Location: Lon Gisland
Posts: 806
Thanks: 113
Thanked 450 Times in 256 Posts
Mentioned: 12 Post(s)
Tagged: 0 Thread(s)
|
As far as sealing the wastegate threads, I would use copper washers and stainless acorn nuts. It is amazing to me that you can fit an engine this tall under the hood of a brz...
|

|

|
| The Following User Says Thank You to toast For This Useful Post: | DustinS (11-25-2021) |
|
11-25-2021, 06:28 AM
|
#1276 |
|
Senior Member

Join Date: Nov 2019
Drives: 2013' Toyota 86 (EU spec)
Location: Germany
Posts: 160
Thanks: 32
Thanked 139 Times in 56 Posts
Mentioned: 4 Post(s)
Tagged: 1 Thread(s)
|
Great build man!
For your throttlle body adapter you could consider a SLS print. Im tatoally on your point that a FDM printed part, no matter which filament is used, will not work out. But SLS printed in aluminium or steel should definately work and still might be arround the ball park in matters of cost as a machined version. Advan tage is, that you still have maximum freedom of design and dont need to care about restrictions of a milling machine.
__________________
|
|
|
|
|
12-04-2021, 02:15 PM
|
#1277 |
|
Senior Member
Join Date: Apr 2014
Drives: 2013 Ultramarine FR-S
Location: Springfield, MO
Posts: 1,948
Thanks: 2,538
Thanked 1,412 Times in 804 Posts
Mentioned: 31 Post(s)
Tagged: 3 Thread(s)
|
Small updates.
Got the Cam/Crank sensor brackets finalized (sort of) and printed in the CF-Nylon. 150C continuous use according to the spec sheet. So should be plenty for this, as well as plenty stiff.   I may change it to allow a set of thread inserts melted into it for better hold on the bolts. Picked up some of the PRP coil stalks for Black Friday, then worked on getting the changes needed to my coil mounts nailed down. I think I just need to thin it up so it sits between the valve covers, as well as make it a tad bit taller. The new stalks shorten the coil enough that the brackets can sit on the head instead of standoffs. So I need to make it a tad taller (2mm-ish) to reach the coil.    Got my coolant tube AN fitting and heater core AN fittings welded on. Just need to get my HVAC case back into the car and AN bulkhead adapters fitted.   Pretty sure this is getting PC'd to match valve covers and compressor housing. Mostly to make it disappear.  Now comes the fun part. Transmission bracket. Now my transmission didn't come with either of the two bracket. Just so happens that the bracket that bolts to the transmission itself it a pain to get a hold of and I can't get a solid answer on if they are pretty much universal. So instead of spending $100 and 1-2 month waiting on it to come in from Germany, I overbuilt my own. Which is 4 times heavier and twice as ugly (and still needs final welded and powdercoated). 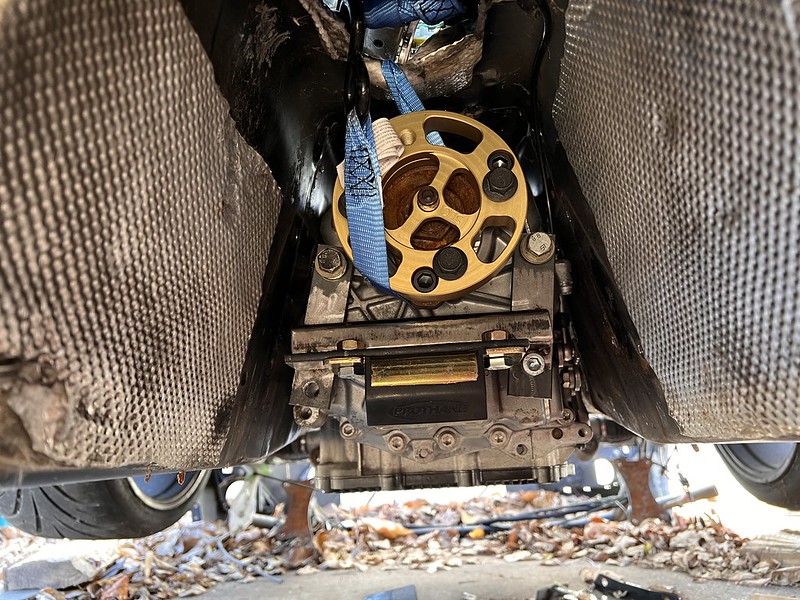 This shows how tall this transmission really is and how much I am going to have to raise the car. With the LS, any exhaust lower than the frame rail scraped pretty bad. Which the trans pan currently does. It also fills all available space for exhaust. So will have to get creative with exhaust routing.  I think really my only option is something like Omar's old 2J FRS and Justin Kelly's F swap FRS (his is 3.5" oval). I really like the idea of a side exit, other than no option for a muffler.   The body side of the bracket was originally going to be a modified Vorshlag trans mount from my T56 Magnum. That didn't work as the DCT stays the entire width of the tunnel it's whole length and ends a couple inches behind the old mount. I had planned on re-using it by moving it the needed length back, but I didn't want to have to redrill and tighten all the bolt again. Once was enough.  So I decided to weld two plates with captive nuts to the underside of the inner frame rail and use 1/8 steel bar to bend me up a brace. Ran into a slight issue bending the 1/8 bar though, so I haven't quite got that finished. I am picking up a vice mounted metal break tonight to help that along. On to pictures! Two of these were made. They have matching brackets that will get welded to the 1/8 bar that spans the tunnel.   Some holeS cut in the frame:  Very poorly welded in while on my back in the dark haha  Then painted. I need to find some kind of sealant to spray up in there to protect the top side from corrosion. I remember seeing some kind of frame spray for just that job, but I can't find it now.  This one side looks extra bad lol  Will hopefully get to work on the brace some time this week so I can get the car back on the ground and get all the wiring sorted.
__________________
 |
|
|
|
| The Following 5 Users Say Thank You to DustinS For This Useful Post: | Axis2011KR (02-03-2022), cactus (12-05-2021), flippy (09-28-2022), Irace86.2.0 (12-15-2021), kevaughan (01-31-2022) |
|
12-15-2021, 08:45 AM
|
#1278 |
|
Senior Member
Join Date: Apr 2014
Drives: 2013 Ultramarine FR-S
Location: Springfield, MO
Posts: 1,948
Thanks: 2,538
Thanked 1,412 Times in 804 Posts
Mentioned: 31 Post(s)
Tagged: 3 Thread(s)
|
Got the transmission mount pretty much finished up. Just have a small brace to weld on the lower mount, and to get everything powdercoated.
My bending could be much better, but I did with what I had access to.  I have a smaller bar stock that fits this gap perfectly. So I will just make a spacer 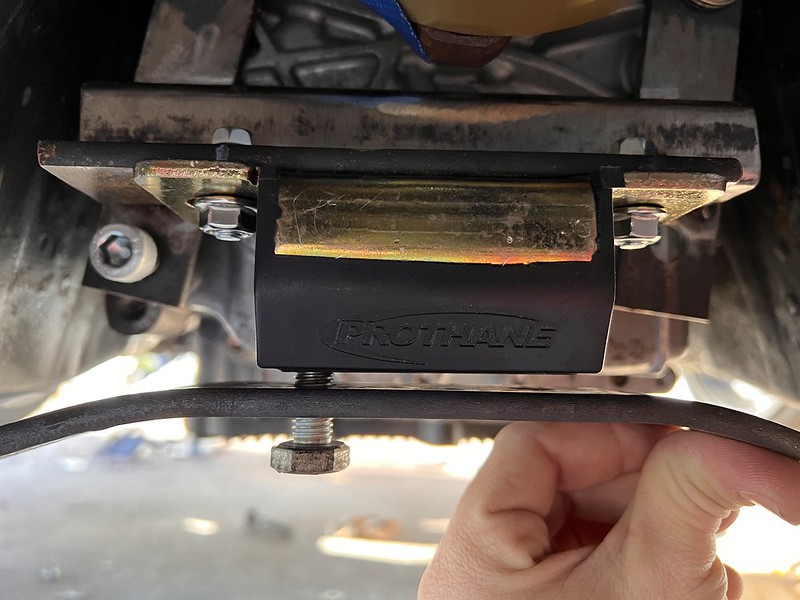 Slightly twisted and not square  Finished up. Needs the bottom bracket brace welded on, the top spacer cut to size and everything finish sanded and powder coated.   On the ground. Ready to get the engine/transmission pulled for final assembly.  
__________________
|
|
|
|
| The Following 3 Users Say Thank You to DustinS For This Useful Post: |
|
12-15-2021, 10:33 PM
|
#1279 |
|
Senior Member
Join Date: Jul 2014
Drives: 14 BSP Edelbrock BRZ
Location: Lon Gisland
Posts: 806
Thanks: 113
Thanked 450 Times in 256 Posts
Mentioned: 12 Post(s)
Tagged: 0 Thread(s)
|
That bottom piece looks like a leaf spring. I get that it is really beefy plate, but that is a lot of weight on that bow. I would take a piece of 1/4" plate and weld it vertically on there. Still lets you get to the bolts but it will make it orders of magnitude more rigid.
|
|
|
|
|
12-17-2021, 06:20 PM
|
#1280 | |
|
Senior Member
Join Date: Apr 2014
Drives: 2013 Ultramarine FR-S
Location: Springfield, MO
Posts: 1,948
Thanks: 2,538
Thanked 1,412 Times in 804 Posts
Mentioned: 31 Post(s)
Tagged: 3 Thread(s)
|
Quote:
__________________
|
|
|
|
|
| The Following User Says Thank You to DustinS For This Useful Post: | toast (12-18-2021) |
|
01-28-2022, 09:21 PM
|
#1281 |
|
Senior Member

Join Date: May 2012
Drives: 2013 Series 10 6MT FR-S
Location: Moreno Valley, CA
Posts: 5,527
Thanks: 1,999
Thanked 2,012 Times in 1,456 Posts
Mentioned: 72 Post(s)
Tagged: 0 Thread(s)
|
after all this time the car will live again. Congrats man!
__________________
2013 Series 10 FRS #553
RCE T2's, SPC LCAs -4/2.6 camber JDL 4-2-1 EL, FP and OP, Tuned by Zach@CSG on e85 RR Wilwood Front/Rear Sport BBK, Motul 600 Fluid ARC-8 17x9 SX2 GTs 245s/Koing 17x8 v730's 225's |
|
|
|
| The Following User Says Thank You to jflogerzi For This Useful Post: | DustinS (01-29-2022) |
|
01-29-2022, 02:12 PM
|
#1282 | |
|
Senior Member
Join Date: Apr 2014
Drives: 2013 Ultramarine FR-S
Location: Springfield, MO
Posts: 1,948
Thanks: 2,538
Thanked 1,412 Times in 804 Posts
Mentioned: 31 Post(s)
Tagged: 3 Thread(s)
|
Quote:
I haven't had made much progress on the car due to the cold weather holding me up. I did get the engine and trans back out of the car so I can get the finishing touches done. Need to get the transmission cooler lines ordered, or at least the fittings. I also need to get the trans mount powdercoated. We have a few warm days coming up so I should be able to get a little bit done
__________________
|
|
|
|
|
| The Following User Says Thank You to DustinS For This Useful Post: | jflogerzi (01-29-2022) |
|
01-31-2022, 11:56 AM
|
#1283 |
|
Senior Member

Join Date: Nov 2017
Drives: BMW E30, 2014 FR-S
Location: Toronto
Posts: 128
Thanks: 553
Thanked 38 Times in 30 Posts
Mentioned: 0 Post(s)
Tagged: 0 Thread(s)
|
Just dropping by to say that I'm so glad you're doing this swap.
I was literally thinking about a 2JZ + DCT project in my head the other day and here you are doing gods work. Can't wait to see it run! |
|
|
|
| The Following User Says Thank You to kevaughan For This Useful Post: | DustinS (02-02-2022) |
|
09-28-2022, 01:36 AM
|
#1284 |
|
Senior Member
Join Date: Apr 2014
Drives: 2013 Ultramarine FR-S
Location: Springfield, MO
Posts: 1,948
Thanks: 2,538
Thanked 1,412 Times in 804 Posts
Mentioned: 31 Post(s)
Tagged: 3 Thread(s)
|
Well I have seriously neglected my build threads for a bit. Lot's of updates to come. I use flickr to host my pictures and found my last round of uploads (almost 100 pictures) to have been jumbled up, so this may get a little out of order, or things may be missed. I will do my best to stay on track.
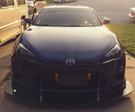
Seems I left off with the trans mount being finalized. Got it finished up and painted.  also got the lines fitted up for the trans cooler. Used some fancy Radium Banjo fittings:   In making sure I had enough clearance for the transmission and Cooler fittings, I gave myself another clearance issue. Floor board is now in the way of the throttle pedal. Going to have to hammer back enough or move my pedal over some. Hoping a little of both will work well enough. Got the heater lines finished up. Which I really hope don't leak. I did my best to test them with the water hose before getting the dash back together.:    I had a few days that I contemplated a decent way to route my heater lines, and I think I landed on an okay solution. My original idea was to use two AN "T" fittings to run coolant feed and return for the turbo, but in the end was swayed to adding an extra fitting on the metal return line that I had the -10an fitting welded to earlier. This cleaned up my hose routing quite a bit. I also used the water port on the drivers side of the block to feed the coolant. Apparently don't have a picture with the lines finished:    This shows both feed and return. I don't like the return and it needs to be simplified, but I moved on after I got a working concept. Will revisit before coolant goes in:  Return line made:  Oil Filter lines made.  You can just see the oil feed in the corner there. I have made brackets with P clamps to hold this tight since this picture was taken. 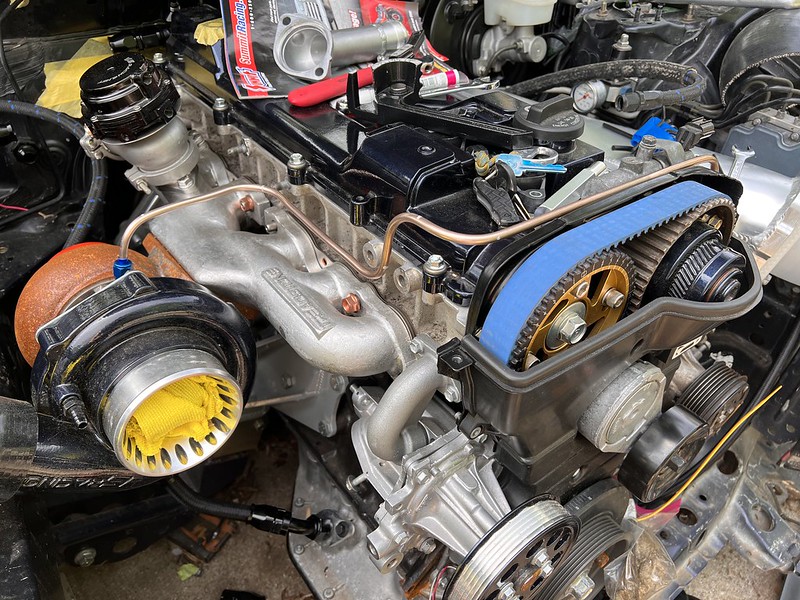 Plan was to hardline the VVTi oil feed as well, but I just could not make it look decent and fit around the coolant hose. So I bit the bullet and bought the PHR VVTi line.  Got my BOV welded on my intercooler and worked on intercooler mounting and piping routing. 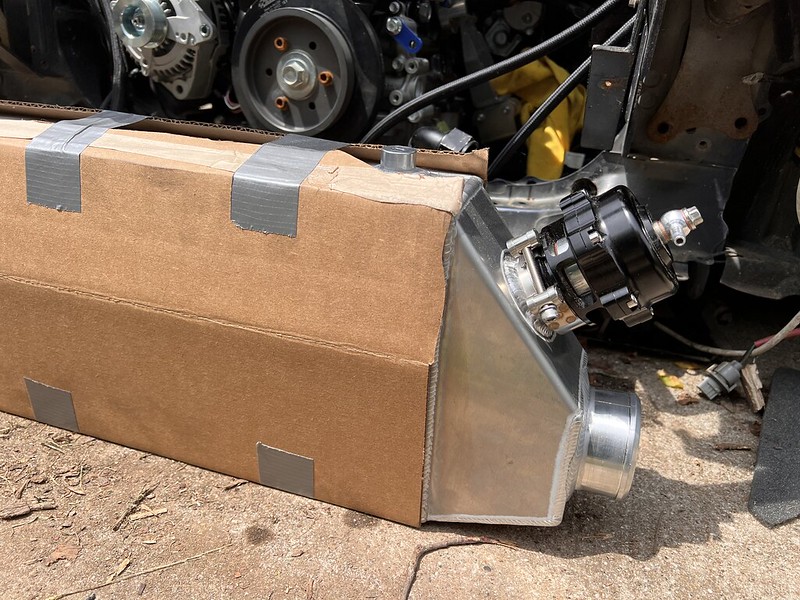 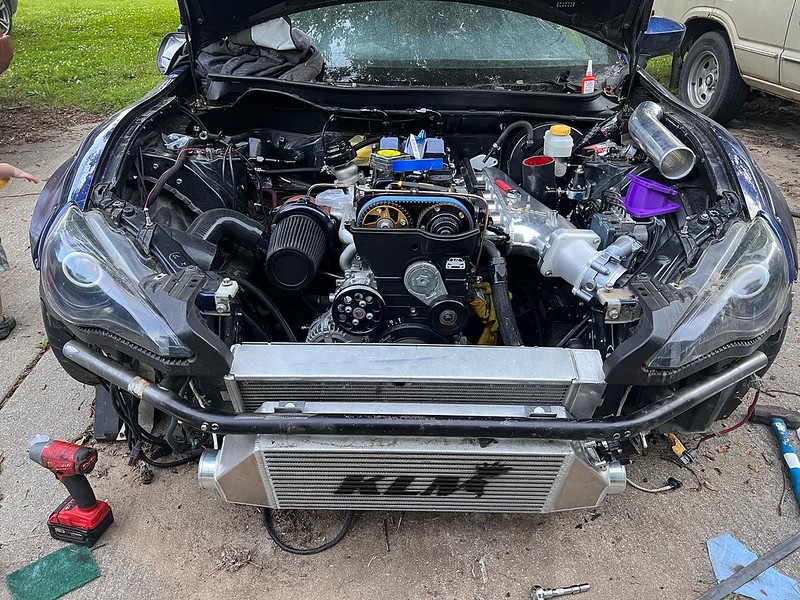   Keen eyes will notice I forgot something very important here.... The A/C Condenser... Which Is going to suck to include, and will require a complete remake of this stack at a later date. I just couldn't make it fit well with the two I have, and didn't feel like chasing a third down at the moment. 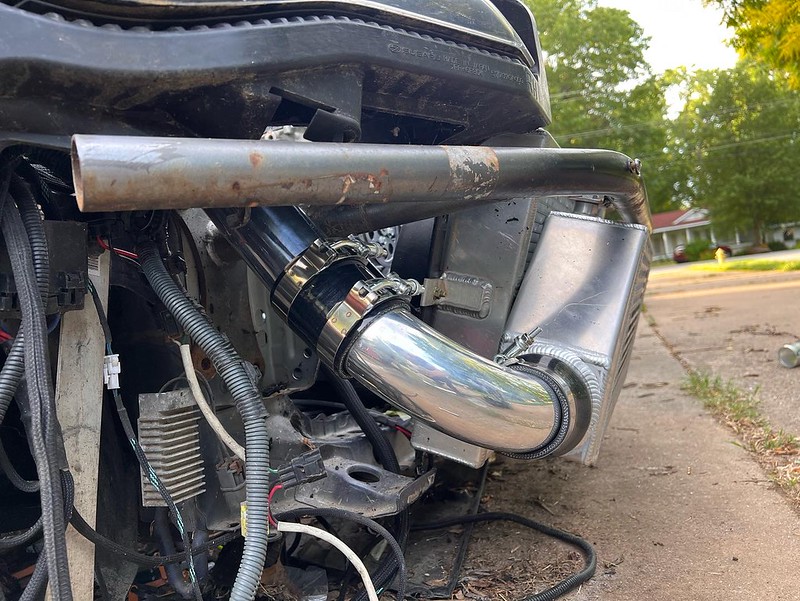 The cut in the bar has been welded back up. Did it to help clean the banjo bolt. Ended up not mattering because I suck and marked it wrong.   Printed a finalized adapter from ABS with a good O-Ring groove. I have just finished my functional prototype in CF Nylon that should last until the aluminum one is finished  At the same time I "finalized" my coil brackets. Now printed in CF Nylon as well.   Harness Preparations were being made when the nice weather rolled in. Marking all the wires and deciding what wire was going to be used for what sensor and grouping all the wires together. Making sure to document it all in my book for later. There was quite a learning curve on the harness, and I have plenty of hours in research trying to do my best:  Used rope to get a baseline for my harness  I got this done and it sat for a bit while I did other things and dreaded working on it because I didn't feel ready. Finished some other projects:     Tundra Alternator modification (Along with finding out that PHR sent me the wrong thermostat housing/extension). They were nice enough to send me the correct one though. Even though it had been over a year since I purchased it. GTE will not fit a GE, it hit either the alternator or the turbo.  ~5mm needs to be taken off the top mount for it to line up with the belt.  
__________________
|
|
|
|
|
09-28-2022, 02:00 AM
|
#1285 |
|
Senior Member
Join Date: Apr 2014
Drives: 2013 Ultramarine FR-S
Location: Springfield, MO
Posts: 1,948
Thanks: 2,538
Thanked 1,412 Times in 804 Posts
Mentioned: 31 Post(s)
Tagged: 3 Thread(s)
|
Continued Mess!!
Fuel system is a closed system and now so is the transmission. I also painted the crash beam and mounted trans oil cooler. Only problem was where to mount it... Not really anywhere else to mount it with everything else going on. So fog light delete. Looks not great, should function well:  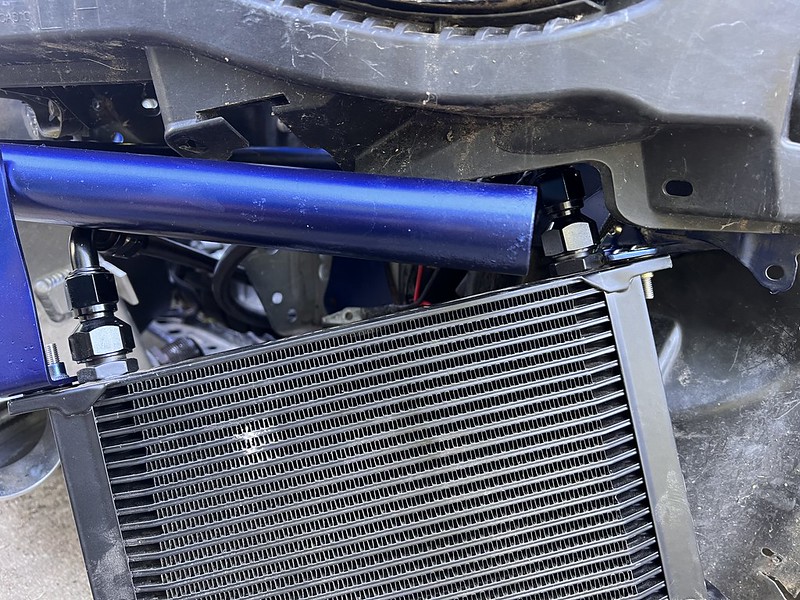  Running out of reasons to neglect my harness. I worked on it a bit. Using a large portion of the messy "craft" room.    All of the interior wires   End-ish result:  Also found the expensive "motorsport" adhesive lined heatshrink sucks (though I didn't give it much bite here, but the cheap stuff from amazon stuck better and is thicker).   Which gets me most of the way caught up. There was a lot of gloss over and missed stuff, but there is just way too much stuff for me to remember all the little stuff. Wish I staying on top of things better. Just recently got my intake manifold and intercooler piping back from getting my TMAP 1 and TMAP 2 sensors mounts welded on. This allows me to use the advanced Throttle Mass Flow features of the Emtron.   Currently Setting up the ECU with all the sensor data, and trying to get OEM canbus integration figured out (next to no info on it). Need to get the transmission filled with fluid and oil for the car. Also don't have a throttle pedal yet. Still deciding between an OEM FRS pedal or re-using the GM pedal already mounted in the car. I have this mess to clean up as well, but at least it's not in the floor board: 
__________________
|
|
|
|
| The Following 4 Users Say Thank You to DustinS For This Useful Post: |
|
10-03-2022, 11:44 AM
|
#1286 |
|
Senior Member
Join Date: Jul 2014
Drives: 14 BSP Edelbrock BRZ
Location: Lon Gisland
Posts: 806
Thanks: 113
Thanked 450 Times in 256 Posts
Mentioned: 12 Post(s)
Tagged: 0 Thread(s)
|
I appreciate the art with the wiring loom. I did a motorcycle from scratch with that flex loom and that was a ton of work. Can't imagine doing an entire car.
|
|
|
|
|
10-03-2022, 11:45 AM
|
#1287 |
|
Senior Member
Join Date: Apr 2014
Drives: 2013 Ultramarine FR-S
Location: Springfield, MO
Posts: 1,948
Thanks: 2,538
Thanked 1,412 Times in 804 Posts
Mentioned: 31 Post(s)
Tagged: 3 Thread(s)
|
Been putting a little bit of time here and there on the harness and setting up the ECU. Ran into an issue with my fuel temp and oil temp sensors faulting out and throwing a CEL. Which turned out to be an incorrect lo/high voltage setting (both set to 0v). Emtron will populate correct fault voltages for some sensors and not others, even if set up the same way. So having to double check everything (which should be done anyway).
Was able to steal a couple wires/pins from a spare harness I have to add the wires for the Paddles on the steering wheel. It seems that the factory TCU on auto cars uses a common ground for the paddles and separate positive triggers for up shift and down shift. My plan is to flip this. Run a common 12v signal and have the ECU ground them.  Next up was the throttle pedal. I really had a hard time deciding between adding a factory pedal back in or using the LS throttle pedal that was in the car. In the end, I just used the LS throttle. I had to mount it differently as it needed moved closer to the brake pedal to clear the tunnel modifications. I also took the time to space it closer to the driver a tad. Stole the connector from my old LS Harness for the time being. After getting everything in, I had no voltage to the pedal. Spent almost an hour going over everything before I found the culprit. I never tapped the wire for it in the harness. I marked all my branch points with white electrical tape and somehow missed this one. Luckily it was still accessible. In a terrible place, but accessible. Got it working and having a hard time calibrating the pedal. Wasn't able to spend any time on troubleshooting, but I think I may have figured out. Going to try on my lunch to get it working correctly.
__________________
|
|
|
|
|
10-22-2022, 03:49 PM
|
#1288 |
|
Senior Member
Join Date: Apr 2014
Drives: 2013 Ultramarine FR-S
Location: Springfield, MO
Posts: 1,948
Thanks: 2,538
Thanked 1,412 Times in 804 Posts
Mentioned: 31 Post(s)
Tagged: 3 Thread(s)
|
Been making progress slowly. Got my fuel pumps and flex fuel sensor wired up. In tank pump and pump 1 in surge tank are wired together into one relay, and second pump is wired onto a secondary relay that I can trigger whenever I need (if I need).
All the harnesses got sheathed to look proper.   The ecu wires didn't reach to the rear of the car, so I used my wire tags to mark the wires the respective color. Done on both sides of this harness.   I kept forgetting the oil level sensor hole in the oil pan. Instead of spending the money and time waiting on a blockoff, I designed one myself. This one just seals with rtv. Next one will use an o-ring:  Not much stopping me from at least trying to start it. Filled it up with some Toyota conventional 10w-30 as first start oil, and starting trying to validate timing. Had a terrible time getting the ecu to read the the cam sync sensor, which ended up being mislabeled shielded pairs. So my knock sensor was wired to my sync sensor input and and vise versa. Took a couple hours of trouble shooting to find and was quite annoying. Then I ran into a no start issue. Car would make a real small cough then crank with no signs of life. I triple checked timing, physical and in the ecu with no change. Eventually realized the ecu was calling for way too much fuel. Still trying to figure out which setting is incorrect as it should have been okay enough to start the engine if I input everything correct. Took out a ton of fuel and finally started. Hoping the misfire are fouled plug from being soaked in fuel, but it does start now. 
__________________
|
|
|
|
| The Following User Says Thank You to DustinS For This Useful Post: | villainous_frx (10-22-2022) |
|
|
|
|
 |
|
|
 Similar Threads
|
||||
| Thread | Thread Starter | Forum | Replies | Last Post |
| Pentosin Trans Fluid Swap | Motul 300 Diff Swap | Impressions | Dezoris | Mechanical Maintenance (Oil, Fluids, Break-In, Servicing) | 15 | 06-06-2017 10:54 PM |
| Ls or 2jz swap? | sgoldberg01 | BRZ First-Gen (2012+) -- General Topics | 13 | 03-22-2016 03:07 PM |
| Rod Swap | protpibe | Engine, Exhaust, Transmission | 6 | 10-21-2015 11:38 PM |
| AT-->MT swap | AlwaysSideways | Want-To-Buy Requests | 3 | 12-15-2014 11:14 AM |
| Should I swap? | michaelahess | BRZ First-Gen (2012+) -- General Topics | 8 | 06-12-2012 07:32 PM |


