follow ft86club on our blog, twitter or facebook.
FT86CLUB
Ft86Club
Speed By Design
Register Garage Community Calendar Today's Posts Search

Go Back   Toyota GR86, 86, FR-S and Subaru BRZ Forum & Owners Community - FT86CLUB > Technical Topics > DIY (Do-It-Yourself) Guides

DIY (Do-It-Yourself) Guides For all DIYs.


User Tag List

Reply
 
Thread Tools Search this Thread
Old 11-26-2012, 12:35 PM   #29
Norkoastal
Never on Time Always Late
 
Norkoastal's Avatar
 
Join Date: Jun 2012
Drives: #silenced crickets
Location: Norcal
Posts: 578
Thanks: 86
Thanked 152 Times in 101 Posts
Mentioned: 9 Post(s)
Tagged: 0 Thread(s)
Garage
Quote:
Originally Posted by nashsnazzy View Post
Is there no vapor barrier behind the door panel / card? If there is can someone tell me what sort of adhesive is used?
There is and the adhesive is butyl im guessing..
__________________
CO>CA Cartel
Norkoastal is offline   Reply With Quote
Old 11-26-2012, 02:21 PM   #30
Daless2
Member
 
Join Date: Nov 2012
Drives: FR-S
Location: GA
Posts: 11
Thanks: 0
Thanked 6 Times in 6 Posts
Mentioned: 0 Post(s)
Tagged: 0 Thread(s)
Nice write-up!

Thanks for posting it.
Daless2 is offline   Reply With Quote
Old 11-26-2012, 07:53 PM   #31
nashsnazzy
Senior Member
 
Join Date: May 2012
Drives: 2013 Scion FR-S White Out
Location: Nashville
Posts: 136
Thanks: 8
Thanked 30 Times in 25 Posts
Mentioned: 3 Post(s)
Tagged: 0 Thread(s)
Quote:
Originally Posted by Norkoastal View Post
There is and the adhesive is butyl im guessing..
Boo, is there an easy way to get that off and not get high as a kite?
nashsnazzy is offline   Reply With Quote
Old 11-26-2012, 09:15 PM   #32
-max-
Senior Member
 
Join Date: Oct 2011
Drives: Firestorm FRS
Location: Louisiana
Posts: 322
Thanks: 6
Thanked 80 Times in 42 Posts
Mentioned: 3 Post(s)
Tagged: 0 Thread(s)
There is a layer of clear plastic with the normal black goo sticking it on.
Just pull it off fast and it comes off pretty easy. Got it all off and did not use anything.
-max- is offline   Reply With Quote
The Following User Says Thank You to -max- For This Useful Post:
nashsnazzy (11-28-2012)
Old 11-26-2012, 10:02 PM   #33
Norkoastal
Never on Time Always Late
 
Norkoastal's Avatar
 
Join Date: Jun 2012
Drives: #silenced crickets
Location: Norcal
Posts: 578
Thanks: 86
Thanked 152 Times in 101 Posts
Mentioned: 9 Post(s)
Tagged: 0 Thread(s)
Garage
Quote:
Originally Posted by -max- View Post
There is a layer of clear plastic with the normal black goo sticking it on.
Just pull it off fast and it comes off pretty easy. Got it all off and did not use anything.
Yup the sticky goo pulls off better with a nice tug.. Didnt notice any noxious fumes from the goop..
__________________
CO>CA Cartel
Norkoastal is offline   Reply With Quote
Old 11-28-2012, 03:24 PM   #34
nashsnazzy
Senior Member
 
Join Date: May 2012
Drives: 2013 Scion FR-S White Out
Location: Nashville
Posts: 136
Thanks: 8
Thanked 30 Times in 25 Posts
Mentioned: 3 Post(s)
Tagged: 0 Thread(s)
Oh that is so great to hear. I'll order some CCF and get ready to do my door speaker install.
nashsnazzy is offline   Reply With Quote
Old 11-28-2012, 04:45 PM   #35
Sportsguy83
I Love custom Turbo kits
 
Sportsguy83's Avatar
 
Join Date: Mar 2012
Drives: Limited BRZ
Location: Miami
Posts: 10,770
Thanks: 20,004
Thanked 8,344 Times in 4,361 Posts
Mentioned: 441 Post(s)
Tagged: 12 Thread(s)
Garage
Quote:
Originally Posted by Guff View Post
I've always called them Door Cards. I know that Edd China calls them cards as well, so

Nice writeup!
Move to the DIY section?
Sportsguy83 is offline   Reply With Quote
Old 12-05-2012, 01:52 PM   #36
slizoth
Senior Member
 
slizoth's Avatar
 
Join Date: Oct 2011
Drives: 2013 WRB Subaru BRZ
Location: Oregon
Posts: 454
Thanks: 185
Thanked 70 Times in 45 Posts
Mentioned: 15 Post(s)
Tagged: 0 Thread(s)
Excited to use this technique to install Dynamat on the doors.
slizoth is offline   Reply With Quote
Old 01-10-2013, 04:09 PM   #37
abutterman
Senior Member
 
abutterman's Avatar
 
Join Date: Dec 2012
Drives: 2013 BRZ Limited - WRB, MT
Location: Long Island, NY
Posts: 1,177
Thanks: 58
Thanked 176 Times in 139 Posts
Mentioned: 15 Post(s)
Tagged: 0 Thread(s)
Quote:
Originally Posted by -max- View Post
Step by step removal of the door panel.

First there are 3 screws that need to be removed.

First is inside the door handle.


Second 2 are under the door pull handle.

So first you must pull off the trim piece that covers the screws. Start at the bottom.

The 2 screws are behind.

Last thing to remove is the clip in the upper forward door. Just use a flathead screwdriver to pop it out.

Now you just pull the door panel off. There are a bunch of clips inside and it takes quite a bit of force to get off.

Once you get it loose you will have to diconnect the cables that hook to the lock and door handle.


Last thing holding on are the wire plugs connected to power window and locks.
Just out of curiousity, when you pull the silver part off from the door handle and take the screws out, does the black padding come off as well?
abutterman is offline   Reply With Quote
Old 01-25-2013, 11:38 PM   #38
Pandle
Member
 
Join Date: Apr 2012
Drives: CBS BRZ
Location: Washington
Posts: 84
Thanks: 9
Thanked 16 Times in 11 Posts
Mentioned: 5 Post(s)
Tagged: 0 Thread(s)
Quote:
Originally Posted by abutterman View Post
Just out of curiousity, when you pull the silver part off from the door handle and take the screws out, does the black padding come off as well?
No. Anyway I'm having trouble getting the actual panel off. I've removed the silver trim and the 3 screws plus the plastic piece near the front of the door but I just can't get it off. Is there a certain spot I should start at? Possibly a video tutorial or a picture of what it should look like where you start pulling it off at?
Pandle is offline   Reply With Quote
Old 01-26-2013, 12:25 AM   #39
Cade01
Senior Member
 
Cade01's Avatar
 
Join Date: Jun 2012
Drives: '13 White FR-S, 09 Triumph St.3 R
Location: Eugene, OR
Posts: 812
Thanks: 30
Thanked 135 Times in 106 Posts
Mentioned: 8 Post(s)
Tagged: 0 Thread(s)
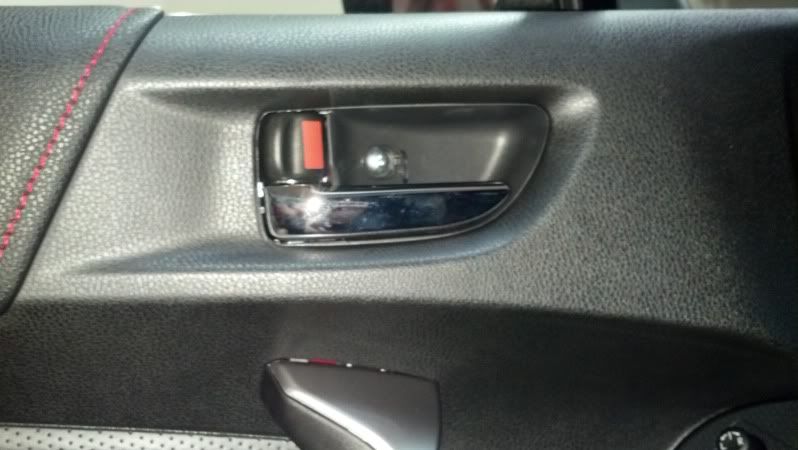
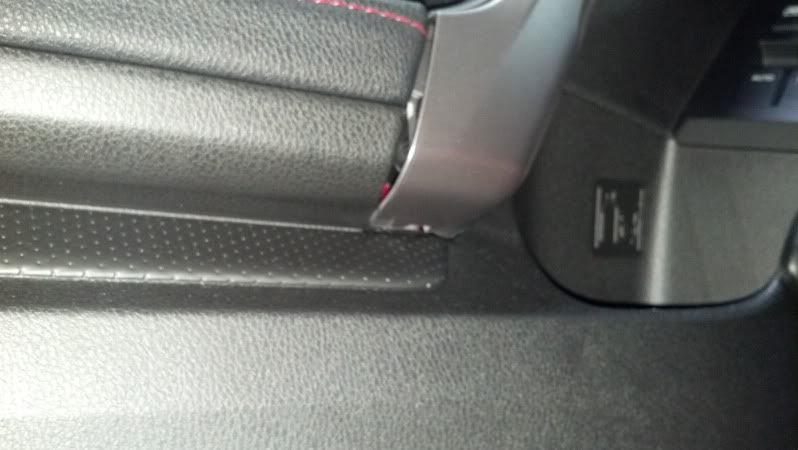
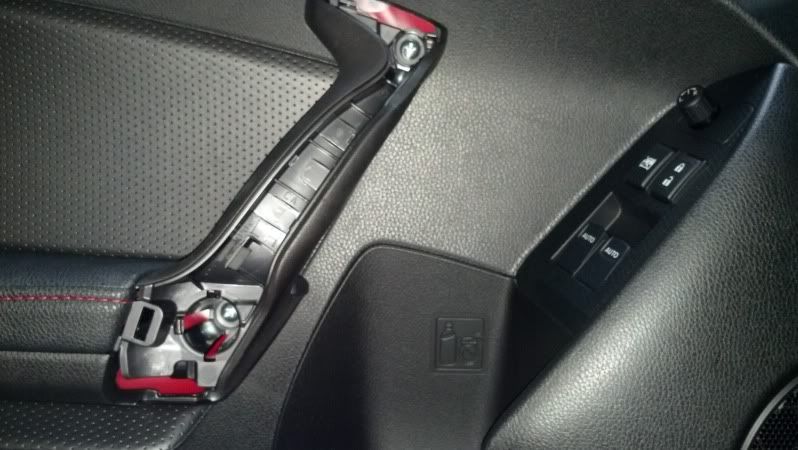
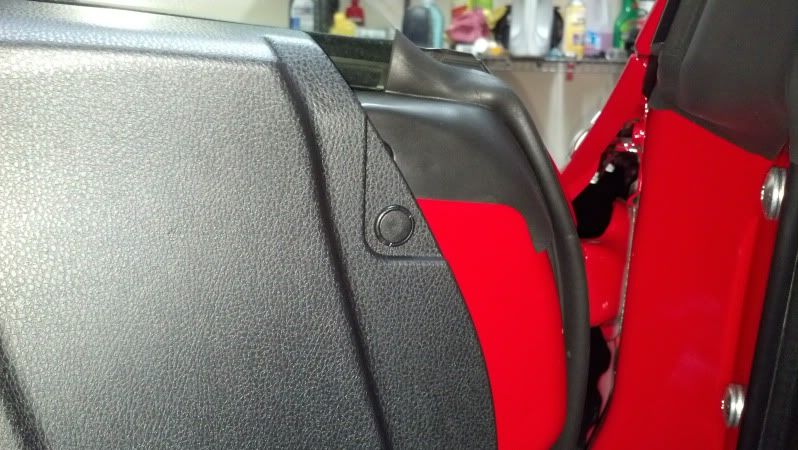
Anyone have a picture of the whole door right after panel removal? I would like to see how much plastic is on there. Is everyone putting the plastic back on the door when finished, if so how?
Cade01 is offline   Reply With Quote
Old 01-26-2013, 06:01 AM   #40
-max-
Senior Member
 
Join Date: Oct 2011
Drives: Firestorm FRS
Location: Louisiana
Posts: 322
Thanks: 6
Thanked 80 Times in 42 Posts
Mentioned: 3 Post(s)
Tagged: 0 Thread(s)
Quote:
Originally Posted by Pandle View Post
No. Anyway I'm having trouble getting the actual panel off. I've removed the silver trim and the 3 screws plus the plastic piece near the front of the door but I just can't get it off. Is there a certain spot I should start at? Possibly a video tutorial or a picture of what it should look like where you start pulling it off at?
Where every you can get a grip. Just give it a sharp pull. If that doesnt work, pull harder. Repeat.
-max- is offline   Reply With Quote
Old 01-26-2013, 10:25 AM   #41
Fever
Member
 
Join Date: Jan 2013
Drives: '13FR-S Ultramarine 6MT
Location: Ontario Canada
Posts: 78
Thanks: 67
Thanked 23 Times in 15 Posts
Mentioned: 1 Post(s)
Tagged: 1 Thread(s)
Quote:
Originally Posted by Pandle View Post
No. Anyway I'm having trouble getting the actual panel off. I've removed the silver trim and the 3 screws plus the plastic piece near the front of the door but I just can't get it off. Is there a certain spot I should start at? Possibly a video tutorial or a picture of what it should look like where you start pulling it off at?
Here's a cheap tool that will help pop the plastic plugs out.


Or the link to it because I don't think the image insert worked for me.
http://http://imgur.com/wm4v93C

Edit: The link may not work either, it's a panel pry tool, can be found at any automotive shop.
Fever is offline   Reply With Quote
Old 02-05-2013, 01:33 AM   #42
Minovsky
Senior Member
 
Minovsky's Avatar
 
Join Date: May 2012
Drives: Fr-s 2013 white out
Location: canada
Posts: 843
Thanks: 559
Thanked 111 Times in 96 Posts
Mentioned: 4 Post(s)
Tagged: 0 Thread(s)
Quote:
Originally Posted by -max- View Post
Step by step removal of the door panel.

First there are 3 screws that need to be removed.

First is inside the door handle.


Second 2 are under the door pull handle.

So first you must pull off the trim piece that covers the screws. Start at the bottom.

The 2 screws are behind.

Last thing to remove is the clip in the upper forward door. Just use a flathead screwdriver to pop it out.

Now you just pull the door panel off. There are a bunch of clips inside and it takes quite a bit of force to get off.

Once you get it loose you will have to diconnect the cables that hook to the lock and door handle.


Last thing holding on are the wire plugs connected to power window and locks.
How do you take of that silver trim piece on the handle???
Minovsky is offline   Reply With Quote
 
Reply


Posting Rules
You may not post new threads
You may not post replies
You may not post attachments
You may not edit your posts

BB code is On
Smilies are On
[IMG] code is On
HTML code is Off

Forum Jump

Similar Threads
Thread Thread Starter Forum Replies Last Post
Pillar Removal? kmbkk Electronics | Audio | NAV | Infotainment 2 07-12-2015 11:55 AM
Dent Removal 7thgear Cosmetic Maintenance (Wash, Wax, Detailing, Body Repairs) 8 10-23-2012 06:38 PM
Scion boost card? Mo707 Scion FR-S / Toyota 86 GT86 General Forum 30 08-01-2012 09:20 AM
Buying a car on credit card? SteelReign Other Vehicles & General Automotive Discussions 8 06-25-2012 12:54 AM
FR-S Badge Removal skoodge Cosmetic Modification (Interior/Exterior/Lighting) 0 05-31-2012 12:46 AM


All times are GMT -4. The time now is 01:34 PM.


Powered by vBulletin® Version 3.8.11
Copyright ©2000 - 2024, vBulletin Solutions Inc.
User Alert System provided by Advanced User Tagging v3.3.0 (Lite) - vBulletin Mods & Addons Copyright © 2024 DragonByte Technologies Ltd.

Garage vBulletin Plugins by Drive Thru Online, Inc.