


 09-16-2013, 09:37 AM
|
#57 | |
|
Banned
Join Date: Jul 2013
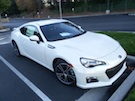
Drives: Subaru BRZ Sport Tech Satin White
Location: Calgary, Alberta,Canada
Posts: 1,228
Thanks: 147
Thanked 320 Times in 225 Posts
Mentioned: 10 Post(s)
Tagged: 0 Thread(s)
|
Quote:
|
|

|

|
|
09-16-2013, 10:58 AM
|
#58 |
|
Senior Member
Join Date: Aug 2013
Drives: tezla
Location: NYC
Posts: 906
Thanks: 72
Thanked 161 Times in 119 Posts
Mentioned: 4 Post(s)
Tagged: 1 Thread(s)
|
bought 3M tape and didnt like it
removed the back tires and added the last screw, seems 10x more stable now. for everyone doing this in the future, remove ur back tires |
|
|
|
|
09-29-2013, 12:11 PM
|
#59 |
|
Senior Member
Join Date: Aug 2013
Drives: 2007 Impreza, 2013 BRZ
Location: Vernon, CT
Posts: 314
Thanks: 240
Thanked 119 Times in 78 Posts
Mentioned: 2 Post(s)
Tagged: 0 Thread(s)
|
FYI, break wheel lugs loose before lifting car completely.
|
|
|
|
|
09-29-2013, 12:26 PM
|
#60 |
|
Senior Member

Join Date: Jul 2013
Drives: Subaru BRZ
Location: usa
Posts: 760
Thanks: 164
Thanked 319 Times in 210 Posts
Mentioned: 17 Post(s)
Tagged: 2 Thread(s)
|
Btw, you can drill the back holes without removing the wheels. (same goes for installing the rear diffuser without removing the bumper).
By removing 5 push clips (3 in the wheel well, 2 under the bumper, and 2 from behind the wheel-well, under the car), the plastic piece you will be drilling into can be removed. Hard to explain without pictures, I can snag a few when I'm out today. I got my rear diffuser and OEM mud flap/guard things installed within 45 minutes without removing any wheels or bumpers. Last edited by SpectreRT; 09-29-2013 at 08:39 PM. |
|
|
|
|
09-29-2013, 07:59 PM
|
#61 | |
|
Senior Member
Join Date: Aug 2013
Drives: tezla
Location: NYC
Posts: 906
Thanks: 72
Thanked 161 Times in 119 Posts
Mentioned: 4 Post(s)
Tagged: 1 Thread(s)
|
Quote:
|
|
|
|
|
|
09-29-2013, 08:39 PM
|
#62 |
|
Senior Member
Join Date: Jul 2013
Drives: Subaru BRZ
Location: usa
Posts: 760
Thanks: 164
Thanked 319 Times in 210 Posts
Mentioned: 17 Post(s)
Tagged: 2 Thread(s)
|
 sorry. sorry. I snagged a picture or two, but they came out blurry. I'll try again tomorrow. |
|
|
|
|
10-03-2013, 05:14 PM
|
#64 | ||
|
Member
Join Date: Jul 2013
Drives: '14 SWP BRZ
Location: San Jose, CA
Posts: 34
Thanks: 25
Thanked 14 Times in 10 Posts
Mentioned: 0 Post(s)
Tagged: 0 Thread(s)
|
Quote:
Quote:
|
||
|
|
|
|
10-03-2013, 05:26 PM
|
#65 |
|
Senior Member
Join Date: Jul 2013
Drives: Subaru BRZ
Location: usa
Posts: 760
Thanks: 164
Thanked 319 Times in 210 Posts
Mentioned: 17 Post(s)
Tagged: 2 Thread(s)
|
Sorry for the delay, been tied up with work and getting home when its dark. I'll try to get out there in a little bit before the sun goes down.
Pictures came out blurry. There are 2 that are at a very funny angle. Here are the easy ones (circled in red).   There are 2 more really easy ones at the bottom of the rear bumper, just behind the wheel well. Just pop them off. When you do that, the little plastic box (has a little fin on it) will feel loose. This is the box you will be drilling into for the rear mud flap. The other 2 push-screw things are at a funny angle that I cannot get a picture of at this time (too dark). I'll update tomorrow with pictures of it. Last edited by SpectreRT; 10-03-2013 at 07:26 PM. |
|
|
|
|
10-20-2013, 01:35 PM
|
#66 |
|
Senior Member
Join Date: Jul 2013
Drives: Subaru BRZ
Location: usa
Posts: 760
Thanks: 164
Thanked 319 Times in 210 Posts
Mentioned: 17 Post(s)
Tagged: 2 Thread(s)
|
*Note I am not responsible for any damage someone does to their automobile or themselves following these steps. It is assumed that you're an intelligent and awesome person, and will read through this before starting your work. I think you'll be pleased with the result. It took me longer to get these pictures and type these paragraphs than it did to actually get the mud flaps installed.
I finally got around to taking more pictures. It was a great day, and I had spare time. These pictures apply to the rear only. The front tires do not need to be removed at all, just turn the wheel and drill. Step 1: Hold the mud flap up to the area where it will be installed. Use a marker or something and mark inside the hole where you need to drill. This will mark perfectly the plastic panel you will be drilling into. Set the mud guard aside. Step 2: Remove a series of 6 Push-Tab thingies. I've got a series of pictures below showing their locations. Two of them are tricky. I'll try to provide more detail on them. Push-Tab #1 This is simple and easy to get to.  Push-Tab #2 Also easy to get to.  Push-Tab #3-4 Super easy, these are on the bottom of the bumper. Note my picture is already with the mud flap installed, yours will not have the screw.  Push- Tab #5-6 Here is where it gets interesting. This picture below shows the actual plastic "box" you're drilling into. This is what we are removing so you can drill without removing the wheel. There are 2 tabs up inside this area, so it'll take you a moment to position your arm/wrist the right way to get in there.  Once you do, you'll find 2 push tabs facing the opposite direction. Just push against the little post and it'll drop down.  The box you're drilling into will fall right out. Drill and replace! Getting push tab # 5-6 can be a real pain. I only put back #5 as I could not get my wrist to bend enough to get #6 back in. Later, I ended up using 3M tape just to ensure nothing ever moves. And there you have it, how to get the mud flaps on without removing the rear wheels. *Note that while this flap is removed, you have access to the bottom of the entire rear bumper area. That means... you can see the area where you need to drill to fully install the rear diffuser. Should you purchase this... you can (if you have a small drill) get right to business and knock it out. If not, this plastic bumper is really soft compound. I just got a drill-bit and attached it to my ratchet and it did the job in about 10 seconds. Hope this helps. |
|
|
|
| The Following 2 Users Say Thank You to SpectreRT For This Useful Post: | davesbrz (10-20-2013), JonnyRocket (10-20-2013) |
|
10-23-2013, 10:21 AM
|
#67 |
|
Member
Join Date: Sep 2013
Drives: 13 BRZ
Location: Canada
Posts: 27
Thanks: 3
Thanked 1 Time in 1 Post
Mentioned: 1 Post(s)
Tagged: 0 Thread(s)
|
Just installed the OEM mud guards on my BRZ last night. Fronts were done without taking the wheels off. I just used the drill bit and made the hole by hand (plastic behind is extremely soft). The rears required taking the wheels off since I couldn't get in the drill bit deep enough.
|
|
|
|
|
11-28-2013, 05:56 PM
|
#68 |
|
USMC
Join Date: Aug 2013
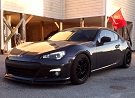
Drives: DGM BRZ LMT
Location: NC
Posts: 106
Thanks: 12
Thanked 29 Times in 20 Posts
Mentioned: 0 Post(s)
Tagged: 0 Thread(s)
|
I installed mine two weekends ago and just didn't drill anything. After driving at 75+ and plenty of rain and mud, they still seem to be very secure. Gonna hold off on drilling for now
__________________
 |
|
|
|
|
11-28-2013, 10:14 PM
|
#69 | |
|
Banned
Join Date: Jul 2013
Drives: Subaru BRZ Sport Tech Satin White
Location: Calgary, Alberta,Canada
Posts: 1,228
Thanks: 147
Thanked 320 Times in 225 Posts
Mentioned: 10 Post(s)
Tagged: 0 Thread(s)
|
Quote:
Note the aero slots in the rear flaps. For normal US speeds likely the extra fasteners are overkill. |
|
|
|
|
|
11-29-2013, 08:52 AM
|
#70 | |
|
USMC
Join Date: Aug 2013
Drives: DGM BRZ LMT
Location: NC
Posts: 106
Thanks: 12
Thanked 29 Times in 20 Posts
Mentioned: 0 Post(s)
Tagged: 0 Thread(s)
|
Quote:

__________________
|
|
|
|
|
|
|
|
|
 |
| Tags |
| flaps, guard, mud, mudflaps, rally armor |
|
|
 Similar Threads
|
||||
| Thread | Thread Starter | Forum | Replies | Last Post |
| Stock Nav swap from BRZ to FR-S & Five Axis trunk spoiler install on BRZ trunk? | 07stealth350z | DIY (Do-It-Yourself) Guides | 8 | 08-27-2020 03:27 PM |
| Mud Guard Question | geb2391 | BRZ First-Gen (2012+) -- General Topics | 36 | 03-01-2013 06:37 PM |
| Opti guard in or near oklahoma? | Flako | Cosmetic Maintenance (Wash, Wax, Detailing, Body Repairs) | 4 | 10-22-2012 07:00 PM |
| Opti Guard | ExWhyZer0 | Cosmetic Maintenance (Wash, Wax, Detailing, Body Repairs) | 2 | 10-10-2012 03:22 PM |
| '13 BRZ | Opti-Guard fun! | michakaveli | Cosmetic Maintenance (Wash, Wax, Detailing, Body Repairs) | 1 | 09-02-2012 05:50 PM |


