


 03-12-2018, 02:07 PM
|
#659 |
|
Senior Member

Join Date: Apr 2014
Drives: 2013 Ultramarine FR-S
Location: Springfield, MO
Posts: 1,948
Thanks: 2,539
Thanked 1,415 Times in 804 Posts
Mentioned: 31 Post(s)
Tagged: 3 Thread(s)
|
I looked at using expanding foam (although it was the stuff in the can) and was steered away from it by multiple people who have done composites work. They recommended the floral foam as it didn't need as much finishing work and is cheaper.
__________________
 |

|

|
|
03-19-2018, 04:18 PM
|
#660 |
|
Senior Member
Join Date: Apr 2014
Drives: 2013 Ultramarine FR-S
Location: Springfield, MO
Posts: 1,948
Thanks: 2,539
Thanked 1,415 Times in 804 Posts
Mentioned: 31 Post(s)
Tagged: 3 Thread(s)
|
That's a close one.
 
__________________
|
|
|
|
|
03-20-2018, 12:33 PM
|
#661 |
|
Senior Member
Join Date: Apr 2014
Drives: 2013 Ultramarine FR-S
Location: Springfield, MO
Posts: 1,948
Thanks: 2,539
Thanked 1,415 Times in 804 Posts
Mentioned: 31 Post(s)
Tagged: 3 Thread(s)
|
Cold/Rainy Weather sucks. Got a few of the wires extended until I couldn't handle the cold and rain.

__________________
|
|
|
|
|
03-22-2018, 10:47 AM
|
#662 |
|
Senior Member
Join Date: Apr 2014
Drives: 2013 Ultramarine FR-S
Location: Springfield, MO
Posts: 1,948
Thanks: 2,539
Thanked 1,415 Times in 804 Posts
Mentioned: 31 Post(s)
Tagged: 3 Thread(s)
|
More wiring work. I stole the Negative Terminal off my battery and used it to place a terminal in the engine bay. Allows me to keep the battery monitor plug thing on the negative terminal. Not exactly sure if I could delete it, so I would rather keep it.
Pictures are pretty bad as it was cold and dark out as I was finishing up. Plan is to just bolt the negative terminal on, possibly do the same with the positive terminal with an electrical cut off switch/fuse.   Engine bay positive terminal Finished up. Just need to mount it.   Got the extension harness finished, wrapped, and routed. Need to figure out that Small harness for the fog lights.  Wheel Speed sensor wires exit into frame:  Ignore red wire, but the speed sensor wiring pops out right where it needs to.  Then harness continues behind the headlights. Still needs attached, will do that once I am 100% sure everything works as it should.  Used the nice fabric OEM-esque tape on some of the wiring. I really like the look.  The engine bay is filthy and needs a good deep clean, Hope to do that before engine gets back from Texas Speed. Next is the custom make some wheel covers so the tires quite throwing stuff into the engine bay.
__________________
|
|
|
|
|
03-26-2018, 02:30 PM
|
#663 |
|
Senior Member
Join Date: Apr 2014
Drives: 2013 Ultramarine FR-S
Location: Springfield, MO
Posts: 1,948
Thanks: 2,539
Thanked 1,415 Times in 804 Posts
Mentioned: 31 Post(s)
Tagged: 3 Thread(s)
|
After Fighting flickr uploader all morning, I have some updates to post.
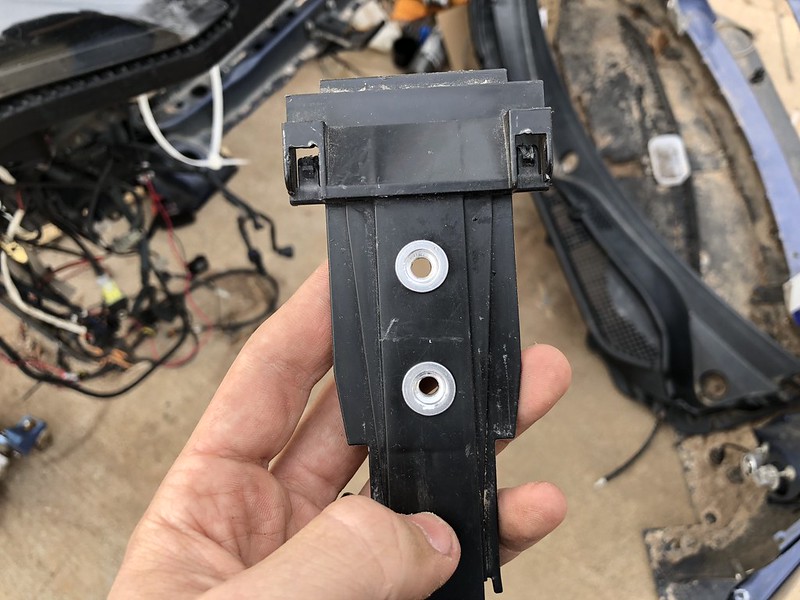
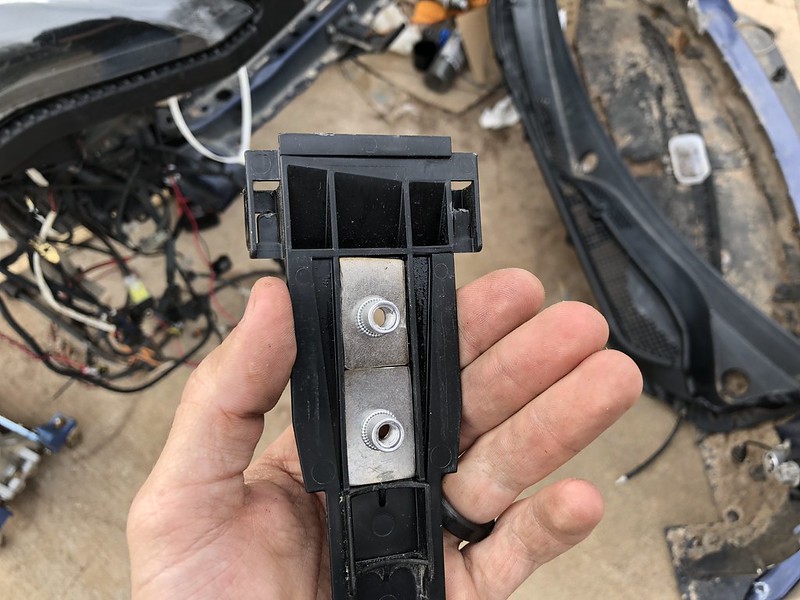
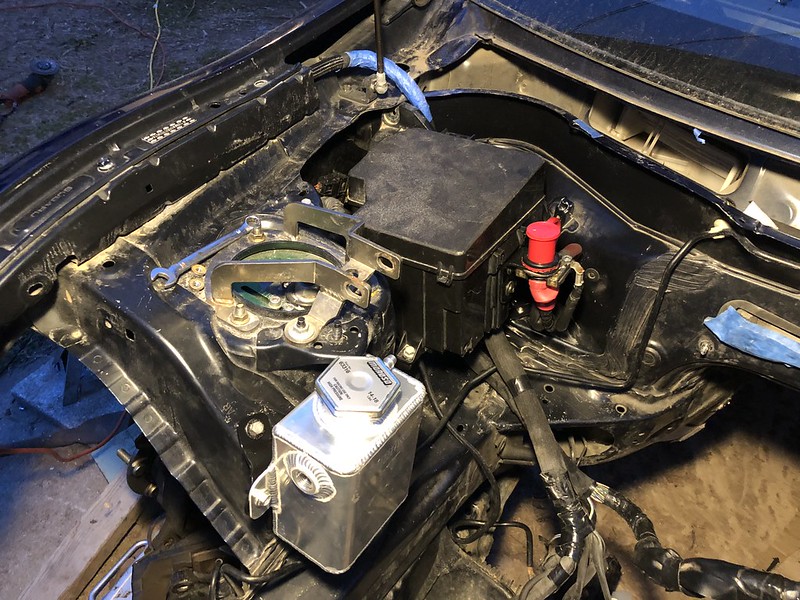
Got the speed sensor wire finished:  Mounting. Needs Painted Black  Currently trying to figure out a way to make this look a little cleaner, though it won't really be seen...  Got the manifold flanges cut off and ready for the engine to be returned and installed.  Radiator Mounting finished up, and factory fan shroud mounts removed.       I also started on a side project. Wanted to clean up the area around the fuse box...        Trying to decide where to go from there. I have a few people telling me to smooth it out and make a mold for it, then make it out of carbon. I am contemplating just making it smooth and painting it satin black. 
__________________
|
|
|
|
|
04-11-2018, 09:49 AM
|
#664 |
|
Senior Member
Join Date: Apr 2014
Drives: 2013 Ultramarine FR-S
Location: Springfield, MO
Posts: 1,948
Thanks: 2,539
Thanked 1,415 Times in 804 Posts
Mentioned: 31 Post(s)
Tagged: 3 Thread(s)
|
Engine is still waiting to be shipped...
Got the Expansion tank mounted. I wish the ports were on opposite sides, but I will make them work. I can/will move it up later if need be.  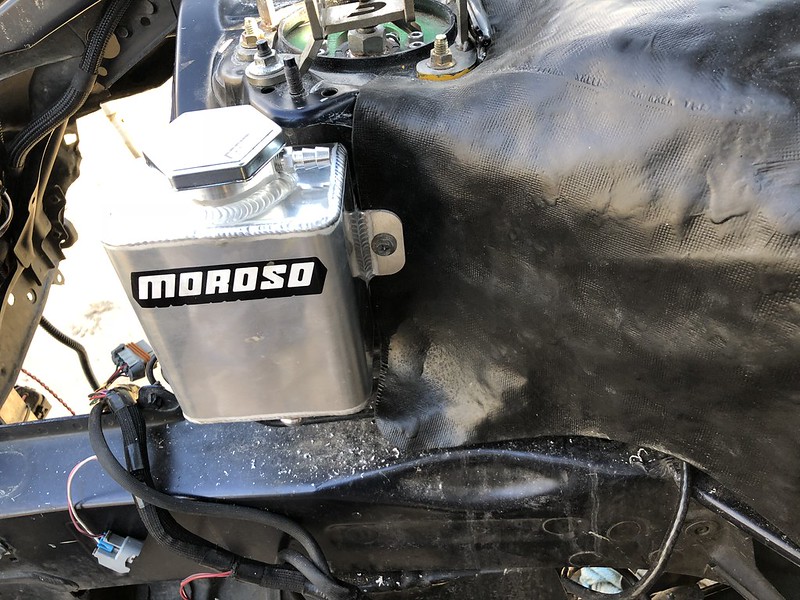 Custom Bracket. Could be a bit cleaner, but oh well. Most likely paint it black. 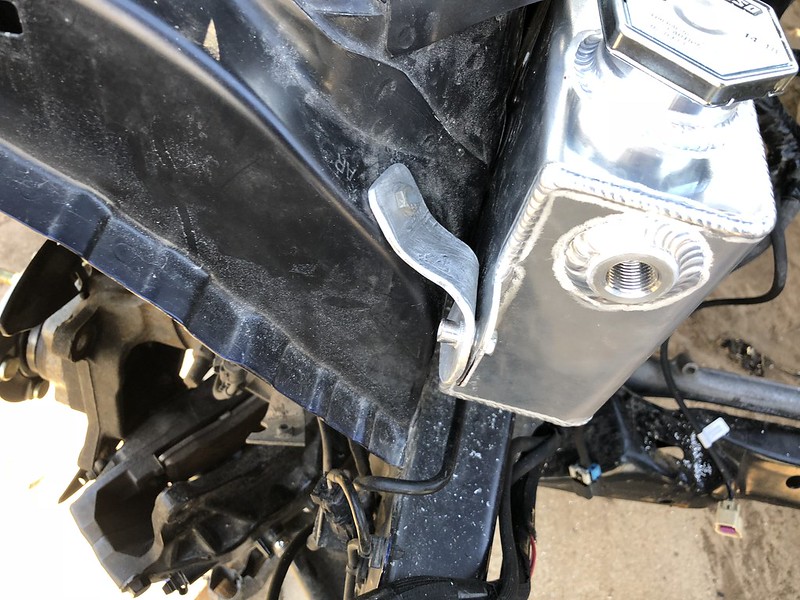 This will most likely be changed to a -12an fitting. I will run AN lines for the heater lines to make it look nice. 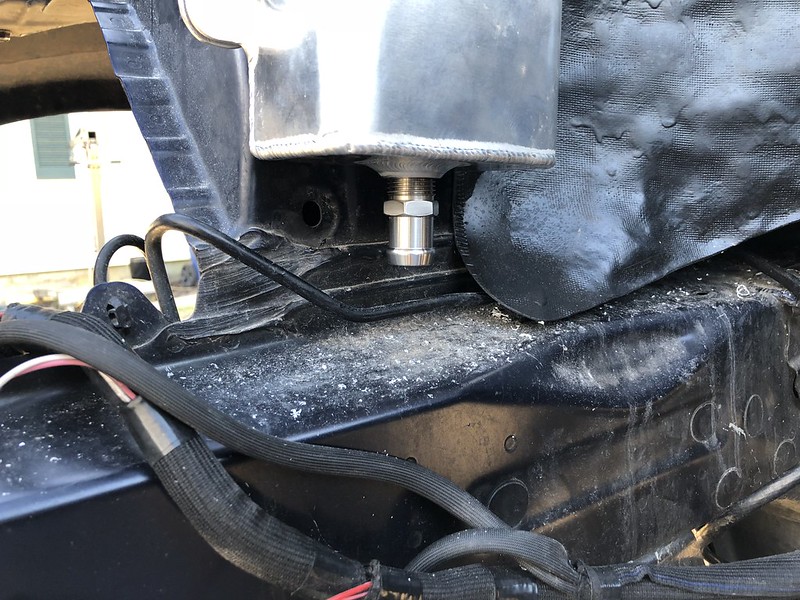 Contemplating removing the cross brace bracket as they don't fit with the LS anyway. I'll make a new bracket when I design new cross braces. 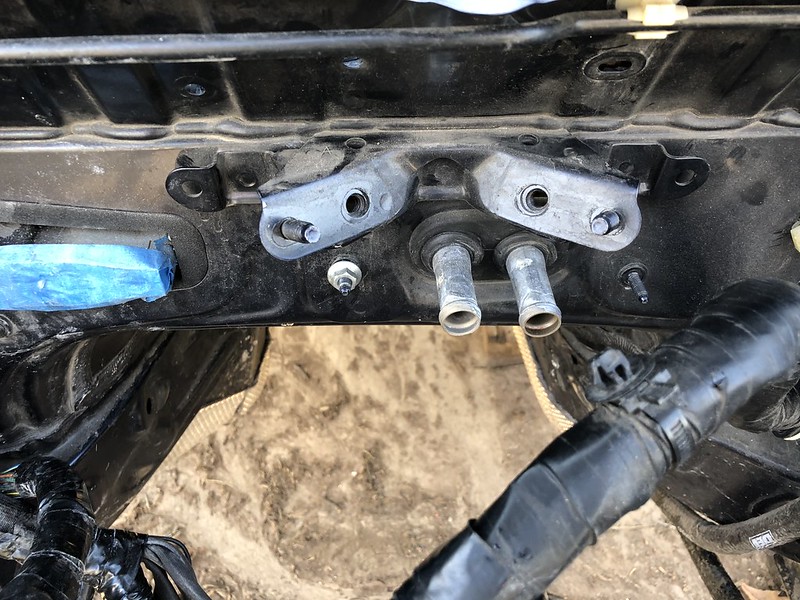
__________________
|
|
|
|
|
04-12-2018, 11:11 AM
|
#665 |
|
Senior Member
Join Date: Apr 2014
Drives: 2013 Ultramarine FR-S
Location: Springfield, MO
Posts: 1,948
Thanks: 2,539
Thanked 1,415 Times in 804 Posts
Mentioned: 31 Post(s)
Tagged: 3 Thread(s)
|
Got the positive terminal installed and brackets painted. Finished up for now.
__________________
|
|
|
|
|
04-12-2018, 03:25 PM
|
#666 |
|
Senior Member
Join Date: Apr 2014
Drives: 2013 Ultramarine FR-S
Location: Springfield, MO
Posts: 1,948
Thanks: 2,539
Thanked 1,415 Times in 804 Posts
Mentioned: 31 Post(s)
Tagged: 3 Thread(s)
|

__________________
|
|
|
|
| The Following User Says Thank You to DustinS For This Useful Post: | zeal86 (04-12-2018) |
|
04-13-2018, 12:31 PM
|
#667 |
|
Senior Member
Join Date: Apr 2014
Drives: 2013 Ultramarine FR-S
Location: Springfield, MO
Posts: 1,948
Thanks: 2,539
Thanked 1,415 Times in 804 Posts
Mentioned: 31 Post(s)
Tagged: 3 Thread(s)
|
Well I got a tiny bit of work done yesterday. I popped open the fuel tank to see if I could figure out my fueling issue. Runs out of fuel around 1/4 tank. I couldn't find anything. Thought the tank was SUPER full. Seems my car always breaks/gets taken off the road right after filling the tank.
 Ground Strap finished up 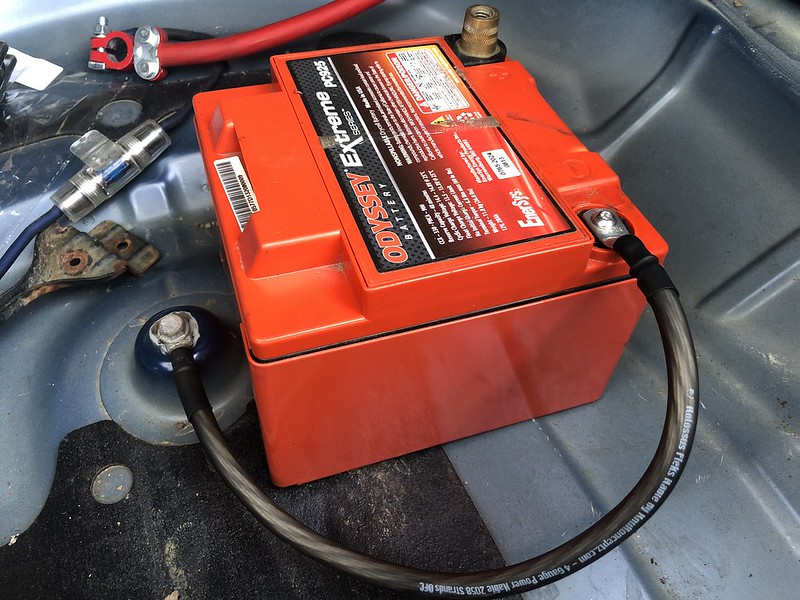 I am going to make a few of these to ground the engine and alternator to the frame. I also got the AMP power wire removed as I no longer need it to go to the front of the car. Engine will be here Tuesday. I think we will just try and stab it in tuesday after work as well. Shouldn't be too much longer till it's running. Though I still have a lot parts to order haha.
__________________
|
|
|
|
|
04-16-2018, 03:15 PM
|
#668 |
|
Senior Member
Join Date: Apr 2014
Drives: 2013 Ultramarine FR-S
Location: Springfield, MO
Posts: 1,948
Thanks: 2,539
Thanked 1,415 Times in 804 Posts
Mentioned: 31 Post(s)
Tagged: 3 Thread(s)
|
Some new STI rear hubs. No longer running 5x100 Hubs.

__________________
|
|
|
|
| The Following User Says Thank You to DustinS For This Useful Post: | zeal86 (04-16-2018) |
|
04-17-2018, 09:34 AM
|
#669 |
|
Senior Member
Join Date: Apr 2014
Drives: 2013 Ultramarine FR-S
Location: Springfield, MO
Posts: 1,948
Thanks: 2,539
Thanked 1,415 Times in 804 Posts
Mentioned: 31 Post(s)
Tagged: 3 Thread(s)
|
Battery Relocation pretty much finished up.
Carefully drilled out some rivnuts as mounts for the battery ties. Still need a main fuse on this side of the positive wire. Using the old battery tray holder as the Battery bracket as it will keep the trunk mat thing from falling on the battery.  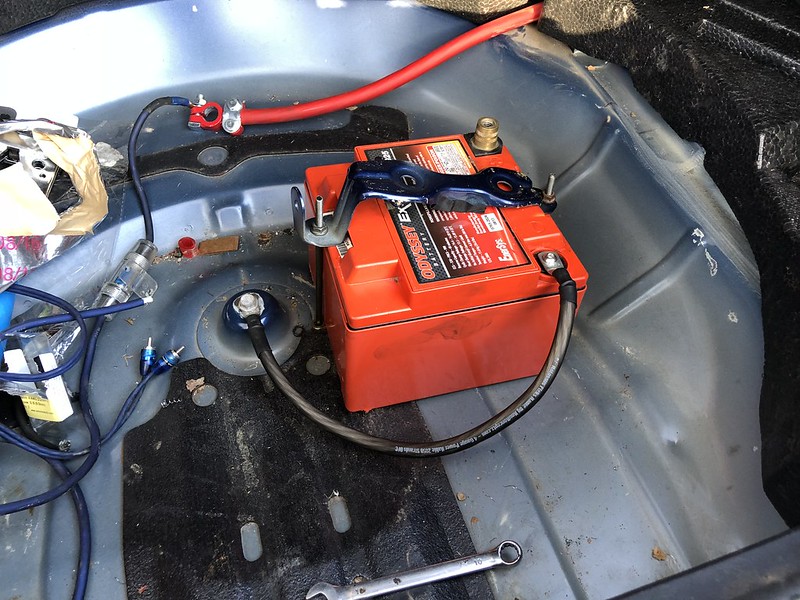 While I was down there working on the battery mounts I found the left rear shock has blown pretty bad.  Edit: 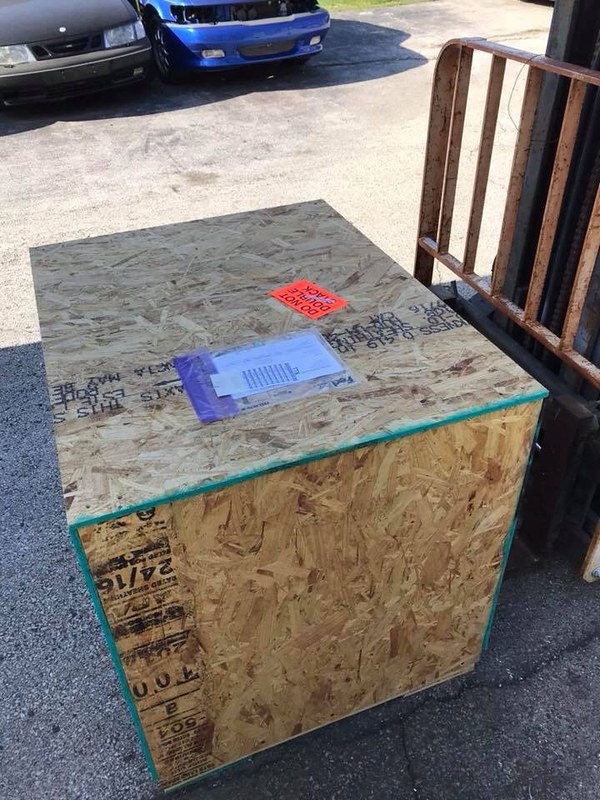 Woo! Ready to get this in. I am going to see about getting the oil pan modified today before dropping it in. This would get rid of the oil bypass valve for the DOD and allow me to run the front sway bar.
__________________
Last edited by DustinS; 04-17-2018 at 11:10 AM. Reason: Engine Came in |
|
|
|
|
04-17-2018, 02:02 PM
|
#670 |
|
Senior Member
Join Date: Apr 2014
Drives: 2013 Ultramarine FR-S
Location: Springfield, MO
Posts: 1,948
Thanks: 2,539
Thanked 1,415 Times in 804 Posts
Mentioned: 31 Post(s)
Tagged: 3 Thread(s)
|
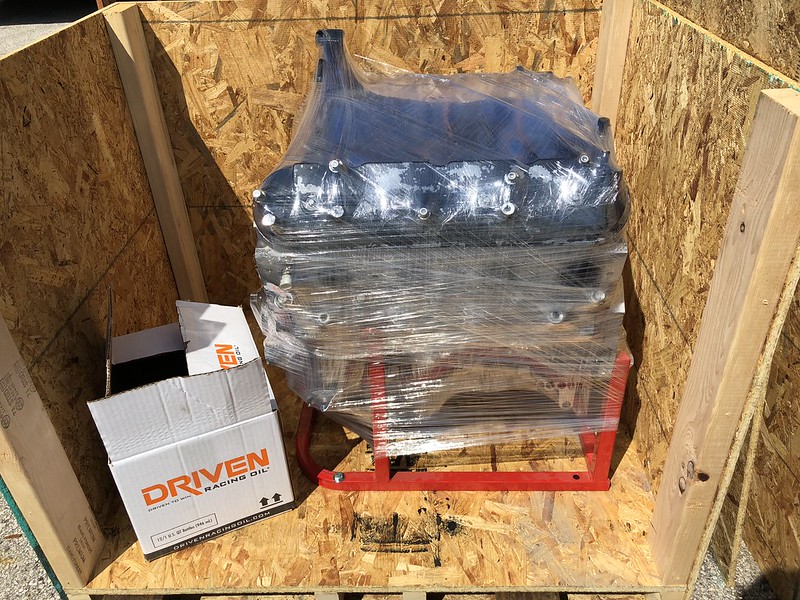 They even included break in oil! 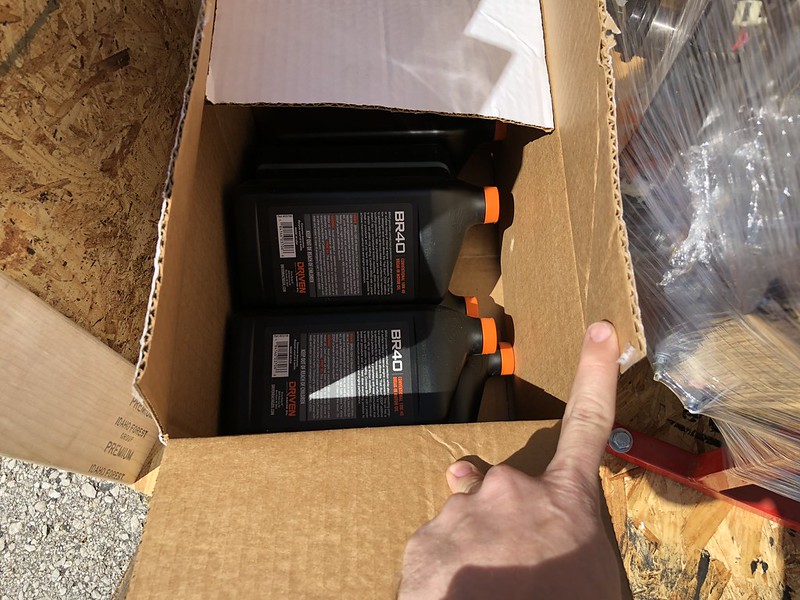
__________________
|
|
|
|
|
04-18-2018, 09:49 AM
|
#671 |
|
Senior Member
Join Date: Apr 2014
Drives: 2013 Ultramarine FR-S
Location: Springfield, MO
Posts: 1,948
Thanks: 2,539
Thanked 1,415 Times in 804 Posts
Mentioned: 31 Post(s)
Tagged: 3 Thread(s)
|
Took the oil pan off as I needed (or so I thought) to remove and cap the oil bypass valve used for the DOD cars, and I was going to cut the pan for sway bar and have it welded shut. I didn't get pictures of the cutting, but I only ended up cutting the pan a bit, but not enough that I needed to get it welded up. I decided to leave that for a future project.
Texas Speed was kind enough to cap it for me:  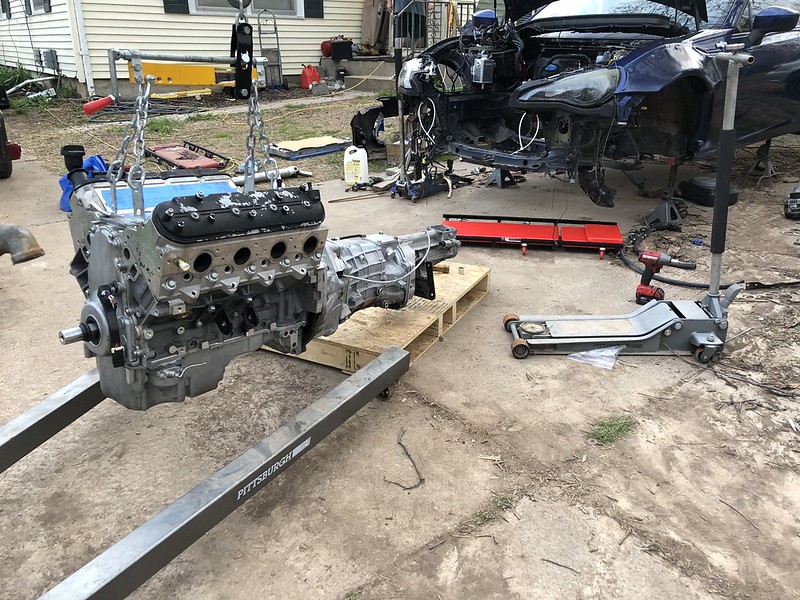 After a bit of fiddling and a trip to the autoparts store for some new hardware for the engine mounts. We were able to get it in. Though I can't get one of the transmission mount bolts in. I still need to mess with that. 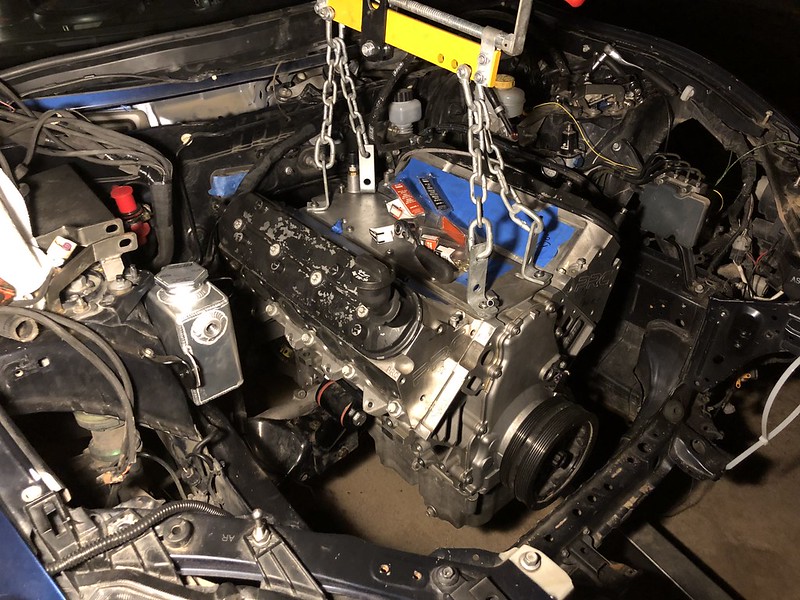 Forgot how much room there is for everything. Expansion tank may be moved upwards a tad. 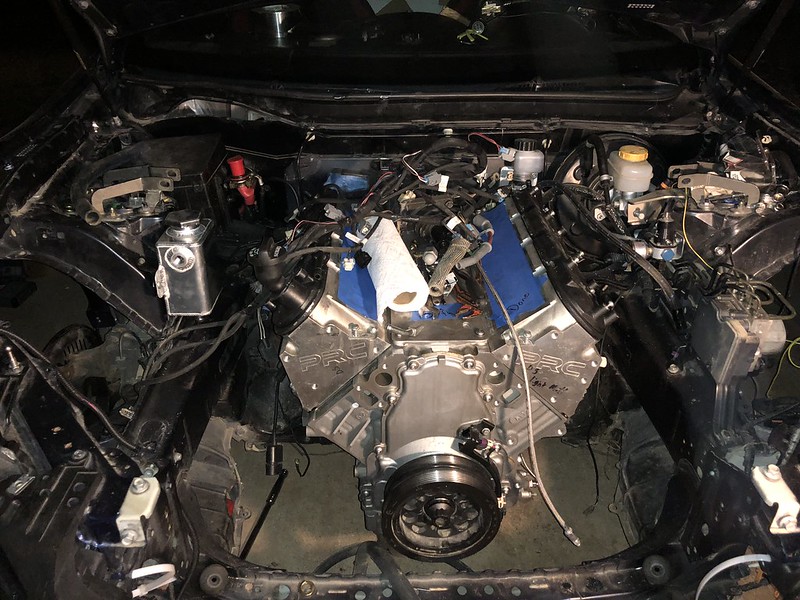 I am trying to decide if I want to try and mount the wiring harness in the gap in the trans tunnel. Will clean up the firewall, but may cause issues with heat, and rubbing. I have plenty of time to figure that out though. 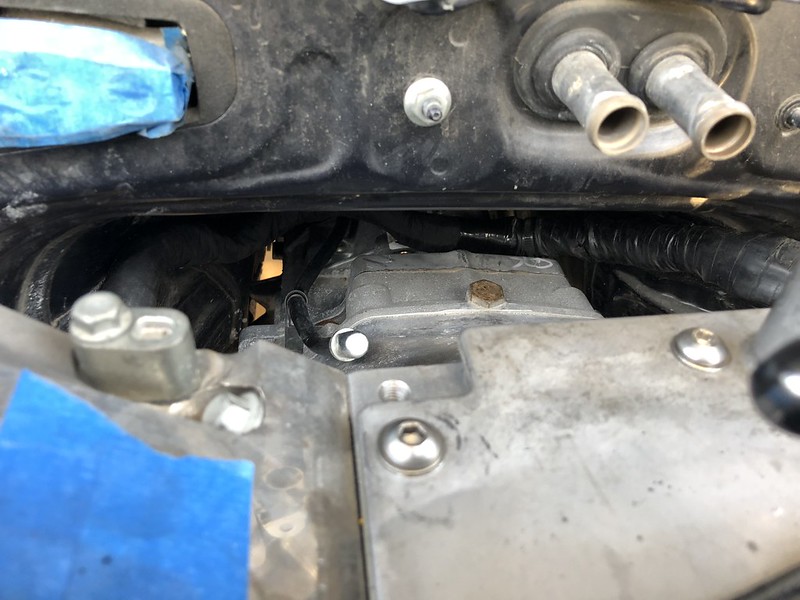 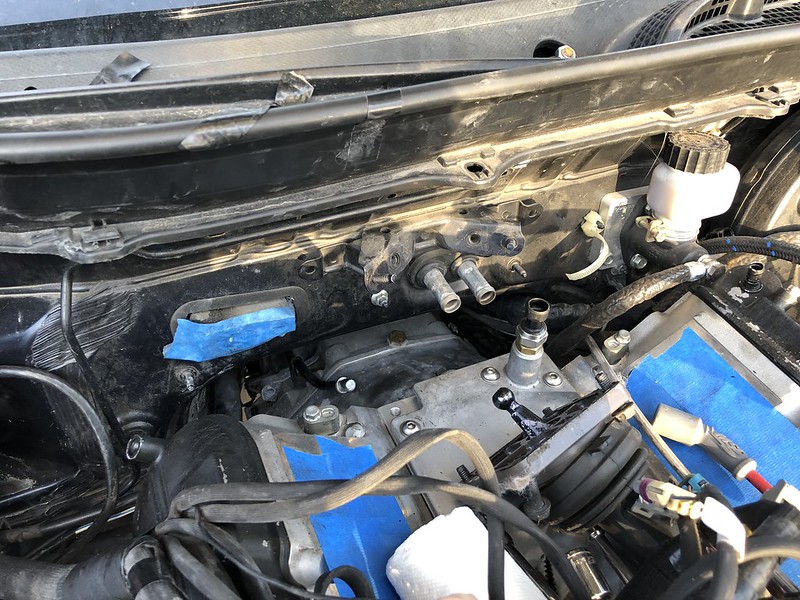
__________________
|
|
|
|
|
04-18-2018, 01:28 PM
|
#672 |
|
Senior Member
Join Date: Apr 2014
Drives: 2013 Ultramarine FR-S
Location: Springfield, MO
Posts: 1,948
Thanks: 2,539
Thanked 1,415 Times in 804 Posts
Mentioned: 31 Post(s)
Tagged: 3 Thread(s)
|
Nice little package today. Still waiting on the -4 hose and -4 90 degree fitting.
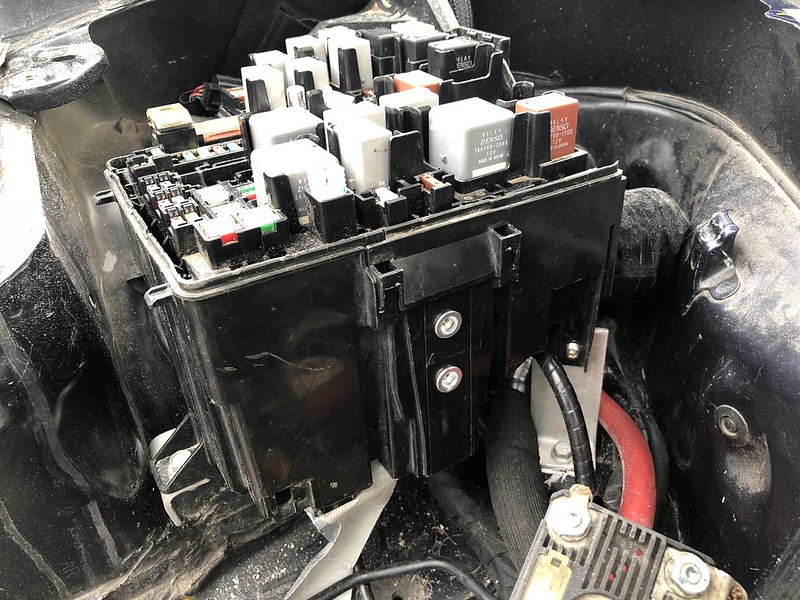
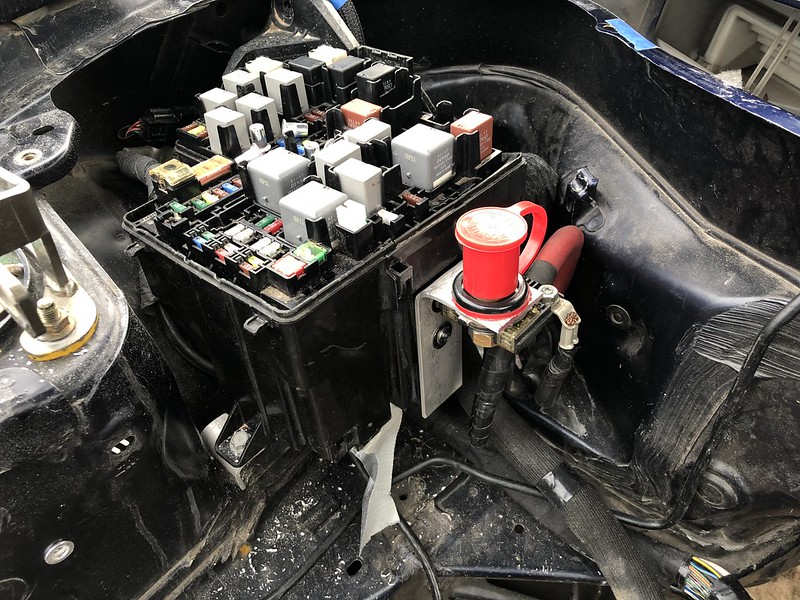
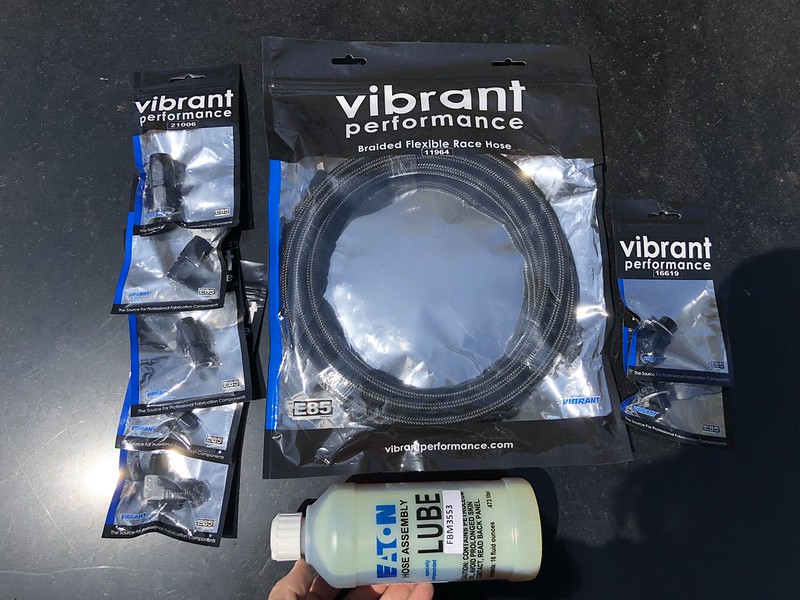 Hose and fittings on right are for the catch can. Running -6an for that. Most likely mount it where the fuse box went. Got the -4an fittings mocked up for coolant overflow and steam port. I REALLY hate pipe threads. The fact you can see the threads drives me nuts. 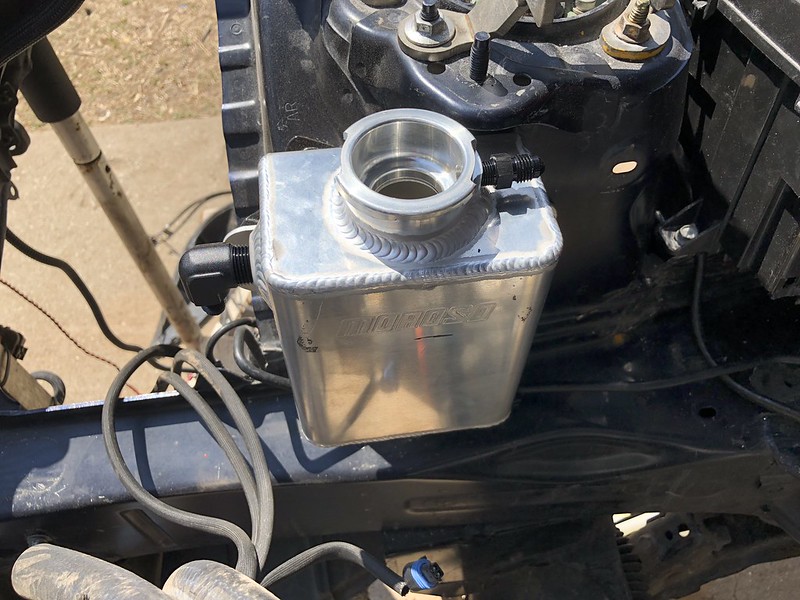
__________________
|
|
|
|
|
|
|
|
 |
|
|
 Similar Threads
|
||||
| Thread | Thread Starter | Forum | Replies | Last Post |
| The reason I'm always broke - Dustin's Supercharged 86 | Dustin | Member's Car Journals | 211 | 11-08-2015 10:57 AM |
| Help! New Car Engine Blew Up. What are my rights? | Obsidiank | Scion FR-S / Toyota 86 GT86 General Forum | 53 | 12-11-2014 11:43 AM |
| Midwest Modified - Auto Photography by Dustin Faulkner (aka Fancy) | Kuzuri | Great Lakes | 20 | 02-16-2014 05:23 PM |
| Engine Warm-up Time | Chad86 | Scion FR-S / Toyota 86 GT86 General Forum | 44 | 01-10-2014 12:03 AM |
| So my engine blew up.... | alliedcam1 | Engine, Exhaust, Transmission | 57 | 12-28-2013 02:50 PM |


