


 03-16-2019, 08:31 AM
|
#169 |
|
Member

Join Date: Oct 2018
Drives: they all have 4 wheels
Location: Cyprus
Posts: 39
Thanks: 33
Thanked 6 Times in 6 Posts
Mentioned: 0 Post(s)
Tagged: 0 Thread(s)
|
subbed! very exciting build!
|

|

|
|
03-18-2019, 07:52 PM
|
#170 | |
|
Senior Member

Join Date: Jul 2016
Drives: BRZ, WRX
Location: Sydney, Australia
Posts: 292
Thanks: 105
Thanked 970 Times in 234 Posts
Mentioned: 2 Post(s)
Tagged: 0 Thread(s)
|
Quote:
Yes! I had a good think about it and I had to consider a few things eg. 1. The length of the rack now that the lower control arms are different and how that might effect bump steer. 2. The angle of the pinion input shaft after flipping the rack and how it would connect to the steering column. 3. The way the rack mounts, I need an easy way of adjusting the rack vertically to match the adjustment built into my control arm mounts. All of the above checks out so last night I bought a rack off ebay USA since all the racks here are RHD. .
__________________
|
|
|
|
|
| The Following User Says Thank You to DIY For This Useful Post: | DustinS (03-19-2019) |
|
03-24-2019, 11:47 PM
|
#171 |
|
Senior Member
Join Date: Jul 2016
Drives: BRZ, WRX
Location: Sydney, Australia
Posts: 292
Thanks: 105
Thanked 970 Times in 234 Posts
Mentioned: 2 Post(s)
Tagged: 0 Thread(s)
|
I have made some more progress on the front cross-member and double wishbone conversion. The lower control arm mounts are now finished.
Once I had worked out the control arm pivot positions I moved the pieces I had made previously onto the bench to get everything measured up and square. I then tack welded some scrap metal to them to hold them in place. 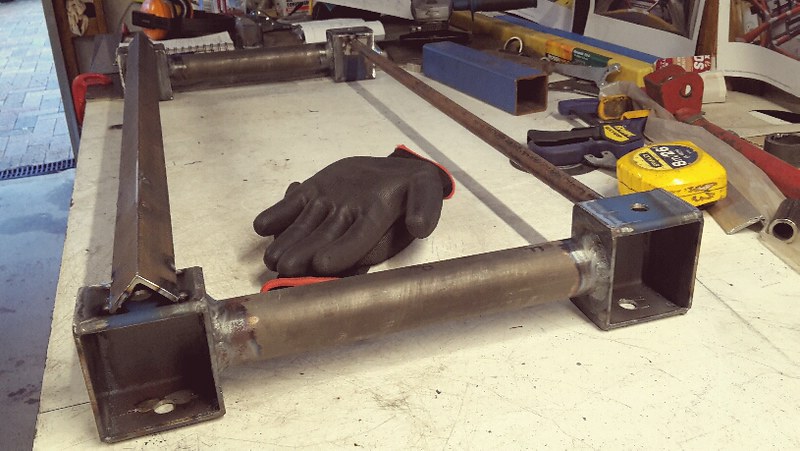 Then I had to position it in the car in the correction spot and take some measurements for the tube required to join it together.  Then with a bunch of tube notching, these are very short so I had to do a complete cut notching two pieces in one go. Usually I do one end at a time to the hole saw is not working so hard. 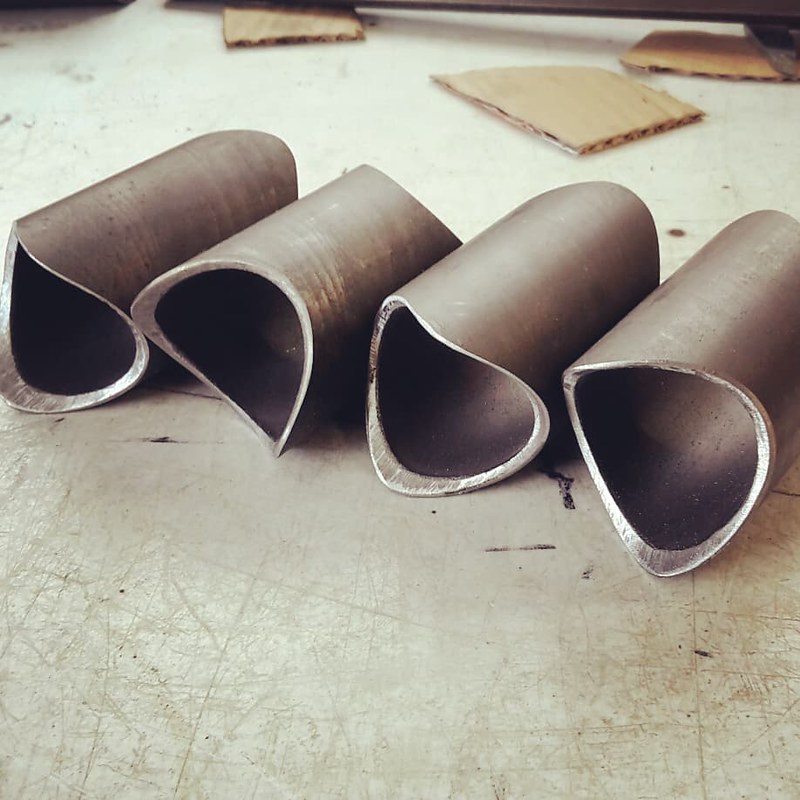 These then join to the parts I had made previously which bolt into the factory front cross-members mounts on the chassis rails. 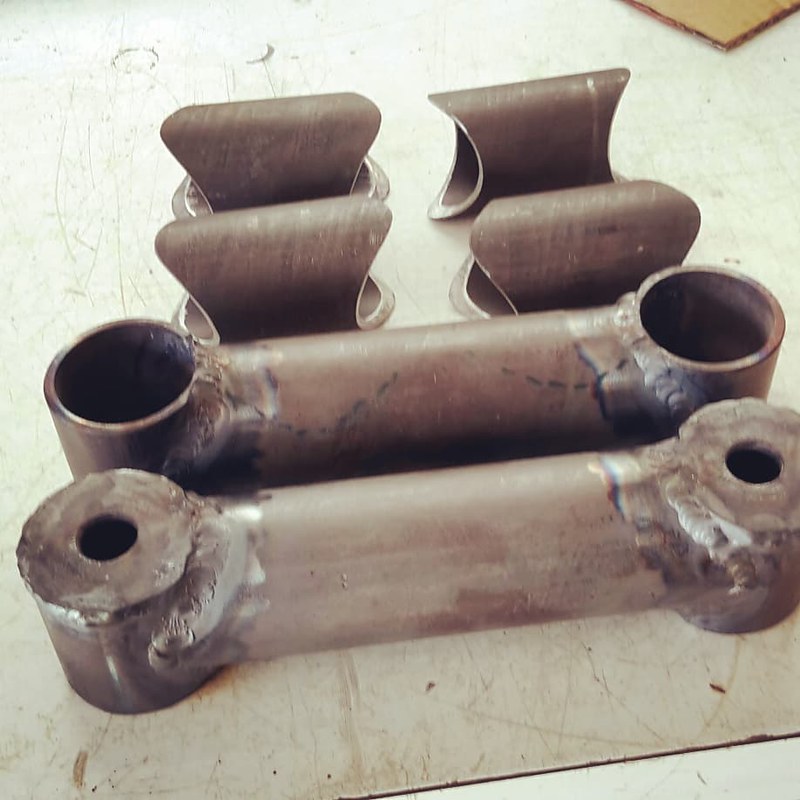 I then tacked it all together on the car before taking it back out so I could weld it on the bench.  I also added some captive nuts to make adjustments to the geometry easier. 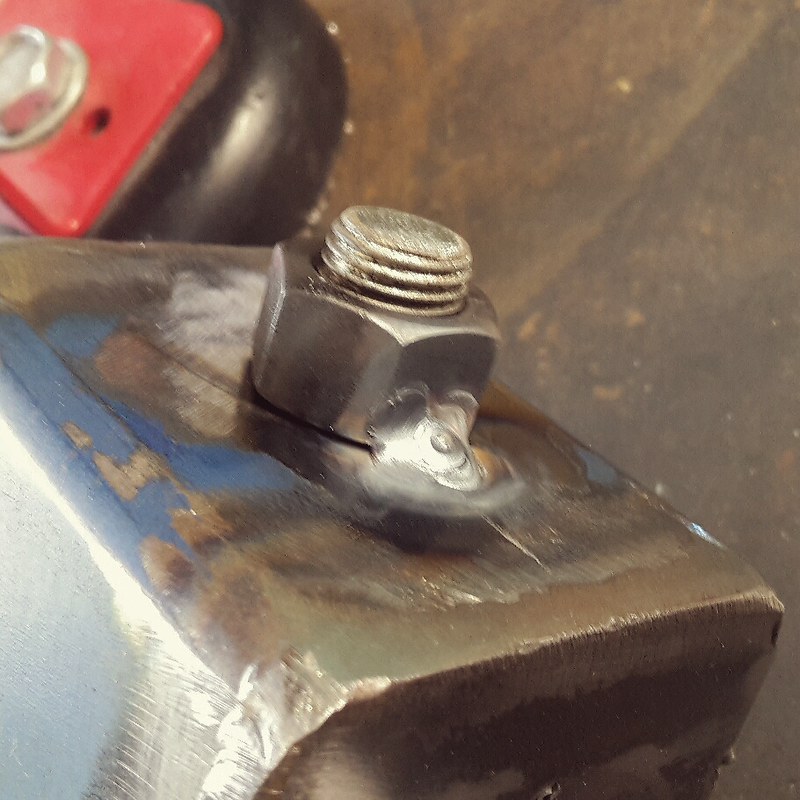 Even though I will be adding to these pieces later I decided to cold gal them to keep the surface rust away. I hate cleaning off surface rust. 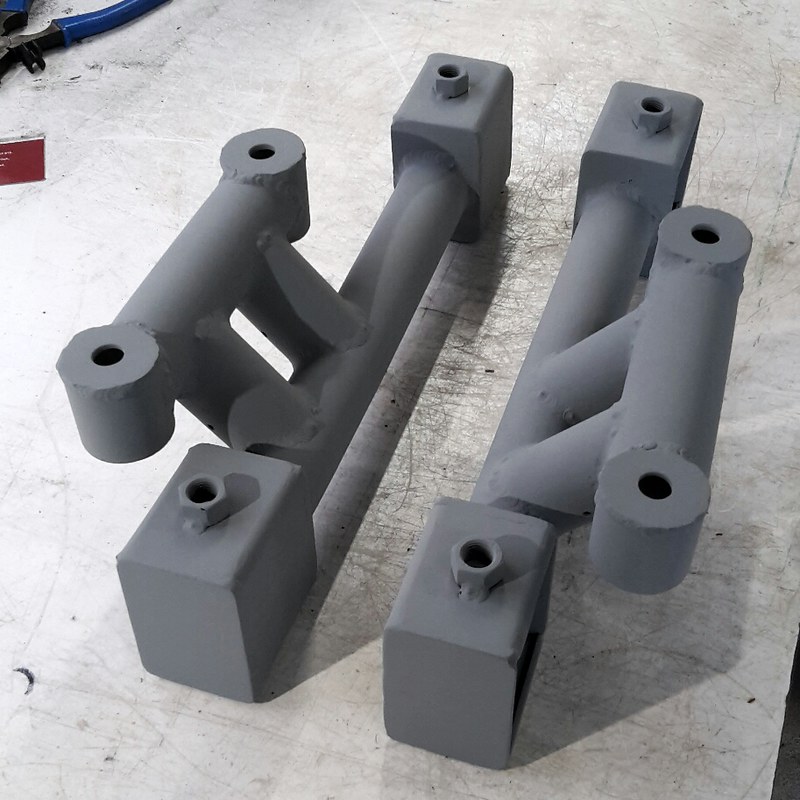 Back on the car.  The rod ends will be mounted horizontally with spacers or varying thickness above and below. This allows me to change the inner pivot height over a reasonable range to tune the camber gain and roll center to my liking.  Next job will be the upper control arm mounts.
__________________
|
|
|
|
| The Following 3 Users Say Thank You to DIY For This Useful Post: |
|
03-25-2019, 04:15 AM
|
#172 |
|
Senior Member
Join Date: Sep 2015
Drives: 2015 frs
Location: Ca
Posts: 511
Thanks: 426
Thanked 196 Times in 148 Posts
Mentioned: 5 Post(s)
Tagged: 0 Thread(s)
|
Nice bit of progress. Are you using carbide tipped hole saw blades in your tubing notcher. I bought a few they worked out well for me. Keep up the good work.
|
|
|
|
|
03-25-2019, 04:29 AM
|
#173 | |
|
Senior Member
Join Date: Jul 2016
Drives: BRZ, WRX
Location: Sydney, Australia
Posts: 292
Thanks: 105
Thanked 970 Times in 234 Posts
Mentioned: 2 Post(s)
Tagged: 0 Thread(s)
|
Quote:
__________________
|
|
|
|
|
| The Following User Says Thank You to DIY For This Useful Post: | Zer0 (03-25-2019) |
|
03-31-2019, 08:25 AM
|
#174 |
|
Senior Member
Join Date: Jul 2016
Drives: BRZ, WRX
Location: Sydney, Australia
Posts: 292
Thanks: 105
Thanked 970 Times in 234 Posts
Mentioned: 2 Post(s)
Tagged: 0 Thread(s)
|
I got the upper control arm mounts for the double wishbone conversion into position today. I need to convert my welder back over to MIG to weld them in but otherwise they are done.
Started by marking out the position of the boxes, drilling a hole at each corner and then using a combination of angle grinder and dremel to cut them out.  Welded the nuts onto the lower side to make adjustments easier. 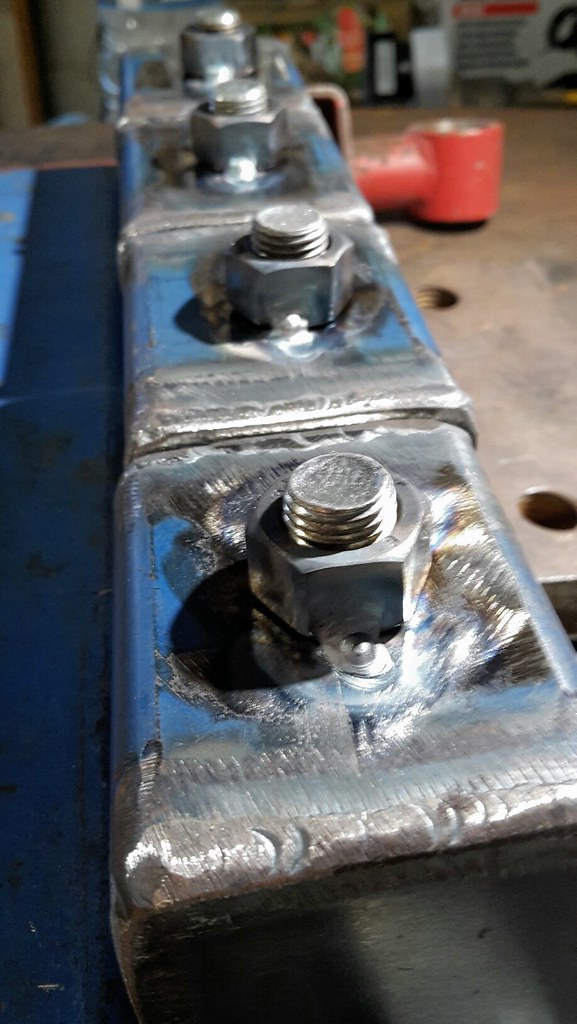 Here is the view from inside the engine bay. You can see I had to trim a bit of metal above the bolts so I can get them in and out.  Final photo for today showing the RX8 knuckle relative to the control arm mounts. 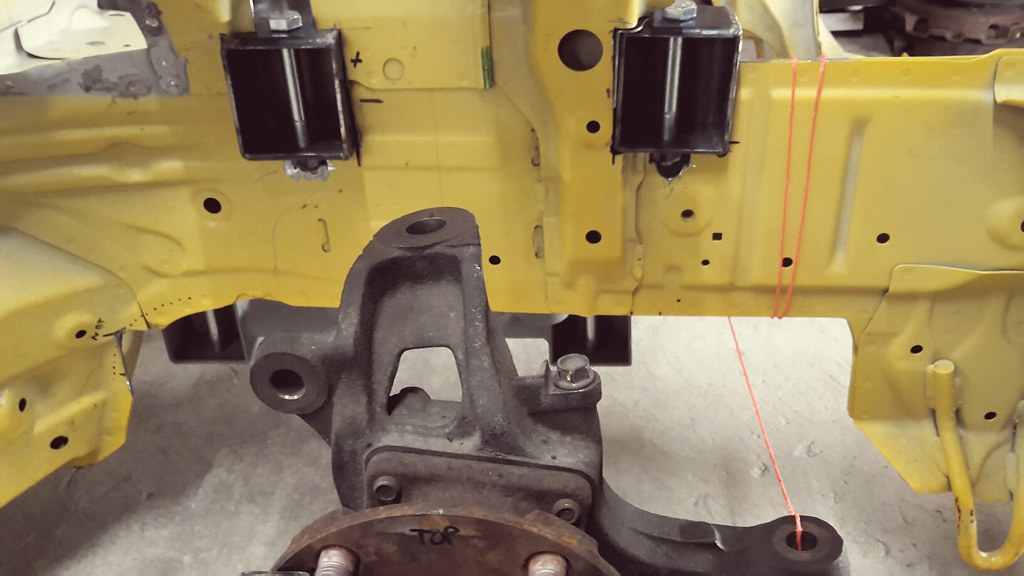 So I've just got remove the paint around the areas I need to weld and then weld them in. All this has to be repeated on the passenger side but I need to spin the whole shell around to do that so I'm just doing this side for now.
__________________
|
|
|
|
|
03-31-2019, 03:29 PM
|
#175 |
|
Senior Member
Join Date: Sep 2015
Drives: 2015 frs
Location: Ca
Posts: 511
Thanks: 426
Thanked 196 Times in 148 Posts
Mentioned: 5 Post(s)
Tagged: 0 Thread(s)
|
Good work. I think the work for your double wishbone conversion is going to pay off for the cars intended use.
|
|
|
|
|
03-31-2019, 05:47 PM
|
#176 | |
|
Senior Member
Join Date: Jul 2016
Drives: BRZ, WRX
Location: Sydney, Australia
Posts: 292
Thanks: 105
Thanked 970 Times in 234 Posts
Mentioned: 2 Post(s)
Tagged: 0 Thread(s)
|
Quote:
__________________
|
|
|
|
|
|
04-01-2019, 05:06 AM
|
#177 |
|
Senior Member
Join Date: Sep 2015
Drives: 2015 frs
Location: Ca
Posts: 511
Thanks: 426
Thanked 196 Times in 148 Posts
Mentioned: 5 Post(s)
Tagged: 0 Thread(s)
|
Nice. Does the transmission bell housing sit lower than your oil pan? I have allot of room under my engine, but the bell housing sits way below the oil pan. I may trim the lower lip on my bell housing to bring the engine down more.
|
|
|
|
|
04-01-2019, 06:28 AM
|
#178 |
|
Senior Member
Join Date: Jul 2016
Drives: BRZ, WRX
Location: Sydney, Australia
Posts: 292
Thanks: 105
Thanked 970 Times in 234 Posts
Mentioned: 2 Post(s)
Tagged: 0 Thread(s)
|
Maybe 30 - 40mm higher than the oil pan, it would be the lowest part once I have the dry sump oil pan on though.
__________________
|
|
|
|
| The Following User Says Thank You to DIY For This Useful Post: | Zer0 (04-01-2019) |
|
04-01-2019, 06:58 AM
|
#179 |
|
Senior Member
Join Date: Sep 2015
Drives: 2015 frs
Location: Ca
Posts: 511
Thanks: 426
Thanked 196 Times in 148 Posts
Mentioned: 5 Post(s)
Tagged: 0 Thread(s)
|
Looking forward to seeing it all bolted in with the dry sump setup.
|
|
|
|
|
04-03-2019, 05:07 AM
|
#180 |
|
Senior Member
Join Date: Jul 2016
Drives: BRZ, WRX
Location: Sydney, Australia
Posts: 292
Thanks: 105
Thanked 970 Times in 234 Posts
Mentioned: 2 Post(s)
Tagged: 0 Thread(s)
|
Steering Rack
My steering rack arrived today from the USA, this is a brz rack from a LHD car but I have flipped it over so it is now front steer.
Gave it a quick clean and then did some measurements to see where the pivot points would be and how they would line up with my control arm pivots as this affects bump steer. Could not be happier with how well this will work. I don't have exact measurements until I remove the boots but the pivot points are around about the right spot. I will need some longer tie rod arms though since I have increased the front track a little. I have done a quick mock up to show how well the pinion aligns towards the steering column. This also shows how I will be able to easily mount the rack such that it is height adjustable by adding and removing spacers under the mounting points. 
__________________
|
|
|
|
| The Following 5 Users Say Thank You to DIY For This Useful Post: | Ash_89 (03-02-2021), BigFatFlip (04-25-2019), DustinS (04-03-2019), JeremyR (04-04-2019), Zer0 (04-06-2019) |
|
04-03-2019, 01:35 PM
|
#181 |
|
Senior Member
Join Date: Nov 2016
Drives: 2013 BRZ Limited 6MT
Location: Nashville, TN
Posts: 208
Thanks: 36
Thanked 80 Times in 58 Posts
Mentioned: 1 Post(s)
Tagged: 0 Thread(s)
|
That's really great that this worked out for you!
|
|
|
|
| The Following User Says Thank You to ka-titties For This Useful Post: | DIY (04-03-2019) |
|
04-07-2019, 04:27 AM
|
#182 |
|
Senior Member
Join Date: Jul 2016
Drives: BRZ, WRX
Location: Sydney, Australia
Posts: 292
Thanks: 105
Thanked 970 Times in 234 Posts
Mentioned: 2 Post(s)
Tagged: 0 Thread(s)
|
I got some more work done on the car today.
Started by converting my multi-process welder over to MIG since you can never really get all the seems clean enough for TIG when welding to the chassis.  I had to use a little CAD to make up this piece to re-strengthen the location of the front upper control arm mount. 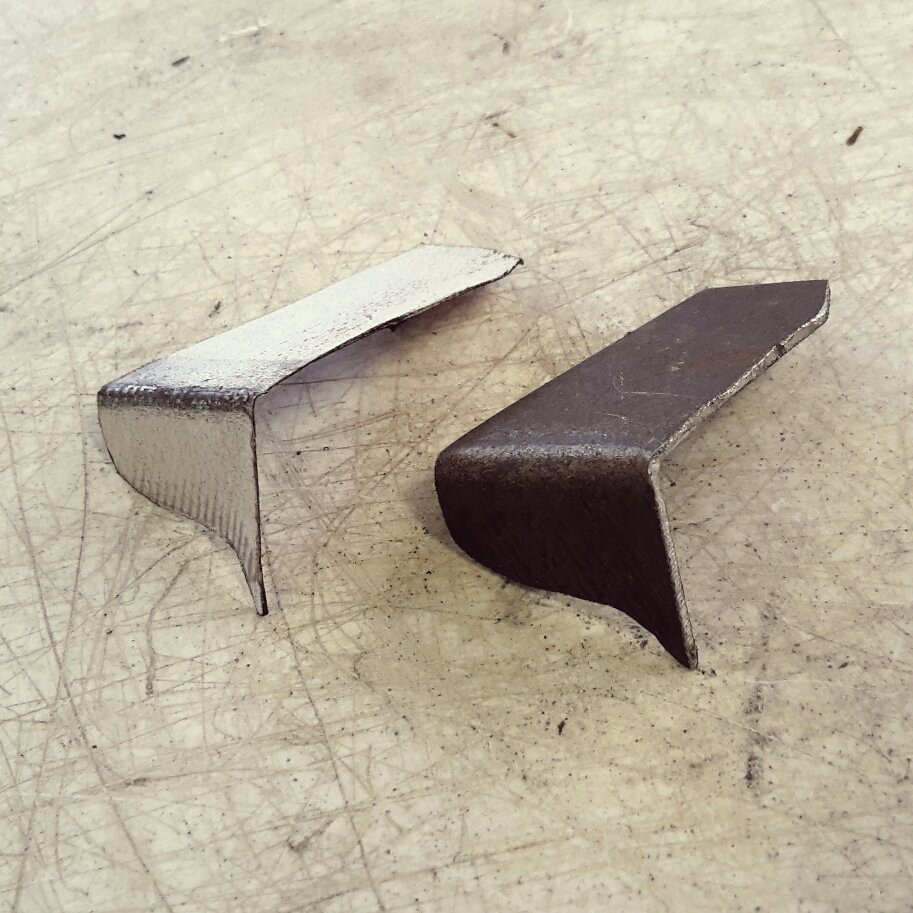 [/url] [/url]This is after welding the small piece in and cleaning up my welds with the grinder.  Then I just went ahead and welded the mounts into the chassis. My MIG welding skills are not great and the majority of the welds look like pigeon poo but I am confident they are plenty strong enough as I usually run it a little hot.  After some minor cleanup with the grinder I gave them a coat of cold-gal.  So one side is now complete and I need to spin the whole shell around to do the other side.
__________________
|
|
|
|
| The Following 3 Users Say Thank You to DIY For This Useful Post: |
|
|
|
|
|
|


