


|
||||||
| DIY (Do-It-Yourself) Guides For all DIYs. |
 |
|
|
Thread Tools | Search this Thread |
 06-23-2015, 01:23 AM
|
#1 |
|
Senior Member

Join Date: Feb 2014
Drives: 2014 FR-S Monogram, Whiteout 6MT
Location: 626, Socal
Posts: 593
Thanks: 469
Thanked 408 Times in 230 Posts
Mentioned: 37 Post(s)
Tagged: 0 Thread(s)
|
DIY $5 reversible always-on for FRS 10 Series, Monogram, RS 1.0 or JDM headlights
First DIY. Building up to my footwell and courtesy light DIY. Be gentle. I know there are other write ups but I didn’t see an official DIY in the directory with a good step by step so I made this. I'm not responsible for any damages done to your car during install. This is a fully reversible ~$5 DIY solution for the DRL always-on mod for those with a 10 Series, Monogram, RS 1.0, or JDM headlights.
For the record, different ohms (100, 200, 300, etc) allow for different brightness. For this example, I used a 10 watt 100 ohm resistor. Special thanks to @Phil_FRS for letting me use his car as an example. And @Siege for his DIY, found here. (This is essentially what he did but with detailed pictures as I kept getting questions/requests about what I did) Time required: ~10-30 minutes Skill level 1=noob to 5=expert: 1.5 Parts/tools required: 1 x 10 watt 100 ohm resistor (~$5 at typical lighting hardware store) 2 x small sunglass flathead or screwdriver 1 x wire stripper 1 x needle nose pliers 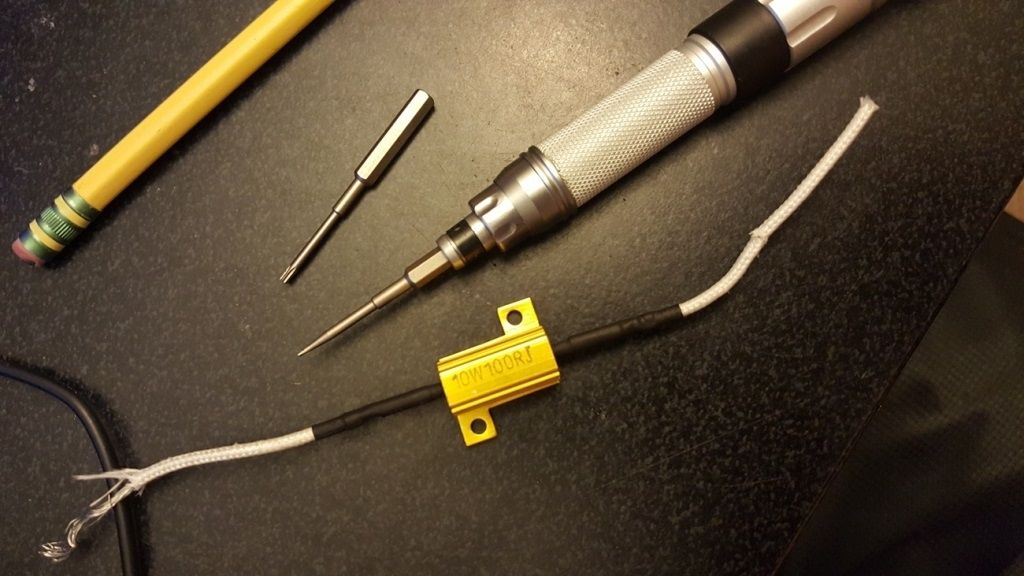 Figure 1: Resistor and small screwdrivers Step 1: Open hood. Find passenger side headlight. Locate and disconnect headlight harness. (Unclip from the bottom and wiggle it loose) 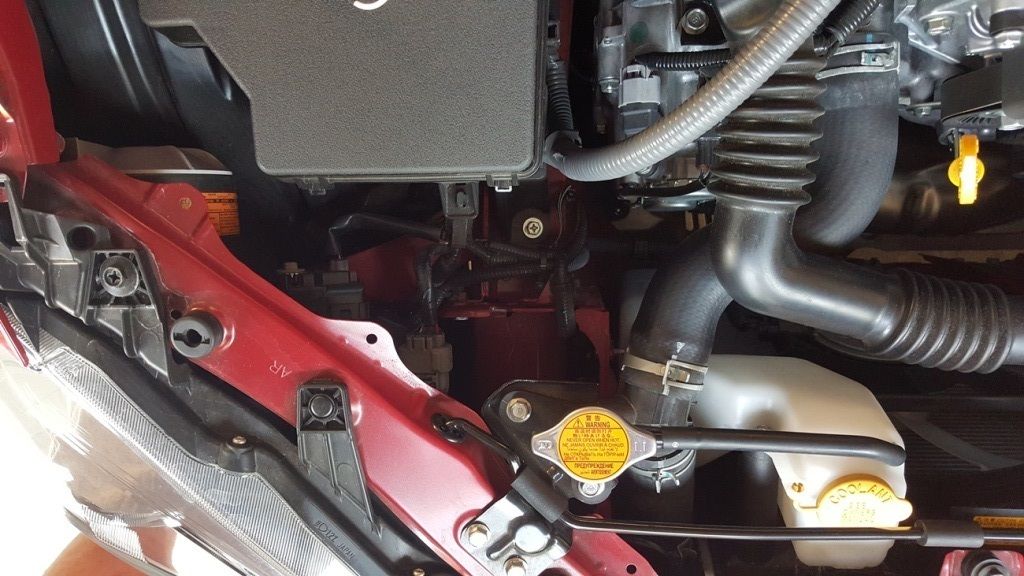 Figure 2: Passenger headlight connection 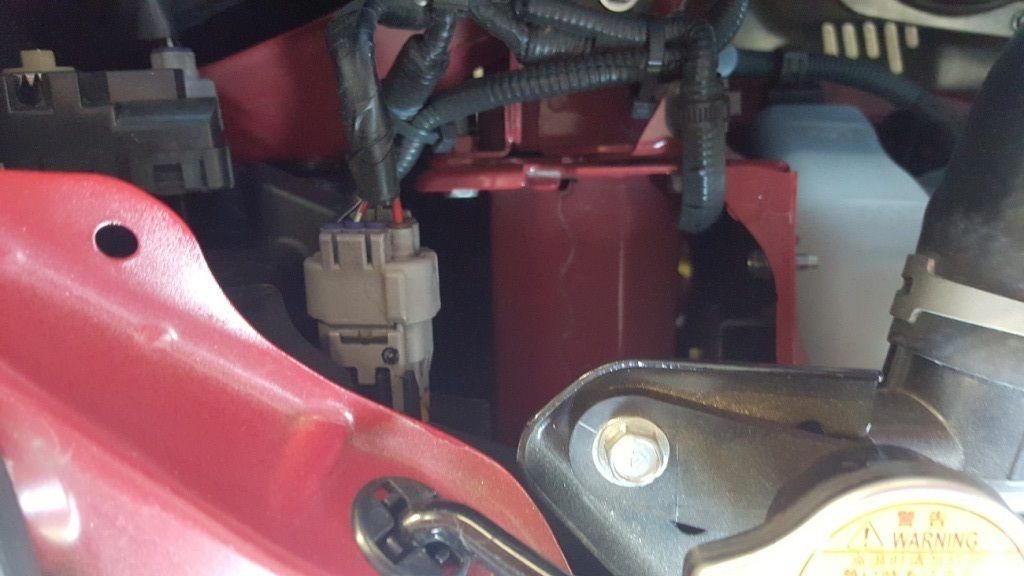 Figure 3: Close up of passenger headlight connection. Step 2: Gently pry out the white plastic piece with small flathead. It comes straight out/up pretty easily. 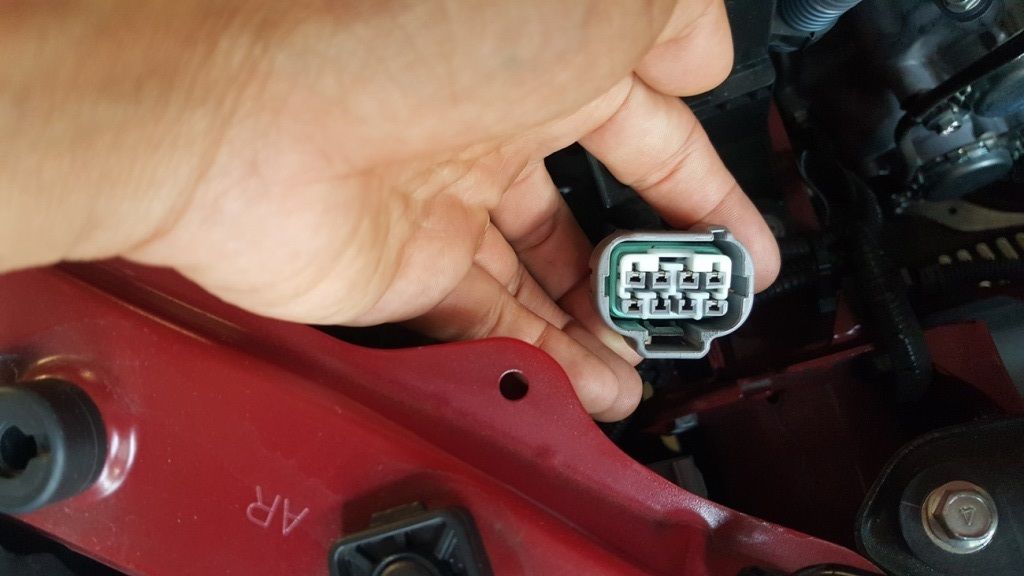 Figure 4: Close up of 8 pin harness. 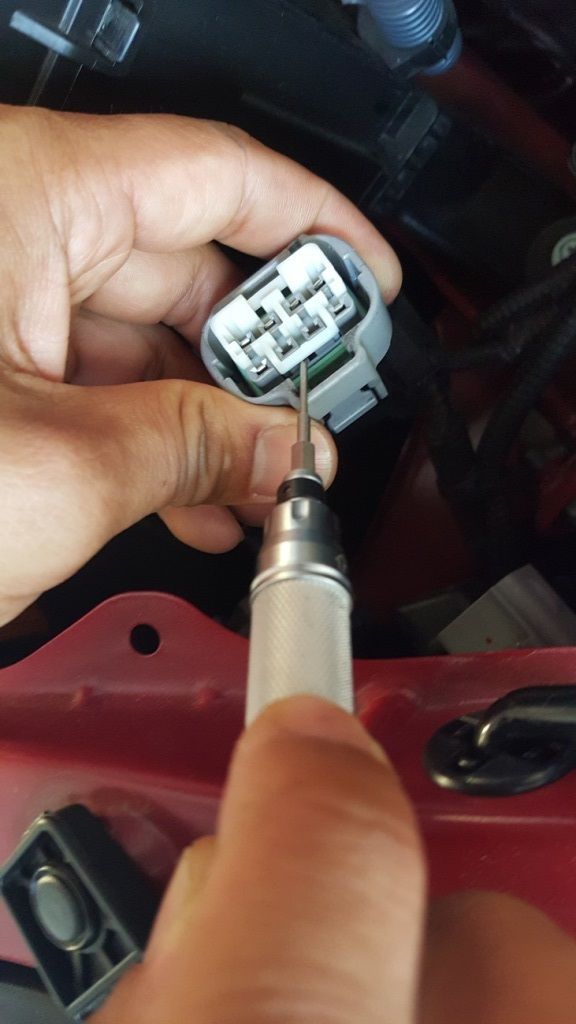 Figure 5: Close up of the flathead prying out white plastic piece. Step 3: Use small flathead to press up on the plastic clip and push metal pin in until it comes out the other end. 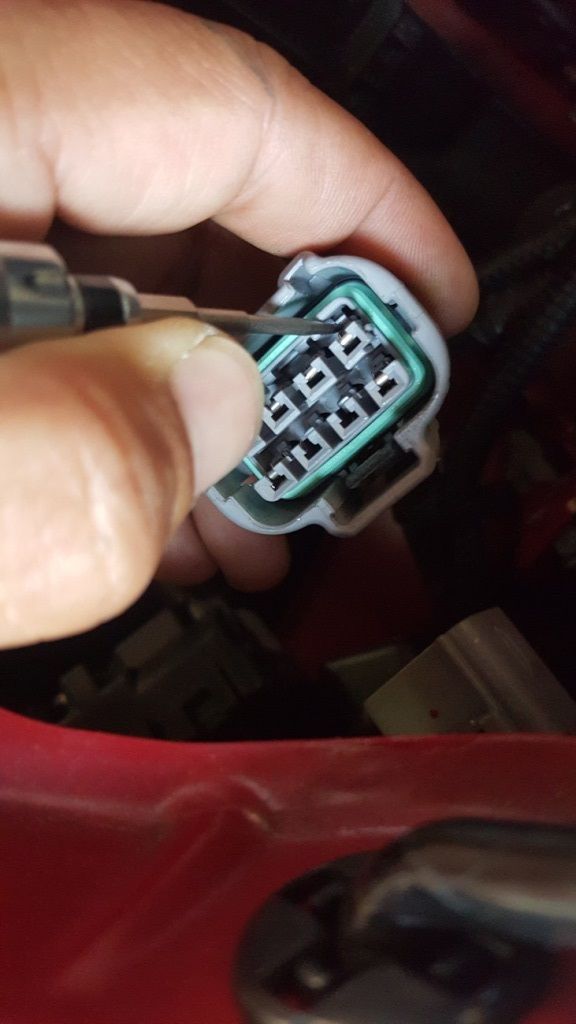 Figure 6: Close up of flathead pushing clip up for the top red wire. Step 4: Repeat for the bottom brown wire. The two wires that are removed are the red and brown wires on the right side. See circles in figure 7.  Figure 7: Circles of the two pins to remove. Step 5: Strip ~1” of wire from both ends of resistors. Wrap both ends around the two unpluged pins. LEAVE enough exposed wire so you have room to plug it back in. See figure 8. 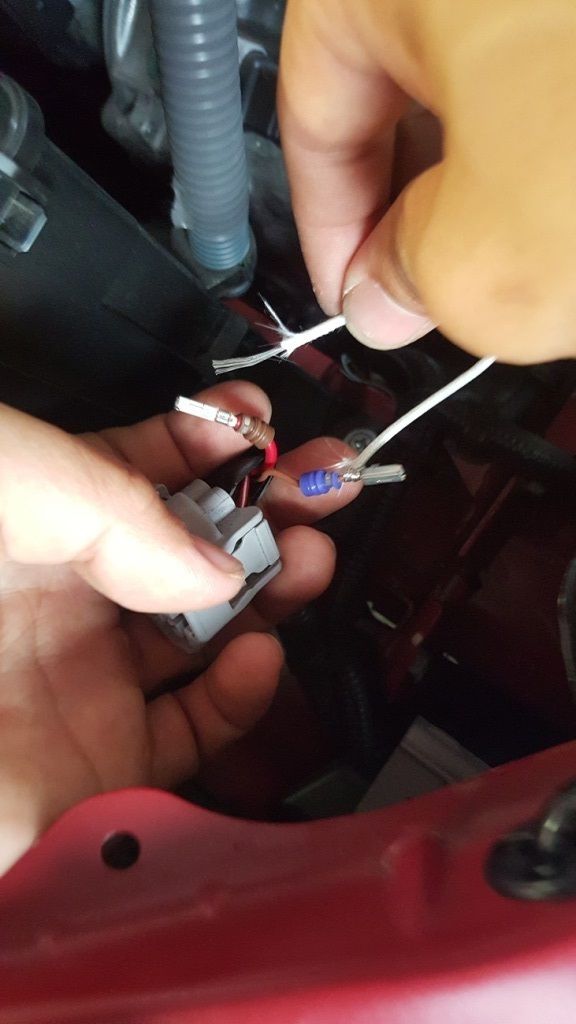 Figure 8: Stripped resistor wrapped around pins. Step 6: (No picture) Use needle nose pliers and plug wires back in. May require some force. Make sure you leave enough exposed wire so you have room to plug it in. You should hear a small audible click. Step 7: Reassemble everything, zip tie resistor to frame, and go for a drive! 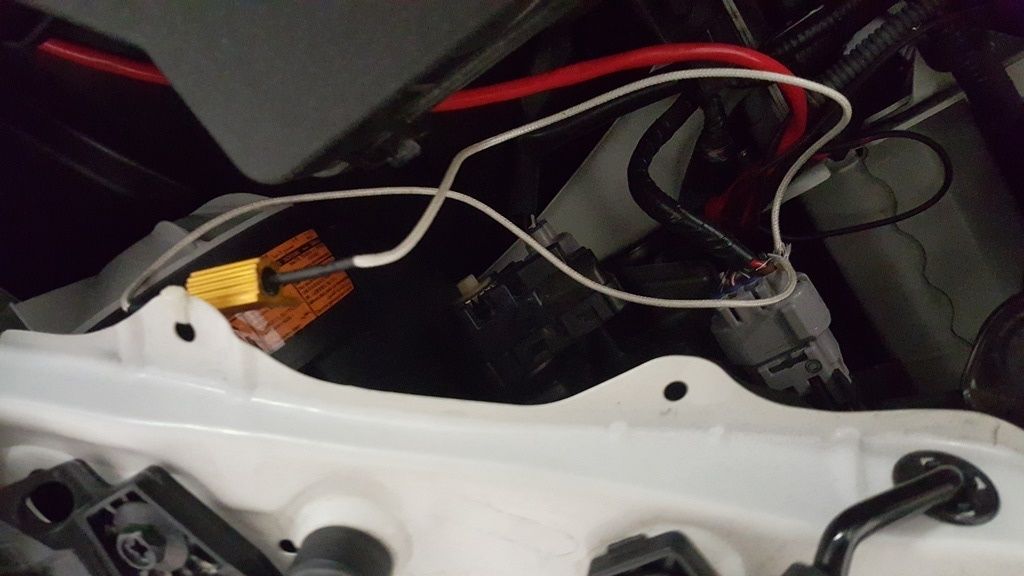 Figure 9: Zip tie resistor to frame 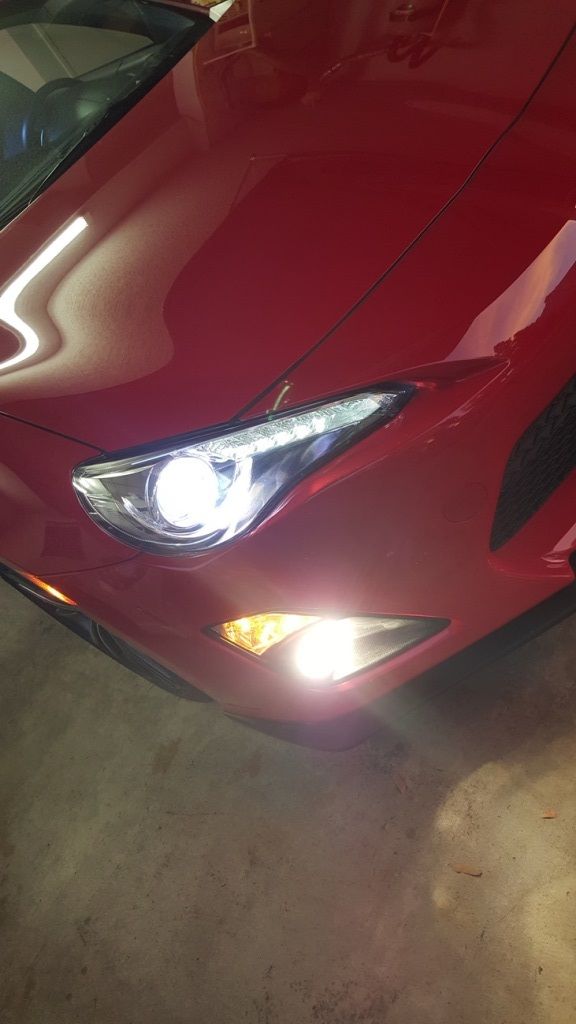 Figure 10: Finished product Last edited by LXXXV1; 06-23-2015 at 01:55 PM. Reason: Fixed photos. |

|

|
| The Following 4 Users Say Thank You to LXXXV1 For This Useful Post: |
|
06-23-2015, 02:20 AM
|
#2 |
|
Member
Join Date: Jul 2014
Drives: 2014 FR-S Monogram Whiteout AT
Location: 626, SoCal, Los Angeles
Posts: 45
Thanks: 21
Thanked 13 Times in 8 Posts
Mentioned: 24 Post(s)
Tagged: 0 Thread(s)
|
How come I can't see the pictures?
|
|
|
|
|
06-23-2015, 03:15 AM
|
#3 | |
|
Senior Member
Join Date: Feb 2014
Drives: 2014 FR-S Monogram, Whiteout 6MT
Location: 626, Socal
Posts: 593
Thanks: 469
Thanked 408 Times in 230 Posts
Mentioned: 37 Post(s)
Tagged: 0 Thread(s)
|
Quote:
__________________
 2007 Honda CBR600RR-Pearl White/Silver - Totaled  2014 Scion FR-S Monogram-Whiteout - #LXXXV1 (build) φφκα |
|
|
|
|
|
06-23-2015, 12:04 PM
|
#4 |
|
Turbo E85

Join Date: Sep 2013
Drives: 13 wrb brz
Location: torrance, ca
Posts: 1,093
Thanks: 172
Thanked 555 Times in 349 Posts
Mentioned: 32 Post(s)
Tagged: 0 Thread(s)
|
Good DIY simple and many picture~
__________________
Flex Fuel Turbo BRZ
|
|
|
|
|
06-23-2015, 10:08 PM
|
#5 |
|
Member

Join Date: Oct 2014
Drives: 2014 FRS Monogram
Location: Rosemead, CA
Posts: 83
Thanks: 59
Thanked 49 Times in 31 Posts
Mentioned: 7 Post(s)
Tagged: 0 Thread(s)
|
Many thanks to LXXXV1 for his excellent installation. Love the end result. Clean look. Two thumbs up for service to the community.

|
|
|
|
|
06-23-2015, 10:09 PM
|
#6 |
|
Senior Member

Join Date: Dec 2013
Drives: Scion FR-S 10 Series #2263
Location: Los Angeles
Posts: 471
Thanks: 208
Thanked 277 Times in 179 Posts
Mentioned: 4 Post(s)
Tagged: 2 Thread(s)
|
You should put a diode in series with the resistor to prevent backflow to the #5 (red, headlight) when the DRL is on and not the headlights.
|
|
|
|
|
06-24-2015, 06:26 PM
|
#7 |
|
Member

Join Date: Mar 2014
Drives: 2014' 86
Location: Philadelphia, Pennsylvania
Posts: 97
Thanks: 723
Thanked 82 Times in 45 Posts
Mentioned: 11 Post(s)
Tagged: 4 Thread(s)
|
You mention this will work for "JDM Headlights", would this include headlight such as the JDM winjets for the frs?
Sent from my iPhone using Tapatalk |
|
|
|
|
06-24-2015, 06:33 PM
|
#8 |
|
A Demon

Join Date: Dec 2013
Drives: Raven GT86
Location: Denver
Posts: 1,992
Thanks: 190
Thanked 1,321 Times in 701 Posts
Mentioned: 20 Post(s)
Tagged: 0 Thread(s)
|
Damn A+ write up.
Sent from my iPhone using Tapatalk |
|
|
|
| The Following User Says Thank You to ZOMFGAARON For This Useful Post: | LXXXV1 (06-24-2015) |
|
06-24-2015, 07:47 PM
|
#9 | ||
|
Senior Member
Join Date: Feb 2014
Drives: 2014 FR-S Monogram, Whiteout 6MT
Location: 626, Socal
Posts: 593
Thanks: 469
Thanked 408 Times in 230 Posts
Mentioned: 37 Post(s)
Tagged: 0 Thread(s)
|
Quote:
Quote:
__________________
2007 Honda CBR600RR-Pearl White/Silver - Totaled 2014 Scion FR-S Monogram-Whiteout - #LXXXV1 (build) φφκα |
||
|
|
|
|
06-24-2015, 11:12 PM
|
#10 |
|
Member
Join Date: Mar 2014
Drives: 2014' 86
Location: Philadelphia, Pennsylvania
Posts: 97
Thanks: 723
Thanked 82 Times in 45 Posts
Mentioned: 11 Post(s)
Tagged: 4 Thread(s)
|
Ok I'll give it a shot
Sent from my iPhone using Tapatalk |
|
|
|
| The Following User Says Thank You to Pat.Thornton For This Useful Post: | FRSBRZGT86FAN (07-08-2015) |
|
09-10-2015, 01:52 AM
|
#11 | |
|
Senior Member

Join Date: Jun 2013
Drives: 2023 GR SUPRA,15 FR-S (SOLD)
Location: Philadelphia, PA
Posts: 4,235
Thanks: 3,086
Thanked 2,100 Times in 1,397 Posts
Mentioned: 31 Post(s)
Tagged: 2 Thread(s)
|
Quote:
[ame="https://www.youtube.com/watch?v=n-NztsSDBj0"]DRL mod - YouTube[/ame] Seems he does something similar to the wiring connector involving switching the two wires at the connector as well as an inline resistor
__________________
*SOLD*OFT Stage 2 UEL E85/Nameless Performance 3 inch axleback with 5 inch mufflers/ TRD CAI / CNT UEL/ Cusco Strut BAR & LHD Brake Stop / "JDM" Toyota Badges / WinJet JDM headlights - DRL MOD from fteightysix.com - 5000K Diode Dynamics HID kit / Diode Dynamics LED interior Lights and sidemarker bulbs / JDM Clear Sidemarkers / Diode Dynamics LED switchbacks/ OLM LED rear turn signals / Tap Turn Relay*SOLD*
|
|
|
|
|
| The Following User Says Thank You to FRSBRZGT86FAN For This Useful Post: | LXXXV1 (09-13-2015) |
|
09-11-2015, 09:21 PM
|
#12 |
|
Senior Member
Join Date: May 2013
Drives: FR-S 10 #103 AT
Location: NC
Posts: 1,519
Thanks: 101
Thanked 599 Times in 347 Posts
Mentioned: 5 Post(s)
Tagged: 0 Thread(s)
|
You want to solder those wires. Leaving them loose like that is begging for trouble. You can always reverse it by snipping them off with sidecutters.
__________________
Necessity may be the mother of Invention but Desperation is quite often the father.
Sex is like Bridge. If you don't have a good partner, you'd better have a good hand. - Mae West Papa said, "son there's a lot of evil temptations out there. Best to try 'em all so you know which ones to avoid." |
|
|
|
|
09-13-2015, 12:16 AM
|
#13 | |
|
Senior Member
Join Date: Feb 2014
Drives: 2014 FR-S Monogram, Whiteout 6MT
Location: 626, Socal
Posts: 593
Thanks: 469
Thanked 408 Times in 230 Posts
Mentioned: 37 Post(s)
Tagged: 0 Thread(s)
|
Quote:
__________________
2007 Honda CBR600RR-Pearl White/Silver - Totaled 2014 Scion FR-S Monogram-Whiteout - #LXXXV1 (build) φφκα |
|
|
|
|
|
09-13-2015, 11:58 PM
|
#14 | |
|
Senior Member
Join Date: May 2013
Drives: FR-S 10 #103 AT
Location: NC
Posts: 1,519
Thanks: 101
Thanked 599 Times in 347 Posts
Mentioned: 5 Post(s)
Tagged: 0 Thread(s)
|
Quote:
__________________
Necessity may be the mother of Invention but Desperation is quite often the father.
Sex is like Bridge. If you don't have a good partner, you'd better have a good hand. - Mae West Papa said, "son there's a lot of evil temptations out there. Best to try 'em all so you know which ones to avoid." |
|
|
|
|
| The Following User Says Thank You to mid_life_crisis For This Useful Post: | LXXXV1 (09-14-2015) |
|
|
|
|
|
|
|
 Similar Threads
|
||||
| Thread | Thread Starter | Forum | Replies | Last Post |
| Monogram series headlights on a FRS | DCStorm | Scion FR-S / Toyota 86 GT86 General Forum | 15 | 12-07-2020 04:59 PM |
| Monogram/ Series 10 Headlights | fitcious | Cosmetic Modification (Interior/Exterior/Lighting) | 130 | 06-10-2016 10:07 AM |
| Monogram/10 series Toyota headlights with adapters | Calavera | Exterior Parts (Aero, Lighting, Etc.) | 8 | 05-10-2015 08:46 PM |
| Monogram Series Headlights. SOLD | JDis3 | Exterior Parts (Aero, Lighting, Etc.) | 6 | 11-03-2014 12:16 AM |
| FS BNIB Series 10/ Monogram Headlights | ecda | Exterior Parts (Aero, Lighting, Etc.) | 5 | 09-30-2014 06:28 AM |


