


|
||||||
| Member's Car Journals Car journals by our members. |
 |
|
|
Thread Tools | Search this Thread |
 05-31-2016, 05:29 PM
|
#1 | |
|
Member
Join Date: Sep 2015
Drives: 86
Location: Seattle
Posts: 34
Thanks: 0
Thanked 9 Times in 5 Posts
Mentioned: 0 Post(s)
Tagged: 0 Thread(s)
|
FRS SQ Install - KM4SH #0002
Before things ramp up, I figured I would start a build thread to track my progress as the install goes. My goal is to upgrade the stock audio of the FRS. I drive the car up to Canada at least every other weekend to visit my fiance, making long commutes very brutal with the stock setup.
Some background on the car... It's Keith's KM4SH #0002. I flew down August of 2015 from SEA -> PHX, and road tripped it back up here. Since then I haven't done much to the car besides, well, daily drive it. I've put roughly 8k miles since then.. The car's been to SEMA 3 times, so i do my best to take car of it! Since it's on bags, commuting up and down Downtown Seattle hills is actually possible! Not to mention the Washington State Ferry I use at least 4 times a month... You're getting the point... Air bags are essential to my commute! What's in the car: Quote:
Project ZN6 - Speedhunters 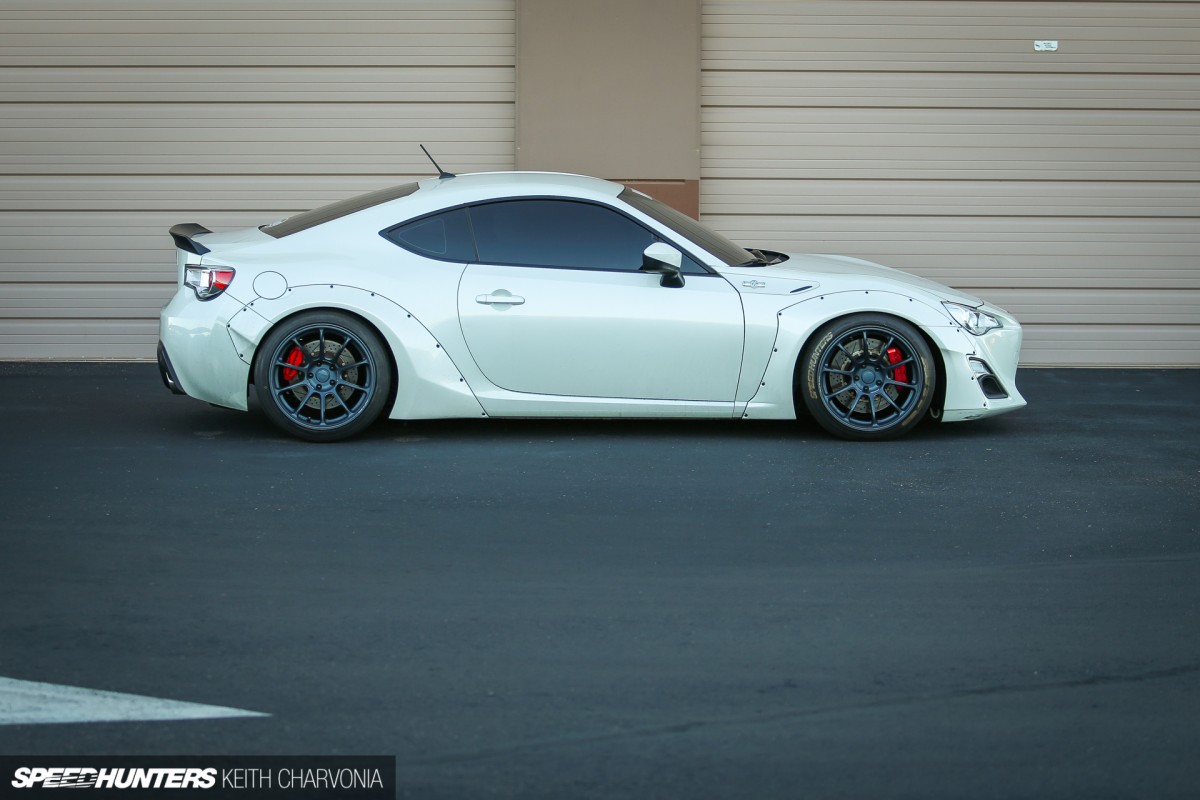  On to the next story... plan is to install a 'simple' active 2-way front stage with a single subwoofer to fill the lows. While I am at it, I will be deadening the entire car with proper treatment, installing a seperate backup/front camera system, and re-integrating my dashcams + radar detector (Passport Escort Max) Following gear: -Deadening treatment: MLV, CCF, CLD -Front Stage: HAT C62-1 -Subwoofer: 12" SI Mag V4 D2 -Headunit: Pioneer DEH-80PRS -Amplifier: Alpine PDX-V9 (5 channel, 500w sub, 100x4 to front stage) I am currently renting a space by my work...luckily I was able to persuade my roommate to give me the garage. It isn't much, but should be just fine for what I'll be doing. More to follow once gear comes in.
__________________
km4sh #00002
 Last edited by Iamwu; 06-03-2016 at 05:52 AM. |
|

|

|
| The Following 2 Users Say Thank You to Iamwu For This Useful Post: | ajaxthebetter (05-31-2016), craigpitts7 (05-31-2016) |
|
06-02-2016, 05:54 AM
|
#2 |
|
Member
Join Date: Sep 2015
Drives: 86
Location: Seattle
Posts: 34
Thanks: 0
Thanked 9 Times in 5 Posts
Mentioned: 0 Post(s)
Tagged: 0 Thread(s)
|
Day one
Bulk of the interior was removed. This car is really the easiest thing in the world. Can't believe it. Everything in this car was made to be modified/gutted. Got practically everything out of the car in a little under 3 hours, and that's with me taking my time making sure none of the pieces were damaged/misplaced (bolts,tabs). All I have left are the seats, floor carpet, and the driver side door. Should take my about 30 more minutes to get all those pieces out. Upon removal of some of the interior parts, I began to uncover a lot of OEM + other wires previously ran. This is what used to be in the car... All of the gear was removed by the time it came into my ownership. But that's okay, I was never a fan of Memphis.    Sad to say, while it really looks great with all of the interior panels/carpet overlay on; once removed I was actually quite disappointed at how the wires were ran. Unorganized and all over the place.. Yeah, its probably my OCD kicking in (electrical engineer undergrad); but for a show car I would've expected things to be bundled more carefully and methodically. I also discovered a few spots where CLD was previously laid down. It was laid down underneath the two rear bucket seats, and underneath the spare tire. Not really sure why these specific locations, as CLD is really meant to deaden rattles as opposed to acoustics. The CLD looks like its sort of peeling off, and could really use reapplication. I won't criticize the brand too much, as I know the car must have sat in some serious Arizona heat.   I didn't realize i lacked an E10 torx socket; quickly ordered one on amazon, should be here friday. A lot of my misc. parts are also coming in...(zipties, electrical tape, heatshrink, wires, etc). Stay tuned. Hopefully I get a hold of a better camera to track my progress.  Outstanding questions: -Best way to mount tweeters... -How to mount MLV on vertical surfaces? -How and where should the subwoofer be mounted? I wanted to place a backslanted 12" sealed enclosure placed in the trunk, facing the trunk...But the height clearance in the trunk from the trunk floor to the rear deck at its most constricted point is roughly 12-13".... This limits my idea of having a vertical facing subwoofer pointed to the trunk. What I could do instead is have it seated on the rear seats in the cabin (with seats down), facing the trunk... Placement is really just going to have to come down to experimentation. I have a spare box I'll use to see what works the best.
__________________
km4sh #00002
Last edited by Iamwu; 06-03-2016 at 06:33 AM. |
|
|
|
| The Following User Says Thank You to Iamwu For This Useful Post: | ajaxthebetter (06-02-2016) |
|
06-03-2016, 05:27 AM
|
#3 |
|
Member
Join Date: Sep 2015
Drives: 86
Location: Seattle
Posts: 34
Thanks: 0
Thanked 9 Times in 5 Posts
Mentioned: 0 Post(s)
Tagged: 0 Thread(s)
|
More supplies arrived today..
Met a local FRS guy from NW fb group to purchase a velox lip... this thing is thick! Can't wait to finish aero on the car.. Plan is to also pair a velox rear diffuser (non-aggressive) and the race upgrade for the front lip. I also have a bunch of "30k tune-up" things I want to do to the car. Backup camera  Front Velox lip splitter   KnuKonceptz order: -3x 5m RCA cables -10ft Kolossus Flex 4 awg -6x 4 awg crimp sleeves  Since none of the deadener arrived yet and the fact that I only had a couple of hours to work on the car prior to work, I knocked out what I could. Today I tackled the big 3 upgrade... basically involves upgrading the following wire connections: -Positive battery to Alternator -Negative battery to Chassis -Engine ground to Chassis I left all of the OEM cables in place and measured out the lengths I would need with the 4 awg wire. Measure, cut, strip, crimp terminal ends, heatshrink ends. Battery before:    
__________________
km4sh #00002
Last edited by Iamwu; 06-03-2016 at 06:33 AM. |
|
|
|
|
08-02-2016, 10:07 PM
|
#4 | |
|
EX-86 Supercharged God

Join Date: Aug 2015
Drives: '16 Series.HyperBlue BRZ
Location: Philadelphia->Montana
Posts: 766
Thanks: 220
Thanked 479 Times in 253 Posts
Mentioned: 16 Post(s)
Tagged: 1 Thread(s)
|
Quote:
__________________
Sprintex 210 Supercharged HyperBlue BRZ "HI MOM"
295WHP/220TQ |
|
|
|
|
|
|
|
|
|
| Thread Tools | Search this Thread |
|
|
 Similar Threads
|
||||
| Thread | Thread Starter | Forum | Replies | Last Post |
| Toyota GTS (aka Nur Spec) Aero, TRD Fender Fin, KM4SH Spoiler | Noz | Cosmetic Modification (Interior/Exterior/Lighting) | 37 | 06-28-2017 09:40 AM |
| KM4SH rocketbunnyXspeedhunters kit | rcm47 | Cosmetic Modification (Interior/Exterior/Lighting) | 135 | 04-15-2016 02:49 AM |
| '13 Speedhunters FR-S: Innovate Supercharged, KM4SH Widebody | ntaphse | Cars for Sale/Trade | 10 | 10-02-2015 11:05 AM |
| KM4SH Rocket Bunny Club | No5ki | Cosmetic Modification (Interior/Exterior/Lighting) | 2 | 08-19-2015 10:42 AM |
| Wtb KM4SH Rear Over Fenders & lip | BboyKidKoda | Cosmetic Modification (Interior/Exterior/Lighting) | 3 | 03-23-2015 07:39 AM |


