


|
||||||
| DIY (Do-It-Yourself) Guides For all DIYs. |
 |
|
|
Thread Tools | Search this Thread |
 06-18-2013, 08:00 PM
|
#15 | |
|
Unemployed DIY Ninja

Join Date: Dec 2012
Drives: 2013 SWP BRZ, 1983 MB SD300
Location: Long Island, New York
Posts: 672
Thanks: 200
Thanked 178 Times in 132 Posts
Mentioned: 13 Post(s)
Tagged: 1 Thread(s)
|
Quote:
 ). ).
|
|

|

|
|
06-18-2013, 08:02 PM
|
#16 | |
|
Unemployed DIY Ninja
Join Date: Dec 2012
Drives: 2013 SWP BRZ, 1983 MB SD300
Location: Long Island, New York
Posts: 672
Thanks: 200
Thanked 178 Times in 132 Posts
Mentioned: 13 Post(s)
Tagged: 1 Thread(s)
|
Quote:
I started this project today, more to come... |
|
|
|
|
|
06-19-2013, 10:44 AM
|
#17 |
|
Unemployed DIY Ninja
Join Date: Dec 2012
Drives: 2013 SWP BRZ, 1983 MB SD300
Location: Long Island, New York
Posts: 672
Thanks: 200
Thanked 178 Times in 132 Posts
Mentioned: 13 Post(s)
Tagged: 1 Thread(s)
|
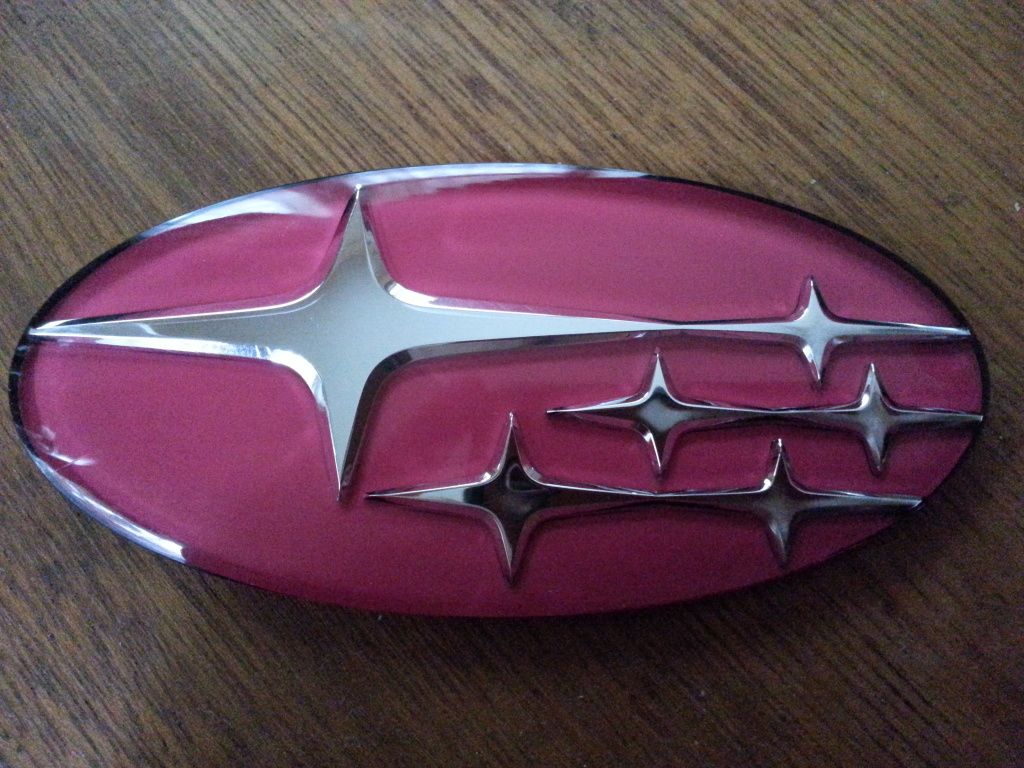
Okay, like I said before, these badges are two piecers... I'll call them the emblem and the backplate. These two pieces are taped together. Also, note that the front and rear badges are different... not only in size but also how they are constructed.
 The one at the top is the rear badge and the other is the front badge. Let's start with the REAR badge as it is much easier to tear apart. You'll see there's a hole in the backplate, allowing you to push the emblem out. I recommend hitting it with a blow dryer or heat gun first. Then using a screwdriver or prying tool to push the emblem through the hole and then running tooth floss (or something similar) around the edges of the emblem and working it like you are debadging the letters.  Now... the FRONT badge...  As you can see, the hole that was present on the rear badge is not here... Without a easy wasy of pushing it out, you really have to put pressure on the backplate and try to find a groove to put the floss in. But be careful cus this can happen...  Maybe, I should have applied more heat here to make the plastic less rigid and also make the tape softer... Well anyways, once you break them apart, you can follow the guide above to strip the paint off, which is a giant pain in the ass. The blue paint is put on in two layers to create that textured effect on the badge. There are little dots that are a bit harder to strip than the base paint and the chrome is even worse. I would recommend getting some plastic polish/scratch remover as you will definitely scratch up the badge while removing the paint (unless someone has some magic product that outdoes Goof Off, while also not thoroughly eating thru the plastic). I broke used around 30 q-tips and probably just as many toothpicks (they snapped a lot). A detailing brush and an xacto knife can in handy too. I'm probably gonna have to take my front badge off to get a solid backplate (just hope I don't break that one too). I'll post some pics once I have finished painting/installing. Good luck! 
__________________
2013 SWP Subaru BRZ - Panda'd
FS: BNIB WORK 11R 17x9 +38 [Custom] 5x100 PCD [Custom] 56.1 Bore |
|
|
|
|
06-20-2013, 11:40 AM
|
#18 |
|
Unemployed DIY Ninja
Join Date: Dec 2012
Drives: 2013 SWP BRZ, 1983 MB SD300
Location: Long Island, New York
Posts: 672
Thanks: 200
Thanked 178 Times in 132 Posts
Mentioned: 13 Post(s)
Tagged: 1 Thread(s)
|
@GH05T
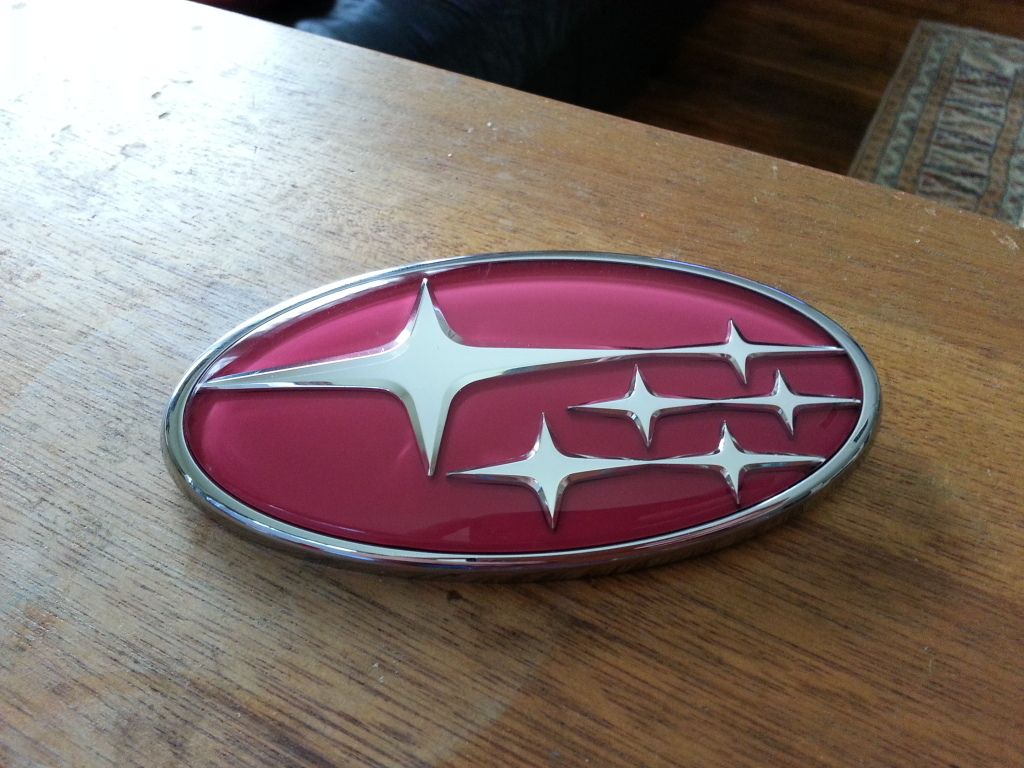
Didn't come out that well, but it looks nice from a distance. Probably need to polish/scratch remove the front some more as well.  SWP touch up paint for the stars (more sparkly in person, looks flat in the picture), black plastidip for the background, black vinyl for the backplate (I may do carbon instead for more contrast)
__________________
2013 SWP Subaru BRZ - Panda'd
FS: BNIB WORK 11R 17x9 +38 [Custom] 5x100 PCD [Custom] 56.1 Bore |
|
|
|
|
06-20-2013, 04:56 PM
|
#19 |
|
Unemployed DIY Ninja
Join Date: Dec 2012
Drives: 2013 SWP BRZ, 1983 MB SD300
Location: Long Island, New York
Posts: 672
Thanks: 200
Thanked 178 Times in 132 Posts
Mentioned: 13 Post(s)
Tagged: 1 Thread(s)
|
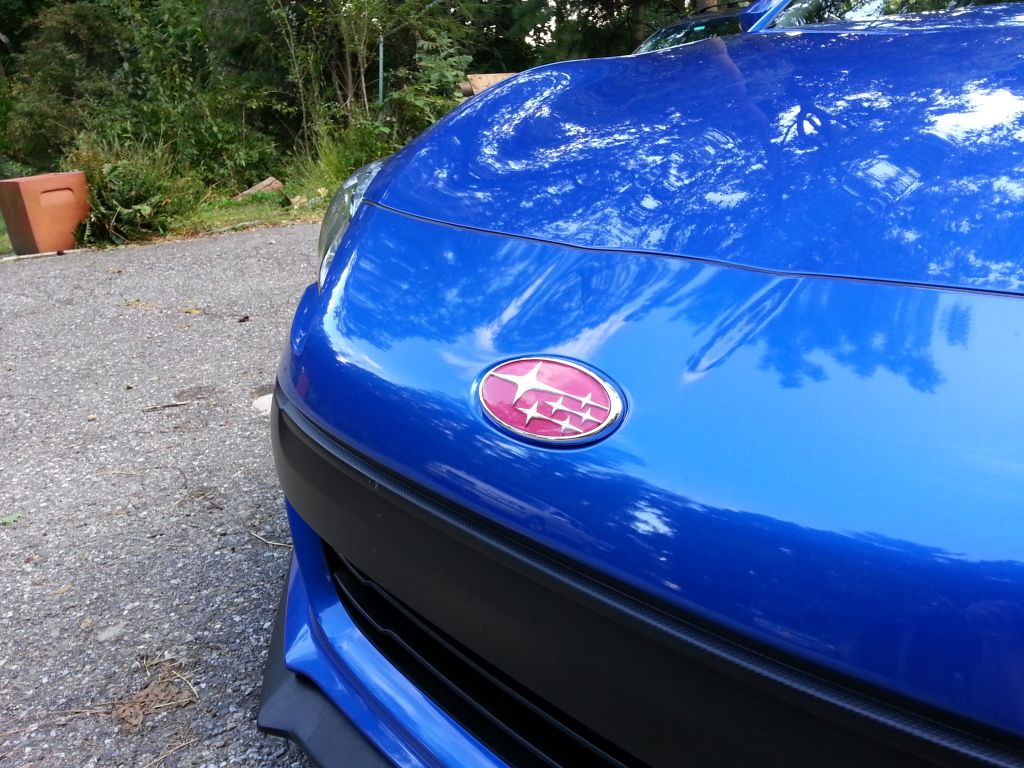
 Polished, stuck together, and ready for mounting. Now I need to do the front badge... hopefully I won't snap my stock back plate in half like I did with the one I ordered.
__________________
2013 SWP Subaru BRZ - Panda'd
FS: BNIB WORK 11R 17x9 +38 [Custom] 5x100 PCD [Custom] 56.1 Bore |
|
|
|
| The Following 2 Users Say Thank You to Perihelion For This Useful Post: | chanomatik (06-20-2013), ImAwesome (06-26-2013) |
|
07-08-2013, 01:03 AM
|
#20 |
|
Member
Join Date: Jun 2013
Drives: BRZ
Location: Toronto
Posts: 28
Thanks: 0
Thanked 2 Times in 2 Posts
Mentioned: 0 Post(s)
Tagged: 0 Thread(s)
|
wow i never know ppl can do this...learn something new today thanks mam
|
|
|
|
|
07-13-2013, 03:57 PM
|
#21 |
|
McNooblet
Join Date: Jun 2013
Drives: Limited Sterling Silver 6MT
Location: Las Vegas, NV
Posts: 10
Thanks: 0
Thanked 12 Times in 4 Posts
Mentioned: 0 Post(s)
Tagged: 0 Thread(s)
|
I've been looking for this for AGES!
 I'm going to do something like this on a pink JDM STi emblem, but I was planning on practicing using my stock trunk emblem before committing to painting the pink one. Thank you! I'm going to do something like this on a pink JDM STi emblem, but I was planning on practicing using my stock trunk emblem before committing to painting the pink one. Thank you!
|
|
|
|
|
10-02-2013, 08:40 PM
|
#22 |
|
Senior Member

Join Date: Oct 2012
Drives: Subaru BRZ Limited
Location: Denver, CO
Posts: 623
Thanks: 243
Thanked 263 Times in 157 Posts
Mentioned: 19 Post(s)
Tagged: 2 Thread(s)
|
Not bad....what other options do we have if we want to purchase new badges?
__________________
 |
|
|
|
|
10-02-2013, 11:32 PM
|
#23 |
|
Senior Member

Join Date: Aug 2012
Drives: WRB BRZ
Location: Westchester, NY
Posts: 539
Thanks: 26
Thanked 168 Times in 131 Posts
Mentioned: 9 Post(s)
Tagged: 0 Thread(s)
|
Here was my attempt.
__________________
In the garage:
1988 BMW E30 M3 2003 Ducati ST4s ABS 2006 Subaru Legacy GT Spec B #444/500 (For Sale) 2013 Subaru BRZ WRB Limited - Acquired 9/15/12 |
|
|
|
| The Following 5 Users Say Thank You to chutrain For This Useful Post: | GaN-MaN (10-04-2013), Hyper4mance2k (04-10-2015), MaXimus (04-06-2015), MemphisR (05-09-2017), Perihelion (10-06-2013) |
|
10-04-2013, 05:06 PM
|
#25 | |
|
Senior Member
Join Date: Aug 2012
Drives: WRB BRZ
Location: Westchester, NY
Posts: 539
Thanks: 26
Thanked 168 Times in 131 Posts
Mentioned: 9 Post(s)
Tagged: 0 Thread(s)
|
Quote:
I used 1000 grit sandpaper to remove the background color. The paint fills in the light scratches.
__________________
In the garage:
1988 BMW E30 M3 2003 Ducati ST4s ABS 2006 Subaru Legacy GT Spec B #444/500 (For Sale) 2013 Subaru BRZ WRB Limited - Acquired 9/15/12 |
|
|
|
|
|
12-26-2013, 11:55 AM
|
#26 |
|
Member
Join Date: Sep 2013
Drives: 2011 Accord
Location: New Jersey
Posts: 22
Thanks: 0
Thanked 3 Times in 3 Posts
Mentioned: 0 Post(s)
Tagged: 0 Thread(s)
|
damn that looks pretty slick... my next project.
|
|
|
|
|
04-25-2014, 11:26 AM
|
#28 | |
|
Senior Member
Join Date: Apr 2013
Drives: Ultramarine FR-S
Location: Philadelphia
Posts: 215
Thanks: 71
Thanked 72 Times in 58 Posts
Mentioned: 1 Post(s)
Tagged: 0 Thread(s)
|
Quote:
You mean to debadge the car or remove the paint? Goof Off is used in the DIY to remove the paint from the badge, Goo Gone is a different product. If you're looking to debadge the car Goo Gone will work great and it's paint safe, it's what I used to debadge my car 
|
|
|
|
|
|
|
|
|
| Thread Tools | Search this Thread |
|
|
 Similar Threads
|
||||
| Thread | Thread Starter | Forum | Replies | Last Post |
| Subaru Badge? | 636 | BRZ First-Gen (2012+) General Topics | 33 | 12-09-2013 07:27 AM |
| Cool Subaru Badge Mod | iBRZ | Cosmetic Modification (Interior/Exterior/Lighting) | 8 | 03-13-2013 03:27 PM |
| Subaru badge v. Scion badge | finch1750 | Cosmetic Modification (Interior/Exterior/Lighting) | 3 | 11-23-2012 01:13 AM |
| paint restoration : Subaru WRX - bringing the paint back to life | brianc | Cosmetic Maintenance (Wash, Wax, Detailing, Body Repairs) | 7 | 06-25-2012 02:23 PM |
| EVO's Subaru BRZ test drive review - 5 Stars | JrunkenC | BRZ First-Gen (2012+) General Topics | 2 | 12-05-2011 02:22 AM |


 Chanyeol
 2013 Subaru BRZ Limited


