


|
||||||
| DIY (Do-It-Yourself) Guides For all DIYs. |
 |
|
|
Thread Tools | Search this Thread |
 01-05-2018, 12:53 AM
|
#1 |
|
Member
Join Date: Sep 2017
Drives: 17 BRZ W/ PP
Location: Wisconsin
Posts: 30
Thanks: 5
Thanked 14 Times in 9 Posts
Mentioned: 0 Post(s)
Tagged: 0 Thread(s)
|
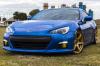
DIY: MY17 BRZ Fog light removal and lamin-x install
I apologize if this has been covered but I wasn't able to find any info on it. I was hoping to find some new bulbs for the LED fog lights but after realizing they are one piece I decided on the Lamin-X. After a night of driving I'm pretty happy with them, depending on the angle the light has a green/blue tint but overall has a nice yellow tint. I used a body panel removal tool, a stubby philips, a pick, and a light.
 Similar to removing the side markers start by removing the 4 plastic philips body clips in the fender liner.  Once the Fender liner is pulled back you will be able to see the three mounting points for the fog lights. Two metal philips screws, one on the outside and one on the bottom. On the inside top of the fog light you will find another philips body clip holding the fog light on. I suggest removing that body clip first and then the two metal ones.  Once those three are removed you can squeeze the fog light out through the fender liner and disconnect the wiring harness.   I cleaned off the surface and then heated the fog light lens and then the Lamin-X with a heat gun ( its a good 8 degrees here so i wanted to be sure the plastic wasn't too cold to stick).  When installing the Lamin-X do your best to find the center of the lens and start there, using the heat gun you can mold it around the fog light and it will stretch a bit if needed. I used to sell cell phones and have plenty of practice installing screen protectors which is basically the same idea. On my last car I tried using a water spray to then be able to move the Lamin-X around and then a squeegee to get the air bubbles out. The heat gun method works much better. Now just go in reverse order and put them back in, this is also a good time to do the side markers as well, I did mine the night before so I was familiar with pulling out the fender liner. 
Last edited by Marty Bonesaw; 01-05-2018 at 01:26 AM. |

|

|
|
01-05-2018, 09:12 AM
|
#2 |
|
22R

Join Date: Apr 2017
Drives: 2012 Camry SE 2017 Toyota 86
Location: South Louisiana
Posts: 236
Thanks: 233
Thanked 141 Times in 79 Posts
Mentioned: 1 Post(s)
Tagged: 0 Thread(s)
|
Great write up ! Now clean dat car !!!!
22R |
|
|
|
|
01-05-2018, 09:14 AM
|
#3 |
|
The Gunshine State

Join Date: Aug 2016
Drives: '14 BRZ Limited
Location: Florida
Posts: 1,463
Thanks: 631
Thanked 1,163 Times in 587 Posts
Mentioned: 9 Post(s)
Tagged: 0 Thread(s)
|
Wow, I just stuck them on from the outside and they turned out great lol.
__________________
 Current DD: M235i |
|
|
|
|
01-09-2018, 02:01 PM
|
#4 |
|
Senior Member

Join Date: Dec 2017
Drives: 2017 SUBARU BRZ
Location: MIAMI
Posts: 198
Thanks: 3
Thanked 70 Times in 49 Posts
Mentioned: 3 Post(s)
Tagged: 0 Thread(s)
|
How is the light output with the fog lights on? My 2017 did not come with fogs.
Any pictures you can post up |
|
|
|
|
|
|
|
|
|
|
 Similar Threads
|
||||
| Thread | Thread Starter | Forum | Replies | Last Post |
| Valenti reverse light/4th taillight wiring with stock MY17 taillights | Elliotw | DIY (Do-It-Yourself) Guides | 3 | 04-16-2020 10:22 PM |
| Need help: Clock Spring Removal NRG Hub install | Iwannajag | Cosmetic Modification (Interior/Exterior/Lighting) | 1 | 04-20-2015 05:30 AM |
| FS: Lamin-X Headlight + Fog Light BNIB | Canehda | Canada Classifieds | 3 | 09-16-2014 07:05 PM |
| HELP: Can anyone install Lamin-X headlight covers for me? | stockysnail | Northwest | 7 | 06-02-2013 04:59 PM |
| Lamin-X - Headlight - Reverse Light Pieces | TeamSweet86 | Exterior Parts (Aero, Lighting, Etc.) | 1 | 12-10-2012 05:34 PM |


 The Burz